The Collins Top Sew-along : Planning your top (free downloadable template)

I am interrupting the Collins Top sew-along with a little treat that can help you get planning! As you may have noticed, the Collins Top includes a lot of panels!

I really love playing with panels during my design process (as you probably have noticed if you have used any of my patterns). I think they provide an opportunity to create simple shapes with interesting details. 

While I was testing the pattern, a couple of the testers suggested creating a little printable template that makers could download to play around with when planning their tops. I thought it was a brilliant idea and hopped to it straight away. Now you can download the template and grab some markers (or even a few swatches of fabric and some glue) and have a play with colour blocking or stripe direction, before you even need to cut into your fabric! Enjoy!


The Collins Top Sew-Along : Lengthening the pattern

collins_top_lengthen_cover.gif

I have a feeling this post in the Collins Top sew-along might be of interest to quite a few of you! When I was designing the Collins Top, I really wanted a top that worked with high waisted trousers and skirts. I wear a lot of high waisted garments, and I know a lot of you do too. But if you don't, you may consider lengthening the Collins Top, to avoid flashing too much skin when you lift your arms (it's happened to all of us, right?) The pattern is drafted for height of 170cm (5'7"), with the front hem finishing close to the high hip (approximately in the position where mid-rise jeans would sit) - the back hem is lower (due to the hi-low hem design).

Lengthening a pattern is a really simple adjustment to make, but due to the panel lines of the Collins Top, it does make the process slightly (just slightly, I promise!) trickier.

There are times when you can just add some length to the hem of a pattern (when the side seams of a garment are quite straight, for example, a pencil skirt), but in the case of the Collins Top (and other patterns like it), you will be wanting to add the length to the inside of the pattern piece, so that you can keep the shape intact. If you were to just add length to the hem of this pattern, you would end up with quite a lot of volume in the hem, which is probably not ideal in a pattern that is already a trapezium shape. Due to the shape of the panels, I understand that this can seem a little daunting. But I promise, it really isn't!


Getting started

We'll start by making the adjustment to the front panels and then once that's done we'll move onto the back. To start, take the CENTRE FRONT PANEL piece and the SIDE FRONT PANEL piece. You can use the actual pattern pieces, or trace a copy if you would prefer to keep the original pieces intact.

Lengthen the pattern piece

You will notice that there is a 'Lengthen and shorten' line on each pattern piece. Take the pieces you are adding length to and cut through each of these lines - separating each piece into two. 

Take a blank piece of pattern paper (the amount you need will depend on how much length you are adding to your pattern) and mark a grainline on the left-hand side of the paper.

Now mark two horizontal lines, close to the bottom of the paper. You need to space the lines apart by the length you would like to add to the pattern. For example, if you would like to add 10cm (4in) to the pattern, space the lines 10cm (4in) apart, making sure they are parallel to each other, and perpendicular to the grainline.

Now, starting with the CENTRE FRONT PANEL pieces, line up the bottom section of the piece with the lower line, and the top section of the pattern with the upper line. Make sure the grainline (in this case the centre front) lines up with the grainline you marked on the pattern paper. Tape or glue pieces in place. 

Re-draw the seams

We now need to re-draw the panel lines to fill the gap that was created by adding length to the pattern. To do this, take a ruler and draw a straight line from the stitch line (marked by a grey line on each pattern piece) at the top of the pattern piece, to the stitch line at the hem. 

Do the same thing for the cutting line (draw a straight line from the top of the cutting line at the top of the pattern to the cutting line at the hem).

You will notice that with your new seam, the notches have become slightly displaced. Extend the original notches until they meet the new seam line. 

At this point you can either cut off the excess paper on the pattern piece, or trace the new lines to create a completely new pattern piece. 

Repeat for side panel

Repeat the process for the side panel. In this case, you will need to draw the grainline in the centre of the pattern paper. Make sure you add the same length to each piece. For example, if you added 10cm (4in) to the CENTRE FRONT PANEL, you will need to add 10cm (4in) to the SIDE PANEL. 

Re-draw the panels in the same way you did on the front piece. 

Move the notches so they are in line with the new seam lines. Cut out the piece or trace onto a separate piece of pattern paper. 

Check pattern pieces

Before going any further, check that the pattern pieces fit together properly and that the notches line up correctly. To do this, place one piece on top of the other, aligning the stitch lines as if you were sewing the pieces together (you will need to flip the SIDE FRONT PANEL so that it's right side down).

For more detail about how to go about checking that your patterns fit together nicely, you can check out this tutorial

Add length to the back panels

collins_lengthen_pattern_13.gif

To add length to the back pieces, you will first need to tape the LOWER CENTRE BACK PANEL to the UPPER CENTRE BACK PANEL. This way you can make the adjustment and then re-cut the LOWER CENTRE BACK PANEL piece, so that everything remains in proportion (you don't want to add all the length to the UPPER CENTRE BACK PANEL as it would really change the design of the top). To do this, align the stitch lines of each piece, one on top of the other, and tape place.


Cut through the 'Lengthen / Shorten lines' on each piece, in the same way you did for the front pieces. Add length to each piece (the same amount you added to the front) and then re-draw each seam line. 

Re-draft back panel pieces

Measure the stitch line on the panel line. On the original pattern (before the adjustment), the panel line cuts the seam about three-fifths down the seam line, which means we need to find three-fifths of this new panel line. To do this, measure the line and then multiply it by 0.6 (three-fifths as a decimal). 

Measuring down from the top of the panel seam, mark a point three-fifths down from the top (the measurment you found in the prvious step).

collins_lengthen_pattern_15.gif

Mark a horizontal line (perpendicular to the centre back) through the point marked in the previous step. 

This will be your new panel line. 

Before splitting the piece into two separate pieces, mark a double notch on the seam line. This means that when you separate them, you will have a marking for how they go back together. 

Cut through the new seam line - separating the pattern back into two pieces. 

Add seam allowance

Add 1.5cm (5/8in) seam allowance to each side of the cut line - moving the notches to meet the edge of the pattern. For more detail on adding seam allowance to a pattern, check out this tutorial.

You will notice that on the LOWER CENTRE BACK PANEL piece, the seam allowance doesn't follow the same angle as the panel line. This is so that when this seam is stitched and the seam pressed down towards the lower panel, the seam allowance will sit flush with the seam and not stick out. For more notes on this and a detailed explanation of how to use this technique yourself, you can take a look at this tutorial

Check back pattern pieces

Again, you will be wanting to check that the pieces fit nicely together and that the notches are in the right place. You may have realised that the middle notch on the SIDE BACK PANEL will no longer be in the correct position as we have added length to the LOWER BACK PANEL piece. 

A : Place the SIDE PANEL on to the BACK PANELS, lining up the stitch lines, one on top of the other. First, check that they are the same length. If they are not, have a look at this tutorial on checking and truing sewing patterns, for how to adjust the seam. 

B : Check that the notches are in line (and if they are not, move one set of notches so they are in the same position). Mark a new notch at the point where the horizontal seam in the back panels meets the BACK SIDE PANEL.

And the last thing you will want to do, is also check that the front and back side panels match correctly (do this in the same way you checked the pattern pieces above).

Lengthening the sleeves


If you would like to add length to the sleeves of the Collins Top, you can do it in exactly the same way as we did for the body pieces. Here you can see an example of this. 

I hope this helps and you are feeling less daunted about adding length to the Collins Top!

See all the posts in the Collins Top Sew-along.


You may also like:

The Collins Top Sew-along : Re-drafting the facing (required after full bust adjustment)

front_facing_adjustment_cover.gif

Over the last couple of days I have shown you how to perform a Full Bust Adjustment (FBA) on the Collins Top to start off the Collins Top sew-along. The process is a little different to what you might be used to, due to the fact that the top doesn't have a dart or bust shaping through a panel and it also has a panel line. You can find the tutorial here (this tutorial guides you through the process of creating a bust dart in the centre front panel). If you would like to know how to make the adjustment without the dart, then take a look at this tutorial (you will need to create the dart and then redistribute the fullness of the dart to the hemline). 

In today's post, I'd like to show you how to re-draft the front facing piece. By making changes to the centre front panel and the side front panel of the Collins Top, the original front facing will no longer fit the pattern. You will only need to do this if you are making View B of the Collins Top (the sleeveless version) and have made a Full Bust Adjustment.


Getting Started

re-draft_front_facing_1.gif

To start, grab your CENTRE FRONT PANEL piece, SIDE FRONT PANEL piece, FRONT FACING and FRONT SHOULDER PANEL piece. These are the pieces you will need to create your new facing piece. 

Relocate the dart (temporarily)

If you have created a dart, we will first need to remove it (don't worry, we will put it back once we make the new facing piece), as where possible, it's best to not have darts in a facing (as it just creates unnecessary bulk). You could fold out the dart - like in this dart shaping tutorial - and then draft the piece, but it becomes quite awkward to do it that way as the centre front piece becomes three dimensional, which makes if really tricky to trace a new piece. The most accurate way to do it is to remove the dart, draft the facing and then put the dart back (don't worry it's less of a cumbersome process than what it sounds like). If you already removed the dart using yesterday's tutorial, then you can simply jump to the next step. 

re-draft_front_facing_2

A : Draw a vertical line (parallel to the centre front line) down from the apex point (the tip of the dart) down to the hem. Cut along this line, from the hemline, up to the apex point. Stop cutting when you are 1-2mm from the apex point. Now cut along the lower dart arm (the one highlighted in the illustration) towards the dart arm. Again, stop 1-2mm from the apex point, creating a small hinge. 

B : Close out the dart by carefully pivoting the lower corner of the pattern so that the lower dart arm overlaps the upper dart arm. Tape in place (I suggest using masking tape so it is easy to remove later on when we want to get our dart back).

If you would like further explanation on this process, check out yesterday's post, where I went into it in a bit more detail.

re-draft_front_facing_3

Take the SIDE FRONT PANEL piece and line the stitching line up with the stitching line on the CENTRE FRONT PANEL, as if the two pieces have been sewn together. Hold in place with a couple of small pieces of masking tape (or even pins). You are going to want to be able to detach these pieces later. 

re-draft_front_facing_4

Now, position the FRONT SHOULDER PANEL onto the CENTRE FRONT PANEL, again matching stitch lines as if the two pieces have been sewn together. Tape in place. 

re-draft_front_facing_5

Place the FRONT FACING piece on top of your panels, lining up the neckline, shoulder seam and centre front. You will notice that the front facing no longer matches the pieces it needs to (due to the full bust adjustment we made).

re-draft_front_facing_6

You can see that if we cut this piece we would be missing fabric at the side seam and under the arm. 

Re-draft the facing piece

re-draft_front_facing_7

Take a piece of pattern paper and trace off the original FRONT FACING piece in pencil (you are going to need to erase part of the line in a minute), being sure to trace the stitch line and the cutting line, as well as the notches. 

re-draft_front_facing_8

Place the traced FACING piece on top of your panels, again lining up the neckline, shoulder seam and centre front.

re-draft_front_facing_9

We will need to know the length of the side seam on the FACING so that when we make the new piece, it will have the same length side seam as the original, so that it still fits correctly with the back facing piece (that does not need any adjustments). Measure the side seam (on the stitch line) and take note of this measurement. 

re-draft_front_facing_10

Now, erase the lines that do not match the shape of the pattern underneath (the underarm and side seam), so that you can draw the correct shaping on the piece. 

re-draft_front_facing_11

To start, trace the side seam from the SIDE FRONT PANEL, making the line the length of the original facing side seam (found a moment ago).

re-draft_front_facing_12

Trace the armhole line as well as the side seam (both stitch line and cutting line) from the pattern underneath. 

re-draft_front_facing_13

Join the endpoint on the side seam with the bottom edge of the facing. You want it to be a nice and smooth curve. 

re-draft_front_facing_14

Transfer notches, cut out the pattern piece and add grainline and cutting instructions.

Go back to your CENTRE FRONT piece and remove the tape from the dart so you can put the dart back in place. 

And voila! You have a new facing piece that fit your adjusted panels. 

See all the posts in the Collins Top Sew-along.


you may also like:

The Collins Top Sew-along : Full bust adjustment - removing the bust dart

full_bust_adjustment_cover.gif

In yesterday's post, I showed you how to do a Full Bust Adjustment (FBA) on the Collins Top pattern to start off the Collins Top Sew-along. The process is a little different to a usual FBA because of the panel line in the front piece, as well as the lack of dart or bust shaping in the pattern. 

In yesterday's tutorial I showed you how to add a dart to the centre front panel of the Collins Top to get some extra width across the bust, if your bust measurement is larger than the B cup In the Folds patterns are drafted for. 

In today's post, I want to show you how to remove that dart, if you would prefer to keep the pattern dartless.

If you have done a little pattern making (or pattern adjusting) yourself though, you will know it is not as easy as just removing a dart. You cannot actually remove a dart, but you can relocate it or redistribute it. So basically, what we are going to do in the case of the Collins Top, is that we are going to relocate the dart to the hemline and then use it as extra fullness in the hem. I have done a tutorial on this process in the past, so if you would like to take a look you can have a look at this tutorial.

I know that the Collins already has quite a bit of ease in the hem (it is a trapeze shaped silhouette after all), so I will also show you how to remove the extra fullness later in the tutorial too. Please bear with me, it is quite a long tutorial, but the process isn't complicated. Just take it one step at a time.


Getting started

remove_dart_fba_1

Step 1 :

Use the first Full Bust Adjustment tutorial to add a dart to your Collins Top. You will only need to follow steps 1 - 14 of the tutorial to get to where you need to be to follow this tutorial.  

Remove the dart

remove_dart_fba_2

Step 2 :

To remove the dart, cut in from the side seam, along the lower dart arm towards the apex point. Stop cutting when you are 1-2mm from the apex point.

remove_dart_fba_3

Step 3 :

Cut up from the hem of the top, along line 2, towards the apex point. Again, stop cutting 1-2mm from the apex point, to create a small hinge. 

Close the dart

remove_dart_fba_4

Step 4 : 

A : Now, swing the side section of the pattern on the little hinge you created, so that the lower dart arm moves towards the upper dart arm. 

B : Continue swinging that section of the pattern around, until the lower dart arm meets the upper dart arm. Once the dart arms are aligned, tape in place. 

remove_dart_fba_5

Step 5 :

As you will know, if you have made pattern adjustments before, there is really no such thing as removing a dart. By closing the dart in the side seam, you are opening up a "dart" at the hemline. You will see that indicated in the illustration above. By closing the dart in the side seam, we have made a large dart in the hem. 

Tape some pattern paper behind the working pattern to fill the gap created in the hemline.

You can choose to leave the top as is - now with the trapeze shape more pronounced or you can choose to remove this extra width from the side seam. If you have chosen to keep the extra fullness, continue working your way through the tutorial. 

If you would like to remove the extra fullness from the side seam, skip the following steps and jump to step 14.

Re-draw the panel line

remove_dart_fba_6

Step 6 :

Measure the opening at the hemline (making sure you take the measurement on the stitch line (1cm / 3/8" up form the edge of the pattern) and take note of this measurement.

remove_dart_fba_7

Step 7 :

We will distribute the added fullness to either side of the panel line, so you will need to mark a point on the hemline at the centre of the opening. 

remove_dart_fba_8

Step 8 :

Draw a straight line from the point you just marked on the hemline, up to the point where the original panel line intersects the armhole. There you have your new panel line!

Mark balance points

Balance points are pointers on your pattern that help you put pieces together correctly, as well as help you when you are sewing a very long, or curved seam.

If you have sewn one of my patterns before, you will know I love a balance point! I really love using them as they basically give you a little reinforcement each time that you are assembling your garment correctly. I loved when one of my pattern testers once said "The notches are like little ticks you get all the way through the process to let you know that you're on the right track." That's exactly what I am going for with all the notches!

remove_dart_fba_9

On the Collins Top, you will notice that there are two single notches on the centre front panel line, so that you know which side of the SIDE FRONT PANEL should be sewn to the CENTRE FRONT PANEL. During the process of the adjustments, we lost those two notches. So now it's time to put them back.

remove_dart_fba_10

Step 9 :

Mark two notches on the panel line. It doesn't really matter where you put them, as these two pieces will be sewn together.

Trace your new pattern pieces

remove_dart_fba_11

Step 10 :

Take a piece of pattern paper and trace your new CENTRE FRONT PANEL piece by tracing around the original neckline, and then down the new panel line. Trace along the centre front line and hemline. 

Add seam allowance + notches

remove_dart_fba_12

Step 11 : 

Add seam allowance to your new pattern piece. You can trace the seam allowance from the neckline, armhole and hem and then add 1.5cm (5/8") to the panel line. For more detail on adding seam allowance to a pattern, check out this tutorial

Transfer the notches onto your new pattern piece, from the working pattern. 

remove_dart_fba_12

Step 12 :

Finalise the pattern piece by adding cutting instructions and grainline.

For more detail about adding cutting instructions to your pattern, take a look at this tutorial.

Side front panel

remove_dart_fba_13

Step 13 :

Repeat process for the SIDE FRONT PANEL. You will notice that you will need to redraw the side seam with a straight line. Draw the line from the top of the original seam line to the bottom of the original seam line. 

True the seam allowances on your new pattern pieces, and check the SIDE FRONT PANEL and the SIDE BACK PANEL still match together properly at the side seam. 

Add grainline and cutting instructions (SIDE FRONT PANEL - CUT 1 PAIR).

And you're ready to start sewing!


Remove fullness from the hem

If you would prefer to remove the extra fullness from the hemline of your Collins Top after your Full Bust Adjustment, then this part of the tutorial is for you!

remove_dart_fba_14

Step 14 :

A : On the stitch line, measure the length of the opening at the hem. Take note of this measurement.

B : Measuring in from the side seam, mark a point the distance found in step A. For example, if the opening is 10cm, mark a point 10cm in from the side seam on the stitch line. 

remove_dart_fba_15

Step 15 :

A : Re-draw the side seam by joining the top of the original side seam to the bottom with a straight line.

B : Now draw a straight line from the point marked on the hemline (in step 14B) to the point on the line you just marked, at the point where you closed out the dart. Extend the line a few centimetres (1" or so) beyond the intersection point. This line will become your new side seam. 

Note : If we simply drew a stright line between the top of the side seam and the new point on the hem, we would lose too much width across the bust from the side seam. 

remove_dart_fba_16

Step 16 :

You will notice that the new side seam deviates from the original side seam a little bit at the top. We need to check how much has been added so we can add that same amount to the front sleeve piece. Take a ruler or tape measure and measure from the original side seam to the new side seam, on the stitch line. In the example, the new side seam is 1.9cm away from the original side seam at the underarm point. This means I need to add 1.9cm to the sleeve piece as well. 

To complete the front and side pattern pieces, draw in your panel line and then trace off the pieces. You can find out how to do this by scrolling back up to steps 6 - 13.


Making the adjustment to the sleeve piece. 

remove_dart_fba_17

Step 17 :

A : Trace a copy of the FRONT SLEEVE pattern.

B : Draw a diagonal line down from the underarm point on the stitch line down to the hem. 

C : Cut down the line from the top towards the hem. Stop when you get 1-2mm from the stitch line at the hem. Cut up from the hem towards the point where you stopped cutting. Leave a 1-2mm hinge in place.

D : Swing open the pattern with the hinge, opening up the sleeve curve by the amount you need to add to the pattern (this is the same technique you learned earlier in this tutorial). For example, 1.9cm was added to my side front panel (step 16), so I will open up this piece by 1.9cm.

remove_dart_fba_18

Step 19 :

Take some scraps of pattern paper and fill in the gaps on your pattern piece. Redraw the armhole curve (and seam allowance) and the hem line (and seam allowance). There you have it. Your sleeve piece will now fit into the armhole on your top. 

If you are making View B of the Collins Top (sleeveless version), tomorrow I'll be going through how to make adjustments to your front facing to fit with your newly adjusted bodice.


You may also like:

The Collins Top Sew-along : Full bust adjustment (FBA for a dartless bodice)

full_bust_adjustment_cover.gif

Welcome to the first tutorial in the Collins Top Sew-along! In today's post, we're talking Full Bust Adjustments (FBA), which is one of the most frequently used adjustments. A few of you have already contacted me about how to do a FBA on the Collins Top, so I know this tutorial will be helpful to a lot of you!

During the Acton Sew-along I showed you how to do a FBA on a princess seam, but for the Collins Top you'll need a slightly different technique as it doesn't have a princess seam (or a dart).

You will be able to use this tutorial on any pattern that has a flat front (doesn't have a princess seam or dart).

We'll be making the FBA by adding a dart to the CENTRE FRONT PANEL only. We will do this by adding a dart to the front (with the side panel and centre front panel as a whole piece) and then removing it from the side panel - leaving you with just a small dart in the centre front panel. If you like, you can then close out the dart altogether and redistribute the fullness to the hem. You can find out how to do that by looking at the next post in the Collins Top sew-along


WHEN YOU'LL NEED TO DO A FULL BUST ADJUSTMENT 

Most indie pattern companies (including In the Folds) draft for a B cup bust. There are of course exceptions to this rule (such as Cashmerette and Colette Patterns), so make sure you check on your pattern before assuming the bust cup size.

In terms of the Collins Top, it is a loose style which means it is a little more forgiving than more fitted patterns (such as the Acton, for example) so in some cases you can probably get away with not making a bust adjustment. For example, if your bust is smaller than a B cup, it is unlikely you need to bother doing a Small Bust Adjustment. I have an A cup bust, but have not made adjustments to any of my Collins tops. Also if your bust is just slightly bigger than a B cup, it is also likely you will be okay without the adjustment. By checking the finished measurmentes, you will see that there is a lot of ease in this pattern. 

Check the finished garment measurements and go from there. 

WORK OUT YOUR CUP SIZE

Your cup size in sewing patterns may not always correspond to the bra size you wear. To be safe, check your measurements before deciding if you need to make any adjustments to the pattern. 

full_bust_adjustment_fba_dartless_bodice_1

To do this, measure your high bust measurement (the area above your breasts, under your arms) as well as your full bust  (the fullest part of your chest) and then take note of each measurement, as well as the difference.

If the difference is 2.5cm (1") your bust is an A cup, 5cm (2") it's a B cup, 7.5cm (3") is a C cup and so on. 

CHOOSE YOUR SIZE

Now, go back to your high bust measurement and add 5cm (2"). This is what your bust measurement would be if you were a B cup and therefore the size you should be choosing from the pattern.

For example, let's say your upper bust measures 81cm (32"). Add 5cm (2") to this measurement to find out what size your bust measurement falls into on the In the Folds sizing chart (and what size you would be if you had B cup breasts). 81cm + 5cm = 86cm which corresponds to a size C. Your actual bust measurement is 89cm  though - 3cm (1") larger than the cup size of the pattern. This means you need to do a FBA and add this 3cm (1") to your pattern. 

As the bodice is cut on the fold, you need to take the measurement you will be adding and divide it by two. For example, this 3cm (just over 1") mentioned in the example, will be split between either side of the front bodice - 1.5cm (1/2") on each side. 


GETTING STARTED

full_bust_adjustment_fba_dartless_bodice_2

Step 1:

Take the two pieces that make the front of the Collins Top - the CENTRE FRONT PANEL and the SIDE FRONT PANEL. The first step will be to turn these pieces into one pattern piece (removing the panel line) as this will make the adjustment much easier to manage. At the end, we'll put the panel line back in place, so there won't be any change to the design of the top (except for the addition of the dart - which can be removed later on, if you prefer). 

TRACE PIECES

full_bust_adjustment_fba_dartless_bodice_3

Step 2:

Take the SIDE FRONT PANEL piece and place it on top of the CENTRE FRONT PANEL, lining up the stitch lines (the grey line on the pattern), as if the pieces have been sewn together. If you are struggling to see the lines, it can help to put the pieces up to a window and see through the paper that way (or a lightbox, if you have one). Once the pieces are correctly lined up, use masking tape (or similar) to hold the pieces in place. 

full_bust_adjustment_fba_dartless_bodice_4

Step 2:

Take a piece of pattern paper and trace the piece - being sure to include all pattern markings (in this case: the grainline and notches). Also trace the panel line.

Make sure you trace both the cutting line and the stitching line - this is really important. In the Folds patterns include the stitching line on each pattern piece so that it is easier for you to make alterations to your pattern. I know we would all love to be able to cut a pattern in a straight size and for it to fit perfectly, but unfortunately that's not the way it is (I even have to make adjustments to In the Folds patterns so they fit my figure properly), so having the stitch lines can help you make adjustments more quickly and easily. When making pattern alterations, I normally suggest removing the seam allowance, but because the stitch line is marked on the pattern, you can leave it on. 

MARK APEX POINT ON THE PATTERN

full_bust_adjustment_fba_dartless_bodice_5

Step 3:

The next step is to mark your apex point on the pattern. Your apex point is the peak of the fullest part of your breast... which basically means your nipple! This point varies from person to person, so you can work it out by holding the pattern piece up to your body and working it out, or by referring to a toile (if you have toiled your Collins Top before working on any adjustments). 

PREPARE PATTERN PIECE FOR THE ADJUSTMENT

full_bust_adjustment_fba_dartless_bodice_5_1

Step 5:

Take a ruler and draw a line from where the panel line intersects the armhole to your apex point. You can label this line as line 1. 

full_bust_adjustment_fba_dartless_bodice_6

Step 6:

Now draw a line from the apex point straight down to the hemline - parallel to the centre front. This is line 2. 

full_bust_adjustment_fba_dartless_bodice_7

Step 7:

Draw a line from the apex point to the side seam. You'll want it to meet the side seam about 5cm (2in) down from the armhole. I chose to rule the line to the first notch on the side seam. This is line 3.

full_bust_adjustment_fba_dartless_bodice_8

Step 8:

Draw the last guideline (4) perpendicular to line 2 about 12cm (3in) up from the hemline.

Cut

full_bust_adjustment_fba_dartless_bodice_9

Step 9:

Now it's time to start making that adjustment!

A: From the hem of the top, cut up line 2, towards the apex point. From the apex point turn and continue cutting, this time along line 1. Stop when you are about 1-2mm away from the armhole line (stitch line).

B: Cut in towards the armhole stitch line from the seam allowance, stopping about 1-2mm from where you stopped cutting in step A - creating a small "hinge."

full_bust_adjustment_fba_dartless_bodice_10

Step 10:

Cut along line 3 from the side seam towards the apex point. Stop 1-2mm from the apex point, again creating a small "hinge."

Add width to the pattern

full_bust_adjustment_fba_dartless_bodice_11

Step 11:

Take a piece of pattern paper (about the size of your front piece) and draw a vertical line in roughly the centre of the paper.

By this stage you should know how much width you need to add to the bust. Take this measurement and divide it by two (you will add half the extra width to either side of the front piece, so in total it equals the whole amount you need). Draw a second line - parallel to the first - this distance away from the first line. For example, if you need to add a total of 5cm (2in) to the bust, you will be drawing the line 2.5cm (1in) away from the first. 

full_bust_adjustment_fba_dartless_bodice_12

Step 12:

Carefully place your pattern piece on top of the paper underneath.

Now that you have cut through the lines, you will be able to manoeuvre the pieces so that you can the extra width you need to add around the bust. Carefully place the pattern onto the guidelines you drew in the previous step. Line up the the left-hand side of your pattern with the first line (line on left side), and carefully tape in place. Only tape above line 4, as in a moment we will be cutting along that line.

Now, carefully spread open the cut (line 2), spreading the side of your bodice until the apex point intersects with the second line (right hand side). As you do this, you will see a dart open up at the side seam (line 3). 

Add length to the pattern

full_bust_adjustment_fba_dartless_bodice_13

Step 13:

Cut along line 4, detaching that piece of the pattern. Move this section down until it is in line with the rest of the pattern (horizontally). Tape or glue in place. You can see that this adjustment has not only added width to the pattern, but length as well. When making a full bust adjustment you need to add extra length so that there is enough fabric to comfortably go over the breasts, without making the garment too short. 

Create a dart

full_bust_adjustment_fba_dartless_bodice_14

Step 14:

You will see that through making the adjustment, you have made a dart at the side seam. Draw in two dart arms, one from each side of the opening on the side seam to the apex point.

full_bust_adjustment_fba_dartless_bodice_15

Step 15:

We will call the dart arms the 'upper dart arm' and the 'lower dart arm.'

Re-draw Panel line

full_bust_adjustment_fba_dartless_bodice_16

Step 16:

The next thing we need to do is work out what this adjustment has done to the panel line and if any adjustment to the line needs to be made. To do this, we will need to fold out the dart as if it has been sewn. To do this, fold along the lower dart arm.

You will notice this tutorial has shifted from illustrations to photographs. Unfortunately my illustration skills leave me hanging a bit when it comes to illustrating three dimensional techniques, so I thought the clearest way to illustrate this technique would be through photographs. I used a print out of one of the illustrations to keep things consistent, and hopefully not confuse you too much!

full_bust_adjustment_fba_dartless_bodice_17

Step 17:

Take your working piece to a corner of your table. By using a corner, you will be able to fold out your dart as if the piece has been sewn. Align the apex point (the dart point) with the corner of the table, and move the folded line (lower dart arm) towards the upper dart arm. 

full_bust_adjustment_fba_dartless_bodice_18

Step 18:

When the lower dart arm is in line with the upper dart arm, finger press (making sure the dart is sitting flat) and then tape or pin in place. 

full_bust_adjustment_fba_dartless_bodice_19

Step 19:

You will notice that the panel line is no longer a continuous line, and it is also no longer straight. 

full_bust_adjustment_fba_dartless_bodice_20

Step 20:

To rectify this, take a ruler and draw a straight line from the top of the panel line (the point that intersects the armhole) to the bottom of the panel line (where the line intersects the hem). This can be a little awkward to do, having the pattern still on the corner of the table, so just be careful and take your time to get it right.

Before removing the pin, take a tracing wheel and run it over the line at the point where the dart is folded (this will transfer the date shaping to the bulk of the dart). If you don't have a tracing wheel, simply take a pin and make pin points every 2-3mm along the panel line over the folded dart. 

full_bust_adjustment_fba_dartless_bodice_21

Step 21:

Unfold the dart.

You will now have the correct dart shaping marked on your piece (so that when your dart is folded and then sewn, the dart will sit flush with the panel line).

full_bust_adjustment_fba_dartless_bodice_23

Step 22:

Take a ruler and join the dots to finalise the dart shaping.

For more detail on the process, check out this tutorial on How to Add Dart Shaping

Finalise the centre front panel piece

full_bust_adjustment_fba_dartless_bodice_23

Step 23:

Take a spare piece of pattern paper and trace off the centre front panel, being sure to trace the new panel line and not the original line.

full_bust_adjustment_fba_dartless_bodice_24

Step 24:

Now, mark the dart. You will want to make the point of the dart about 1.5cm (5/8in) from the apex point (inside the dart), to avoid the dart point sitting right on top of your nipple (not a great look).  

Add seam allowance

full_bust_adjustment_fba_dartless_bodice_25

Step 25:

Add seam allowance by tracing the original seam allowance on the neckline, armhole and hem and then adding 1.2cm (1/2in) to the panel line.

For further explanation about adding seam allowance to a pattern, check out this tutorial

Mark notches

full_bust_adjustment_fba_dartless_bodice_26

Step 26:

Mark in your notches by tracing the original notches and then adding one at either dart arm. Add another notch on the panel line (this will act as a balance point for when you are joining the FRONT SIDE PANEL). You can place it wherever you like as we will mark it on the FRONT SIDE PANEL piece a little later in the tutorial. 

You will also need to mark the dart point. I like to mark dart point 1.5cm (5/8in) inside the dart so that when I am sewing it, I sew 1.5cm (5/8in) beyond the marking and the marking gets hidden inside the dart. 

full_bust_adjustment_fba_dartless_bodice_27

Step 27:

Finalise the pattern piece by adding cutting instructions, marking the grainline and the centre front. You can then cut out your pattern piece, ready for fabric cutting!

For more information on adding pattern markings, take a look at this tutorial, which covers all you need to know about notches, grainlines and cutting instructions.  

Finalise the SIDE FRONT panel

full_bust_adjustment_fba_dartless_bodice_28

Step 28:

Move back to your working piece.

Cut along the panel line (being sure it's the new panel line and not the original panel line) - separating the piece into two, so that we can focus on the SIDE FRONT PANEL.

full_bust_adjustment_fba_dartless_bodice_29

Step 29:

Cut along the dart arms that intersect the FRONT SIDE PANEL (we will be removing the dart from the FRONT SIDE PANEL, as we only need the dart in CENTRE FRONT PANEL) to create two separate pieces. 

full_bust_adjustment_fba_dartless_bodice_30

Step 30:

Tape the two pieces together by lining up the cut edges. You have now closed out the section of the dart that was on this panel. 

Create a new pattern piece

full_bust_adjustment_fba_dartless_bodice_31

Step 31:

Take a piece of pattern paper and trace the new pattern piece. Your side seam is likely to be a little disjointed since making the adjustment (like mine is in the example). Re-draw the seam by drawing a straight line from the top to the bottom of the seam - on the stitch line. This is called "truing" a pattern.

Add seam allowance

full_bust_adjustment_fba_dartless_bodice_32

Step 32:

Add seam allowance in the same way that you did on the front panel. The side seam has 1.5cm (5/8in) seam allowance and the panel line has 1.2cm (1/2in).

full_bust_adjustment_fba_dartless_bodice_33

Step 33:

Transfer the grainline and add cutting instructions.

You will notice that we have lost almost all the notches in the process of making the adjustment. I'll show you how to get those back now. 

Marking notches

full_bust_adjustment_fba_dartless_bodice_34

Step 34:

Place the SIDE FRONT PANEL on top of the CENTRE FRONT PANEL, lining up the stitch line - as if the two pieces were being sewn (this is when transparent pattern paper is really helpful). The CENTRE FRONT PANEL will be right side up and the SIDE FRONT PANEL will be right side down. 

full_bust_adjustment_fba_dartless_bodice_35

Step 35:

Transfer the notches from the CENTRE FRONT PANEL onto the SIDE FRONT PANEL. Only transfer the notch from the lower dart arm, not the upper dart arm (as when the dart is sewn, the dart will be what lines up with the notch on the SIDE FRONT PANEL).

True the seam allowance

full_bust_adjustment_fba_dartless_bodice_36

Step 36:

While you have the pattern there, true the seam allowance at the hem (so that when the seam is pressed it will sit flush with the hem).

For more detail on why we do this and how to do it, check out this tutorial on truing patterns

full_bust_adjustment_fba_dartless_bodice_37

Step 37:

Now we can true the top of the seam allowance by aligning the top of the panel seam (above the top notch) with the CENTRE FRONT PANEL. You will notice that the rest of the seam no longer matches up. This is because of the dart. When the dart is sewn, the angle of the seam will change and match perfectly with the SIDE FRONT PANEL.

full_bust_adjustment_fba_dartless_bodice_38

Step 38:

True the seam allowance in the same way that you did for the other end of the seam. 

Add notches to the side seam

full_bust_adjustment_fba_dartless_bodice_39

Step 39:

Now it's time to add notches to the side seam. Take the SIDE BACK PANEL so that we can transfer the notches from this piece onto the SIDE FRONT PANEL (as these pieces will be sewn together and therefore need to match). 

full_bust_adjustment_fba_dartless_bodice_40

Step 40:

Again, line up the stitching lines, as if you were sewing the pieces together. Transfer the notches from the SIDE BACK PANEL to the SIDE FRONT PANEL. 

Please note : If there is a discrepancy between the lengths of the side seams (which there could be due to the alteration we made to the SIDE FRONT PANEL), use this tutorial to true the seams so that they are the same length. 

full_bust_adjustment_fba_dartless_bodice_41

And there you have it, the finished SIDE FRONT PANEL!

Now you can go ahead and make your Collins Top! The process will be the same as the instructions that come with the pattern, except you will need to start by sewing your darts in the CENTRE FRONT PANEL. 


I know that turned out to be a very long tutorial. What did you think? Easy process?


You may also like:

The Collins Top Sew-along : Tester Round-up

Yay! It's time to start the Sew-along for the Collins Top! This has been a long time coming. I had high hopes for this sew-along being ready as soon as the pattern was released, but unfortunately it didn't work out that way. I decided to release the Collins Top the week before #makersforfashrev and two weeks before an overseas trip and so that is what caused the delay (sometimes my planning skills leave a bit to be desired!). 

If you have been following my blog for a little while, you'll proabbly know that a sew-along for me is a pretty big deal. I really like to jam pack in as many posts as possible, to ensure that if you are following along, all your questions get answered and I can help you make a garment that you really love and fits you well. You may remember that the Acton sew-along had a whopping 24 posts in it! It is a lot of work to do, but as a lot of the content can be applied to many other different patterns, I feel it is a worthy mission. I want to help makers be the best makers they can be and I feel this is a great way to help!

I'll be starting with the tester round-up, as I think it's always the best place to start. It gives you a chance to see how the pattern looks on a variety of body shapes, as well as in a range of different fabrics.

I'm not going to lie, testing this pattern was tough. I made a bit of a drafting blunder in the original pattern, which I somehow overlooked before sending it out for testing. I corrected the problem and overall am much happier with the final product, but this did mean that I had to test the pattern twice - which meant a huge testing group!! Thankfully I had so many amazing people put their hands up to get the job done (some of them even tested in both rounds of testing) and we made it in the end!

So without further adieu, here is a round-up of the tester versions of the Collins Top. I have included everyone who wanted their photos shared and have put them in alphabetical order for no reason except that it will help me know that I haven't forgotten anyone!


Adrienne

Alice

"This was a wonderful pattern and produced a lovely garment. This top has already become my favourite item of clothing, not just that I have made but in my whole wardrobe." 

Asheley

"I actually love the inside of my garment. I am a stay at home mom who runs around with my 2 year old and 5 year old, mostly wearing jeans and t-shirts. This top is one of the nicest finished garments in my wardrobe and I made it. Also, I love modern but timeless silhouette. I don't own anything else like this, but would like to make more garments like this."

Becky

"I can sense the work and love in this pattern, everything is so detailed and helpful."

Caz

"Oh my! I love how your patterns fit together! All those angles at the edges and seam allowances, so neat and tidy!"

Emma

"I have always enjoyed making In the Folds patterns. Comfort , thoughtful , generous ; sizing,instructions,sharing of knowledge, design ....artistic .... I learn new techniques every time and there is a simplicity to the design element I adore."

Erin

"I feel very fortunate to be a regular pattern tester for In the Folds. Her unique design style and thoughtful perspective always produce the most interesting and fun garments to maker and wear."

Genevieve

"I really like the amount of ease around the waist and hips to allow for flowy fabric and comfort. I also really like the fit around the bust and the shoulder so that I have a bit of shape without being tight. I like the way it hangs off the shoulder to the back. I think that's panelling. It's lovely and gives subtle help to bring the eye in at the wide points."

Jackie

"I liked that the diagrams in the instructions had the pieces numbered - I mostly just follow diagrams and skim the words so this made it super easy to follow."

Jennifer

"I love that it feels like I am not wearing anything. It is so light and breezy and doesn't hug anything!! I also like the hem design. It adds interest to my wardrobe. I also like the button detail. It adds a nicely tailored aspect to the shirt."

Jessica

"I'm so thankful for have been chosen to test this pattern! I didn't think garment sewing could be so fun! I'm so used to sewing straight seams on quilts that I thought this was going to be really hard to do, but it wasn't. It was really enjoyable. I looked forward to sewing on it each time I did and telling my husband about what I had learned while I was working on the pattern that day."
 

Jurgie

"It feels so comfortable! Easy to wear, easy to style with pants or a skirt. I love the construction of it and how smarty-pants I feel when looking at the panels that make up the top. The dropped hem flatters."

Kate

"A great pattern for woven fabric with loads of panels to mix and match fabric. This top looks great in a fabric that has structure but I decided to use a silk/poly mix which gives it a lovely drape."

Kate

"I love the panelling in this pattern. For me, as a slim flat chested girl, I find fitting a challenge and also that the majority of clothes and commercial patterns are aimed at women with fuller figures or have necklines that only flatter a bigger bust. The panels on the front of the Collins are great because they imitate the effect of princess seams but are much less daunting (for me!). Also the sleeve attachment was so easy - it's all about the raglan sleeves for me these days! I don't know why I didn't start off with patterns which featured raglan sleeves, they're so much easier!" 

Renee

"I especially love the top part (neckline and sleeves) of the Collins top in my chosen fabric. It fits perfectly and is flattering."

Vesna

"I thought that the look is really unique and interesting - I love panel lines of the pattern as well as both versions - with and without the sleeves. While loose and boxy this design is still very flattering, which is not an easy thing to achieve in my opinion. I loved that about Collins. Also, I'm certain that this design would work in pretty much all lengths - which is awesome! I see Collins as a starting point for lots of different looks: depending on the choice of fabric, sleeves or no sleeves and crop/blouse/tunic or dress length - you can end up with a number of cool looking silhouettes, each significantly different than the next one!"


That's it! What do you think? Has this inspired you to make a Collins Top for yourself?

See all the posts in the Collins Top Sew-along.


You may also like:

New pattern in collaboration with Peppermint Magazine : The Slouchy Cardi

Yay! It's that time again! Time for me to show you the new pattern I made in collaboration with Peppermint Magazine!

I am extra excited about this one as it was something I really needed in my wardrobe as the weather started cooling down in Sydney. A new cardigan! I don't get around to doing much sewing for myself, so nothing like a project to force me into making myself a couple of samples (which I have basically lived in since making them!)

I went for a really simple and cosy cardigan shape, with in-seam pockets. I wanted something that was easy to just throw on, without the fuss of any fastenings. 

It's a really quick and easy sew and would work well in a wide range of knit fabrics. I went with a beautiful merino loop back jersey because it's toasty warm and also has some stability to it, to really highlight the shape of the cardigan. 

As always, the best bit is that you can download the pattern for free from the Peppermint Magazine website! If you are in the northern hemisphere and not really looking for a cosy cardigan, you can also find a whole lot of other free sewing patterns there that might tickle your fancy. 

Get the pattern now. 


You may also like:

Are you joining me for #makersforfashrev?

Last year I had all these grand ideas for what I wanted to do for Fashion Revolution Week. As is the case with a lot of my grand plans, I realised that I had left it too late and there was far too much to do for me to get it happening in time. So I went for second best (or what I thought was second best at the time) and decided to run a little Instagram photo challenge. I have seen a lot of them run very successfully, and I knew it was a good way to spread the word and raise the profile of an issue, so I quickly made some daily prompts and put it on Instagram with the hashtag '#makersforfashrev' to let people know what it was all about.

Oh boy was I surprised when people started sharing it and putting the hands up to take part too! Suddenly it wasn't just me, but countless makers from all around the world, jumping on board to spread the word. As of today there are 1 378 posts with the hashtag. I was thrilled to see others thought it was an important issue to discuss too. 

I still love the idea of hosting some kind of event for Fashion Revolution (maybe next year), but I also  appreciate the incredible power of the internet. From my little studio here in Sydney I can spread the word about Fashion Revolution far further than I could by hosting a class or an event, and for now, that's exactly what I plan to do!

What is Fashion Revolution?

So if you are new around these parts, or have not come across the Fashion Revolution movement, you can check out my blog post from last year to get an overview of what it's all about.  

In short, what it's about is asking 'Who Made My clothes?' It is about questioning working conditions, work practices and the overall impact the fashion industry has on people and planet.

The reason I thought it was important for makers to get on board spreading the word about this issue is that we are the ones making our own clothes. We appreciate the time it takes to make clothing and the skill required to do so. Why should the garments handmade by us be valued, appreciated and worth more than the garments handmade in a factory in a third world country? They shouldn't be. All clothing is made by hand and this needs to be remembered and never devalued or discredited. 

We have the power to spread the word amongst our friends, and communities, to promote and acknowledge that clothes are valuable and use valuable resources to create them. We should love them, take care of them and nurture them. We should keep them out of landfill at all costs. We should also question the working conditions of those who make them for us.

#MAKERSFORFASHREV

To promote this amazing movement amongst the making community online I have decided to host another photo challenge on Instagram for the week of Fashion Revolution (24-30 April). Although some of us may not buy our clothing from retailers, there is still a lot we can do to encourage change, and I would love if you help me spread the word (and maybe even encourage more people to start making their own clothes).

WOULD YOU LIKE TO JOIN ME?

Each day during Fashion Revolution Week, I will post a prompt on Instagram to promote thoughts, discussion and inspiration related to a particular aspect of the revolution. If you would like to play along, simply use the hashtag #makersforfashrev, as well as the official Fashion Revolution hashtags - #FashRev and #whomademyclothes - this way we will all be able to find each other. I'll choose my favourites each day and do a little round-up! You can find me on Instagram @inthefolds.

If you would like to let the world know you are taking part you can post the image above on your blog, Instagram or Facebook page. The further we spread the word, the better!

WHAT CAN WE DO AS MAKERS TO INFLUENCE CHANGE?

  • Slow down! Do you really need all those clothes? Take your time to make one beautiful garment instead of five hurried makes. Spend extra time by working on beautiful finishes or decorative techniques. Use your making time to upskill rather than fill your wardrobe with more and more.
  • Make for others when you have enough in your wardrobe.
  • Use sustainable materials to create products.
  • Teach others your skills. Encourage others to make their own clothes.
  • Work out ways to reduce waste (this could be in relation to your studio / office space, the packaging you use to wrap or post your products, etc.)
  • Recycle whenever possible
  • Consider using second hand whenever you can (I use second hand fabric for the majority of what I sew)
  • Make plans. Don't buy things impulsively. Take the time to think about it and work out if you actually need it. 
  • Sew from your stash.
  • Go to clothing and fabric swaps.
  • Ask your suppliers and manufacturers about their labour practices.
  • If you have your business, consider manufacturing locally.
  • Be disruptive and embrace change.

YOU MAY ALSO LIKE:

New pattern : Introducing the Collins Top

I am so excited to be here telling you all that my new pattern is here! Meet the Collins Top -  a loose-fitting trapeze-shaped top designed for woven fabrics. 

The Collins top is It is A-line in shape, perfect for hot summer days. It features a round neck, panel lines, a high-low hem and a centre-back opening, with a button and loop closure.

Due to its length, the Collins Top is the perfect top to pair with skirts or trousers that sit on or above the natural waist.

As always, this pattern is available in 10 sizes, from bust 76cm (30in) - 131cm (51.5in).

What I am most excited about when it comes to the Collins Top is that I designed this pattern specifically for beginners. Okay, I know, I know, there are a lot of pattern pieces and panel lines (I really can't help myself, can I?), but I believe that if you have mastered sewing a straight seam and a curved seam, you can make the Collins. Also, due to the loose nature of the top, there are not too many fitting issues to worry about (possibly just a full bust adjustment), which makes it even more beginner friendly! And, although I designed it specifically for beginners, it does not mean that you more seasoned stitchers won't enjoy it too. It is a really fun pattern to sew up, and lots of room to play! 

View A

The Collins top (view A) has a three-piece raglan sleeve with some extra volume, which creates a fun and interesting shape. Due to the nature of a raglan sleeve, there is no sleeve setting in required (it is all done flat), so it comes together really quickly and easily. 

The neckline is finished with bias binding.

As you can see in this sample, this pattern leaves a lot of room for playing with stripes (or colour blocking), which really highlights the panel lines in the design. As I knew this was something a lot of you would get excited about, I created a little template that you can download for free and experiment with your ideas of colour blocking and stripe direction, before cutting into your fabric. Download it now. 

View B

The Collins top (view B) is sleeveless and the neckline and armholes are finished with an all-in-one facing for a really clean and professional finish. 

The Collins top is compatible with a range of different fabrics. Your choice of fabric will dictate the silhouette you achieve. Consider using light to mid-weight fabrics such as: linen, linen blends, cotton, gauze or chambray. For a softer silhouette, consider sateen, silk (crepe de chine or habotai) or viscose (rayon). These two versions were made from cotton, so I can't wait to share all the tester versions next week, so you can see the range of silhouettes you can achieve with this pattern!

Learn more about the pattern and grab your copy here. 

What do you think? I'd love to hear your thoughts about the new member of the In the Folds pattern family


You may also like:

Talking about : Accepting slow and embracing my creative process

As I celebrate finally making it to the week in which I will release my new pattern - the Collins Top, I can't help but become a little reflective, thinking about the process, the lessons learned, the challenges overcome and the skills gained. If you asked me a year and a half ago, when I started In the Folds, where I would be now, I would have told you that I would have had a truckload of patterns in my Pattern Shop by now. Oh how naive I was! And thankfully I was that naive. If I knew how much time, blood, sweat and tears would go into creating just three sewing patterns, I probably would have run the other way. Thankfully, all I had for a reference were the amazing women in the indie sewing scene that are producing patterns, and they seemed to be able to churn out 4-6 patterns per year, so why couldn't I? 

Well there is many a reason that I have learned (and finally accepted) that at this moment, it is just not in my power to do so. And the main reason is not that I'm a one-woman show (although I am), or that drafting a pattern and creating the instructions takes a really long time (although it does). The reason is that I like to let my thoughts and ideas percolate. I like to work on things in a way that allows my ideas to do their time in my brain, dancing in and out of my thoughts, coming back in different shapes and forms, until eventually they feel right. I can't make important decisions on the spot, and I have decided to stop putting pressure on myself to do so. I have learned that I create my best work when I give it the time it needs to breathe, and without doing so, I don't think I would be pushing myself to my creative limits. I have learned over time that my best ideas come when I am not looking for them, or forcing them, or expecting them. They come when I'm going for a walk, or driving my car, going to sleep, or talking to friends. They surprise me, and exhilarate me and remind me why I started this journey in the first place. 

I want to create patterns that are beautiful, thoughtful and surprising to makers. Patterns that are timeless, and are relevant year after year. And that is my mission. That's what gets me up each morning and what goes around and around in my mind when I'm working on one of the tedious parts of the process (I am looking at you cutting plans and yardage requirements!) It's what allows me to work on the same pattern for months on end, never giving up, even when the stress of it does seem too much. It's what makes me choose to hold a pattern back if I know it can be improved. It's what makes me illustrate an entire pattern after I have already completed and tested the pattern with photographs (the shift from photos to illustrations happened weeks before I was planning to release the Acton). It's what makes me re-test a pattern when I know the fit could be better. 

I recently did a customer survey (thank you again to all of those who took the time to do it) and many people asked what takes me so long to produce a pattern, and I realised that I rarely talk about my creative process. So today I start. I will aim to talk more openly about the way in which I work and how a sewing pattern is created. I can definitely not speak for everyone, but my process is one I know inside and out, and I would love to share it! 


You may also like:

New pattern in collaboration with Peppermint Magazine : The pleated skirt

I am excited to let you all know that I have just released another pattern in collaboration with Peppermint Magazine! It's a pleated skirt, which features stitched down knife pleats, slanted pockets (that are deep enough to keep your hands nice and snug and your belongings nice and safe), shaped waistband, invisible zip and a hem facing.

I must say, this is my favourite of all the patterns so far. I didn't think I was one to wear this kind of style / silhouette, but once the sample was made up, I really didn't want to give it away! The fabric I used was a beautiful linen / cotton blend from The Drapery (a lovely little fabric retailer based in South Australia, with a great online store), which made it even harder to part with.

It's a little hard to see all the details with the busy print, so here is the technical drawing, to give you a better idea of what's involved. I have rated it as an advanced beginner pattern, as it's quite a straight-forward sew, with only your waist to fit!

You can download the pattern for free from the Peppermint Magazine website. As a bonus, for the first time I have also made the pattern available in A0 format for copy shop printing, as I know how much you all like that feature!

While you're on the Peppermint Magazine website, you may also want to check out the other patterns I have made for the magazine over the past 12 months. I made the Beach Cover-up pattern for summer, the Peplum Top pattern in spring (which has been a favourite for many) and the Sweater Dress pattern last winter. All patterns are available for free!

Get the Pleated Skirt pattern now


You may also like:

Talking about : A new job, a little less time, a survey (and a giveaway!)

I recently started a new part-time job, which unfortunately means a bit less time in the studio for me. It has been a difficult adjustment to make over the past few weeks, but thankfully now the fog seems to be lifting, and there does seem to be enough room in my brain, and room in my day to balance my business and my job (and even my relationship and friendships on good days too!)

While adjusting to my new schedule, I have been thinking about how I should be spending my time. As time is now more limited than it was before, I already find myself constantly asking myself "Is this a priority?" or "Is this really how I should be spending the 4 hours I have at the studio today?" (Some good definitely comes out of being pushed for time!) This has got me questioning what kinds of blog posts I should be writing, what patterns I should be producing, and overall what types of content I should be creating for the people who buy my patterns and visit my blog. I have been ruminating over this for a couple of weeks now, and then it occurred to me, why don't I just ask? It's all well and good for me to sit here bending my brain trying to put myself in your shoes, but at the end of the day, I am not the one reading my blog, or using my patterns, you are!

I have created a survey with some questions about what you would like to see from In the Folds in the future and what I could be doing better (among other things) and I would love if you could spare some time to take it. I must warn you, it's not a quick two-minute survey. I tried to avoid multiple choice when I could, as although it makes it much faster to look at the data, I'm not really into sticking people in four separate boxes and then calling it a day! I really want to get a true idea of who you are, why you sew and what you are looking for, so that I can create content that will actually benefit this community of ours. It takes a really long time to create a tutorial and even more to create a pattern, so I may as well check-in to see that it's something that is actually needed in the world before taking the time to create it.

To show my appreciation for your time, by doing the survey you can enter a draw to win your choice of pattern from my online shop. I know I don't have a huge amount of patterns available at this stage, so if you are lucky enough to win and you already own both my patterns, then you can save the credit for a future pattern release. Prizes will be drawn in 14 days from today (i.e. 13 March 2017, 9am AEST), so get the survey done before then to be in with a chance! 

I also realised that it wasn't fair for me to ask you you take the time to sit down and answer these questions, and for me not to do the same. So I took the survey too! You can receive my responses to the survey as an email if you like. Just enter your email address when prompted in the survey (don't worry, your email address will be used for nothing spammy, just for you to hear my answers!) and it will come straight to your inbox. 

To help me make In the Folds even better, please click the button below.

Thank you so much for taking the time to help me create content that will be interesting, useful and beneficial to this community!


You may also like:

The Acton : A little pocket pattern hack

I made a new Acton dress lately (photos to come eventually... when I finally psyche myself up to get in front of the camera) and while I have been wearing it, there has been a little thing that I think I will change next time I make an Acton. I'd love to extend the pocket pieces so that they can be stitched to the dress waist seam and then always stay in the front of the dress (sometimes they like to flip towards the back skirt). This was something I thought about when developing the pattern, but because there isn't one set place where people like their pockets (as we are all different height) I worried it would make it more challenging for people, if they felt an adjustment needed to be made. 

acton_pocket_hack_intro.gif

So today, I thought I'd show you how to extend the pocket pieces. This tutorial is for you if you have found your optimum pocket position, and now just want to prevent the pockets from moving around when you're wearing your Acton. This tutorial could also be adapted to other patterns too. You could do this for any skirt or dress pattern that has a waistband or waist seam. 

Getting started

To start, take the SKIRT FRONT pattern piece (view A) as well as the original in-seam pocket piece. No alteration will be made to these pattern pieces, so using the originals is fine.

Place the pocket piece on top of the skirt piece, in the position it will be sewn. Use the notches as a guide. If the original pocket placement is too high or too low for you, move to a more comfortable position. 

Creating the new pattern piece

acton_pocket_hack_3.gif

Take a small piece of pattern paper and place it over your pocket (make sure it extends up to the top of the pattern piece, as this is the area we will be extending on the pocket). It really helps if your paper is transparent enough to see the pieces underneath. If it's not, consider using a light box or taping your pieces to a window. If you are worried about your pocket piece moving, you can tape it in place on the skirt.

Trace the bottom edge of the pocket bag. This will remain the same as the original for the new pattern piece. Stop tracing at (approximately) the point where the curve of the pocket edge turns back towards the side seam. 

Now, draw a straight line up to the waistline from the point on the curve where you stopped tracing. I would suggest that the point on the waistline should be about 6-7cm (2 - 3") from the side seam (measuring from the stitch line, not the cut edge), but this is up to you.

Trace along the side seam of the skirt, between the bottom of the pocket bag and the waist - transferring this line onto your new pocket piece. Then trace along the waist seam until you reach the edge of the pocket. 

Transfer pattern information

acton_pocket_hack_7.gif

Transfer pattern information onto the new pattern piece. This includes labelling the pattern piece, cutting instructions (cut 2 pairs) and the grainline (which should be parallel to the centre front). For more details on pattern markings, check out this tutorial

Transfer notches

Add notches to your new pattern piece. Start by transferring the relevant notches from the original pattern pieces. This includes the side seam notch and one of the balance points on the edge of the pocket. For more information about notches (and why they really help you when assembling garments), check out this tutorial

A few more notches will be needed, apart from the original ones. Place one notch on the side seam of the pocket, where the original pocket started (this notch will match the notch on the side seam of the skirt). Add two more notches on the curve of the pocket. These notches will act as balance points so that you can match the two pocket pieces together correctly when you are up to that point. 

And there you have it. A new pocket piece! 

Sewing your pocket

1. After you have sewn your front and back skirt pieces together (along with the pocket) - in line with the original instructions (sew-along post here), sew a line of stitching down the side of the pockets on each side to prevent the pocket being open from the waist seam down. 

2. When assembling your Acton with the new pocket piece, be sure to stay stitch the top edge of the pocket onto the front waistline before you join the bodice to the skirt. This will keep the pocket in place as well as help you get a really nice finish (as it means everything will be tucked nicely into the bodice lining). 


You may also like:

Notes on : Notching patterns

notching_sewing_patterns_1

During the Acton sew-along, I showed you a range of different alterations you may need to make to your Acton dress pattern.

As I was creating the tutorials, I realised that I probably should provide some information on how to notch patterns correctly. Sometimes, when making alterations to patterns, you may displace a notch or two, so today I will show you how to re-mark notches, as well as add notches to your own patterns (if you are drafting from scratch).

Just in case you have no idea what I'm talking about, I thought I'd start by letting you know what a notch is, and then how to use them. 

What is a notch?

notching_sewing_patterns_2

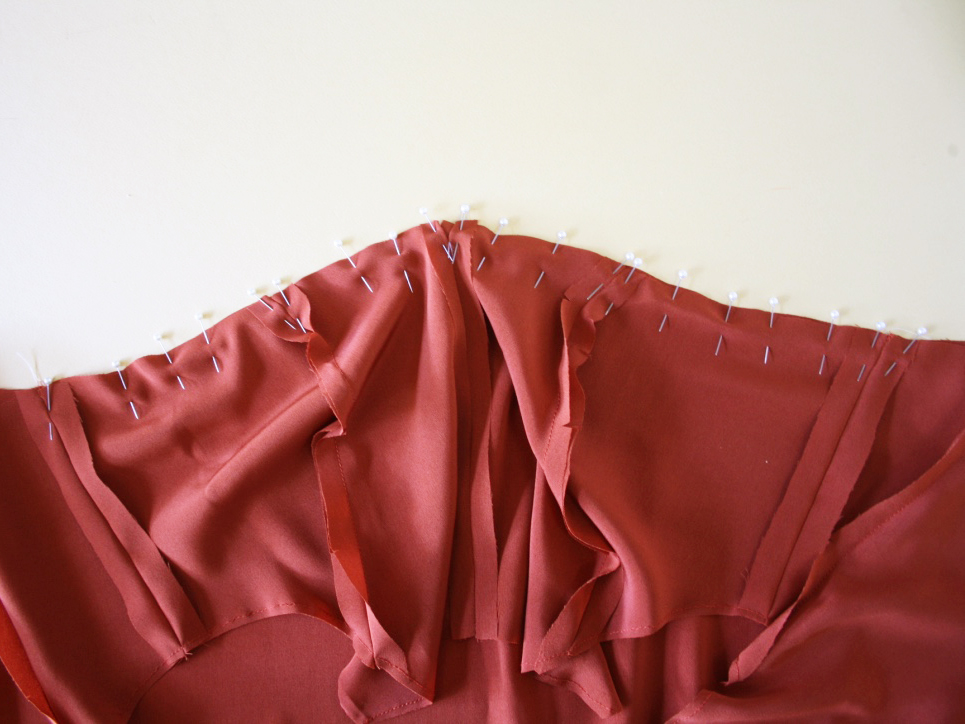
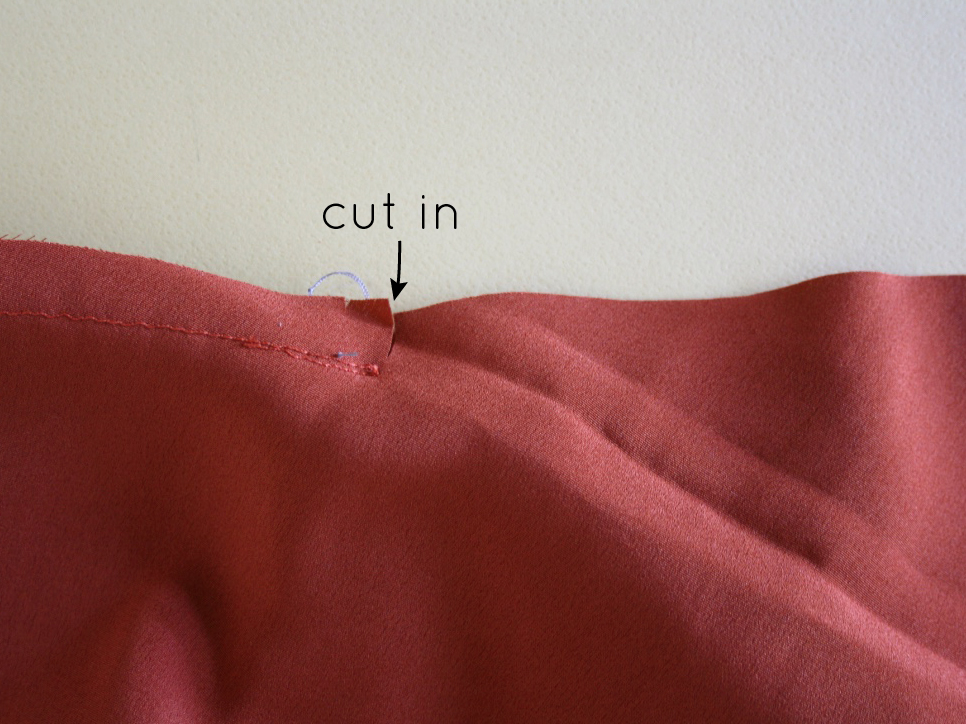
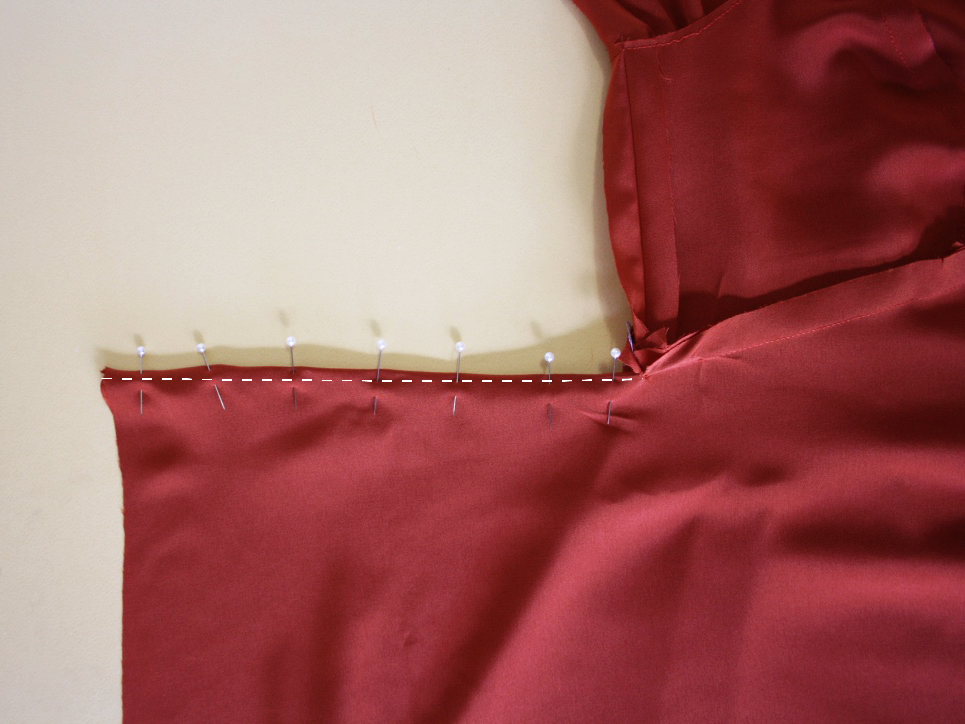
A notch is a small cut in the fabric (or a triangle on some commercial patterns) that help guide you while you are sewing. They are used to indicate seam allowance, dart arms, the location of design details, such as pleats, tucks, gathers, hems and pockets, or indicate key points on the pattern (like the centre front or centre back). Notches are also used to indicate balance points (points on your pattern that help you sew the right pieces together, as well as help you when you are sewing long or curved seams).

Why use notches?

If you are drafting your own patterns, you will be wanting to add notches to your patterns to make it easier to assemble the garment. If you are clever about where you put them, having well placed notches can help you assemble a pattern without instructions (which is handy if you are drafting your own patterns, as you won't have any!). Notches will help you know which piece is the front or back, what seam allowance is required and if there are any special design details such as pleats.

If you are designing patterns for other people, I think it is even more important for you to take the time to notch patterns correctly. I know the way I notch my patterns is an aspect that people really like about my patterns. They act as little markers along the way that let you know you are putting the garment together correctly. I remember one of the women that tested the Rushuctter pattern for me said she felt that each time she reached a notch, she felt like it was a little tick to let her know she was going well. As designers, it's not just about making patterns that help sewists make beautiful clothing. It's also about making a pattern that creates an enjoyable and memorable making experience, and I believe that attention to detail is a great way to do this.

Where should I place the notches?

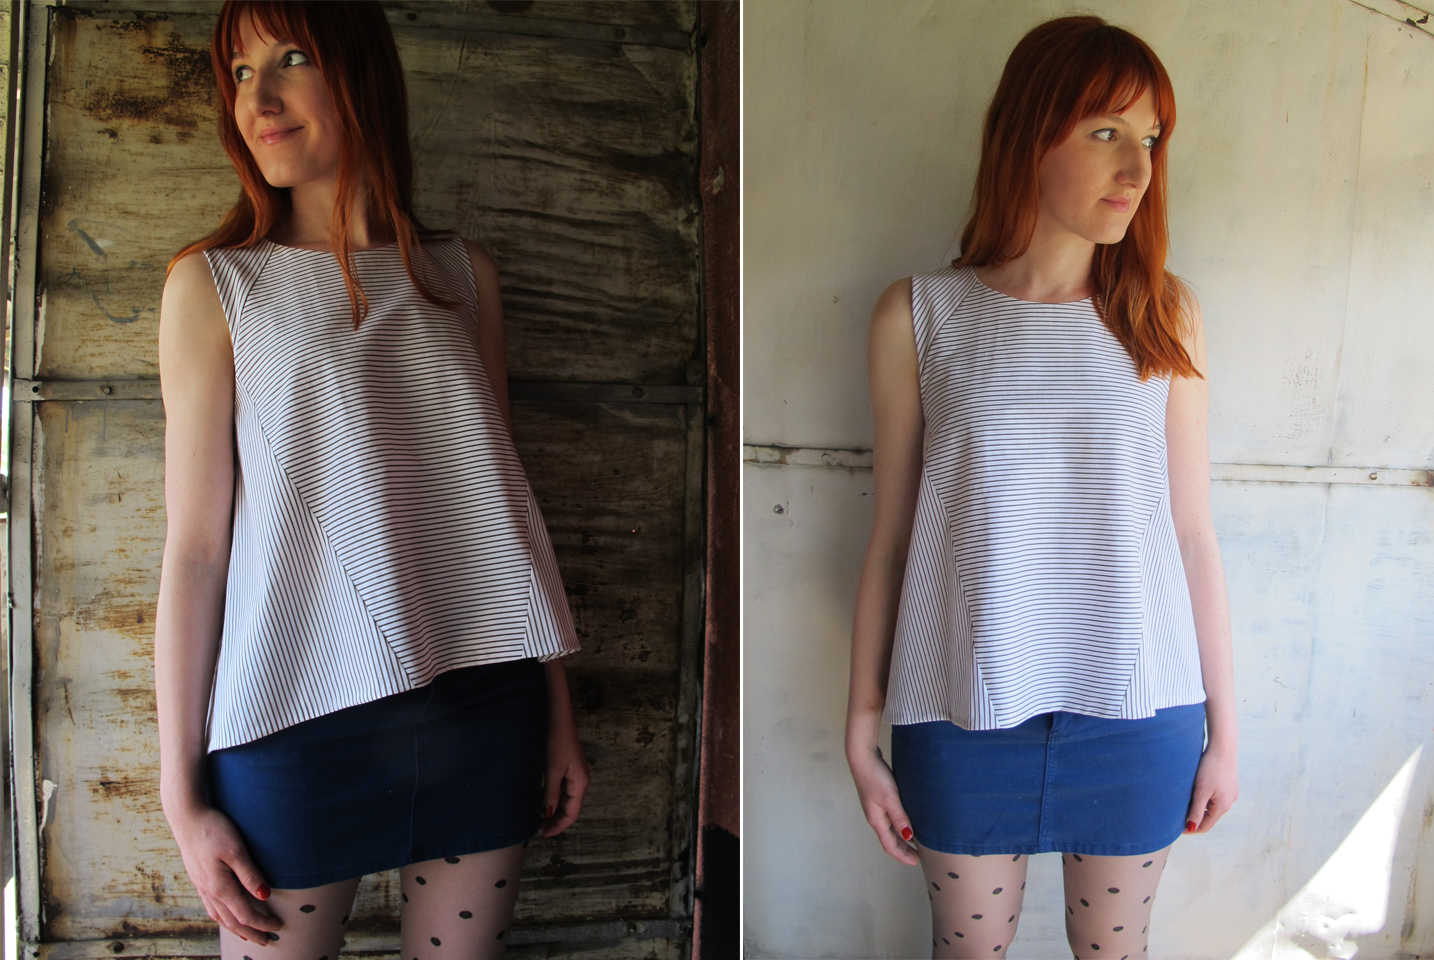
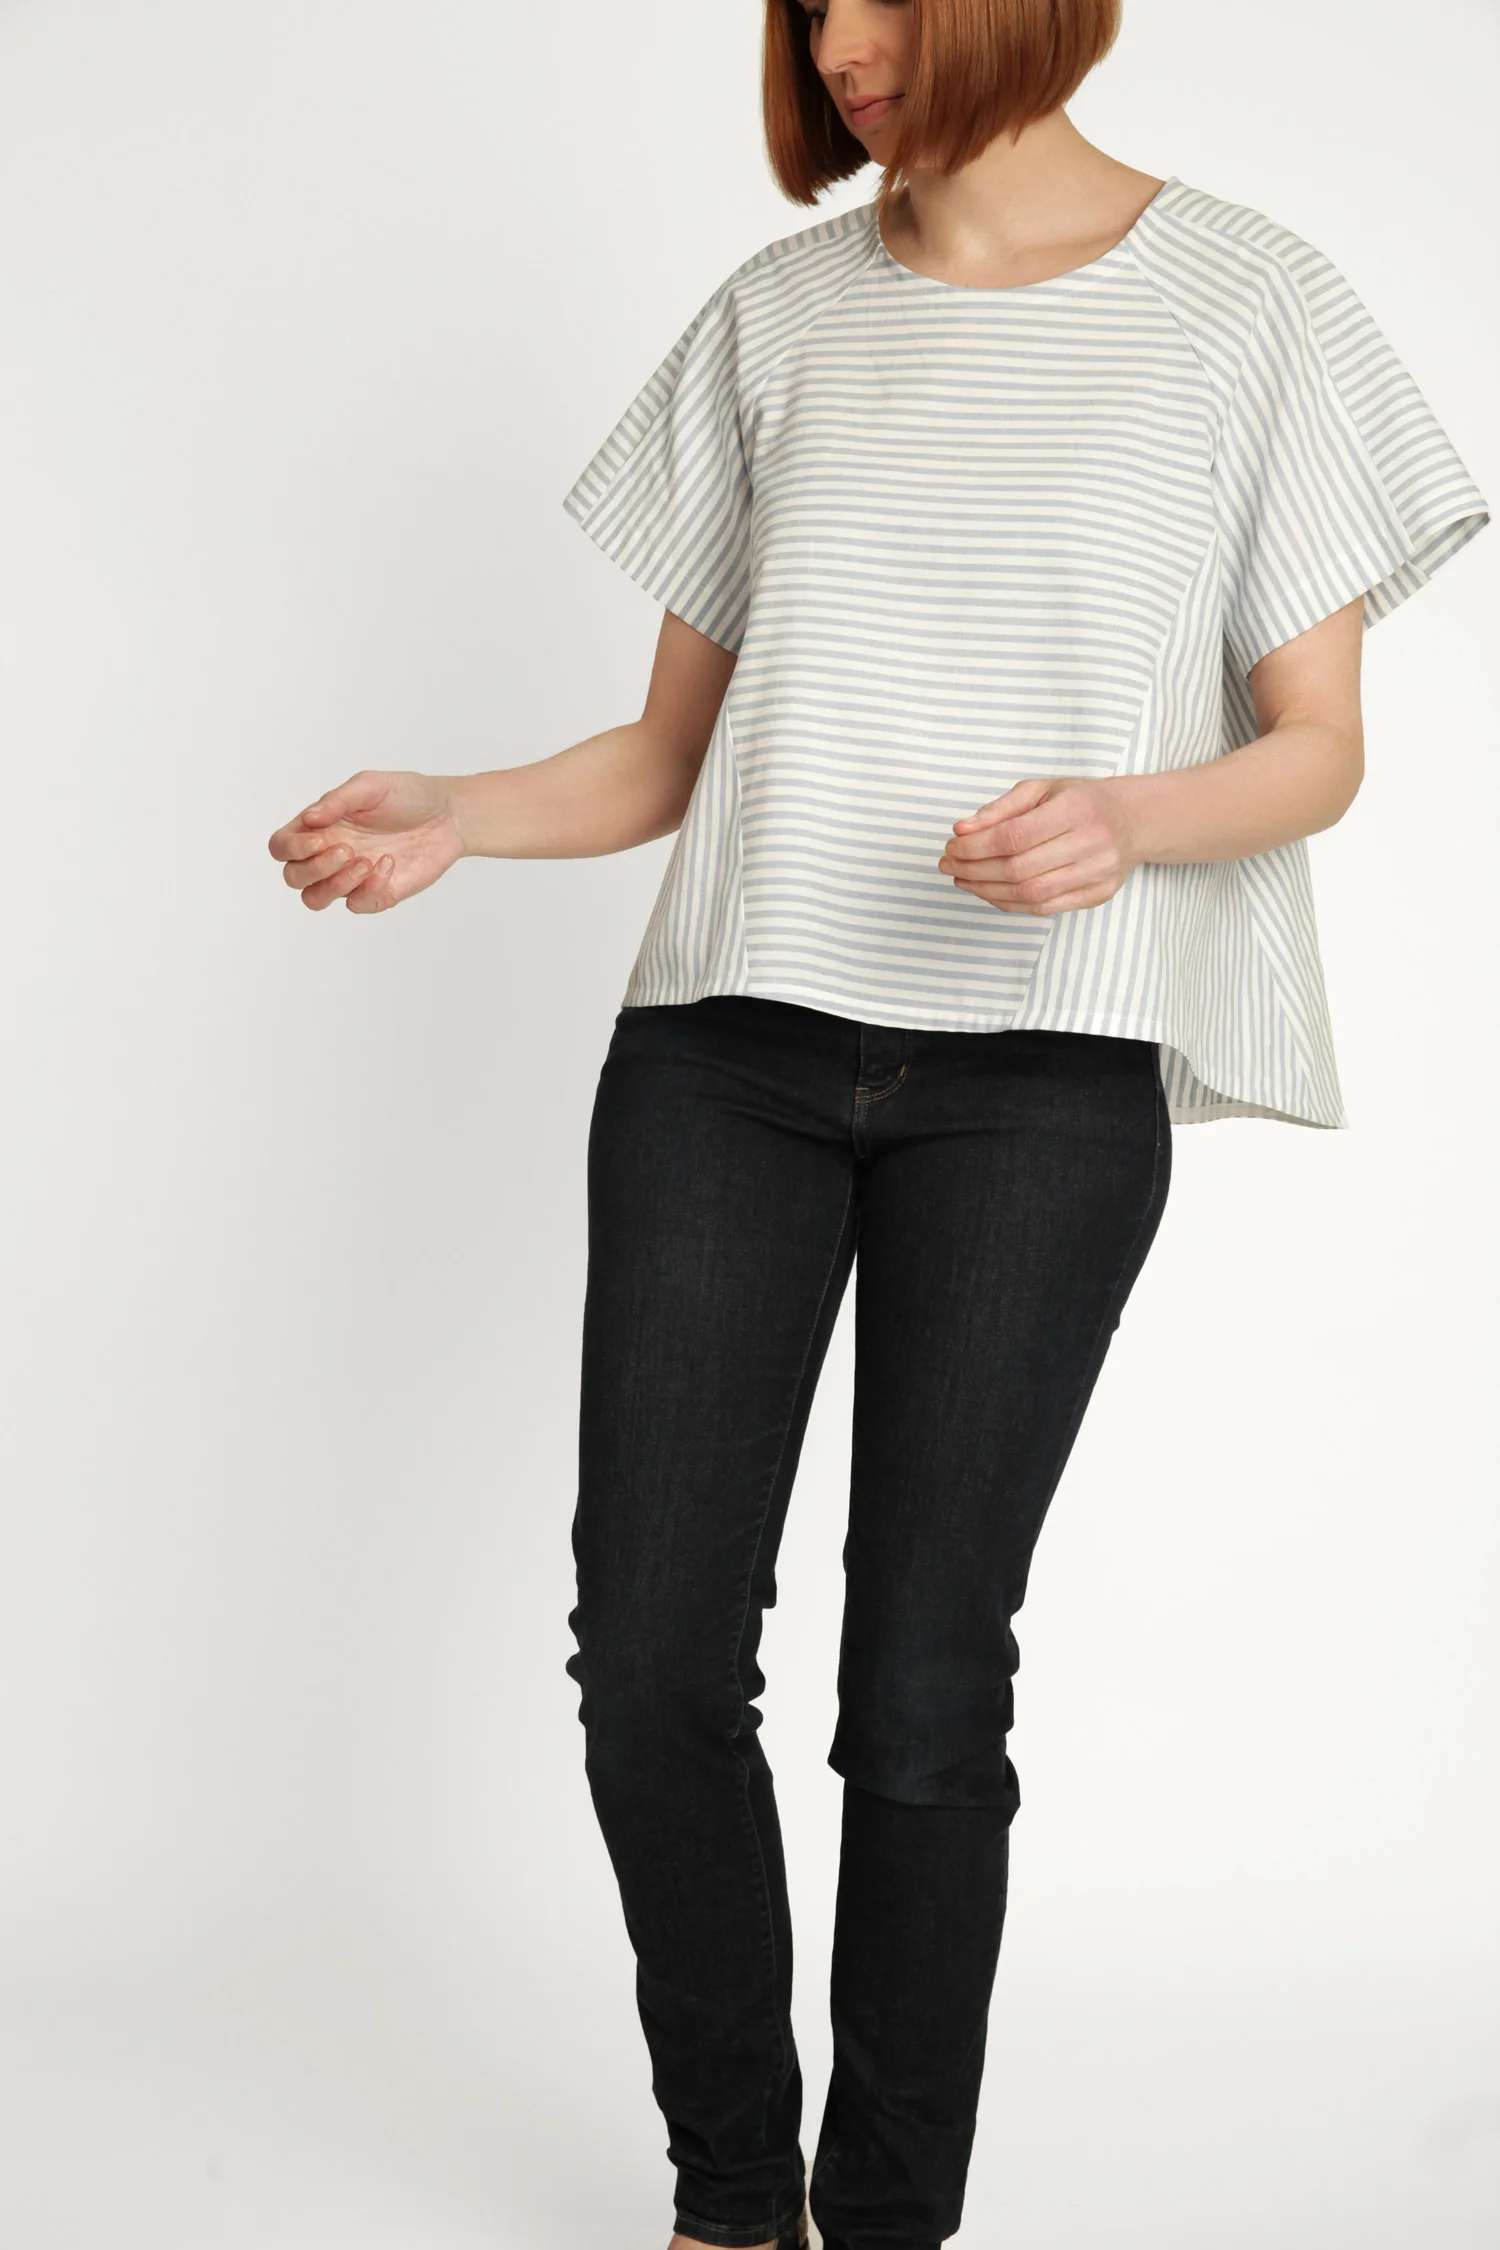
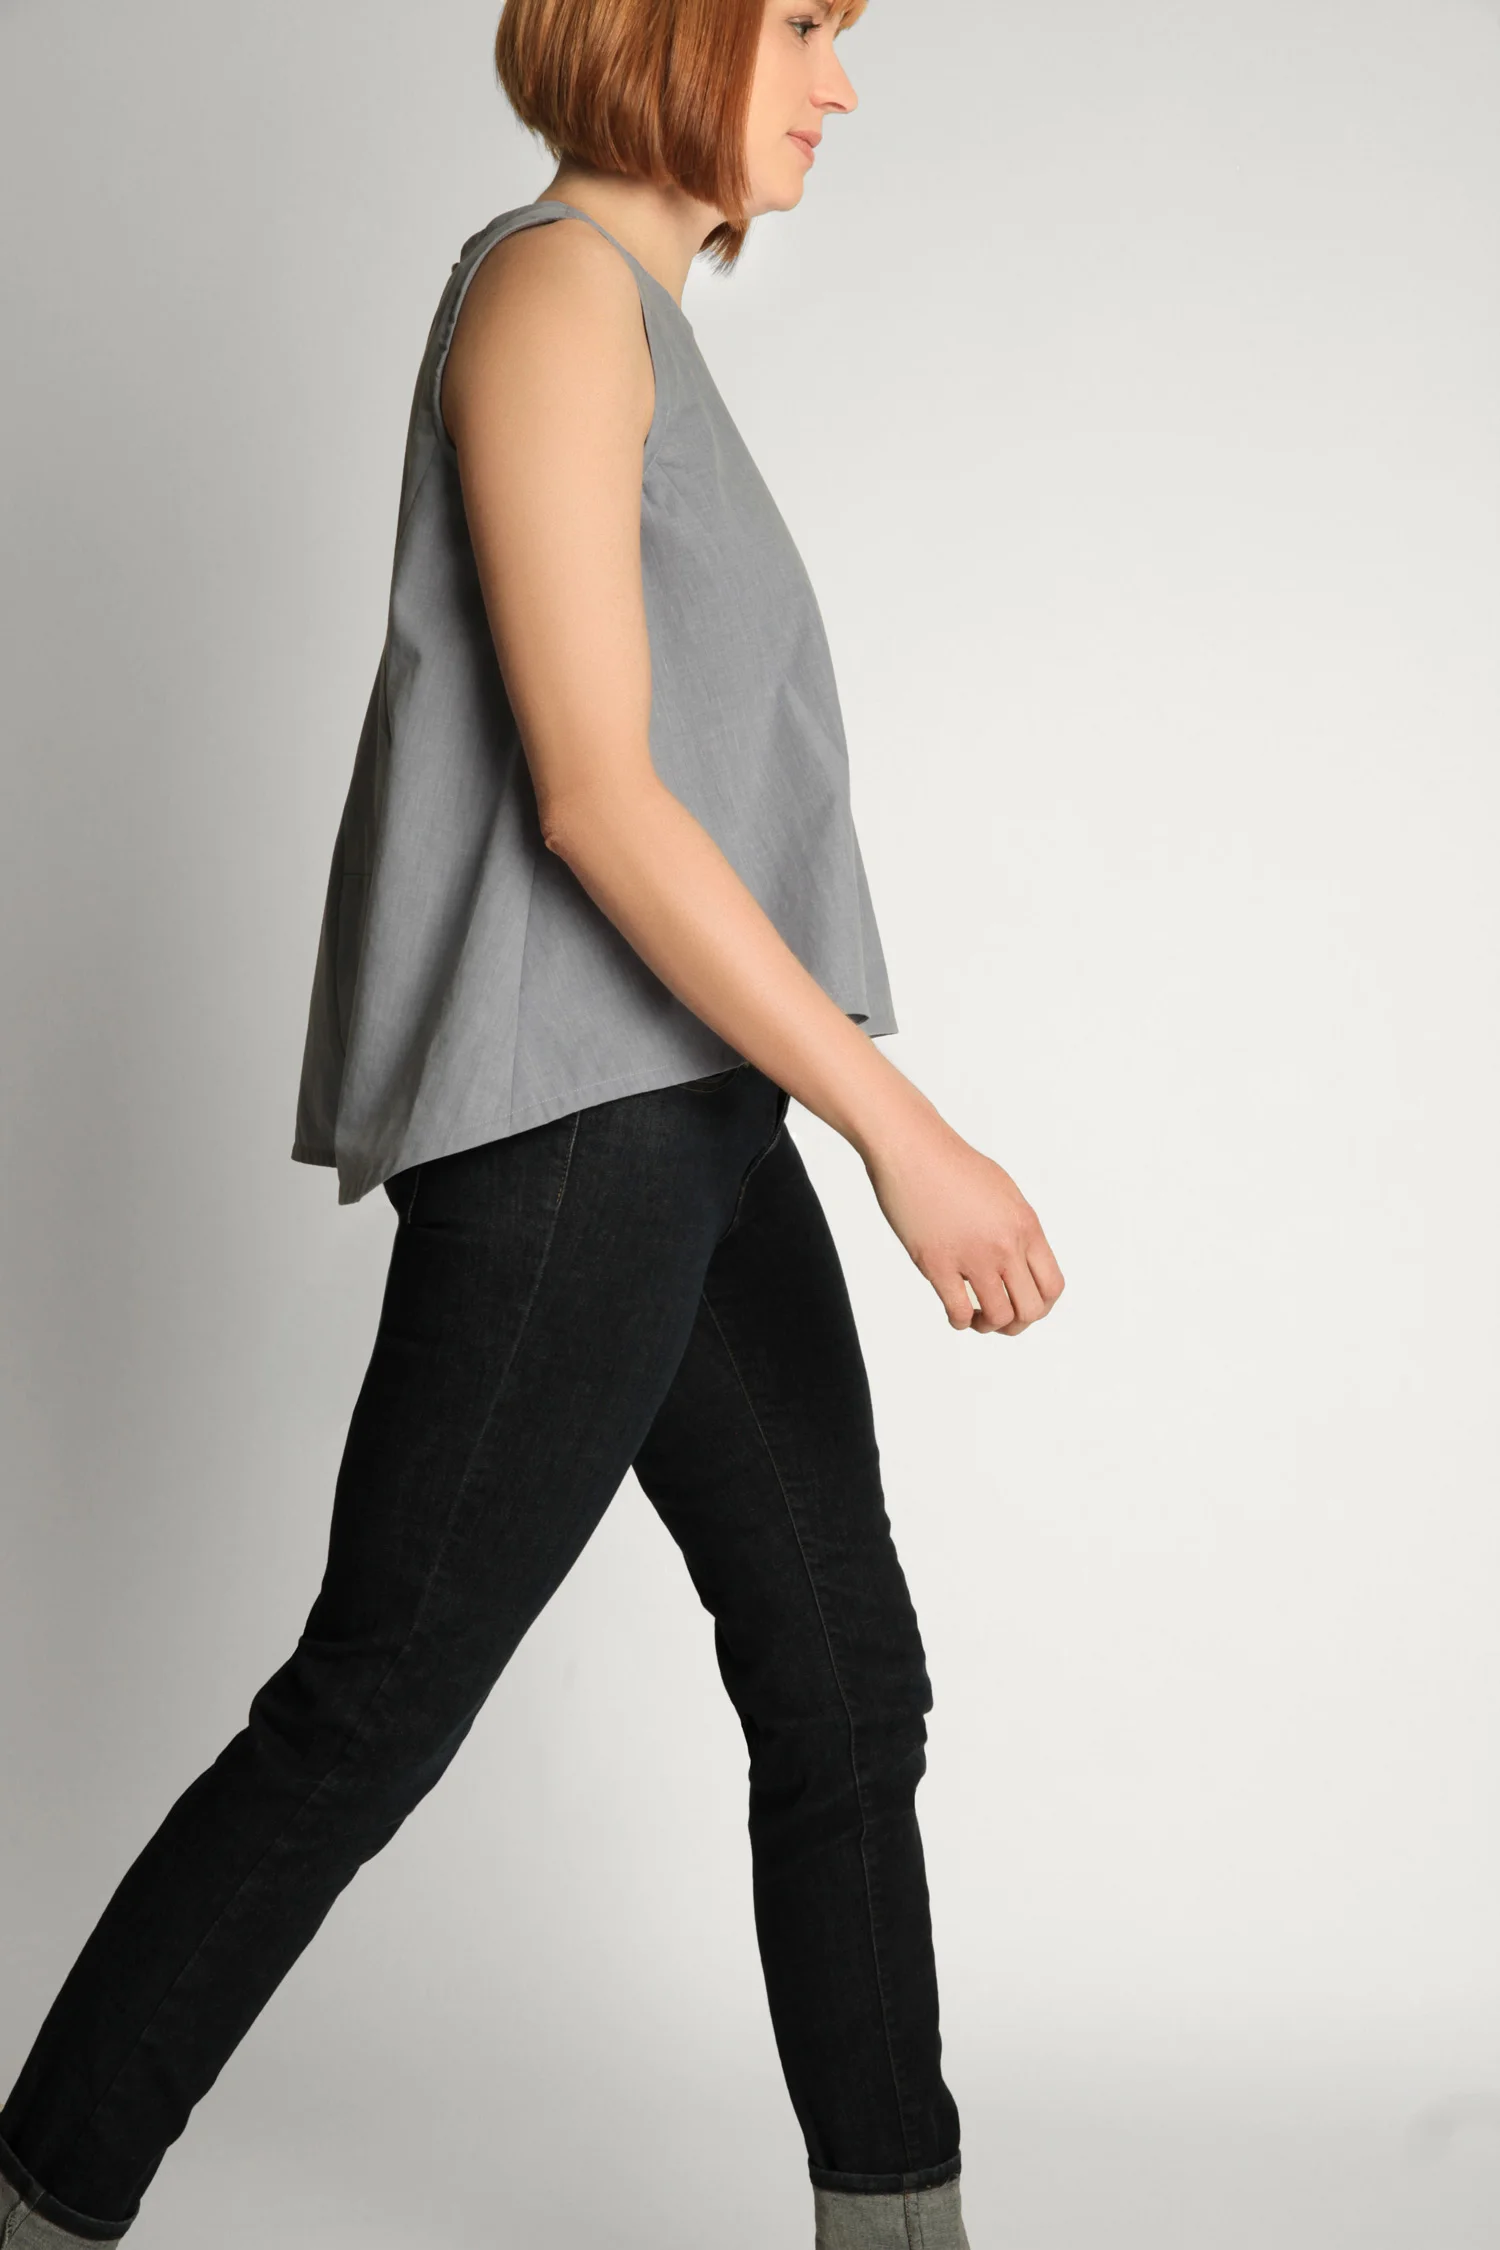
I thought it would make the most sense if I showed you one of my patterns and where each notch was placed, and why, and then you can apply this method to your own patterns. It really is very simple if you just add your notches in a methodical way. The pattern I am using for the example is the Peplum Top that I made in collaboration with Peppermint Magazine, that can be downloaded for free here

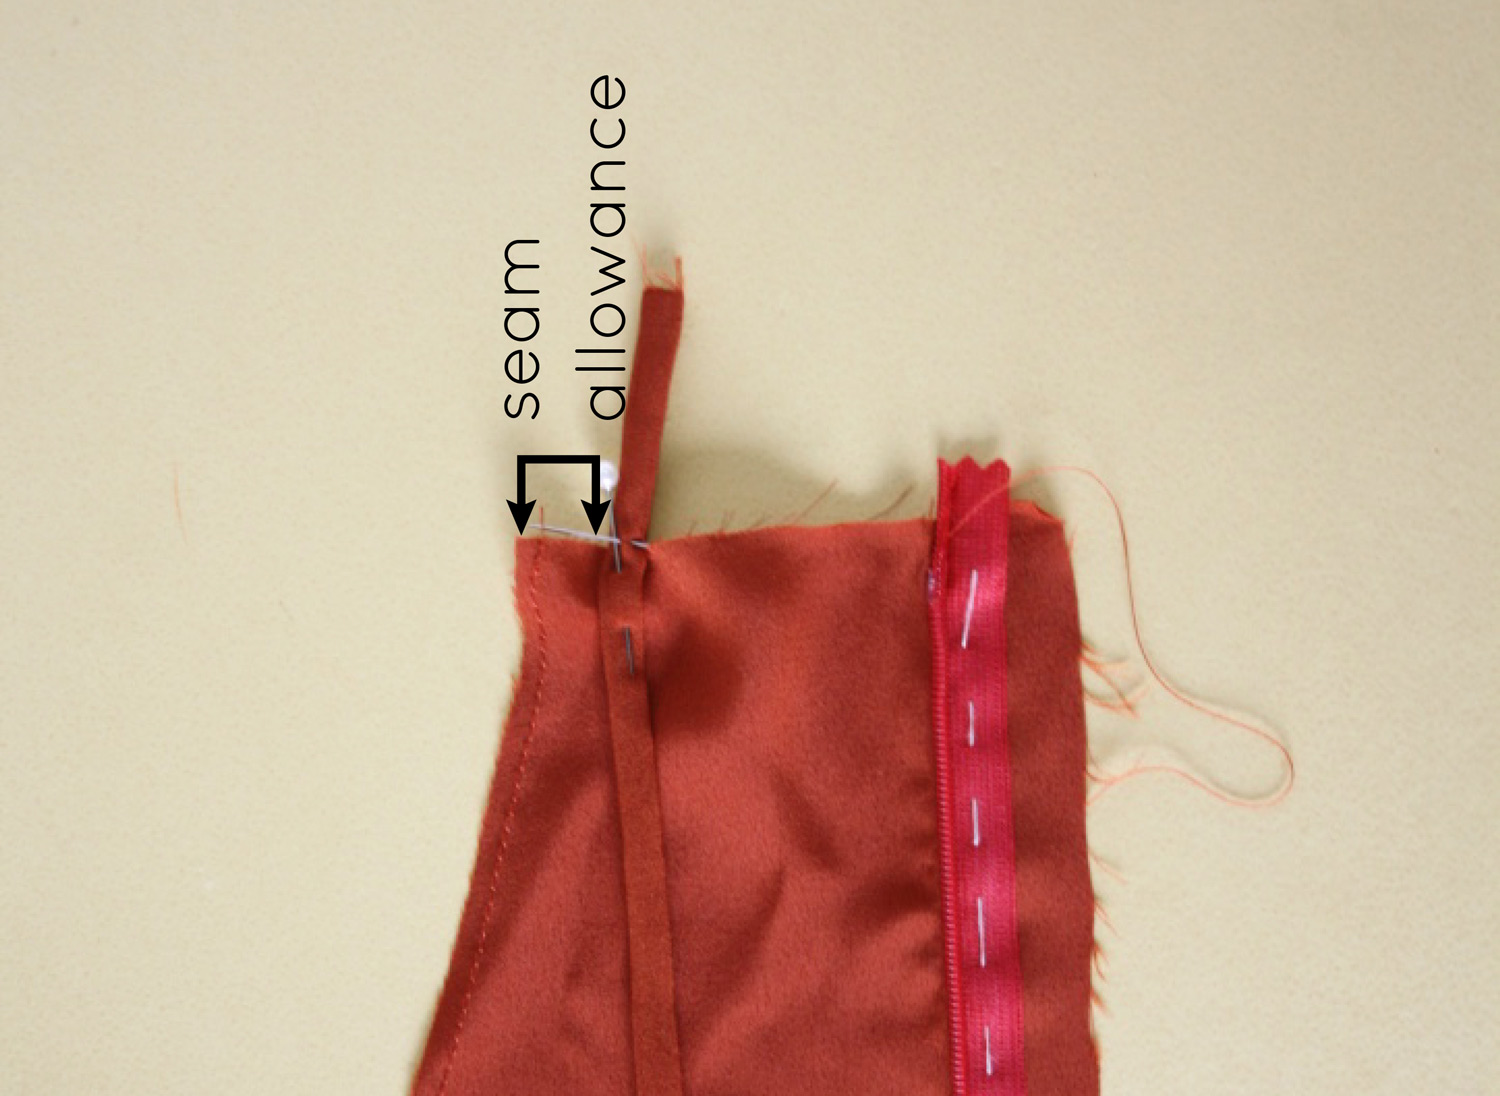
Indicate seam allowance

notching_sewing_patterns_3

Start by using notches to indicate seam allowances. This is really helpful if you are using various seam allowances (which you should - find out more about seam allowances here) and struggle to remember what seam allowance is applicable where. Use a notch to indicate each seam allowance on your pattern. You will see in the example that I have used a notch to mark the shoulder seam, side seam and waist seam. You don't need to mark the seam allowance at both ends of the seam, just one will do. Consider the order of construction when positioning your notches. For example, I normally sew the side seams of a garment from the armhole down, so I will put the notch at that end of the seam. 

notching_sewing_patterns_4

You also want to avoid notching two sides of the same corner. This can weaken the pattern and the fabric. 

notching_sewing_patterns_6

Put notches in the same places on the back pattern piece, so that when you join the pieces, the notches will match. For example, when putting a notch on the side seam of the back pattern piece, I will put it in the same position as the front - which is at the top of the seam. The back pattern piece has a centre back seam, so I added a notch to indicate that too.

Add balance points

notching_sewing_patterns_7

The next thing to do is to add 'balance point' notches. These are the notches that help you figure out what seam matches with what, and which way the pieces go, as well as help you ease pieces together, or sew ver long seams.

In the example, there is a shoulder panel piece that is attached to the front and back shoulder seams. It looks almost the same at both ends, so without these notches it would be really tricky to know which way to put the piece in. On the front pattern I used two single notches to indicate the front and on the back one single and one double notch (double notches are generally used to indicate the back pattern piece or back of a pattern piece). 

notching_sewing_patterns_8

Transfer the notches from the shoulder seam to the shoulder panel. Do this by simply matching the seams together, as if they were being sewn, and transfer the notches onto the pattern piece (a tracing wheel can help with this step). You can also transfer the seam allowance notch at this stage.

notching_sewing_patterns_9

Do the same for the back. 

Notch centre front and centre back

notching_sewing_patterns_10

Use notches to indicate the centre front and / or the centre back of the pattern. As the Peplum Top has a seam in the centre back, only the centre front requires notches. 

Mark any other details

notching_sewing_patterns_11

At this stage, use notches to mark any other design details, such as pocket location, dart arms etc. In the case of the Peplum Top, it has a gathered piece attached to the waist, so I added notches so that it is easy to know how much you need to gather the panel (it is a pet peeve of mine when patterns don't have notches for gathered panels).

Putting notches on curves

You may have noticed that there were no curved seams to add notches to in the example. When working with curves, you need to "walk" the curve into the seam it will be sewn to and transfer the notches along the way. This tutorial goes into more depth if you need to notch your curves - for example: sleeves, princess panels etc.

So, what do you think? Are you convinced that notches will help you sew better?


You may also like:

Pattern hack : How to add a full skirt to the Acton dress

Hello, hello, I hope you enjoyed the Acton sew-along! Today I thought I'd show you a little pattern hack. A customer got in touch to tell me she was planning on using the Acton pattern to make her bridesmaids dresses (swoon!) and wanted to know how she could go about adding a full circle skirt, instead of the standard A-line skirt (view A). I thought it would be a good tutorial to share on the blog, as I'm sure many of you would love an Acton with a full skirt, while some of you may also be interested in how you add a full circle skirt to a pattern that doesn't have a straight waist seam - and this tutorial fits the bill for both!

Getting started

To start, trace a copy of the front skirt pattern piece with seam allowance - be sure to also trace the stitch line (the grey line on the pattern) and transfer the notches, grainline and drill hole. Cut out the pattern piece. 

Take a large piece of pattern paper and draw a vertical line down the right hand side. Label line as "Centre Front."

Take your pattern piece and line up the centre front of the skirt, with the line marked as Centre Front on the paper. Tape in place (only down the centre front).

Mark in your 'Cut and Spread' lines

We will be using the 'Cut and Spread' method to add the extra fullness to the skirt.

Draw two straight lines from the top of the skirt to the bottom - roughly splitting the skirt into thirds. 

Starting at the hem of the skirt, carefully cut up each of the lines. Cut up to the stitch line, but do not cut through the stitch line. 

Cut the remainder of each line from the top edge (cutting down towards the stitch line). Don't cut all the way through though, stop a few millimetres from the stitch line, leaving a 1-2mm "hinge" to keep the pieces together (if they do accidentally come apart, just tape back in place). 

Cut and spread

Slowly open up the hemline of the skirt by swinging the section closest to the side seam out from the cut. You will see that the small hinge created will allow you to open (or close) the cut lines by the desired amount. 

Open up the second cut line (closest to the centre front) and then play around with the openings until you are happy with how much you are adding to the hemline overall (and both are opened evenly). 

When you are happy with the result, tape or glue the pieces in place on the backing paper. 

Re-draw the waistline

You will now notice that the waistline is looking a little scary! We will need to rectify that now. 

Re-draw the waistline with a smooth curve (on the stitch line). Be careful not to let the line stray too far from the original stitch line. The new line needs to be the same length as the original waistline so that the new skirt piece will still fit with the original bodice. 

Re-draw the hemline

Re-draw the hemline with a nice smooth curve. 

Trace the pattern

Take another large piece of pattern paper and trace a copy of the new pattern piece. Start by tracing the stitching line - centre front, new hemline, side seam and new waistline. 

Add seam allowance

Add seam allowance to the new pattern piece - either using the original cutting lines as a guide, or adding it yourself - 1.5cm at the side seam, 1.2cm at the hem and waistline. If you are wondering why the seam allowance sits at an angle on the side seam, check out this post

Add notches, grainline and drill hole

Transfer the notches from the original pattern, as well as the grainline and drillhole in the centre front. 

Finalise the pattern

Cut out your new pattern piece and add cutting instructions (i.e. "Cut 1 on fold"). Repeat process for the back pattern piece (opening up each cut and spread line by the same amount as you did on the front piece).

One last tip

Tip: Be sure to let your full skirt hang for a few days before you hem it. Due to the nature of a full skirt, some parts of the skirt are cut on the bias, which means they stretch (or "drop") more easily that other sections of the skirt, which means that if you hem it straight away, you are likely to end up with a wobbly hemline. Let your skirt hang and then re-cut the hemline before hemming. 

The Acton sew-along will continue tomorrow. Hope you are enjoying these posts and learning lots!


You may also like:

The Acton sew-along : Finishing up (view B)

Welcome back to the Acton sew-along! Today we will be finishing up the wrap version of the dress (view B). 

Prepare the lining

You should have assembled the bodice lining at the same time as you assembled the bodice. If you haven't done it already, check out this post for how to do it (it's exactly the same as the bodice). 

lining_1.jpg

Take the bodice lining and with right side facing down, fold back the centre back seam allowance 2cm (¾in) and press flat on both sides.

lining_2.jpg

With the lining still face down, turn up the bottom edge by 1.2cm (½in) and press.

ATTACH THE LINING TO THE BODICE

lining_3.jpg

With the dress right side out, pin the lining to the bodice (with right sides together). Start at the centre back and work your way around the armhole, matching each set of seam lines. Be sure to have the zip open and the centre back seam allowances pressed flat and not folded back.

lining_4.jpg

Continue pinning until you reach the centre back on the other side. This step can be a little awkward as the straps are quite short, so keep checking that the straps haven’t been caught up by the pins.

lining_5.jpg

Stitch along the edge with a 1cm (⅜in) seam allowance.

Trim down the seam allowance by 5-6mm (¼in) and clip into the curves. Turn the dress to the right side.

UNDERSTITCH

lining_6.jpg

Lay the seam flat, and with the seam allowances pushed towards the lining, understitch the seam
allowances to the lining. Start as close as you can get to the top of the back armhole and continue around the armhole.

lining_7.jpg

Stitch as close as you can to the strap, before back stitching and then moving on to the neckline.
Backstitch again when you get as close as you can to the second strap, before moving on to the
second armhole.

Attach lining at centre back

lining_8.jpg

With the bodice turned inside out, pin along the centre back seam - sandwiching the zip between
the bodice and the lining. Turn up the bottom edge by 1.2cm (½in) and pin in place (this is where the crease you made earlier comes in handy).

lining_9.jpg

Using a regular zip foot, stitch the lining in place, by stitching next to the zip on the side closest to the raw edges. Repeat for the second side.

CLIP THE CORNERS

lining_10.jpg

Trim back the seam allowances on either side of the corner to minimise bulk. On the lining, trim back the seam allowance from the bottom corner close to the zip, to minimise bulk in this area.

lining_11.jpg

Turn the bodice right side out and use a corner turner (or pencil) to get a nice sharp corner, before giving the bodice a good press.

Before pinning the lining in place, use the cuts in the seam allowance at either side, to overlap the
seam allowances. Pin seams flat to the bodice.

ATTACH LINING AT THE WAIST

With the seam allowance on the lining still folded under, pin the lining to the bodice, along the waistline.

If you would like to stitch the lining in place by machine, turn the bodice to the right side, insert pins through the wasitline (ensuring that you catch the lining) and then stitch in the ditch (look here for more details). 

To sew by hand (for a really clean finish on the inside and outside) take a sharp fine needle and pick up a few threads at the waistline seam, before feeding the needle through the fold line on the bodice lining and then going back through the waistline.

Hemming

Before hemming your dress it is a good idea to let it hang overnight to let the hem drop (particularly if you are using silk or similar). Trim down the hem if necessary after hanging.

With the dress inside out, turn up the hem by 6mm (¼in) and stitch. You can simply do this with your finger rather than pressing and pinning. Turn the hem by another 6mm (¼in) and press. Pin hem in place and stitch along the original stitch line to complete the hem.

Turn the hem by another 6mm (¼in) and press. Pin hem in place and stitch along the original stitch line to complete the hem.

And that's it! Both our Actons are all done. For a review of all the posts we've covered, have a look here

I hope you have enjoyed the sew-along, and learned a thing or two!


You may also like:

The Acton sew-along : Attaching the straps (view B)

Over the past few weeks we have been working our way through the Acton dress for the sew-along. It will finally come to an end this week, as we finish up the wrap version. I'd love to hear what you have thought of these posts, do you find them useful? 

A quick re-cap

Last week we assembled the bodice (it's the same process as the A-line version) and attached the skirt to the bodice. Before working tour way through this post, you will need to insert the invisible zip. The tutorial is for View A, but the process is exactly the same - you just have different back bodice pieces to attach. 

Attach the straps

bodice_straps_1.jpg

When the zip is inserted, it's time to make the straps. Use the same method as we did for View A (these straps are just much shorter). 

Take the straps and place them face down on the front of the bodice, pinning them in place between the neckline and the armholes. The straps need to be positioned with the short end sticking up beyond the top edge of the bodice (it will become right way up when the bodice is lined). Stitch in place 6mm (¼in) from the top edge.

TRY ON THE DRESS

Try on the dress and pin the straps in place at the back (this is when an extra set of hands really helps), at the length that they feel comfortable. Strap positioning is very important, so have a play around to ensure you have got it right. The peak of the princess seam on the bodice should sit on the peak of your bust. If you are struggling with this, it may help to check out some of the tester versions of the dress, to see how the bodice sits on a range of different figure shapes. 

Take the dress off and use a horizontal pin to mark the correct length on the back end of each of the straps, before taking off the dress.

Being careful not to twist the straps, pin the straps in place on the back of the bodice. When attaching the strap to the back, be sure to remember that there is a 1cm (⅜in) seam allowance around the armhole, and the strap will need to sit clear of that. Stitch in place 6mm (¼in) from the top edge.

I was planning on showing you how to line the bodice today too, but I have just realised, that would create a very very long blog post! So, as not to overwhelm you, I'll leave that until tomorrow.


You may also like:

The Acton sew-along : Adding waist ties

Welcome back to the Acton sew-along! Yesterday we got started on the wrap version of the Acton dress, and today we'll be continuing by adding the waist ties and finishing up the side seams on the wrap. 

Make the waist ties

Take the waist tie pieces and fold in half lengthways, right sides together. Stitch along the length of the strap with a 1cm (⅜in) seam allowance. Trim the seam allowance down to 3-4mm (⅛in) before using a safety pin (or bodkin) to turn right side out. Use a pin to tuck one short edge of the tie inside itself and stitch close to the edge to enclose.

Attach waist ties + finish side seams

36.jpg

Take the dress and with it right side out, pin the skirt side seams together, using the notches to guide you. Take the raw end of the waist tie and pin the tie in place at the top of the seam, overlapping the side seam by 1-2cm (⅜ - ¾in). I know this looks a little bit strange, but I promise it will work!

waist_tie_2.jpg

Stitch the side seam with a 6mm (¼in) seam allowance. Trim down the seam allowance by 2-3mm (⅛in).

Trim back the raw edge of the waist strap by the same amount. Repeat on the other side.

Turn the dress inside out and press the seam flat, being careful to check that the waist ties remain
straight. Pin in place, before stitching with a 6mm (¼in) seam allowance. Repeat on the other side.

And that's it for today's post! Next week we will be finishing up by sewing on the straps, attaching the bodice lining and hemming.


You may also like:

The Acton sew-along : Attaching the bodice to the skirt (View B)

If you have been following along with the Acton sew-along, you will have seen that yesterday we finished up View A (the A-line version).

Now it's time to start sewing view B (the wrap skirt version), which I am very excited as I must admit it is my personal favourite!

Construct the bodice

Construct the bodice in the same way that you would construct View A - check out this post if you need some guidance. Follow the same method to assemble the lining. 

Attach the bodice front to front skirt

The method for attaching the skirt to the bodice for the Acton, is probabaly a little different to any method you have used in the past, don't worry about that. Just follow the instructions carefully and I promise it will all come together beautifully!

Take the SKIRT FRONT and lay it right side up on your cutting table. Place the bodice right side down (so the pieces now have right sides together), aligning the opening in the centre front of
the bodice with the drill hole in the centre front of the skirt. Pin in place.

Using the notches on the skirt to guide you (they align with the princess seams on the bodice), pin the front of the bodice front to the skirt on just one side. Stop pinning when the side seam of the bodice lines up with the drill hole on the skirt front.

Move on to the other side of the front bodice, pinning from the centre front to the bodice side seam on the other side (you will notice that the small opening in the bottom of the centre front bodice seam really helps with this bit).

Stitch from one drill hole / bodice side seam, to the centre front, with a 1.2cm (1/2in) seam allowance. As you approach the centre front, go nice and slow - walking the final stitches if you need to. Insert the needle in the centre front and turn the corner before sewing to the other drill hole / bodice side seam.

Press the seam allowance up towards the bodice, before checking that there is no puckering at the point where the centre front bodice and skirt meet.

While the dress is still wrong up, make small cuts in the skirt piece. To do this, from the top edge of the skirt, at the point where the stitching stops, carefully snip into the seam allowance, towards the line of stitching (be careful not to cut through the stitches). This will help you achieve a clean finish when it comes to joining the top edges of the front and back skirt. Repeat on the other side.

Attach the bodice back to back skirt pieces

Take the the back pieces of the skirt and finish the raw edges of the centre back on both pieces. If you would like to get a really beautiful finish, consider finishing with a Hong Kong bind. 

With the dress right side up, fold back the SKIRT FRONT so that you can access the back
waistline on the bodice.

Take the SKIRT BACK and, matching the centre back on the skirt to the centre back on the bodice (with right sides together), pin the skirt waistline to the bodice waistline. Use the notches to guide you like you did with the front bodice. Pin until you reach the drill hole on the skirt back and the side seam on the bodice.

Fold back the unpinned part of the skirt to check that the seam is pinned up until the front skirt meets the bodice, but is not overlapping.

Stitch seam with a 1.2cm (1/2in) seam allowance, going nice and slow as you approach the drill hole.

From the top edge of the back skirt, at the point where the stitching stops, carefully cut into the skirt seam allowance towards the stitch line (in the same way that you did for the front skirt). Repeat on the other side. 

Join the front and back skirt

You will now join the top edges of the front and back skirt with a french seam (for more info on french seams, check out this tutorial). Turn the dress right side out and pin the top edge of the front skirt to the top edge of the back skirt.

Stitch with a 6mm (1/4in) seam allowance.

15.jpg

Trim down the seam allowance by 2-3mm (⅛in).

Turn the dress inside out and press the seam flat. Pin the seam, enclosing the raw edge inside the
seam.

Stitch with a 6mm (¼in) seam allowance.

Go nice and slow as you approach the bodice, being careful to meet the stitch line at the waistline. Repeat for the second side.

Turn the dress to the right side and give it a good press.

That's all for today's post. I hope you didn't find it too tricky! Tomorrow we'll be making the waist ties and sewing up the side seams of the skirt.


You may also like:

The Acton sew-along : Hemming

If you have been following along with the Acton sew-along, you will know we have almost finished sewing the Acton with A-line skirt (view A), which means that tomorrow we will be starting the Acton view B (wrap skirt version)! 

This post is a quick one, as all that we have left to do is the hem.

In the instructions I advise to just do a simple finish and turn hem, but you could consider using binding if you wanted something a little fancier (check out this post for making your own binding  if you want to give it a go). If you are using a really light-weight fabric, you may want to do a rolled hem for a cleaner finish (use this tutorial to learn how to sew a rolled hem without a rolled hem foot). 

Hemming the Acton 

Finish the hem with an overlocker or zig-zag stitch and then fold up by 1.2cm (1/2in). Press and in pin.

Give your dress a good press and you are ready to wear your Acton! 

Told you it was going to be a very quick post today!

All done!

Have you been sewing along with me? I'd love to know how you are going. Let me know by tagging me on Instagram @inthefolds with the hashtag #theactondress. I can't wait to see your progress!


You may also like: