Over the last couple of days I have shown you how to perform a Full Bust Adjustment (FBA) on the Collins Top to start off the Collins Top sew-along. The process is a little different to what you might be used to, due to the fact that the top doesn't have a dart or bust shaping through a panel and it also has a panel line. You can find the tutorial here (this tutorial guides you through the process of creating a bust dart in the centre front panel). If you would like to know how to make the adjustment without the dart, then take a look at this tutorial (you will need to create the dart and then redistribute the fullness of the dart to the hemline).
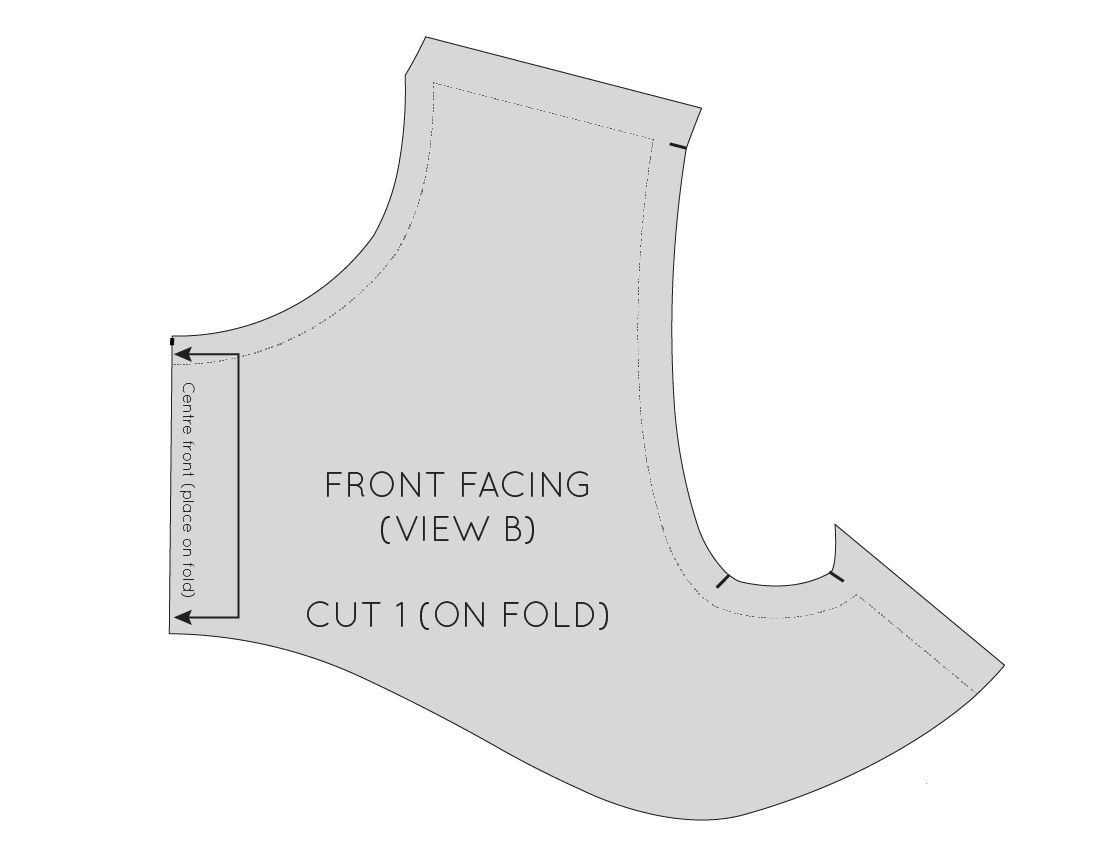
In today's post, I'd like to show you how to re-draft the front facing piece. By making changes to the centre front panel and the side front panel of the Collins Top, the original front facing will no longer fit the pattern. You will only need to do this if you are making View B of the Collins Top (the sleeveless version) and have made a Full Bust Adjustment.
Getting Started
To start, grab your CENTRE FRONT PANEL piece, SIDE FRONT PANEL piece, FRONT FACING and FRONT SHOULDER PANEL piece. These are the pieces you will need to create your new facing piece.
Relocate the dart (temporarily)
If you have created a dart, we will first need to remove it (don't worry, we will put it back once we make the new facing piece), as where possible, it's best to not have darts in a facing (as it just creates unnecessary bulk). You could fold out the dart - like in this dart shaping tutorial - and then draft the piece, but it becomes quite awkward to do it that way as the centre front piece becomes three dimensional, which makes if really tricky to trace a new piece. The most accurate way to do it is to remove the dart, draft the facing and then put the dart back (don't worry it's less of a cumbersome process than what it sounds like). If you already removed the dart using yesterday's tutorial, then you can simply jump to the next step.
A : Draw a vertical line (parallel to the centre front line) down from the apex point (the tip of the dart) down to the hem. Cut along this line, from the hemline, up to the apex point. Stop cutting when you are 1-2mm from the apex point. Now cut along the lower dart arm (the one highlighted in the illustration) towards the dart arm. Again, stop 1-2mm from the apex point, creating a small hinge.
B : Close out the dart by carefully pivoting the lower corner of the pattern so that the lower dart arm overlaps the upper dart arm. Tape in place (I suggest using masking tape so it is easy to remove later on when we want to get our dart back).
If you would like further explanation on this process, check out yesterday's post, where I went into it in a bit more detail.
Take the SIDE FRONT PANEL piece and line the stitching line up with the stitching line on the CENTRE FRONT PANEL, as if the two pieces have been sewn together. Hold in place with a couple of small pieces of masking tape (or even pins). You are going to want to be able to detach these pieces later.
Now, position the FRONT SHOULDER PANEL onto the CENTRE FRONT PANEL, again matching stitch lines as if the two pieces have been sewn together. Tape in place.
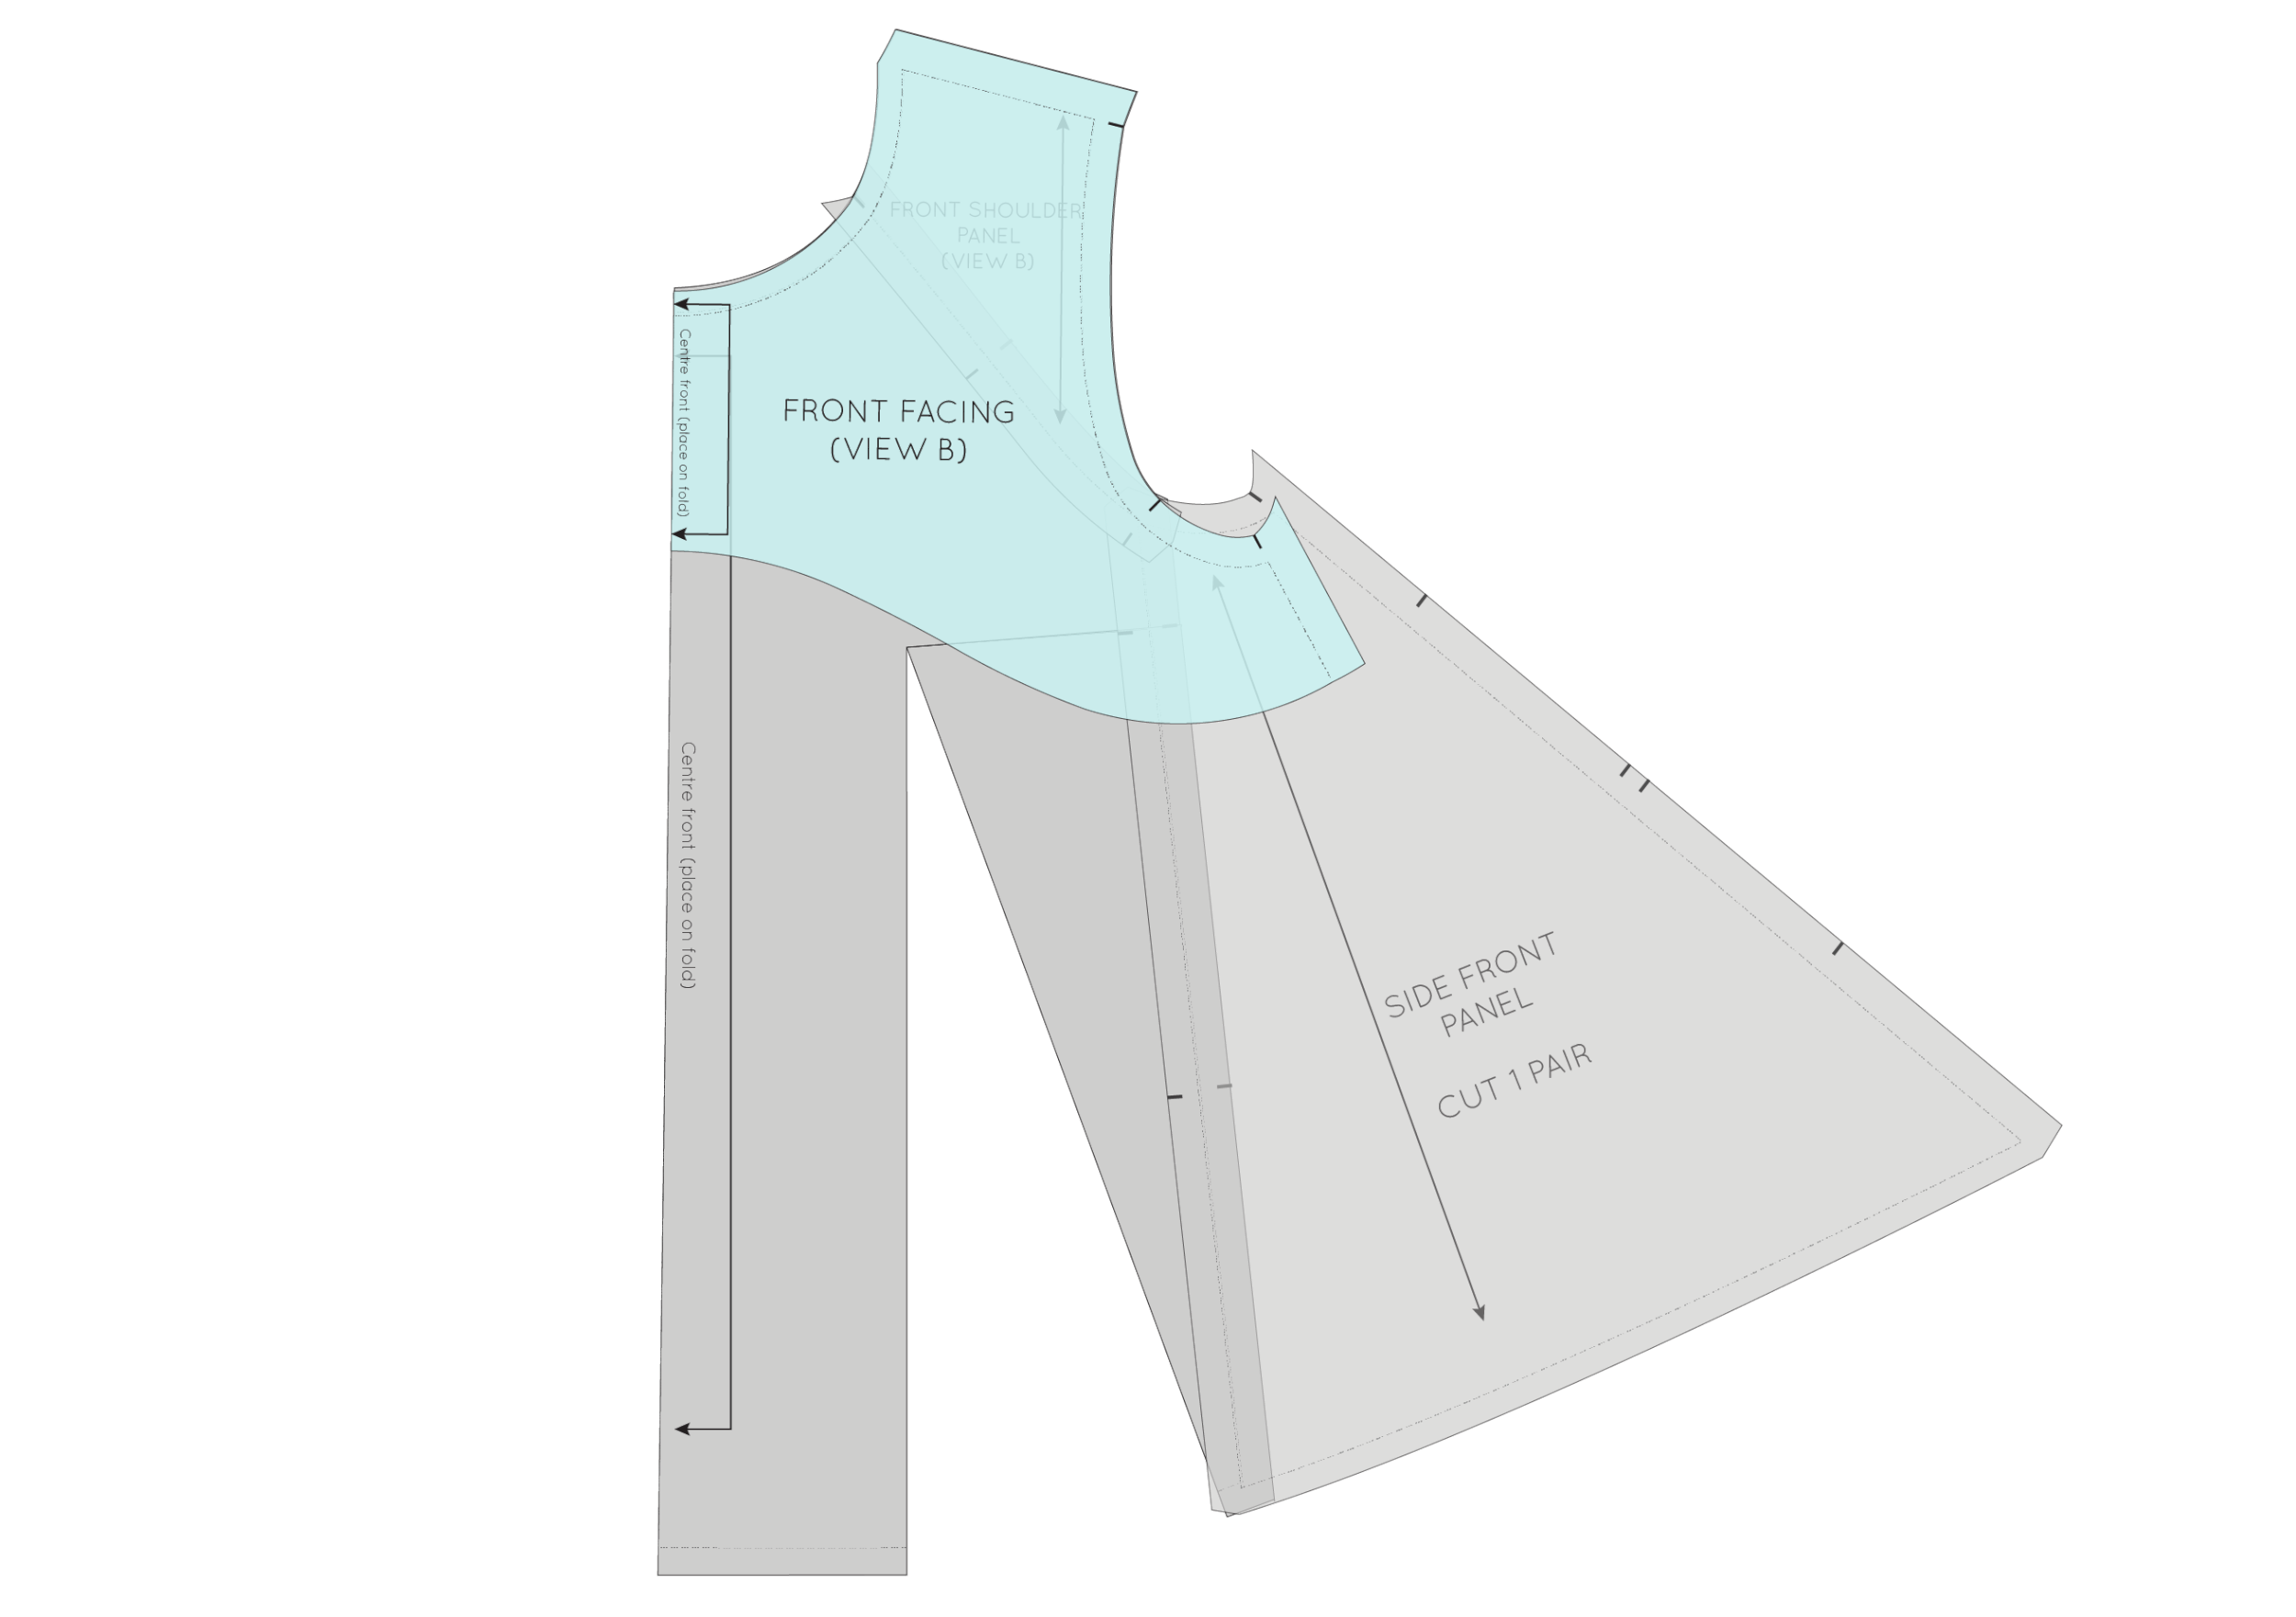
Place the FRONT FACING piece on top of your panels, lining up the neckline, shoulder seam and centre front. You will notice that the front facing no longer matches the pieces it needs to (due to the full bust adjustment we made).
You can see that if we cut this piece we would be missing fabric at the side seam and under the arm.
Re-draft the facing piece
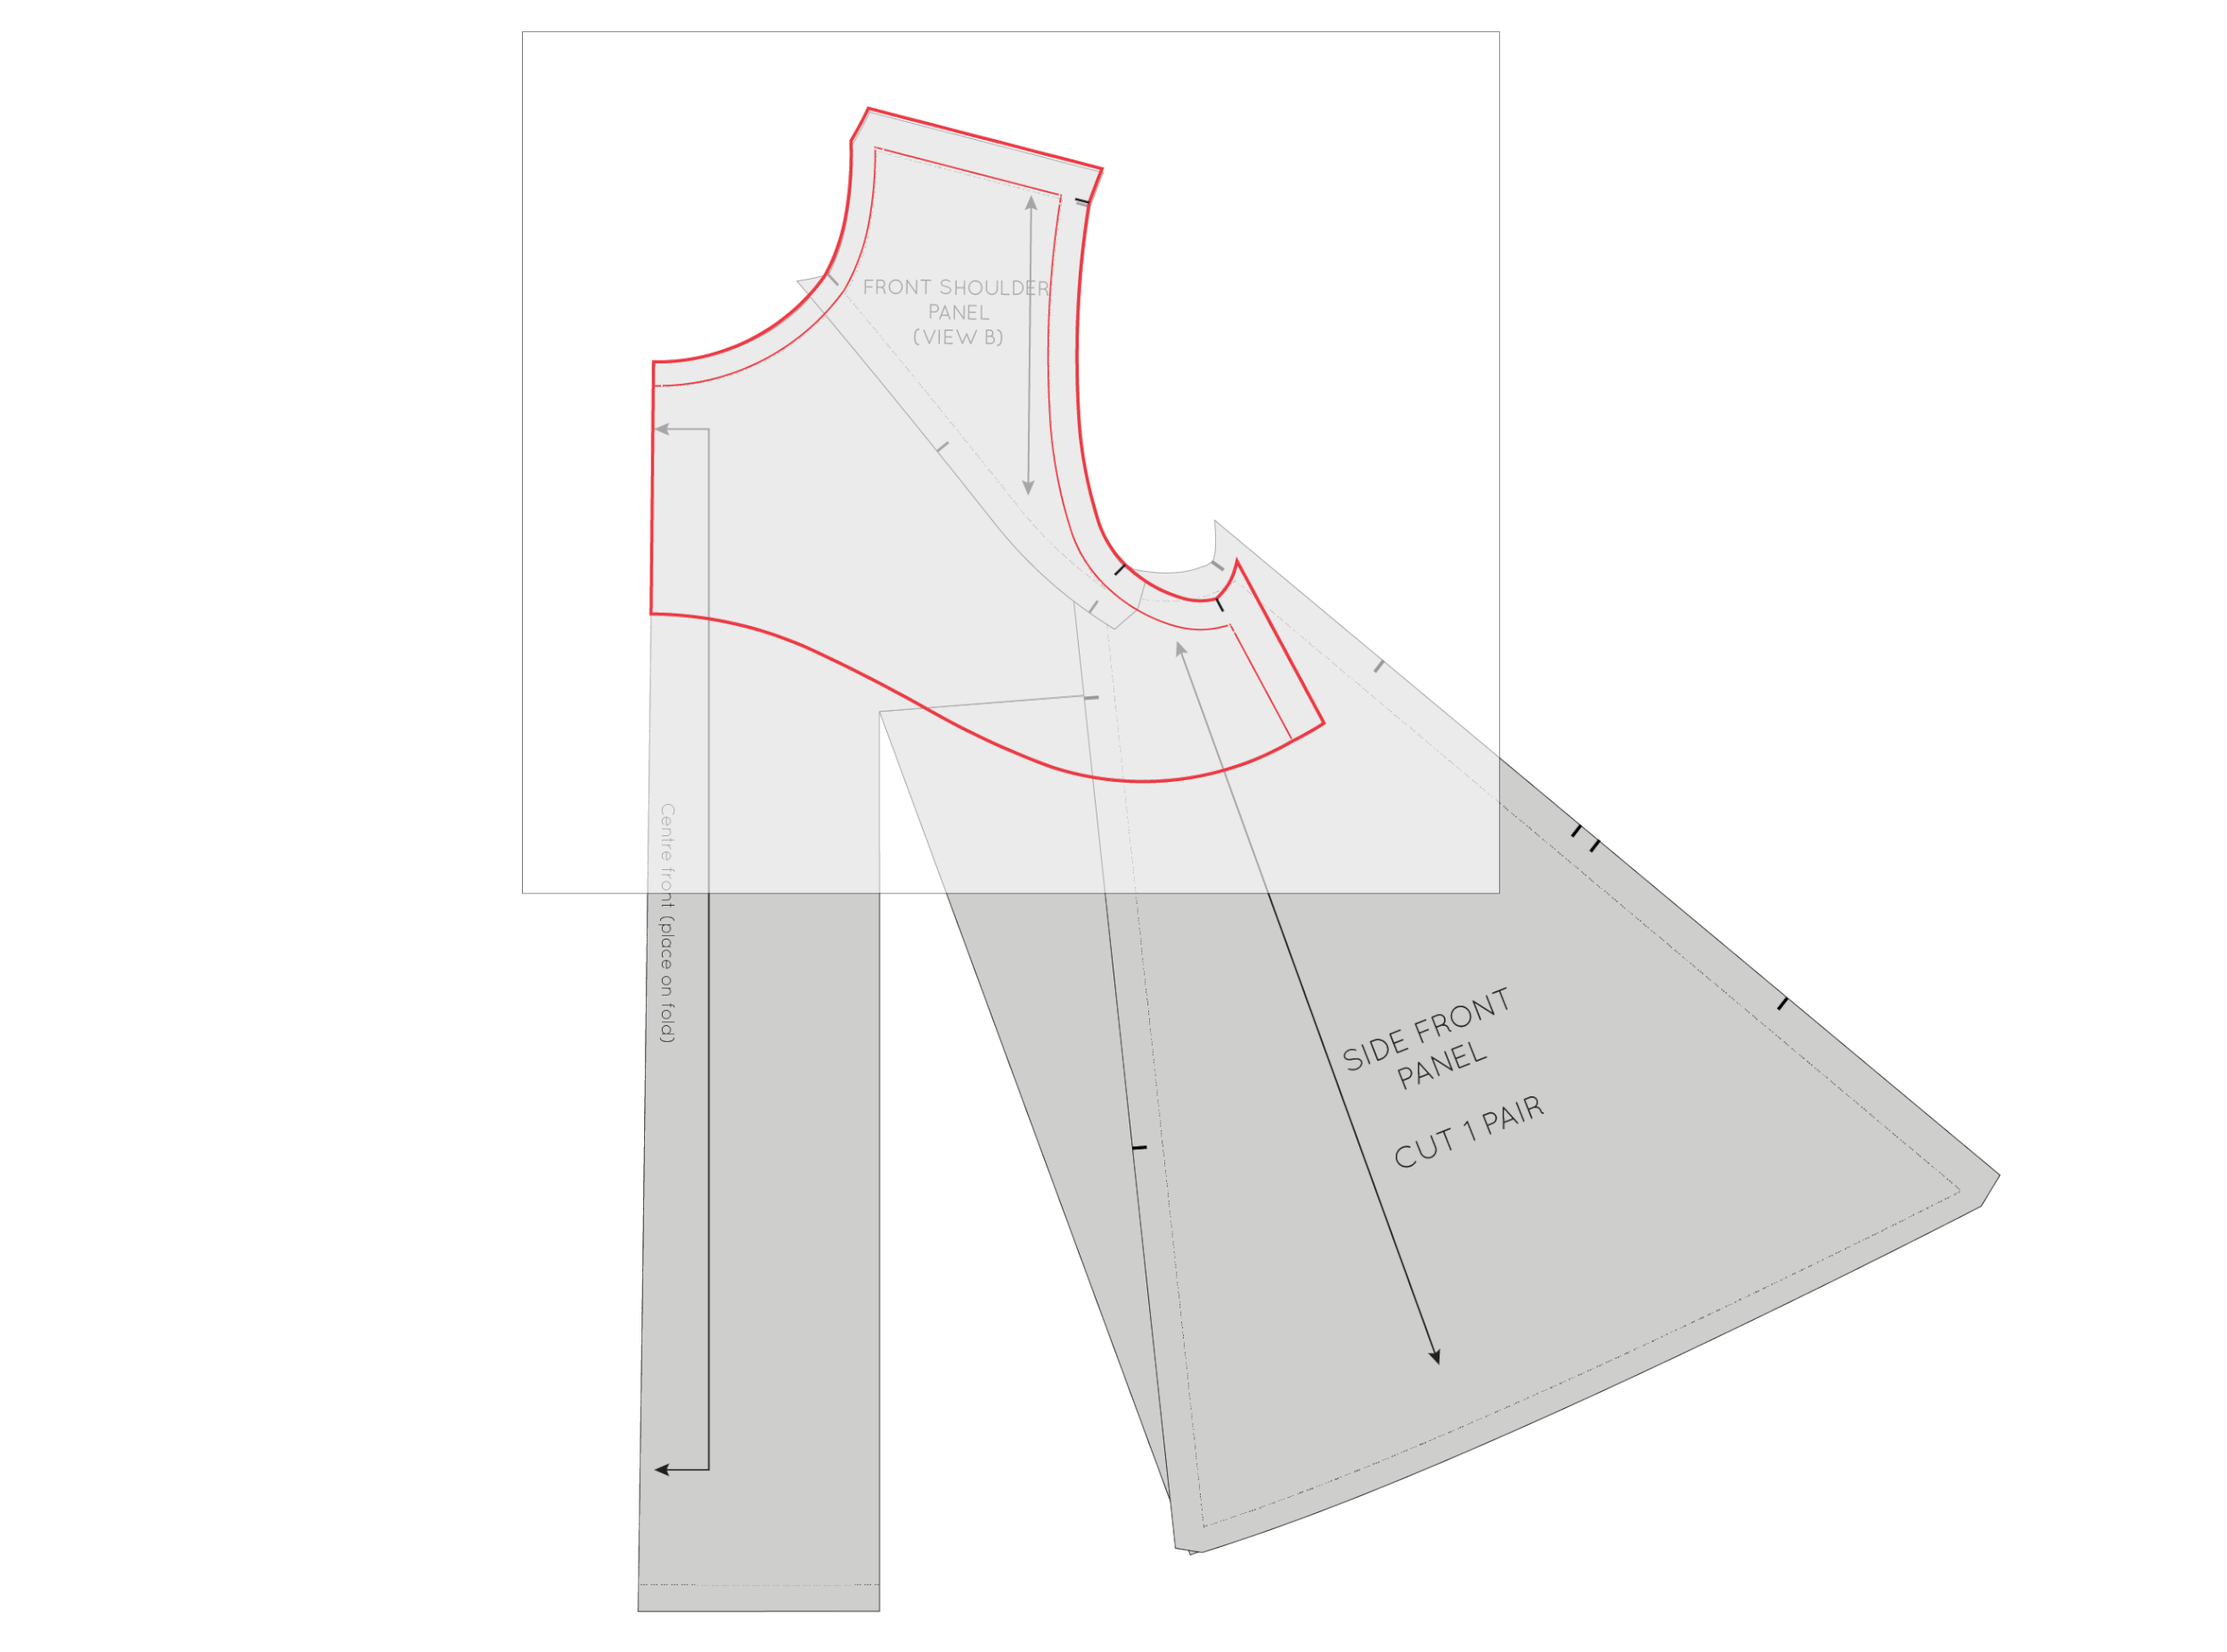
Take a piece of pattern paper and trace off the original FRONT FACING piece in pencil (you are going to need to erase part of the line in a minute), being sure to trace the stitch line and the cutting line, as well as the notches.
Place the traced FACING piece on top of your panels, again lining up the neckline, shoulder seam and centre front.
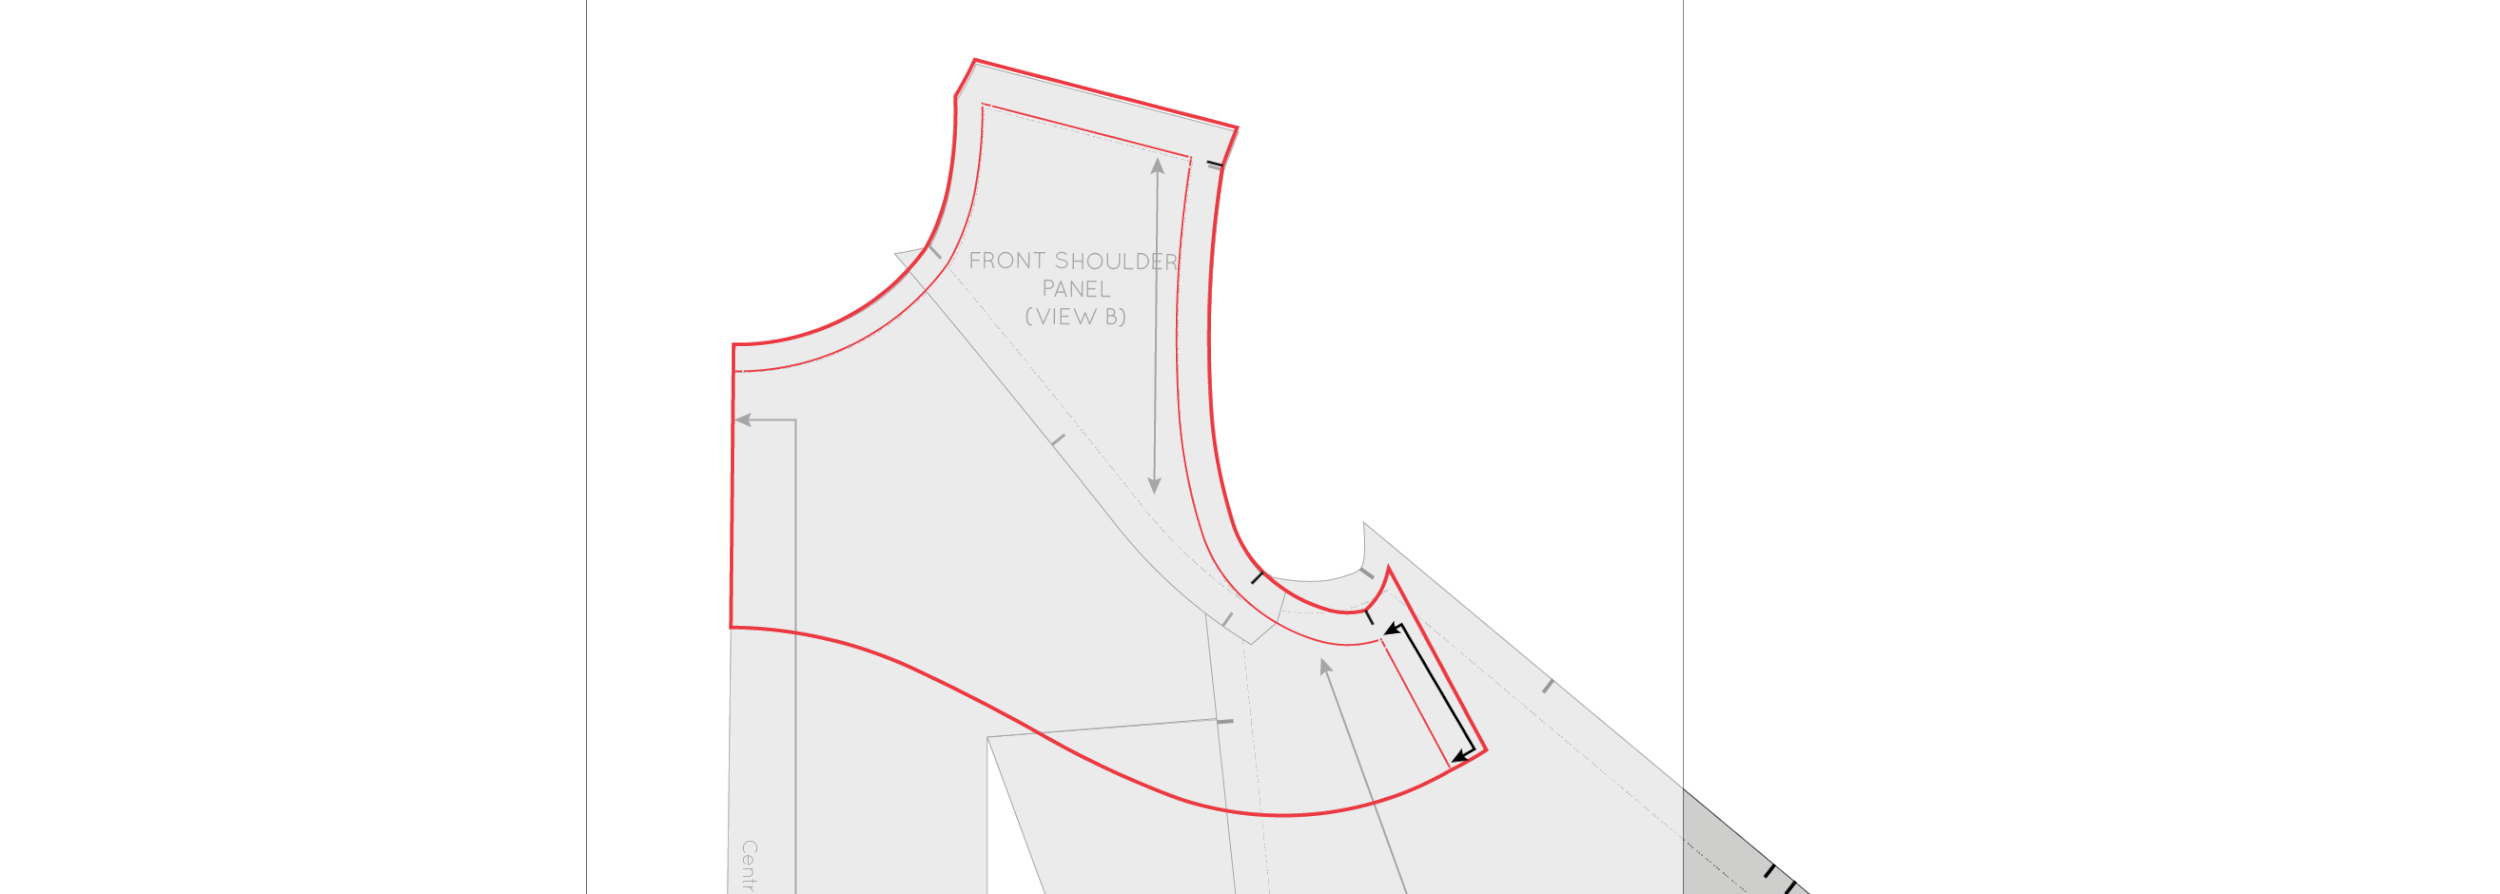
We will need to know the length of the side seam on the FACING so that when we make the new piece, it will have the same length side seam as the original, so that it still fits correctly with the back facing piece (that does not need any adjustments). Measure the side seam (on the stitch line) and take note of this measurement.
Now, erase the lines that do not match the shape of the pattern underneath (the underarm and side seam), so that you can draw the correct shaping on the piece.
To start, trace the side seam from the SIDE FRONT PANEL, making the line the length of the original facing side seam (found a moment ago).
Trace the armhole line as well as the side seam (both stitch line and cutting line) from the pattern underneath.
Join the endpoint on the side seam with the bottom edge of the facing. You want it to be a nice and smooth curve.
Transfer notches, cut out the pattern piece and add grainline and cutting instructions.
Go back to your CENTRE FRONT piece and remove the tape from the dart so you can put the dart back in place.
And voila! You have a new facing piece that fit your adjusted panels.

