
THE Q & A SERIES
Full bicep adjustment on dolman sleeves
Hi Emily
I recently read your Q&A on full bicep adjustments which was fantastic, but I now have the problem of how to do a full bicep adjustment on grown-on sleeves or even dolman sleeves. Any tips?
Thanks!
Chloe
Sheffield, UK
Hi Chloe,
Thanks for reaching out and I’m happy to help.
DO I NEED A FULL BICEP ADJUSTMENT?
This adjustment is needed if a sleeve is too tight around the bicep, or if the fabric bunches up around the bicep. As you can imagine, it’s not too hard to figure out if you need to make this adjustment on a finished garment. You’ll know, either as soon as you put it on, or within a very short period of time while wearing it.
But what if you haven’t actually made the garment yet?
HOW TO CHECK IF YOU HAVE FULL BICEPS AND NEED TO ADJUST YOUR PATTERN
Firstly, think about your current wardrobe. Is this a problem you’ve experienced with ready-to-wear or other garments you’ve made before? If so, you’ll probably need to do a full bicep adjustment.
However, it’s important to consider the design of a pattern and amount of ease allowed for.
For fitted designs it’s likely that you’ll need to do an adjustment if this is a problem you’ve had before, whereas more generous ease allowances found in relaxed garment styles may mean that you can avoid doing the adjustment entirely. To double check, keep reading!
Measure your bicep and compare it to the bicep measurement of the pattern. Some patterns may specify this measurement, which makes it easy to compare, but if not, measure the sleeve pattern piece, minus the seam allowance and multiply by two.
Hold a measuring tape around your bicep at the length allowed for in the pattern. How does it feel? Is there plenty of room when your bicep is flexed and at rest? If so, you probably don’t need a bicep adjustment.
Still not sure? Keep reading!
Make a toile/muslin to be absolutely certain before sewing the pattern in your ‘good’ fabric. Put the toile on and consider how it feels around your bicep. If you aren’t happy with the fit and think it needs more ease, proceed on to making the actual adjustment, as outlined below.
HOW TO MAKE A FULL BICEP ADJUSTMENT ON A GROWN-ON SLEEVE
Want to know how to do a full bicep adjustment on a regular sleeve? Check this tutorial out.
When making a pattern adjustment of any kind the first thing you need to think about is what area you need to alter. In this case, the goal is to add width to the bicep area of a pattern.
Step 1
Mark the bicep line on the pattern. (Your bicep is usually the fullest part of your upper arm.) On a grown-on sleeve you can estimate where this is by holding the pattern up to your body. If you have a toile, refer to that.
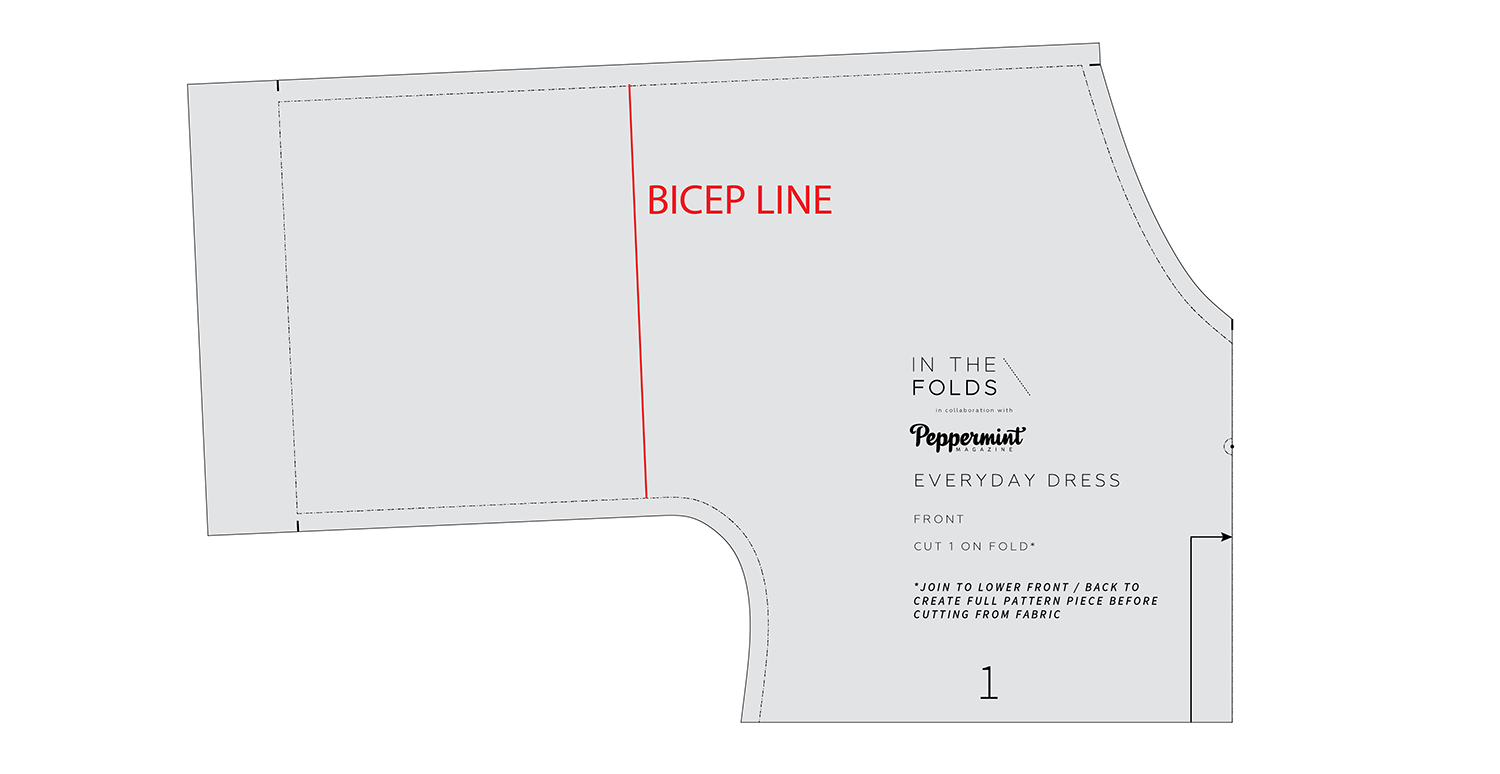
Draw the line from stitch line to stitch line.
Step 2

Measure the bicep width on the pattern and take note of your measurement.
You will need to do the same on the BACK pattern piece and add the two numbers together. Compare this to your actual bicep measurement.
To find this, wrap a tape measure around your bicep - usually the widest part of your arm. Flex the muscle if you know there is a large difference between your bicep while flexed and at rest.
Compare the measurements and consider how much ease you would like in the pattern.
For a relaxed style like the Everyday dress, you will want at least 10cm (4in) ease or more. Alternatively, if you have made a full bicep adjustment on a standard sleeve, you can add the same amount to this sleeve.
Step 3
Now that the bicep is marked, think about what other lines you need on the pattern to make the alteration. It can be helpful to look at the alteration on a regular sleeve to see what’s required and then apply it to the pattern you’re working on.
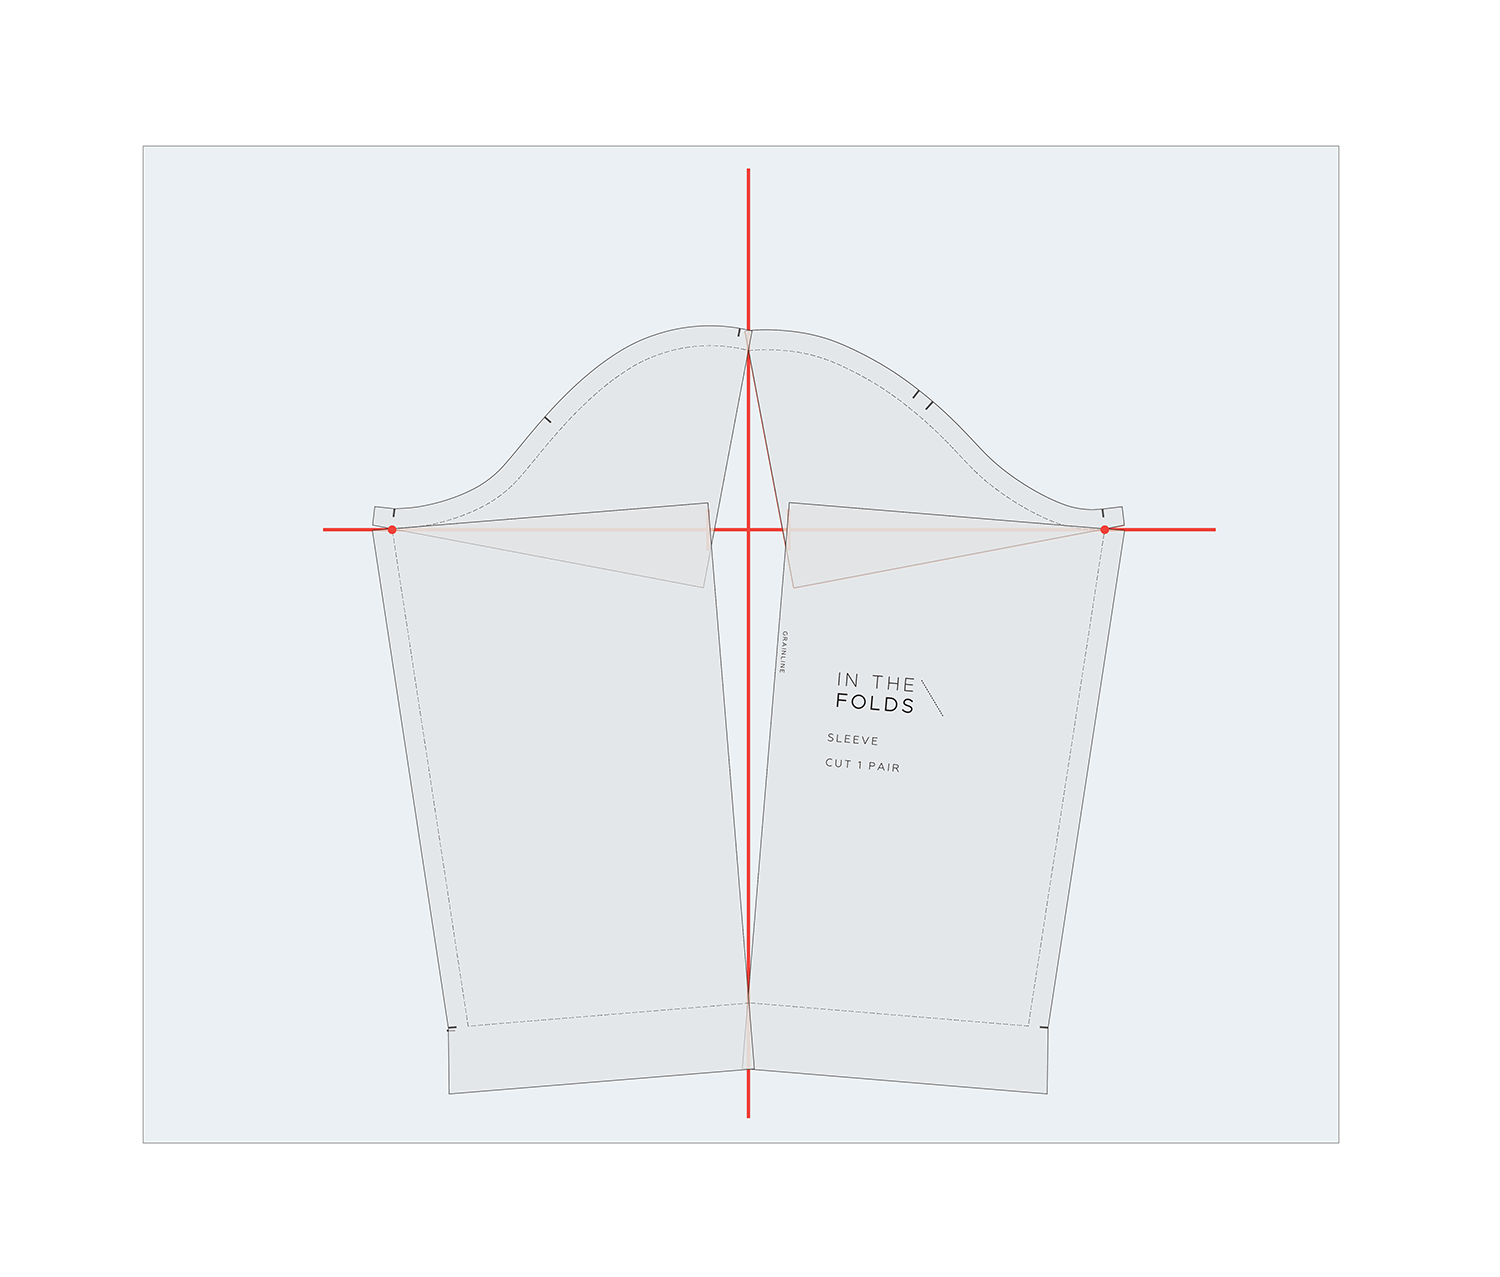
For example, if you look at the same alteration on a regular sleeve (above) you can see we also need a vertical line from the bicep to the hem to help us add our width.

Step 4
Draw a line perpendicular to the sleeve hem that intersects with the bicep line.

Step 5
You’ll also need another line that runs from the intersection point on the bicep line, up to the neckline.

Step 6
From the shoulder, cut down through the bicep line to the stitch line at the underseam. Stop 1-2mm from the stitch line and then cut into the seam allowance towards the end of the cut line to create a small hinge.

Step 7
From the bicep line, cut down the line to the hem. Stop 1-2mm from the hem stitch line and then cut into the hem allowance towards the end of the cut line to create a small hinge.

Step 8
Slide some pattern paper under the pattern piece.
Use the small hinges in the pattern piece to open the bicep line by the desired amount.
Remember that you will be doing the same alteration to the back so if you are adding 4cm (for example), you need to split this amount through the front and back.

Use the hinge at the neckline to manoeuvre the upper shoulder section to line up with the lower sleeve. Tape the piece in place on the pattern paper.

Step 9
To finalise the pattern piece, you have a few options.
You can mark a line over the alteration as a smooth curve. Join the new sleeve seam to the hem line with a straight line that is perpendicular to the shoulder seam.
As you can see in the illustration, to have a hemline that is perpendicular to the shoulder seam, I needed to cut a little bit of length off the seam. This isn’t an issue as you can see a similar amount of length was added to the shoulder seam when I made the alteration.

Or, an alternative is to draw a straight line through the alteration. As you can see, this will add some width to the hem, so you need to consider if you are happy with this.

If you would like the straight shoulder seam like the original pattern but don’t want any extra hem width, consider taking some width off the underseam as illustrated.
Step 10
Once you’ve made the alteration to the FRONT, you will need to repeat for the BACK. Always be sure to check and true your seams by walking the seams together.
And, don’t forget to add seam allowance back on to the altered sections of the pattern!
To sum up the process of making an alteration to an unconventional pattern piece:
Work out what area needs to change and mark a guideline. If you are changing the bust this would mean finding the bust line. In this case, it’s marking the bicep line.
Look at how to make the alteration on conventional/traditional shaped patterns and then translate this to your pattern.
Mark in additional guidelines to help you slash and alter the pattern. Remember, only cut to the stitch line. It can be helpful to print the pattern piece on a small piece of paper (i.e. print the A0 version as A4) and have a play around to see if the cuts will give you the desired effect. I often do this multiple times until I am happy.
Once you’ve made the alteration, do the same to any pieces that are also impacted.
Check and true your pattern pieces to ensure everything still matches together.
Add seam allowance back on to altered seams.
Make a toile to check that you’re happy with the alteration.
Happy fitting!
Emily
For more issues of the Q & A series, you can check out the archive here.
WHAT YOU’VE BEEN MAKING
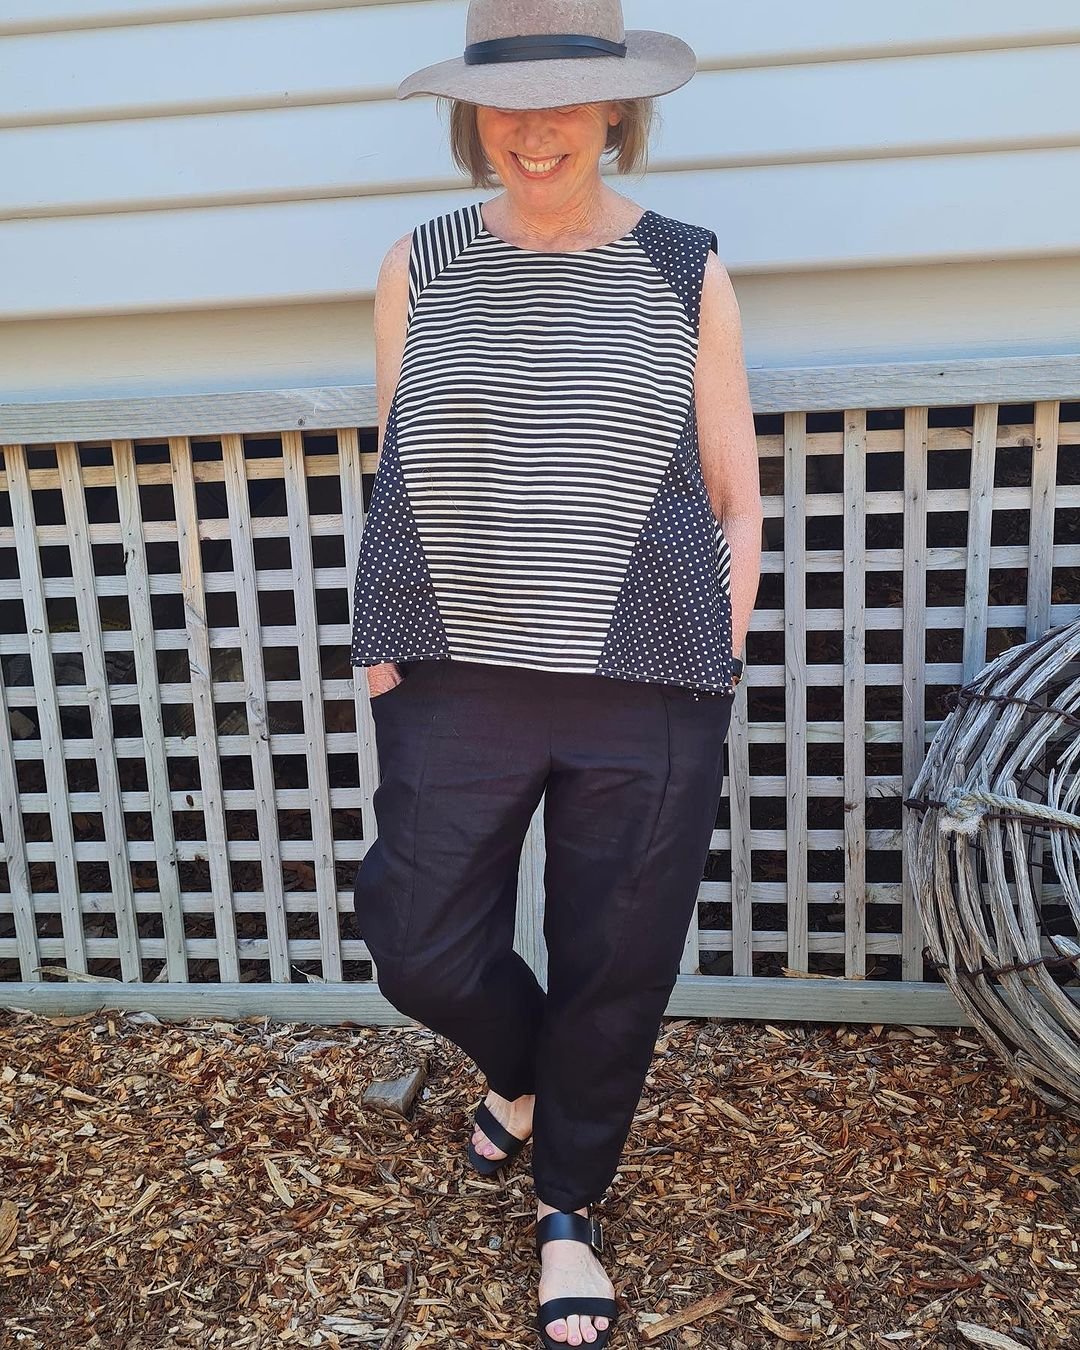
Collins top made by @sheilalovesfabric

Peppermint Wrap skirt made by @sosewemma

