THE Q & A SERIES
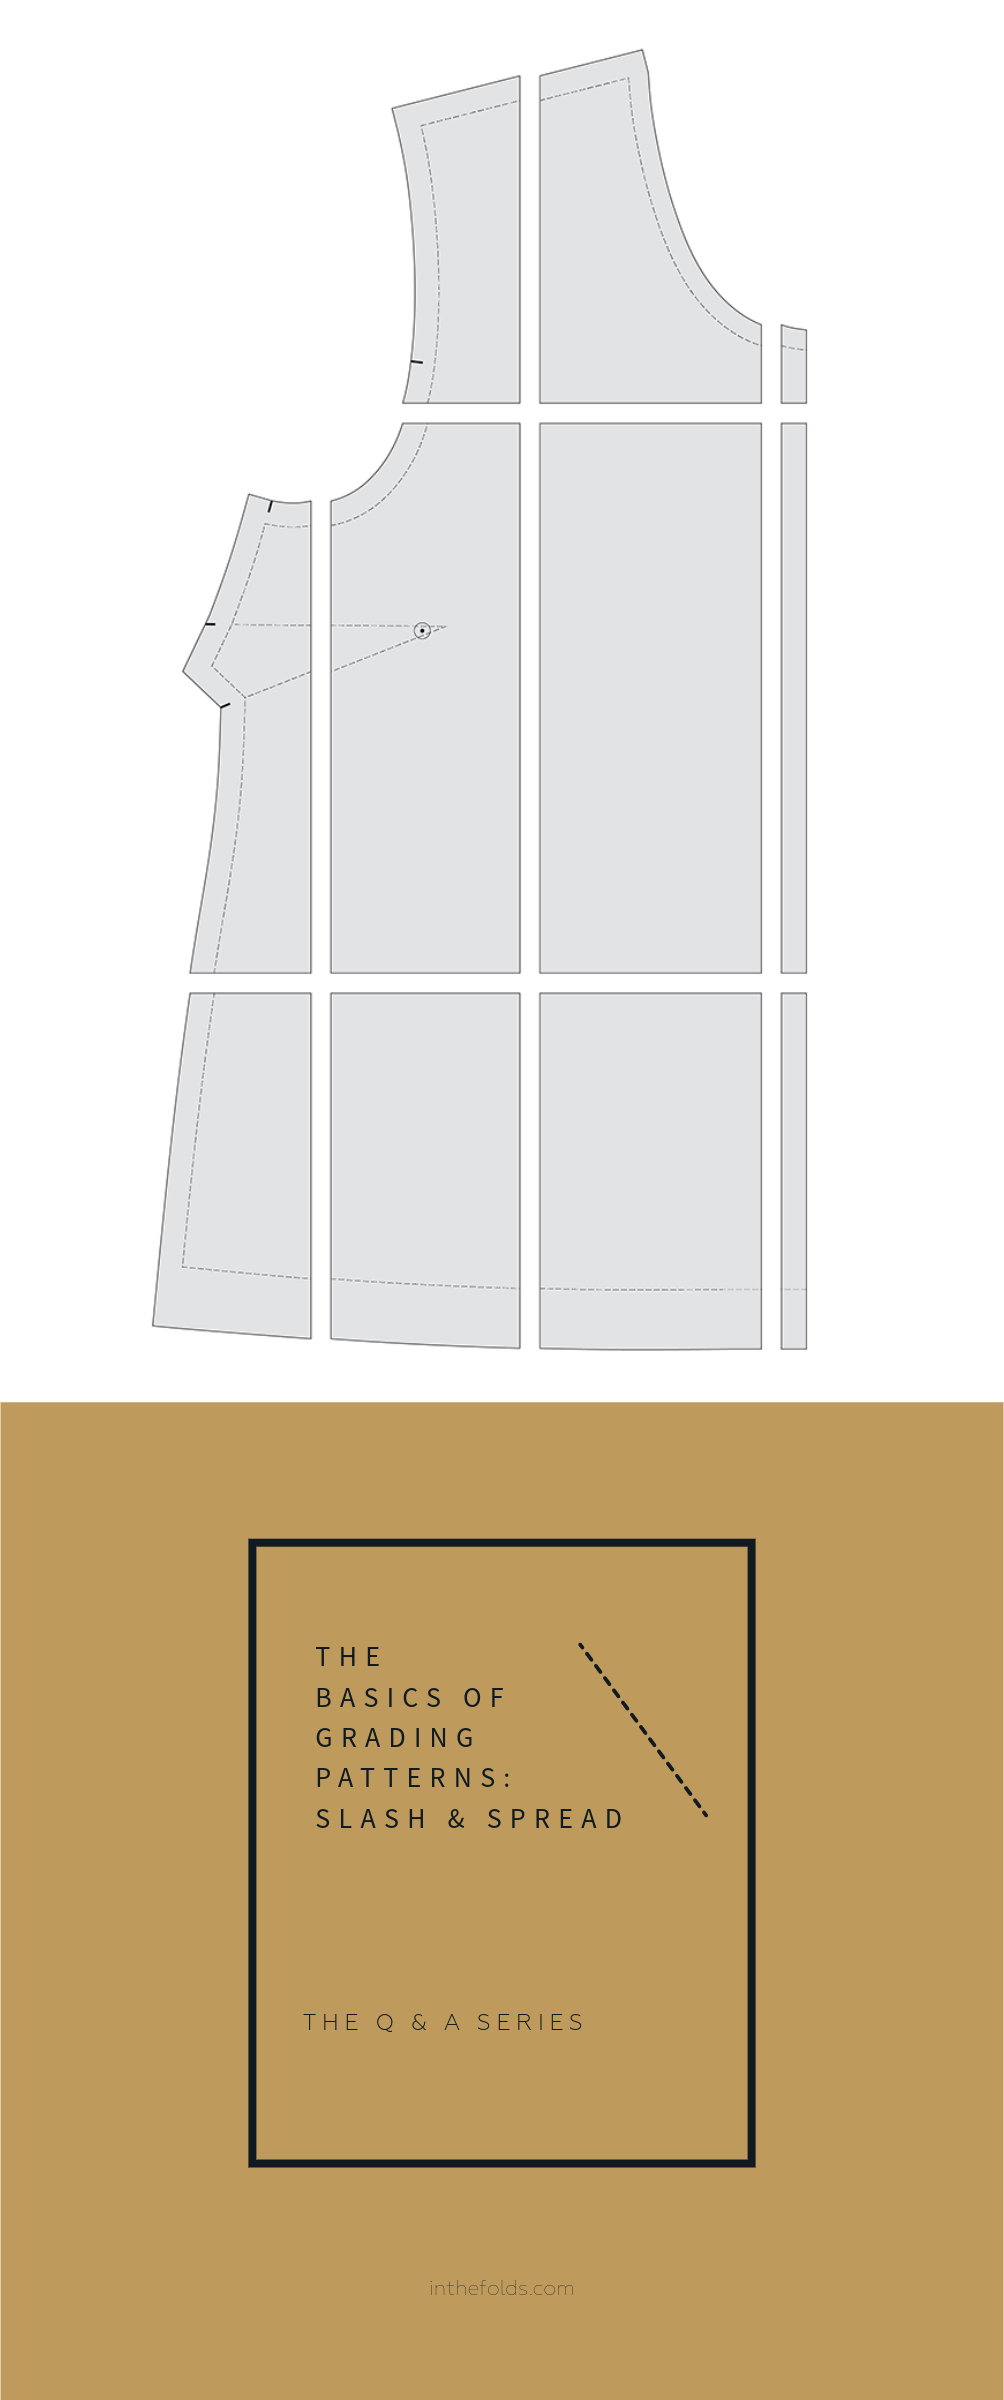
THE BASICS OF GRADING PATTERNS: SHIFT METHOD
Hi there!
I recently got some vintage pattern but unfortunately they’re not all my size:(. I think that means it’s time for me to learn how to resize patterns, if you could please help me, even if it’s just some tricks or things to look out for, I’d be so very appreciative!
Sadiya Coovadia
Toronto, Canada
Following on from part one of our answer (which you can read here), this week I’m going to show you how to grade patterns using the Shift method.
If you’re new to pattern grading, I’d suggest giving the Slash and Spread method a go first, as it will familiarise you with the concepts involved. This is an important part of learning how to make pattern alterations.
WHY USE THE SHIFT METHOD OF PATTERN GRADING?
The Shift method of pattern grading is a good option if you don’t want to cut up your pattern pieces, and is the method professional patternmakers use when grading manually.
how to grade patterns using the shift method
For this method, you will need the stitch line marked on the pattern. (Note: All In the Folds patterns come with the stitch line marked, however not all patterns do. Read more about this here.)
You can either have the seam allowance on the pattern or not. If you do have seam allowance on the pattern you will need a tracing wheel to transfer the pattern lines onto the pattern paper.
Step 1
To get started, prepare your pattern in the same way you did in steps 1 to 3 of the Slash and Spread method. You need the lines marked on the pattern piece.

Step 2
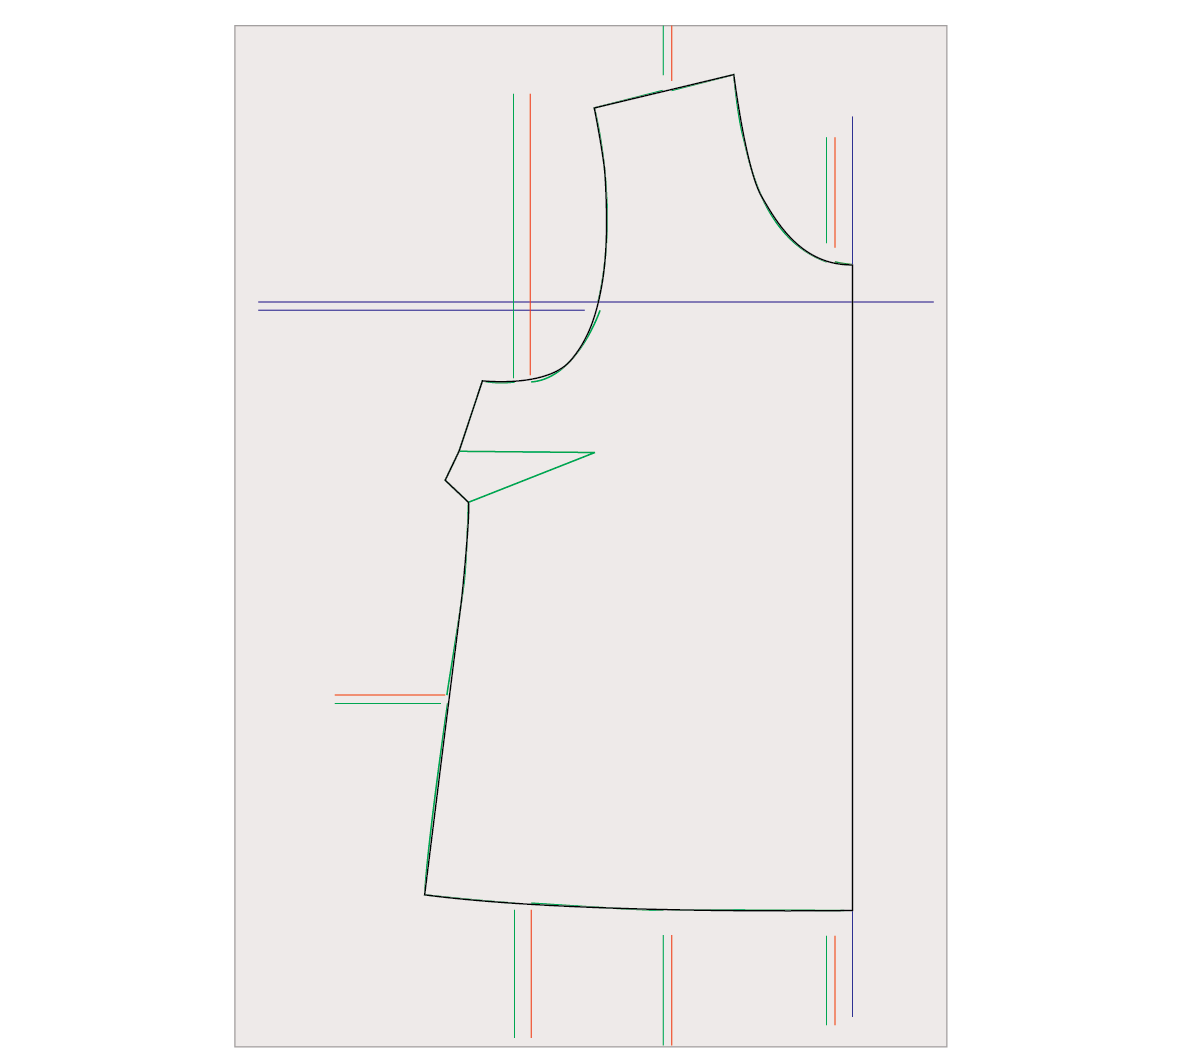
On a piece of pattern paper mark a vertical line and label it CENTRE FRONT. Mark a horizontal line, perpendicular to the first, towards the top of the line. These lines will help you keep things accurate as you move the pattern piece.

Step 3
Line up the CENTRE FRONT of the pattern piece with the CENTRE FRONT line on the paper. Line up the upper grading line on the pattern with the horizontal line on the pattern paper. Hold in place with pattern weights.

Step 4
Starting at the CENTRE FRONT neckline, trace the neckline up to the vertical grading line onto the paper using a tracing wheel. If your pattern doesn’t have seam allowance, just trace the edge of the pattern.

Step 5
Using a ruler, extend the grading line onto the paper at the top and bottom of the pattern piece.

Step 6
Mark a second line, ¼ of the grade amount from the first (See Part One for how to work this out).

Step 7
Carefully slide the pattern piece over so that the grading line on the pattern piece lines up with the second line. Use the horizontal line to ensure the piece stays level. Hold in place with a pattern weight.

Step 8
Continue tracing the pattern stitch line until you reach the next grading line.

Step 9
Again, extend the grading line onto the paper and draw a second line to the left of the first, ¼ of the grade amount.

Step 10
Slide the pattern piece over and continue tracing the piece up to the next grading line.

Step 11
For the vertical lines, do the same thing. Mark a second line below the first and slide the pattern piece down to line up with the new line.

Step 12
Continue the process until you get back to the CENTRE FRONT. Remove the pattern piece.
Step 13
Finalise the pattern piece by drawing nice smooth lines over the traced lines. Add seam allowance and pattern markings. Repeat for the remainder of the pattern.
Finally, check and true the pattern.
Happy sewing,
Emily
For more issues of the Q & A series, you can check out the archive here.
WHAT YOU’VE BEEN MAKING

Acton dress made by @janice.makes