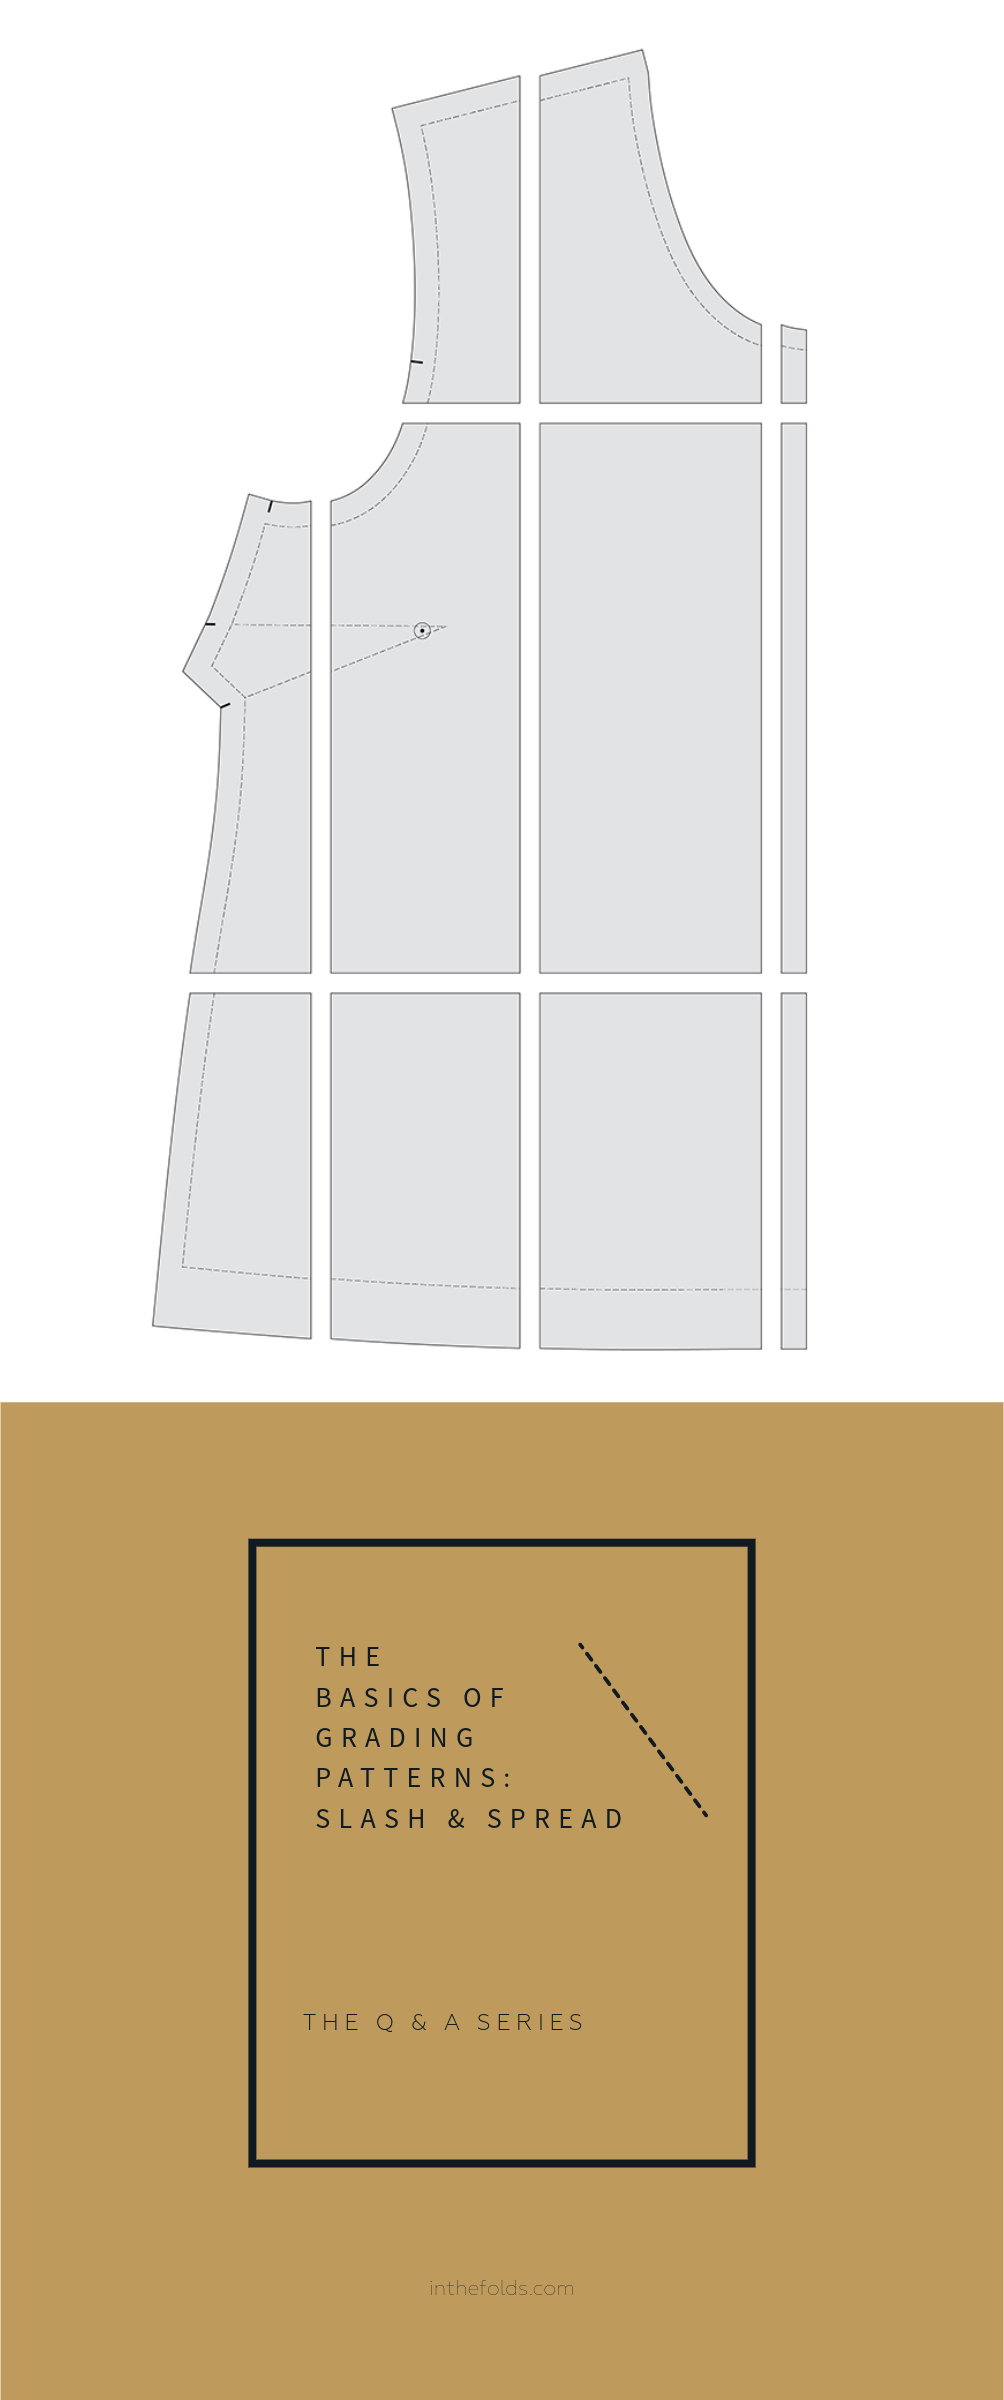
THE Q & A SERIES
THE BASICS OF GRADING PATTERNS
Hi there!
I recently got some vintage pattern but unfortunately they’re not all my size:(. I think that means it’s time for me to learn how to resize patterns, if you could please help me, even if it’s just some tricks or things to look out for, I’d be so very appreciative!
Sadiya Coovadia
Toronto, Canada
Hi Sadiya,
What a great opportunity to begin building on your sewing skills! The thing about learning skills and techniques like these is that it opens up a whole new world of sewing, and we’re happy to help a fellow maker on their sewing journey.
So, congratulations, and here’s what you need to know!
To start with, you’re going to need to either increase or decrease the vintage patterns to make them fit your size. To do this you need to understand grading.
WHAT IS GRADING?
The term ‘grading’ is used in two ways in the sewing world.

Firstly, grading can refer to when you alter the lines of the pattern to go between sizes. For example, you may have a size D bust, a size E waist and a size F hip. Obviously, you can’t make a straight size E because the bust will be too large and the hip will be too small. So you will grade between sizes to get a fit that suits your specific measurements. This is a very common pattern alteration when making your own clothes and a good one to learn how to do.
The other use of the word grading is how it’s used in the fashion industry. Pattern grading is the process of increasing or decreasing the size of a clothing pattern to create various sizes, while maintaining the proportions and overall design of the original garment.
Grading involves using a set of rules and measurements to scale the pattern up or down, typically based on standard size charts or specific customer measurements. This ensures that each size of the garment fits correctly and maintains the intended style and design details.
two methods of grading manually
There are two main ways to grade a pattern manually: the slash and spread method and the shift method. In this week’s tutorial I will show you how to grade a pattern using slash and spread, and next week I will show you the shift method.
Which grading method is better?
Both methods will give you the same result, but if you’re just getting started, the method I’ll show you in this tutorial - slash and spread - is easier. It’s also a great starting point for getting your head around the concept of grading, which will in turn be helpful if you decide you prefer to use the shift method.
The disadvantage of the slash and spread method is that you need to cut through your pattern, so I suggest tracing a copy of the original pattern before you get started.
Tools for grading
You need a transparent grading ruler for this tutorial. You can make it work with a regular ruler, but a grading ruler will speed up the process and make it more accurate.
You also need some pattern paper, glue or tape and a pacer pencil.
HOW TO RESIZE PATTERNS USING THE SLASH AND SPREAD METHOD
The first thing you need to do when grading a pattern is work out how much width needs to be added or removed.
Start by looking at the size chart for the pattern, and comparing it to your actual measurements. Remember, patterns for woven garments have a certain amount of ease built into them (the space between your body and the garment) so when grading a pattern you want to have the same amount of ease in the pattern as when it was designed. The finished garment measurements can help with that.
Ease = finished garment measurements - body measurements

For our example, we will say that you need to add 10cm (4in) to your pattern in the bust, waist and hip.
If you think about a bodice pattern, normally you have a front and back piece that are cut on the fold to create the full garment. So you have a left front, left right, left back and right back. This means that when grading a pattern, you need to distribute the alteration between the four parts of the pattern.
To increase the pattern by 10cm, we divide this by 4 (the four parts of the pattern), which means each part of the pattern will increase by 2.5cm.
You then need to know what ¼ of this amount is and what ½ of this amount is. I find it helpful to jot these numbers down at the beginning of the process so they’re right in front of me.
In this case, ¼= 6.25mm (I’ll round to 6.2mm)
½= 1.25cm (I’ll round to 1.3cm)
Distribute the grade through the pattern
It’s helpful to have a diagram of where the alteration will be made in front of you as specific parts of a pattern need to be altered, and this will be the same across most patterns. This diagram from Threads is a helpful reference.
Mark the lines on the pattern

Step 1
Mark in the horizontal slash lines on the pattern. We’re working on a top pattern, so the horizontal lines go through the armhole and the waist. These lines need to be perpendicular to CENTRE FRONT.

Step 2
Mark in the vertical slash lines. They go through the neckline (close to the centre front), through the shoulder, and through the armhole near the side seam. These lines should be parallel to the CENTRE FRONT.
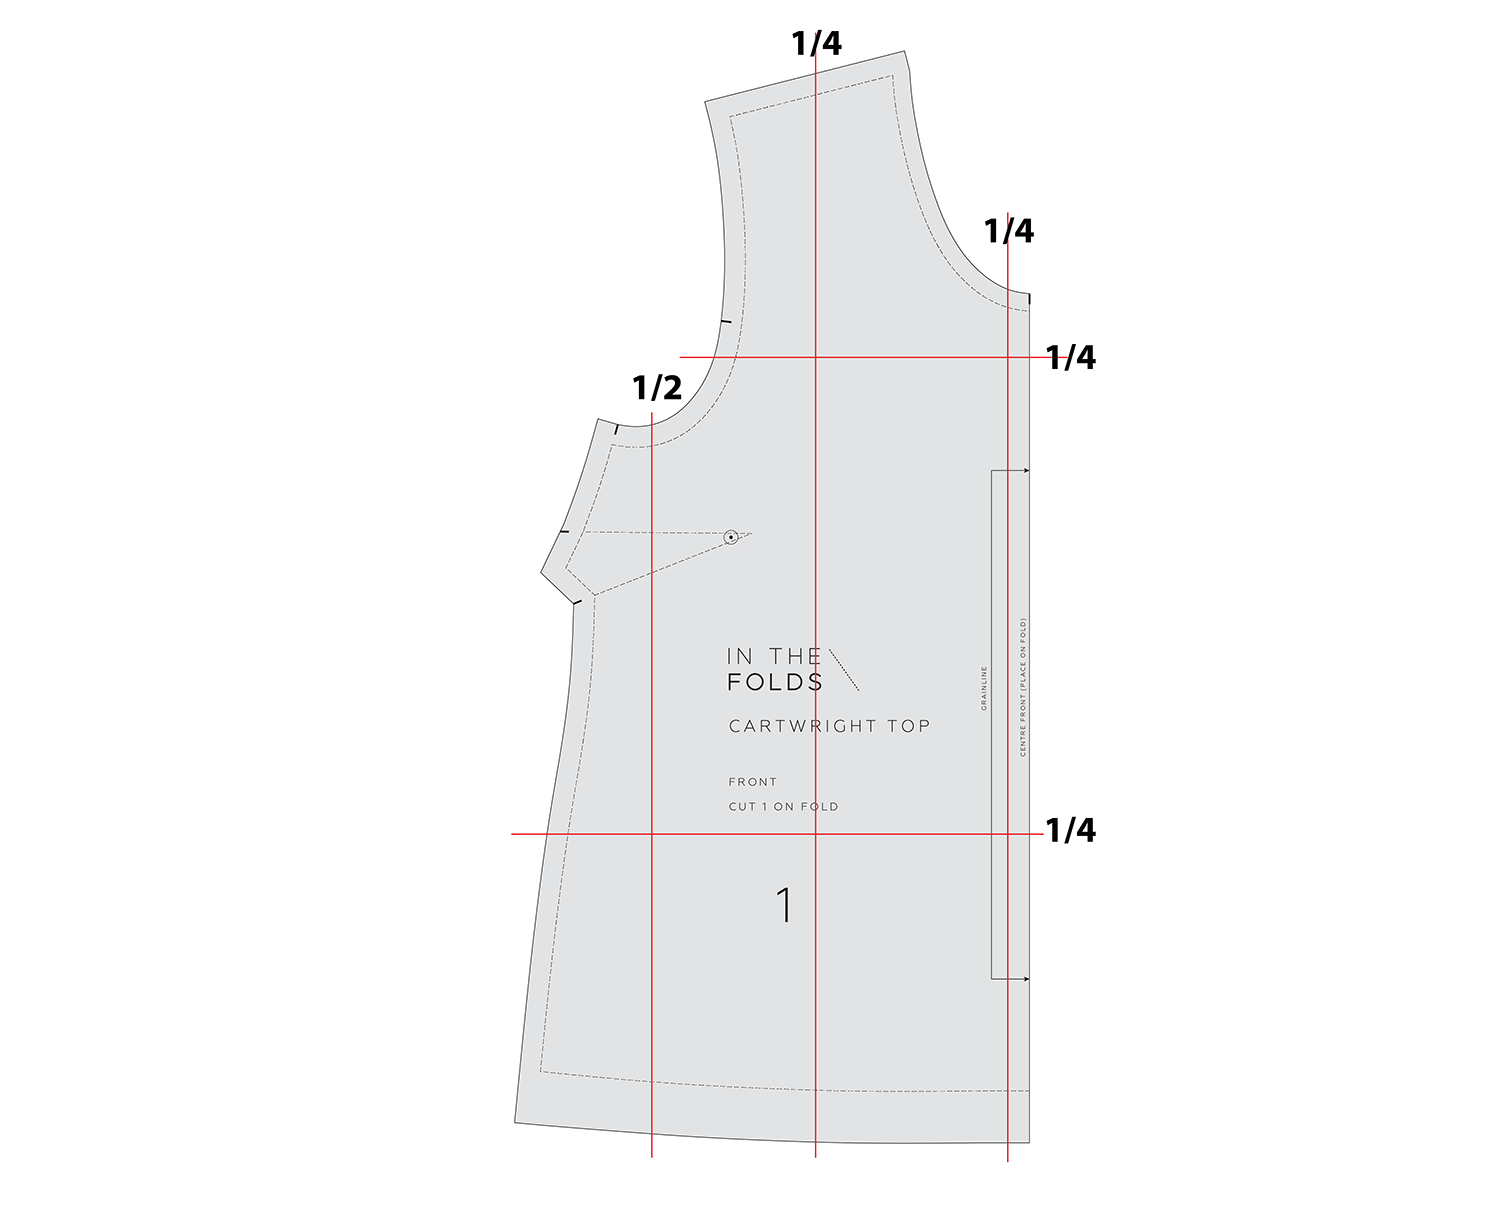
Step 3
Take note of how the grade will be distributed through the piece.
For the vertical lines, ¼ goes through the line closest to CENTRE FRONT, another ¼ through the shoulder area, and ½ through the armhole area. If you add these fractions together you get 1, which means the whole grade will be distributed through the piece.
For the horizontal lines, we will distribute ¼ through each line.

Step 4
Cut through the slash lines. Being careful to not mix up the pieces.
Step 5
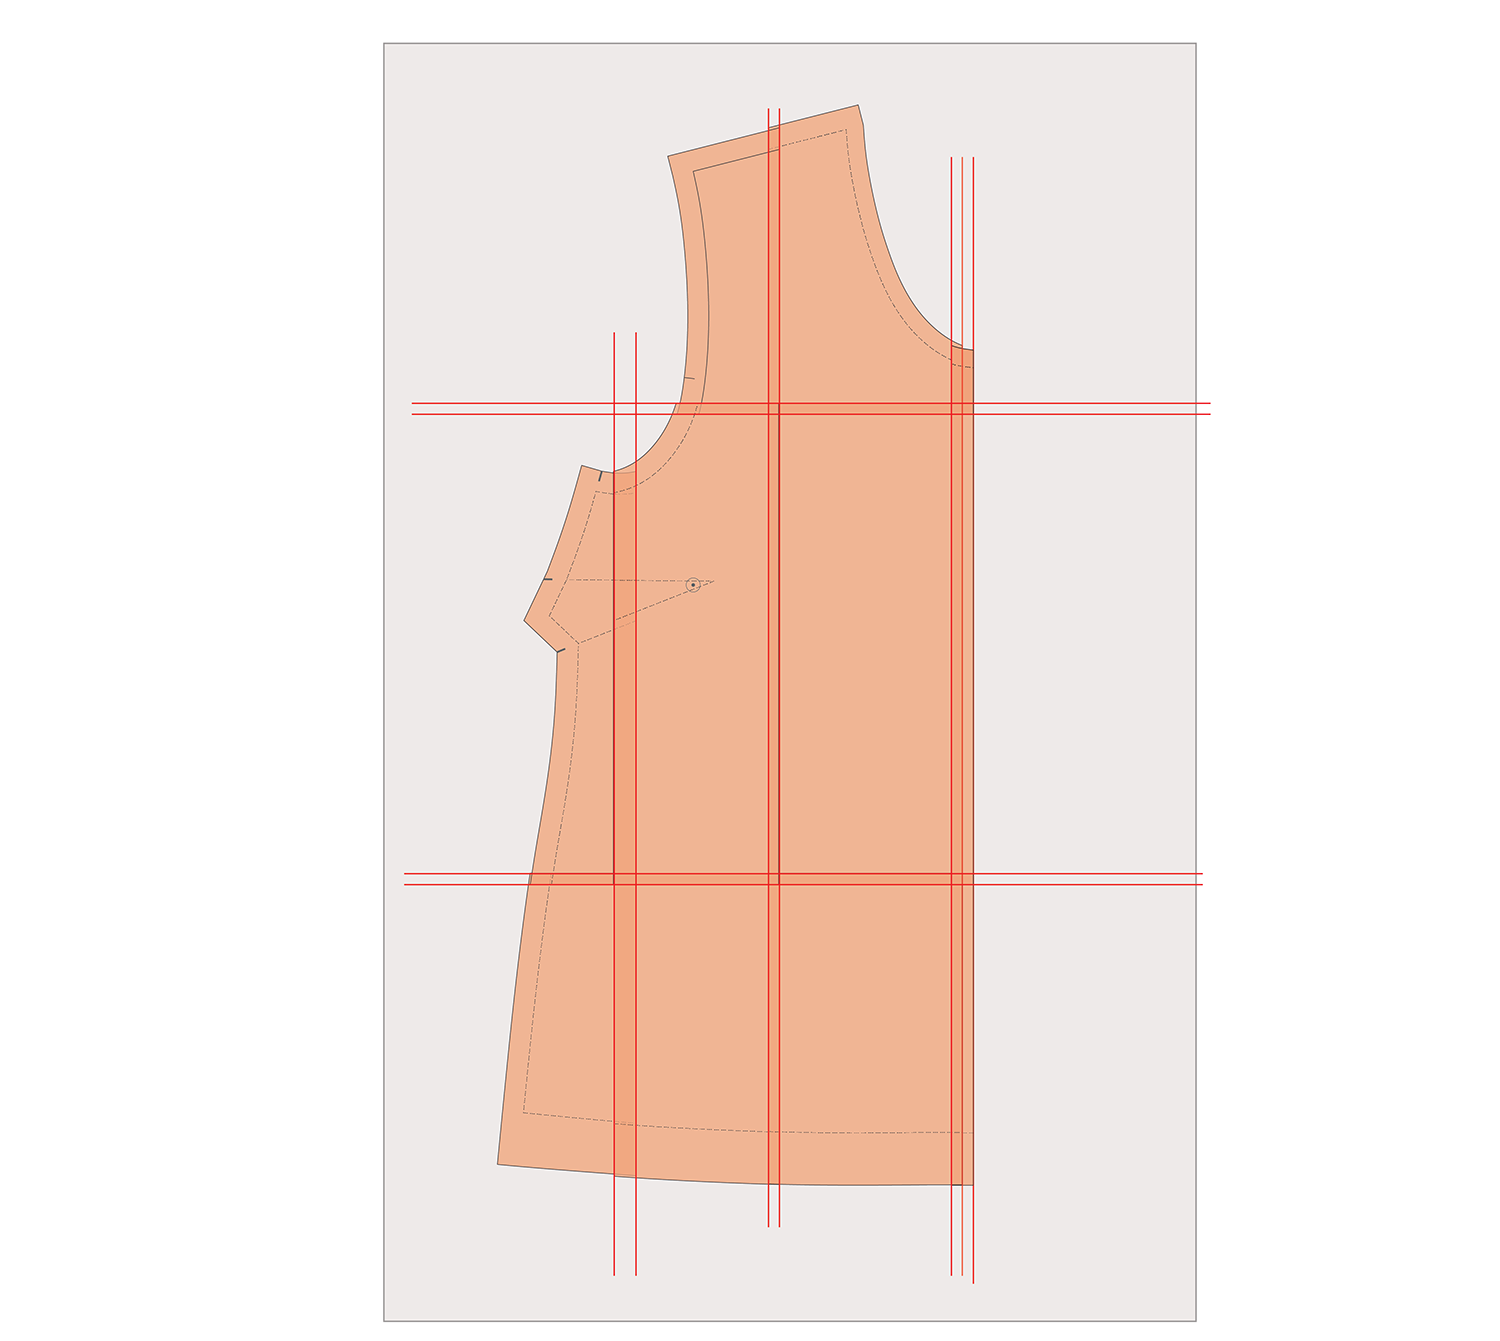
Take a piece of pattern paper that is larger than your pattern piece (if grading the pattern up) and mark in the CENTRE FRONT down one side.

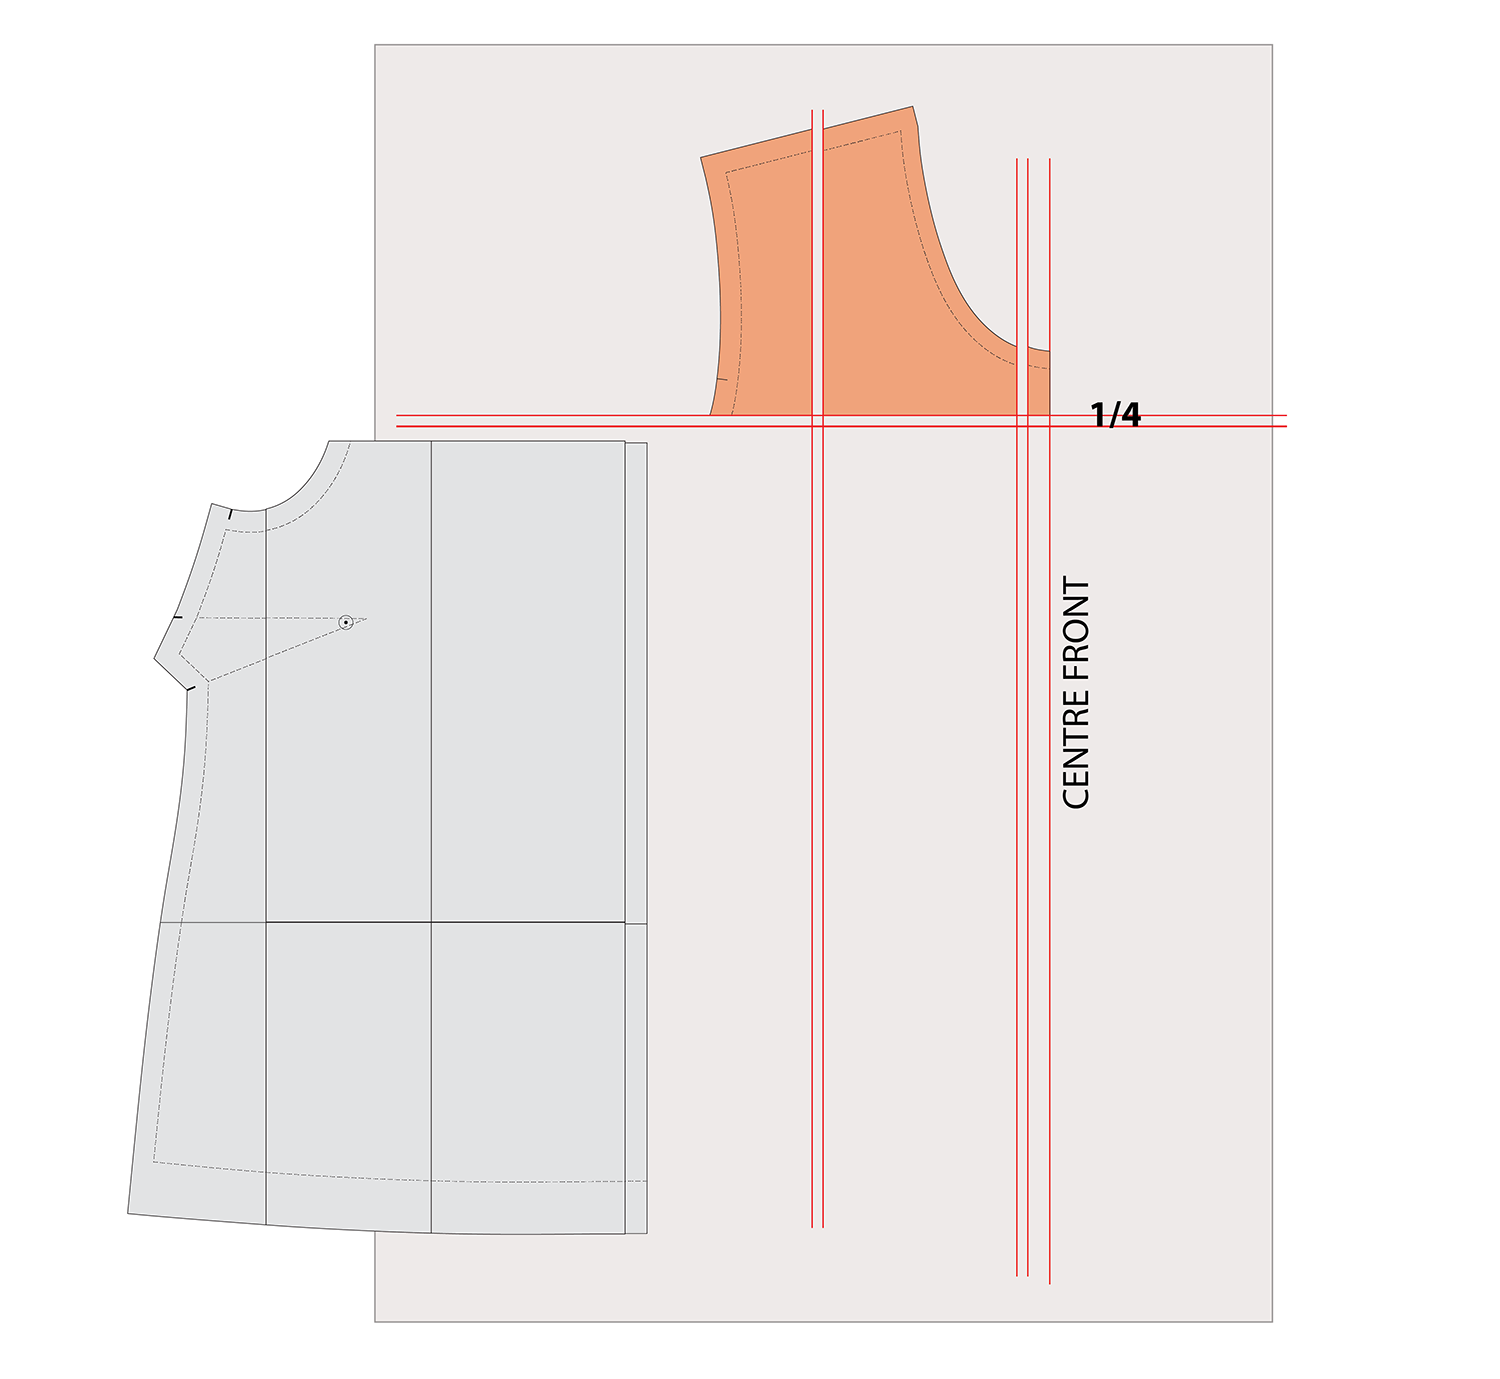
Step 6
Start with the CENTRE FRONT next section of the pattern. Line up the CENTRE FRONT edge with the CENTRE FRONT marked on the page and glue or tape in place.
In the illustrations I have changed the section of the pattern to orange when it is in position.

Step 7
Draw a line down the side of the piece that is taped in place, parallel to the CENTRE FRONT. Draw a line across the bottom of the piece, perpendicular to CENTRE FRONT.

Step 8
Referring to your diagram in Step 3, you will see that ¼ of the grade (i.e. 6.2mm) needs to be added to this section.
Draw a line 6.2mm from the vertical line, making sure it’s parallel to the first line.

Step 9
Slide the next piece of the pattern over and line up the corner of the piece with the corner created by the lines. Tape or glue in place.

Step 10
Repeat the process on the other side of the piece, again adding ¼ of the grade. Slide the pattern piece over and tape or glue in place.
Step 11
At this stage you have the top section of the pattern in position, so you now need to move to the next row of pieces.
Before we get started, we need to add ¼ of the grade to the piece vertically. Use your ruler to mark this in below the pieces that are stuck in place.

Step 12
Place the next three pieces in position using the guidelines. Stop when you get to the armhole, as we need to add another guideline there.

Step 13
Draw a line down the side of the last piece that is taped in place, parallel to the CENTRE FRONT.
Mark in another guideline, parallel to the CENTRE FRONT, this time ½ of the grade (i.e. 1.3cm). Slide the next part of the pattern over and tape or glue in place.

Step 14
Rule a line across the bottom of the pieces and another ¼ of the grade down from that. Position the remaining pattern pieces and tape or glue in place.
FINALISE THE PATTERN

Redraw smooth stitch lines over the alteration. Add seam allowance back onto the pattern.
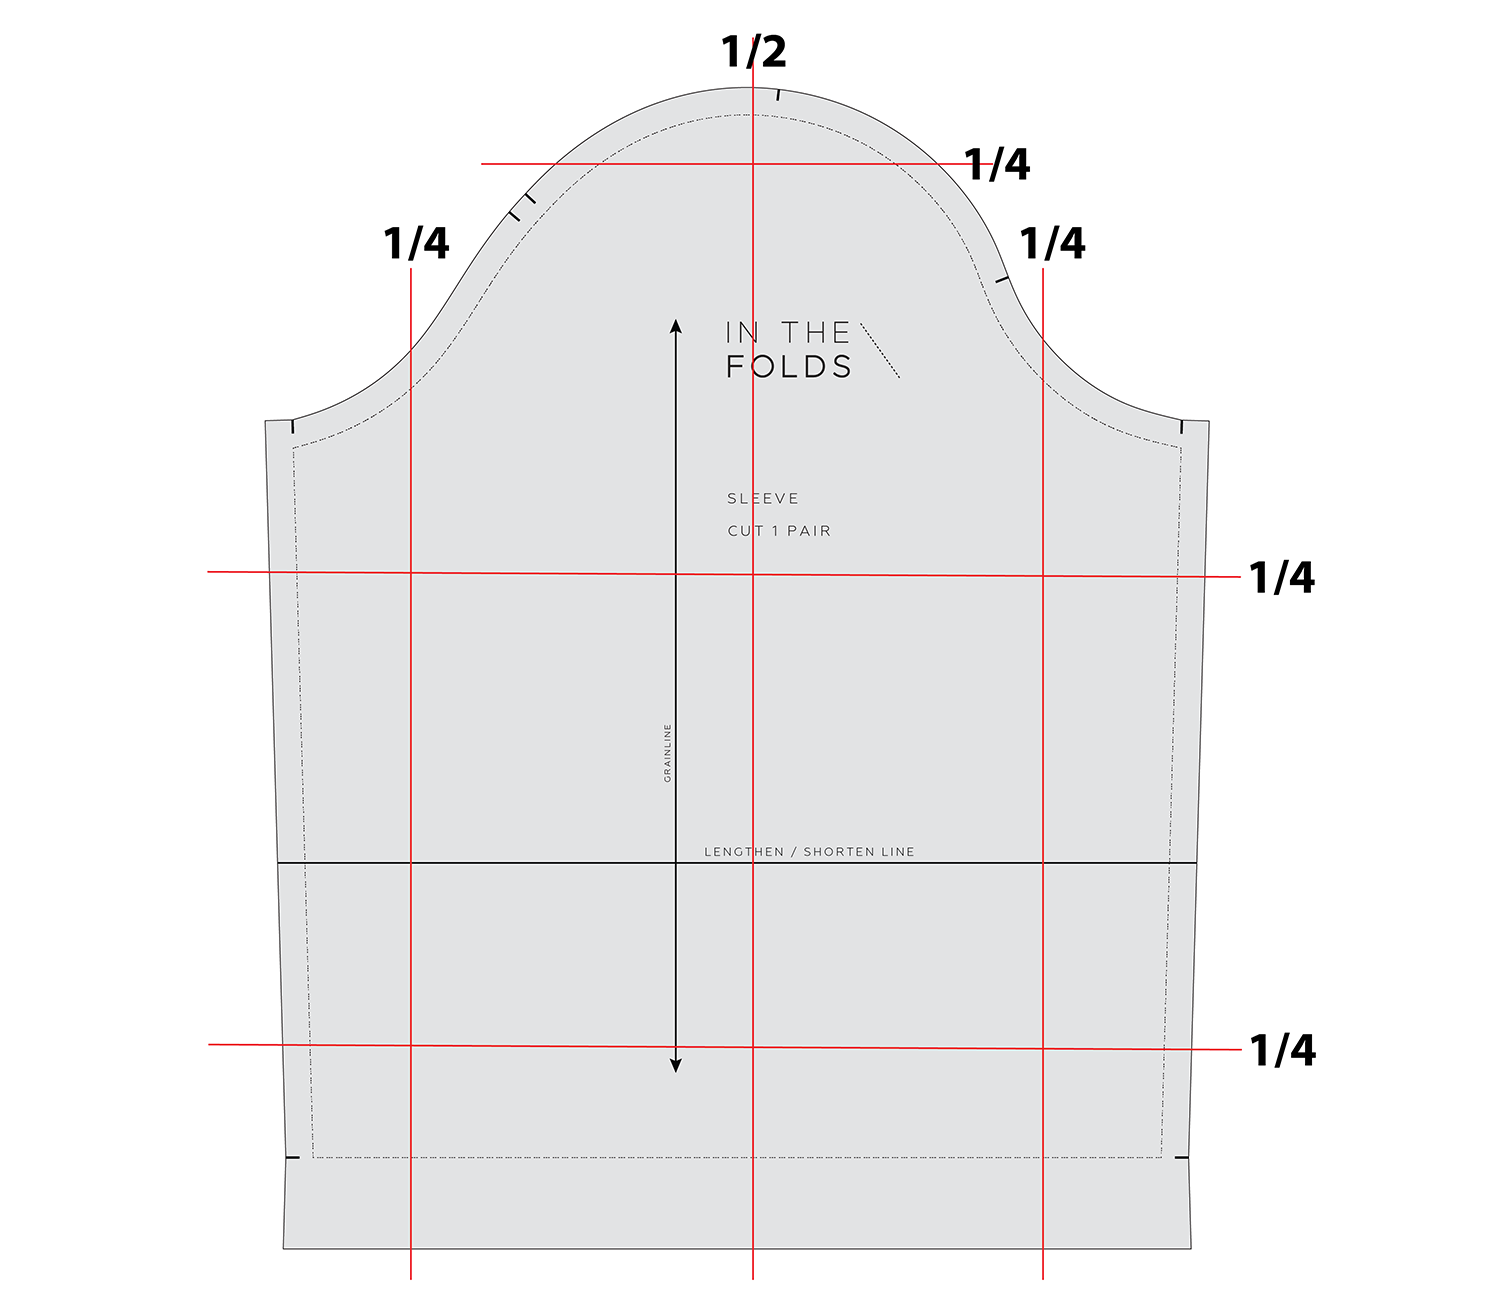
Repeat the process for the back pattern (with the guidelines in the same positions as on front) and sleeve (if it has one).
Making the pattern smaller
The same process can be used for making a pattern smaller. Rather than slashing and spreading to add width, you need to overlap the sections of the pattern to make it smaller.
Finally, check and true the pattern.
Happy sewing,
Emily
RESOURCES MENTIONED IN THIS ISSUE
Checking & truing patterns - read the tutorial here.
For more issues of the Q & A series, you can check out the archive here.
WHAT YOU’VE BEEN MAKING

Elwood dress made by @maker.baker.girl