
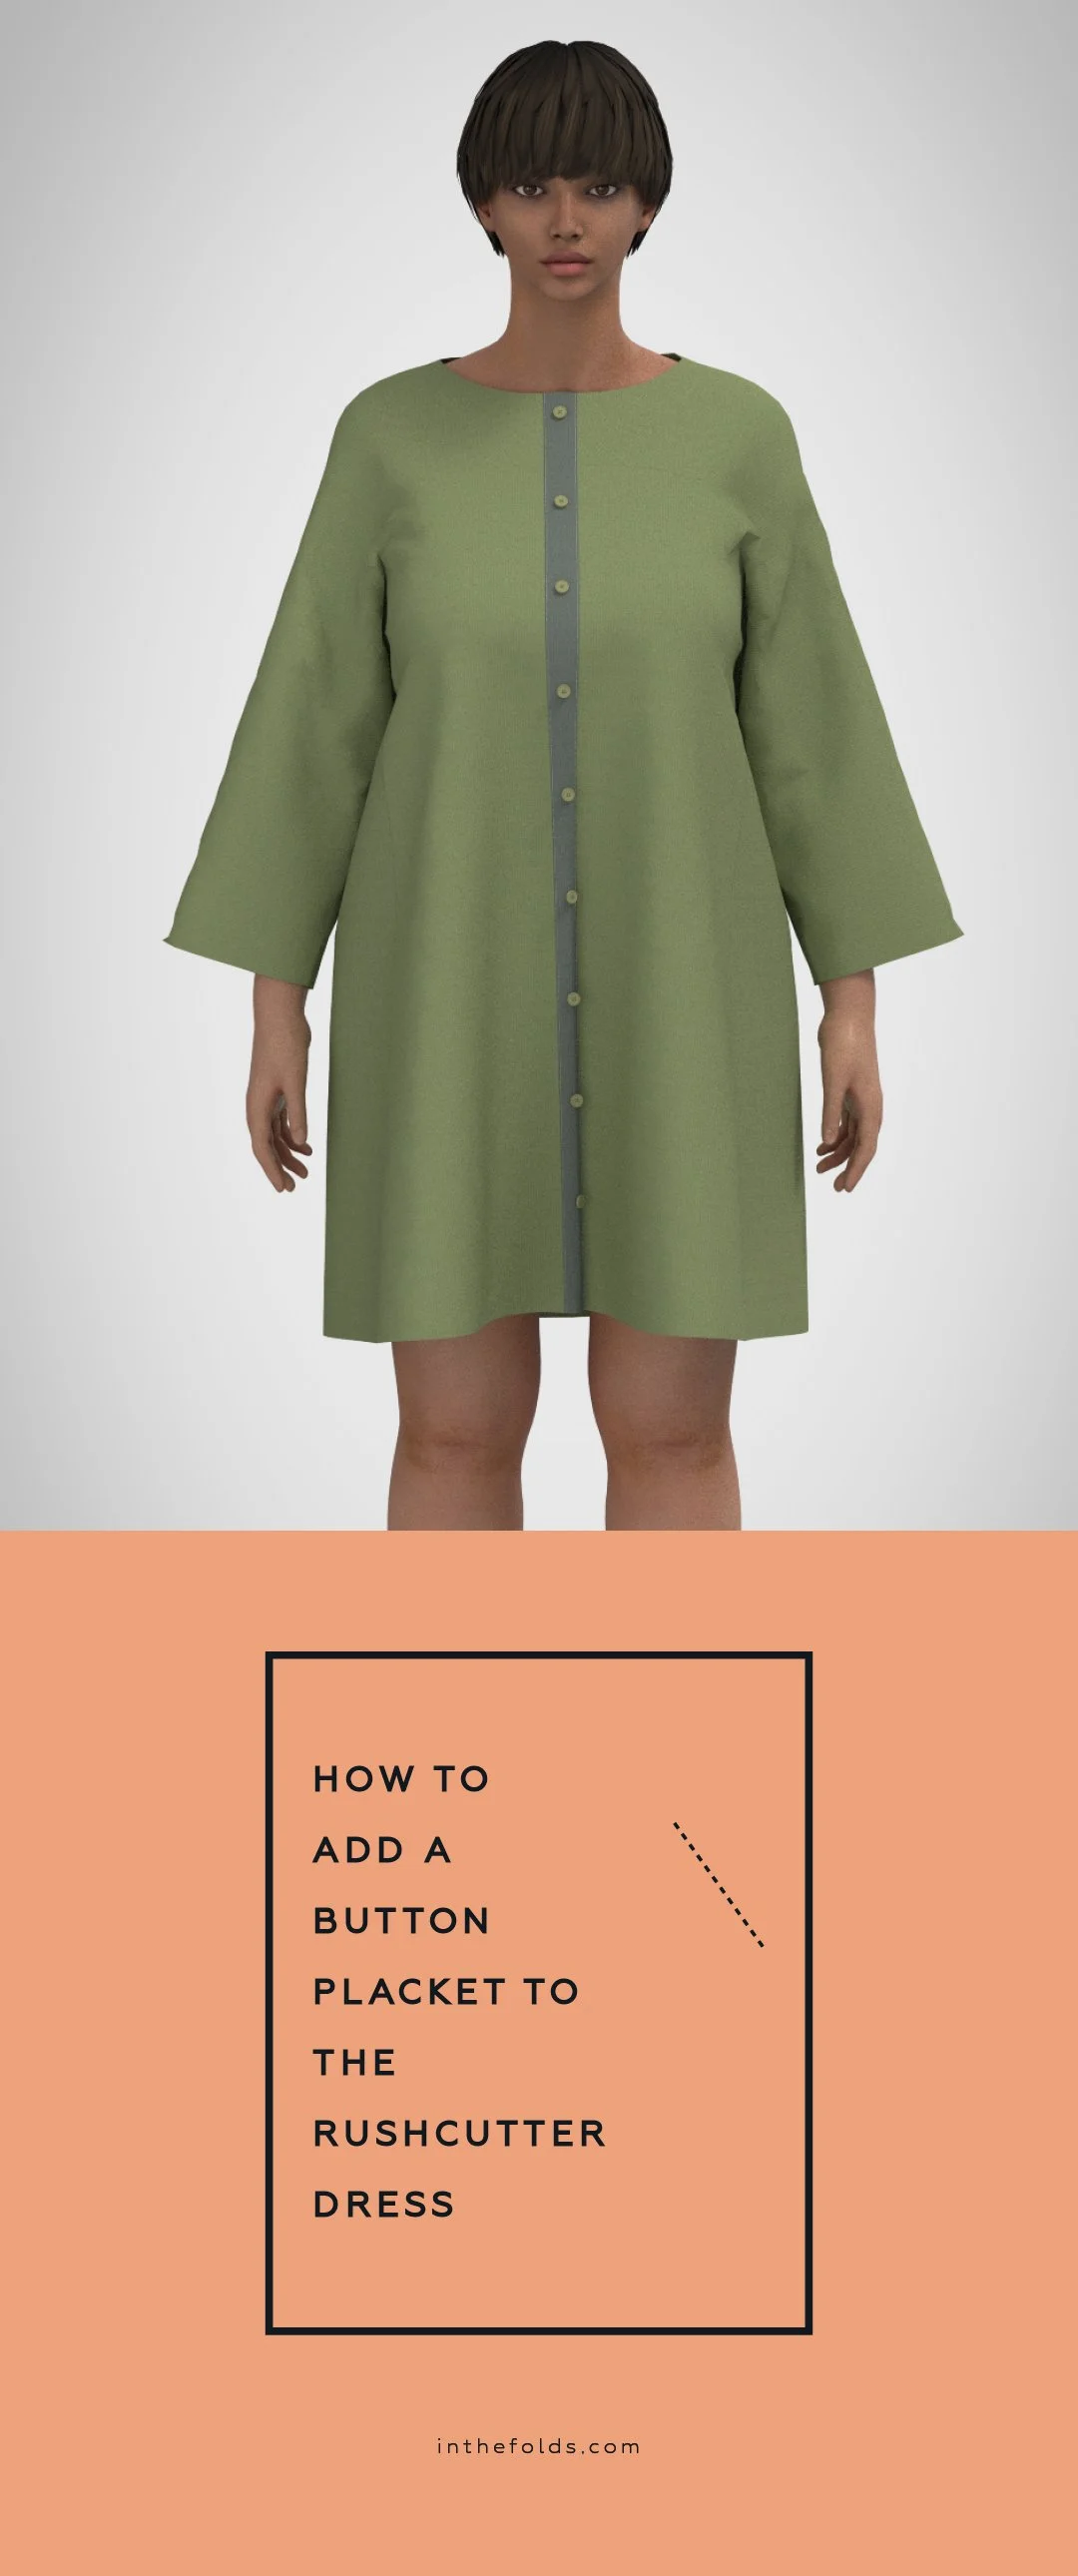
One of the things I’d love to encourage you to do with your sewing patterns is to start seeing them as a jumping-off point, rather than a fixed set of instructions for making one particular garment.
Sometimes a small change can completely shift how a pattern looks or, perhaps more importantly, how it works for you and your life.
Adding a button placket to the centre front of the Rushcutter is a great example. You might simply prefer the look of buttons down the front, but there are practical reasons to make this alteration too. Perhaps a centre back zip is difficult for you to reach or manage, or you need easier access for breastfeeding. Whatever your reason, moving the opening to the front can make the Rushcutter work differently for you without changing the foundations of the pattern.
In this tutorial, I’ll show you how to add a button placket to the centre front of the Rushcutter dress. I’ll take you through the steps I would use, but I’d also encourage you to think of this as more than a Rushcutter tutorial. Once you understand how a button placket works and how to add one to a pattern, you can start thinking about where else you might use the same idea.
That’s the part of patternmaking I’d love to help you feel more confident with: learning a skill, understanding what it does, and then asking, where else could I use this?
BEFORE WE BEGIN
I’ve intentionally kept this tutorial as simple as possible. I want to give you enough information to understand the alteration and have a go, without getting too caught up in the nitty gritty. If you’d prefer more detailed instructions, I’ll include a link at the end of the tutorial to a PDF from one of our previous Hack Kits that walks through this type of alteration in more detail.
You might also notice that the pattern pieces in this tutorial look a little different from the ones you have at home. As part of this experiment, I’m trying out CLO 3D as a quicker and simpler way for me to illustrate tutorials, rather than creating every illustration in Adobe Illustrator as I normally would.
The pattern pieces shown here don't have seam allowance, whereas your Rushcutter pattern pieces do. This shouldn't cause any problems when following along. In the Folds patterns have the stitch line marked, so use the stitch line on your pattern whenever you need to refer to the shape or edge shown in my illustrations.
This is part of the experiment for me too: finding ways to spend less time producing perfectly polished illustrations and more time sharing the patternmaking ideas and skills I hope will help you experiment with your patterns.
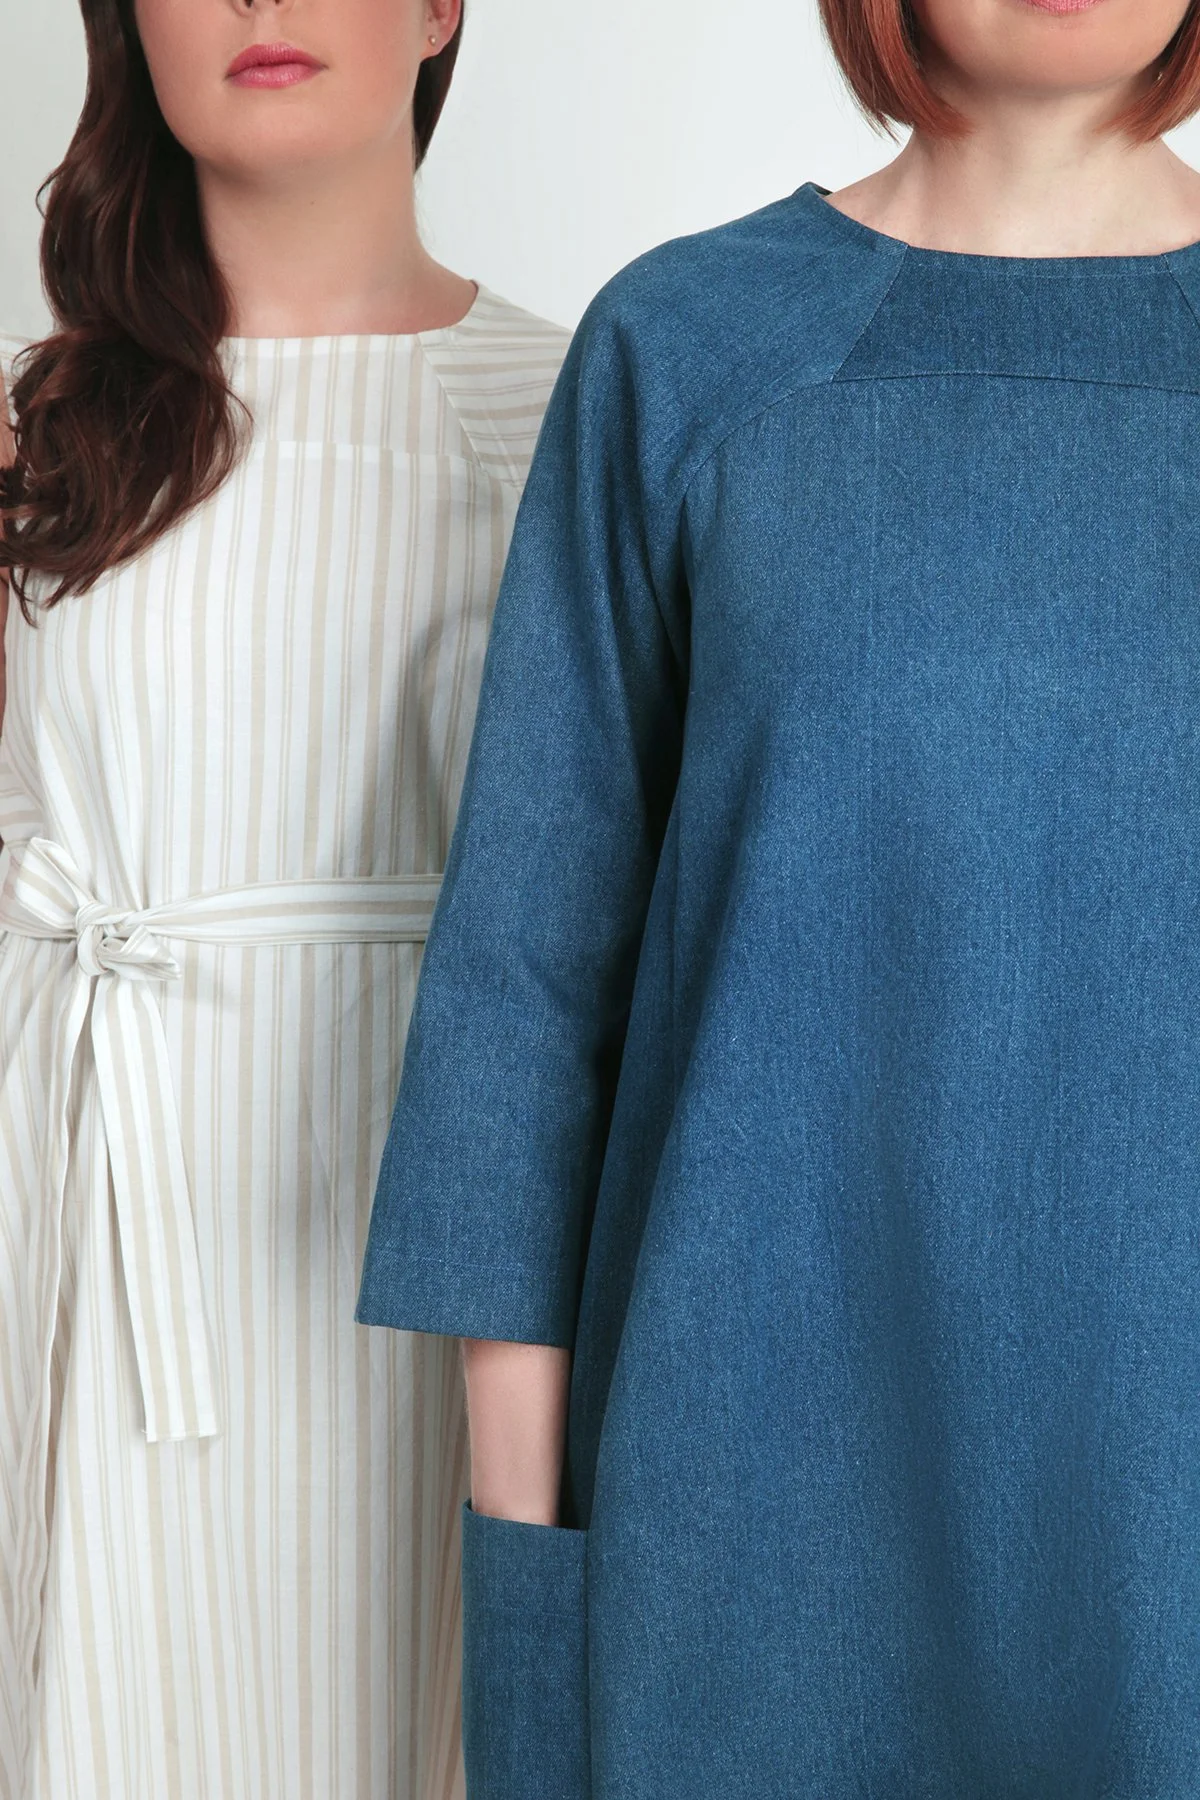
Remove the panel lines
The Rushcutter has a raglan sleeve and a small centre front panel detail. To add a button placket, we first need to remove that panel by attaching it to the sleeve.
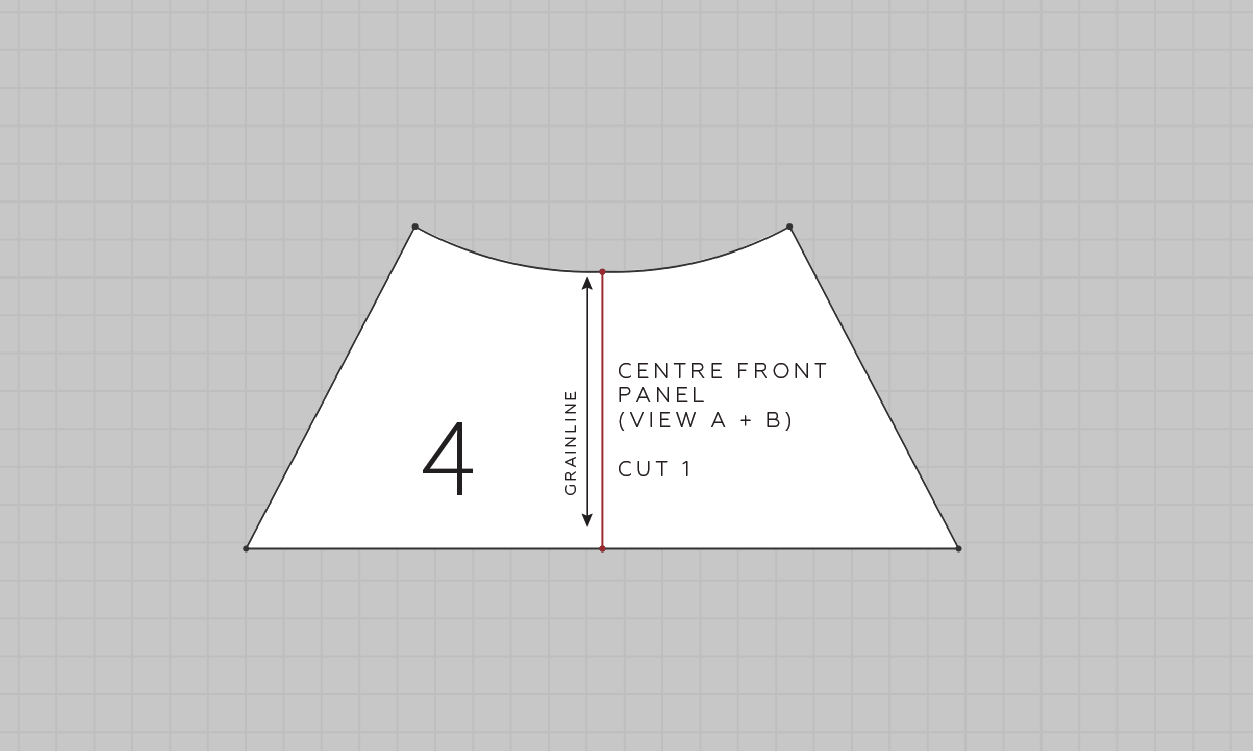
Step 1a
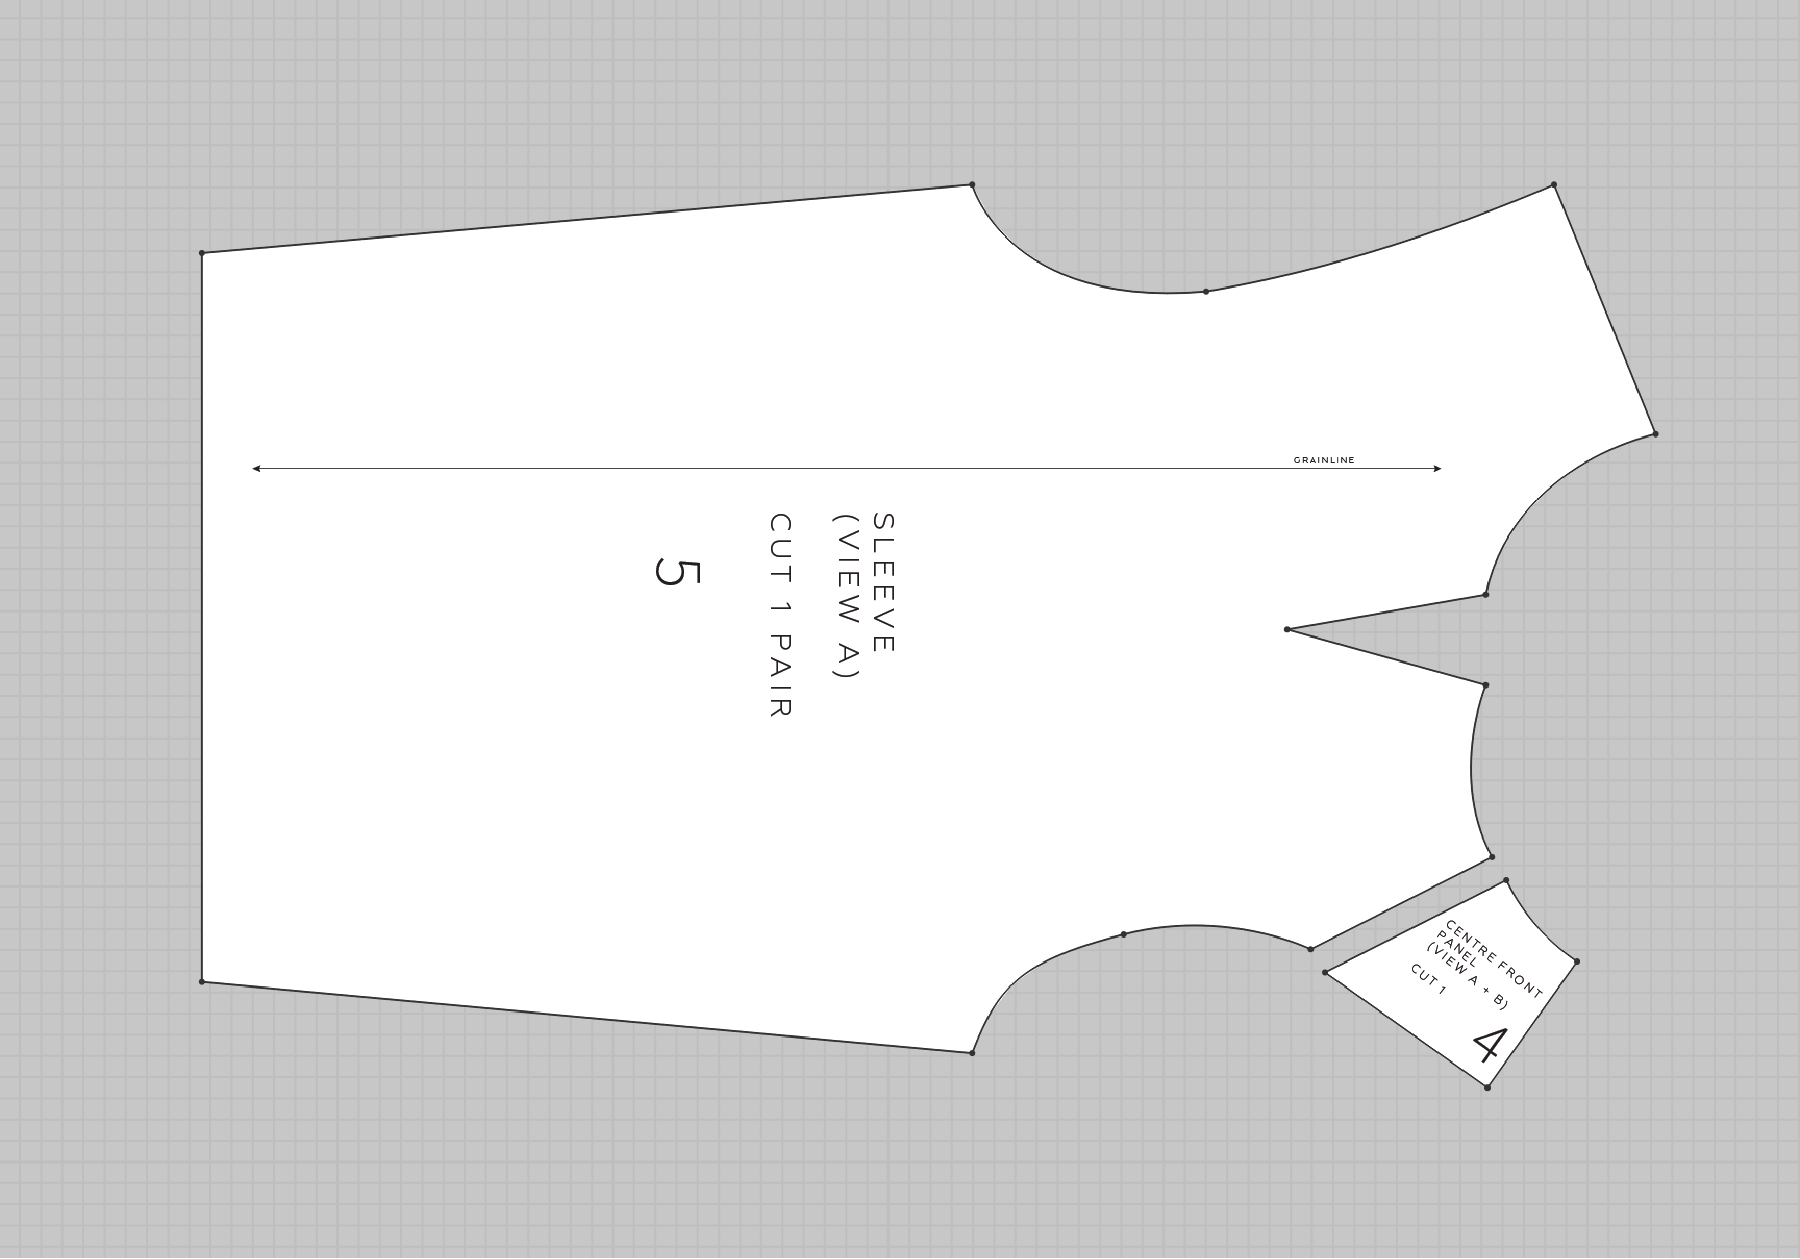
Take the CENTRE FRONT PANEL [4] and draw a line through the CENTRE FRONT - using the notches to guide you.
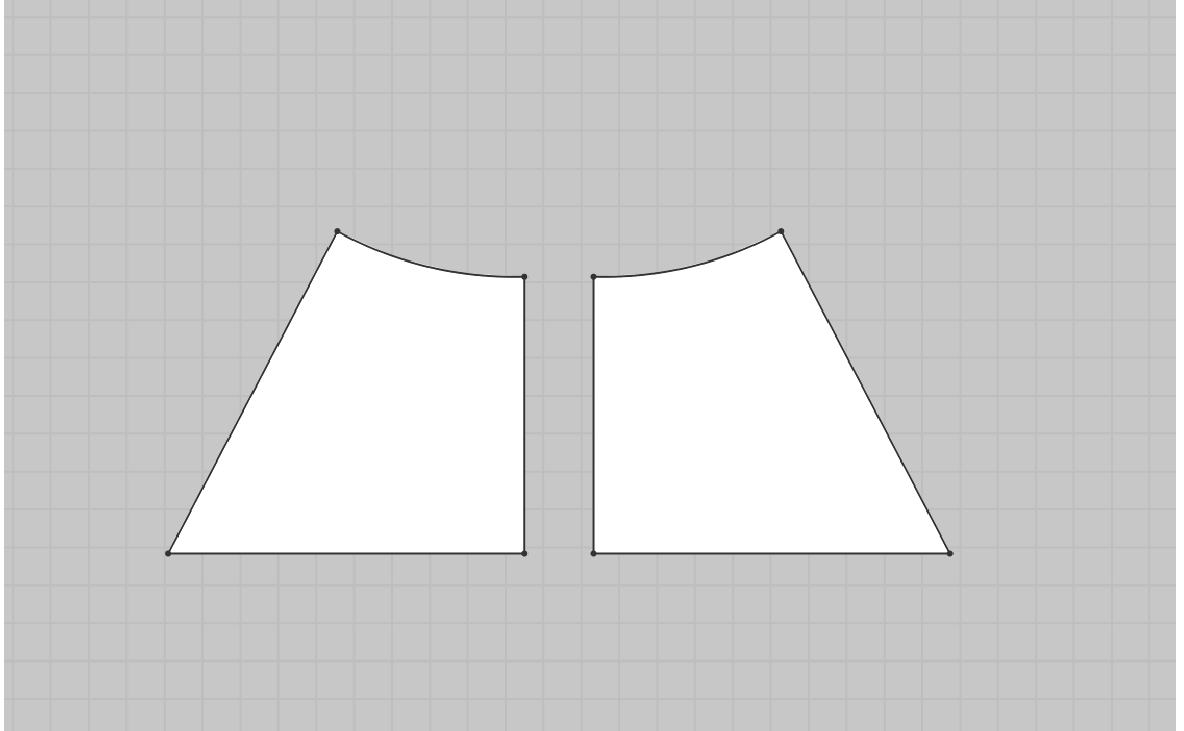
Step 1b
Cut through the panel piece along the line marked.
Step 2a
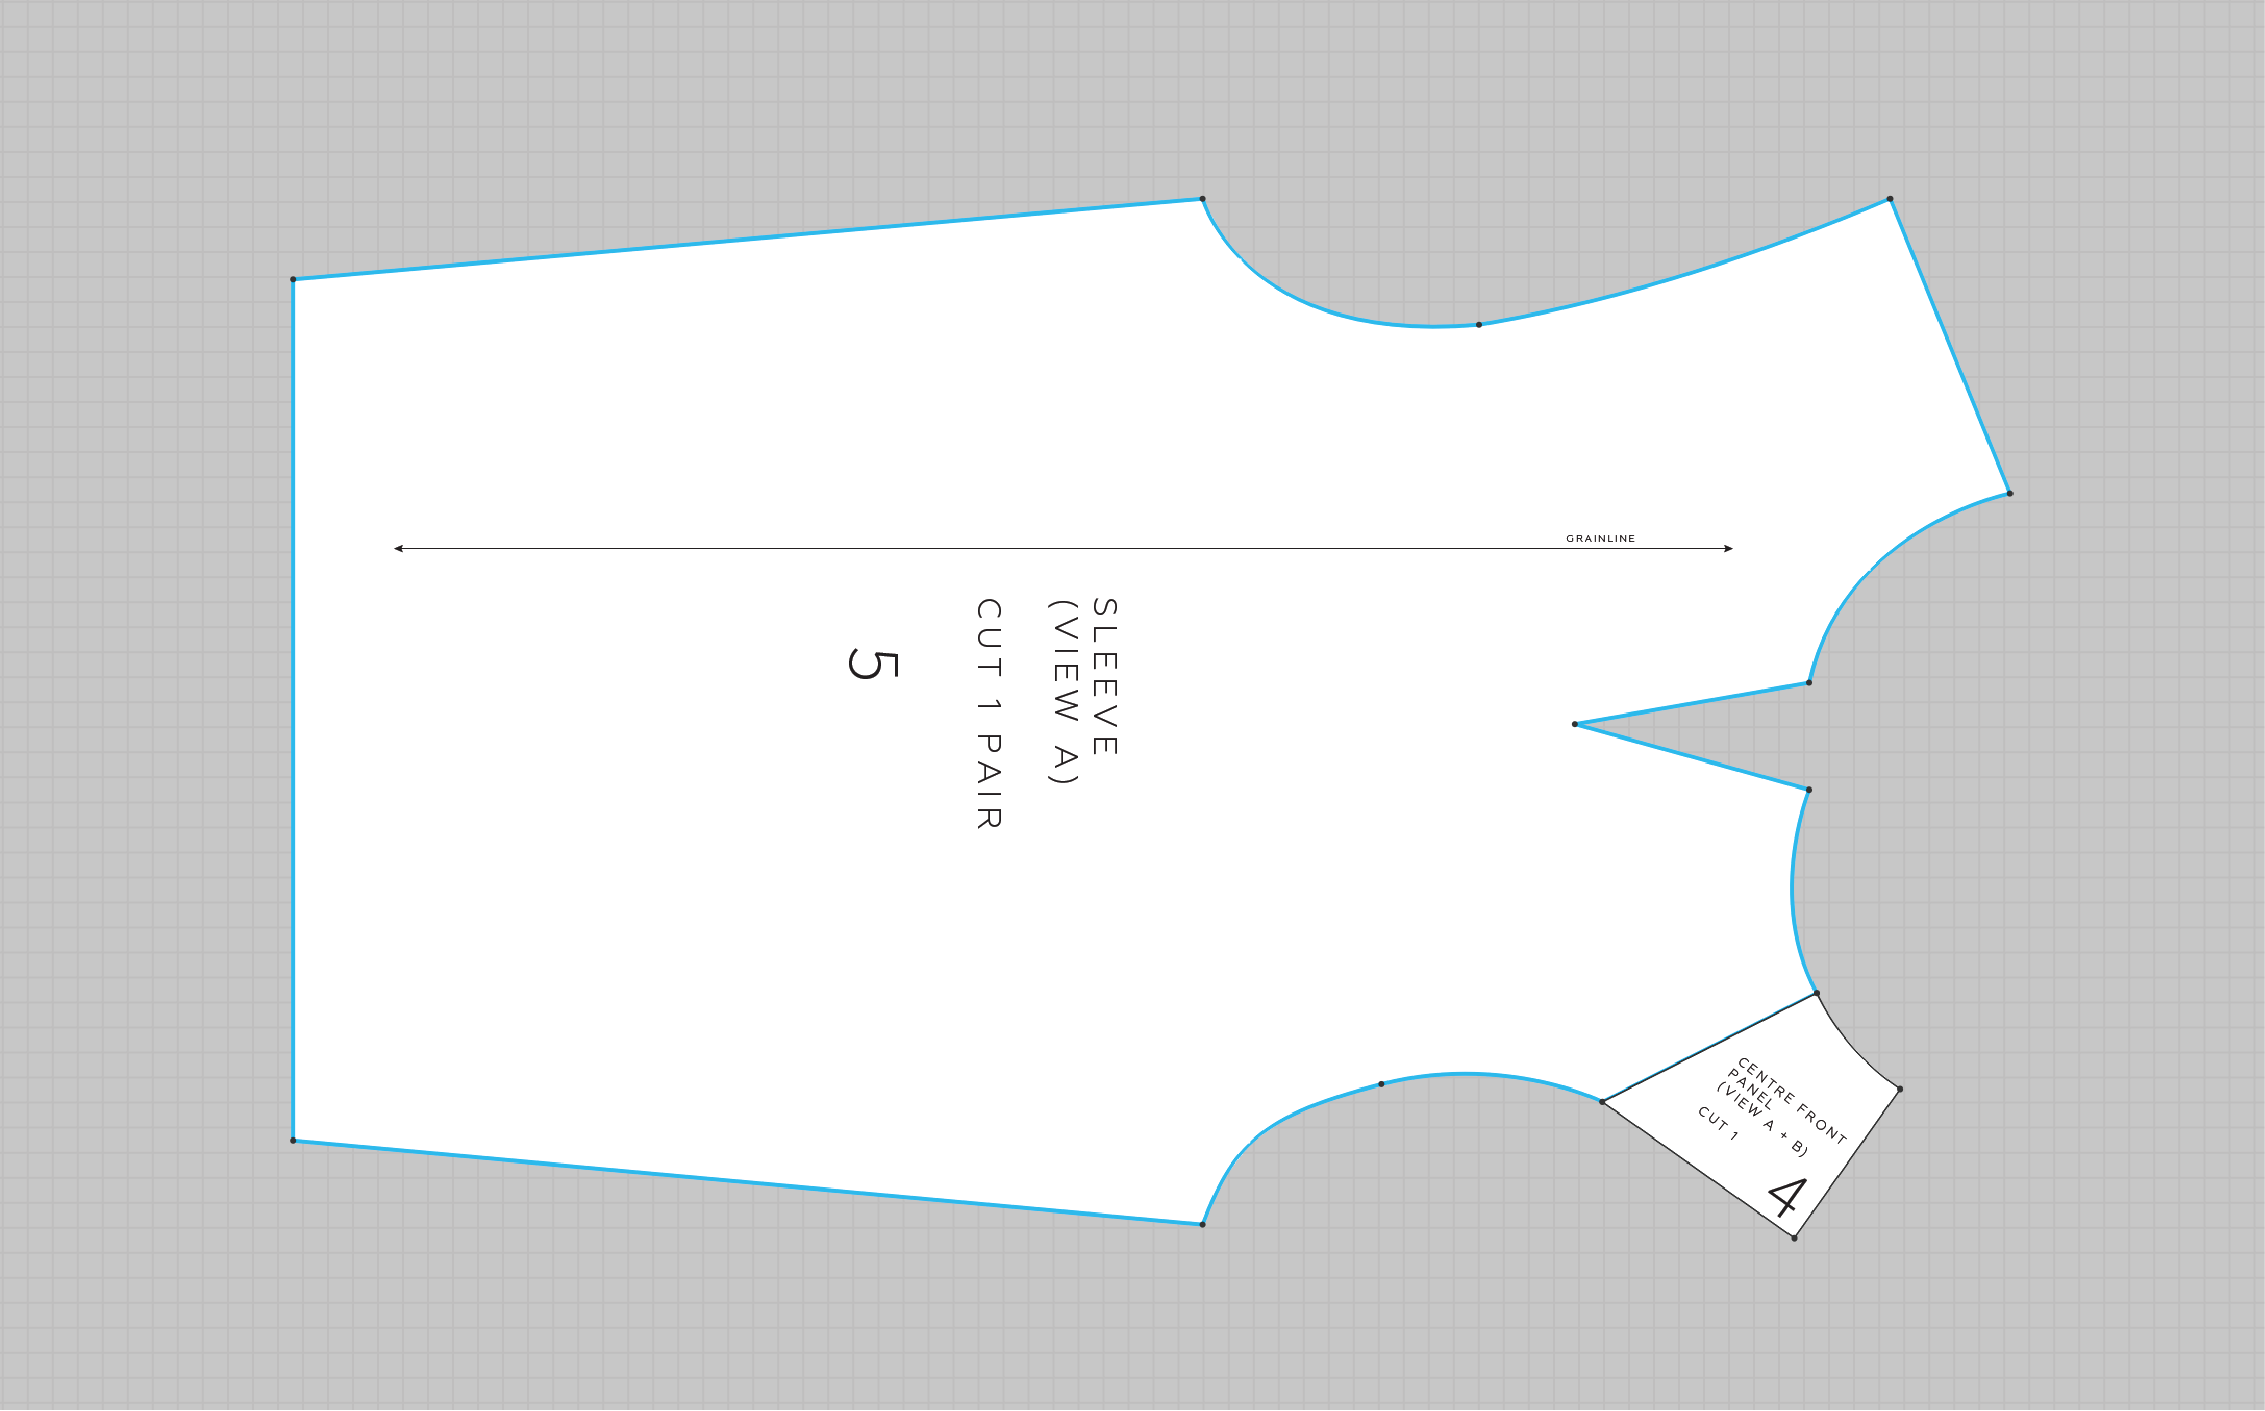
Move the CENTRE FRONT PANEL [4] over to meet the SLEEVE [5], along the edge that it would be joined to if you were sewing it the regular way.
Step 2b
Line the pieces up, STITCH LINE to STITCH LINE, and tape or glue in place.
The CENTRE FRONT PANEL is now a part of the SLEEVE piece and we have removed the panel line.
Draft the placket
Step 3a
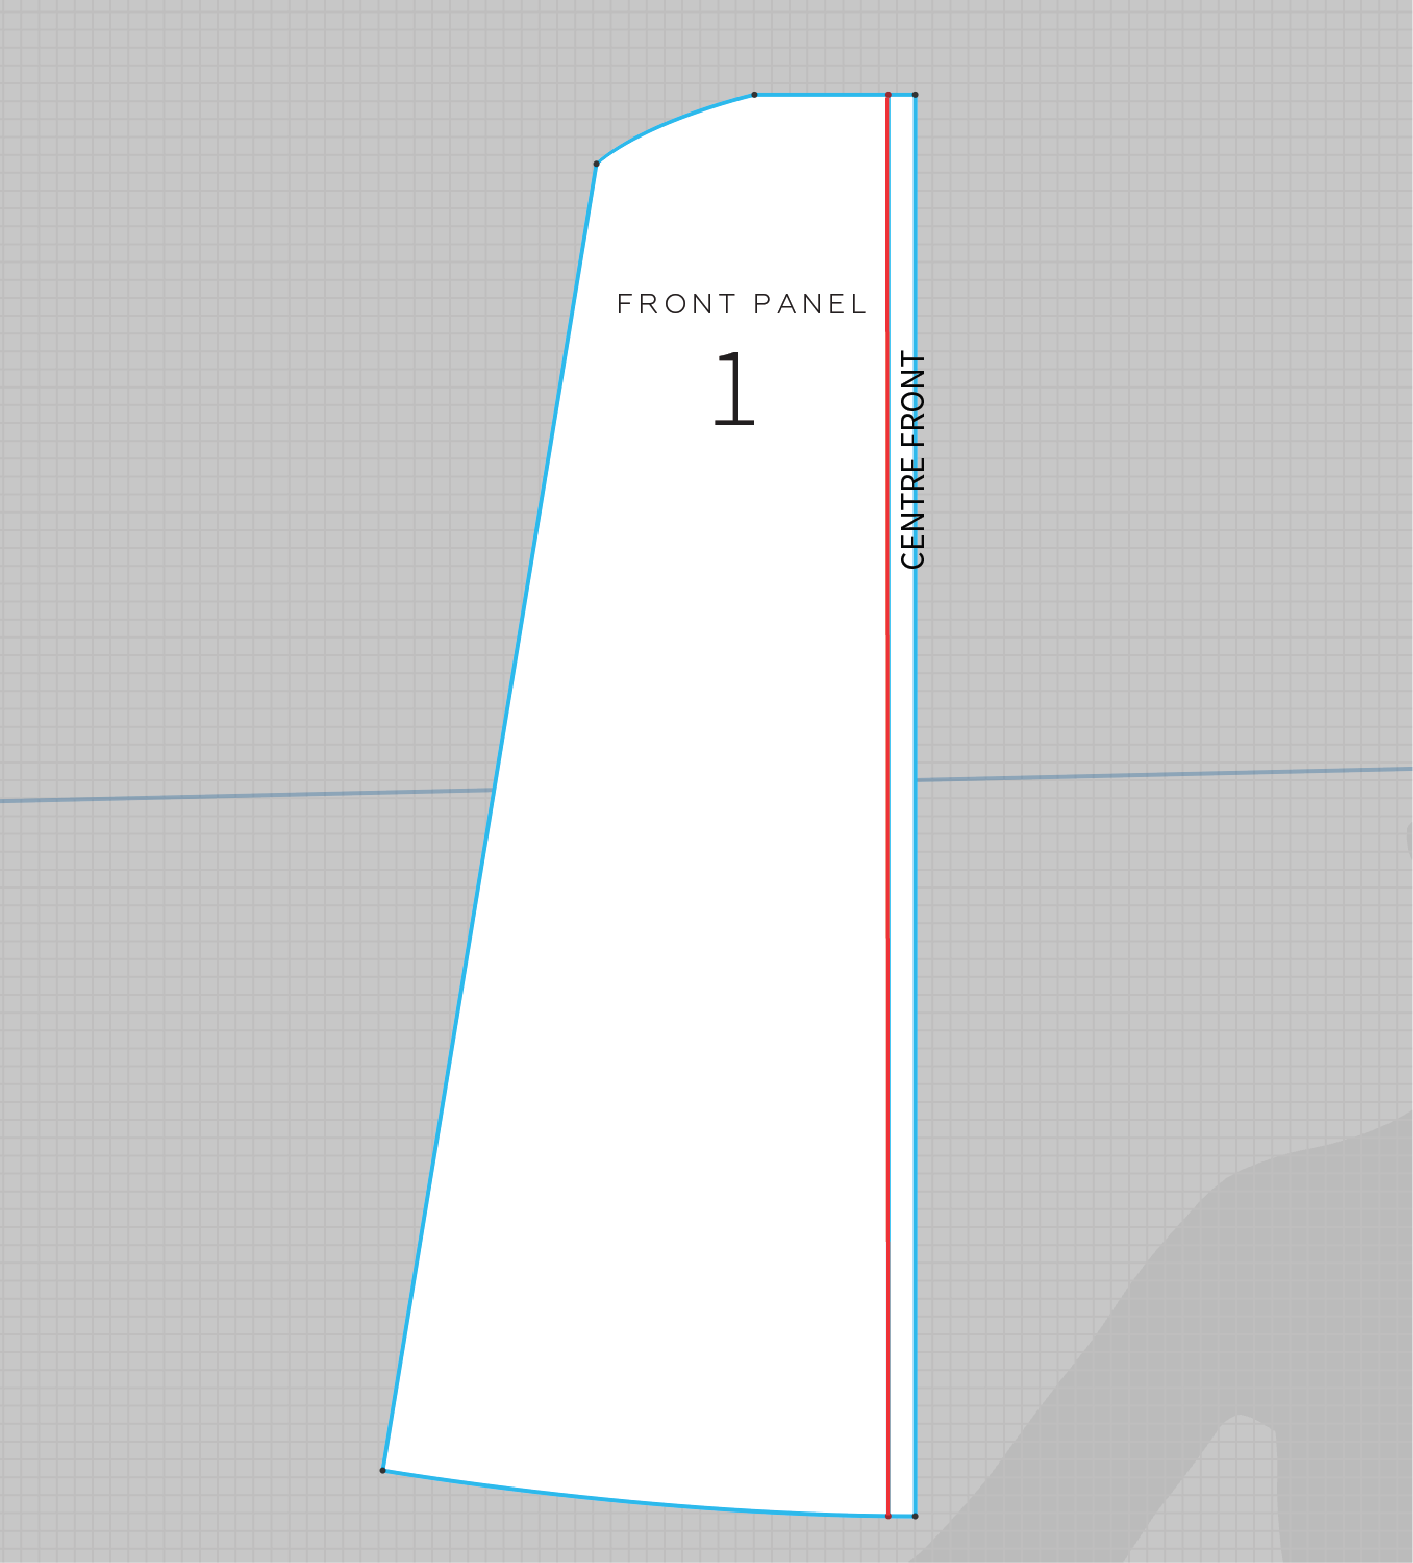
Take the FRONT PANEL [1] and mark a line parallel to the CENTRE FRONT that is half the width you would like the placket to be. For example, if you would like a 3cm wide placket, mark the line 1.5cm from the CENTRE FRONT.
Context: What we are doing here is saying that the CENTRE FRONT will be the centre of the placket and will be where the buttons and buttonholes are placed.
If you’re not sure of the placket width you would like to have, take a look at some garments in your wardrobe and measure. You can also measure a particular button you would like to use, making sure there is enough width to stabilise the button.
Step 3b
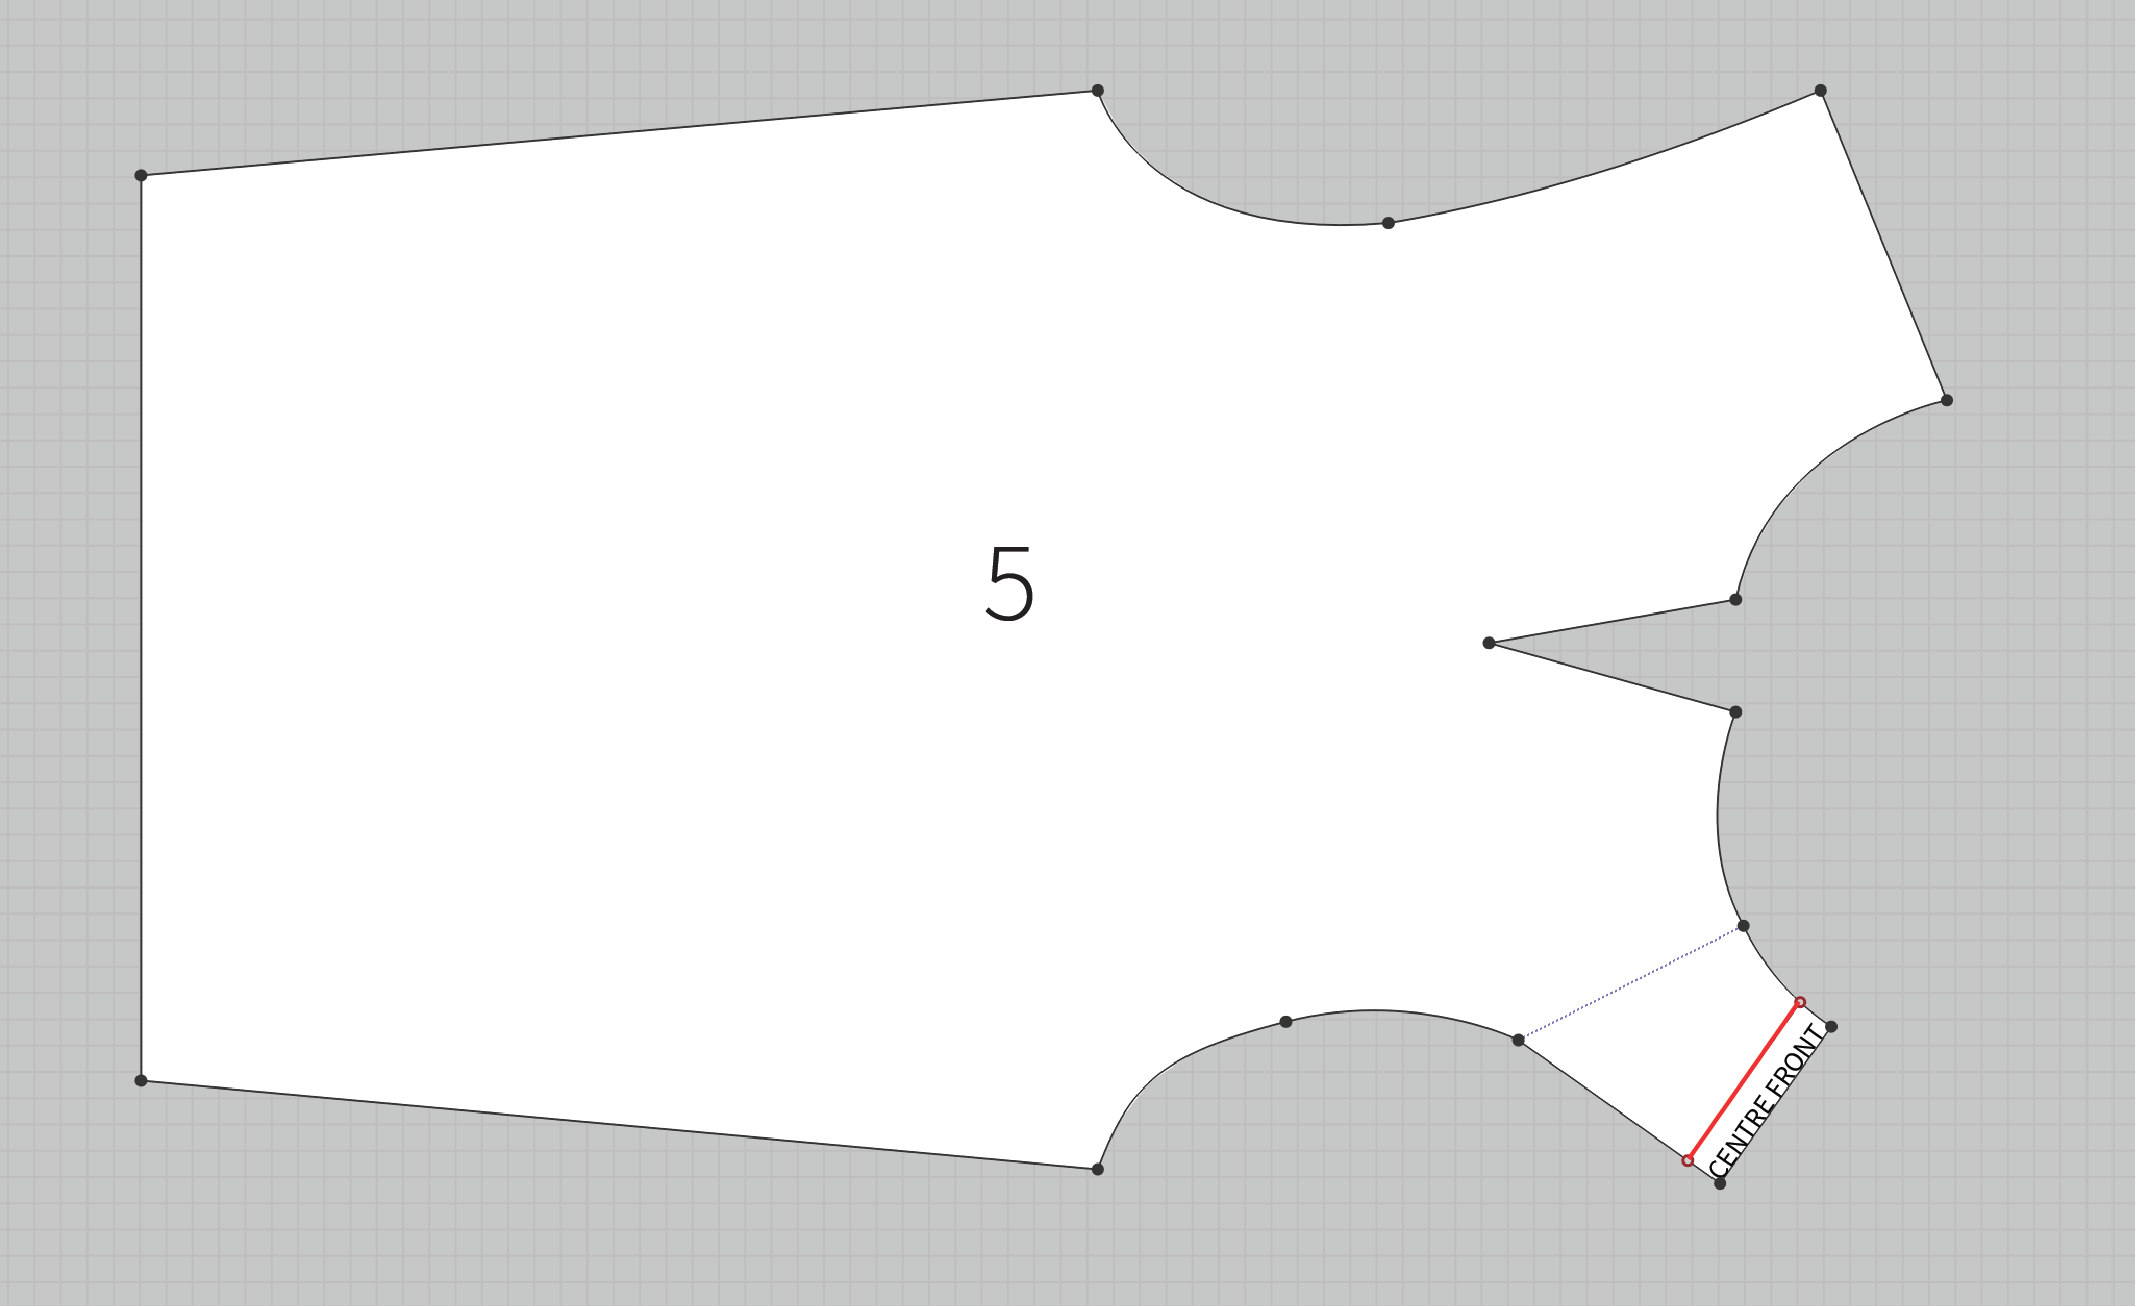
Repeat on the sleeve.
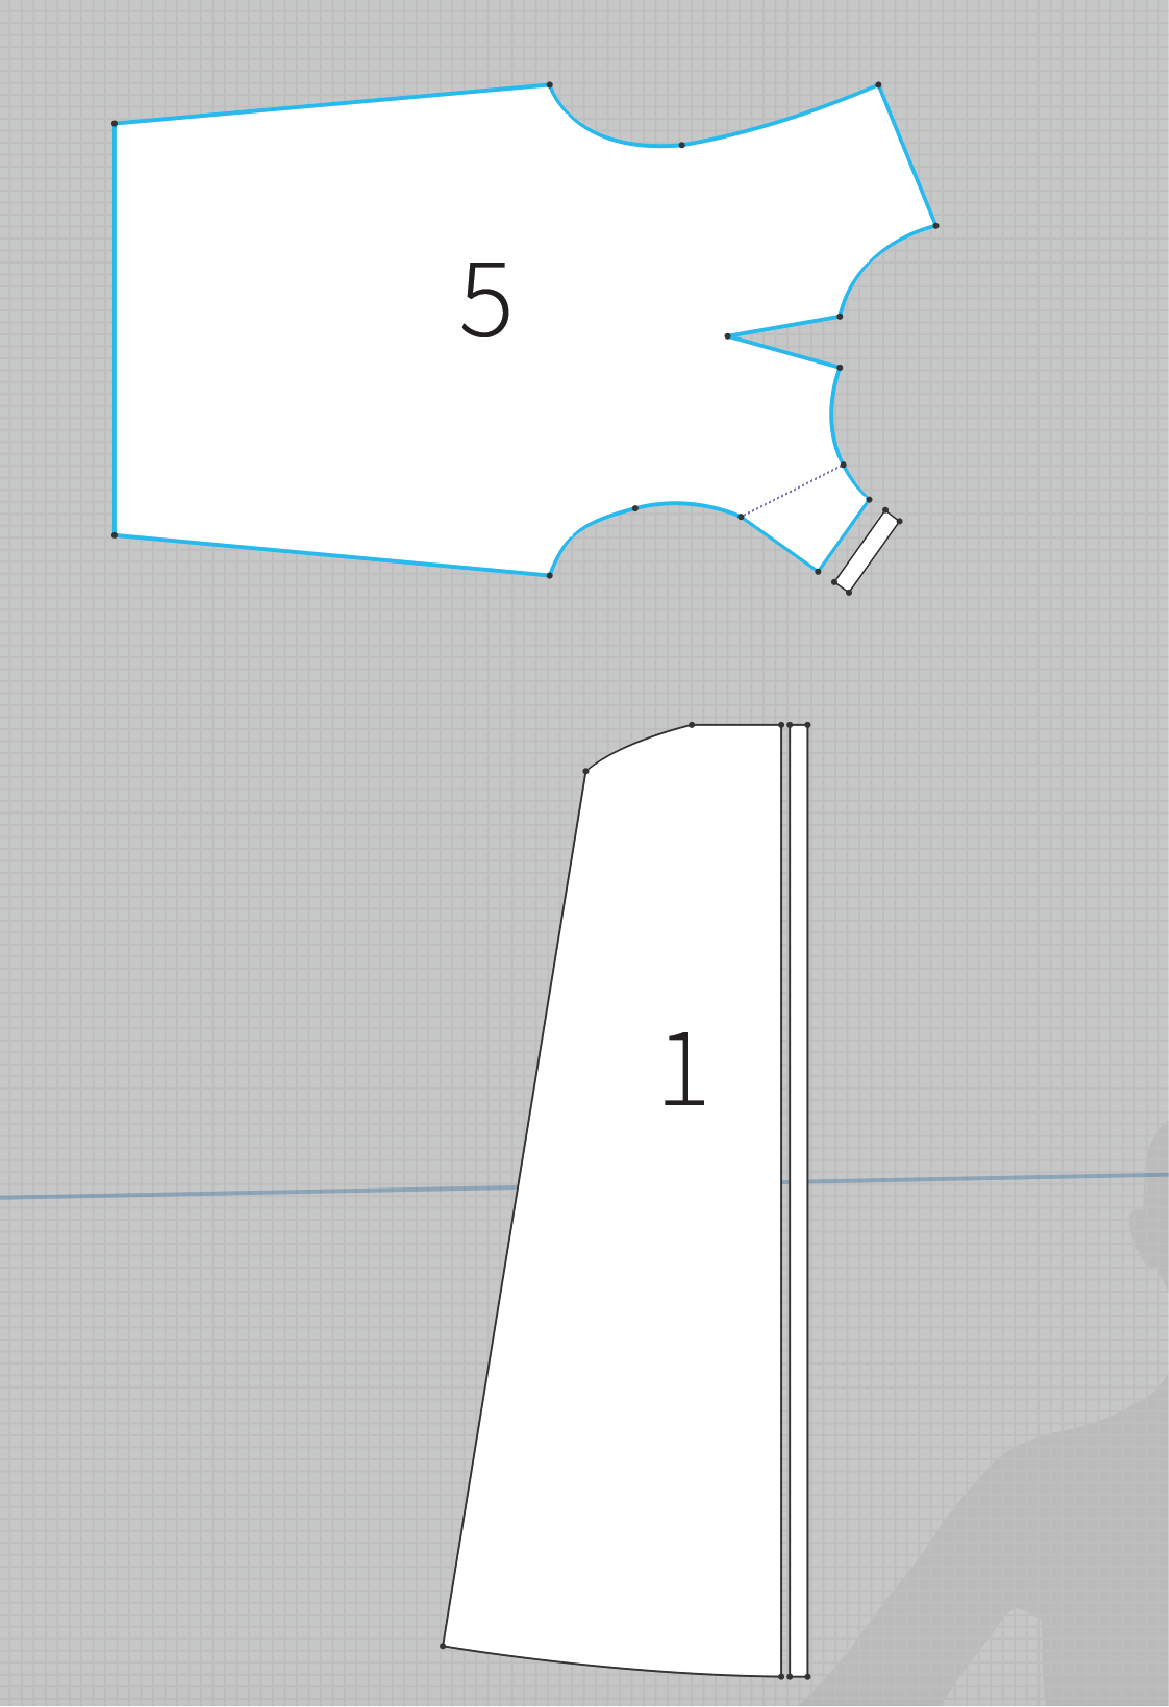
Step 4
Cut the placket pieces off the FRONT [1] and SLEEVE [5] by cutting through the lines marked in STEP 3.
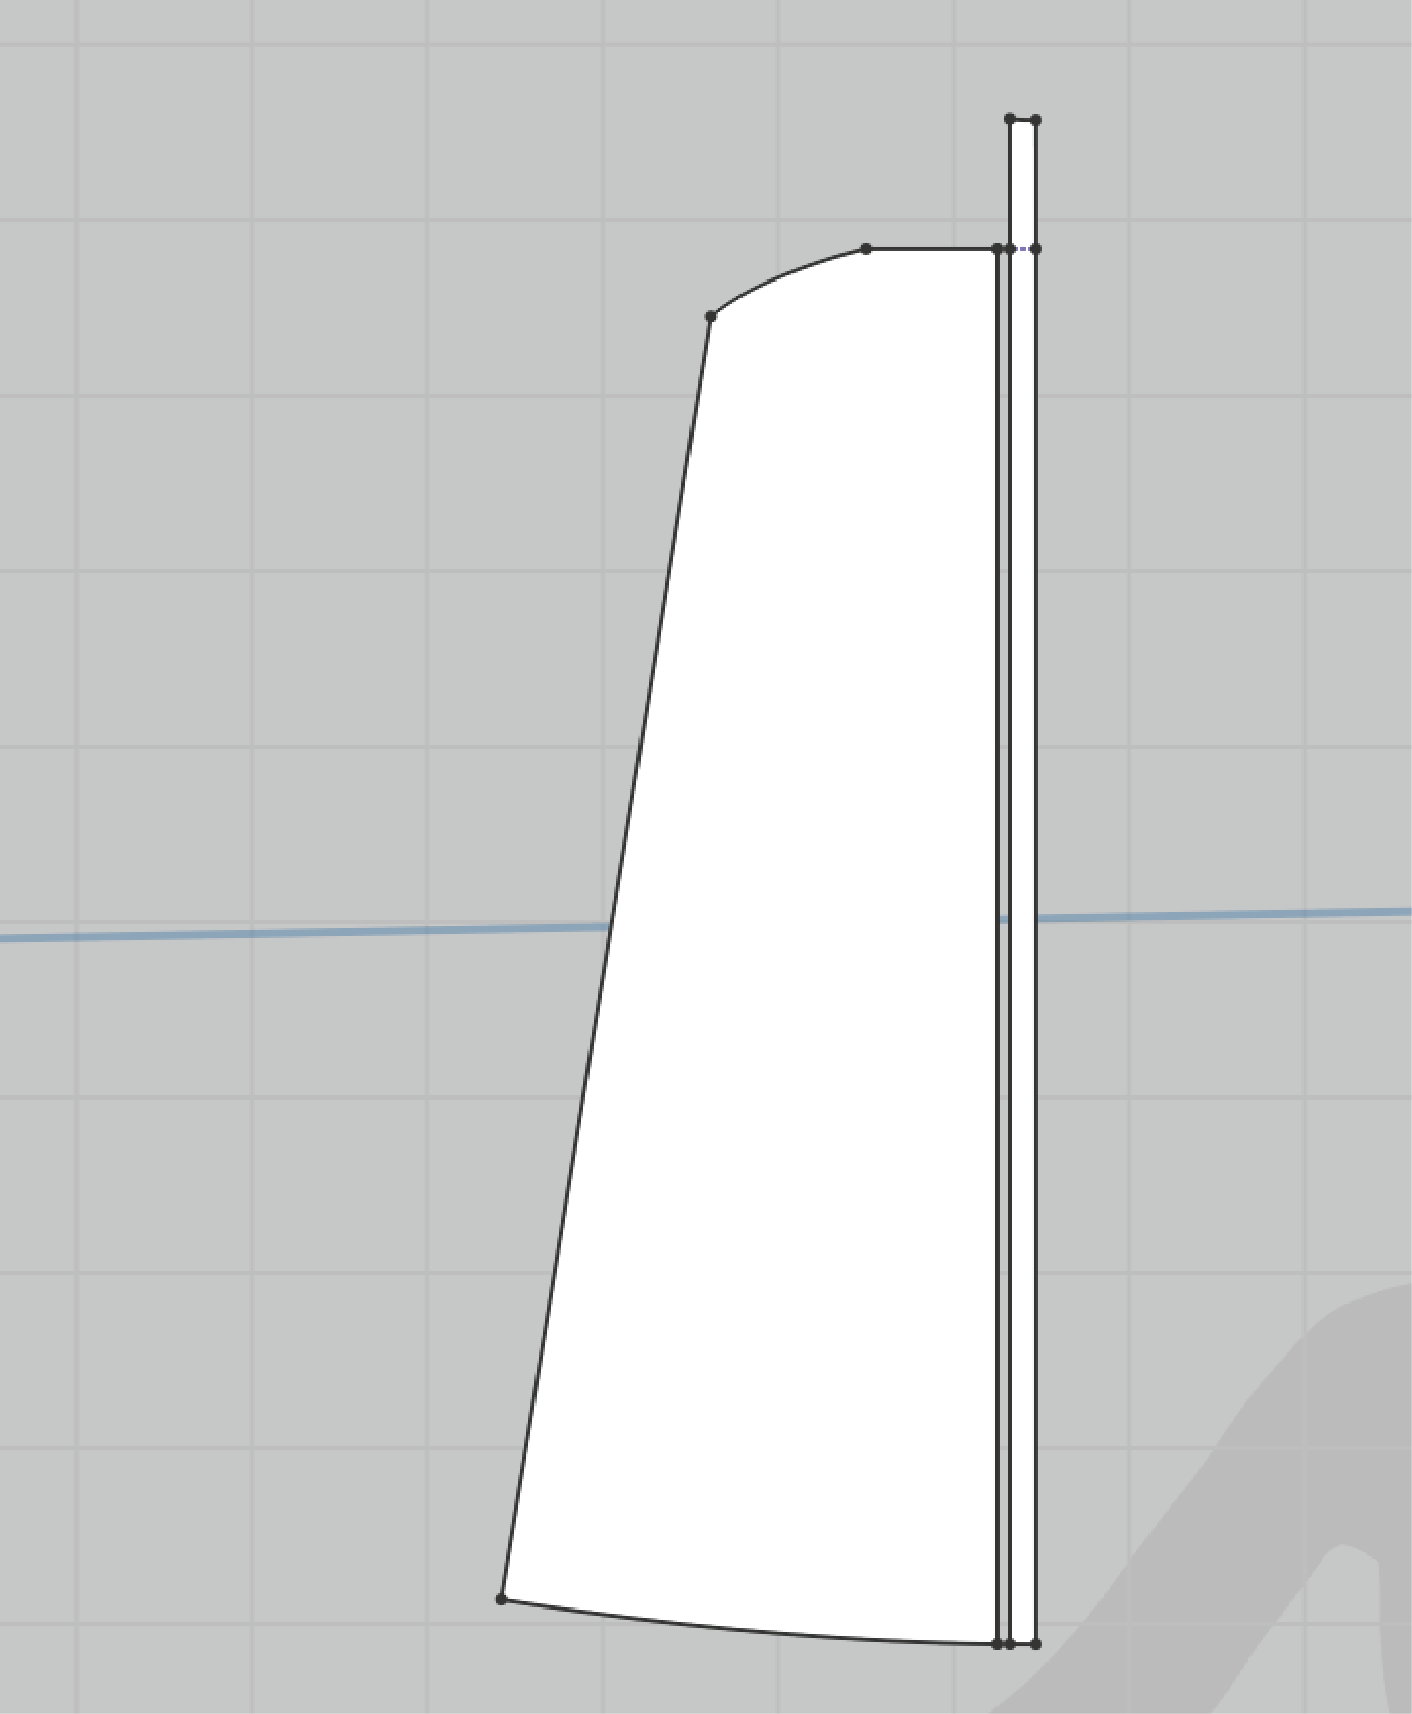
Step 5
Join the two pieces of the placket together to remove the seam line.
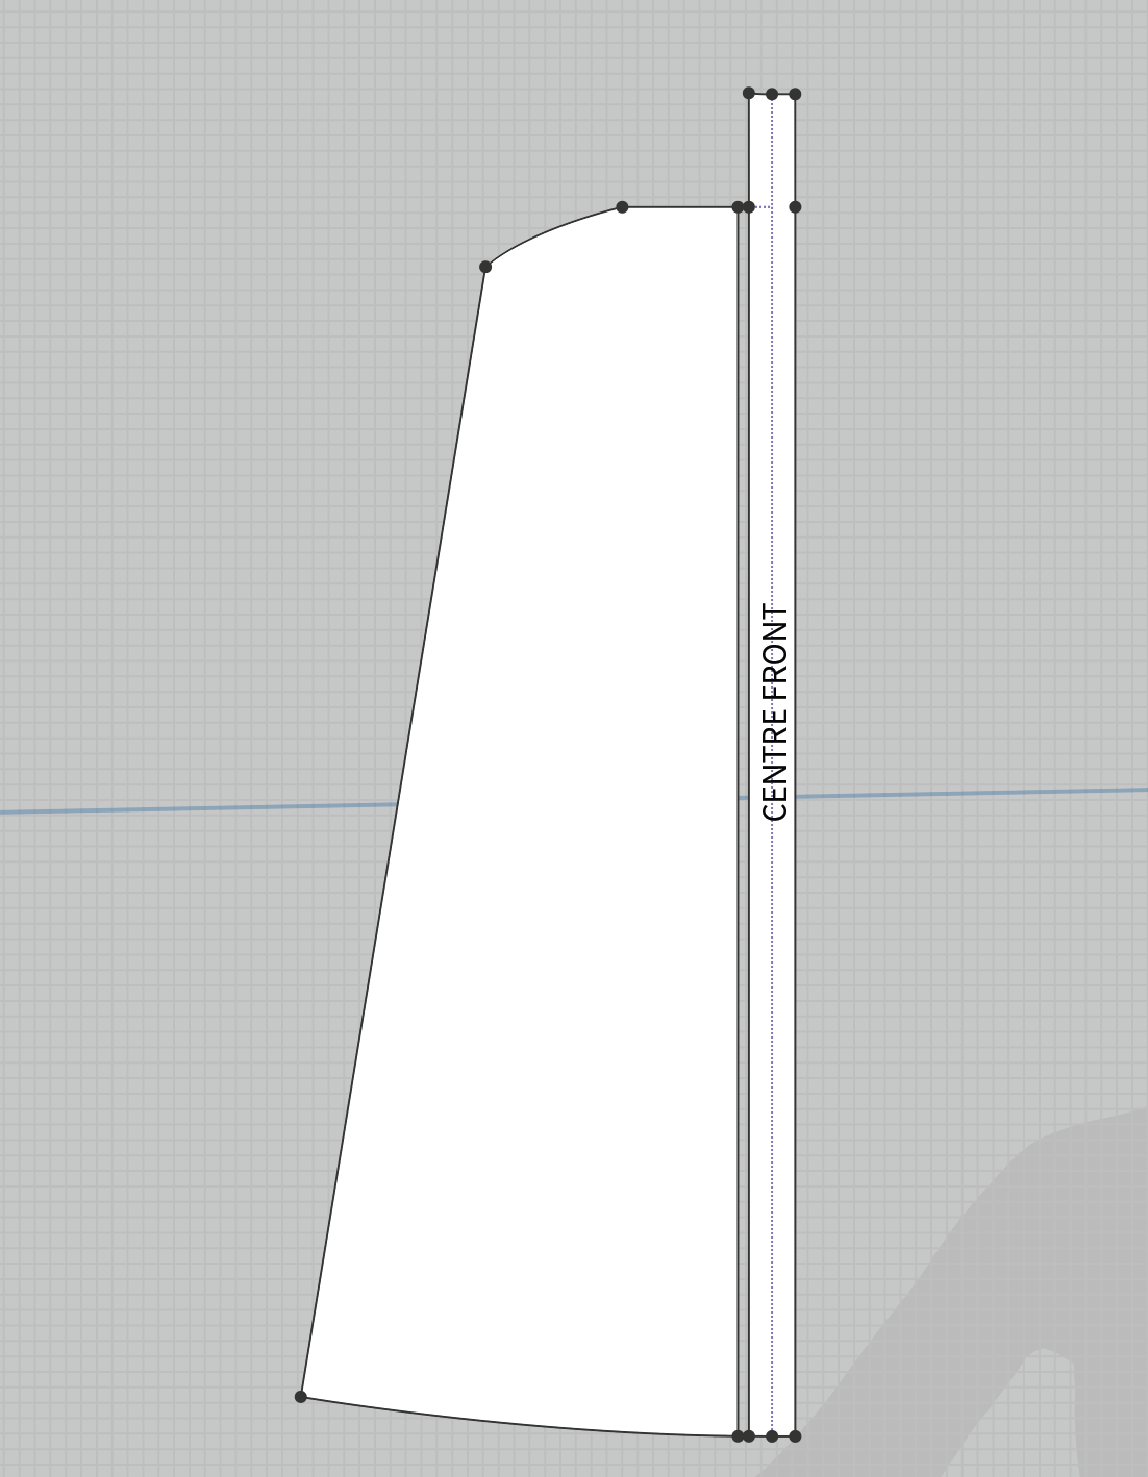
Step 6
Double the width of the placket (before this, you just have half a placket). This is the part you will see when the garment is complete and the buttons and buttonholes will be positioned along the CENTRE FRONT.
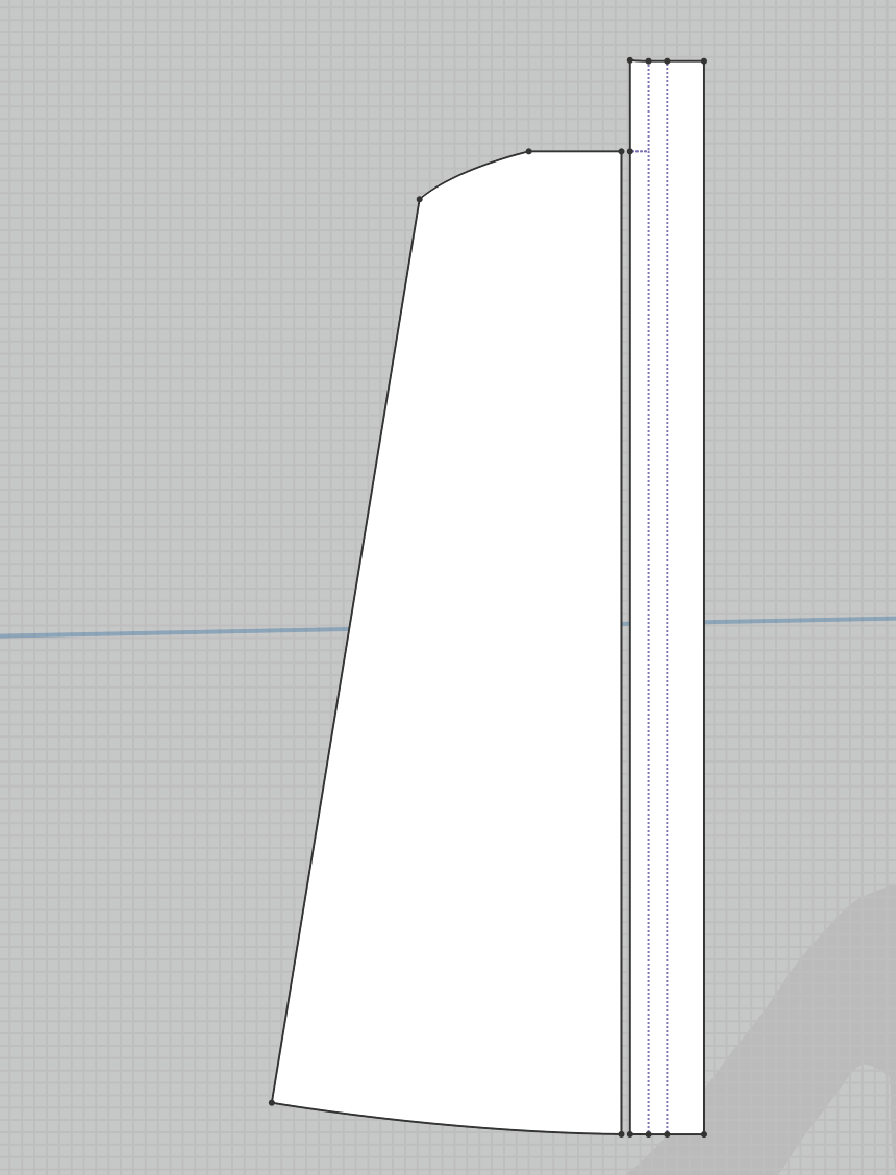
Step 7
Double the width of the placket again. This creates a “backing” to the placket so that when the placket is folded there will be two layers of fabric which gives the placket a clean finish and the extra stability it needs to support the buttons and buttonholes.
Step 8
Add 1cm seam allowance to the two long edges of the placket. The top and bottom edge already have seam allowance on them from the original pattern. Add 1cm seam allowance to the FRONT PANEL and SLEEVE where the pieces will be sewn to the placket.
Label the pattern: PLACKET, CUT 1 PAIR, BLOCK FUSE.
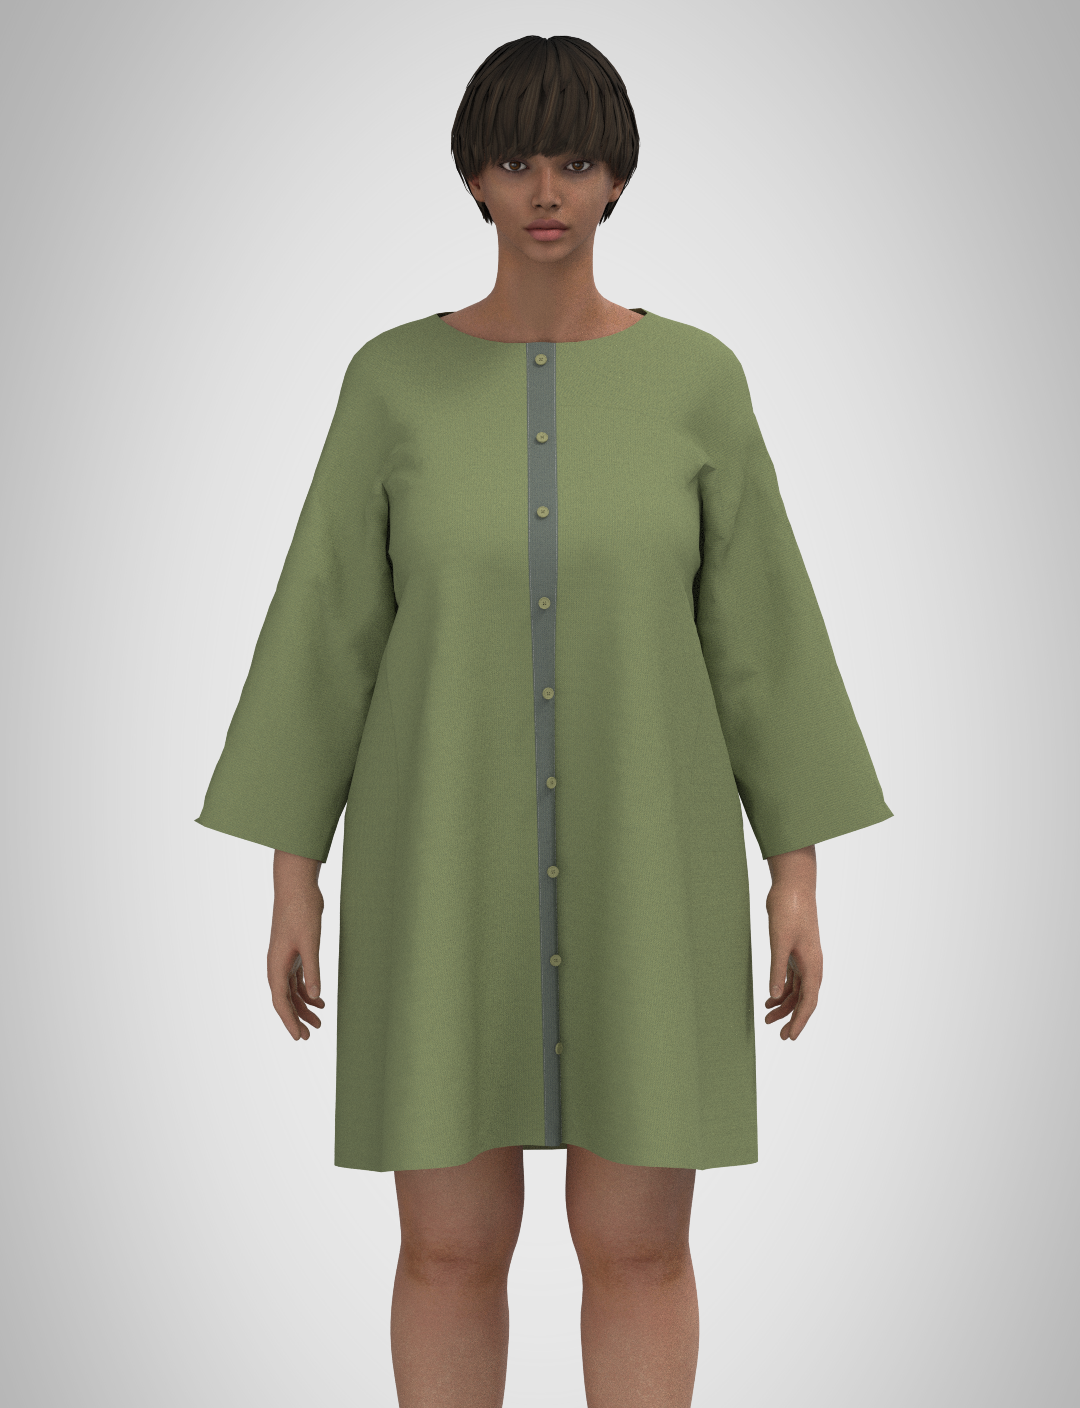
And there you have it — a Rushcutter with a centre front button placket!
Now it’s your turn
I hope that as well as showing you how to make this particular alteration, this tutorial gets you thinking about what else might be possible. Could you use the same idea on another pattern? Could you change the width of the placket, play with the buttons you use or take what you’ve learned here and apply it in a completely different way?
You don’t need to know exactly how something will turn out before you begin. Patternmaking is a process of trying things, checking what happens and making adjustments along the way. The more you give yourself permission to experiment, the more you’ll start to understand how patterns work — and the more confident you’ll become in making them work for you.
If you’d like more guidance, you can find a more detailed explanation of this alteration in our Cartwright Hack Kit. It gets into more of the nitty gritty if that’s what you need. I have packaged the relevant pages for you to access as a free download by clicking the button below.
Otherwise, I’d love for you to give it a go and see where it takes you. And if this tutorial sparks an idea for the Rushcutter, or another pattern entirely,I’d love to hear about it.
Happy sewing,
Emily