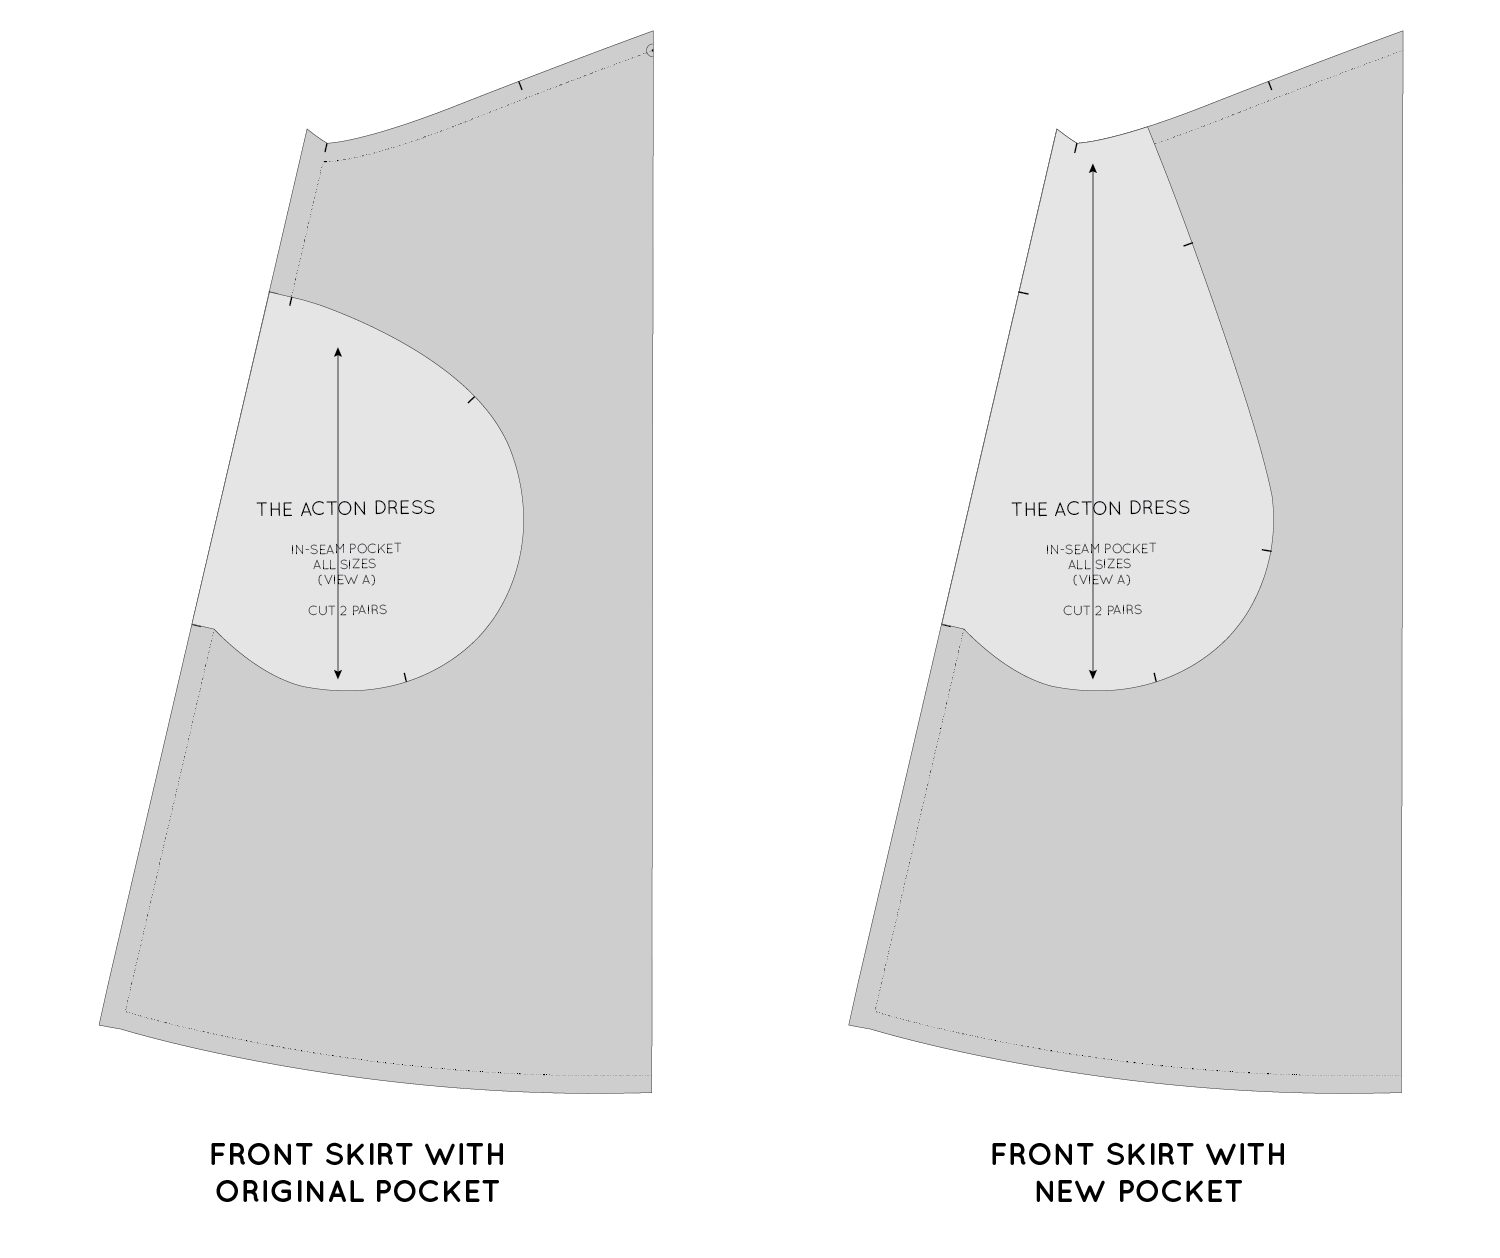
I made a new Acton dress lately (photos to come eventually... when I finally psyche myself up to get in front of the camera) and while I have been wearing it, there has been a little thing that I think I will change next time I make an Acton. I'd love to extend the pocket pieces so that they can be stitched to the dress waist seam and then always stay in the front of the dress (sometimes they like to flip towards the back skirt). This was something I thought about when developing the pattern, but because there isn't one set place where people like their pockets (as we are all different height) I worried it would make it more challenging for people, if they felt an adjustment needed to be made.
So today, I thought I'd show you how to extend the pocket pieces. This tutorial is for you if you have found your optimum pocket position, and now just want to prevent the pockets from moving around when you're wearing your Acton. This tutorial could also be adapted to other patterns too. You could do this for any skirt or dress pattern that has a waistband or waist seam.
Getting started
To start, take the SKIRT FRONT pattern piece (view A) as well as the original in-seam pocket piece. No alteration will be made to these pattern pieces, so using the originals is fine.
Place the pocket piece on top of the skirt piece, in the position it will be sewn. Use the notches as a guide. If the original pocket placement is too high or too low for you, move to a more comfortable position.
Creating the new pattern piece
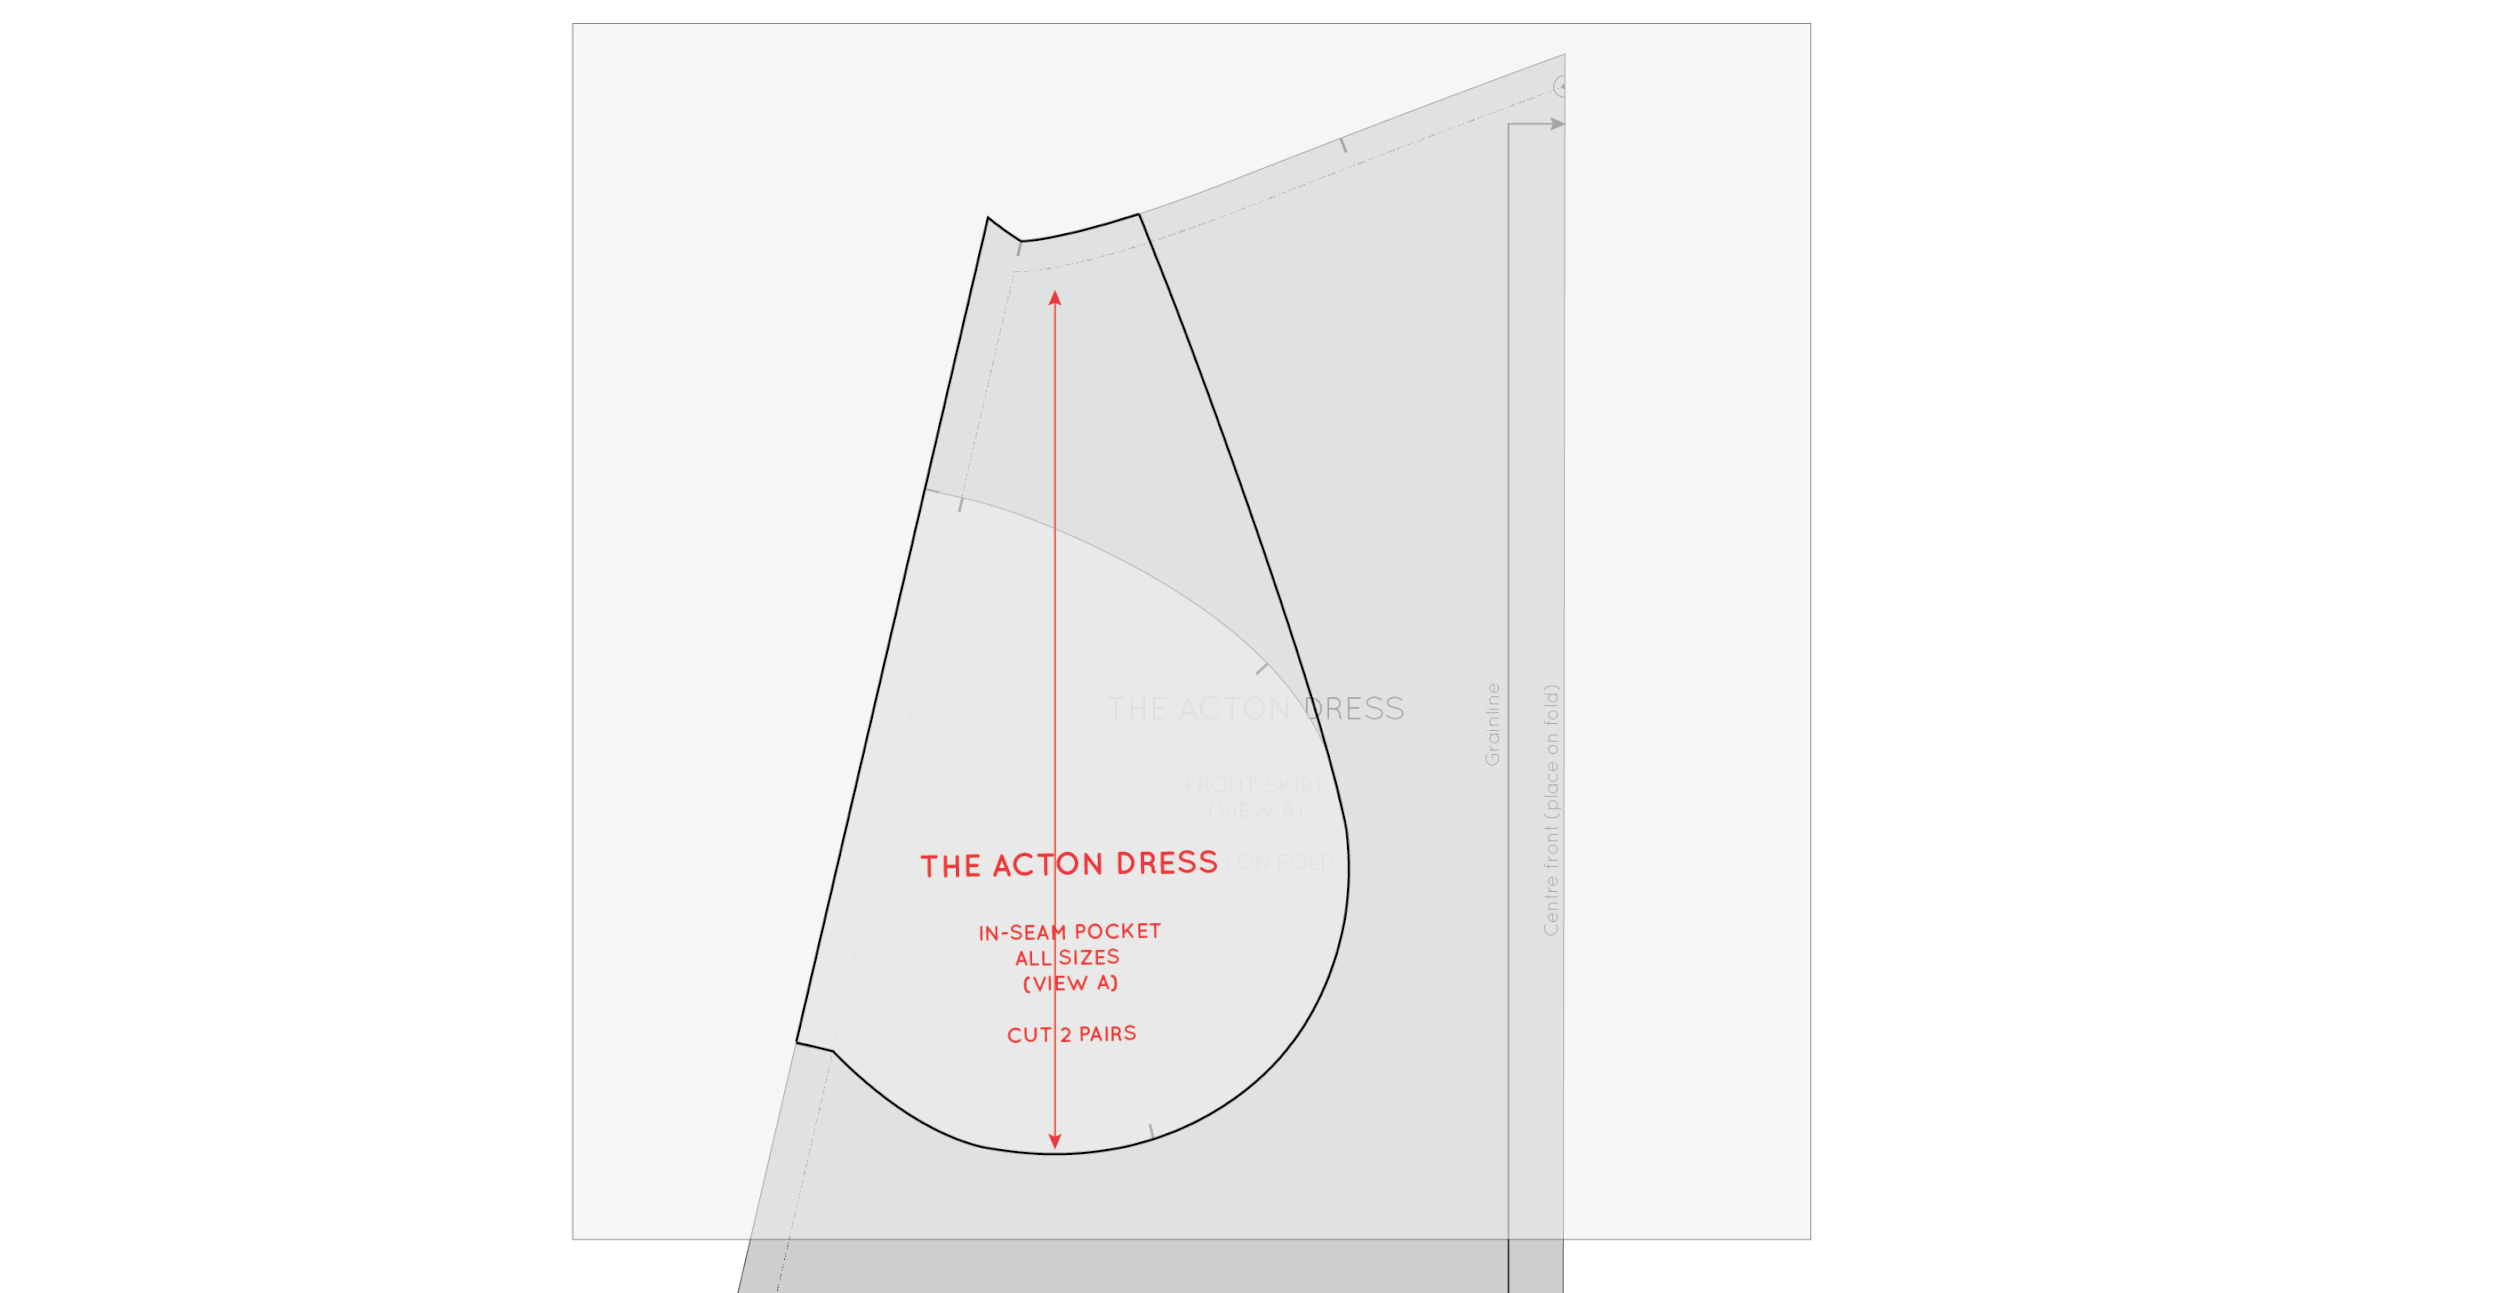
Take a small piece of pattern paper and place it over your pocket (make sure it extends up to the top of the pattern piece, as this is the area we will be extending on the pocket). It really helps if your paper is transparent enough to see the pieces underneath. If it's not, consider using a light box or taping your pieces to a window. If you are worried about your pocket piece moving, you can tape it in place on the skirt.
Trace the bottom edge of the pocket bag. This will remain the same as the original for the new pattern piece. Stop tracing at (approximately) the point where the curve of the pocket edge turns back towards the side seam.
Now, draw a straight line up to the waistline from the point on the curve where you stopped tracing. I would suggest that the point on the waistline should be about 6-7cm (2 - 3") from the side seam (measuring from the stitch line, not the cut edge), but this is up to you.
Trace along the side seam of the skirt, between the bottom of the pocket bag and the waist - transferring this line onto your new pocket piece. Then trace along the waist seam until you reach the edge of the pocket.
Transfer pattern information
Transfer pattern information onto the new pattern piece. This includes labelling the pattern piece, cutting instructions (cut 2 pairs) and the grainline (which should be parallel to the centre front). For more details on pattern markings, check out this tutorial.
Transfer notches
Add notches to your new pattern piece. Start by transferring the relevant notches from the original pattern pieces. This includes the side seam notch and one of the balance points on the edge of the pocket. For more information about notches (and why they really help you when assembling garments), check out this tutorial.
A few more notches will be needed, apart from the original ones. Place one notch on the side seam of the pocket, where the original pocket started (this notch will match the notch on the side seam of the skirt). Add two more notches on the curve of the pocket. These notches will act as balance points so that you can match the two pocket pieces together correctly when you are up to that point.
And there you have it. A new pocket piece!
Sewing your pocket
1. After you have sewn your front and back skirt pieces together (along with the pocket) - in line with the original instructions (sew-along post here), sew a line of stitching down the side of the pockets on each side to prevent the pocket being open from the waist seam down.
2. When assembling your Acton with the new pocket piece, be sure to stay stitch the top edge of the pocket onto the front waistline before you join the bodice to the skirt. This will keep the pocket in place as well as help you get a really nice finish (as it means everything will be tucked nicely into the bodice lining).


