Hello there, I hope you are having a lovely lead up to the Christmas period, and life isn't too stressful getting organised for the silly season (my techniques is to totally ignore it, and seems to be doing the trick!).
Image posted with permission from Yoshimi -http://yoshimitheflyingsquirrel.blogspot.com.au/2011/03/mermaid.html ]
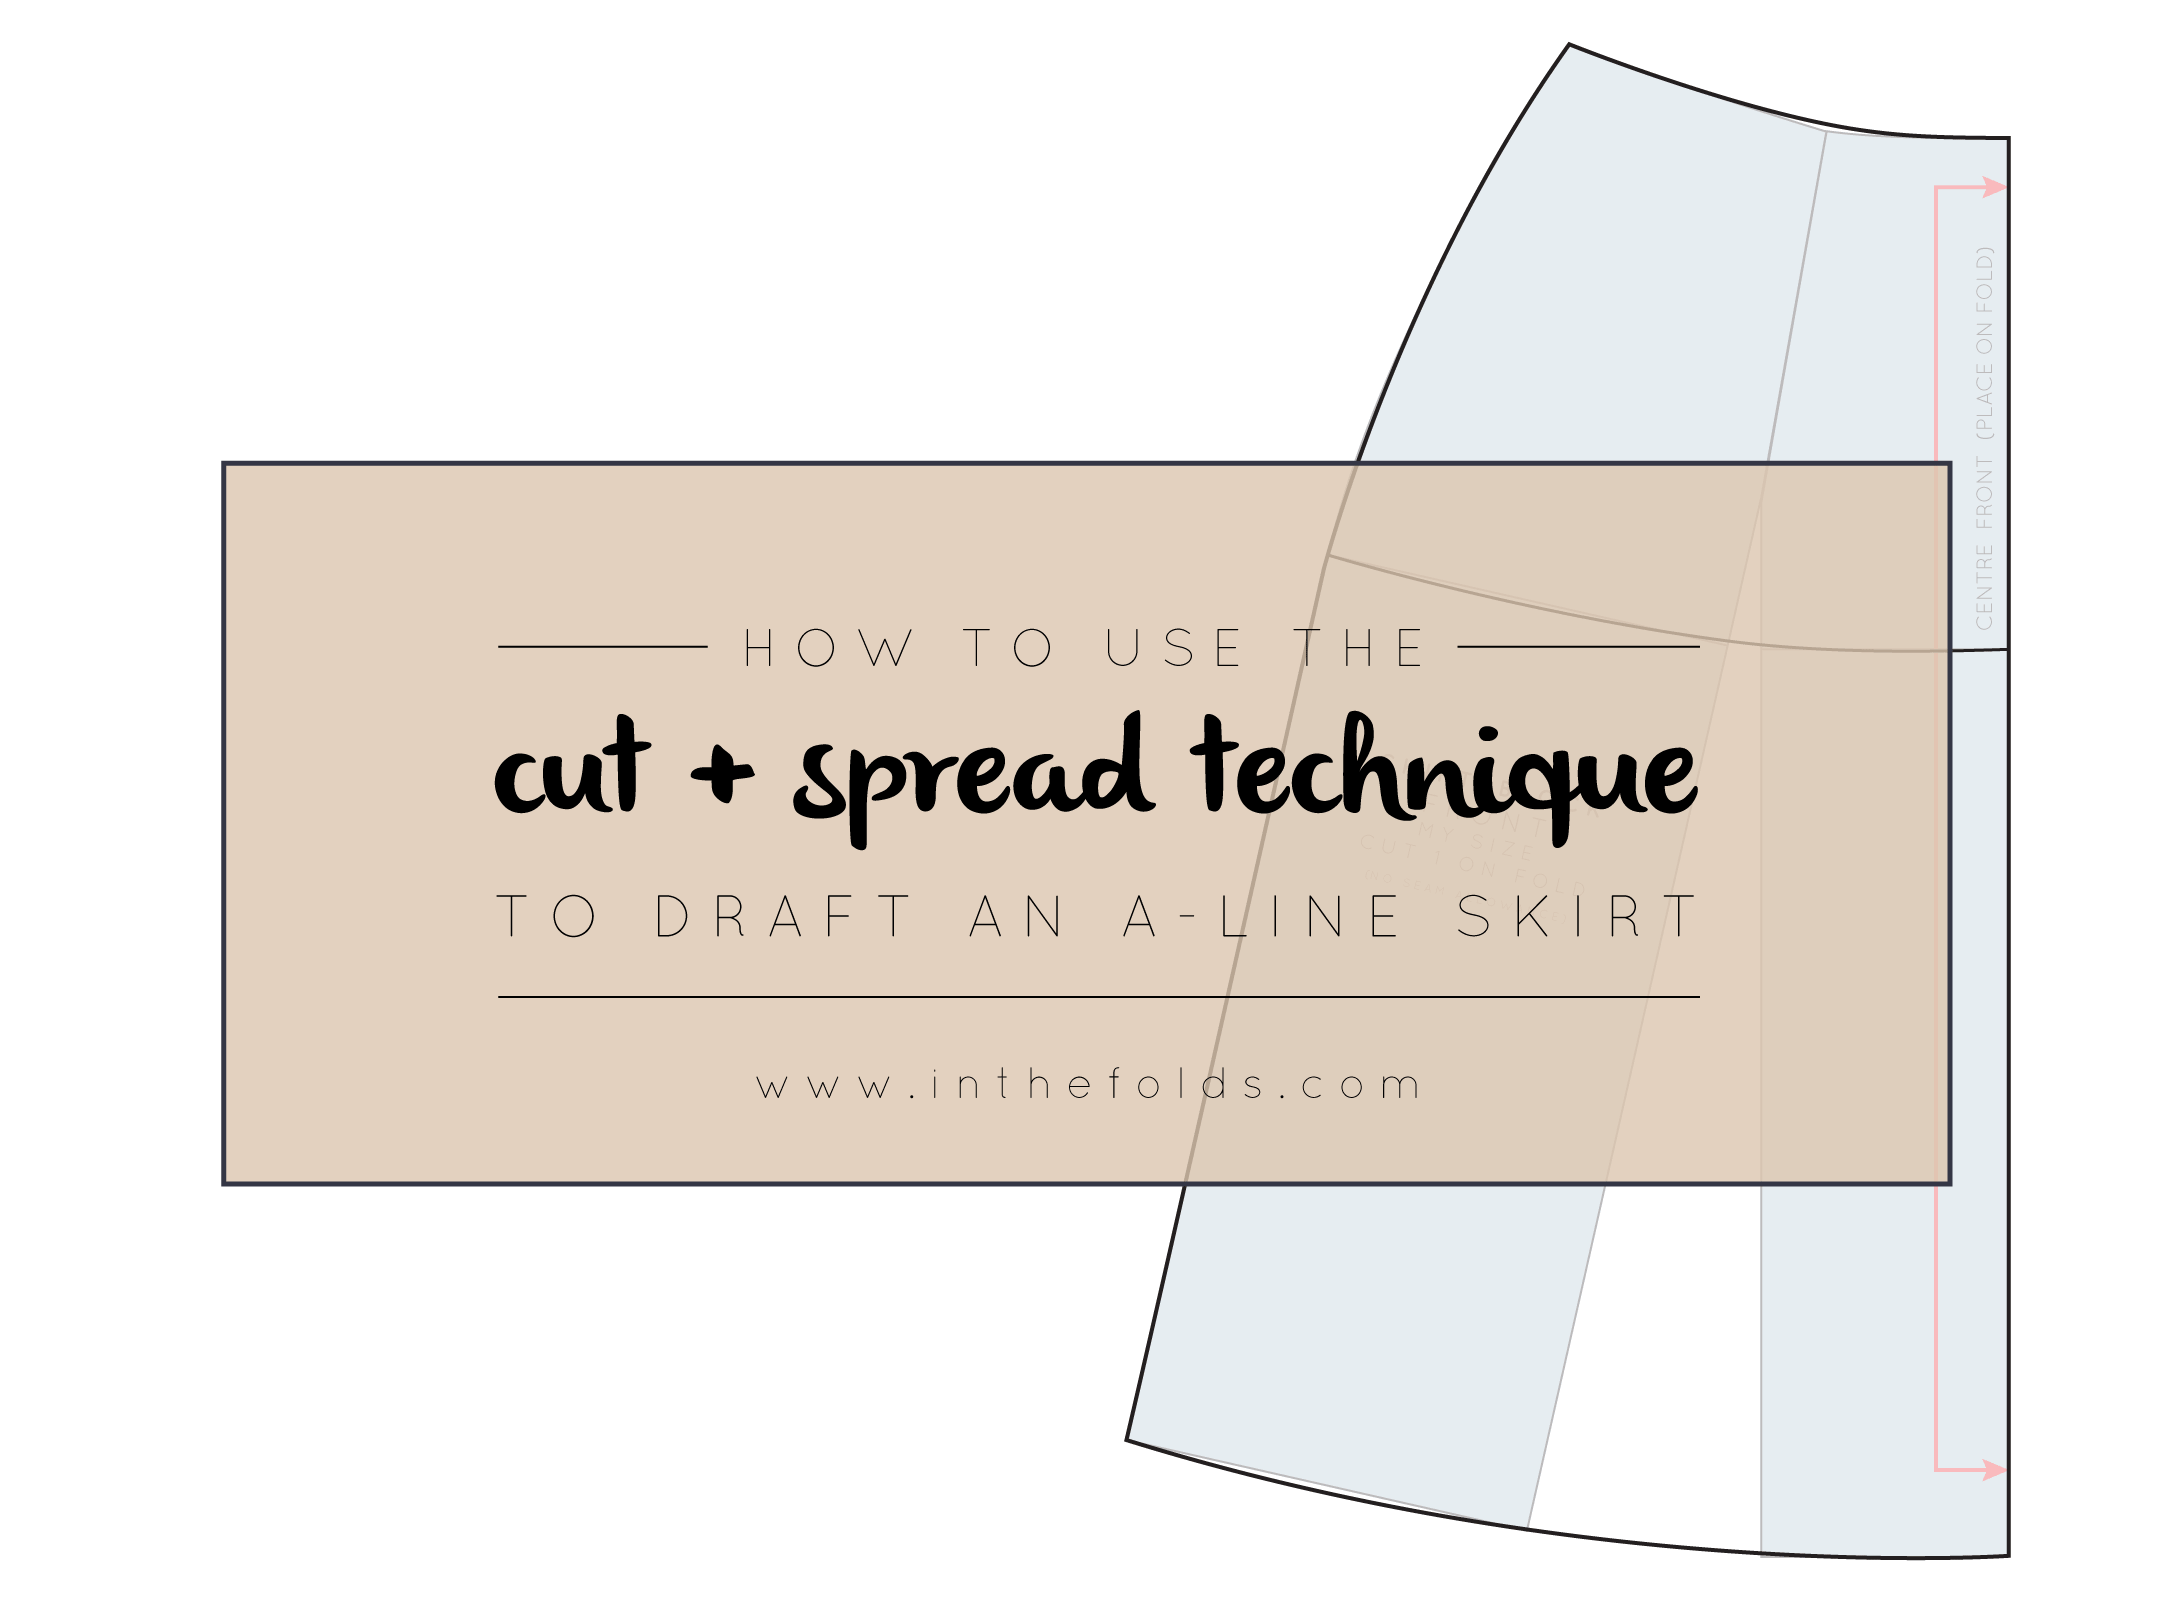
Yesterday, I showed you how to draft a fit and flare skirt. Before going ahead and cutting out your skirt pattern though, there is one thing you must do... Check your patterns! For some reason this lesson took a little while to sink into my brain (although my pattern making teachers at university said it constantly) and I would just want to jump into the cutting and sewing. I paid for this mistake a number of times, so now I check my patterns religiously.
Why check patterns?
So here I am, now sounding like my nagging pattern making teachers! It is really important that you ALWAYS check that your patterns fit together correctly before going on ahead and cutting your fabric. It may seem a bit tedious checking each seam, but taking a few minutes to check your patterns at this stage can save you cutting out incorrect patterns and wasting precious time and fabric later on . It is really easy to do, and will only add a couple of minutes to your pattern making process (and could potentially save you loads of time in the long run).
When it comes to curves, the process for checking patterns is slightly different to when you check a straight seam.
To check straight seams, you simply have to place one stitch line on top of the other, and ensure they are the same length, and the transition between pieces is smooth (this is a very simple explanation, and I promise to give a more detailed explanation in the future).
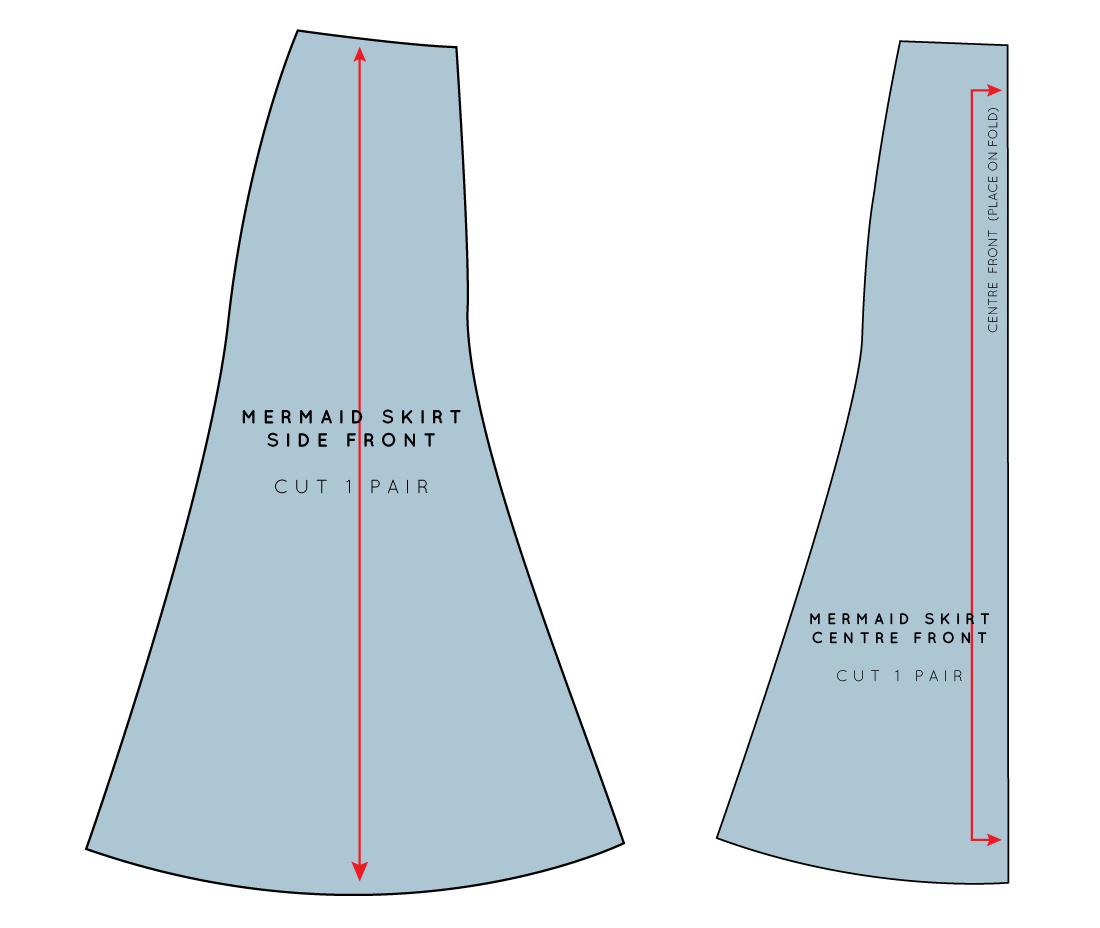
Today though, I want to talk about curved seams, as the fit and flare skirt that we drafted yesterday is made up of panels with curved seams.
Identify the seams you are checking
Take the patterns you are checking and focus on the curved seams, and how they fit together.
Measure or match?
I know that some people like to measure their curves (with a flexible ruler or tape measure), but I prefer to match the two pieces together as if they are being sewn. This way you can get a really good idea of how they fit together, and if any adjustments need to be made to the shape of the seam.
Match the pattern pieces together
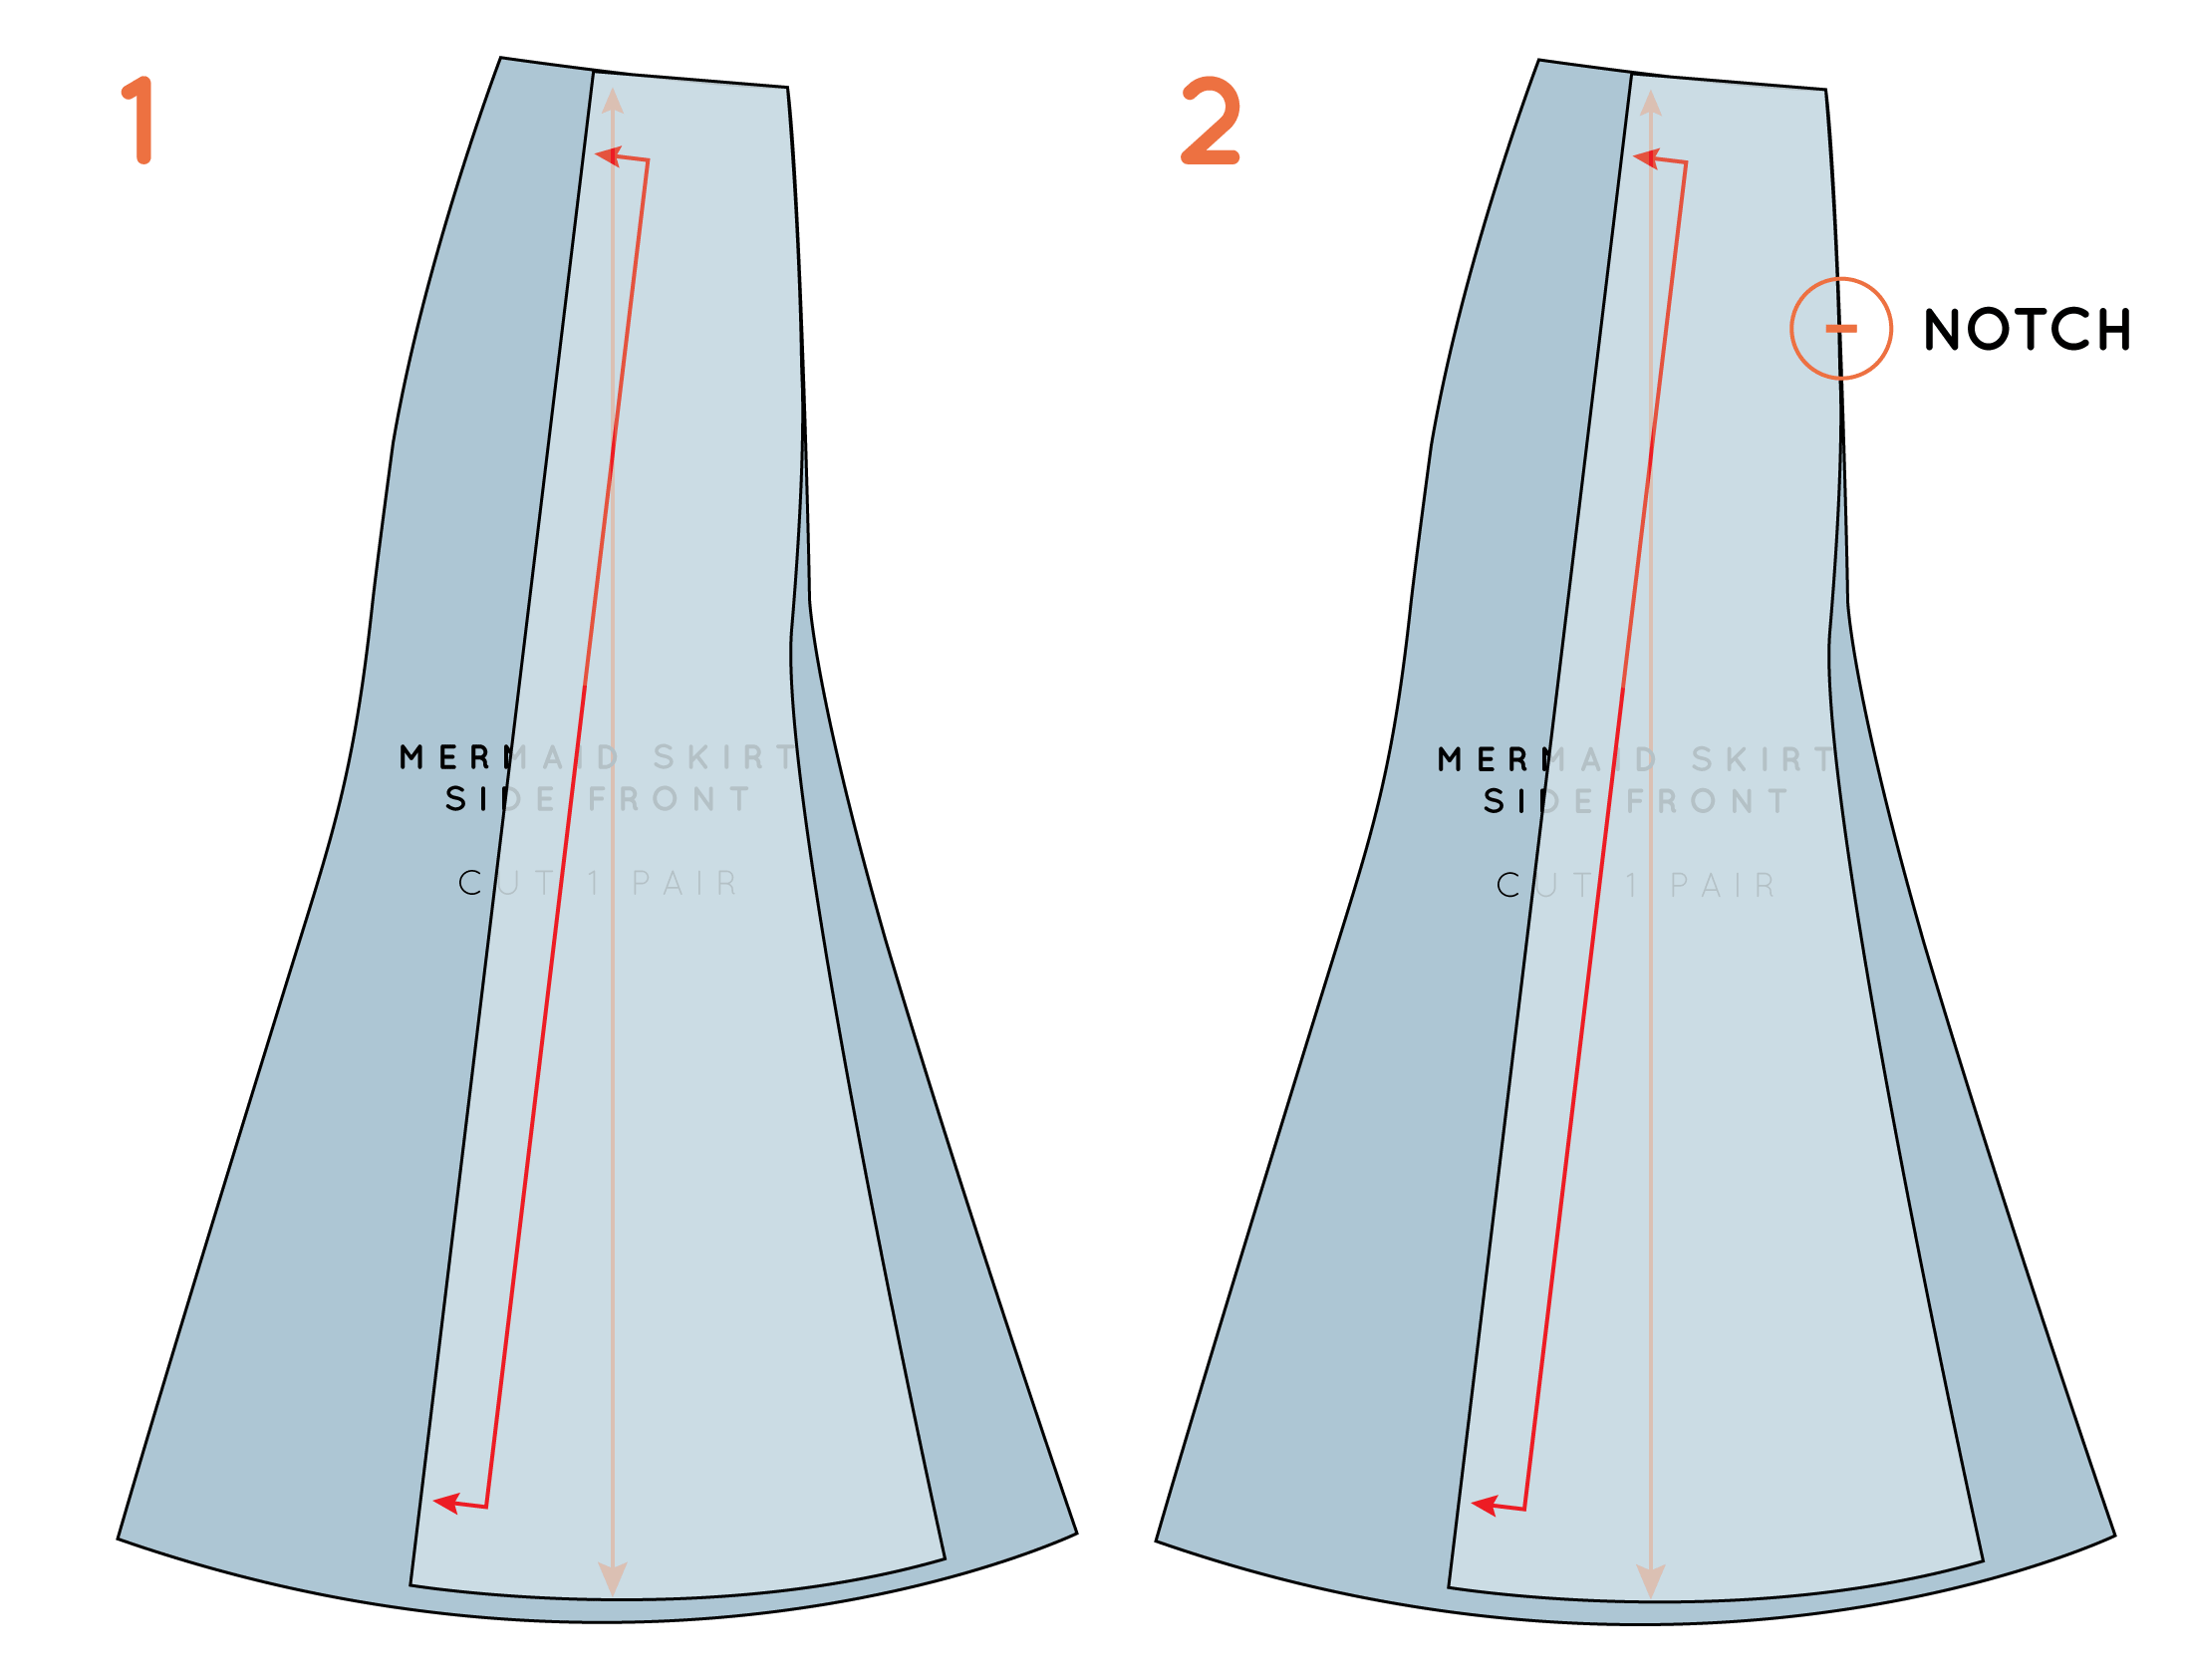
1. Match the seams together, as if you were sewing them (one on top of the other). You may need to flip one upside-down (which is the case in the example) to line them up correctly.
If you are checking patterns that do not have seam allowance you can simply match the edges. If your patterns have seam allowance, make sure you are matching the stitching lines and not the edge of the patterns (this is when transparent pattern paper is very handy).
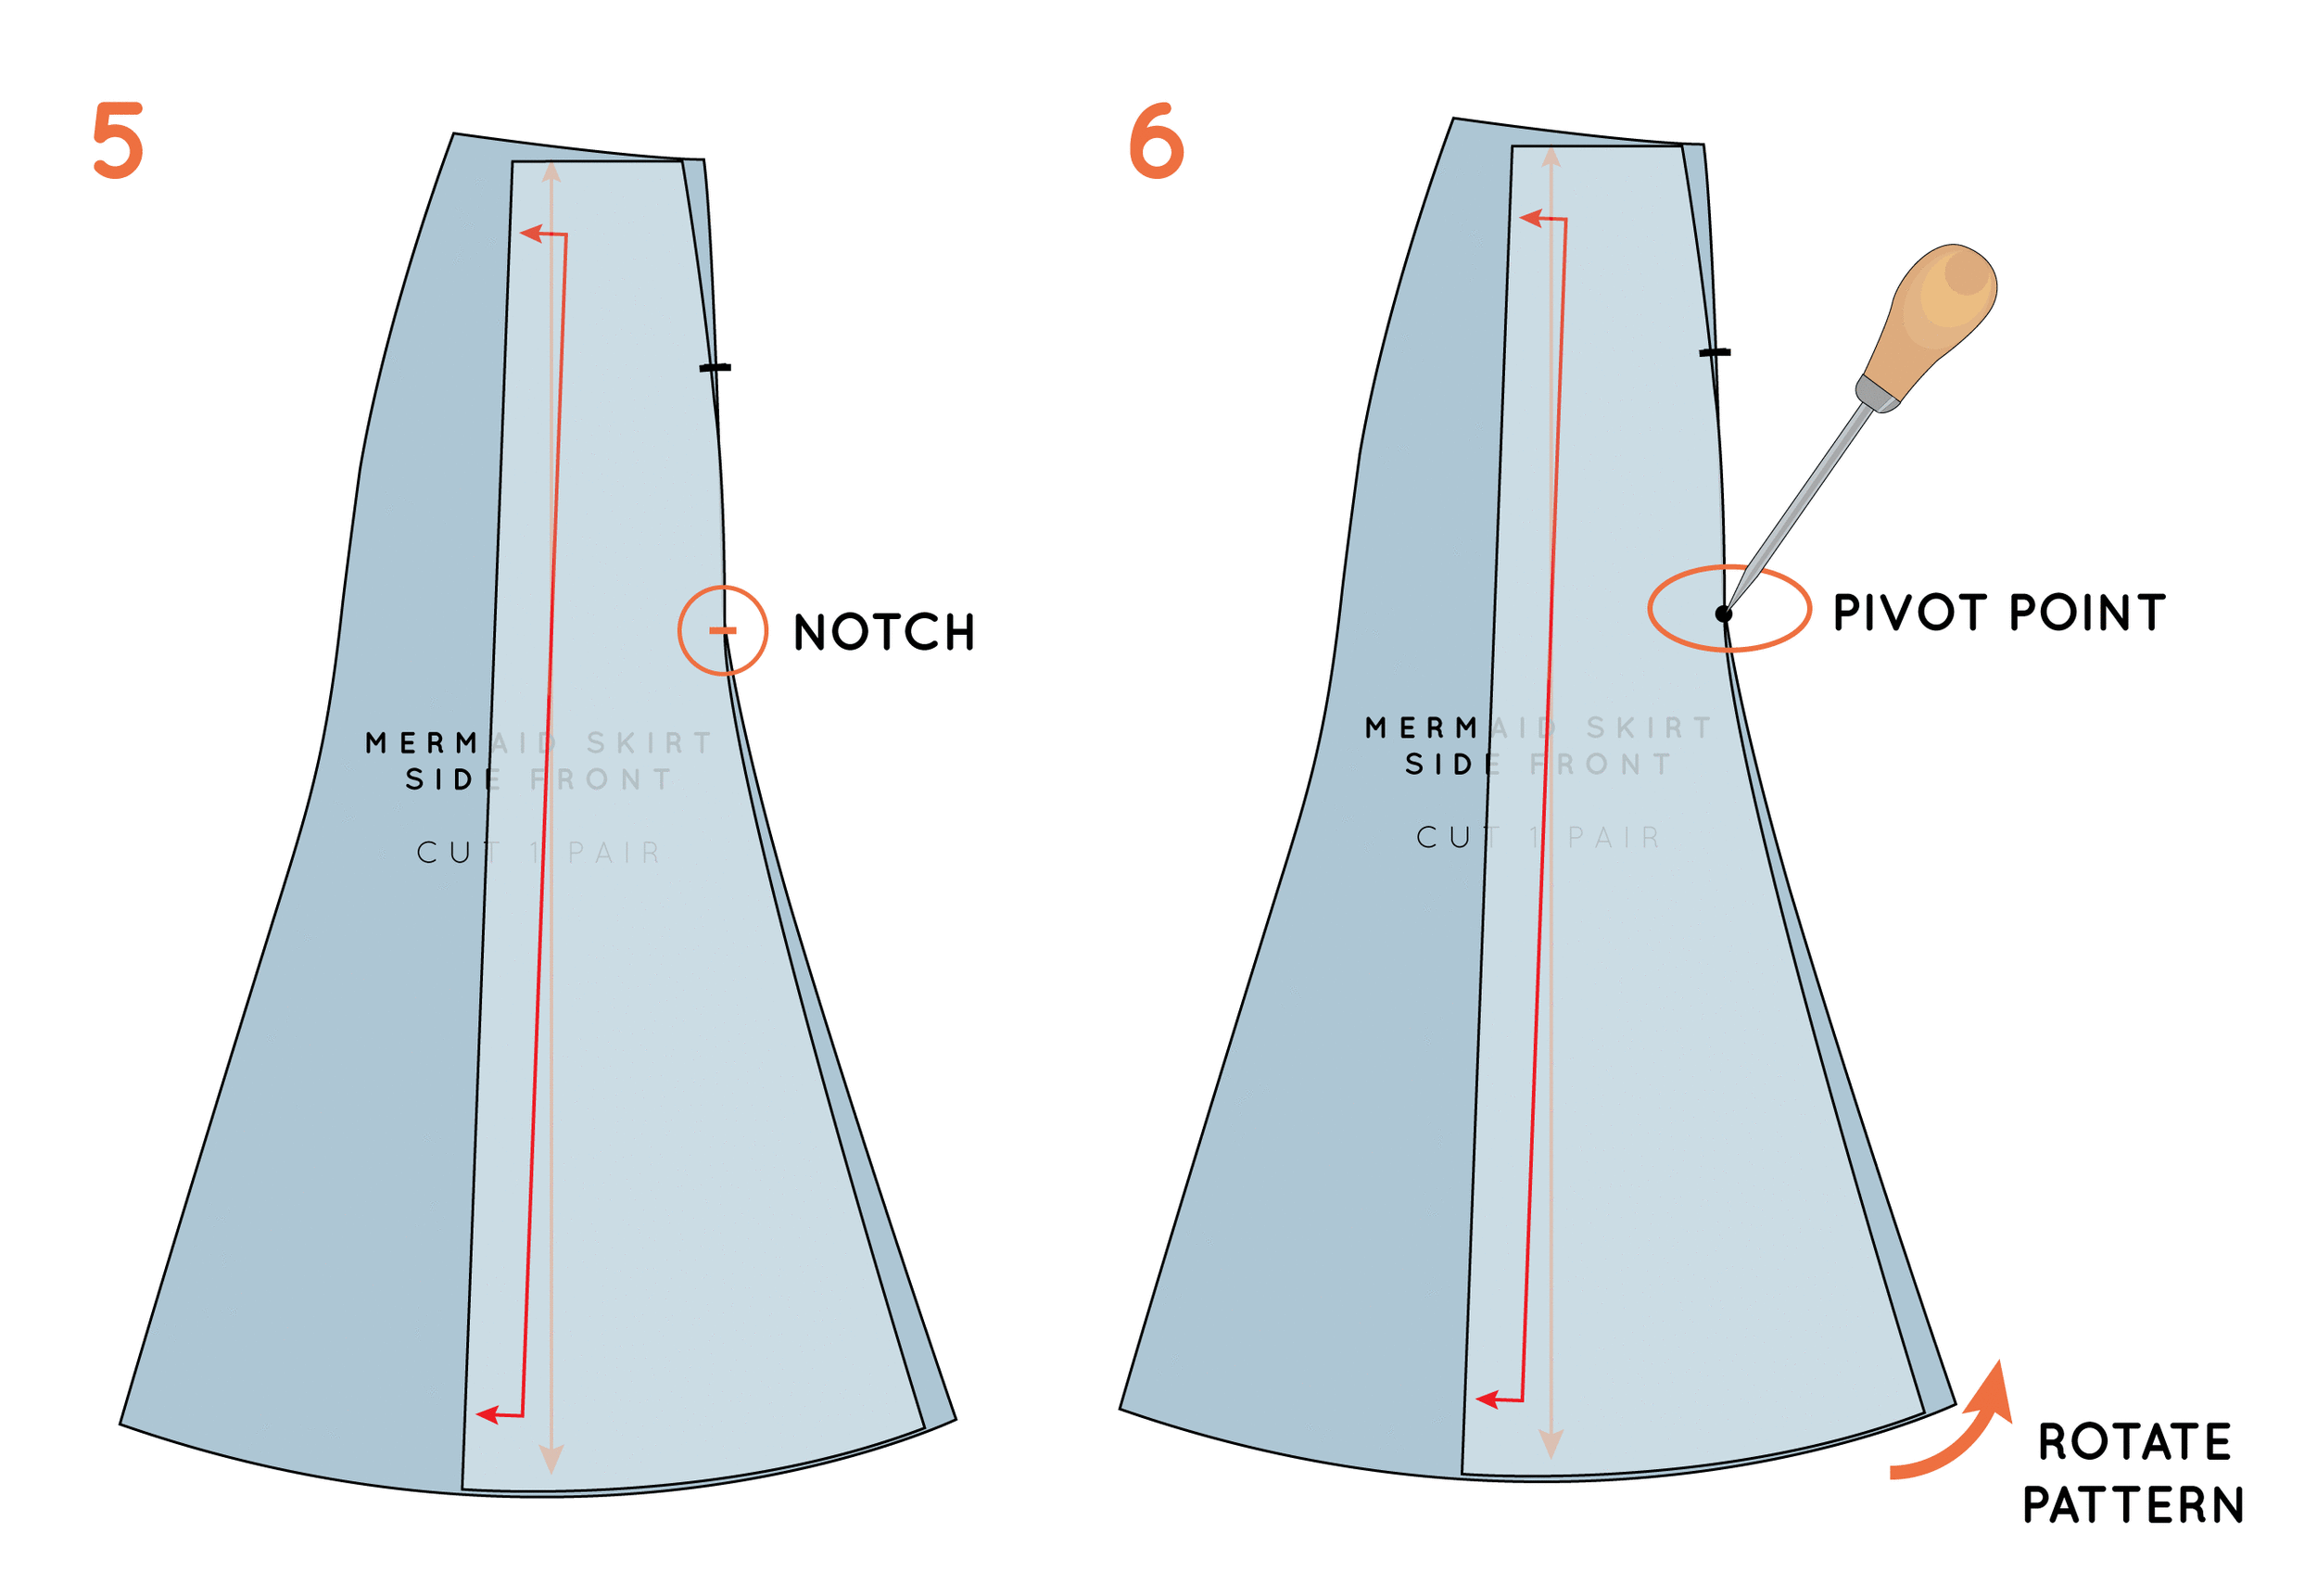
2. I like to notch my pattern at the same time that I check them. When the pieces are lined up correctly, mark a notch. Before moving on, transfer it onto the pattern underneath - a tracing wheel is a good way to do this. Curved seams can be difficult to sew - if you mark notches at regular intervals, you will make it easier for yourself later on.
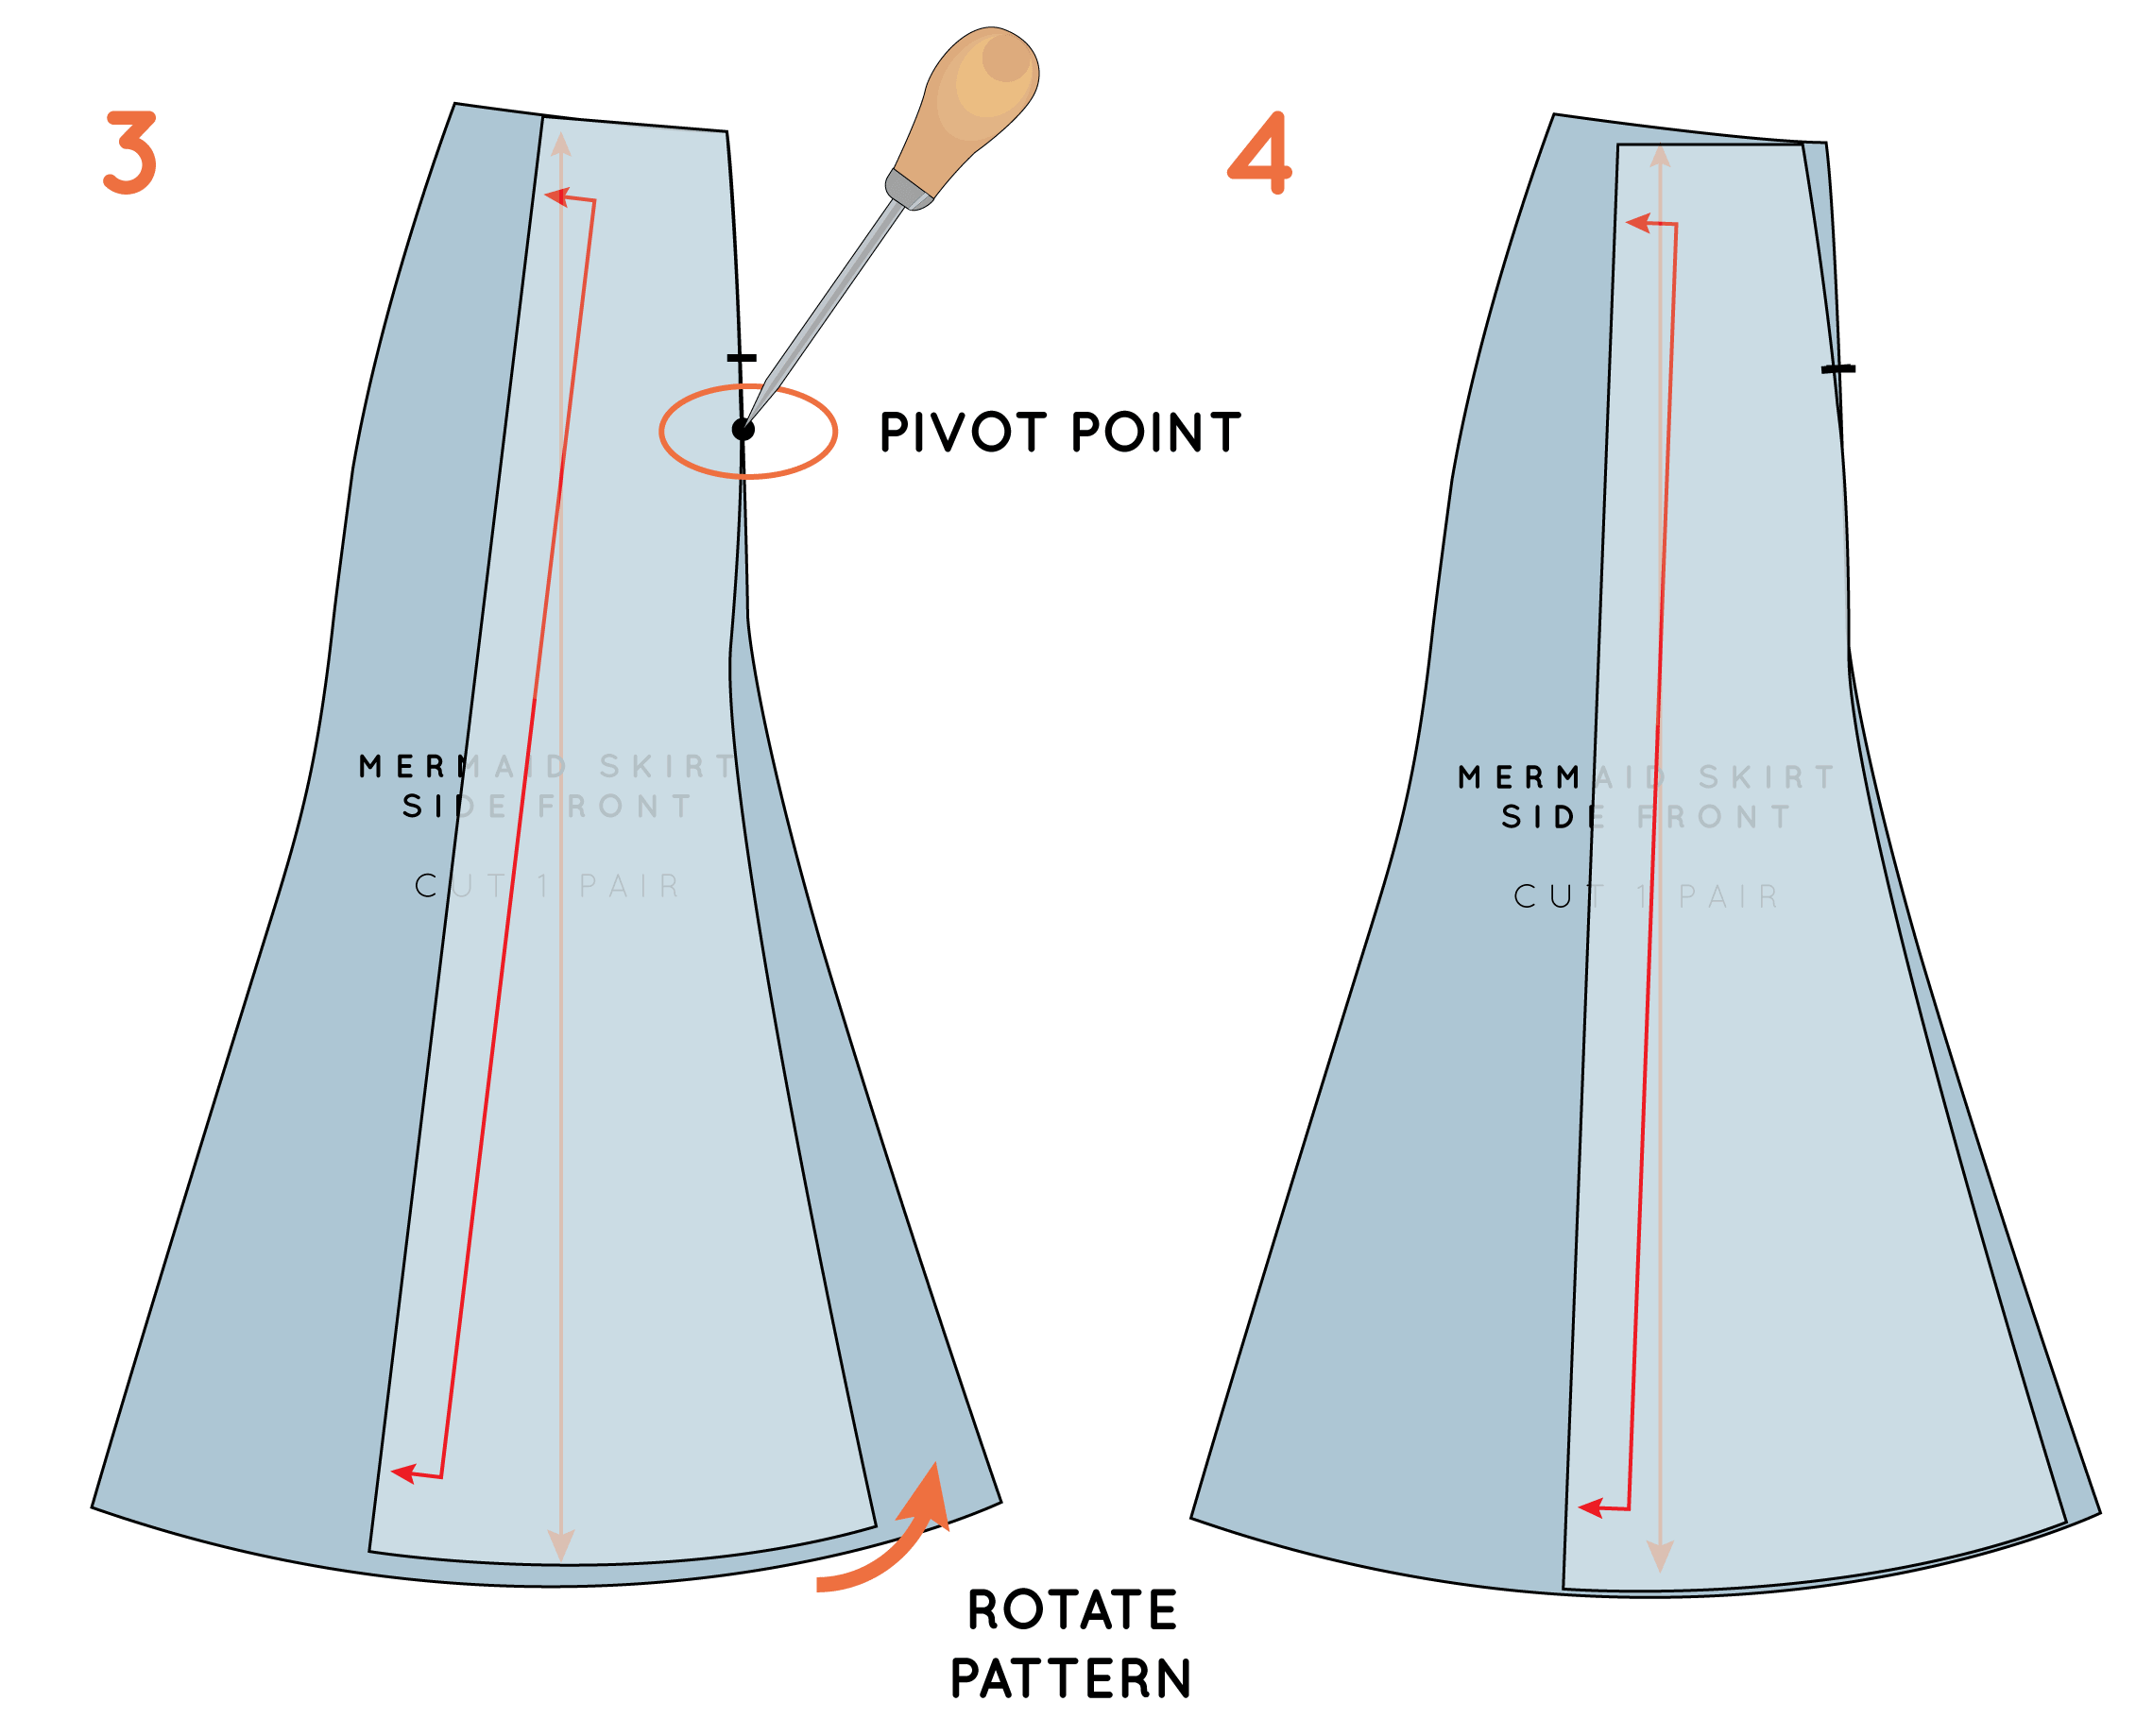
3. You will need to pivot the pattern, so that you can continue matching the seams. Take a stiletto/awl (or a sharp pencil or pin) and insert it at the point where the seams diverge. This will allow you to keep this point together, but also allow you the movement you need to match the remainder of the seam. When it is in place, you should be able to rotate the top pattern, without moving the pattern underneath.
4. As you rotate, the seams will line up again.
5. Once they are in line again, hold in place and mark another notch. Remember to transfer the notch onto the pattern underneath with a tracing wheel.
6. Move the point of the stiletto to the next pivot point (where the seam lines diverge again), and rotate the pattern until the seams align again.
7. Mark another notch. Once again, ensure the notch is transferred onto both pattern pieces.
8. Check that the seams are the same length.
If one of your seams is longer by a small amount (up to 1cm), simply trim off the excess. If the discrepancy is bigger, you will need to remove half the excess from the length of one pattern, and add the other half to the other pattern, so that they are the same length.
Check the hemline
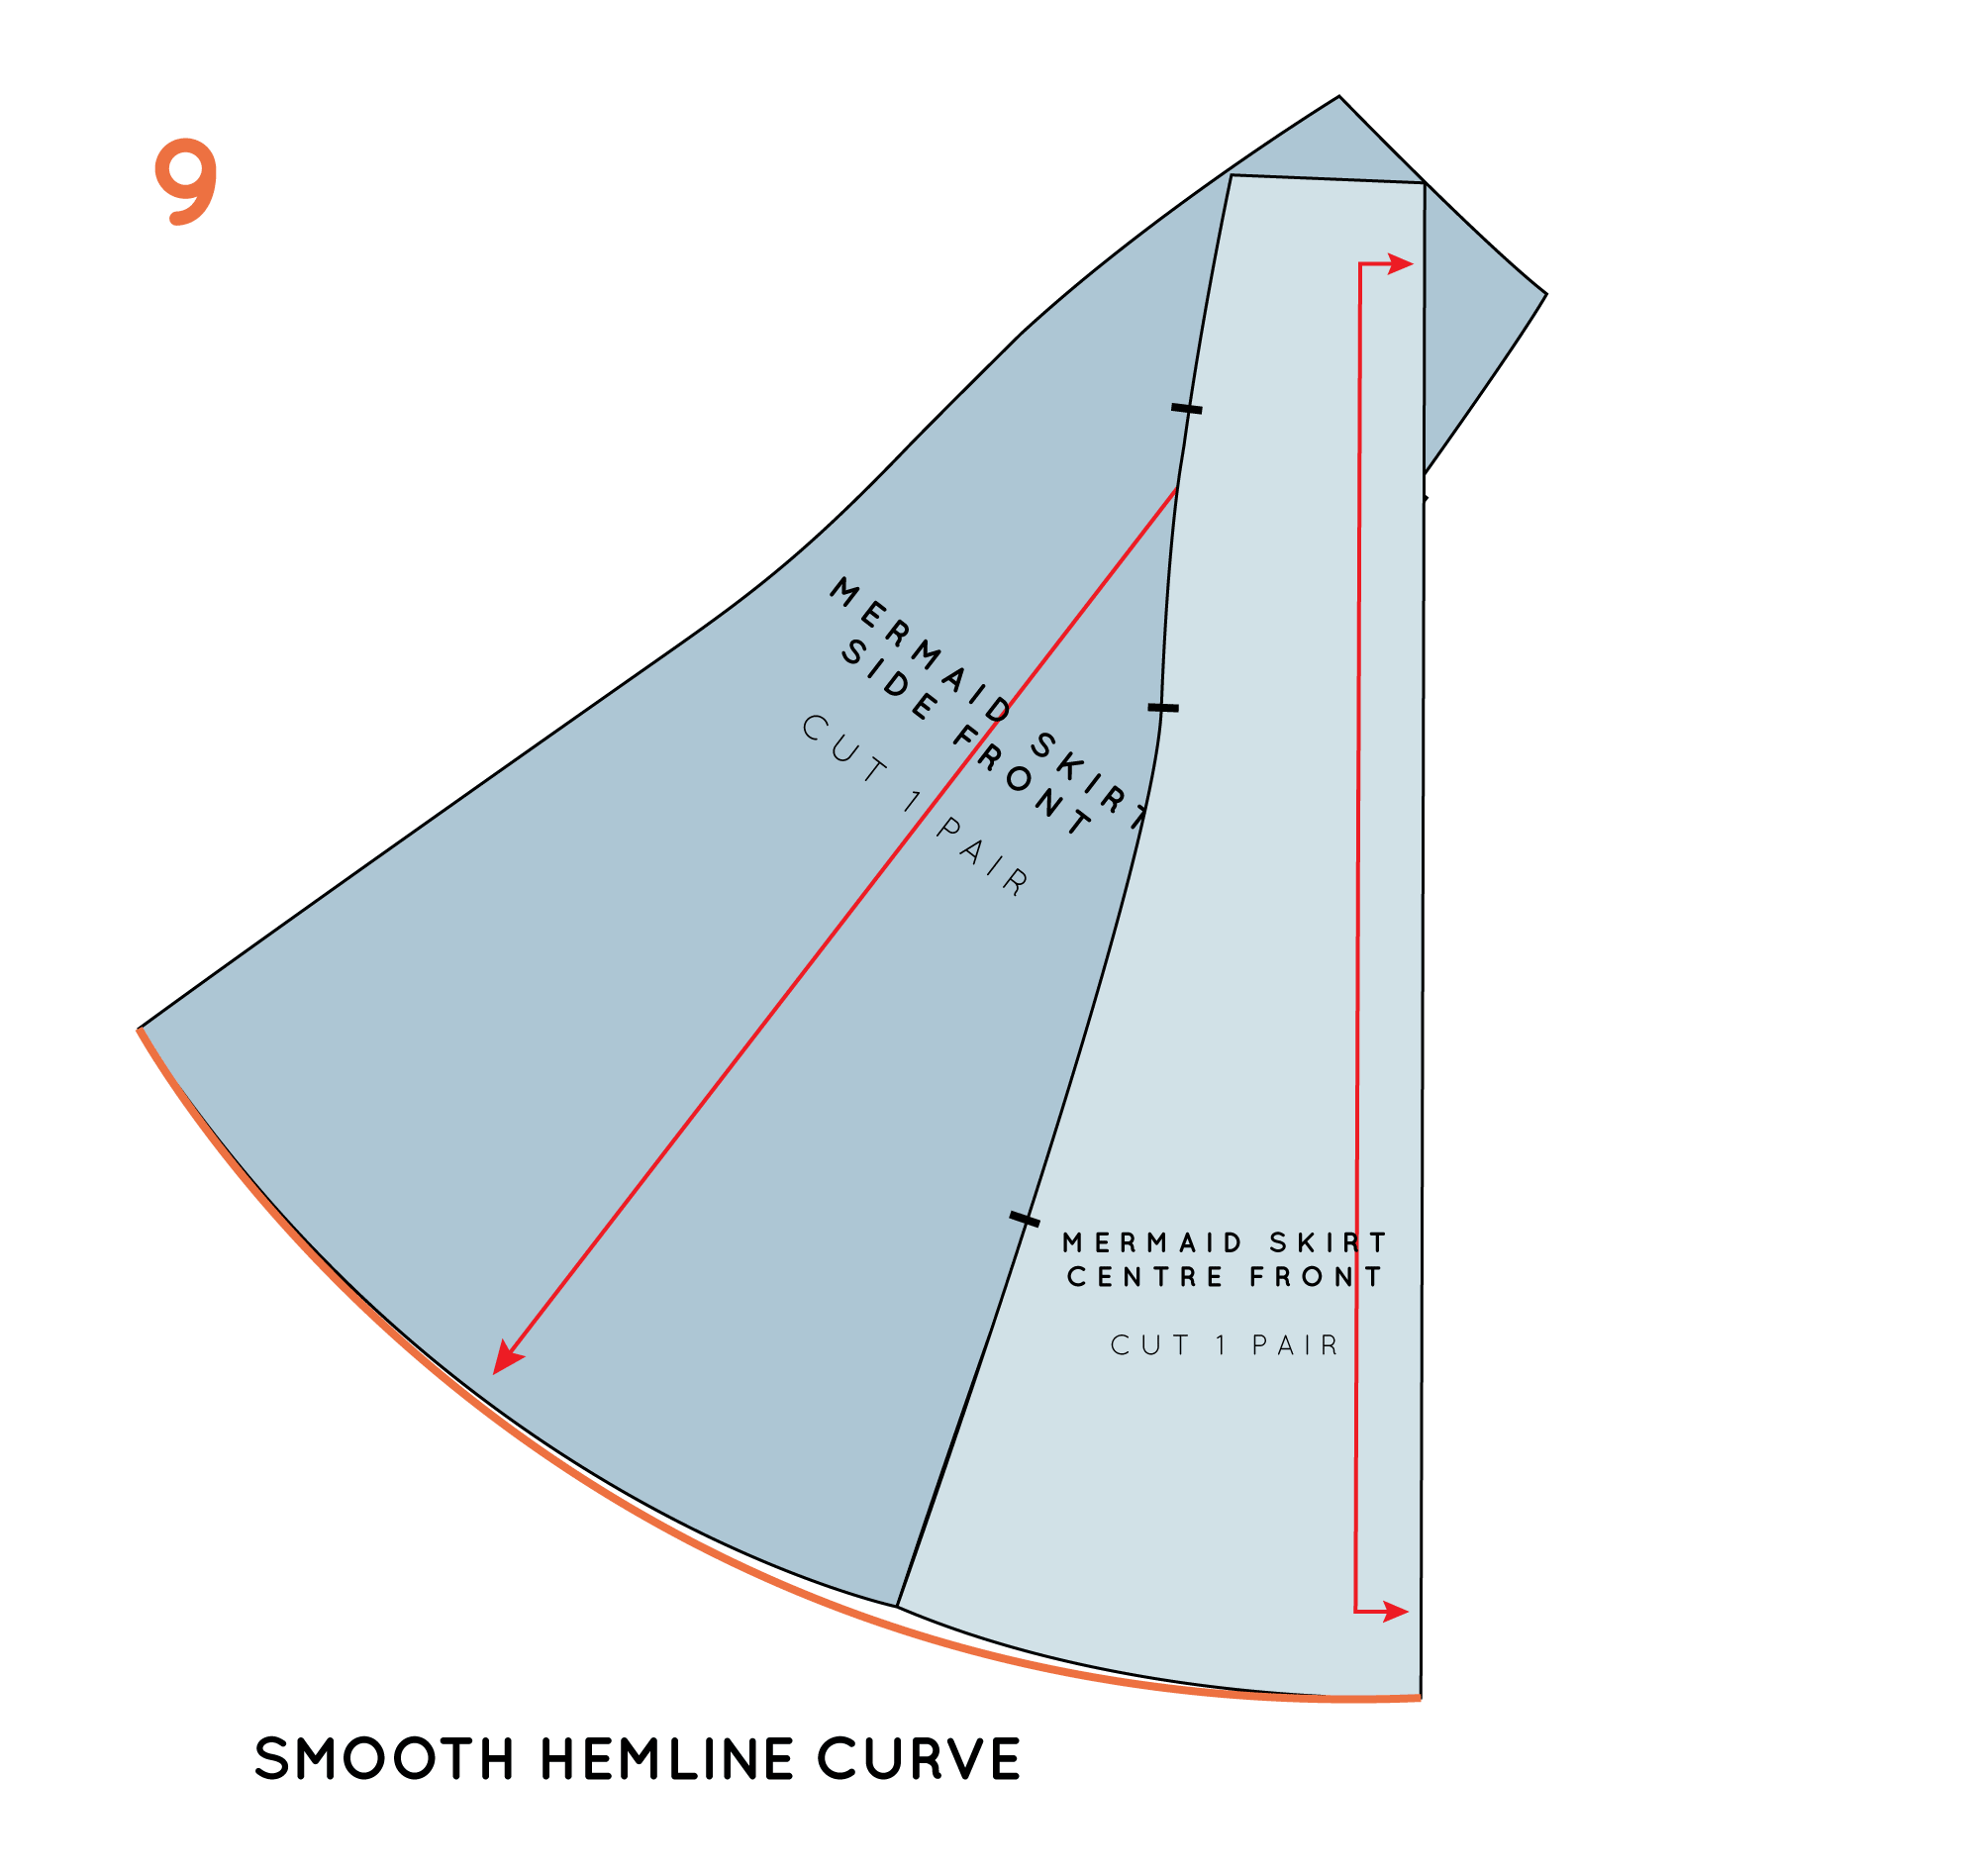
9. Now, flip the pattern over, and place the two pattern pieces together (as if they have been stitched together and then pressed open), to check the hemline. As you can see in the example, there is a small dip where the two patterns are joined. Redraw the hemline as a smooth curve, and adjust the pattern pieces to match.
10. At this point, you should also check that the angle between the centre front and hemline is a right angle. This means that when you cut the piece on the fold, you will get a nice smooth line. Check the side seam too - this should also come to a right angle.
Check the waistline
11. The same way that you checked the hemline, check that the waistline is also a nice smooth curved (and if it's not, make some adjustments).
ADD SEAM ALLOWANCE
12. To finish, add seam allowance.
As I mentioned in the last post, if you have a style of skirt you would like to know how to draft, let me know (comment here or email me) and I'll see if I can develop a tutorial around it!

