Introducing 'The Maker's Glossary'
Today I am working on finishing up the wrap skirt tutorial that I posted last week, and I realised that it is about time to start some kind of glossary on this site. There are many techniques that I use in almost every pattern I cut, and would make much more sense if I could just link straight to the technique I'm talking about - rather than writing the same thing over and over (which will give me time to write more new tutorials!)
Recently, I was doing a freelance project for some lovely women that needed a pattern made. They came into my studio to discuss the project, and while they were here, they asked what my favourite pattern making tool is. I instantly picked up my tracing wheel and my stiletto, and said I couldn't choose between them. They are definitely the tools I reach for the most when I'm pattern making, and they really do make some of the processes and techniques used in pattern making much easier. So I thought I'd share one of those techniques today, which is pivoting a pattern piece.
What is pivoting?
Pivoting is a technique used to check that seam lines match together. A ruler is normally sufficient when a seam is straight, but when it comes to curved seams, pivoting is a fast and easy way to check that the seams are exactly the same length. It is also a good way to make sure you are placing your notches in the right place.
What do I need?
To pivot a pattern piece, I use a stiletto (also known as an awl), but if you don't have one of those, a sharp pencil or pin will do the trick.
How to pivot a pattern piece
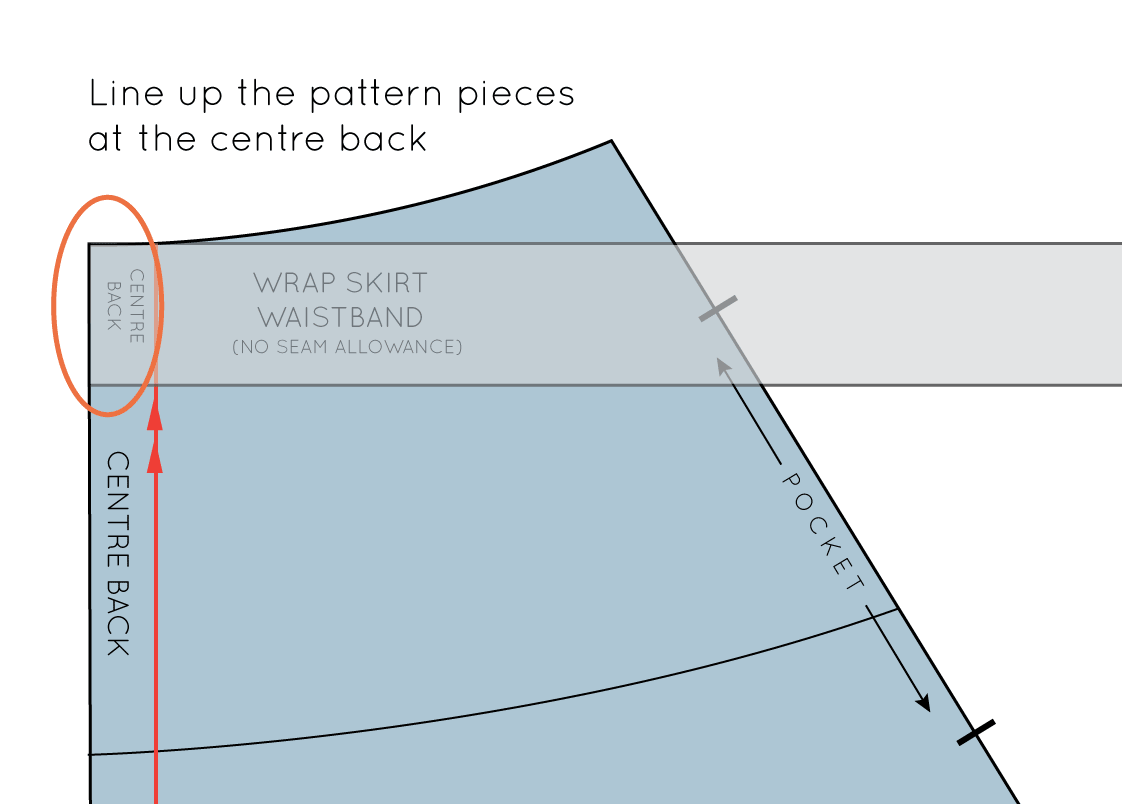
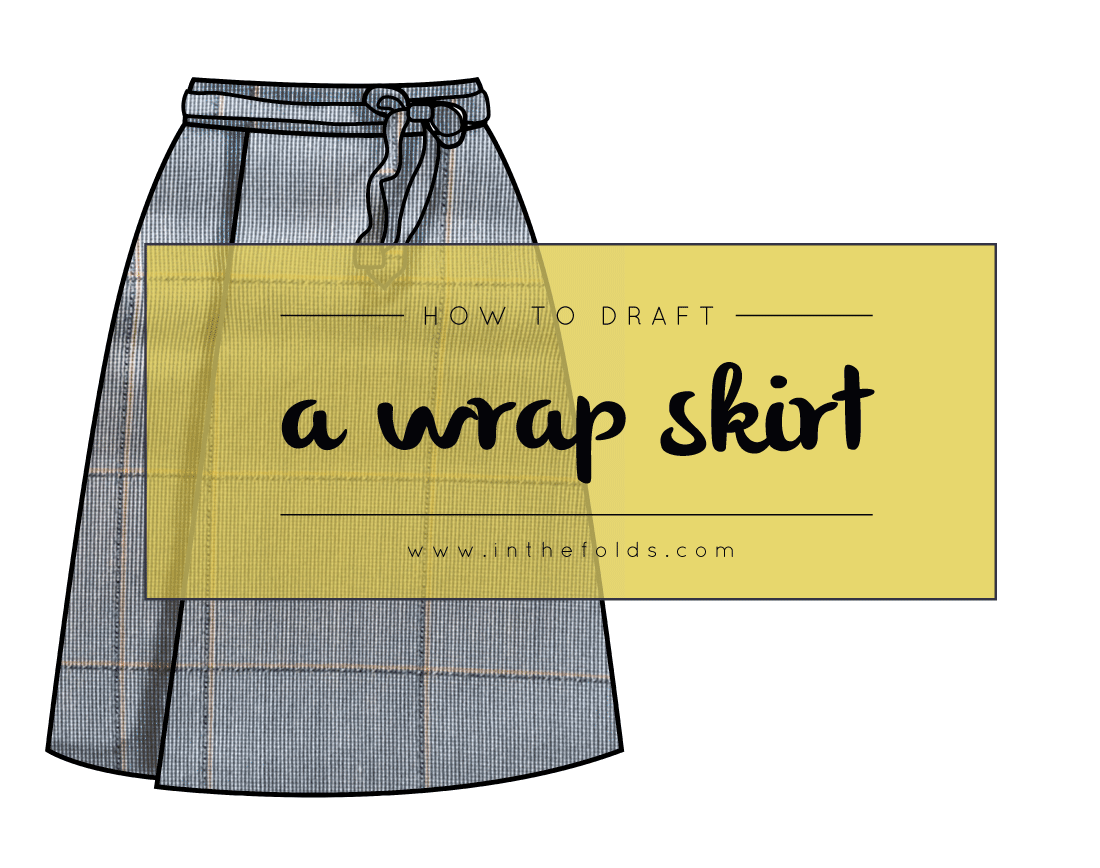
For the example, I am using the back pattern piece and waistband from my wrap skirt. I want to check that the waistband is the right length for the waistband, as well as mark notches at any points of interest (for example, side seam and centre front), to make it easier to attach the waistband when it gets to sewing up the skirt.
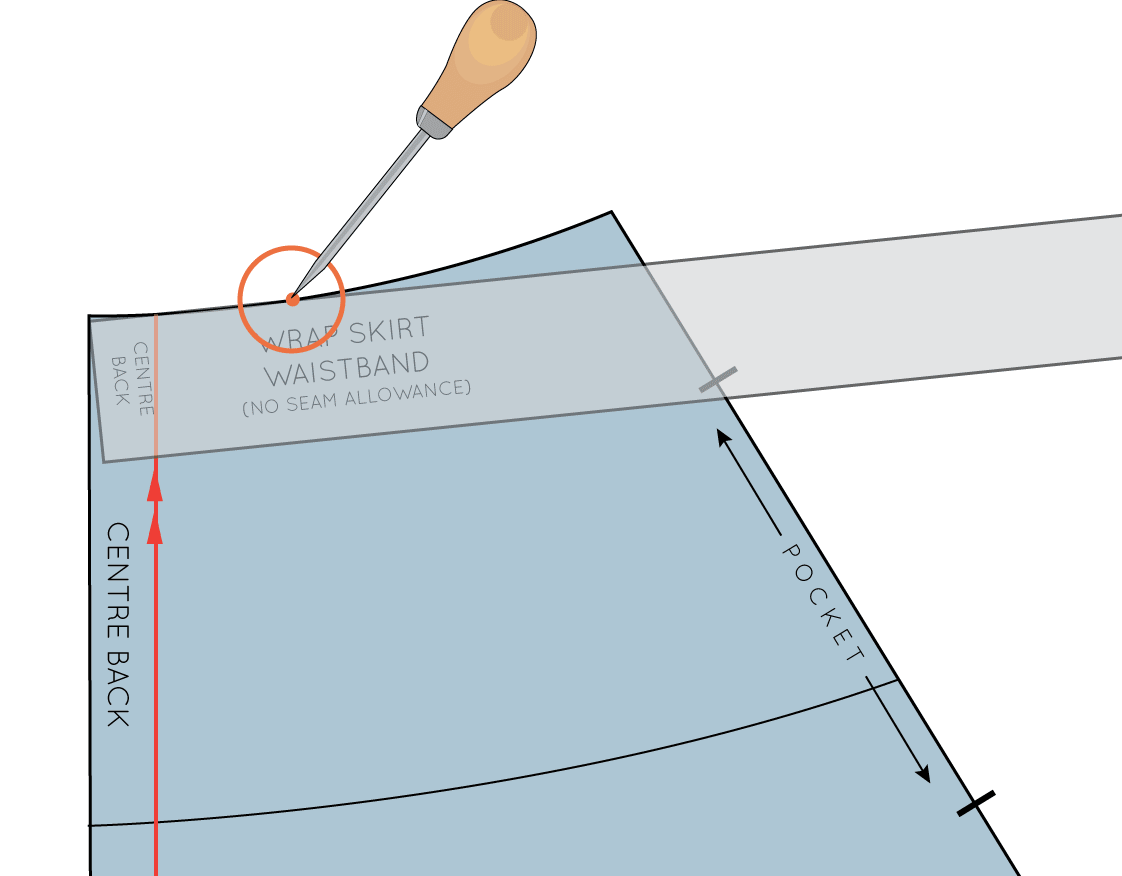
Align your pattern pieces, like you were sewing the pieces together. For the example, the centre back line on the waistband needs to be lined up with the centre back on the skirt back. Remember that if your pattern pieces have seam allowance already added, you need to match the stitching lines and not the edge of the pattern.
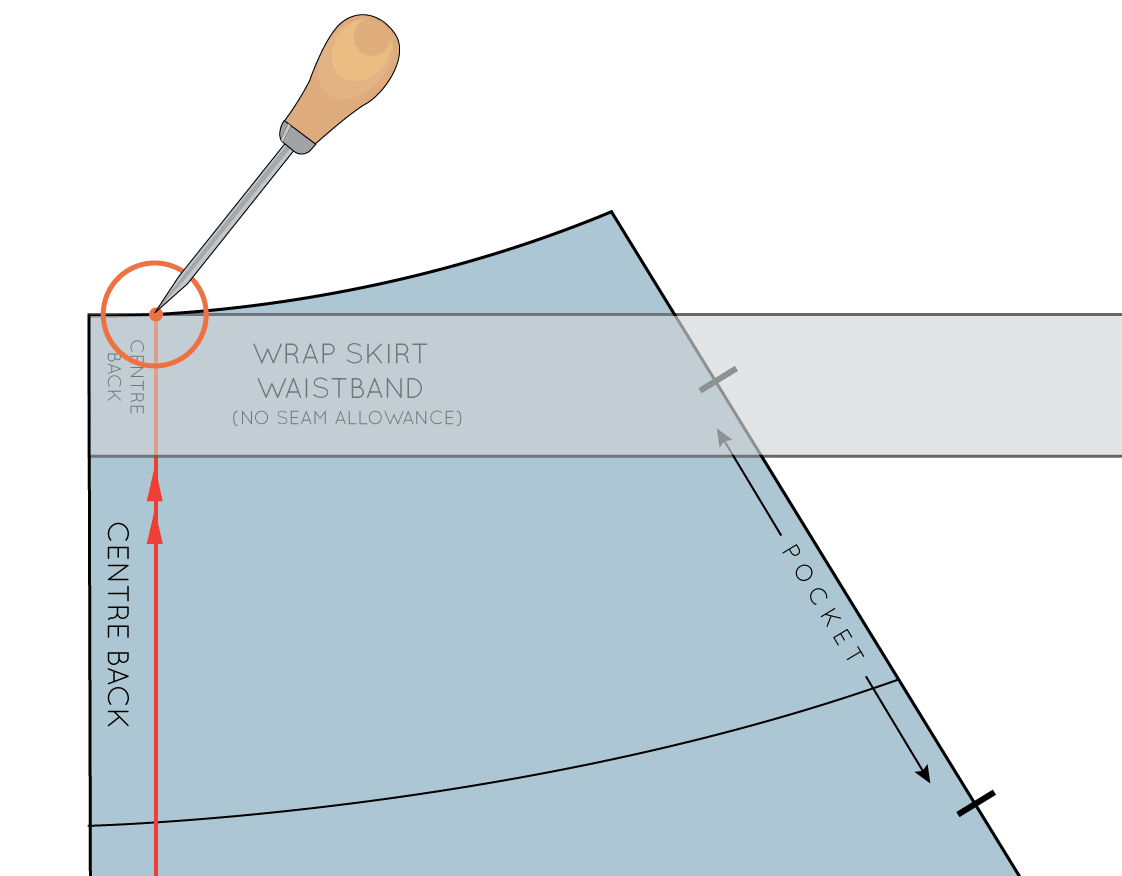
Take your stiletto (or pin) and place it through both pattern pieces, at the point where the two seams no longer fit together.
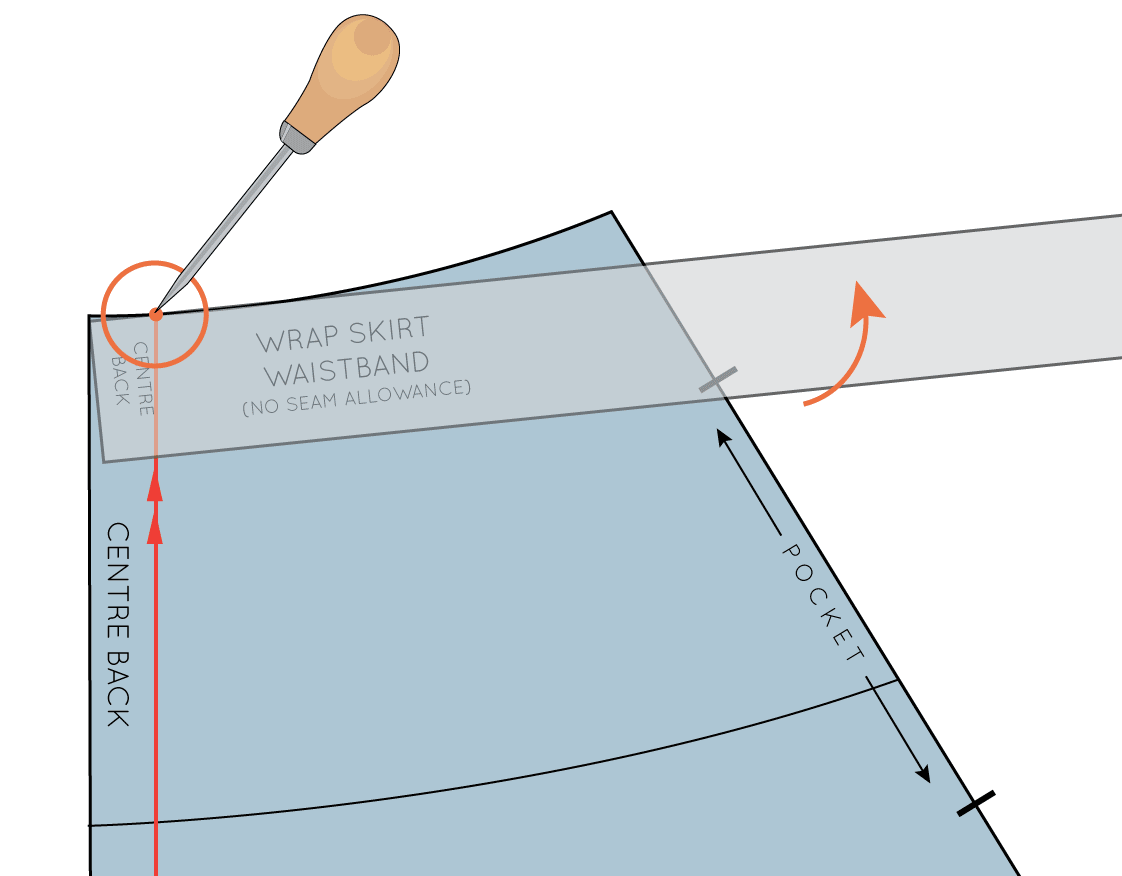
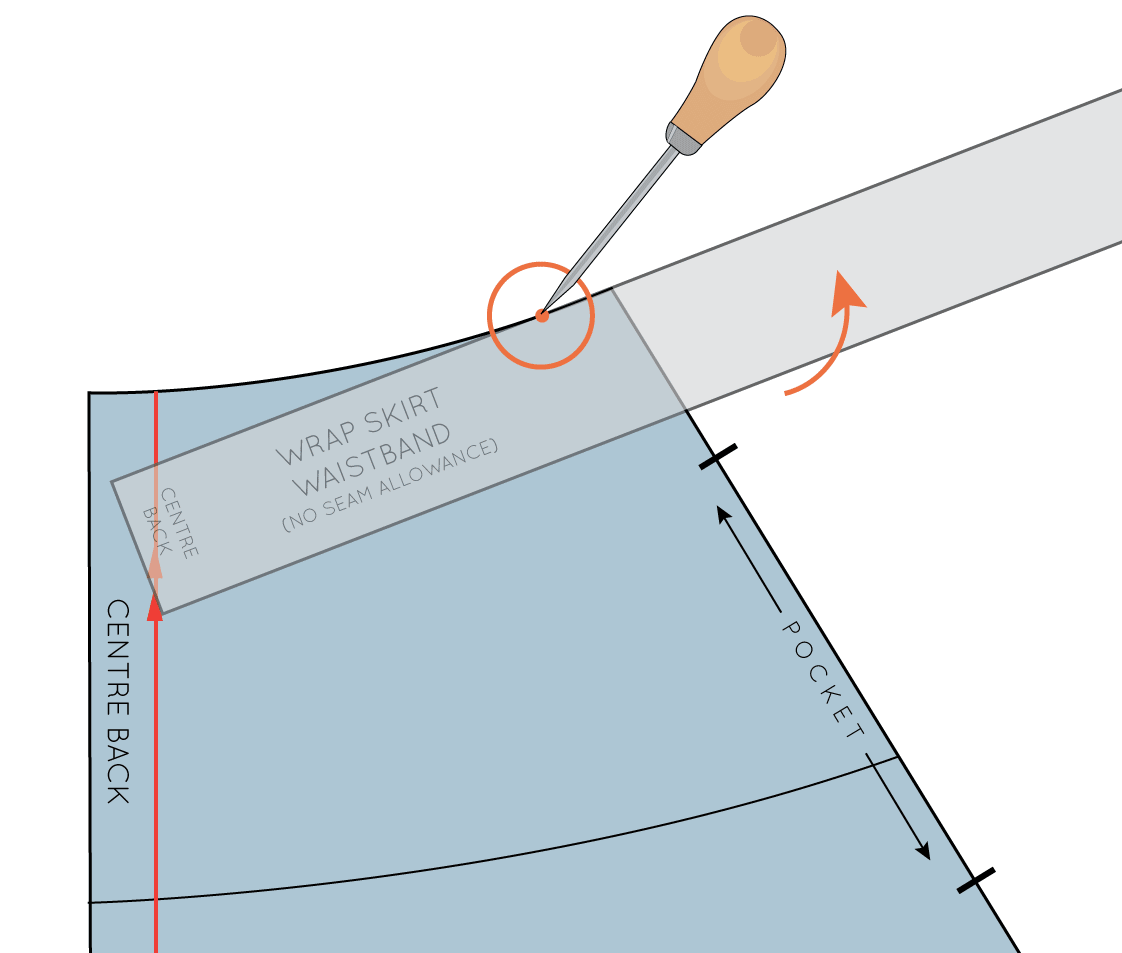
Use your hand (or a weight) to hold the underneath pattern in place (in this case, the skirt), while you carefully pivot the top pattern, until the seams are aligned again.
Hold both pattern pieces in place, and once again, take your stiletto, and place it where the seams diverge, before pivoting the top pattern until the seams are aligned again.
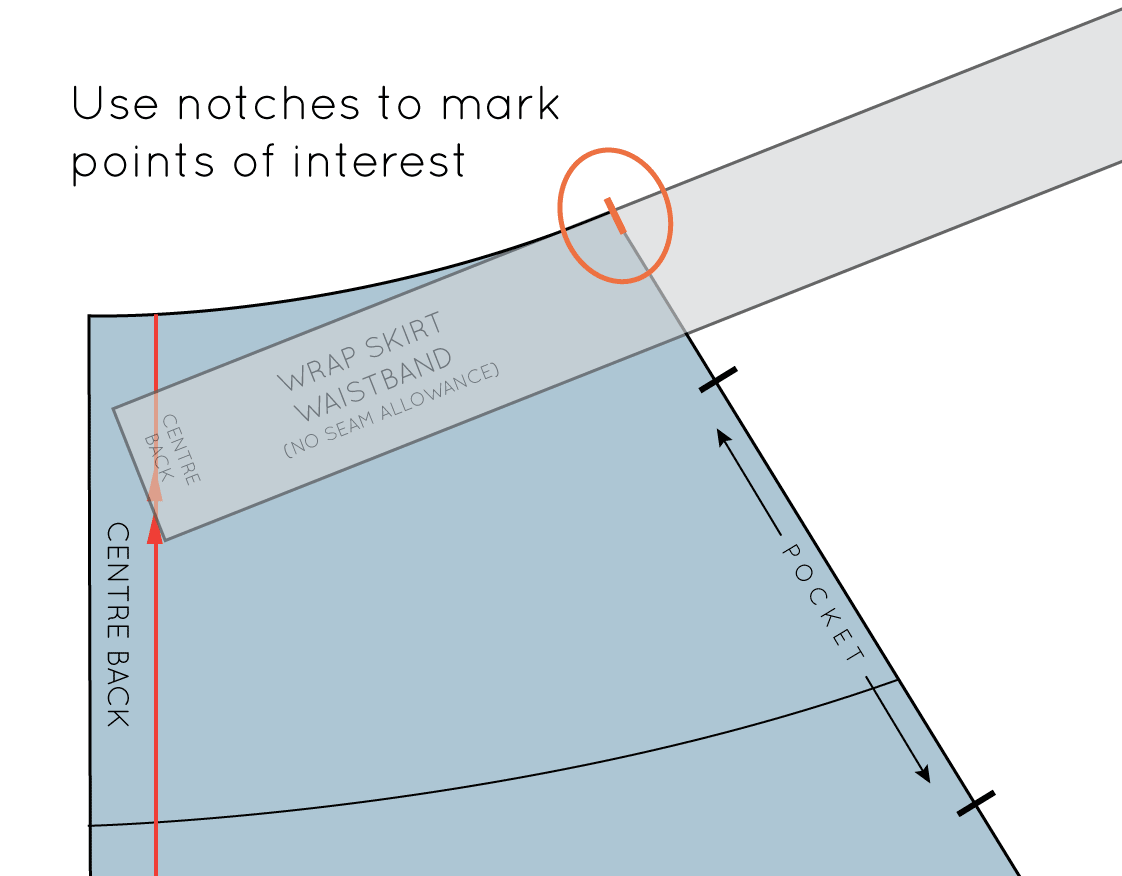
Continue pivoting until you get to the end of the seam (or to a point of interest). In the example, I have reached the side seam.
Before removing the waistband pattern, I need to mark the location of the side seam with a notch.
Now, to check the front, all I would need to do, is match the side seam notch on the waistband, with the side seam on the front pattern piece and continue pivoting.

