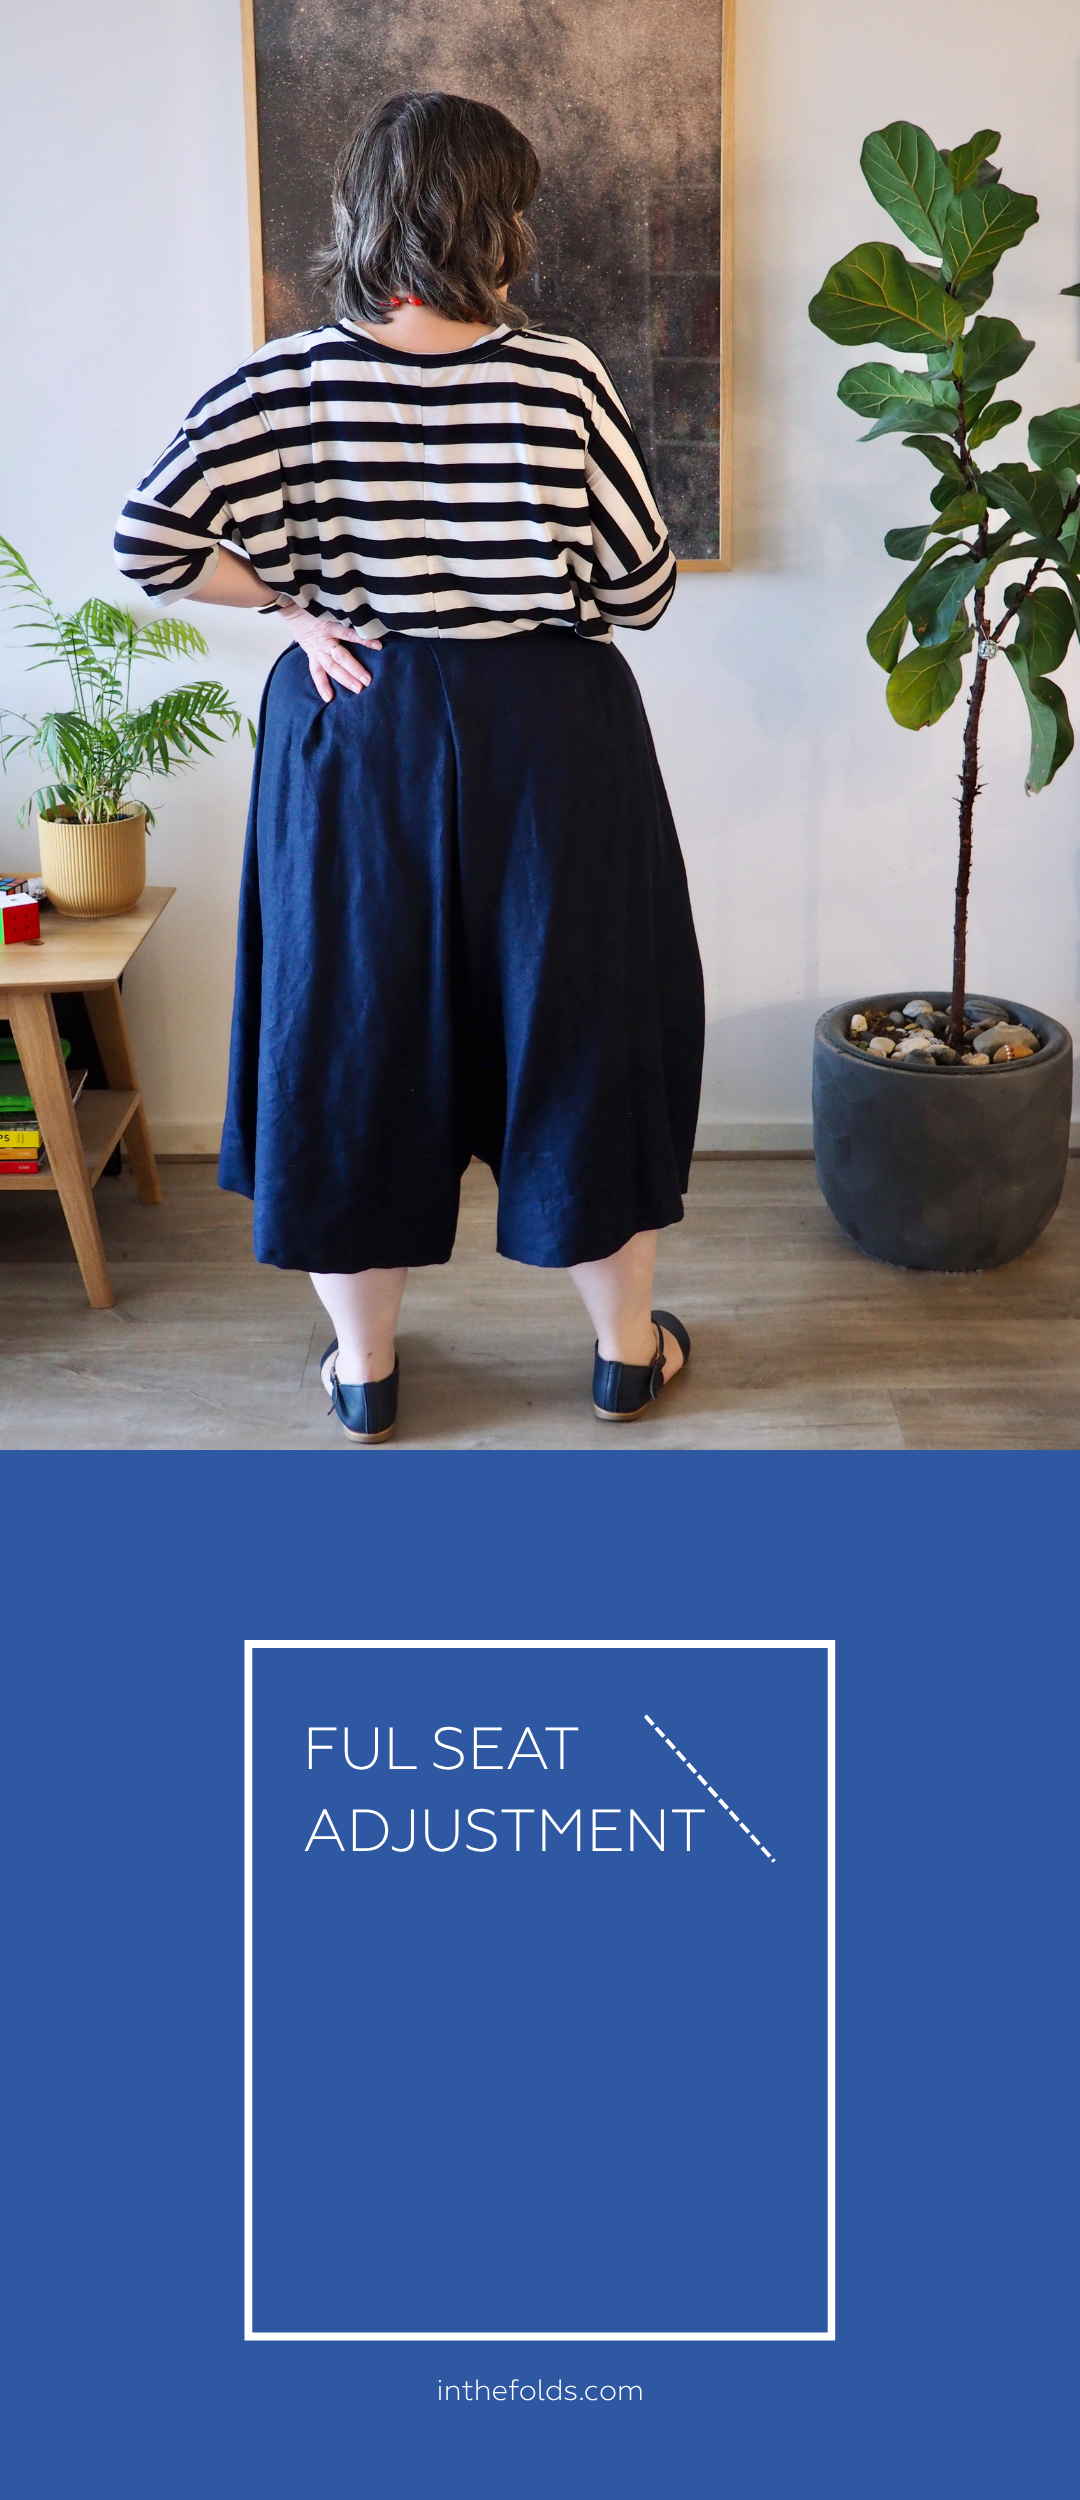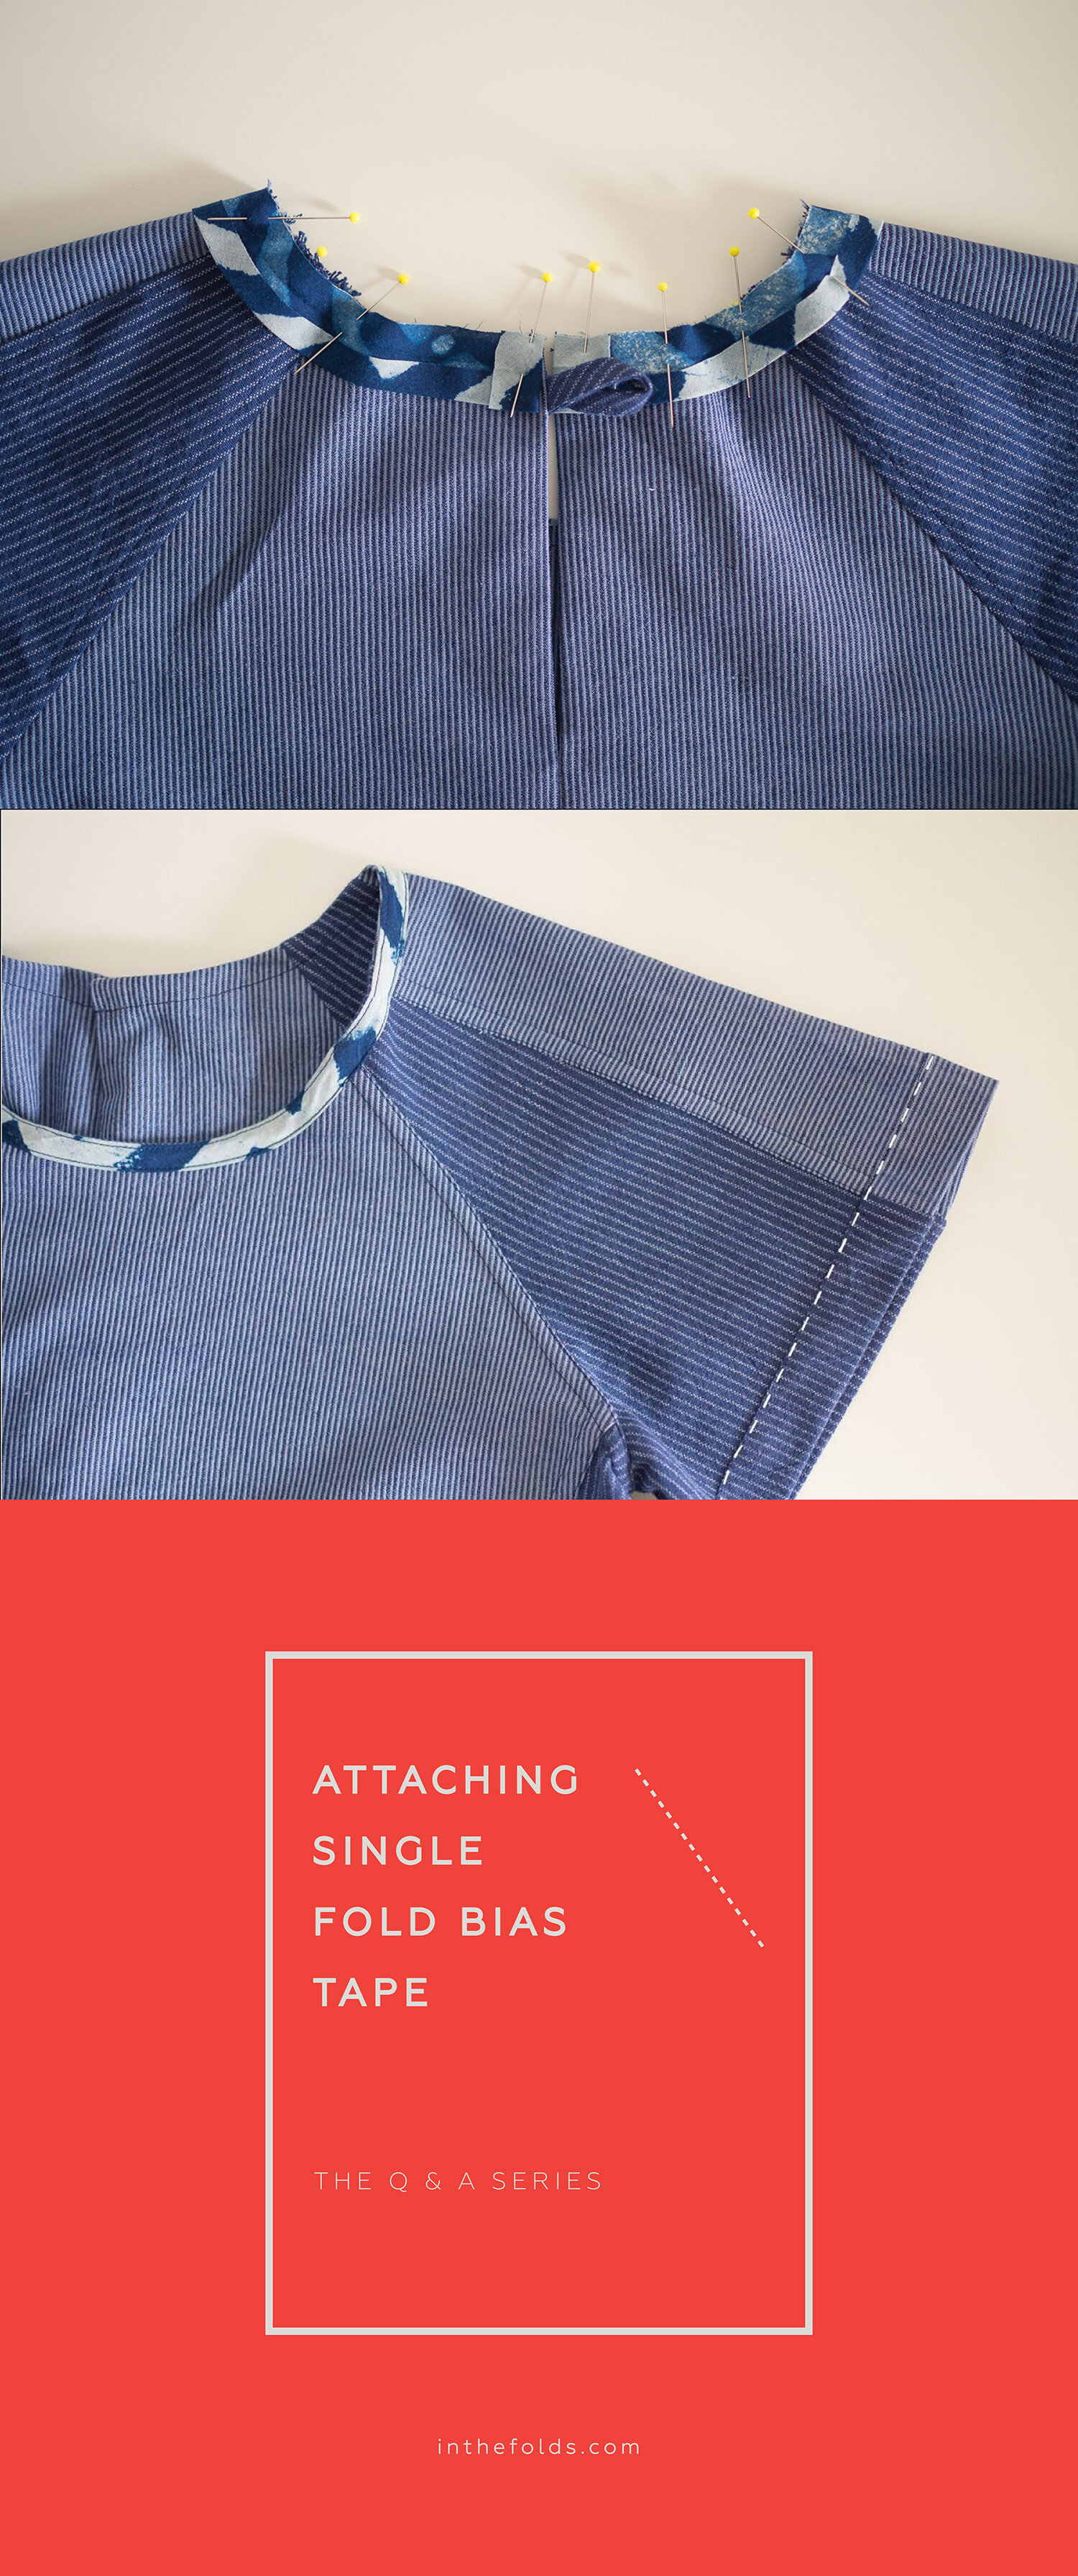
THE Q & A SERIES - ATTACHING SINGLE FOLD BIAS BINDING
Hi Emily,
Regardless if i use pre-made bias tape or make my own, I get so confused on how to apply and my garments don't look as neat as I'd like.
Can you please break down the steps to applying bias tape if A) you want the bias tape to SHOW ON THE RIGHT SIDE of your garment and B) you do not want your bias tape to show on the right side of your garment?
Thanks so much!
- RG
Portland, Oregon

Hi RG,
Bias binding can be a beautiful finish for armholes, necklines and finishing seams (among may other applications), but I understand it can also be tricky to get right.
I am more than happy to set out some tips, and then I'd suggest just getting lots of practice! It is one of those things that once you get the hang of it, it will come a lot more easily to you and you will be wanting to reach for the bias binding more and more!
I'm going to split this answer over the next two issues of the Q & A series, so the two applications remain clear and seperate and you will be able to refer to each issue when you need it (and I also don't want to scare you off by writing the longest email of all time!)
WHAT IS BIAS BINDING?
Bias binding is a strip of fabric cut on the bias (diagonal to the grainline / selvedge) that can be used in a variety of applications. By cutting the fabric on the bias, it gives the fabric a small amount of stretch, which makes it ideal for finishing curves and wrapping around seams (in the case of bias bound seams).
SINGLE FOLD & DOUBLE FOLD BIAS BINDING
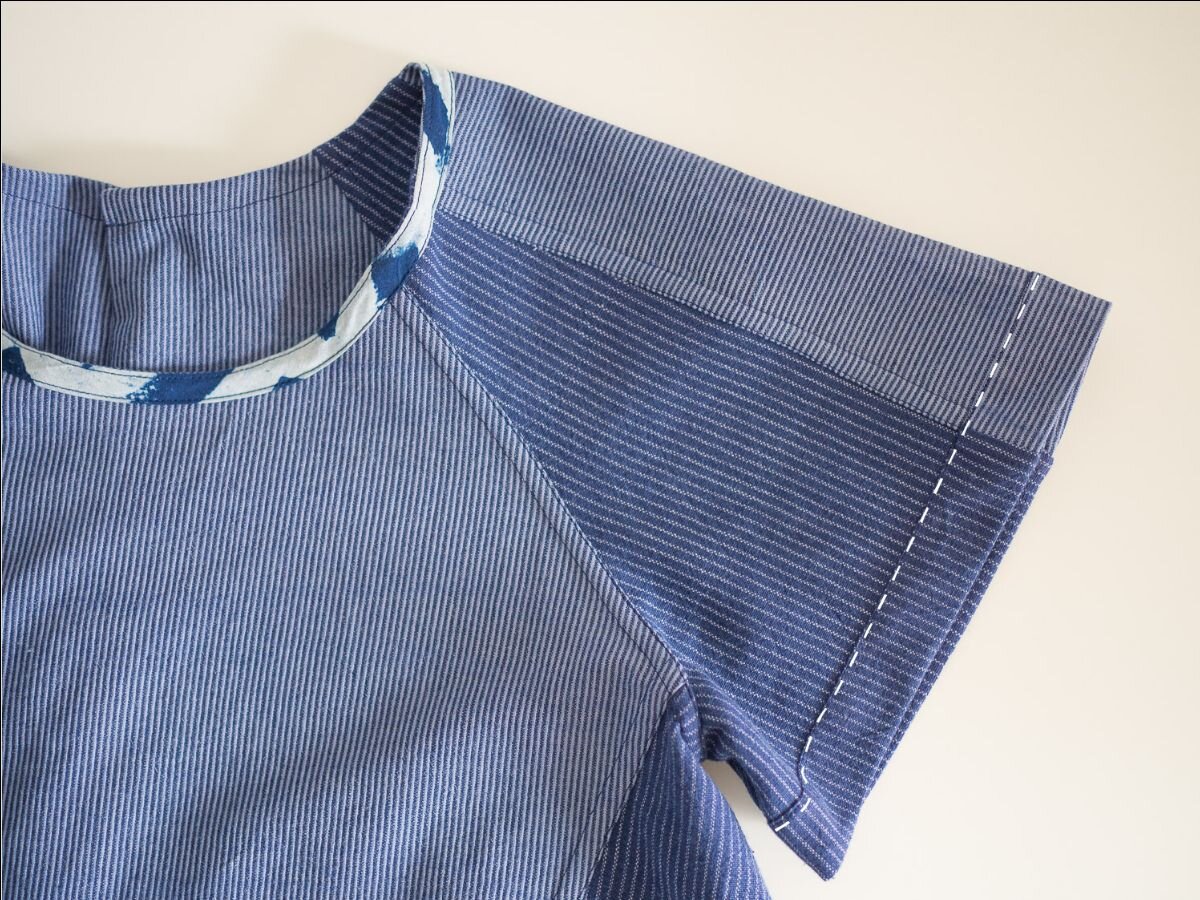
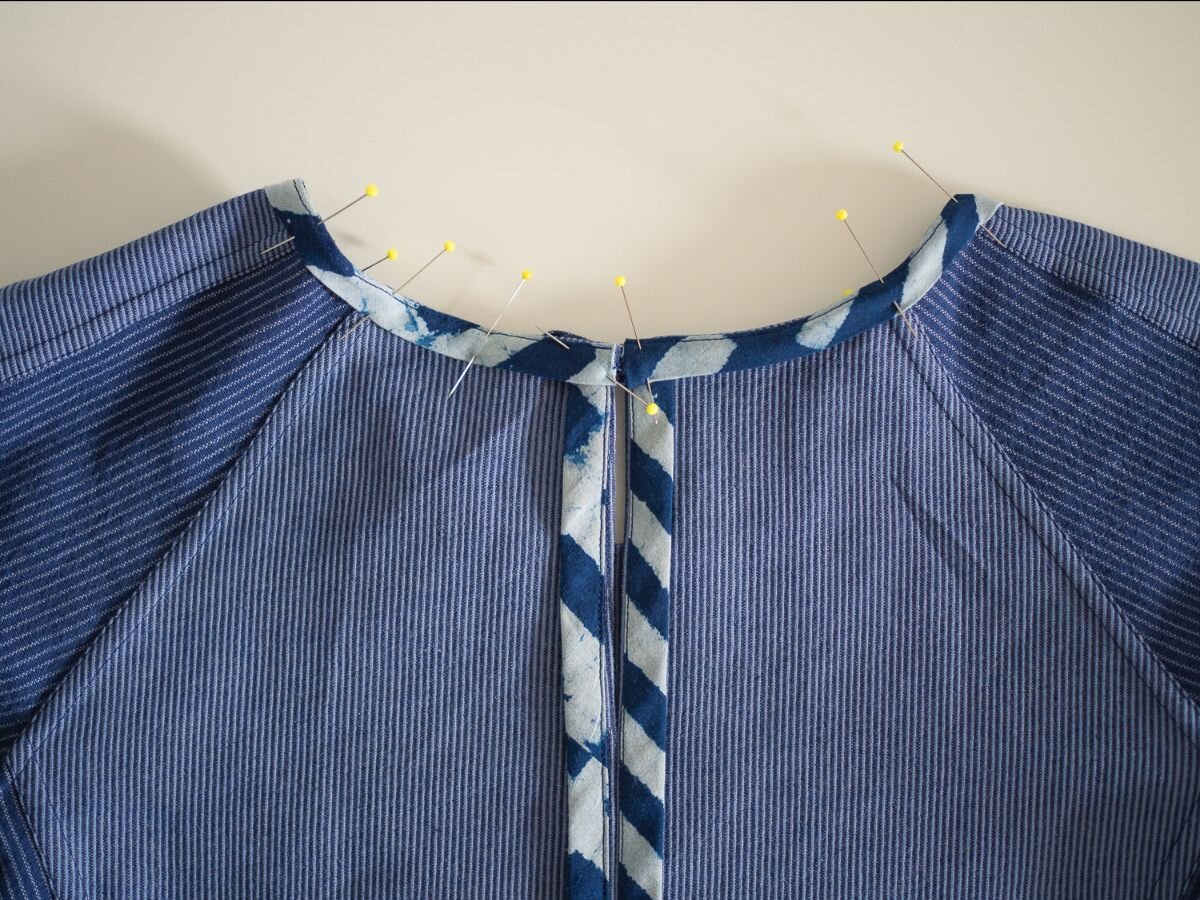
In the photo above, the Collins top is inside out - showing the finish of the binding on the inside.

Single fold bias binding is the type of binding you will most often see in ready to wear fashion, as well as most sewing patterns that include a bound neckline or armholes.
This type of binding will give you a clean finish on the right side of the garment (you will just see a stitch line where the binding has been secured), and on the inside of the garment you will be able to see the bias strip neatly finished and stitched along the edge.
This issue will show you how to apply single fold bias binding.


Double fold bias binding is what you will use if you want to see the bias binding on both the right side of the garment and the inside of the garment.
There is an extra fold put in the binding (which is what gives it the 'double fold' name) that is used to wrap around the edge of the garment, so it is visible on both sides.
Next week's issue will show you how to apply double fold bias binding.
WHAT TYPE OF BINDING TO USE
You can make your own bias binding or purchase it by the metre / yard from a store. If making your own bias binding, I recommend using a lightweight cotton fabric such as cotton lawn or cotton shirting. You can also consider using a contrasting colour or print to add a fun pop of colour to the inside of your garment.
Depending on what instructions you are following, information changes slightly from person to person when it comes to the best way to cut your own binding as well as apply it. The instructions I am giving you today is the way I was taught at university and is the method I continue to use today. Like anything in sewing, find the techniques that work for you!
If purchasing binding, you will need to buy 25mm (1in) single fold bias binding. If you are making it yourself, you will need to cut 3.2cm (1¼in) strips from a square of fabric and then fold the bias binding with a bias tape maker or fold and press by hand. The reason for the difference in width between the home made and the store-bought is that when buying pre-made bias binding, the width on the label refers to the width of the exposed part of the binding (as this is what you will see when the binding has been sewn on the garment), rather than the width of the binding when it's pressed flat.
For more information on cutting your own binding, you can see this tutorial.
APPLYING BIAS BINDING TO A NECKLINE
I will guide you through binding a neckline as this is one of the most common applications, and once you’ve nailed a neckline, you should be able to apply binding to any curve!
These instructions will guide you through applying bias binding to the neckline of the Collins top. The Collins top has an opening in the back, so the binding does not need to be joined. For a neckline without an opening, you need to join the two ends of the binding (see this tutorial for more information on joining binding).
If you prefer photos (rather than illustrations), you can see the photo tutorial here.
Using a tape measure, measure around the neckline of the top, starting from the centre back on one side, and continuing around the neckline until you reach the centre back on the other side of the back opening.
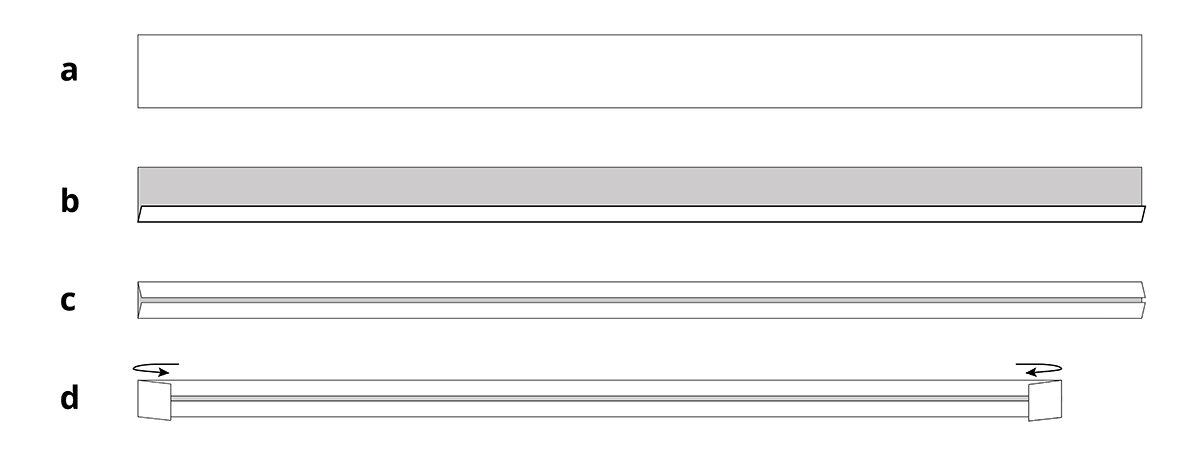
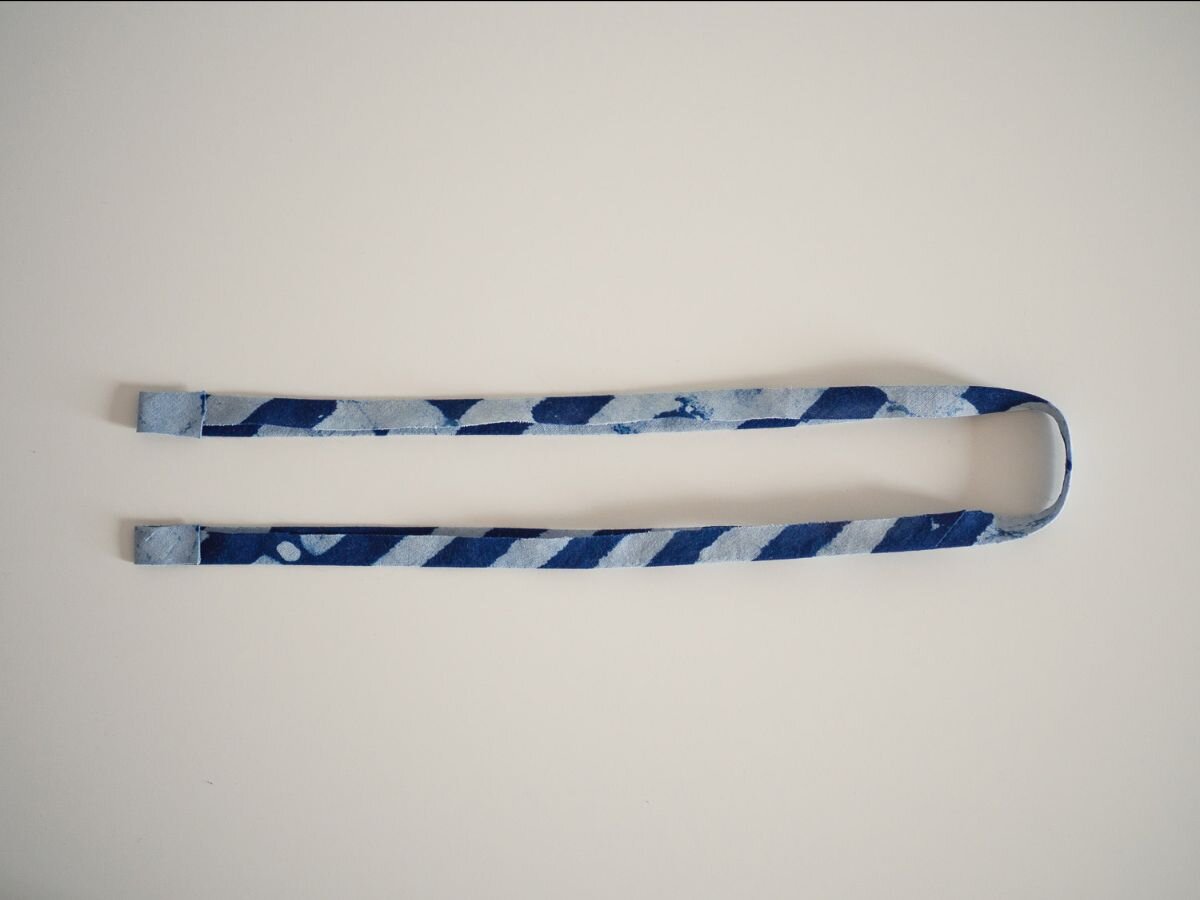
a Cut a piece of bias binding about 4cm (1⅝in) longer than your neck measurement (the neck of the top).
b If you have made your own binding, place it right side down and press one long edge of the binding under by 1cm (⅜in). (If you are using store-bought binding, the binding will already have these folds made in steps b and c).
c Repeat for the other (long) side.
d Press both short edges under by 2cm (¾in).
Unfold the binding for the time being (the creases will help you apply the binding).

With the top right side out, pin the binding to the neckline with right sides together (top is right side out). In the case of the Collins top, you need to have the short ends of the binding folded.
Start at one side of the centre back opening and line up the folded edge of the binding with the folded edge of the back opening. The centre back seam allowances need to be folded inside the top.
Work your way around the neckline (being careful not to stretch the neckline or the binding) until you get to the other side.
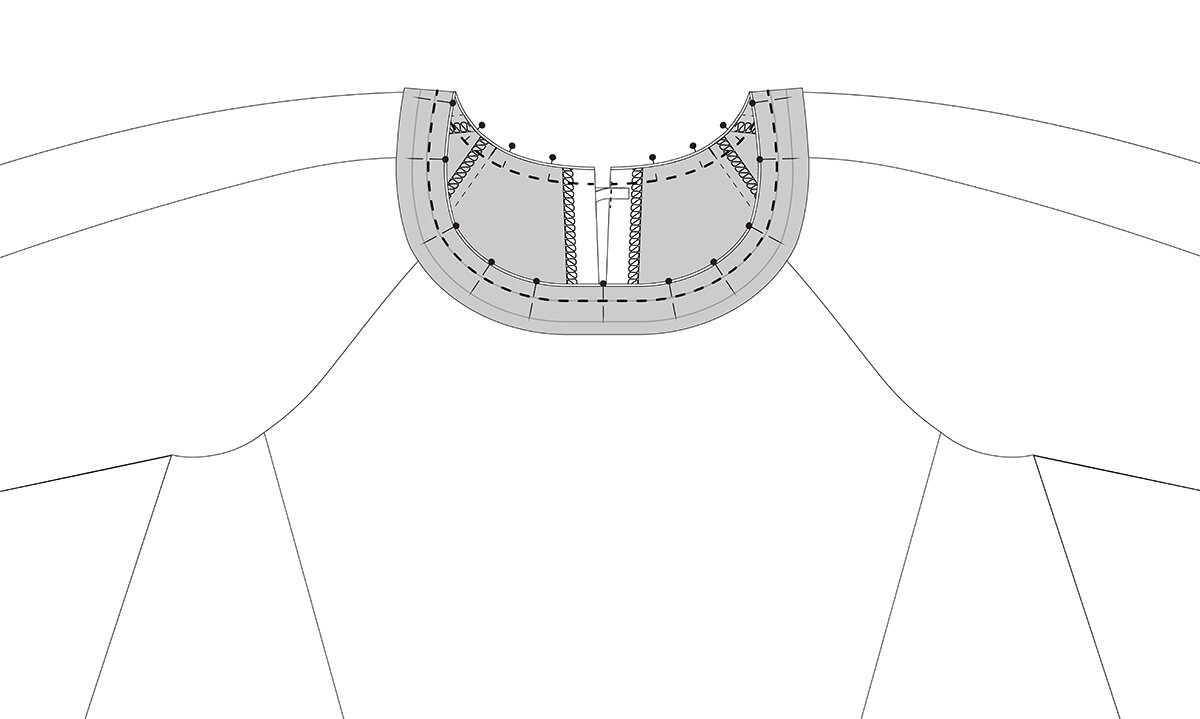
Stitch the binding in place with a 1cm (⅜in) seam allowance (you can stitch along the crease line). Check that all seam allowances are still pressed in the right direction.

Trim down the seam allowance around the neckline by 6mm (¼in), and then clip and grade.

Flip the binding up to show the right side. Using your finger, press the seam allowance up towards the binding and understitch the seam allowance to the binding.

Turn the top inside out and fold the neck binding to the inside of the neckline, rolling the seamline towards the inside of the top slightly. With the raw edge of the binding folded under, press the binding flat around the neckline. Pin in place. Stitch along the folded edge of the binding.
Give the neckline a good press from both the right and wrong side of the top.
I hope that demystified the process of applying single fold bias binding to a curve. Next week I will show you how to finish a neckline with double fold binding!
Would you like to have a practice sewing this finish? Both the Rushcutter dress and the Collins top include a bias bound neckline.
Happy sewing!
Emily
RESOURCES MENTIONED IN THIS ISSUE
How to make your own bias binding (the low tech way) tutorial. Blog post can be found here.
Collins top sewing pattern. Pattern can be found here.
How to join bias binding - How to finish an armhole with bias binding tutorial. Blog post can be found here.
The Collins top sew-along: Binding the neckline. Blog post can be found here.
The Rushcutter dress sewing pattern. Pattern can be found here.
P.S. Would you like to know what the Q & A series is all about? This page tells you a little bit more about the motive behind the series.
Don't have a question, but found this newsletter helpful? I'd love to hear from you! Get in touch and say hi.