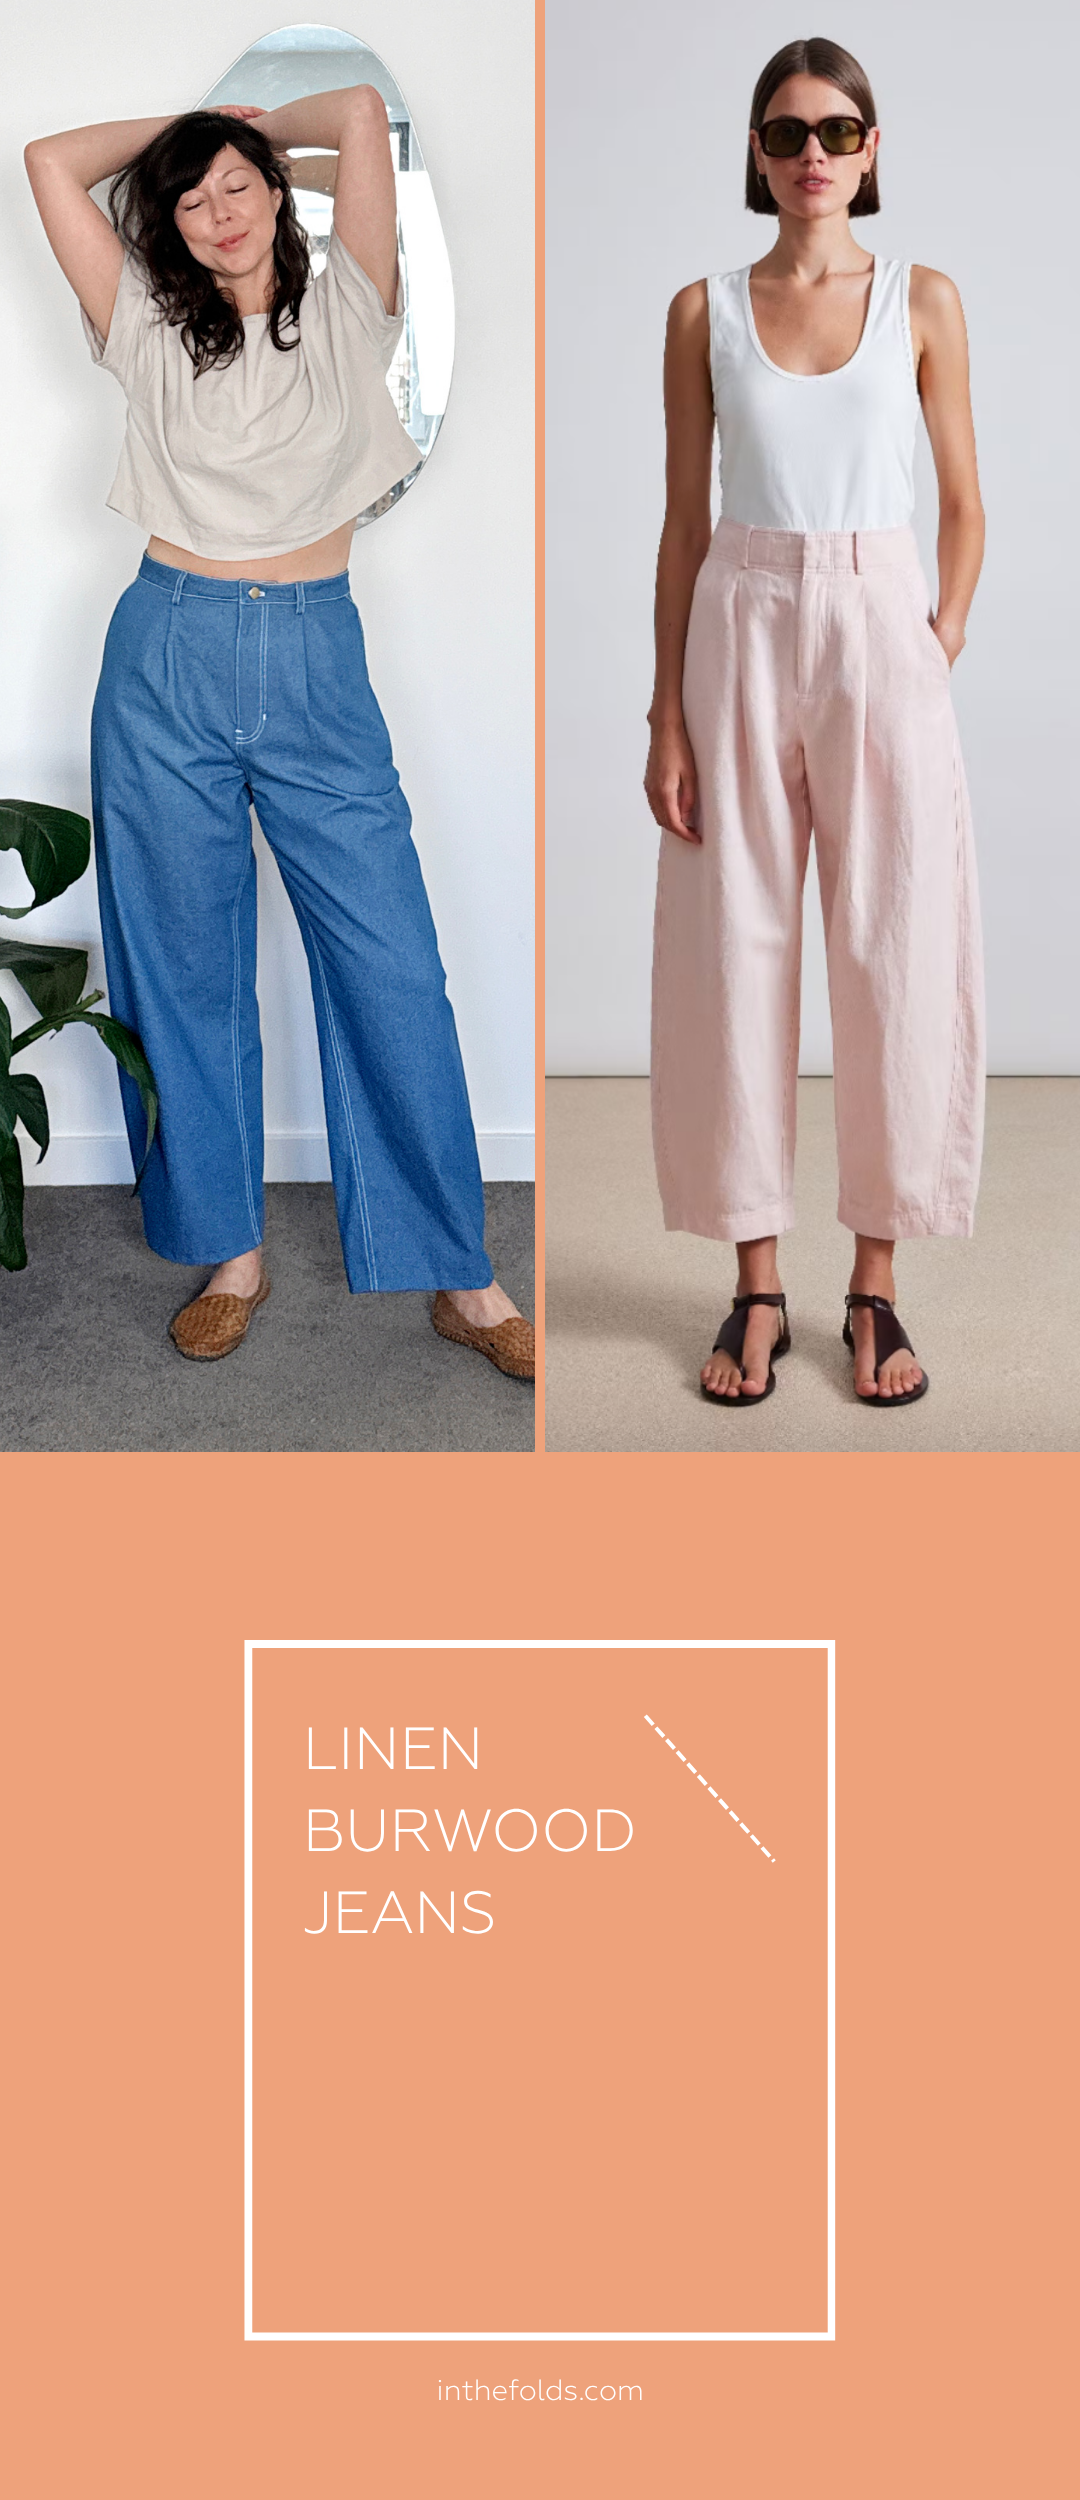
Making the Burwood jeans pattern in linen
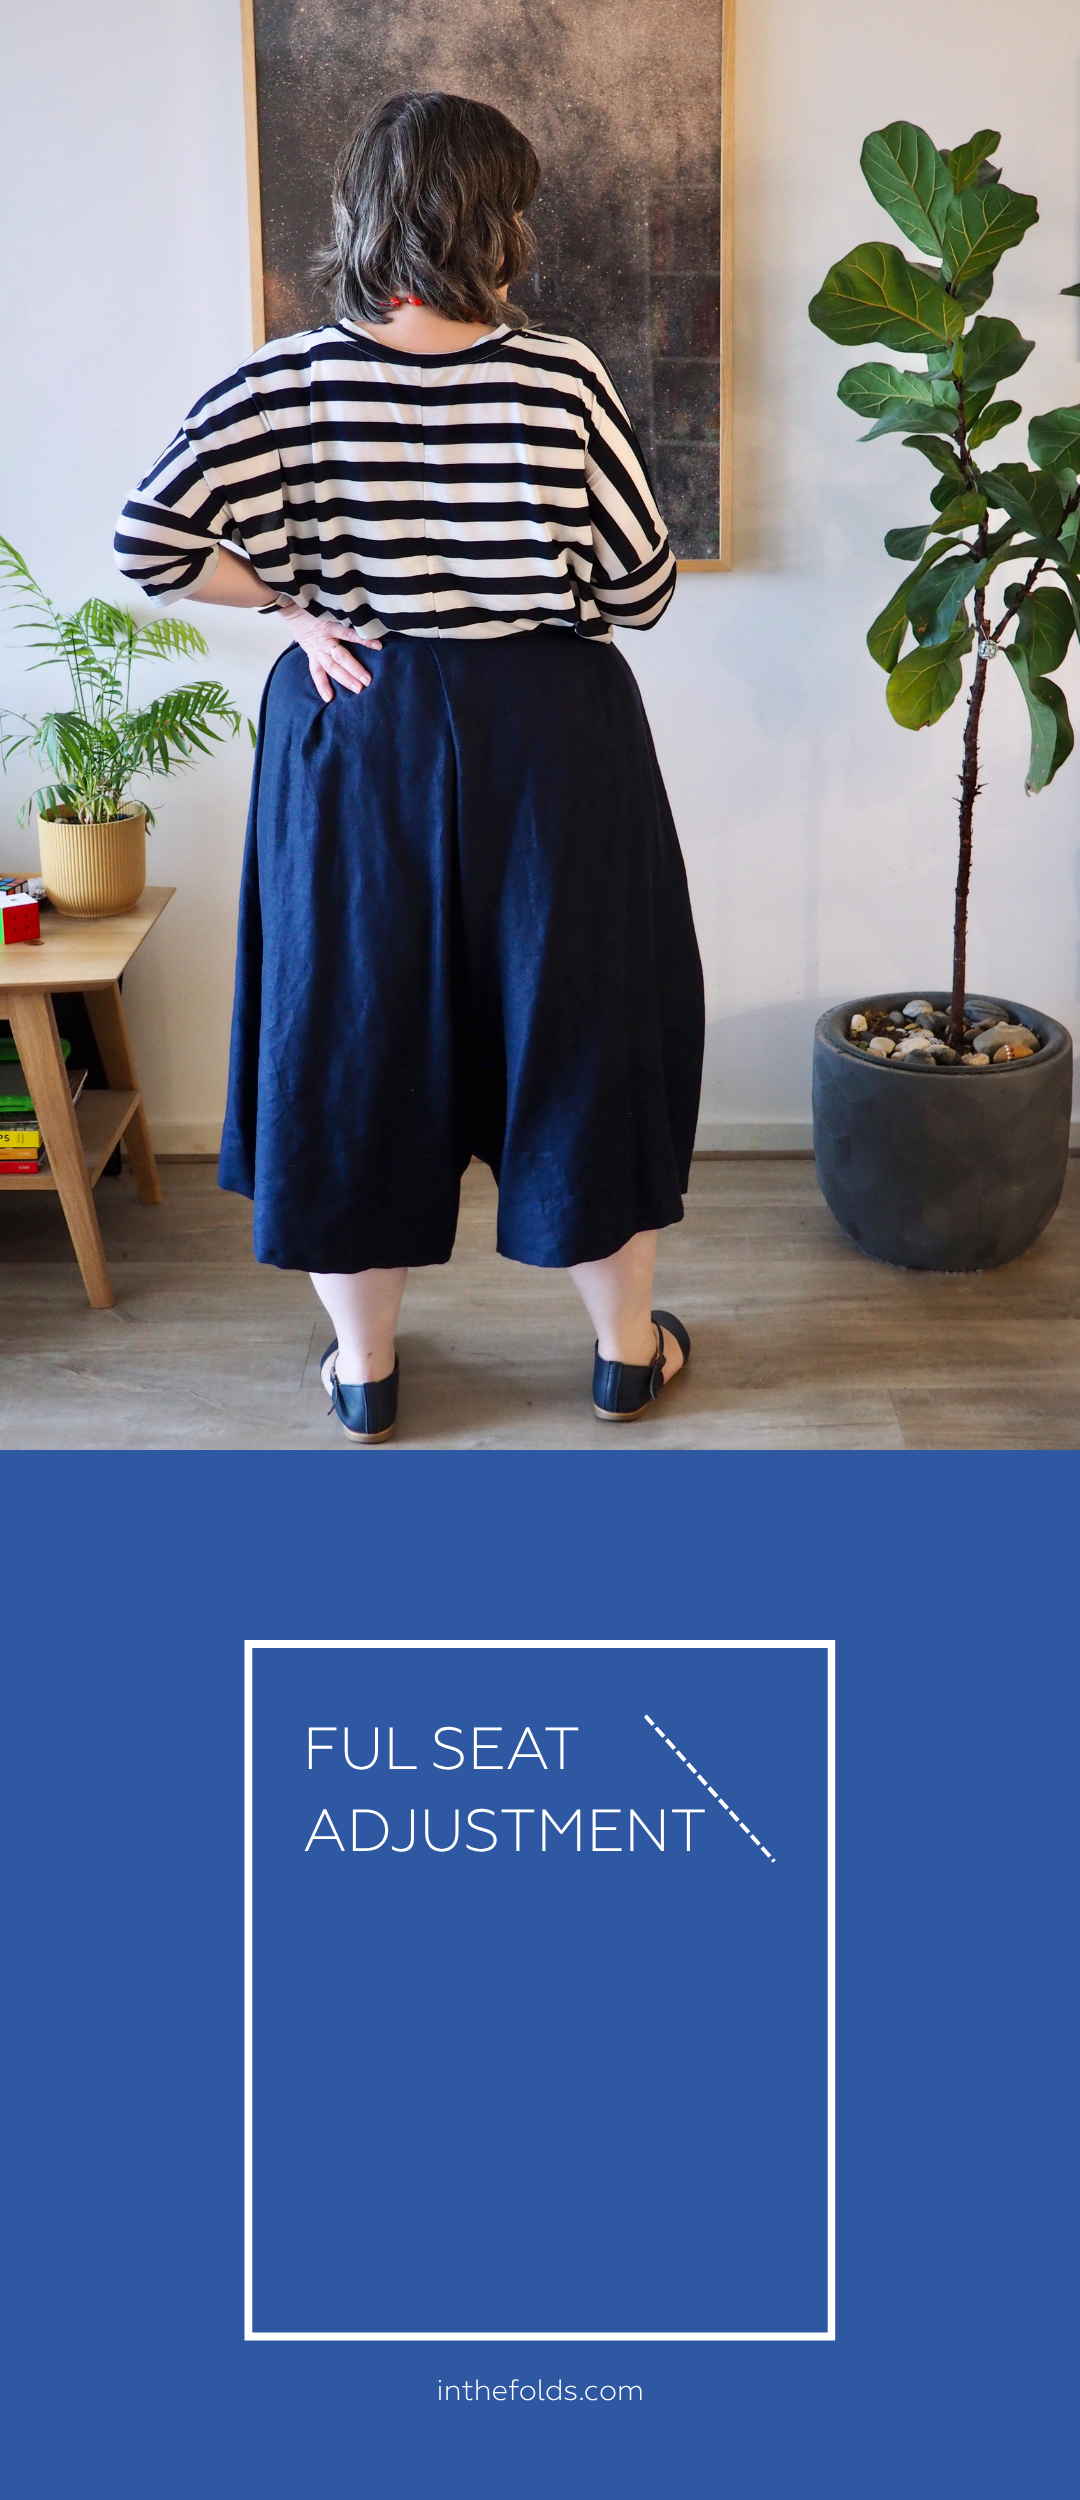
Q & A - PANTS FITTING: FULL SEAT ADJUSTMENT
Q & A - PANTS FITTING: SWAY BACK ADJUSTMENT
Q & A - WHAT IF YOUR AMBITIONS ARE BIGGER THAN YOUR SKILLS?

THE Q & A SERIES
WhAT IF YOUR AMBITIONS ARE BIGGER THAN YOUR SKILLS?
What if your ambitions are bigger than your skills, so you get discouraged? How do you stay within reasonable boundaries while still holding onto bigger ideas for your projects?
Marsha
United States
Hi Marsha,
I think this is something so many of us wrestle with, and I feel like it's what my whole business ethos has been based on. Sewing is such a rewarding hobby, but it can also be very frustrating. Fabric is expensive. Tracing a pattern, cutting the fabric and then sewing it up all takes a lot of time, so when it doesn't work out quite how we pictured it, it can be very disheartening.
Learning new skills is hard and can be intimidating. When I launched Curated (the project subscription we ran between 2021 and 2025), I wanted to structure our learning so we could break the bigger projects down and we could focus on one thing at a time, rather than try to learn it all at once.
Break the project down
Thinking about this made me think about how I learned to drive a car. We started in an empty car park, just getting used to the accelerator, brakes and steering wheel and slowly but surely worked our way up to driving next to other cars, busier roads, parallel parking and freeways. A few years later, learning to drive a manual car, I only had to focus on the clutch and the gears as everything else was already second nature. I wasn't trying to learn everything at once. I was picking up a couple of things at a time, starting with the simpler skills and building from there.
The same applies to learning new sewing skills in order to make a more ambitious project.
As an example, here’s how I would break down making a pair of jeans, which can seem pretty daunting for a lot of makers.
Make a toile to check the fit. This means that the stakes are automatically low. You are using calico (or something similar) that is cheap and accessible. You won't be finishing your seams properly. You may even ignore details such as pockets altogether. This means you can just focus on working with one skill, and that is fit.
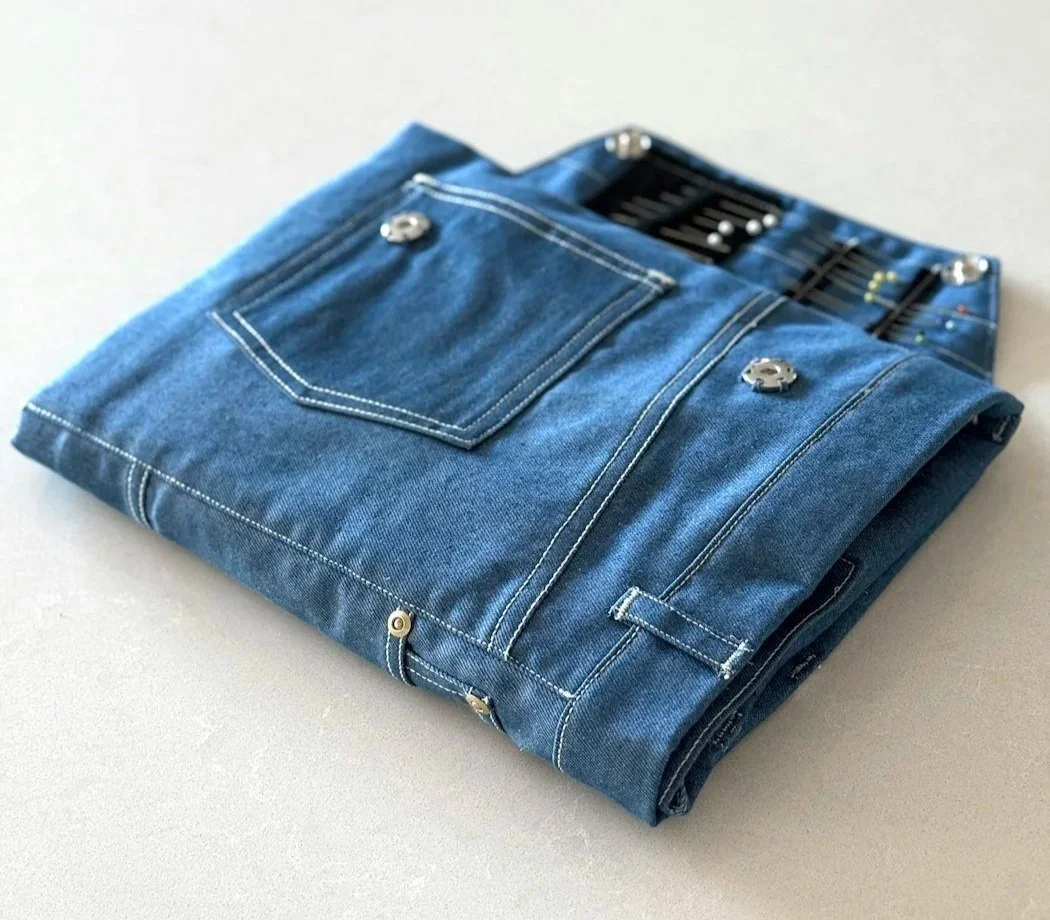
Practise topstitching on some denim scraps. This way you can get a hang of the thread and see how your machine handles the layers of denim, without worrying about damaging the fabric or spending too much time unpicking. (Our Sewing Jeans Skills Kit + Burwood Tool Roll walks through this step by step, if you'd like a guided way in.)
Practise doing flat felled seams on scrap fabric. This means that you'll get comfortable with the technique, so that when it's time to do it on your jeans, you'll feel confident and will have found your preferred way of doing it.
Consider making something else from denim to practise all your new skills. You may want to have a real practice run to combine all the skills, but still in a lower stakes way. You might make a cushion cover out of scraps of denim, or a pair of denim shorts out of some cheap or thrifted denim.
Finally, make the jeans. By the time you make the jeans, you should be feeling confident in a whole lot of skills, and they're all skills you've already practised. Not only does this mean you have a better chance of being happy with the outcome, it also makes the whole experience more enjoyable, because you can just relax into the process. You won't be wondering, "Is this going to fit me?" or "Did I just do that flat felled seam right?"
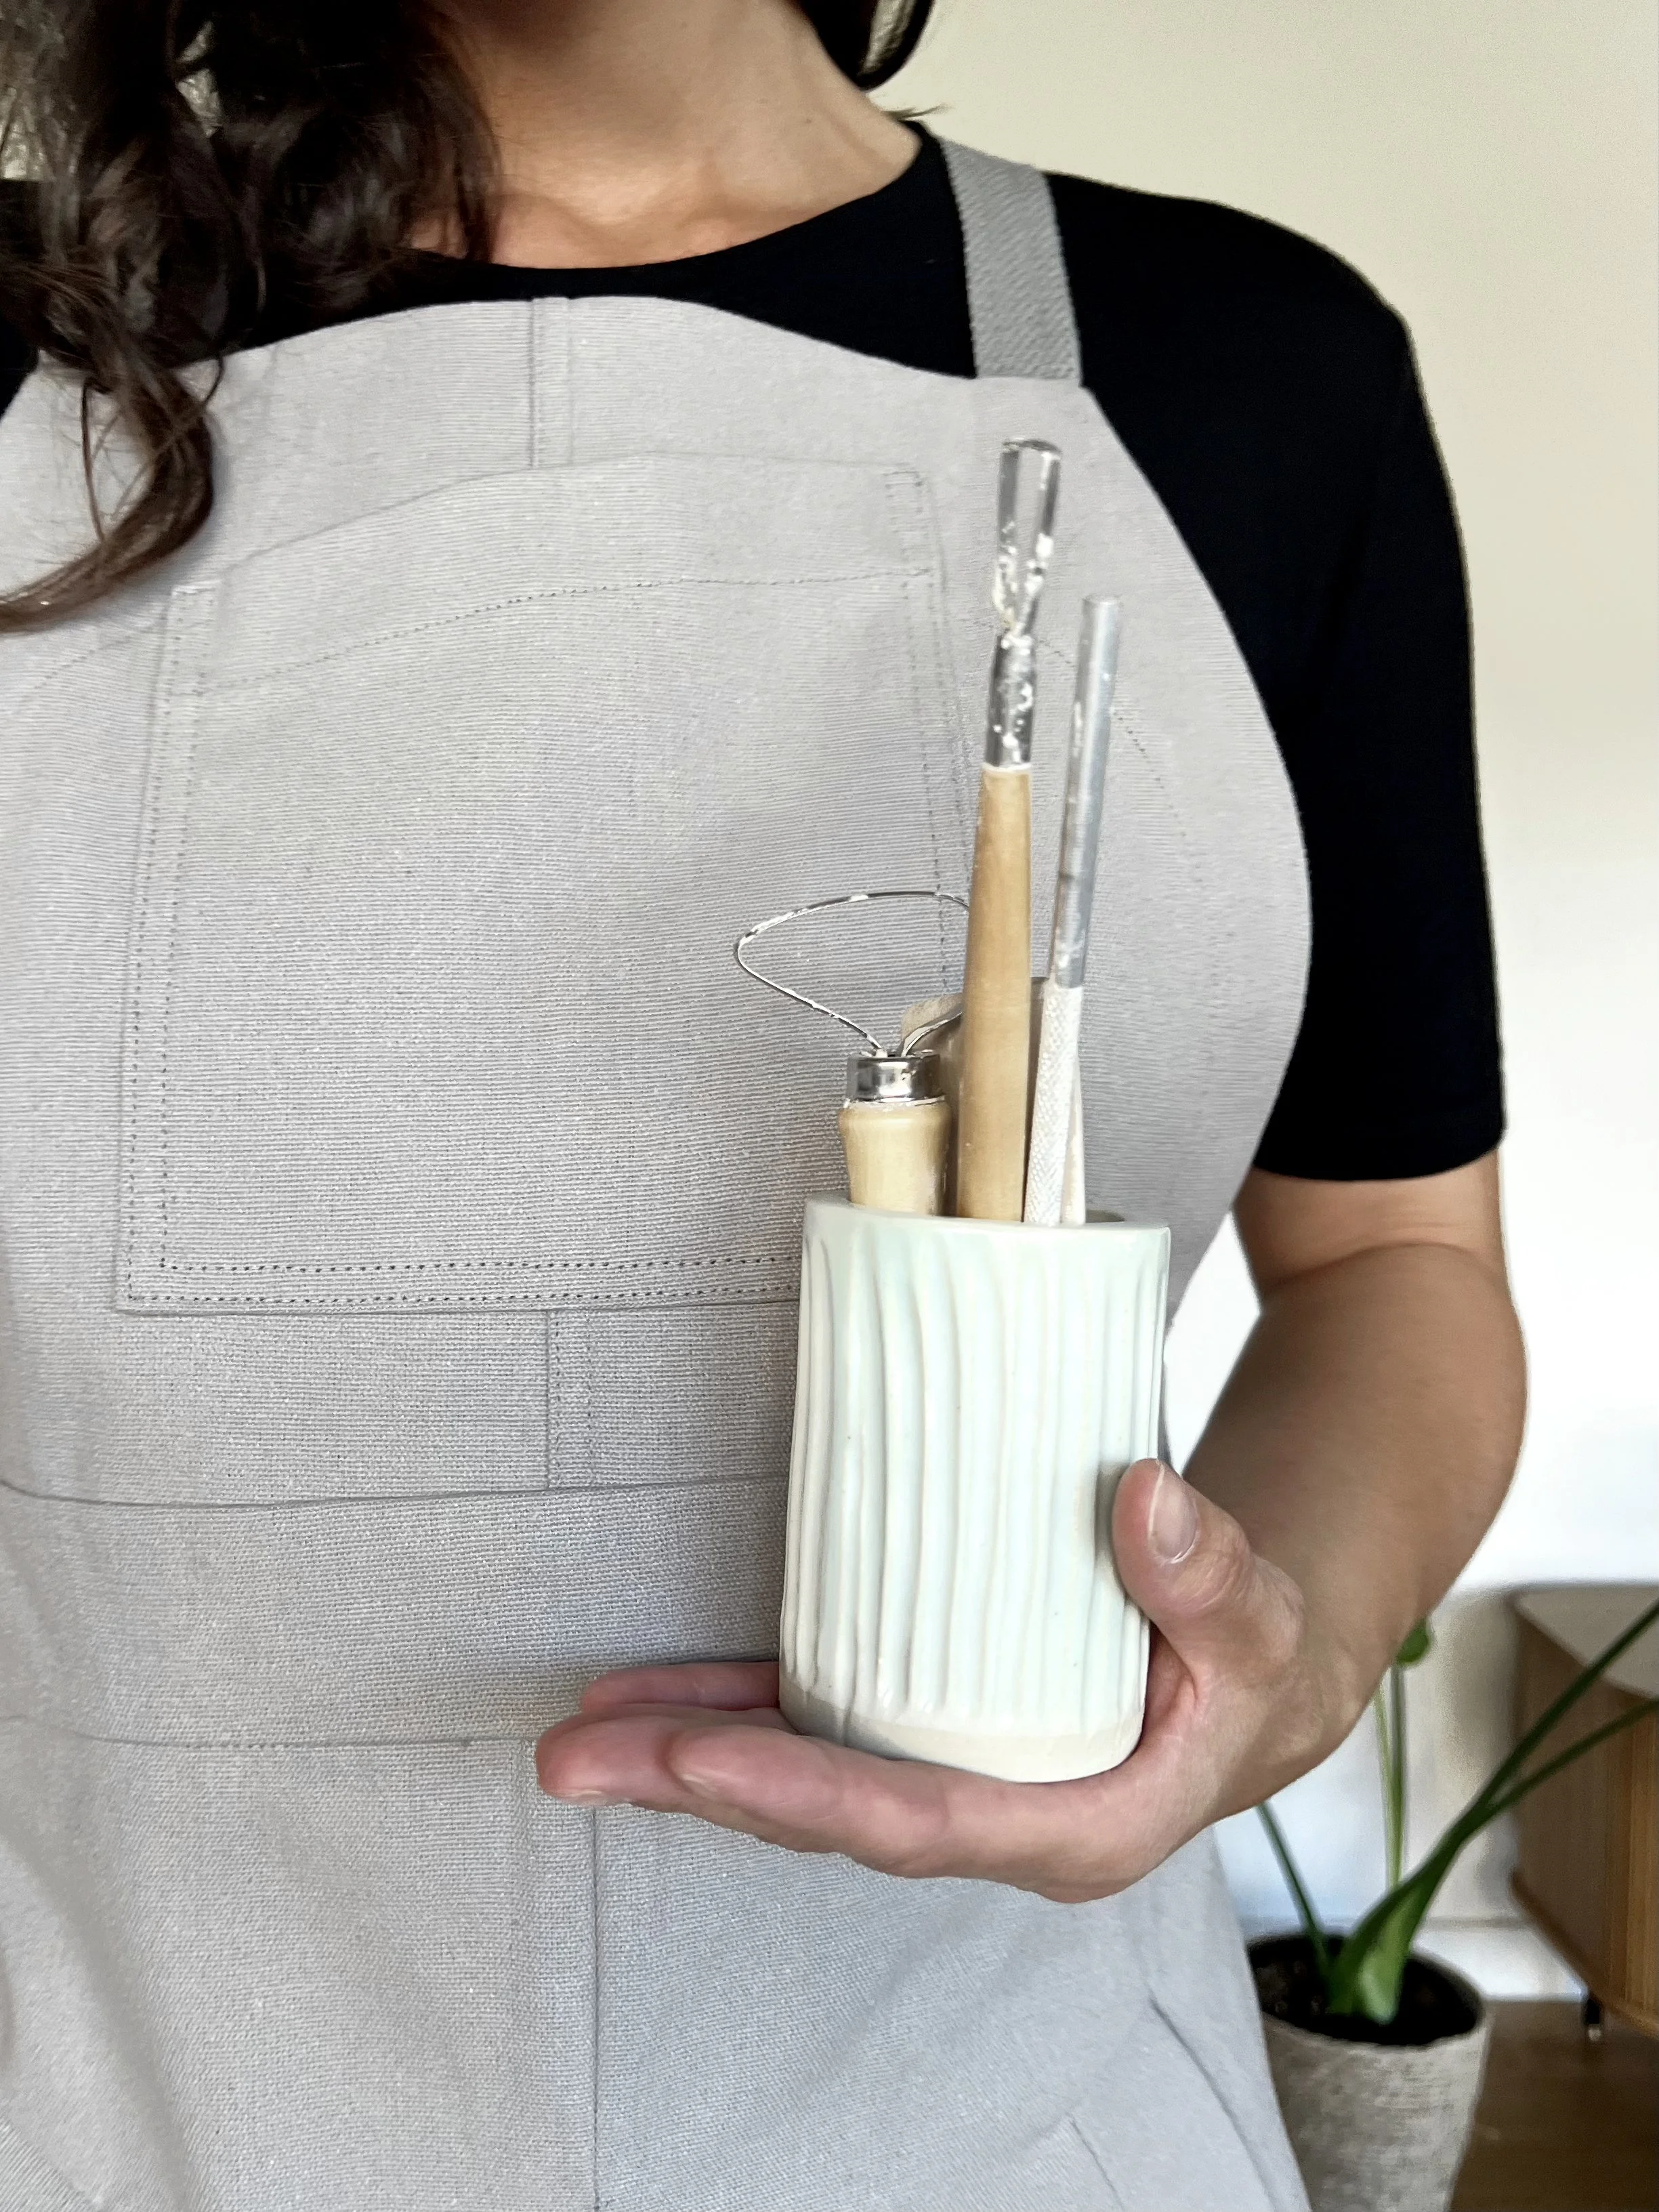
Burwood Tool Roll
projects that build SKILLs
Making pants that fit: Pants Making Series
Learning how to sew with knits: Sewing Knits Series
Make a pair of jeans: Sewing Jeans Skills Kit & Burwood Tool Roll
Make a button up shirt: Shirt Making Series
Learn how to make a coat: Coat Making Series
Sewing Coats Skills Kit + Ormond Apron Pattern
Or, focus on just one skill at a time
Another approach is to focus on one skill at a time, within a single project. For example, you may want to focus on fit. Pick a garment that will help you learn some adjustment techniques, but will be an easy enough sew. Alternatively, you may want to try out some fancy finishing techniques, in which case it might help to avoid worrying about fit by making a boxy top, a loose fitting dress or an elastic waist skirt.
When a project doesn't go to plan, reflect rather than judge
The previous examples might make it sound like skill building is a completely linear process. It certainly isn't!
Even after doing all the prep, making toiles, practising seams and so on, sometimes a project still ends up feeling like a flop. The fabric you chose just isn't quite right, the fit isn't what you expected, or a garment just doesn't feel good. This is when taking some time to reflect on the process can help you reframe it and feel less disappointed. Even if something isn't wearable, there are still lessons you can take into your next project.
What did this project teach me that I couldn't have learned without making it?
Which part felt harder than I expected, and why?
If I made this again, what is one thing I would do differently?
Did I learn something about my preferences, my body or the way I like to work?
What new skill or piece of knowledge can I carry into my next project?
If a friend had made this, what would I encourage them to celebrate?
Is there a part of this project I can reuse, repurpose or revisit later?
What would success look like if I measured it by the learning, or the time I enjoyed in my hobby, instead of the finished object?
Remember, it's a long game
Skills grow through making. You may watch something on YouTube and it looks like something you could easily do, but you give it a try and it's much harder than it looks. That's normal! Your hands are learning a new skill. If you only ever attempt things you're already good at, you never expand your capabilities. The trick is to stretch yourself just enough that you stay curious and excited, without getting overwhelmed.
For a lot of us, we're hoping that sewing will be a hobby for life. It's not something we're picking up for a week or two before moving onto something else. It's okay for it to take time to improve.
I have talked about this quote before, and I'll do it again, because there's one quote by the podcaster Ira Glass that I have returned to over and over when I'm feeling frustrated by learning something new.
"Nobody tells this to people who are beginners, I wish someone told me. All of us who do creative work, we get into it because we have good taste. But there is this gap. For the first couple years you make stuff, it's just not that good. It's trying to be good, it has potential, but it's not. But your taste, the thing that got you into the game, is still killer. And your taste is why your work disappoints you. A lot of people never get past this phase, they quit. Most people I know who do interesting, creative work went through years of this. We know our work doesn't have this special thing that we want it to have. We all go through this. And if you are just starting out or you are still in this phase, you gotta know it's normal and the most important thing you can do is do a lot of work. Put yourself on a deadline so that every week you will finish one story. It is only by going through a volume of work that you will close that gap, and your work will be as good as your ambitions. And I took longer to figure out how to do this than anyone I've ever met. It's gonna take awhile. It's normal to take awhile. You've just gotta fight your way through."
Happy sewing,
Emily
For more issues of the Q & A series, you can check out the archive here.
TOPSTITCHING TIPS
ISSUE 209 Q & A - Burwood Tool Roll Sewalong: Part 2 - Assemble Front Panel + Coin and Side Pockets
ISSUE 208 Q & A - Burwood Tool Roll Sewalong: Part 1 - Inner Flap
Q&A ELASTIC WAIST BACK PANTS
Q&A 204 - How to get into sew flow
THE Q & A SERIES
HOW TO GET INTO SEW FLOW
Have you ever sat down at your sewing machine, looked up… and realised two hours have passed?
Welcome to your creative flow, or as we like to call it ‘sew flow’.
Flow is that state where you’re fully immersed in what you’re doing. You’re not thinking about your to-do list. You’re not checking your phone. You’re not even really thinking about the finished garment. You’re just focused on the step in front of you.
And somehow, your hands know exactly what to do.
In our Sewing Mindset Journal, we describe flow as that moment when the challenge of the task perfectly matches your skill level. It’s engaging enough to hold your attention, but not so difficult that it feels overwhelming. When that balance clicks into place, time seems to disappear.
For some of us, flow feels calm and grounding.
For others, it feels energising and addictive.
For many, it’s the reason we fell in love with sewing in the first place.
HOW TO CREATE MORE FLOW
Make without a deadline
Deadlines can be motivating, but they can also block flow. When you can, give yourself space to sew without pressure. Let the process be the point. We’ve been exploring this in Making, Again.
Create a clear container for your time
If you know you “should” be doing something else, it’s hard to relax into your sewing. Even 45 minutes that you’ve intentionally set aside can make all the difference.
Match the project to your energy
Flow happens when the challenge feels just right. If you’re tired, choose something simple. If you’re craving growth, choose a project that stretches you slightly. Not everything has to be ambitious.
Tidy your space
An organised space reduces friction. When you don’t have to hunt for tools or clear a surface, it’s easier to sink into the work. Need help organising your space? Check out our guide here.
Add gentle background support
A favourite podcast, music. or an audiobook. The familiar rhythm of your machine. Sometimes occupying just enough of your brain helps your hands take over.
Most importantly, treat your creative time as something real and valuable. Not a luxury. Not a reward. But a meaningful part of your wellbeing.
Because when we nurture creative flow, we don’t just make garments.
We reconnect with ourselves.
We slow down.
We remember why we sew.
If you’d like support in intentionally creating more of these moments, the Sewing Mindset Journal includes prompts and reflections to help you understand what flow looks like for you, and how to invite more of it into your practice. To celebrate it’s stand alone release, receive 20% off until 18.2.26.
Happy sewing,
Emily
RESOURCES MENTIONED IN THIS ISSUE
For more issues of the Q & A series, you can check out the archive here.
MORE POSTS IN THE SERIES


Q&A 202 - FINDING YOUR SEWING COMMUNITY
Q&A 201: GENTLE GUIDE TO DELICATE FABRICS

THE Q & A SERIES
GETTING STARTED WITH DELICATE FABRICS
If you’ve ever dreamt of sewing with silk, chiffon or organza but hesitated at the thought of slippery seams and fraying edges, you’re not alone. Delicate fabrics can feel intimidating at first, but with the right preparation and a little patience, they can be incredibly rewarding to sew.
The key is to slow down, set yourself up for success, and let the fabric guide you.
This guide brings together our favourite tips from the Delicate Fabrics Hack Kit and Skills Kit to help you begin your journey with confidence.
1. Know Your Fabric
Each delicate fabric has its own personality. Silk charmeuse drapes like liquid and catches the light. Crepe de chine has a soft, matte texture and gentle crinkle. Organza is crisp and sheer, while georgette feels airy and slightly springy.
Before you cut, spend some time getting to know how your fabric moves. Hold it up to the light, notice its weight and transparency, and press a small test corner to see how it reacts to heat. Understanding these qualities will help you choose the right techniques and finishes later on.
2. Prepare Your Tools and Space
When working with fine fabrics, your tools can make all the difference.
Needles: Use a fine, sharp needle such as size 60/8 or 70/10 to avoid snags or visible holes.
Thread: Choose a high-quality polyester thread. For extra softness, try silk thread.
Pins: Fine silk pins or glass-head pins are best. Pattern weights help avoid marks.
Pressing cloth: Use a silk organza cloth to protect the fabric and see your work clearly.
Before you begin, clear your workspace and check that your cutting surface is smooth. Even a small nick or rough patch can catch on delicate fabric.

Clover Glass Head Silk Pins
3. Set Up Your Machine
Delicate fabrics prefer gentle machine settings. Always test on scraps first.
Stitch length: 1.5 to 2.5 mm.
Tension: Adjust to prevent puckering. If stitches look uneven, reduce presser foot pressure.
Machine feet: A Teflon foot helps fabric glide smoothly. A walking foot keeps layers even.
And when in doubt, hand baste. Slower, yes, but it gives you control and precision.
4. Prepare and Cut Carefully
Pre-wash your fabric gently, then give it a light press before cutting. Because delicate fabrics shift easily, stabilising is key.
Try these methods:
Cut in a single layer to prevent slippage.
Place tissue or pattern paper underneath and pin through both layers.
Use a rotary cutter with a sharp blade and pattern weights for clean edges.
Accuracy at this stage will make sewing far easier later.

5. Try Spray Starch
A light mist of spray starch can help keep slippery fabrics stable while cutting and sewing. Use sparingly and always test first, as too much can leave residue or stiffness.

6. Choose the Right Techniques
Delicate fabrics shine when finished lightly and cleanly.
French seams enclose raw edges for a neat, refined finish.
Rolled hems add an airy drape to sleeves and edges.
Bias or French binding works beautifully for necklines or sheer edges.
Each finish should support the fabric, never overwhelm it.

7. Press Thoughtfully
Pressing sets stitches and shapes your garment. With delicate fabrics, gentle is best.
Use steam carefully, always with a pressing cloth, and let each section cool before moving it. Think of pressing as sculpting the fabric into its final form.
8. Embrace the Process
Sewing with delicate fabrics invites you to slow down. It’s an exercise in patience and precision, but the results are worth it—the soft sheen, the fluid drape, the seams that melt into the fabric.
Start small with a sleeveless top or scarf and build your confidence. Each project teaches you something new about the balance between control and flow.
Ready to Try It?
Explore our Delicate Fabric Series in Curated for step-by-step tutorials on French seams, rolled hems and more. Each project is designed to help you learn at your own pace, one technique, one stitch, one beautiful fabric at a time.

RESOURCES MENTIONED IN THIS ISSUE
For more issues of the Q & A series, you can check out the archive here.
MORE POSTS IN THE SERIES
Q&A 200 - HOW TO SEW ACCURATE CURVES

THE Q & A SERIES
HOW TO SEW ACCURATE CURVES
Lately I have been doing a bit of a deep dive into thinking about what In the Folds patterns are all about. What we are known for, what makes our patterns stand out, and what elements of our patterns make them specifically “In the Folds.” Something that comes to mind are curves. I love an interesting curved seam line, and in today’s post I thought I’d chat to you about sewing accurate curved seams.
Get your bearings
First you need to get clear about what pieces are being joined. Sometimes this will be more obvious than others.
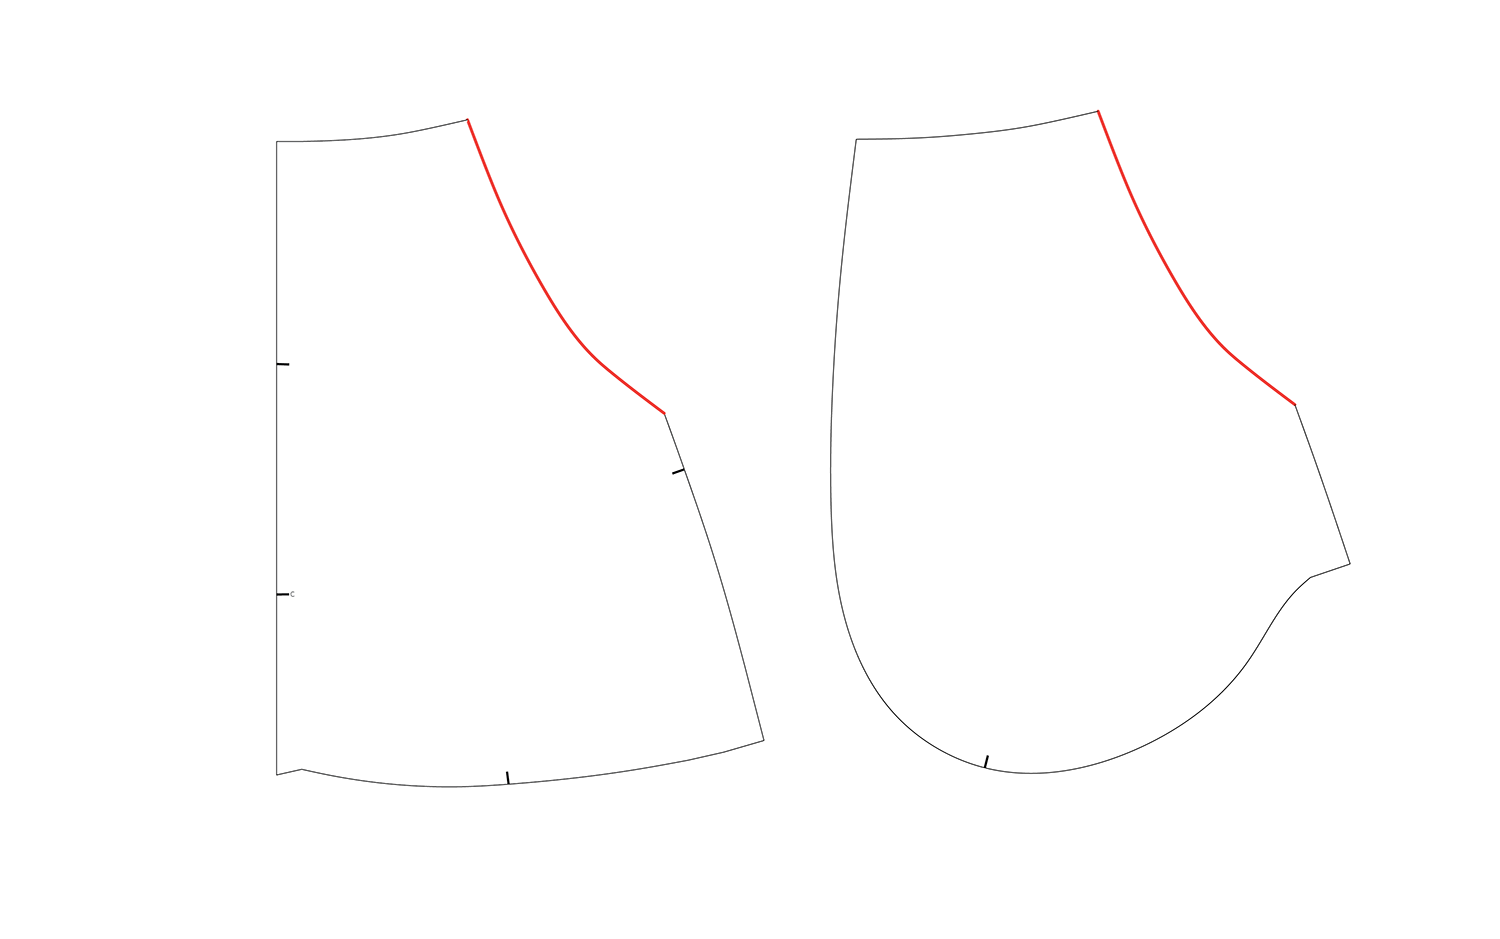
In this example you can see the curve of the pocket opening on the Mornington skirt. It’s the same shape between the POCKET FACING and POCKET BAG, meaning that it’s easy to match up and no extra notches are required.
Sometimes you will be left wondering “Am I pinning the correct pieces together?” This is when checking your notches line up is very important.
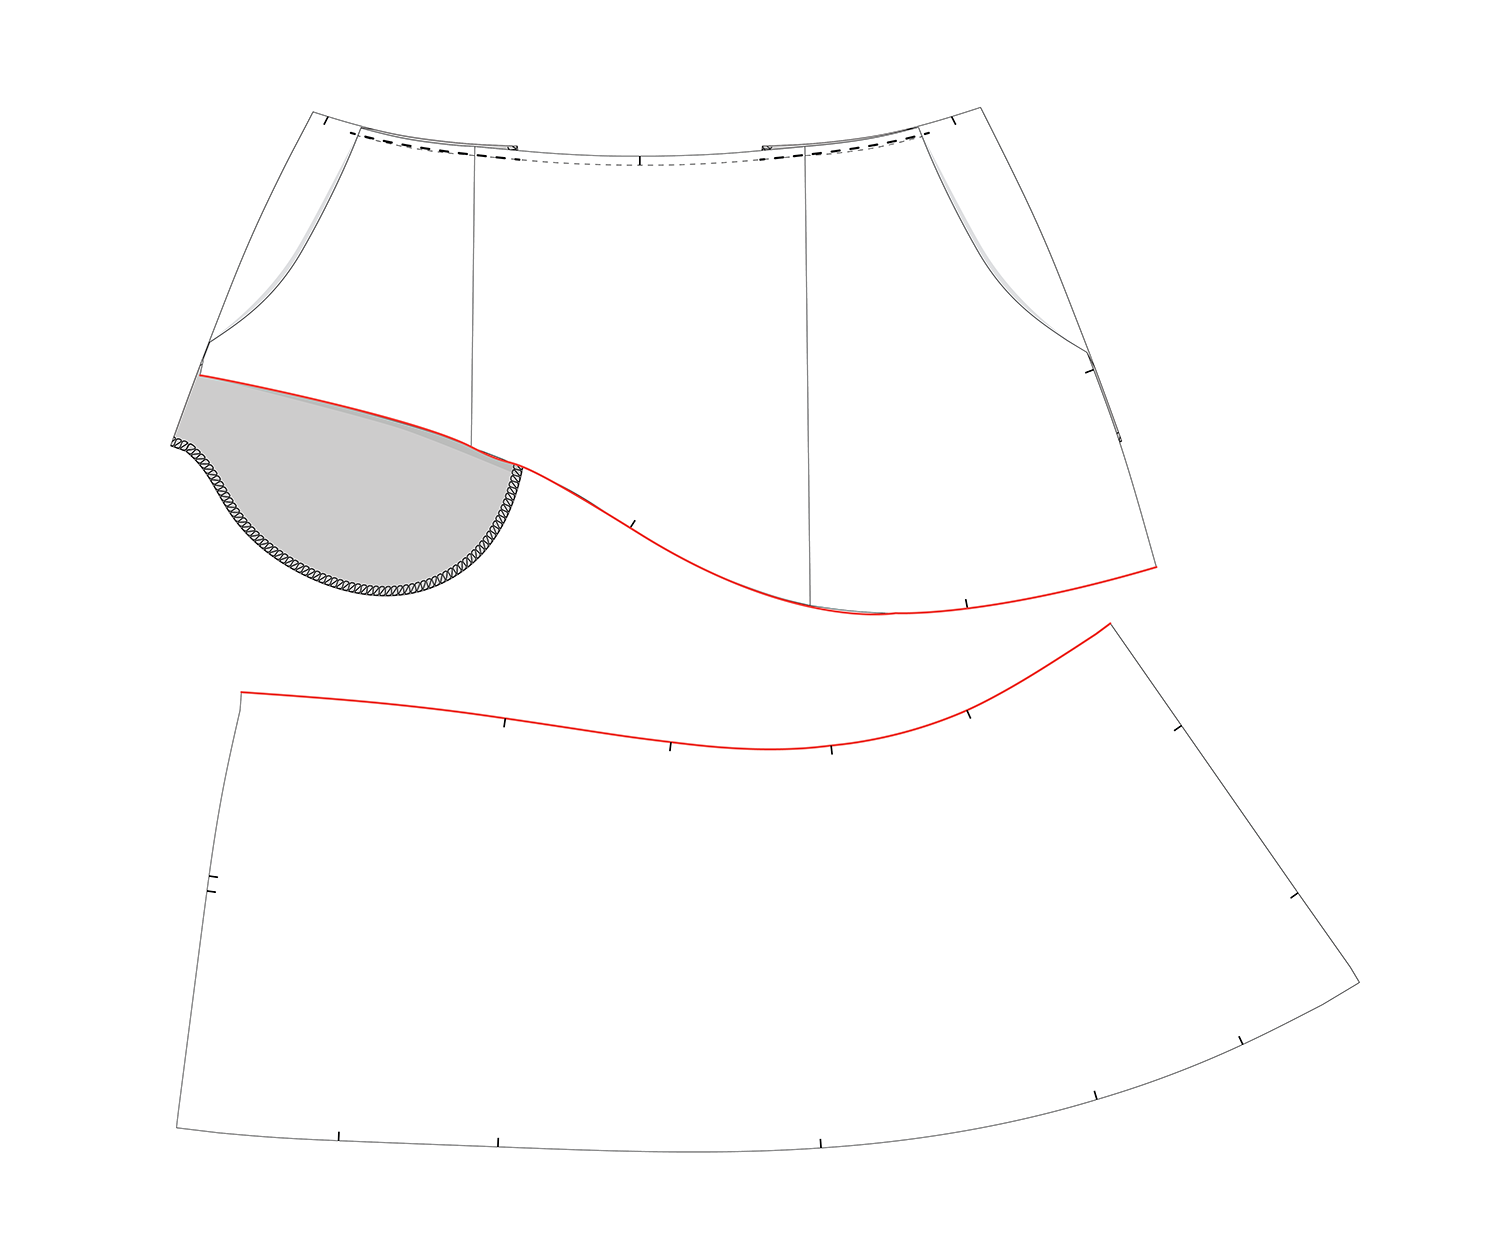
In the second example, it’s not obvious how these pieces come together, or even if it’s the correct piece. This is because there is some shaping being created in the seam.

This is when notches will do the heavy lifting for you.
2. The importance of pinning
Accurate pinning is your best friend when it comes to sewing curves.

Line up the notches first and pin in place. Place the pins perpendicular to the seam edges - this will prevent the fabric from moving, but is also the safest way to pin as pins come out easily as you sew, but also means if you accidentally sew over a pin, the needle should slide to one side of the pin, rather than through it.

Pin between the notches and to the edges of the pieces. For extreme curves, use more pins than you usually would - every 2-3cm (1in) is a good guide.
3. Go nice and slow
Once you get on the sewing machine, go nice and slow. Curves often take a bit of tweaking when you start sewing, even if you have done a great job of pinning.

As you sew, you might see small puckers forming, especially if you are sewing quite an extreme curve. For small puckers, use a pin to press the puckers flat.
For larger puckers, put the needle down into the fabric using the hand wheel and lift the foot to release the puckers. Gently smooth out using your fingers.
4. Keep your eye on the edges.

For some curves, one layer of fabric is going to try to pull away from the other at the edge. Keep your eye on this - it could be the layer on top or the underneath layer.

Gently move the edge of the fabric back over to where it should be as you sew.
5. Check for puckers

When you finish sewing the seam, check for puckering on both the front and back of the seam. If you have puckering, unpick a few centimetres (1in) either side before carefully re-sewing. Ensure all puckering is removed before finishing the seam allowance.
6. Pressing curves
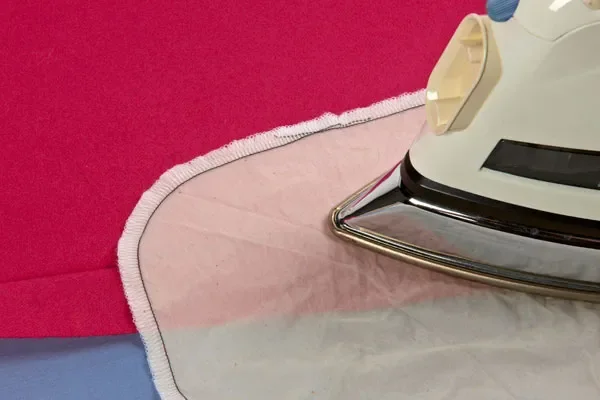
When pressing curves, consider where the curve is positioned on the body.

If it’s in an area that should be sitting flat, press flat on the ironing board.

If it’s an area of the body that is contoured (such as panel lines over the bust, waist or hips) use a pressing ham to shape the seam.
And that’s it! With these tips up your sleeve you should be sewing beautiful and accurate curves in no time!
Happy sewing,
Emily
RESOURCES MENTIONED IN THIS ISSUE
The Mornington skirt pattern can be found here.
For more issues of the Q & A series, you can check out the archive here.
WHAT YOU’VE BEEN MAKING

Ormond Coat made by @helensewsmemadeclothes

Ormond Coat made by @pippa2633
MORE POSTS IN THE SERIES
ISSUE 199 Q & A - WHICH PATTERNS TEACH WHAT FINISHING TECHNIQUES
ISSUE 194 - AN ALTERNATIVE SIDE SEAM FINISH FOR THE ATTWOOD PANTS

THE Q & A SERIES
AN ALTERNATIVE SIDE SEAM FINISH FOR THE ATTWOOD PANTS
Hi Emily,
In the Attwood pants pattern a ‘faux’ fell seam is proposed as an alternative for the outer side seams. I am interested in an alternative seam finish but I have not found an ITF method. Some other tutorials show different methods that differ greatly from each other…
What would be the best for the Atwood pants? Wrong sides together to start or right sides together? Thanks for your help.
Amanda
Paris, France
Hi Amanda,
This is a good question and one we went back and forth on a lot when developing this pattern!


The Attwood pants are made similarly to jeans - the crotch seam is sewn first, rather than the method of constructing each leg separately and then joining the crotch seam in the round. This is because we wanted the crotch seams to be sewed as flat felled seams, as well as the crotch seam. This means that the final seam of assembling the pants is the side seam.
As we say in the instructions, this seam can be a little tricky to sew as a flat felled seam as the legs are already attached at the crotch and inner leg seam. It is not difficult, but it will take patience. If you would prefer an alternate finish, consider a faux flat felled seam, or, if you don’t want to use an overlocker/serger, a French seam is a good option.
When sewing a faux flat felled seam, you will still need to feed the pant leg through the machine, but it is more decorative so it’s not as hard to manage with the small folded edge of the flat felled seam. But if you have a few makes under your belt, give it a go to do the actual flat felled seam, just go nice and slow. If you choose this option, sew the seams with right sides together, rather than wrong sides.
Your question also mentions how many different techniques there are for sewing flat felled seam, and this is true! For the Attwood pants we chose a different approach in comparison to the one we went with for our upcoming jeans pattern as on jeans, traditionally the bulk of the seam is inside the pants, while for the Attwoods as it’s not a traditional pant style, we could do what we liked!
We included the instructions below in the pattern as we know our community love to know “the why” behind the decisions we make.


There are various ways to sew flat felled seams and we have chosen the method we find
the most straightforward. Flat felled seams can be sewn so that the seam is enclosed on the right side of the garment (Option 1) or on the wrong side of the garment (Option 2).
For the Attwood pants, we used the method that has the enclosed seam on the right side of the pants to make a feature of the flat felled seams. If you would prefer the alternative (enclosed seam on the wrong side of the garment), you can construct them that way. We suggest sewing samples of both options to work out your preference.
As always, remember this is your garment which means you can do what you like! I like your approach though, I think working out all the different options to decide from is a really good start, and understanding why a finish works in one application and not in another will level up your sewing in the long run.
Happy sewing,
Emily
RESOURCES MENTIONED IN THIS ISSUE
The Attwood pants pattern - digital pattern available here.
For more issues of the Q & A series, you can check out the archive here.
WHAT YOU’VE BEEN MAKING

Attwood pants made by @tenderfoot.sewing

MORE POSTS IN THE SERIES

ISSUE 192 - AUTOMATIC BUTTONHOLER TROUBLESHOOTING TIPS

If a button band is narrow what’s the best way of using an automatic buttonhole attachment so it doesn’t make contact with the seam at the bodice which detects it and makes the machine stop halfway through making the buttonhole.
Helena
Linby, UK
Buttonholes. They can be a little bit daunting, can’t they!?
Because once you’ve cut through that fabric, there’s no going back. And even if you haven’t got that far, it can be a real pain in the ‘you know what’ to have to unpick a finished buttonhole, especially if you find the fabric has been damaged by the close stitches.
And to think that once upon a time they had to be sewn completely by hand!!
Needless to say, we are pretty lucky to have an amazing array of attachments we can add onto our modern sewing machines that make certain things a whole lot easier. But even with all these technological advances, there’s still a level of skill involved in getting them right. (And a whole lot of practice!)
Which brings us to Helena’s question. So let’s start at the beginning.
WHAT IS AN AUTOMATIC BUTTONHOLE ATTACHMENT?
An automatic buttonhole attachment (also called an automatic buttonhole foot) is a presser foot used with a sewing machine to create perfectly sized and evenly stitched buttonholes automatically, based on the size of the button you’re using.
It’s a feature on a lot of modern sewing machines, while older machines will normally have a manual four step buttonhole option, where you need to make the measurements, tell the machine when to sew and when to stop etc etc.
An automatic buttonhole attachment basically does all that for you, once you’ve set it up.
After inserting the button into the attachment’s sliding mechanism, the sewing machine uses sensors or a set buttonhole stitch pattern to determine the exact length of the finished buttonhole and stitches the entire buttonhole in one step—forward, back, side-to-side—without you needing to turn the fabric or manually measure.
But even with all this wonderful technology, sometimes there are still limitations which require a little bit of troubleshooting, but here are a few things you could try when running into this problem.

TROUBLESHOOTING AUTOMATIC BUTTONHOLE PROBLEMS
1. Add a temporary spacer behind the foot
Place a folded piece of fabric, cardboard, or buttonhole stabiliser behind the foot (at the back)—level with the start of the buttonhole. This helps the foot stay level and not tilt when it reaches a thicker seam. You can also place something of equal height in front of the foot too, depending on the seam's location.
This helps prevent the foot from thinking it's at the end of the buttonhole path due to the tilt caused by seam bulk.

2. Sew buttonholes before attaching the placket to the bodice
Consider if there is scope to sew the buttonholes before attaching the placket to the bodice. If possible in your construction order, sew the buttonholes while the button placket is still flat—before it's attached to the bodice. That way, you can avoid the seam issue altogether. This may require a little bit more thinking about seam allowances etc, so it might be a good idea to do a practice run!
3. Use a manual buttonhole stitch
If the seam interferes too much and the auto-foot keeps stopping, switch to the manual 4-step buttonhole function (or equivalent on your machine). This way you control the length, and the foot won’t stop prematurely.
This would probably be my go-to solution as I like having control when I can. But it will depend on how many buttonholes there are as it can be difficult to get them all the same when sewing manually.

4. Slightly shift the buttonhole
If your design allows, you might be able to shift the buttonhole slightly away from the seam—even 1–2 mm can help avoid triggering the sensor.
I hope that helps and you have pristine buttonholes in no time!
If you are looking up to sharpen your skills and knowledge on buttonholes, you may want to checkout our Sewing Shirts Skills Kit where we go into depth about marking button placement, sewing buttons and buttonholes and positioning buttons.
Happy sewing,
Emily
RESOURCES MENTIONED IN THIS ISSUE
Sewing Shirts Skills Kit - check out the complete Sewing Shirts Series here.
For more issues of the Q & A series, you can check out the archive here.
WHAT YOU’VE BEEN MAKING

Ormond chore coat made by @hazel_b_obv

Neale jumpsuit made by @saritha.sews
MORE POSTS IN THE SERIES
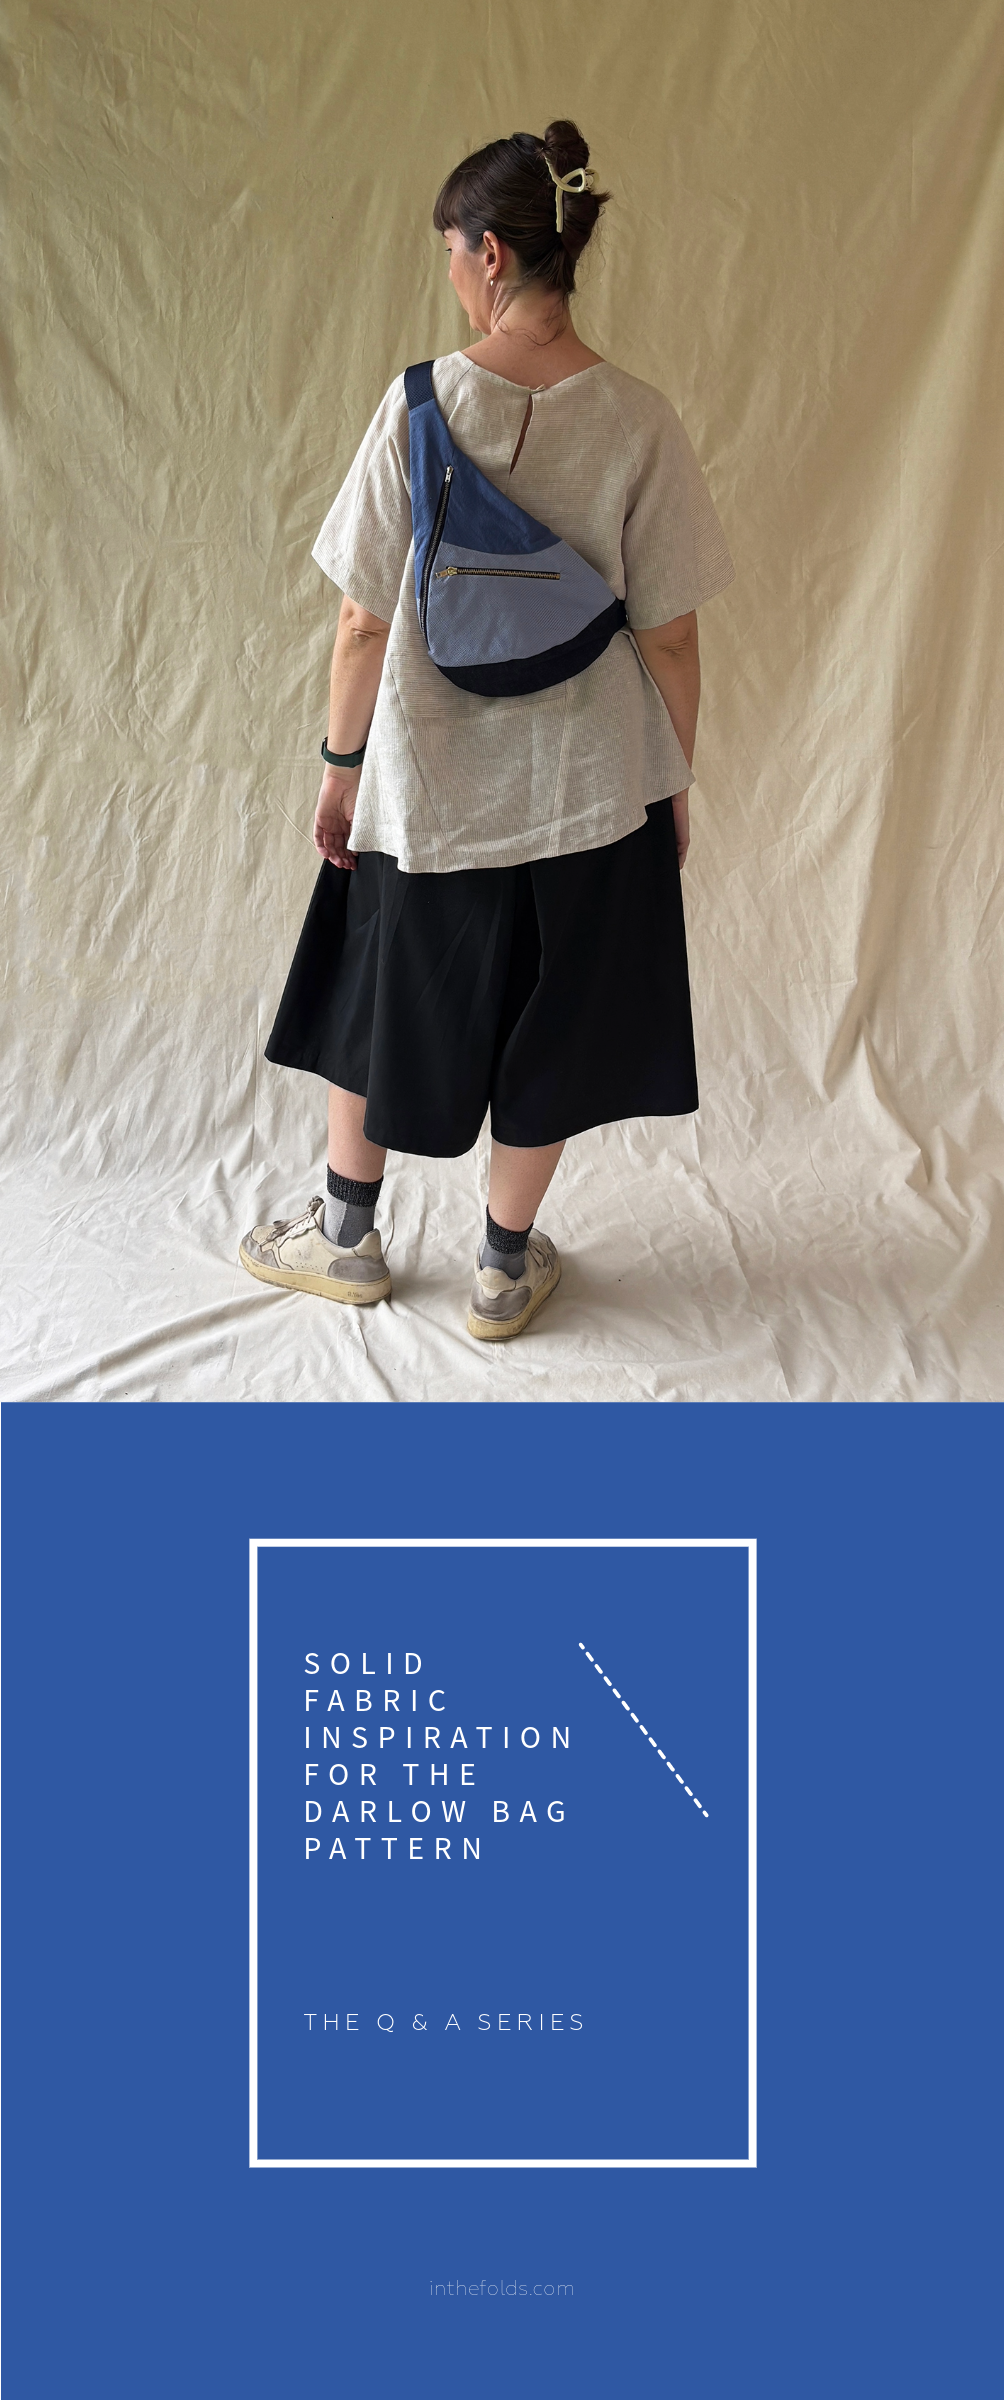
ISSUE 190 - COLOUR-BLOCKING INSPIRATION FOR THE DARLOW BAG PATTERN

Hi there,
I’m a bit unsure of what fabric to use for the new Darlow bag pattern. I’d love it if you could share some inspiration. I always struggle with putting together different prints, but are solids too boring?
Maria, Melbourne
This week we’re sharing part two of our answer to this question - colour-blocking inspiration for the Darlow bag pattern. Check out our first part about solid fabric inspiration here.
Inspired by the Darlow pants pattern, with curved panels that twist around the bag, this design is ideal for diving into your fabric scraps bin and using what you’ve got. We’ve even included fabric requirements specifically for this purpose with the pattern!


HOW TO TEST OUT FABRIC COMBINATIONS BEFORE YOU START A PROJECT
We know that for many makers (us included!), coming up with a combination of scrap fabrics that we really love when they’re all together can be challenging. How do we know we’re going to love it when we’ve finished making the bag??
This month, inside our private online community for our Curated subscription, Leanne has shared a tutorial for using a digital app (specifically, Procreate) to test out colour-blocking ideas. But if you’re not digitally-minded, what can you do?
Manual colour-swatching to the rescue!

Our Darlow bag pattern comes with a design page (shown above) which you can use to test out different colours, either by colouring it in with pens and pencils, or using fabrics scraps like Leanne did in the image below for our Hove tote pattern.

But what if you’re still not sure?
Looking to other makers’ makes for inspiration, is your best bet. Here’s a couple of scrappy Darlow bags from our amazing community so far...


And because this pattern was derived from our Darlow pants pattern, we have to share some of our favourite colour-blocked pants from our wonderful Instagram community.


There’s plenty more Darlow pants inspiration on Instagram, which you can use to inspire your Darlow bag make. Check out the hashtag here!
Happy sewing!
Emily
RESOURCES MENTIONED IN THIS ISSUE
The Darlow bag pattern is currently only available to Curated by ITF subscribers. More information about our Curated by ITF subscription can be found here. Sign up during the month of April to get the Darlow bag pattern delivered straight to your inbox.
The Darlow pants pattern - digital pattern available here.
For more issues of the Q & A series, you can check out the archive here.
WHAT YOU’VE BEEN MAKING


MORE POSTS IN THE SERIES
ISSUE 189 - SOLID FABRIC INSPIRATION FOR THE DARLOW BAG
Hi there,
I’m a bit unsure of what fabric to use for the new Darlow bag pattern. I’d love it if you could share some inspiration. I always struggle with putting together different prints, but are solids too boring?
Maria, Melbourne
If there’s one thing many of us struggle with, it’s choosing fabric for our makes! If you’re anything like us, we often scroll through social media admiring the fabric other makers choose for their projects. It always seems to be perfect! But then we’re left wondering why we have so much trouble choosing fabric for our own makes.
Getting inspiration from other makers is a great way to feel more confident about the fabric you’re choosing. So because the Darlow bag pattern was inspired by the Darlow pants pattern (it’s all about the panels!), we thought it could be helpful to share some of the lovely Darlow pants that have been made over the years.
This Q&A will focus on solid colours or using just one fabric for the entire Darlow bag, and in our next Q&A we’ll share some colour-blocking, scrappy fabric inspiration and tips.
SOLID FABRIC INSPIRATION
Solid colours and fabrics definitely don’t mean boring! But if you’re leaning that way, here’s some tips to help you choose one you’ll love.

Dark colours
If you decide to go with a solid fabric, be conscious that the darker fabrics won’t allow the details of the design to show up. But there are some positives too. Darker colours make a great canvas for topstitching the panels (more on that below) and as it's a bag, it's not something you are likely to wash often (or at all!), so dark fabric can be a great choice.

While lighter fabrics, like in these Darlow pants, really let the design shine it might be hard to keep a lighter colour bag clean. (Hands are always dirtier than they seem!)
Here’s some lovely solid Darlow pants colours that we think would look fantastic as bags!


Keep in mind that linen isn’t an ideal fabric for the Darlow bag. Instead, consider mid-weight woven fabrics with such as cotton canvas (lightweight or midweight), cotton drill, denim and heavyweight nylon. The weight of the fabric will determine the amount of structure in the finished bag.
And be sure to choose fabric that has a stable weave and doesn't easily fray - you’ll be thanking yourself when you get to the zips!
ADD SOME TEXTURE

If you’re going for a solid colour, but want to add a bit of zhuzh, why not add a bit of texture?
Whether it’s texture through the substrate (like these amazing corduroy Darlow pants) or texture through a print (like Shuay’s Darlows above), both can add visual interest because of the change in fabric direction on the different panels.
TOP-STITCHING AS A FEATURE
If you’re keen to stick with one solid colour for your Darlow bag, you might consider using top-stitching as an eye-catching feature, like in these Darlow pants.

We have a bit of a soft spot for top-stitching. It really elevates the finish of a garment, and makes it look a bit more ‘high-end’. If you’re feeling extra confident with your skills, you could even use a contrasting thread colour like in the Darlow pants above! Just be conscious that your stitching will be front and centre, so have a few practice runs and then go for it!
trust your gut
Sometimes, if you’ve got an idea you’ve just got to trust your gut and go for it. Case in point: These Darlows are AMAZING! They’re definitely a statement piece, and we all need one of those in our wardrobe.
There’s plenty more Darlow pants inspiration on Instagram. Check out the hashtag here!
Happy sewing!
Emily
RESOURCES MENTIONED IN THIS ISSUE
The Darlow bag pattern is currently only available to Curated by ITF subscribers. More information about our Curated by ITF subscription can be found here. Sign up during the month of April to get the Darlow bag pattern delivered straight to your inbox.
The Darlow pants pattern - digital pattern available here.
For more issues of the Q & A series, you can check out the archive here.
WHAT YOU’VE BEEN MAKING

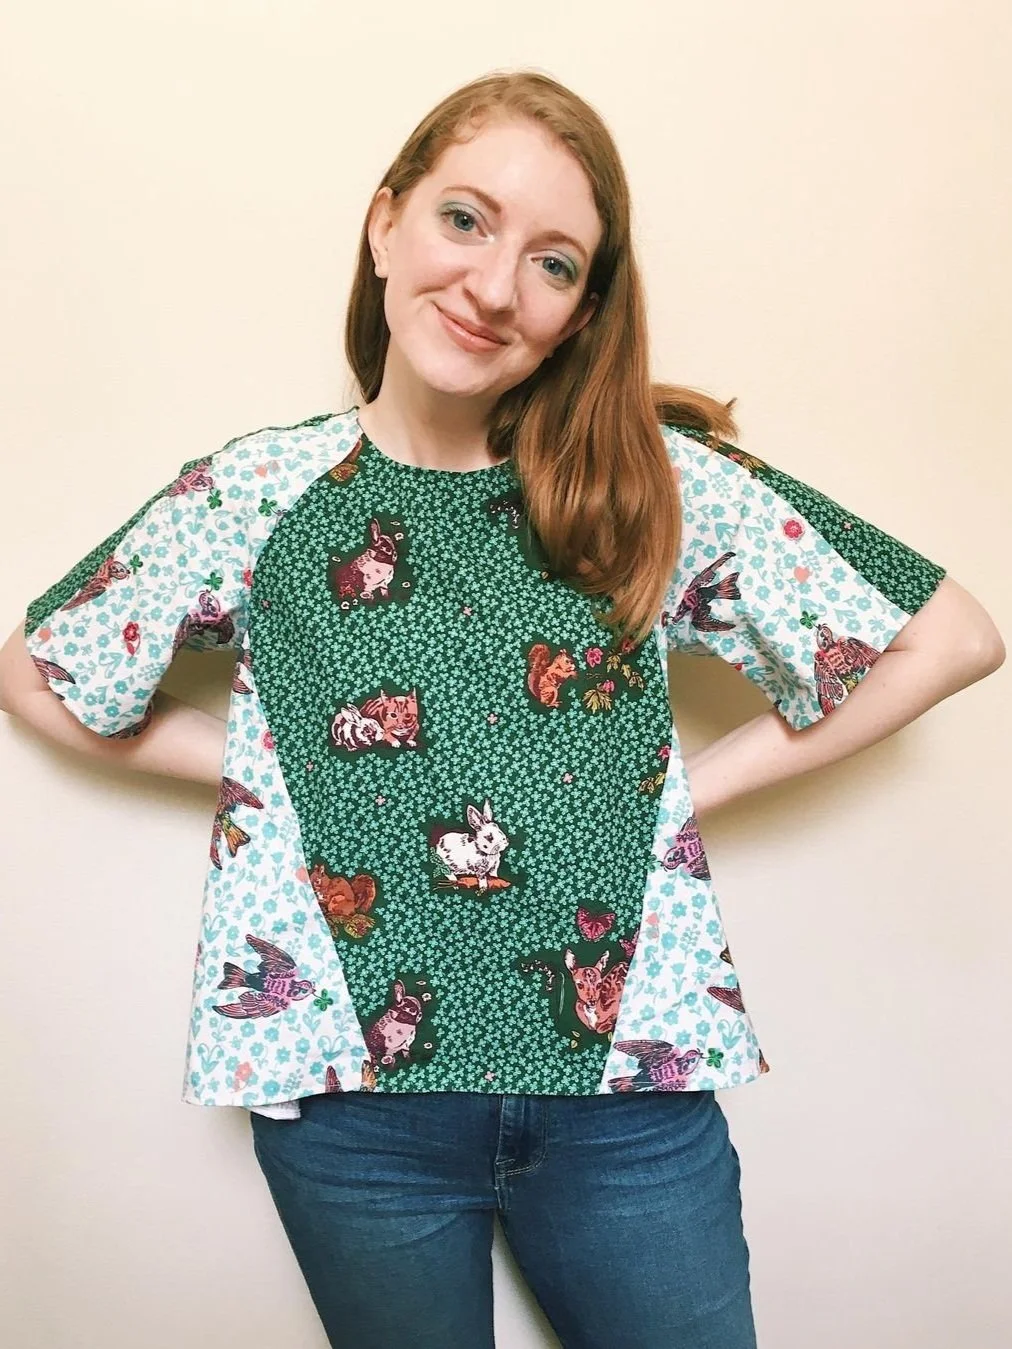
Dress copied using the Copy your clothes Skills Kit made by @maker.baker.girl

MORE POSTS IN THE SERIES
ISSUE 185 - Fabric inspiration for the Jacob dress pattern

THE Q & A SERIES
fabric inspiration for the
jacob dress pattern
Hello!
I’m going to give the Jacob dress pattern a go, but I feel like I need to make sure I use the right type of fabric. Can you please give me some ideas for what types of fabric you recommend?
Rosie
Hi Rosie,
This is a great question, and you’re right - the type of fabric you use to make the Jacob dress will definitely have an impact on the finish.
In all our patterns we provide information on the types of fabric we recommend for each specific design. In the Jacob pattern, this is what we’ve said:
“The Jacob dress is compatible with light to medium weight woven fabrics such as: cotton poplin, chambray, linen, linen blends, cupro, rayon and rayon blends. If you prefer a softer, drapier silhouette, consider fabrics like sateen, silk (crepe de chine or habotai) or viscose (rayon).”


You can see the different finish that you get with different fabrics in the Jacob dress samples we’ve been sharing on Instagram. Leanne’s Jacob is made from a twill fabric from meetMILK. It is quite a drapey fabric in comparison to the linen that Sara used to make her Jacob dress. Side by side, the two dresses have a slightly different look to them, despite being made from the same pattern.
Before you buy your fabric, or start cutting into something from your fabric stash, I’d definitely recommend considering the silhouette you’d like your Jacob dress to have. If you want the fabric to fall smoothly across your body, opt for a drapey fabric. If you want to really highlight the ruffles of the drawstrings, go for something with a bit more body. Your local fabric store can help you with this if you’re not really sure what type of drape a fabric has. If you’re buying online, some stores share videos of the fabric to show you what it’s like. If not, send them an email and ask the question!
This month we asked Maaike from MaaiDesign and Amaya from Pattern Scissors Frock to send us their fabric recommendations for the Jacob dress, so keep reading for some fabric inspiration from local Aussie fabric stores.
JACOB DRESS FABRIC RECOMMENDATIONS FROM PATTERN SCISSORS FROCK

We had to start with this amazing Lilac Garden Linen Cotton blend from the Miss Moresby range. Amaya describes this substrate as a little softer than linen thanks to the cotton, but with the strength of linen. From the video it looks like it has a finer slub than regular linen fabric. This one could strike a good balance between drape and structure if you’re not sure which way to go!

Merchant and Mills is always a good idea in our opinion, and Amaya has said their hemp/cotton blend could be good for a little more structure. This chalky blue looks beautiful!

Jacob dress fabric recommendations from MaaiDesign

First on Maaike’s list is this range of cupro linen tencel. Described as an alternative to silk, with a similar gloss, but without the silk price tag it sounds pretty good! It’s a beautiful drapey fabric, perfect for a special occasion. Available in a rainbow of colours you are sure to find one you love.

Next up is a linen viscose which is described as divinely soft, with a matte finish, lots of drape and extremely comfortable to wear. Available in a range of colours. Another perfect option for Jacob!

For a final bit of fun we wanted to share this lovely Jessica Nielsen print in cotton viscose twill. The fabric is described as having fluidity and softness, making it ideal for flowing dresses and skirts. Maaike has a range of other artist prints in cotton viscose which you can view here.
I hope this helps you in your fabric finding endeavours!
Happy Jacob dress sewing!
Emily
RESOURCES MENTIONED IN THIS ISSUE
The Jacob dress pattern is currently only available in our Curated by ITF subscription. It will be released as a standalone resource later in 2025. More information about our Curated by ITF subscription can be found here.
For more issues of the Q & A series, you can check out the archive here.
WHAT YOU’VE BEEN MAKING


MORE POSTS IN THE SERIES
ISSUE 184 - Fabric inspiration for the jacob dress pattern

THE Q & A SERIES
How to sew a flat neckline with vilene shields
Hi Emily,
I am making the top out of very slippery material. I successfully cut it out using tissue paper but am really struggling to get the curve of the neck to lie flat. I pressed it ok but when I sew, especially along the neckline it puckers out of shape. Any tips?!
Anne
Altrincham, United Kingdom
Hi Anne,
What is probably happening is that the neckline is stretching, which makes it almost impossible to get it to lie flat. When working with slippery or delicate fabrics, as well as staystitching the neckline, it can be a good idea to use Vilene tearaway shields to help your neckline remain flat
WHAT IS A VILENE SHIELD?


Tear-away Vilene shields are a sewing aid used to prevent stretching in areas like necklines and armholes, during garment construction.
WHEN TO USE VILENE SHIELDS
In a lot of cases, staystitching provides enough stabilisation to prevent a curve from stretching, but if you are using a fabric that is prone to stretching, is particularly delicate, or have seams cut on the bias or close to the bias, your fabric may need extra stability. That's when Vilene shields come in handy. It also provides an opportunity to check that your fabric hasn't stretched - and if it has, you can use the Vilene shield to guide you when steaming the seam back to its original shape.
HOW TO CREATE VILENE SHIELDS
Some patterns will include the shield pattern ready for you to use. At other times you may feel the need for one and it hasn't been provided. Or, if you’ve hacked the pattern the original shield pattern may no longer work.
It's safe to say that when working with fabrics prone to stretching, curved areas like necklines will require Vilene shields. You can draft these at the cutting stage. But you might also find the need for one once you start sewing the project and notice particular areas stretching. You can always go back to the pattern, draft the shield and then steam the fabric back into shape.
You can draft the pattern on pattern paper so you have it to use in the future or can draft directly onto the Vilene and cut.
HOW TO DRAFT A VILENE SHIELD PATTERN
Step 1
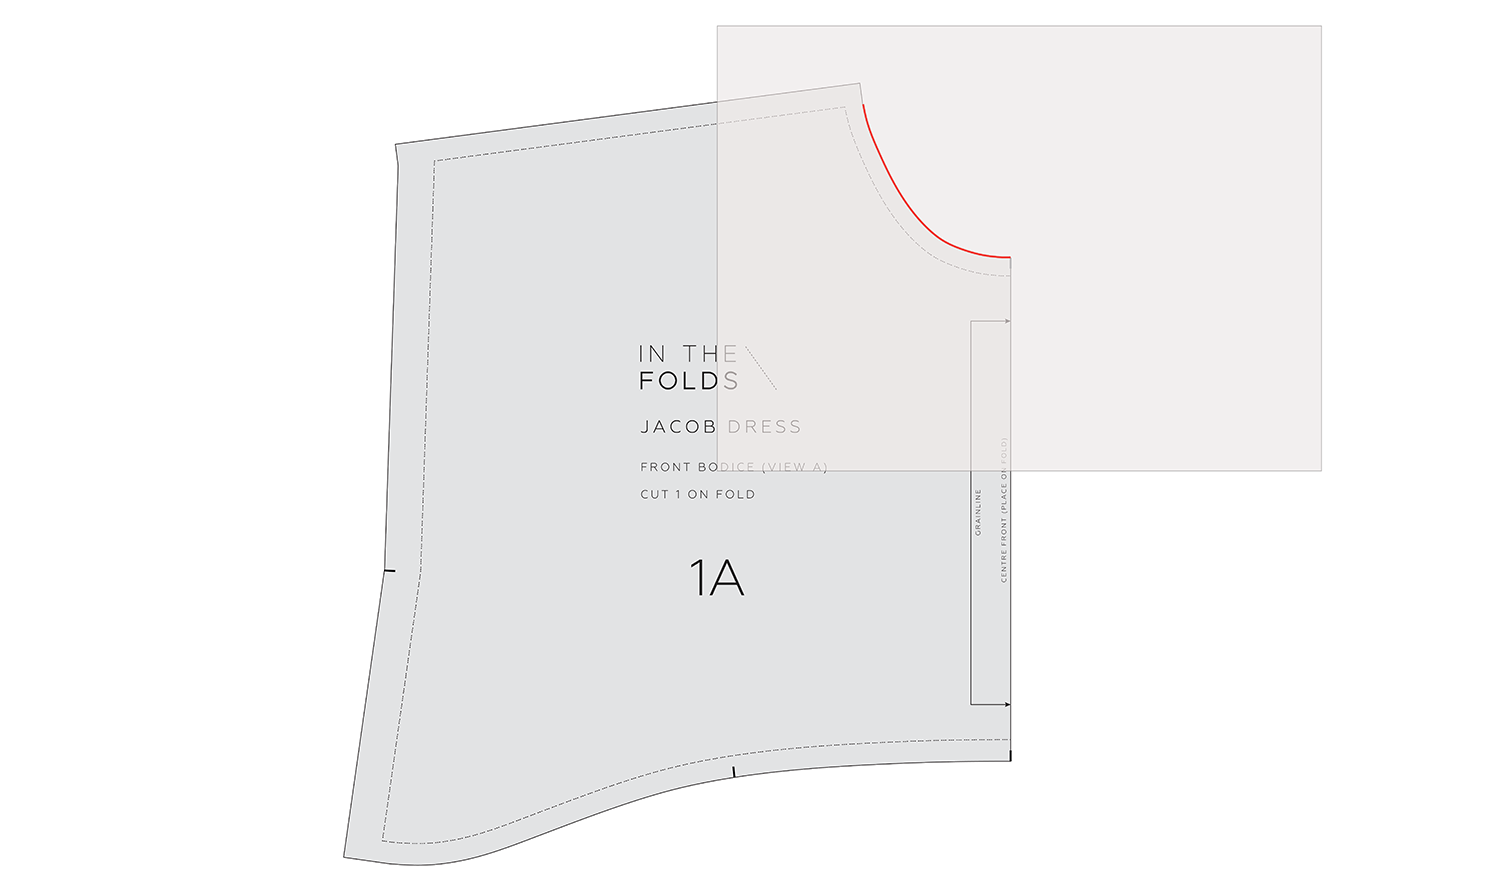
Place a piece of paper onto the neckline. If you would like to make a full piece (as opposed to a piece that will be cut on the fold), leave enough space to create the full piece. Use pattern weights or pins to hold the paper in place. Trace the neckline CUT LINE. Use a French curve if you have one.
Step 2

Draw straight lines from the neckline down the shoulder STITCH LINE and CENTRE FRONT line the width you would like the shield to be. We suggest making it 2.5cm - 4cm (1in - 1½in) wide.
Step 3

Measuring from the neckline, mark the shield width in regular intervals between the two lines marked in STEP 2.
Step 4

Join the broken line with a smooth curve. Fold in half and transfer the lines to the other side or pin through the paper and cut it out.
Step 5

Label the pattern piece - FRONT VILENE SHIELD CUT 1 TEARAWAY / VILENE ONLY. Mark at CENTRE
FRONT neckline. Repeat this process for the BACK to create the back neck shield.
Step 6

When making shields for other seams, consider the order of construction when creating the shield.
For example, for the shoulder on the Jacob dress, the hems are sewn before the shoulder seams are joined (due to the drawstrings) so the shield needs to stop at the armhole STITCH LINE.
HOW TO SEW WITH VILENE SHIELDS
Step 1

Staystitch the neckline on the FRONT 6mm (¼in) from the edge. Start at the shoulder on each side and stitch towards the CENTRE FRONT.
Repeat on the BACK neckline.
Step 2

Follow instructions to join shoulders and any other elements required before finishing the neckline.
Step 3

Turn the bodice inside out. Pin FRONT NECK VILENE SHIELD to the inside of the neckline, lining up
the CENTRE FRONT notch and the edges with the shoulder seams.
Repeat on the back with the BACK NECK VILENE SHIELD.
Step 4

Attach binding / facing using the method given in the instructions. We have a tutorial about how to bind a neckline here.
Step 5
Carefully remove the Vilene shields before you trim, clip and grade the seam allowance.
I hope that’s helpful, Anne!
You may also like to have a look at these blog posts about cutting tricky fabrics - Issue 7 - Cutting linen (and other tricky fabrics) and Issue 87 - Tips for working with delicate fabrics.
Happy sewing!
Emily
RESOURCES MENTIONED IN THIS ISSUE
The Jacob dress pattern is currently only available in our Curated by ITF subscription. It will be released as a standalone resource later in 2025. More information about our Curated by ITF subscription can be found here.
Cutting linen (and other tricky fabrics) - blog post here.
Tips for working with delicate fabrics - blog post here.
How to bind a neckline - blog post here.
For more issues of the Q & A series, you can check out the archive here.
WHAT YOU’VE BEEN MAKING

Sawtell dress made by @mamasuesews

Peppermint Everyday dress hacked into a tunic by @netty.hayes.sews
MORE POSTS IN THE SERIES


ISSUE 180 - HOW TO CHOOSE GARMENT LINING FABRIC

THE Q & A SERIES
HOW TO CHOOSE LINING FABRIC FOR GARMENTS
Hi Emily,
Thank you for your Q&A series - it is so informative and a great platform for learning, especially for a beginner like myself.
I am planning to make a summer dress using a sheer polyester fashion/main fabric, and was wondering if it is OK to use lightweight cotton/silk chiffon as the lining fabric? I am not sure if using synthetic and natural fabrics together is going to cause issues in the finished garment.
Many thanks,
Joanne
Hi Joanne,
This is an interesting question. Normally when thinking about fabric and lining combinations we would be thinking about the silk or cotton being the main fabric and the polyester being the lining (which is very common). In this case, where the polyester is the outer and the silk or cotton is the lining, it will depend on the weights of the fabric and the garment you are lining.
Things to consider when selecting lining fabrics
The best fabrics for linings depend on the purpose and type of garment being lined. Key factors include the drape, weight, breathability, and durability of the fabric.
When selecting a lining fabric, consider the main fabric of the garment, the intended use, and the desired comfort and appearance. For instance, a summer dress may benefit from a lightweight, breathable cotton lining, while a winter coat might require a warmer, more substantial acetate or polyester lining.
In fabric stores you will see specific lining fabrics, which are a good option, but you don’t need to be limited by these options if you would prefer to use a fashion fabric.
It is important to choose a lining fabric that is compatible to the outer fabric in terms of care instructions so that the garment can be laundered easily.
It is best to choose a lining fabric that is:
Smooth
Tightly woven
Opaque
Slippery (Although not absolutely imperative, a slippery fabric will make the garment easy to put on and take off and will reduce stress and friction on the lining. This is particularly important for coats, jackets and skirts, while it’s likely not a problem for a dress.)
You may also like to consider whether the fabric will crease easily or not. Natural fibres such as cotton and rayon have good breathability but will likely crease easily. Polyester linings don’t crease easily but can be hot and cause you to sweat.
SHOULD YOU MIX SYNTHETIC AND NATURAL FABRICS WHEN LINING A GARMENT?
Mixing synthetic and natural fabrics, like polyester with cotton or silk chiffon, is an option, but there are a few things to keep in mind.
Polyester is less breathable than natural fabrics like cotton or silk, so while the chiffon lining can improve comfort, you might still notice some differences in how the fabrics handle moisture and air flow.
Synthetic fabrics often have less give than cotton or silk, which may result in the fabrics pulling or behaving differently over time. If your outer fabric has some stretch, make sure the lining fabric accommodates that movement.
Polyester is prone to static electricity, which could cause the fabrics to cling to each other. Being natural fibres, silk and cotton may help reduce this, but it's something to keep in mind.
You might need to adjust the care routine for the finished dress. Polyester can generally handle machine washing, but silk or cotton chiffon will likely need more delicate care, like hand washing or dry cleaning.
If these factors work for you, the combination of a sheer polyester outer with a natural chiffon lining can create a beautiful, flowing dress perfect for summer.
If it’s a fitted garment, I’d be hesitant to mix the polyester outer with the natural lining as the natural fibres may stretch more than the outer when worn and cause some issues. If it’s a more floaty style I would be less worried about it. Another thing to think about is the amount of give in the two fabrics. I’d be holding them side by side and having a feel - how do they drape, how do they stretch on the crossgrain and the bias? Is it similar?
I hope this helps you on your lining adventure! And if you’re interested in learning more about sewing linings, take a look at our latest skill-building series, the Drafting linings Skills Kit and the Sewing linings Skills Kit.
Happy sewing,
Emily
RESOURCES MENTIONED IN THIS ISSUE
More information about our Curated by ITF subscription can be found here. Sign up during the month of September to get part one of our Sewing Linings Series, the Drafting linings Skills Kit, delivered straight to your inbox.
For more issues of the Q & A series, you can check out the archive here.
WHAT YOU’VE BEEN MAKING

Rushcutter dress made by @commesew_commeca
Collins top made by @unpo.dappertutto