
THE Q & A SERIES
How to GRADE BETWEEN SIZES Mornington skirt
Hi there, I've just joined - because of your beautiful Mornington skirt. I'm pear-shaped though - waist your size C, hips D - E. Do you have tips for how much I'd want to grade out at the hips and where on the pattern to do it? Or do you reckon that this is the kind of wide-hipped skirt where it wouldn't matter too much? I don't have too much of a problem with ready to wear in these kinds of styles.
Thanks, Bridget
Hi Bridget,
I am sure there are others wondering the same! To start, let's look at the size chart and work out if you do need to grade between sizes.

Work out ease in the pattern
You will see that in the size D, the actual hip measurement is 99cm and the finished garment is 113cm. To find the amount of ease (the space between the garment and the body), we deduct the actual hip measurement from the finished garment measurement.
i.e. 113cm - 99cm = 14cm
14cm ease on a skirt is not a lot, but also not a little. It's somewhere in between. For a fitted skirt, you may see as little as 5cm ease, while on a billowing full skirt. you might have something like 50cm! So 14cm means the skirt isn't very fitted through the hip, but it also isn't sitting too far away.
Test how much ease you would be comfortable with in your skirt
As you say your waist is a size C, and your hips are larger, what I would suggest you do first is work out how much ease there would be at the hips if you went with a straight size C. Hold a tape measure around your hips at this measurement and see how it feels. Can you sit down comfortably?
As your hip measurement isn't a straight size D, but between a D and E, I'd suggest at least grading up to a D at the hips. This way you will eat into a small amount of your ease, but not by much. Unless you want your skirt to be more fitted through the hips than it has been designed... which is totally okay too!
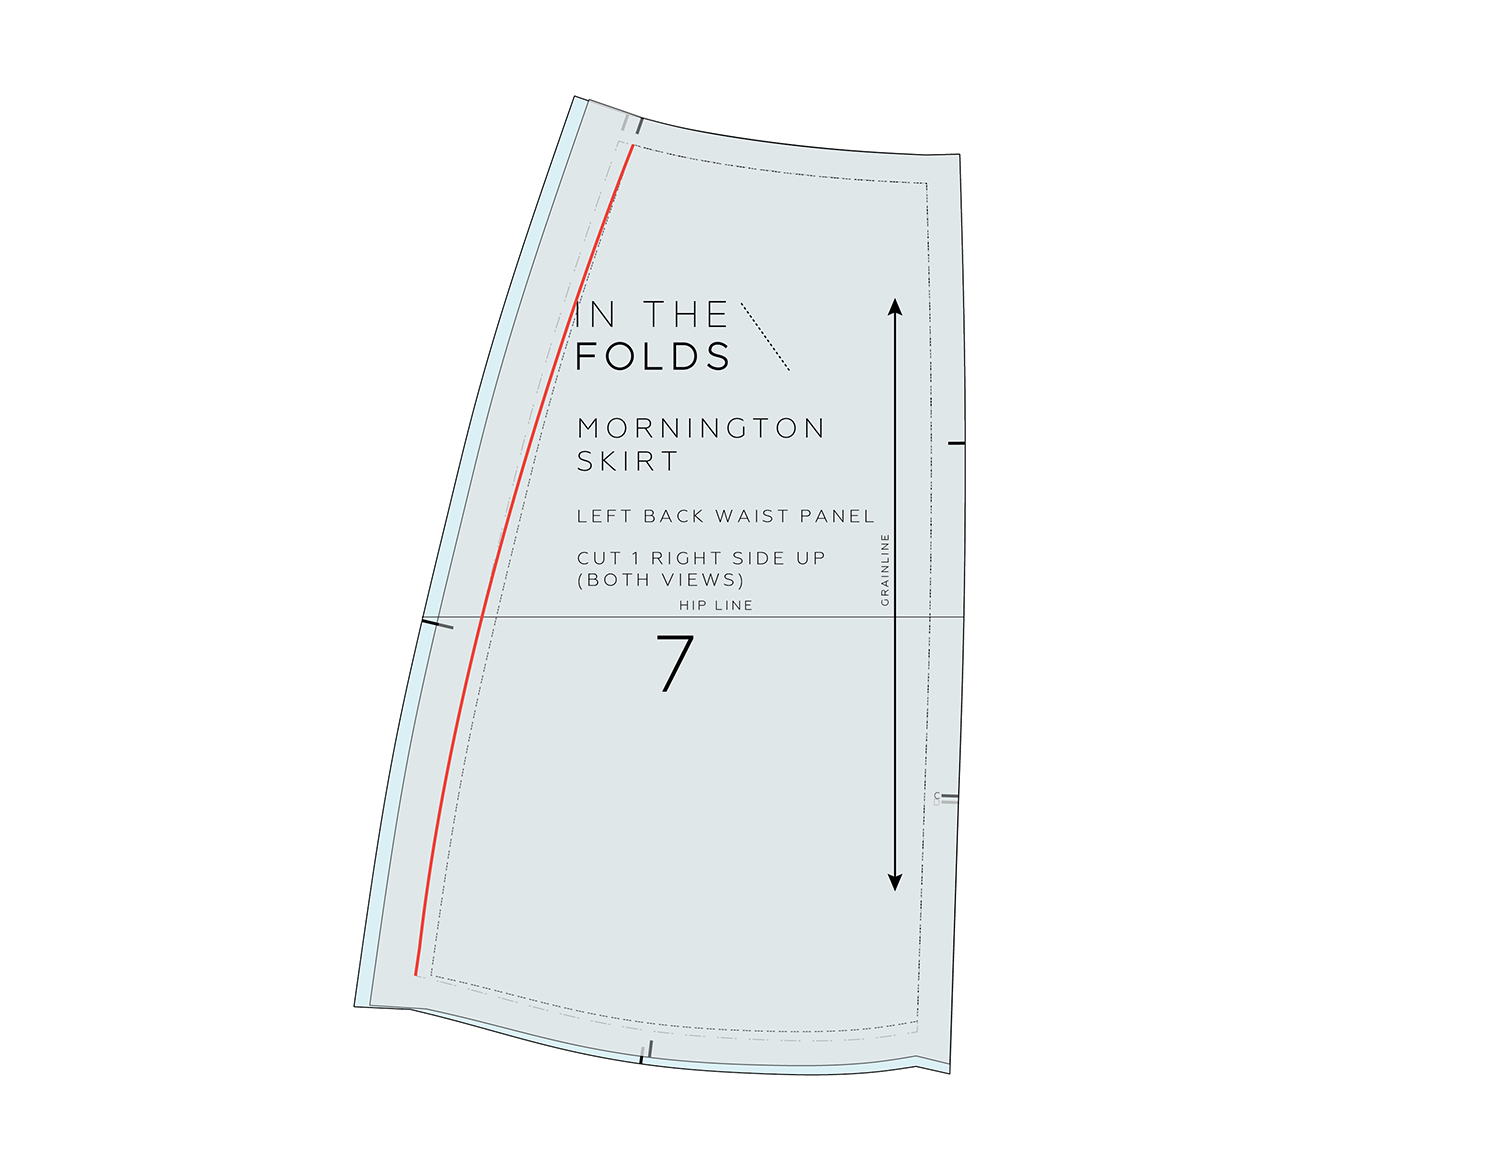
How to grade between sizes on the Mornington skirt
If possible, print the pattern in only the sizes you need. In this case, I have used the size C and size D.
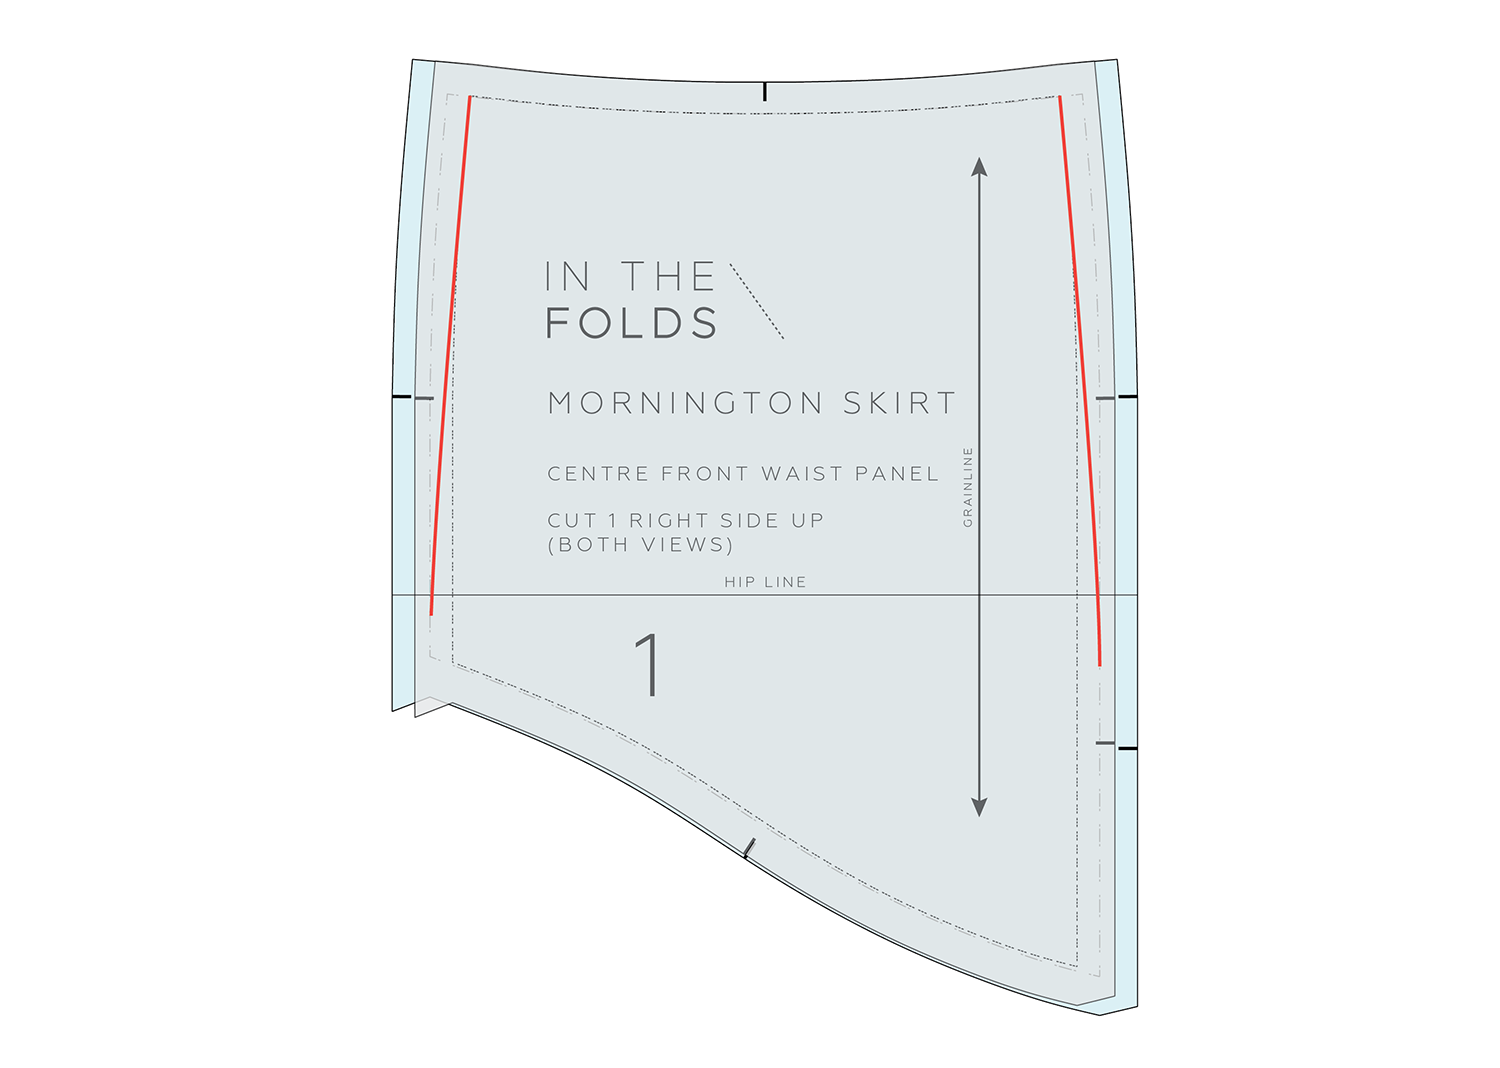
1. Start with the CENTRE FRONT WAIST PANEL [1]. Draw a curved line from the waist size on the STITCH LINE to the hip size at the HIP LINE (this is marked on the pattern). If you haev a French curve you will find it helpful.
As the pattern is asymmetrical, you need to do this on both sides of the piece. You can fold it in half and transfer the line from one side to the other using a tracing wheel if you have one.
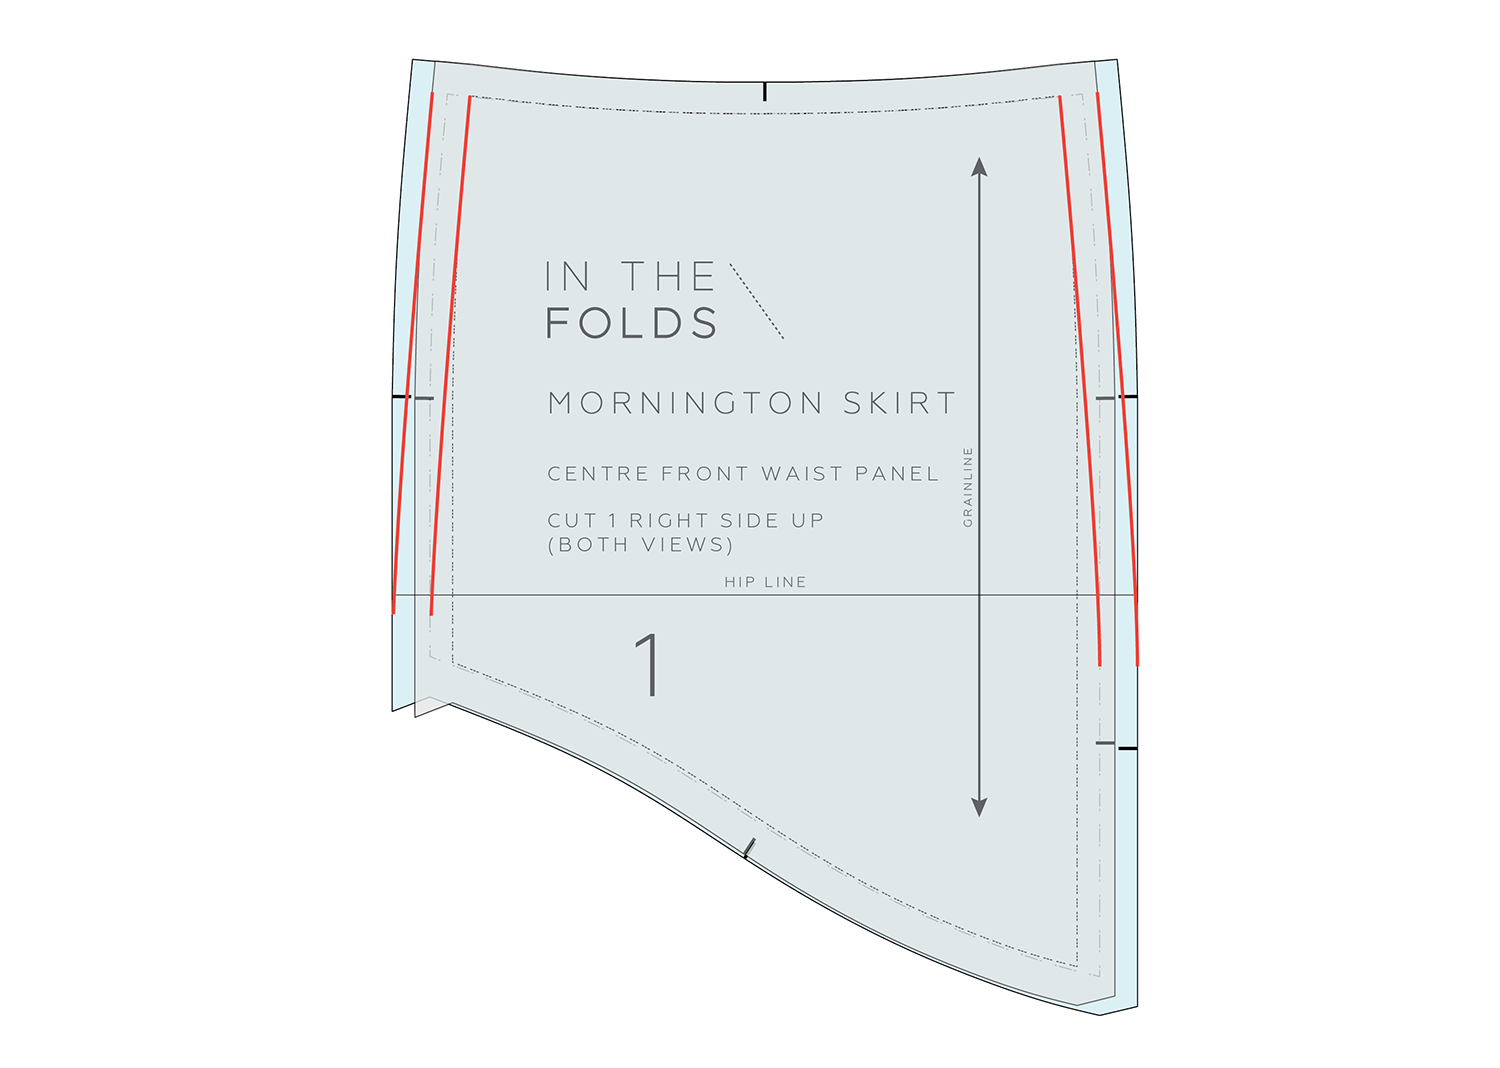
2. Add seam allowance to the new STITCH LINE. Move the notches to the new CUT LINE.
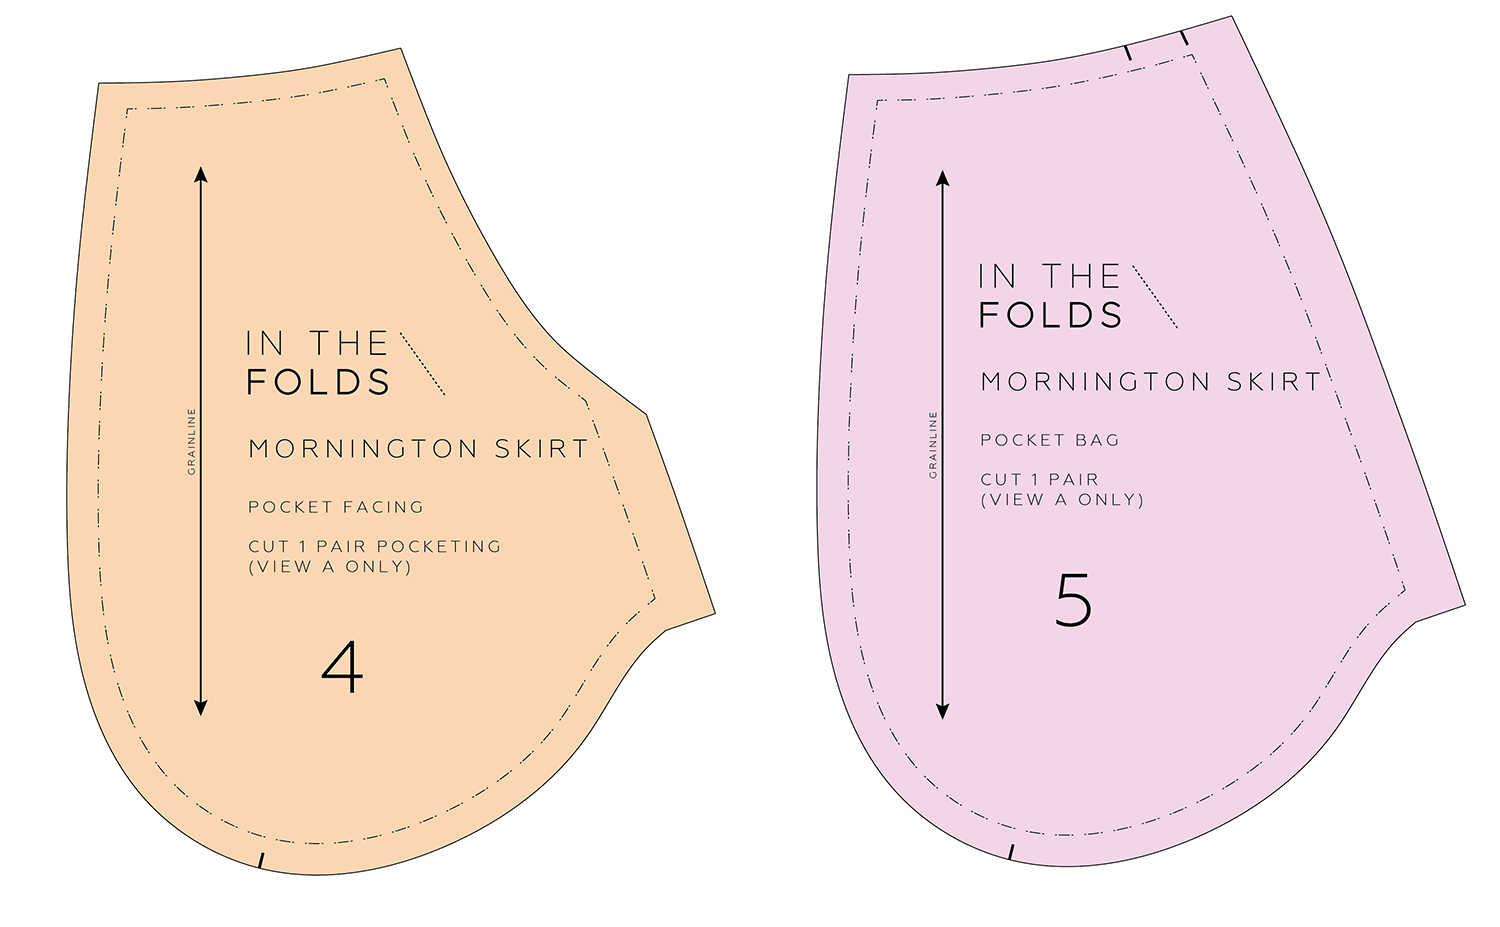
If you are making View A, you will need the two pocket pieces - POCKET FACING [4] and POCKET BAG [5]. These are the same regardless of the size you are making, but will have to be altered as this alteration is changing the curve of the side seam.

3. Place the POCKET FACING [4] onto the POCKET BAG [5], lining up the waist edges and side seam edges. Hold pieces together with a pin.

4. Place the LEFT FRONT WAIST PANEL [3] onto the two pocket pieces, lining up the waist edge of the size you intend to make (in this case, the size C) with the waist edge of the pockets. Line up the side seam of the pocket with the waist size for now.
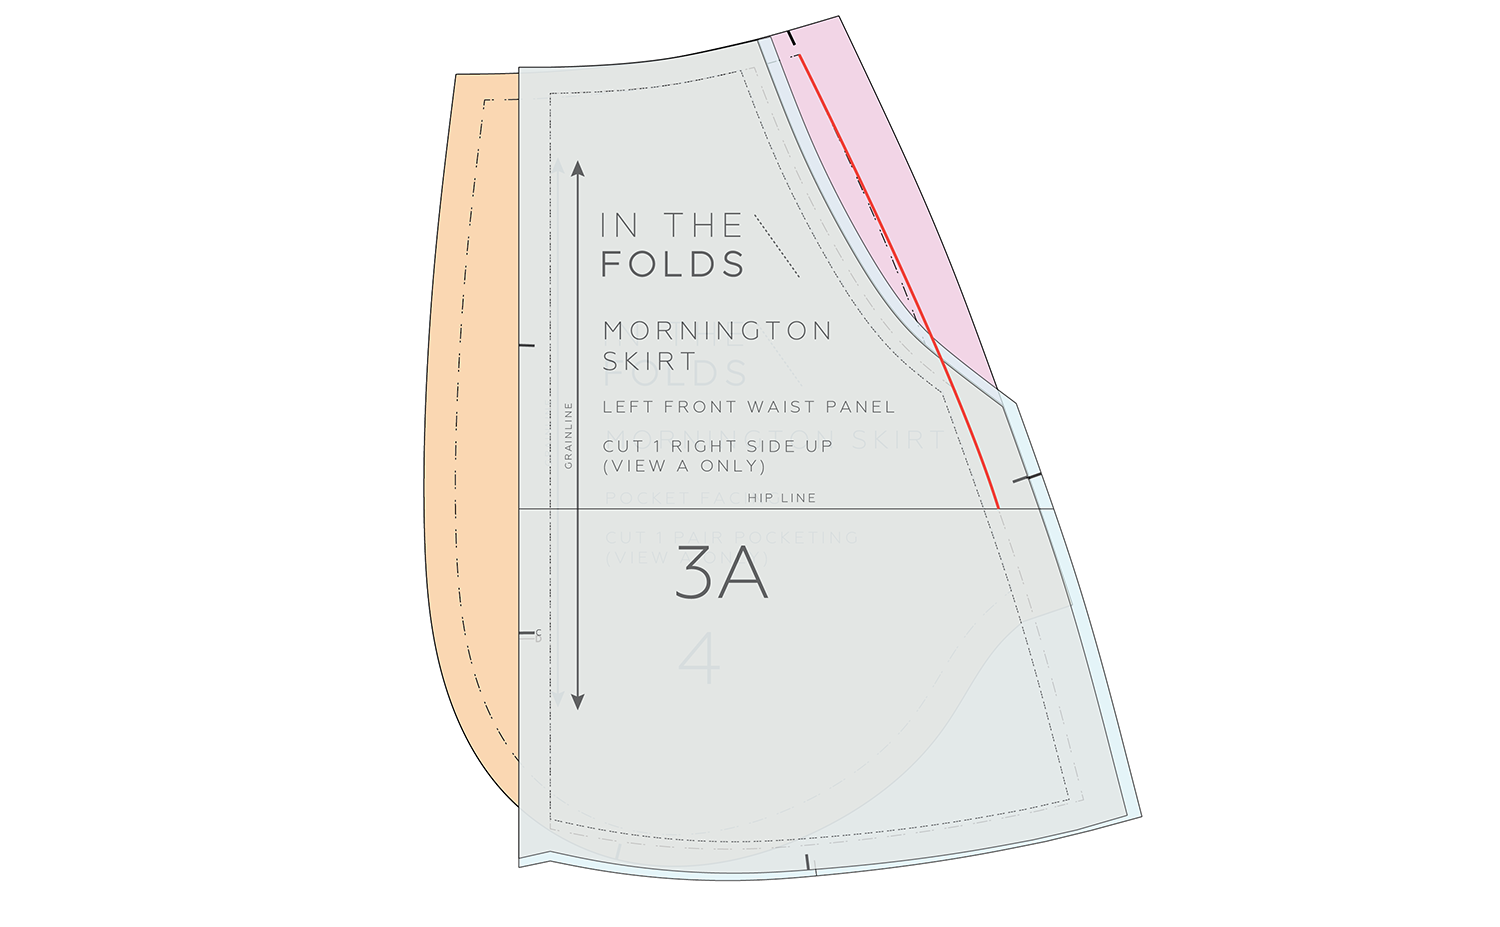
5. Draw in a new side seam, from the waist down to the HIP LINE STITCH LINE of the hip size you'd like to make. Again, use a French curve if you can.

6. Extend the curve of the pocket shape to meet the new side seam STITCH LINE.

7. Use a tracing wheel to transfer the new pocket curve and side seam onto the pieces underneath. Trace the side seam until you reach the bottom of the pocket.
Repeat for the remaining pieces. Cut the lower pieces in your hip size and waistband pieces in your waist size.
Happy sewing,
Emily
RESOURCES MENTIONED IN THIS ISSUE
The Mornington skirt is available until the end of this month in our Curated by In the Folds Membership.
For more issues of the Q & A series, you can check out the archive here.
WHAT YOU’VE BEEN MAKING
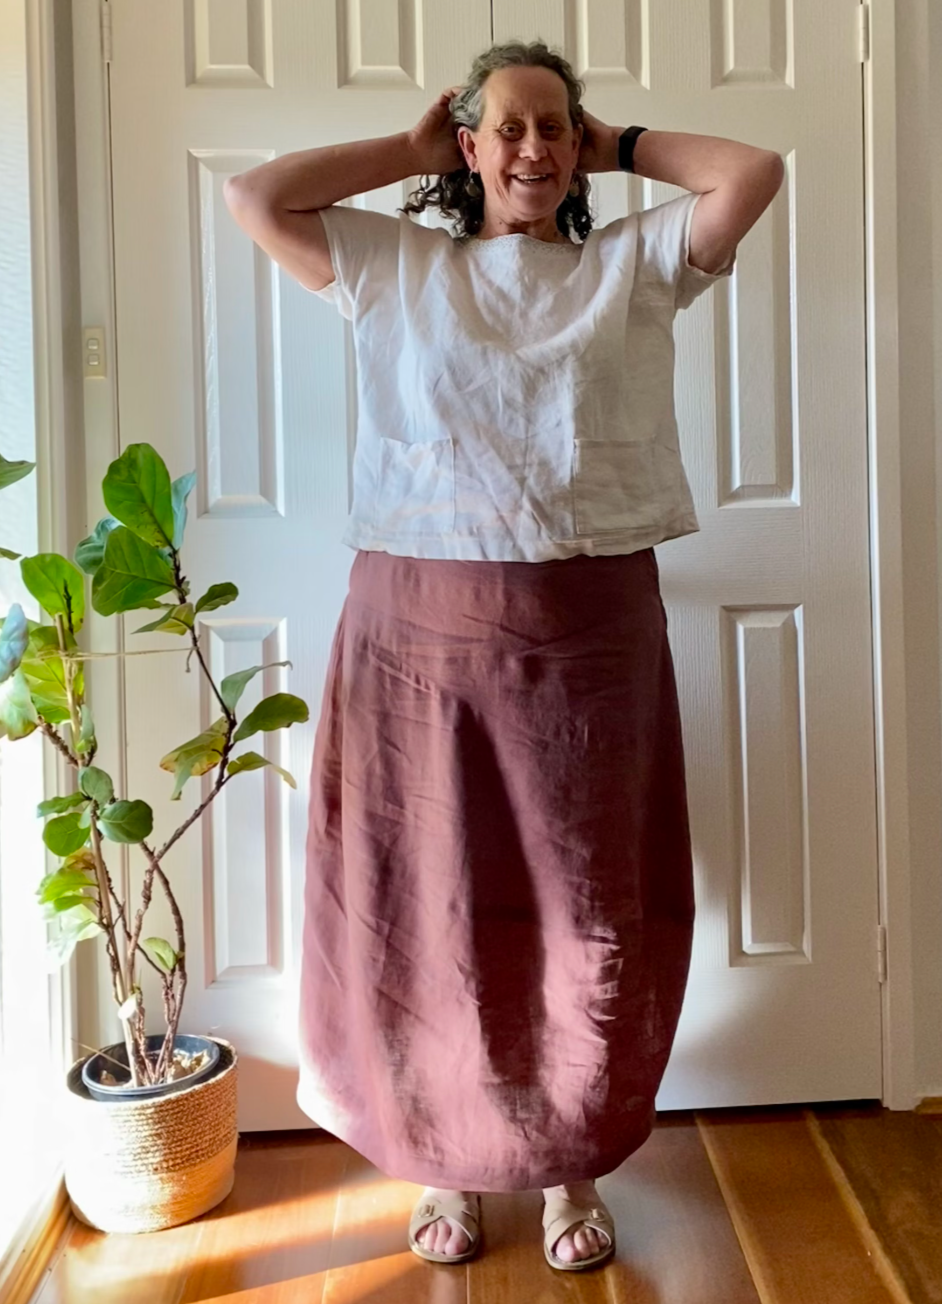

Mornington skirt and Darlow bag made by Rachael