Over the last couple of weeks I have been writing blog posts about drafting skirts - from drafting a block to your own measurements, adding the correct markings to the pattern and adding seam allowance. Since the block was completed, I have been showing you ways that you can manipulate the pattern to create your own designs.

Last week I did a little round-up of all the posts so far, and asked if there was a specific style anyone wanted to learn how to make.
Carol got in touch:
The skirt I would love to see as I fell in love with it when I first saw it, was from a blog post by Yoshimi. They call it a mermaid skirt. I think 6 gores with a flare at the bottom. I haven't seen a pattern like this and have a pic of it saved on my hard drive just to look at.
I was excited to get a suggestion, but also a little apprehensive about the skirt suggested. The term 'mermaid skirt' brought ball gowns to my mind... Which you may have noticed, is not really my style!


[ Image posted with permission from Yoshimi - http://yoshimitheflyingsquirrel.blogspot.com.au/2011/03/mermaid.html ]
But it was a lovely surprise when I found the skirt in question. It's lovely - sleek and simply, and a perfect skirt for a beginner to draft. So thank you very much for the suggestion Carol!
Drafting a flared skirt with panels
It may be difficult to see in the images, but the skirt is made up of 3 panels in the front, and 4 in the back (as the centre back has a seam for the zip). You could use this method with as many panel lines as you like, as it is a matter of preference, but I will draft it the same way as the source image.
To start this pattern, you will first need to add panels to your skirt block - which is one of the tutorials already in the series.
Trace the pattern
Trace a copy of each of the pieces, without seam allowance. For the example, I will only be using the two front pattern pieces, as the process is exactly the same for the back.
Mark flare point
1. Have a think about what point you would like the skirt to flare from. I wanted my pattern to be the same as the example from Yoshimi, so I measured down from my waist to the middle of my upper thigh, to find the right measurement for me (22cm [8 1/2in] down from the waist). Another way you could do this, is by putting on your skirt toile and marking the point you would like it to flare out.
When you have the measurement, mark it on your pattern pieces, measuring down from the waistline. Draw perpendicular lines through each pattern piece at this point.
2. You will be cutting through the pattern pieces at the horizontal lines. Before cutting, label each pattern piece so that they don't get mixed up.
I chose to label my pieces as 'Upper panel - side front,' 'Lower panel - side front,' 'Upper panel - centre front' and 'Lower panel - centre front.' It doesn't really matter what you call each piece - as long as you can remember what's what!
Cut pattern into sections

3. Cut along the horizontal lines so that you have four seperate pattern pieces.
Cut and spread
4. We will be cutting an spreading to add volume (and create the flare) to the lower section of the skirt. Draw vertical lines through the the lower panels. It is up to you how many lines you would like to draw (and will depend on how many panels your skirt has), but I think 4 in the side panel and 2 in the centre front is a good place to start. Keep the spacing between the lines as consistent as possible.
Have you cut and spread before? It is a really simple way to add volume (or remove) to a pattern. I wrote a tutorial here, if you would like a closer look at this technique.

5. You now need to carefully cut along each of the lines, starting from the hemline, and cutting up towards the top edge. Don't cut all the way through the piece, leave 1-2mm (1/16in) at the top to act as a "hinge" (a small strip of paper that will hold the pieces together, but also allow movement).
6. Now it's time to spread! Carefully spread each cut line by the desired amount (this will depend on your preferences. I'd suggest 3-5cm [1 1/4 - 2in]). Be careful to spread each cut line by the same amount. You can play around until you are happy with the amount of fullness you have added.
7. You can now stick the lower pieces back on to the upper pieces, to create single pattern pieces. As the top edges of the lower pieces have become curved, the pieces may need to overlap a little (as seen in the example).
Trace the pattern
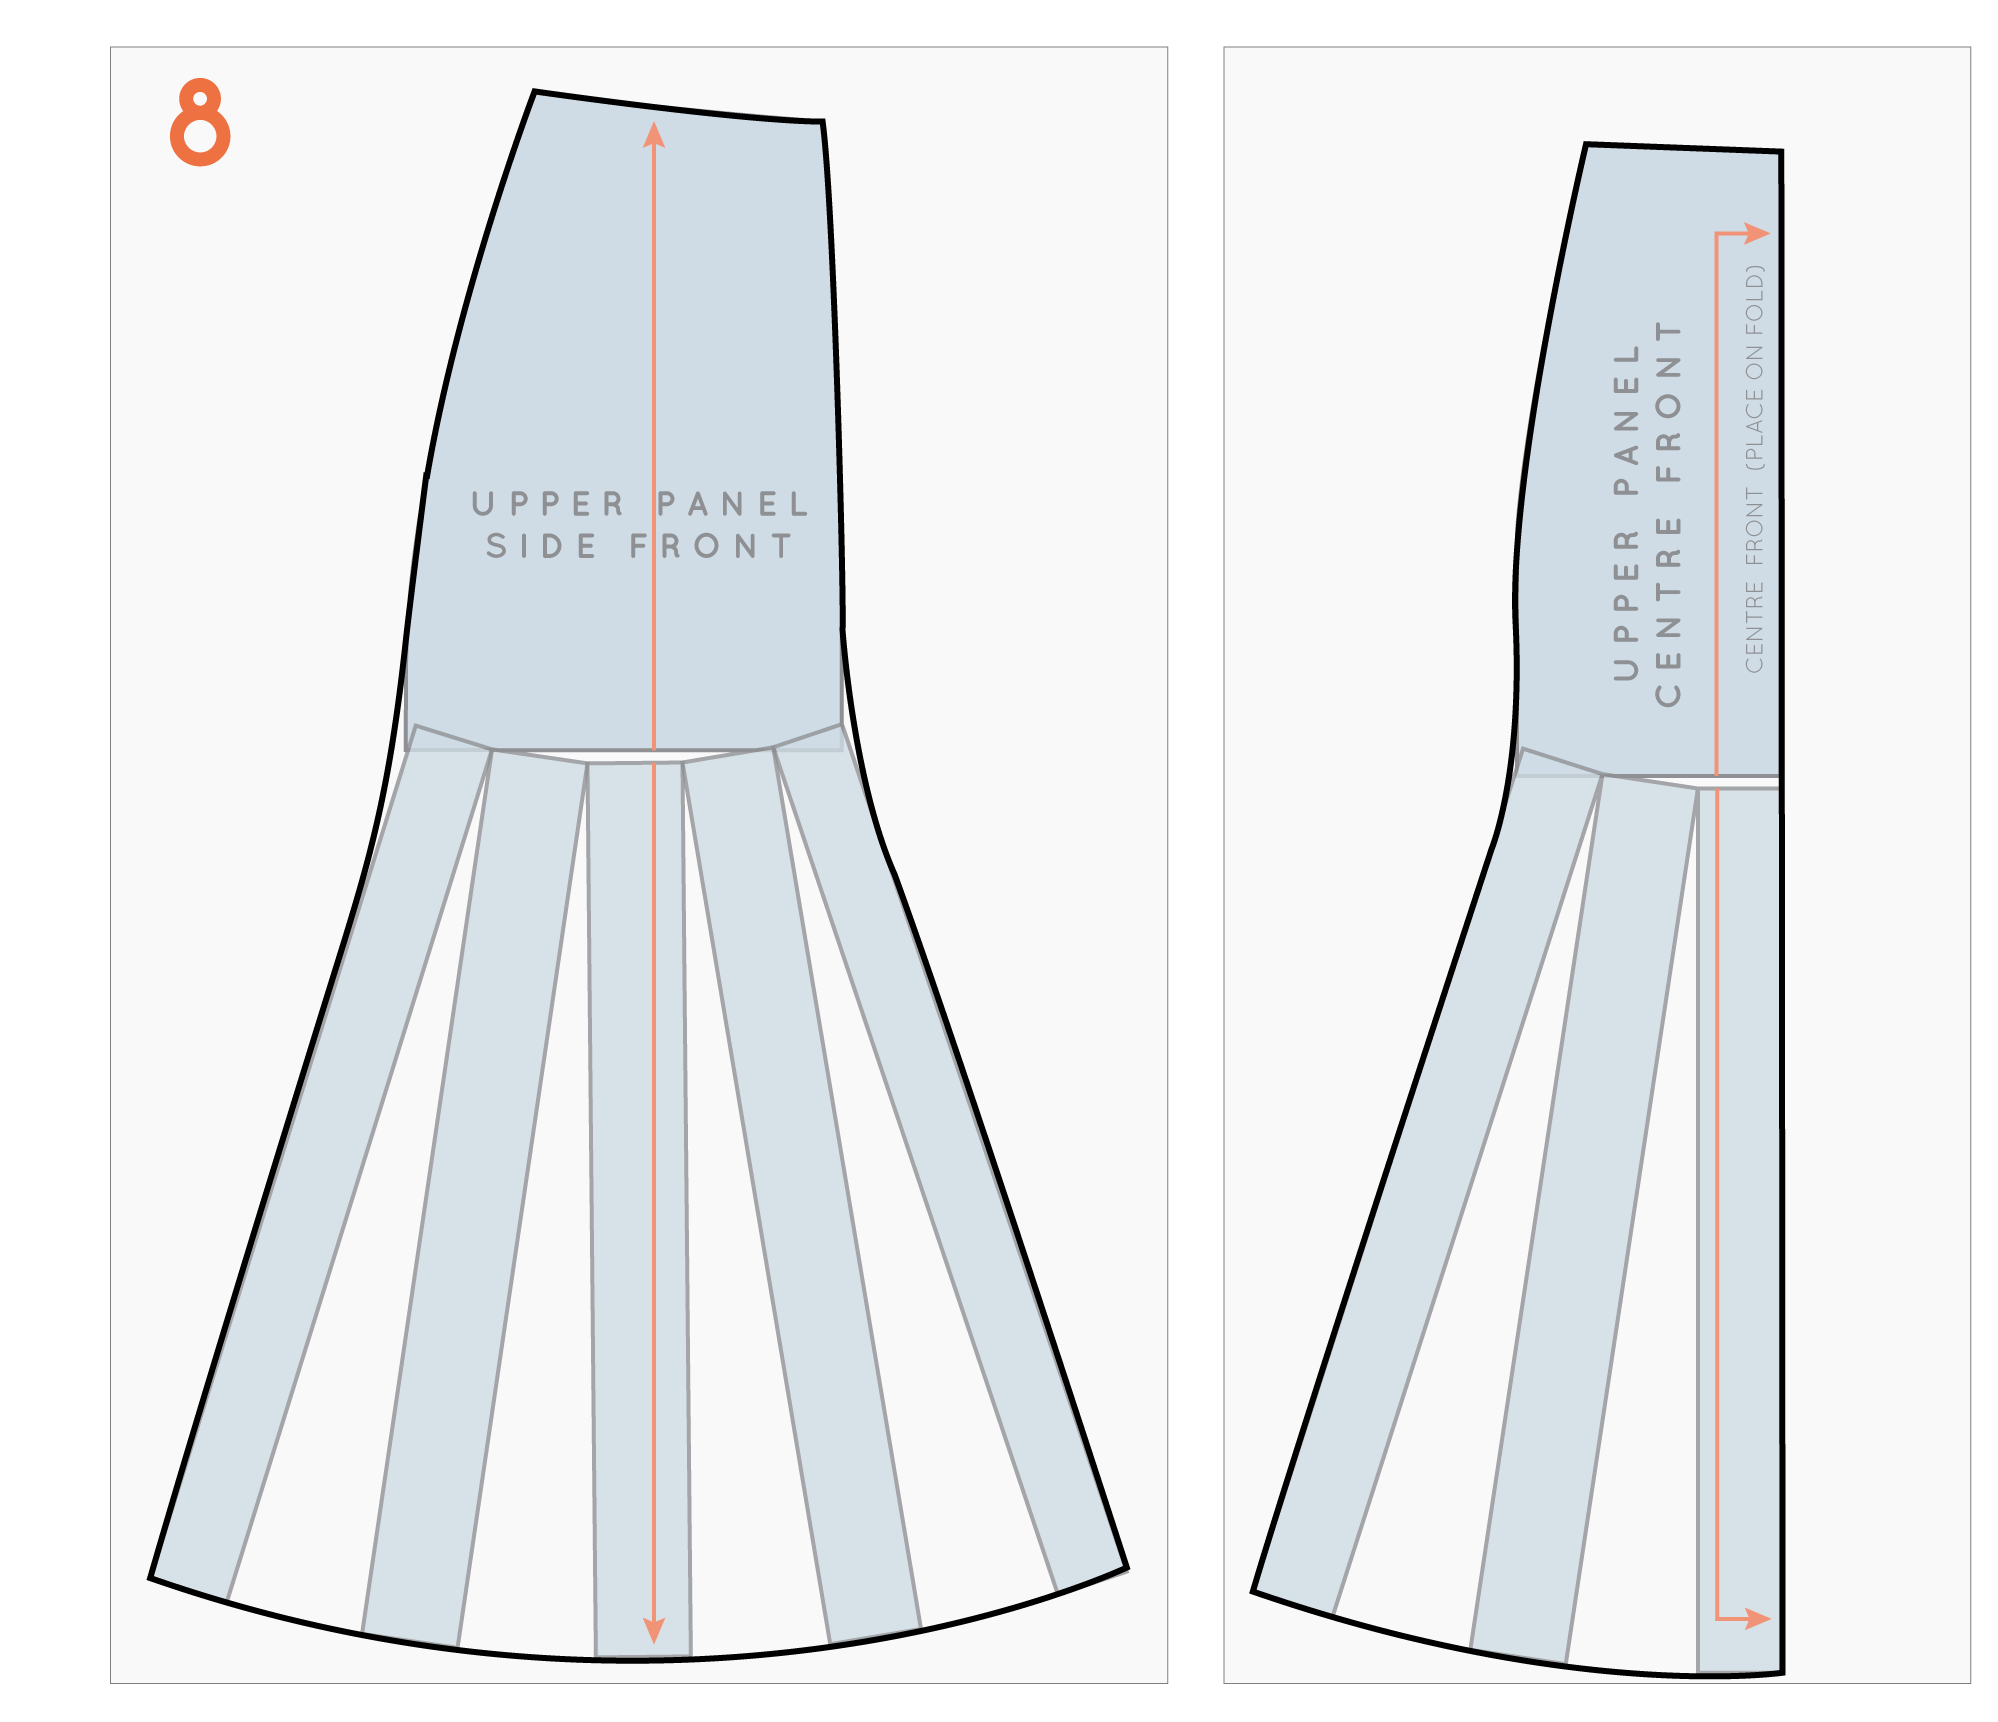
8. Now take a piece of pattern paper and trace each pattern piece. Instead of the point that is created at the joint of the two pieces, draw a smooth curve.
Add pattern markings
9. Be sure to mark the grainline on each pattern piece, as well as cutting instructions.
The final thing to do, is to check that the seams fit together correctly. But I'll leave that bit for tomorrow!
I want to finish up by saying a huge thank you to Yoshimi for allowing me to use her images for this post! You should definitely head over to her blog for a look around - she has made some beautiful stuff, and her instagram is very nice too.
Once again, thank you Carol for suggesting today's blog topic. Is there a skirt you would like to know how to draft? Please let me know and maybe it will be your suggestion next!