pattern drafting

BEHIND THE SCENES: THE PROS AND CONS OF DESIGNING PATTERNS IN HALF SCALE

When I first started planning our Sewing Linings Series (which kicked off this month with part one!), I decided I wanted to cover a lot of ground. As I delved into exploring everything to do with linings, I realised there were three main areas that I felt were important to cover - lining jackets and coats, linings skirts, and lining tops and dresses with and without sleeves.

And then I realised it was going to be a lot of work. Suddenly a project that I had envisaged as a one month project became a two month project - one month to work on drafting linings and one month to work on sewing linings. And even then it was still A LOT of content to create!
WHY WORK ON DESIGNS IN HALF SCALE?

I started thinking it might be a good idea to work in half scale to create the patterns and the sewn samples. This way I could save time on assembling patterns, cutting samples, drafting and sewing. As my patterns are already digitised, it’s easy enough to jump into Adobe Illustrator and transform them to half scale. I was overloaded with work at the time and asked a lovely friend, Melanie, who is also a patternmaker to get started on the project by drafting the Ormond coat lining patterns.

In terms of drafting in half-scale, the process is simple enough. If working with measurements or seam allowances, you simply halve the measurement for the smaller pattern. For example, if adding a 1.2cm (1/2in) seam allowance, this becomes 6mm (1/4in) in half scale.

Drafting in half-scale to be used as a reference for creating tutorials was great. If Melanie had been drafting in full scale it would have been difficult to photograph the pattern pieces and show all the details. Especially for the longer version of the Ormond coat that has quite large pieces. In half scale I could very easily see what was happening on the pattern and create the digital illustrations.

The next phase of the process was to make a sample, photograph the steps and take notes as we went. The notes were then sent to our illustrator who created all the illustrations for our sewing instruction booklets. When it came to sewing, the early stages were easy enough, and again, it was easy to take photos of all the pieces, a task which can be difficult in full scale. I often climb up onto a step stool to try to fit in as much of the sample in the shot.

However, as the process went on it got more and more difficult to sew with the small seam allowances. A 6mm (1/4in) seam allowance is only 2mm (1/8in) in half scale, which is almost impossible to sew! When I checked in on Melanie at this stage she said she would have preferred to sample in full scale as it would have been a lot easier and potentially taken the same amount of time as things would have come together more smoothly, but at this point it was too late and the patterns were already drafted in half scale.

Thankfully, Melanie has a little half scale mannequin, which not only meant we could see the little tiny jackets on a body (how cute!) but also catch any problems as we went. As you can see in the photo above of the Ormond coat, when the coat is worn open the point where the lining joins to the facing is visible. By catching this on the sample we were able to update the instructions to include a section on altering the facing so this would not happen.

When it was my turn to work on content (I did the Barkly skirt, Stow dress and Cartwright dress) I decided to stick with half scale (even though Melanie had warned me how tricky it was!). I was short on time and also had some figuring out to do while sewing the samples so thought it would be helpful. I could check things easily enough and if I needed or wanted to take a different approach I could easily re-cut the pieces and start again.


build your sewing skills with a
curated by itf membership


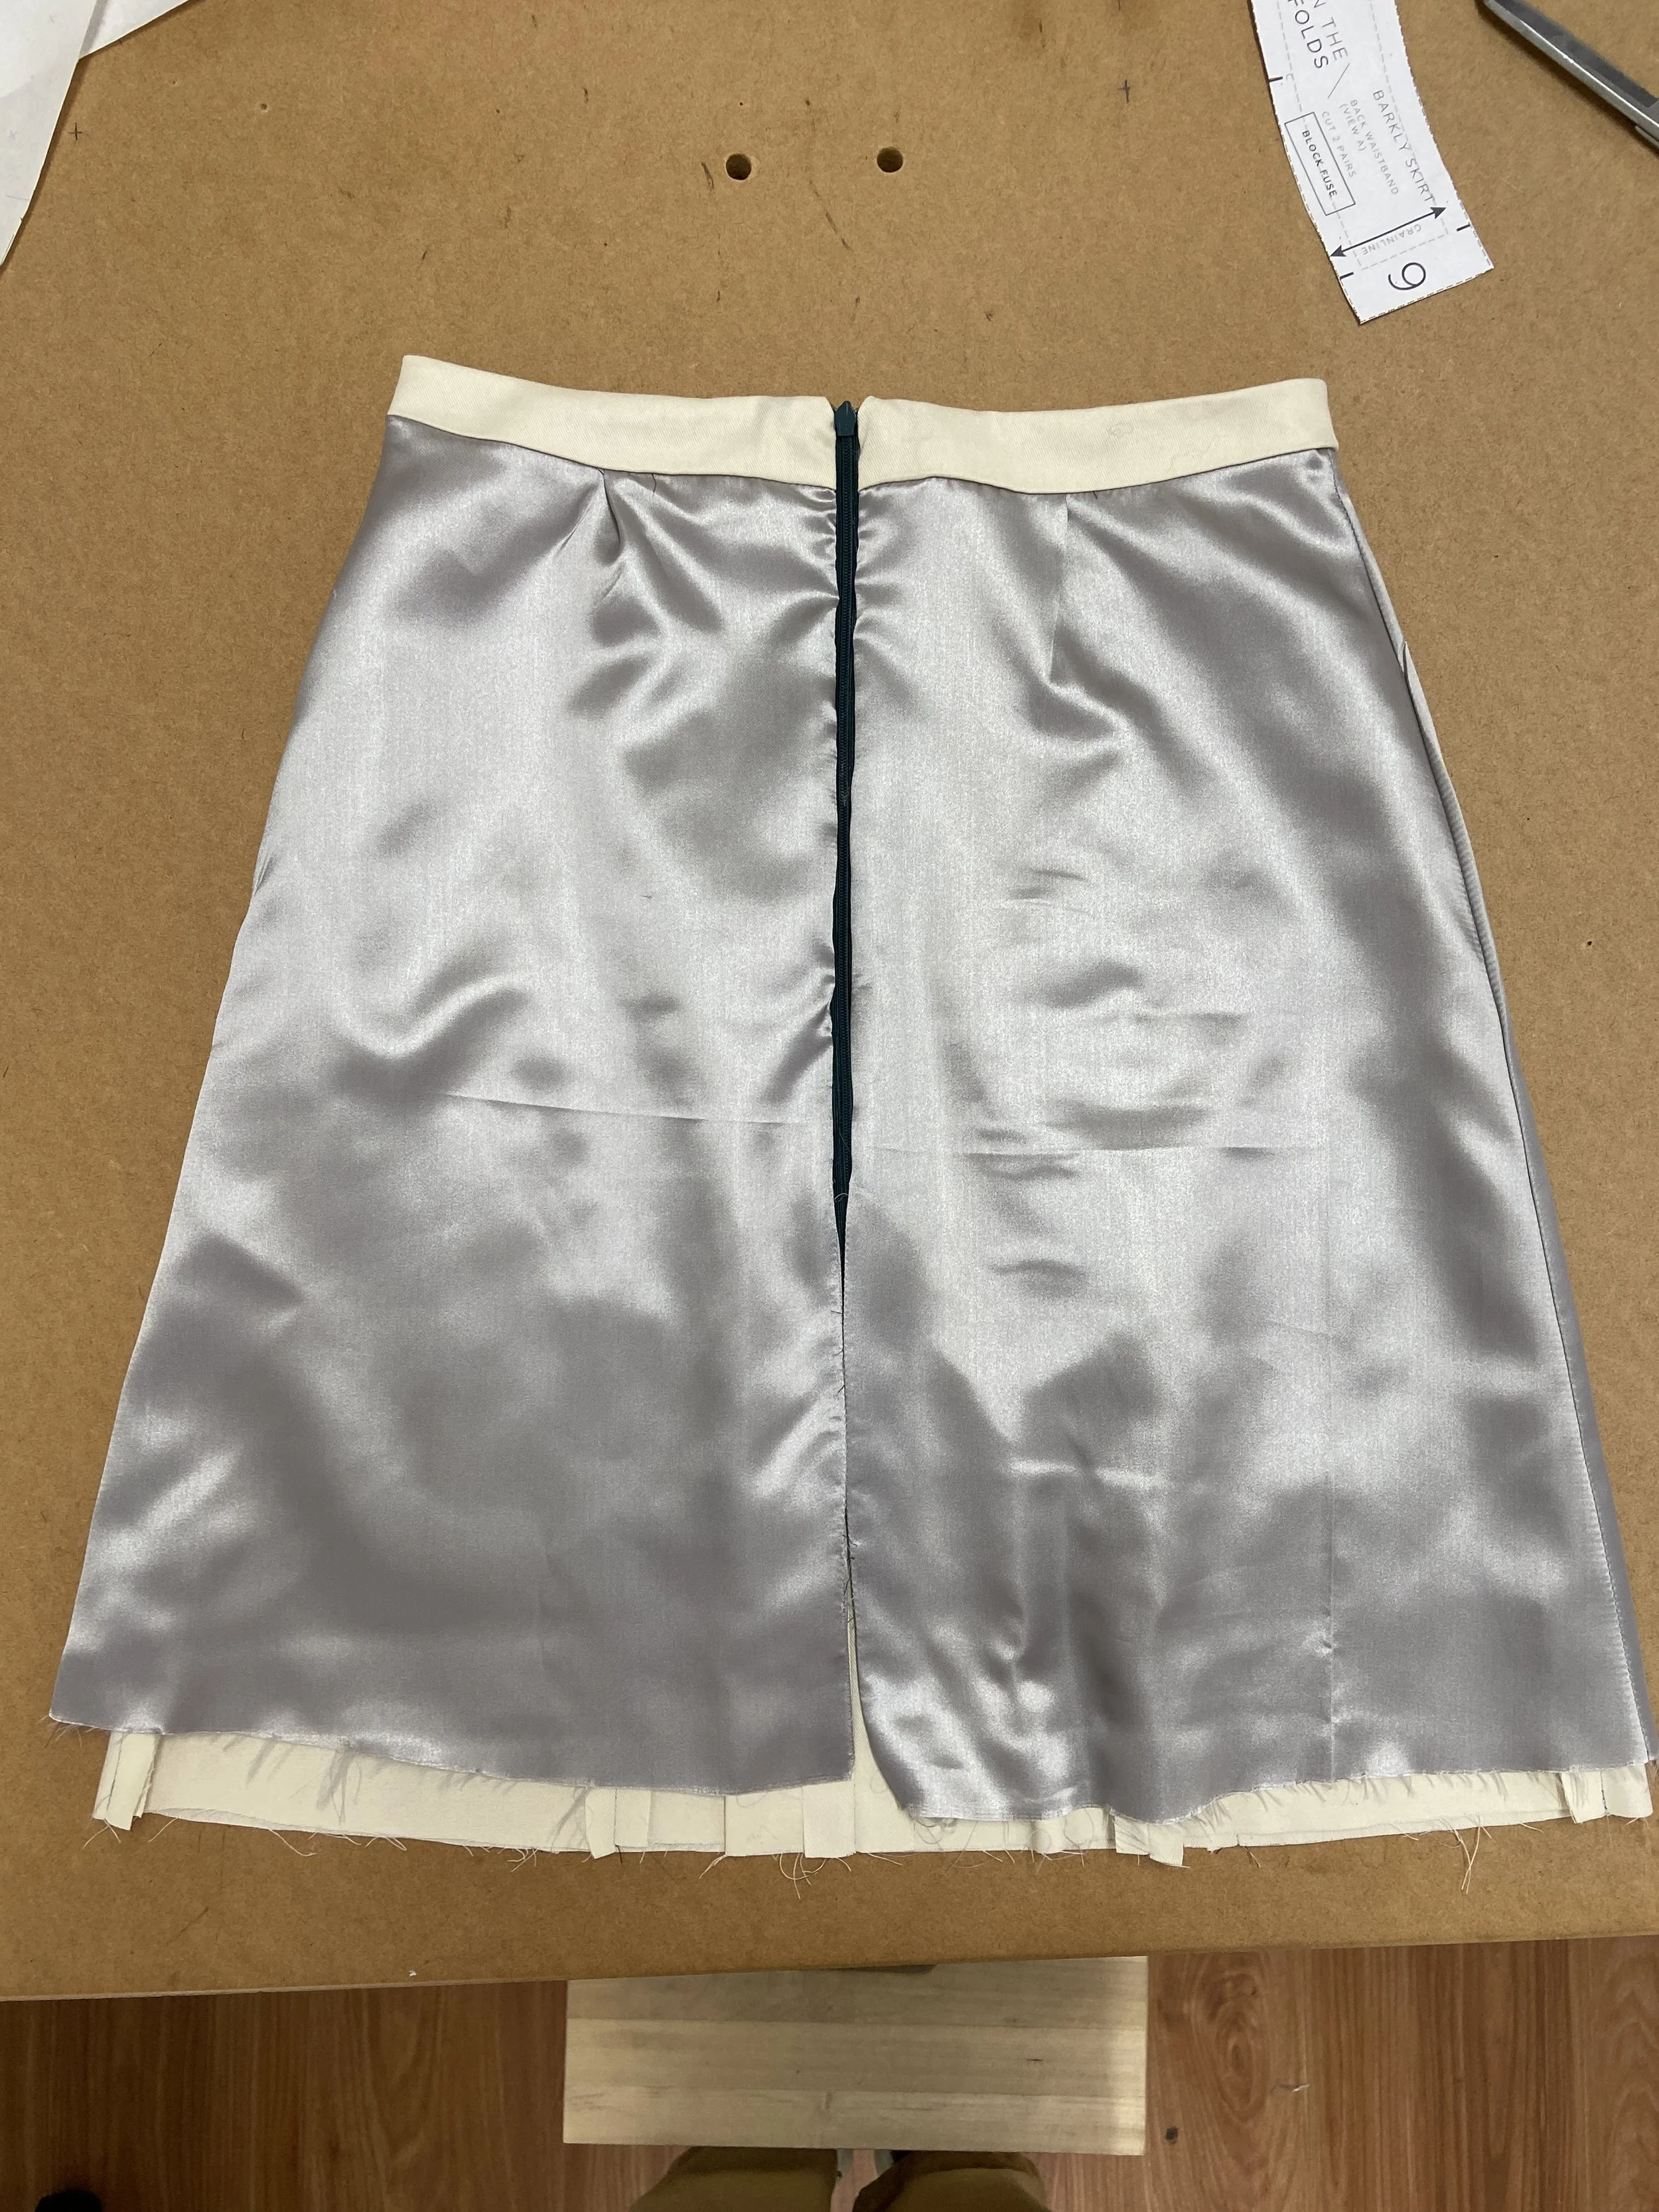
For View B (the version with the side split), I wasn’t sure what the best way was to cleanly finish the lining at the side split. I made the half scale sample and when I got to this point I realised the lining was sitting much too close to the top of the side opening. By making the sample in half scale, I could quickly cut out another one and work on a different approach to the side split and compare the two. 

When it was time to make the Stow dress, sewing in half scale did speed things up, but what I hadn’t thought about was how impossible it is to turn out a facing / lining using the burrito method with a very narrow shoulder. It was almost impossible to feed the dress through the shoulder to get a clean finish at the armhole. As these photos are just used to send to our illustrator (who is a patternmaker and has all the skills needed to interpret these photos) I didn’t worry too much about the sample not being finished correctly at the armhole, as I knew in full scale this would be fine.

So would I create project content in half scale again?

It depends. 

What I have taken away from this process is that patternmaking in half scale is the best way to ensure all the details are clear in the photos, and I feel it makes the process of creating tutorials easier. 

As for the sewn samples, I think this depends on the garment. For more complex garments like the Ormond coat, working in full scale would have been much easier and cut down on frustration. I would also make the Stow dress in full scale if I were to do it again. But the Barkly skirt and Cartwright dress worked a dream in half scale so I’d stick with that

As a sewist, there are some advantages of working in half-scale. If you want to learn a new skill but are not sure you’d use the pattern, then following the tutorial in half scale is a great idea. You’ll learn the skills without having to use all the paper, time and fabric it would normally take to work in full scale. Working in half scale is also handy if you want to try something out but you’re not sure how it’s going to work. I often do this if I am testing out an alteration on a specific pattern and I need to see what will happen to the design lines. Once I’m happy with how it’s working I can do it in full scale and not waste any time or get any nasty surprises.

So what do you think, will you try your next patternmaking project in half scale?

Happy patternmaking!

Emily


WHAT YOU’VE BEEN MAKING…

BEHIND THE SCENES: THE JOURNEY FROM PATTERN TO PRODUCT

Each month we like to give you a bit of a peek behind the curtain in our Behind the Scenes email. As our team discussed ideas for this month, we thought it would be good to share the challenges I faced when creating the Malvern culottes pattern as this isn’t something that many pattern designers do. 

With how many designers there are in the world, you might think that sewing patterns come together really easily, but a lot of the time, that’s just not the case. With Malvern, I ran into a few issues when drafting the actual pattern, and that’s pretty normal, but the main challenge was when I had to turn it from pattern to product.

What do I mean when i say from pattern to product?

In theory, I am a patternmaker; but not in the traditional sense. 

In the traditional sense, a patternmaker drafts patterns that are used to create ready-to-wear garments. This means the end-user (the person who buys the finished garment) never sees the pattern, and a lot of people don’t even know a pattern is used to cut a garment!

When it comes to making patterns for home sewists, the pattern is the product. So, the pattern not only has to be functional (as it does in ready-to-wear), but it also needs to look good and lead to a positive user experience. 

In this way, I sometimes think of myself more as a product designer, and maybe (at a stretch) an experience designer. I am constantly thinking about the experience of using our patterns and doing everything that I can to make sure that the experience is interesting, thought-provoking, positive and confidence-building. 

This is a lot to keep in mind when designing a pattern! I try to pull back and take it one step at a time, knowing that it’s all the parts working together (the design, the pattern, the instructions, the support in our community group) that will create a successful project. But it is pretty hard to juggle all those balls and do it well!

The intention behind the Malvern culottes pattern

When I set out to create the Malvern culottes, I had a couple of things in mind. 

Firstly, I wanted to create a garment that was unique and interesting, while still being comfortable to wear. I also wanted the pattern to be fun and interesting to make, and for it to include some new sewing skills for our Curated by ITF members.

I have two pairs of RTW culottes in my wardrobe that I love. When I wear them I always feel like I’ve stepped my outfit up a notch compared to how I feel when I’m just wearing jeans. And they have a serious comfort factor that many garments worn on the lower half of my body do not! 

The idea of a pair of In the Folds culottes has been hovering in the back of my mind for a long while, so I was excited to have the opportunity to give it a go for this month’s issue of Curated.

Creating the Malvern culottes pattern

I wanted to create an oversized silhouette that almost looks like a skirt, with deep pleats that would hide the seams. So that was the basic premise I started out with.

But I’m not going to lie - I struggled creating this pattern! 

There were a number of times when I was working on it that I wondered if what I was trying to achieve was too complex, or if the lack of sleep (I have a toddler that does not sleep well) had finally caught up with me. 

Thankfully, I kept at it, because I love the finished product (and apparently, so do lots of makers!).

I am always mindful of other patterns that are already available on the market and try to make sure what we are offering is something new and different. 

Although I often do preliminary design and drafting work in CLO3D, for this design I just felt I needed to do it by hand. This gave me a feel for the depth of the pleats in the flesh, allowed me to see how the pleats fell in fabric and adjust as I went. I made 4 or 5 toiles, pushing the design further and further each time. And then, sometimes, pulling it back.

In this photo you can see that I toyed with the idea of having a horizontal seam. I realised the design was enough without it, and having the seam wasn’t adding anything more to the design.

One thing I noticed as I was making all these toiles? It was very important to make sure I was folding the pleats correctly and folding them in the correct order. 

Often when you fold pleats into fabric you just fold one at a time, working along the fabric or the garment consecutively because the pleats don’t impact on each other. 

However, in the case of Malvern, the pleats interact with each other AND the seams, so they have to be sewn in a particular order. For example, the pocket has to be stitched to the side seam and the side seams sewn before the front pleats can cross the side seam to the back. The centre back pleat is created by layering up the fabric at the back.

In patternmaking, pleats are indicated with notches, and arrows show which way the pleat is folded. This seemed clear enough on the original pattern that I sent to our pattern grader, but I had it in mind that with all the sizes overlapping into a nested pattern, there was potential for it to get pretty messy.

I suggested to our grader that we label each notch with A - Z, so when folding the first pleat you fold from notch A to B, then C to D and so on.

When the graded pattern came back, I began to worry this wasn’t going to work. Although normally some tweaking and formatting is required when I receive the pattern back from the grader, this didn’t seem like a little reformatting issue. As you can see, the letter C is somewhat clear between sizes, but letters A and B are basically illegible. 

At the same time, I was chatting to our other pattern grader, the one who looks after our size G-P range. After looking at the pattern, she wrote:

“I admittedly have no idea how these are intended to go together. I'm lost, lol. I'm trying to match up letters in alphabetical order, following the arrows, but I can't quite wrap my head around how the views are different in the back. The front is a bit of a mystery as well because it looks like the panels overlap, but I'm not sure what the overlapping points are. It's kinda hard to tell from the photos as well. 

I know you are probably deep in sewing directions with the labels as is...but just food for thought - I have another client that does lots of tucks and they number the tuck notches so you would match number to number (IE- 4 to 4, and 2 to 2, etc). I'm just a little concerned when I can't tell how to put a pattern together without instructions.”

The realisation that a professional pattern maker had no clue how to put this pattern together made me go back to the drawing board. Although we include very thorough instructions with our patterns, I do like the idea of our patterns saying as much as possible and giving makers a good idea of how the garment is going to come together.


build your sewing skills with a
curated by itf membership


I had also realised that after grading the waistband had become very confusing. Notches are very important when pinning a waistband to a skirt, pants or pair of culottes. They help you make sure you’re not stretching the garment and that the waistband is lined up correctly. I realised that we were going to have to label the notches with the name of each of our sizes (letters) which just confirmed the decision to number the pleats.

With this decision, it meant we lost the labels that were marked on the graded pattern, and although I initially tried not to include this information for ease of use, when our Content Creator, Leanne, gave the pattern a go, she suggested that would have made the process easier if she knew which notch was supposed to line up with which seam or notch.

Rather than adding any more information to the pattern (as there is already a lot!) I decided it made more sense for this information to go in the instructions, which is what you can see in the image above.

I then returned to working out how to label those pleat notches. 

To start with, I tried our grader’s suggestion of labelling them 1 to 1 etc, but realised it didn’t help with pleat direction, which is very important in this pattern. Although the arrows would always be marked on the pattern, I didn’t want to leave anything up to guesswork. So, I started playing with the idea of labelling each notch with a different number - 1 goes to 2, 3 to 4 etc. 

While updating the pattern, I realised this was always going to be the better option, as letters are used for our pattern sizes and having letters for our pleats too was just going to cause A LOT of unnecessary confusion. And here is where I was reminded of my mission to create patterns that are enjoyable to use and leave makers feeling confident.

Once I started putting the numbers onto the pattern, it was a careful balance of trying to get the numbers large enough to see, but not so big that they ended up overlapping each other and creating more confusion. It took some time to update all the notches with the correct information, but in the end I was left with a pattern that was legible and had clear annotations for how to use it.

While working on this pattern, I realised that the sewing of the culottes is not what is tricky about this project. Rather, it’s understanding the pattern, particularly because it’s an asymmetrical design, and what you do to one side is slightly different to the other side. But that excited me, as I know our community is always up for a challenge and keen to learn new skills. I was confident that this pattern was going to push their pattern interpretation skills, while giving them a new-found confidence in garment sewing, which is a big success.

Some tips for working with the Malvern culottes pattern

These tips will help you work through any complex sewing pattern!

  • If possible, only print the size or sizes that you need.

  • Read the instructions from beginning to end before getting started. Even if you are a proficient sewist, this will help you understand the process so when you get started you know what lies ahead.

  • Leave pattern pieces pinned to fabric until you are ready to sew the piece. This means that pieces don’t get mixed up and you also have the pattern right there to refer to.

  • When working with complex pleats, pin small pieces of paper (or use masking tape if it won't damage the fabric) to the notches on the fabric to record the pleat number. This will mean you don't need to keep referring back to the pattern when folding the pleats.

  • Trust the process. This is one of those patterns (like the Darlow pants and the Hove tote) that may not feel intuitive at times. Be encouraged to slow down, read the instructions carefully and trust that it will all make sense soon enough!

I hope this has given you a little more insight into what goes on behind the scenes of designing sewing patterns.

Happy sewing,
Emily


WHAT YOU’VE BEEN MAKING…

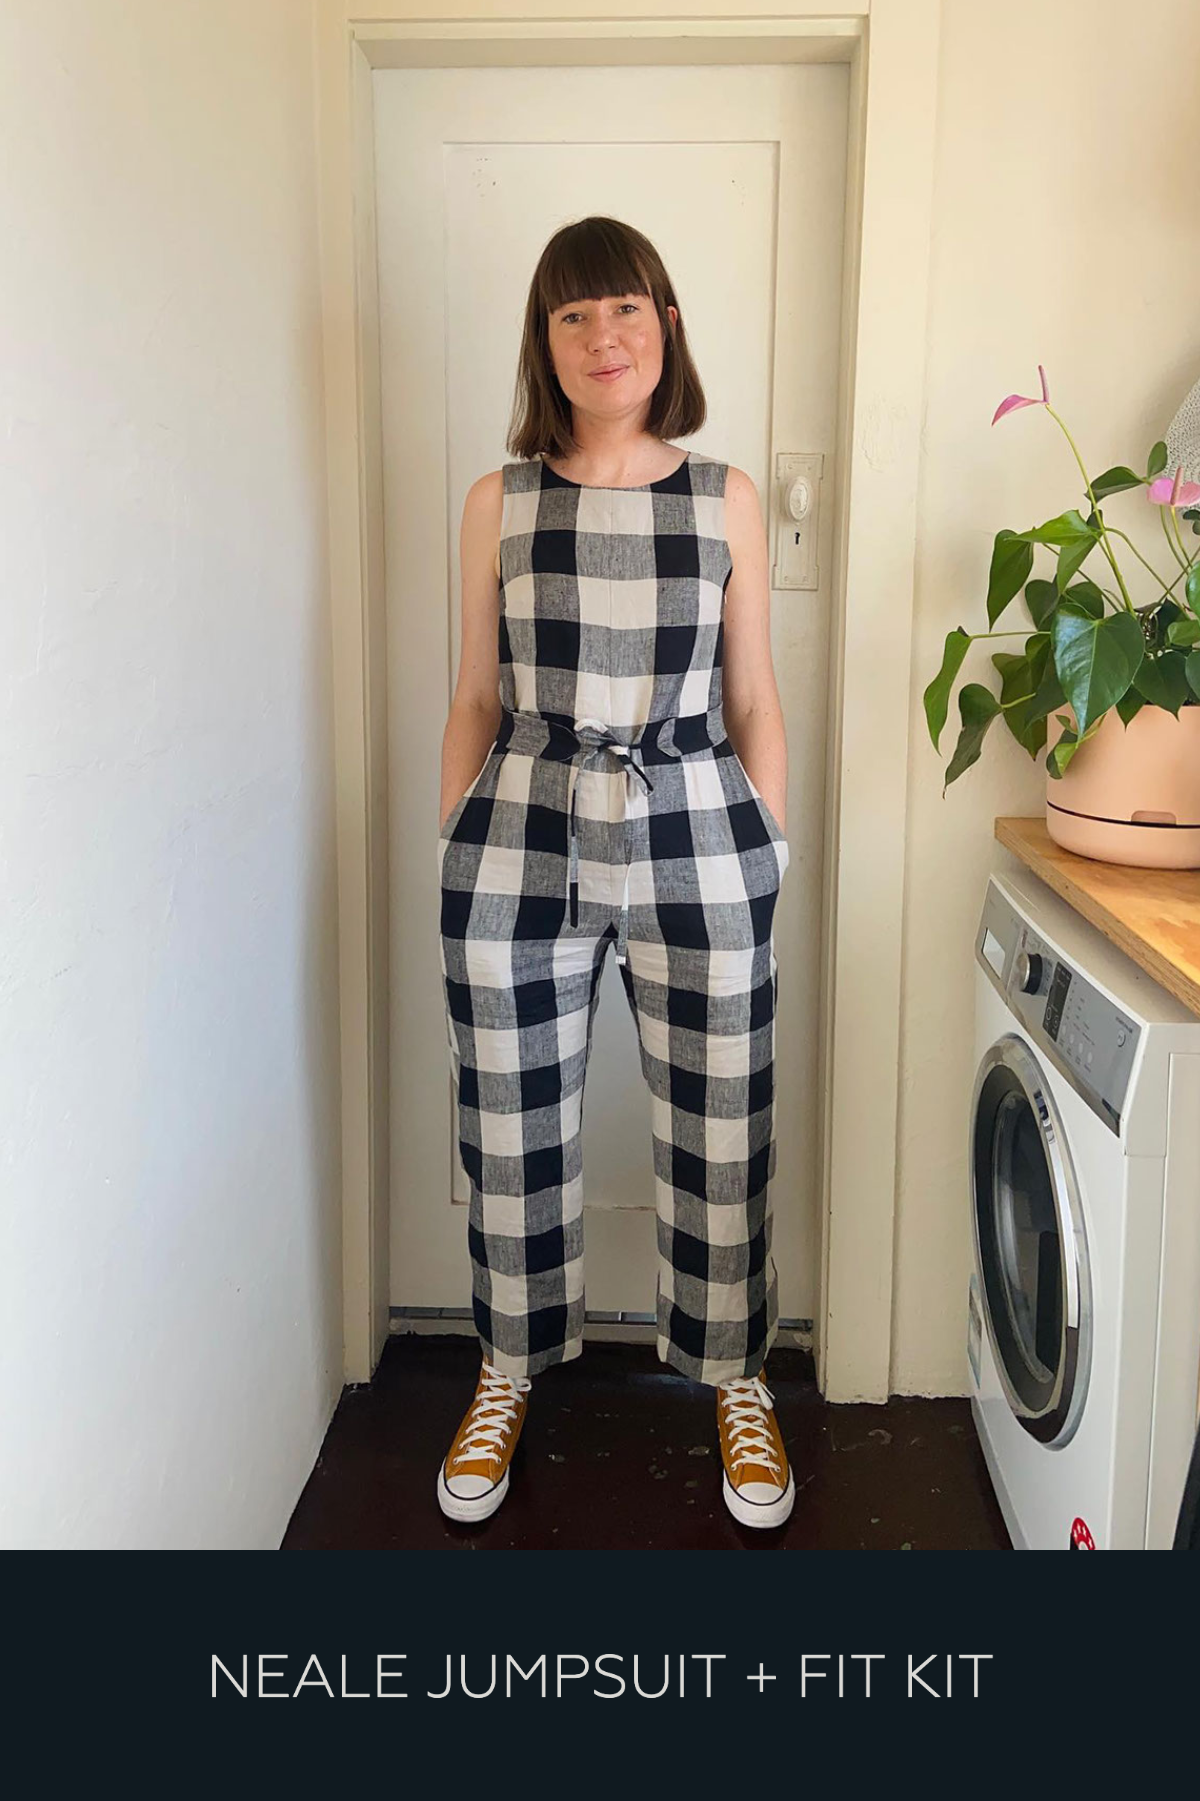
Neale jumpsuit hacked by Curated by ITF member, Rachael.

ITF SPOTLIGHT: LEANNE'S KEBAYA-INSPIRED WEARABLE TOILE & SEWING JOURNEY

A couple of weeks ago I shared my experience using the Copy Your Clothes resources to modernise and personalise a Kebaya blouse, a garment with a lot of cultural sentimental value to me. 

This week, I’m really excited to share some of my toiling journey with you, along with the lessons I’ve learned through the process. If you’re keen to see the entire process, I’ve shared it all in great detail in the Curated by ITF private online community (I recommend joining us!), but here’s a brief overview for context.

After analysing the original Kebaya blouses I had in my wardrobe (watch the video I created about this here), I used the techniques I learned in last month's Copy Your Clothes Skills Kit to trace the garment and draft a base pattern. Here you can see the drafted front bodice, back bodice and sleeve pattern pieces. 

Pattern pieces drafted from a traditional Kebaya blouse.

I then graded my pattern up two sizes using the slash and spread method. As the original blouse was a little tight I felt that moving one size up would deal with this tightness. The additional size up was a personal design ease preference, taking this from being a form fitting blouse to a more relaxed and casual light layering jacket. Here’s my graded Kebaya pattern.

Graded pattern drafted from a traditional Kebaya blouse.

I quickly proceeded from this stage to whip up my first toile!

Leanne trying on her first Kebaya blouse toile.
Close-up of Leanne's first Kebaya blouse toile.

I used this first toile to gauge what kinds of style changes I wanted to make, as well as how I wanted the garment to fit. I realised that, despite grading up two sizes, I still needed to make a broad shoulder adjustment. (This is why it’s so important to make a toile or two!)

Leanne testing out lengths for Kebaya on toile.
Back view of Leanne's Kebaya toile showing shoulder tension.

With my notes from toile number one in hand, I proceeded to make the modifications to the pattern and dived into toile number two. I was really happy with the boxier fit that resulted from the adjustments I made to the original pattern.

I then made a third Kebaya toile, choosing a fabric from my stash which I thought fit the bill but that I wasn't overly precious about (should things not work out well). I had 1.2 metres of this fabric (140cm wide) which, as it turns out, was the precise amount I needed! Sadly, by the time I finished my garment, I found myself questioning why I chose this temperamental fabric for a toile, wishing I'd chosen something better behaved. 

Leanne's Kebaya blouse on a bust - front view.
Leanne's Kebaya blouse on a bust. Back view.

build your sewing skills with a
curated by itf membership


It wasn't a complete disaster, and I do love the breezy, elegant drape of fabric like this; it's wearable, with a touch of special. But, this Ochre Moonstone Viscose from Atelier Brunette was a bit shifty and liked to fray. 

Attempting to hem it had me shaking my fist at those fabric gods though. I applied interfacing to the bodice facing, as well as 3cm strips of interfacing to the bodice and sleeve hems to add a bit of heft to this slinky fabric. I folded up the hems and then tucked the raw edges under, using hem tape to help keep things place. 

Leanne wearing her third Kebaya blouse toile.

This turned out to be a mistake as when I went to steam the garment in preparation for taking these photos, the tape shrank and made the fabric pucker. I had to unpick the hem and remove the tape. 

But this experience got us thinking. One thing about copying a ready-to-wear garment is that you don’t have sewing instructions to refer to. There’s no notes about the best fabric to use, or how to approach tricky situations like these. So what do you do?

WHAT TO DO WHEN YOU DON’T HAVE SEWING INSTRUCTIONS

  • Most sewists have a decent stash of sewing patterns, and this can be a great resource for trying to figure out what you need to know. Find a pattern that has a similar style or perhaps uses similar fabric and see what approach it uses to solve the problem you’re having.

  • Ask the fabric store you bought the fabric from if they have any advice. Most people who work in fabric stores are also avid sewists, so there’s bound to be someone who can help!

  • Ask your sewing community! Having a community to turn to, like we have with Curated by ITF, is great because there’s a wealth of knowledge just in the sewing experience of all the members. In Curated by ITF you can also ask as many questions of our team. (We love helping our Foldies!) When I posed the question to our community we came up with two solid solutions to my tricky fabric problem.

Back view of Leanne's hacked Kebaya blouse toile.

HOW TO HEM SLIPPERY VISCOSE FABRICS

  1. Double-rolled hem - Check out our tutorial here.

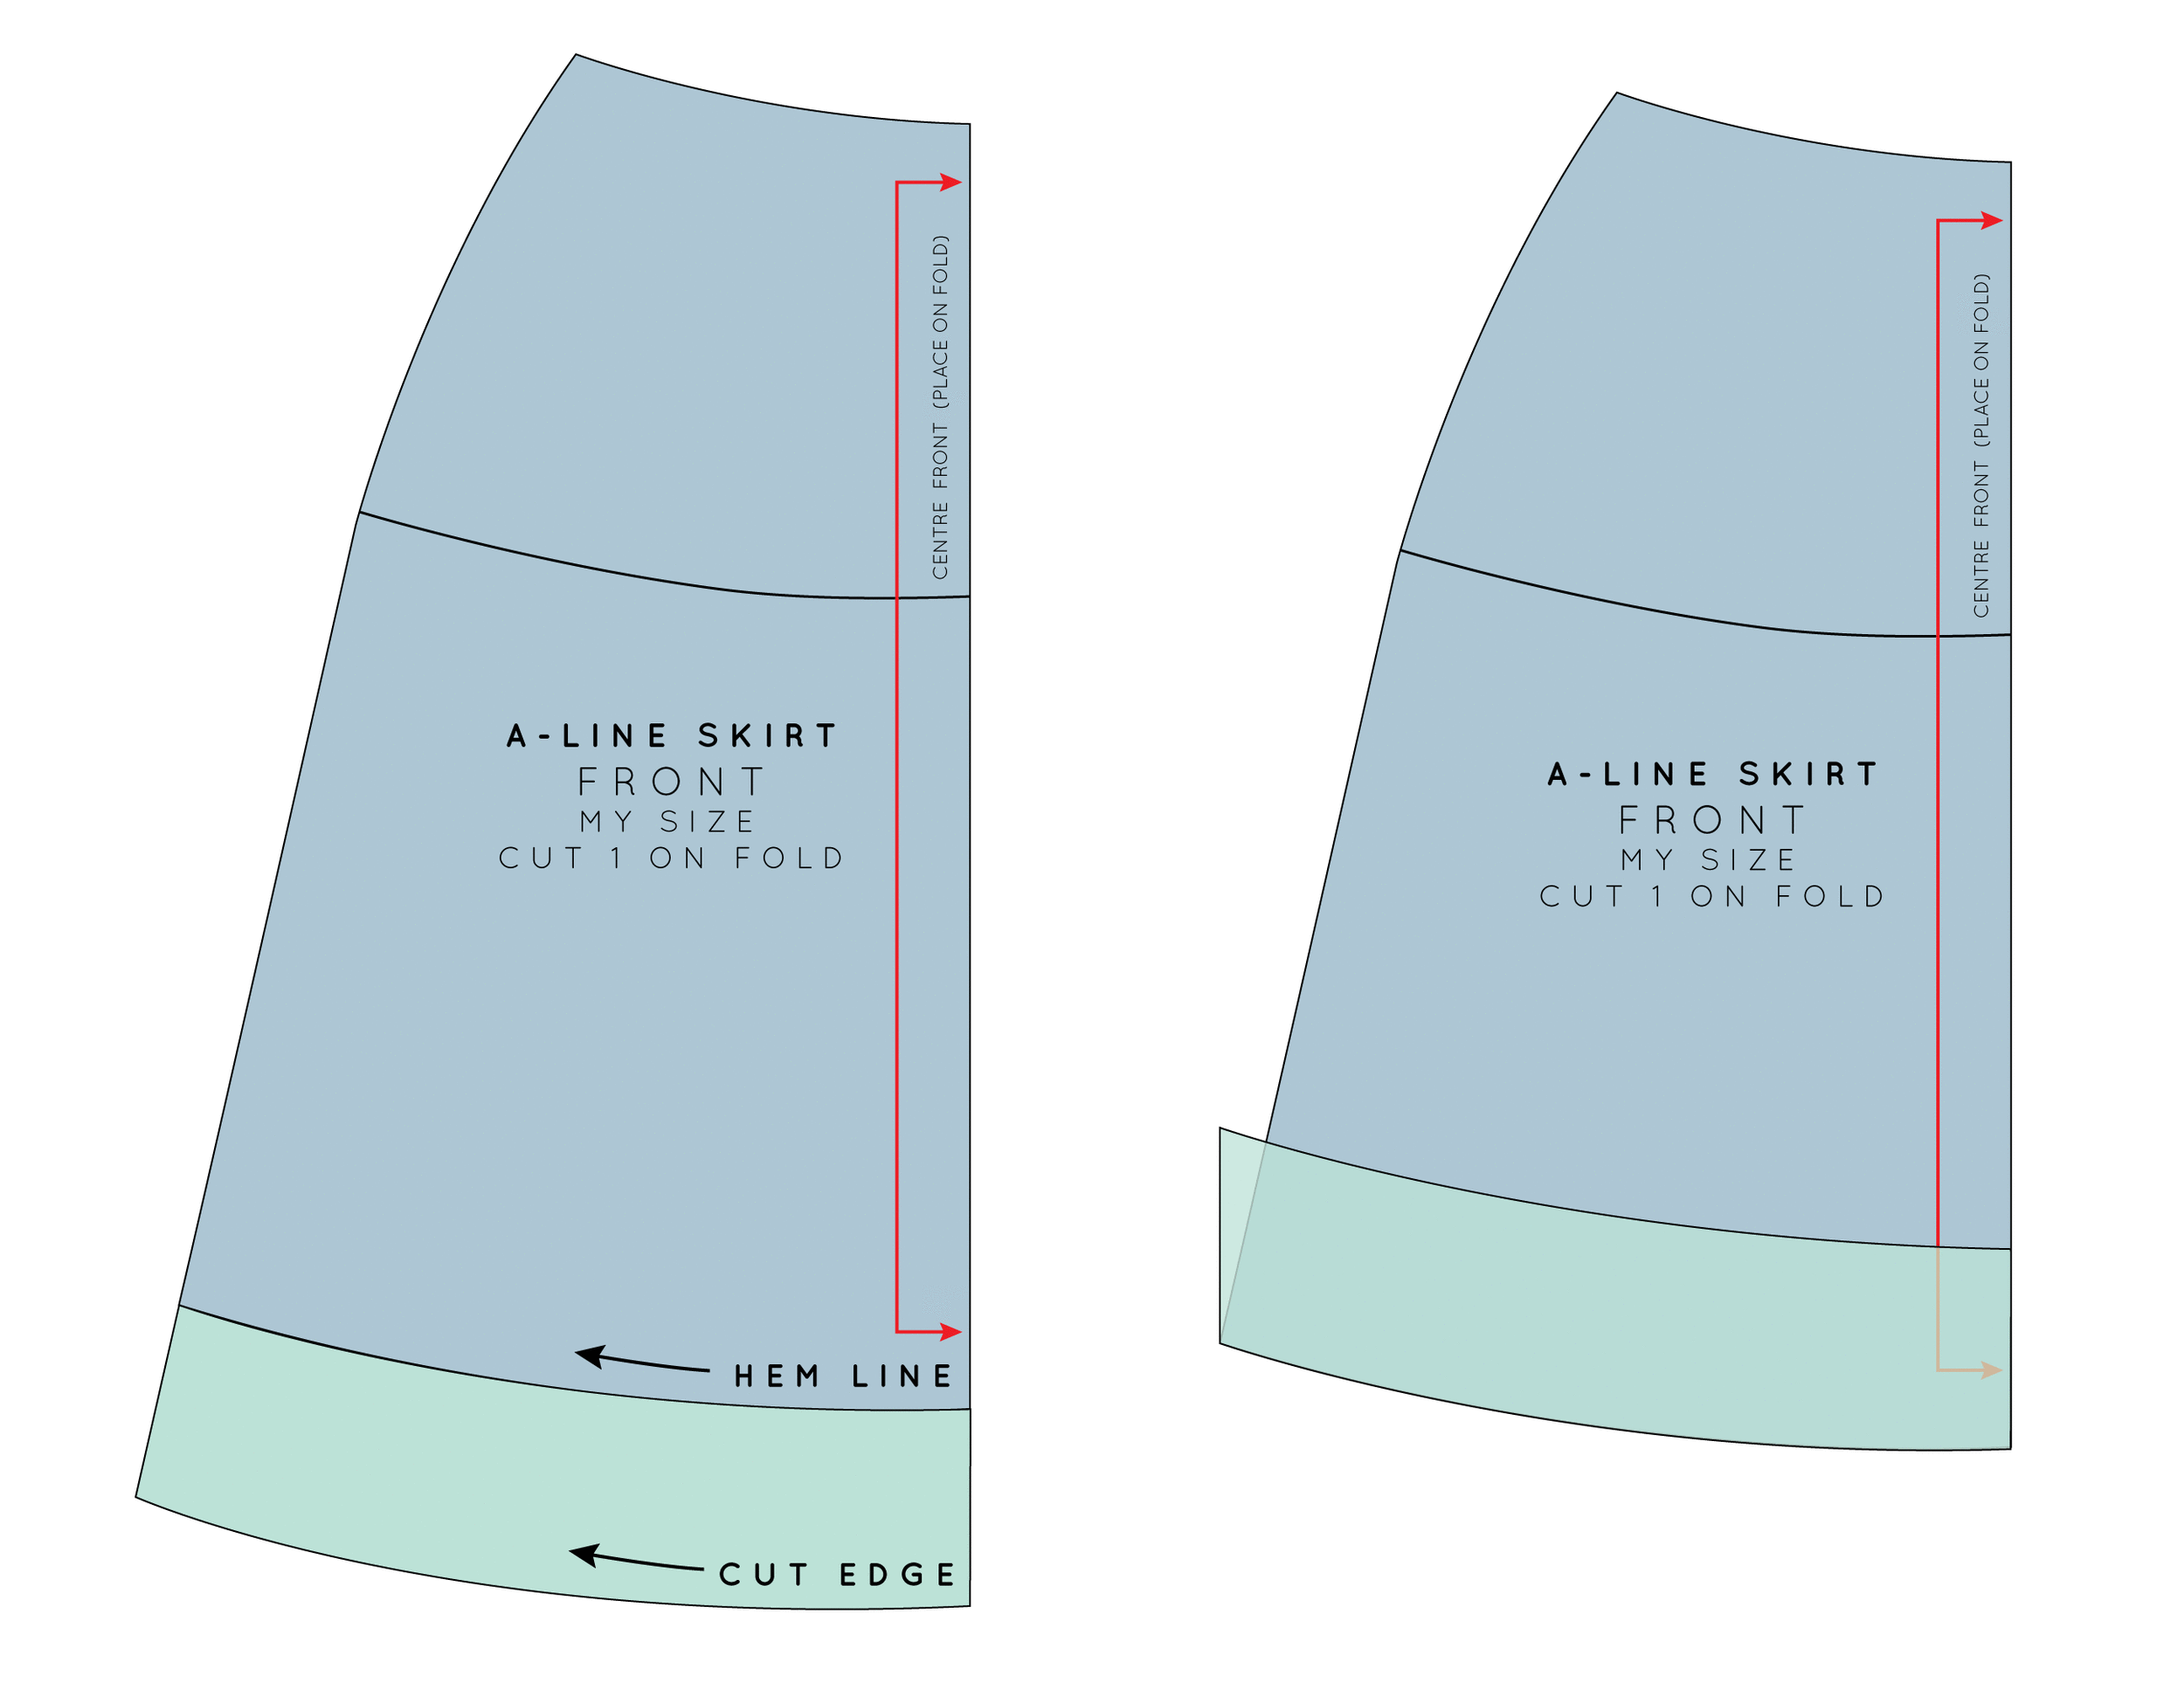
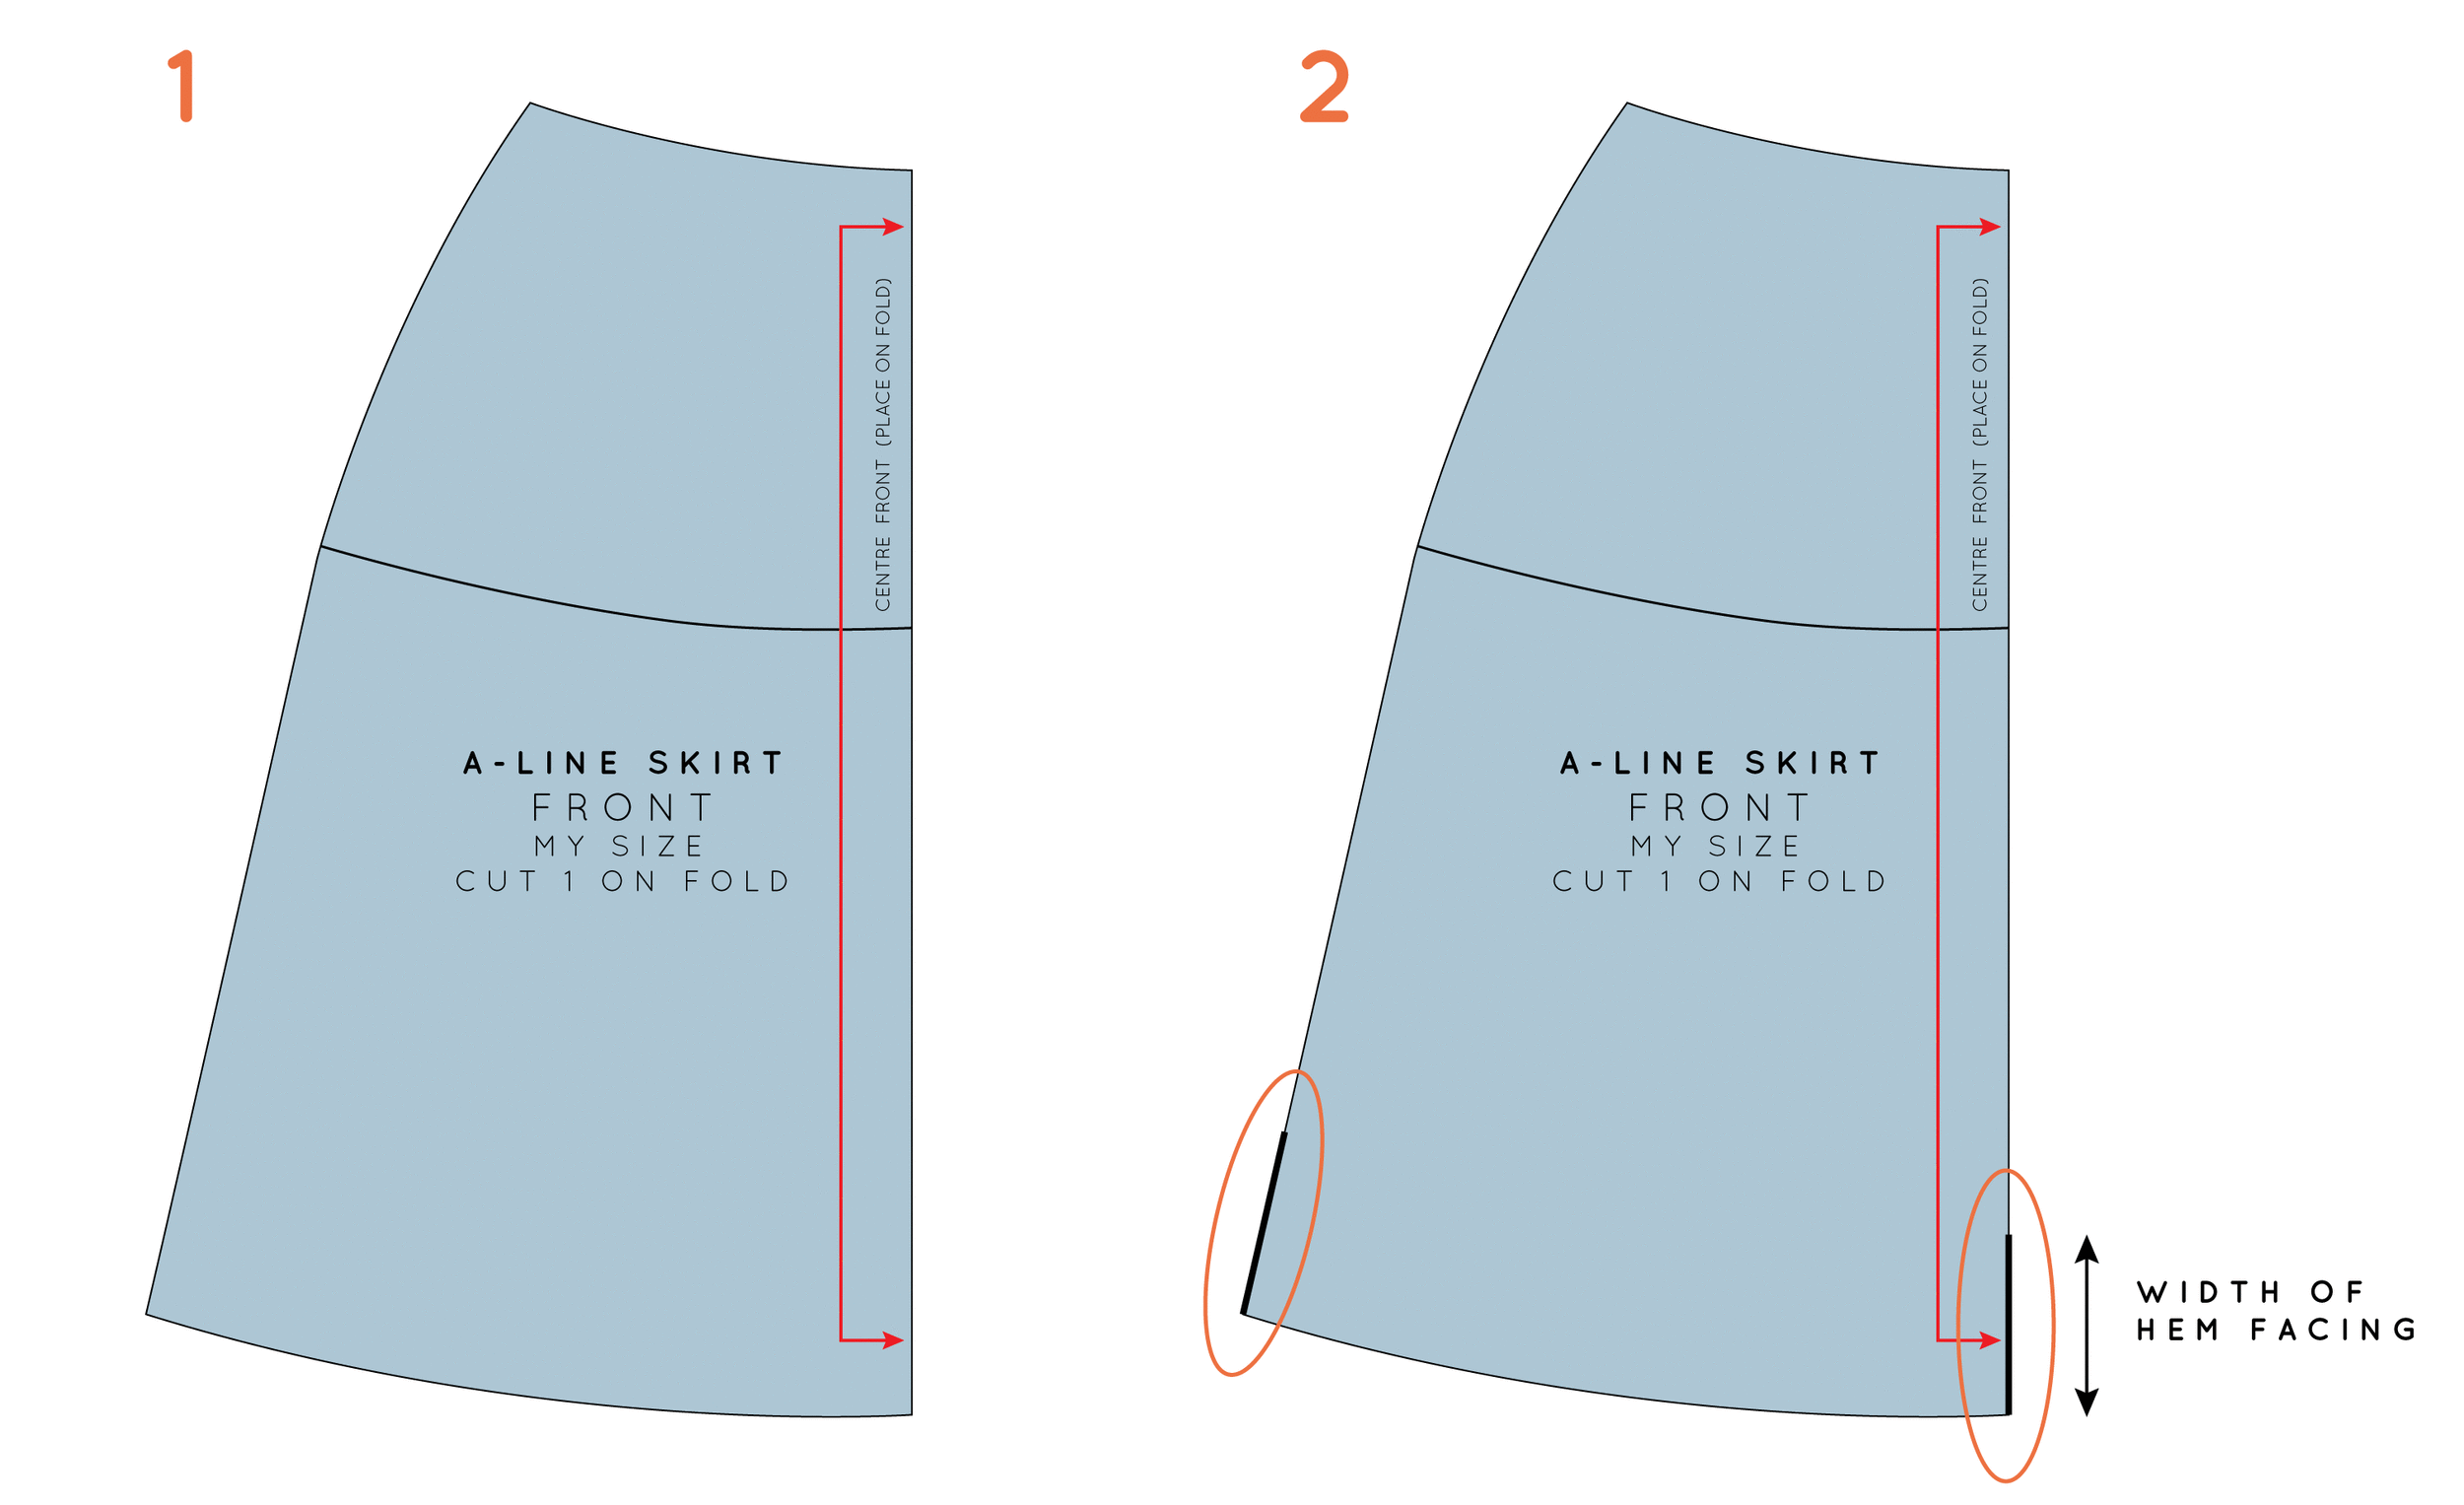
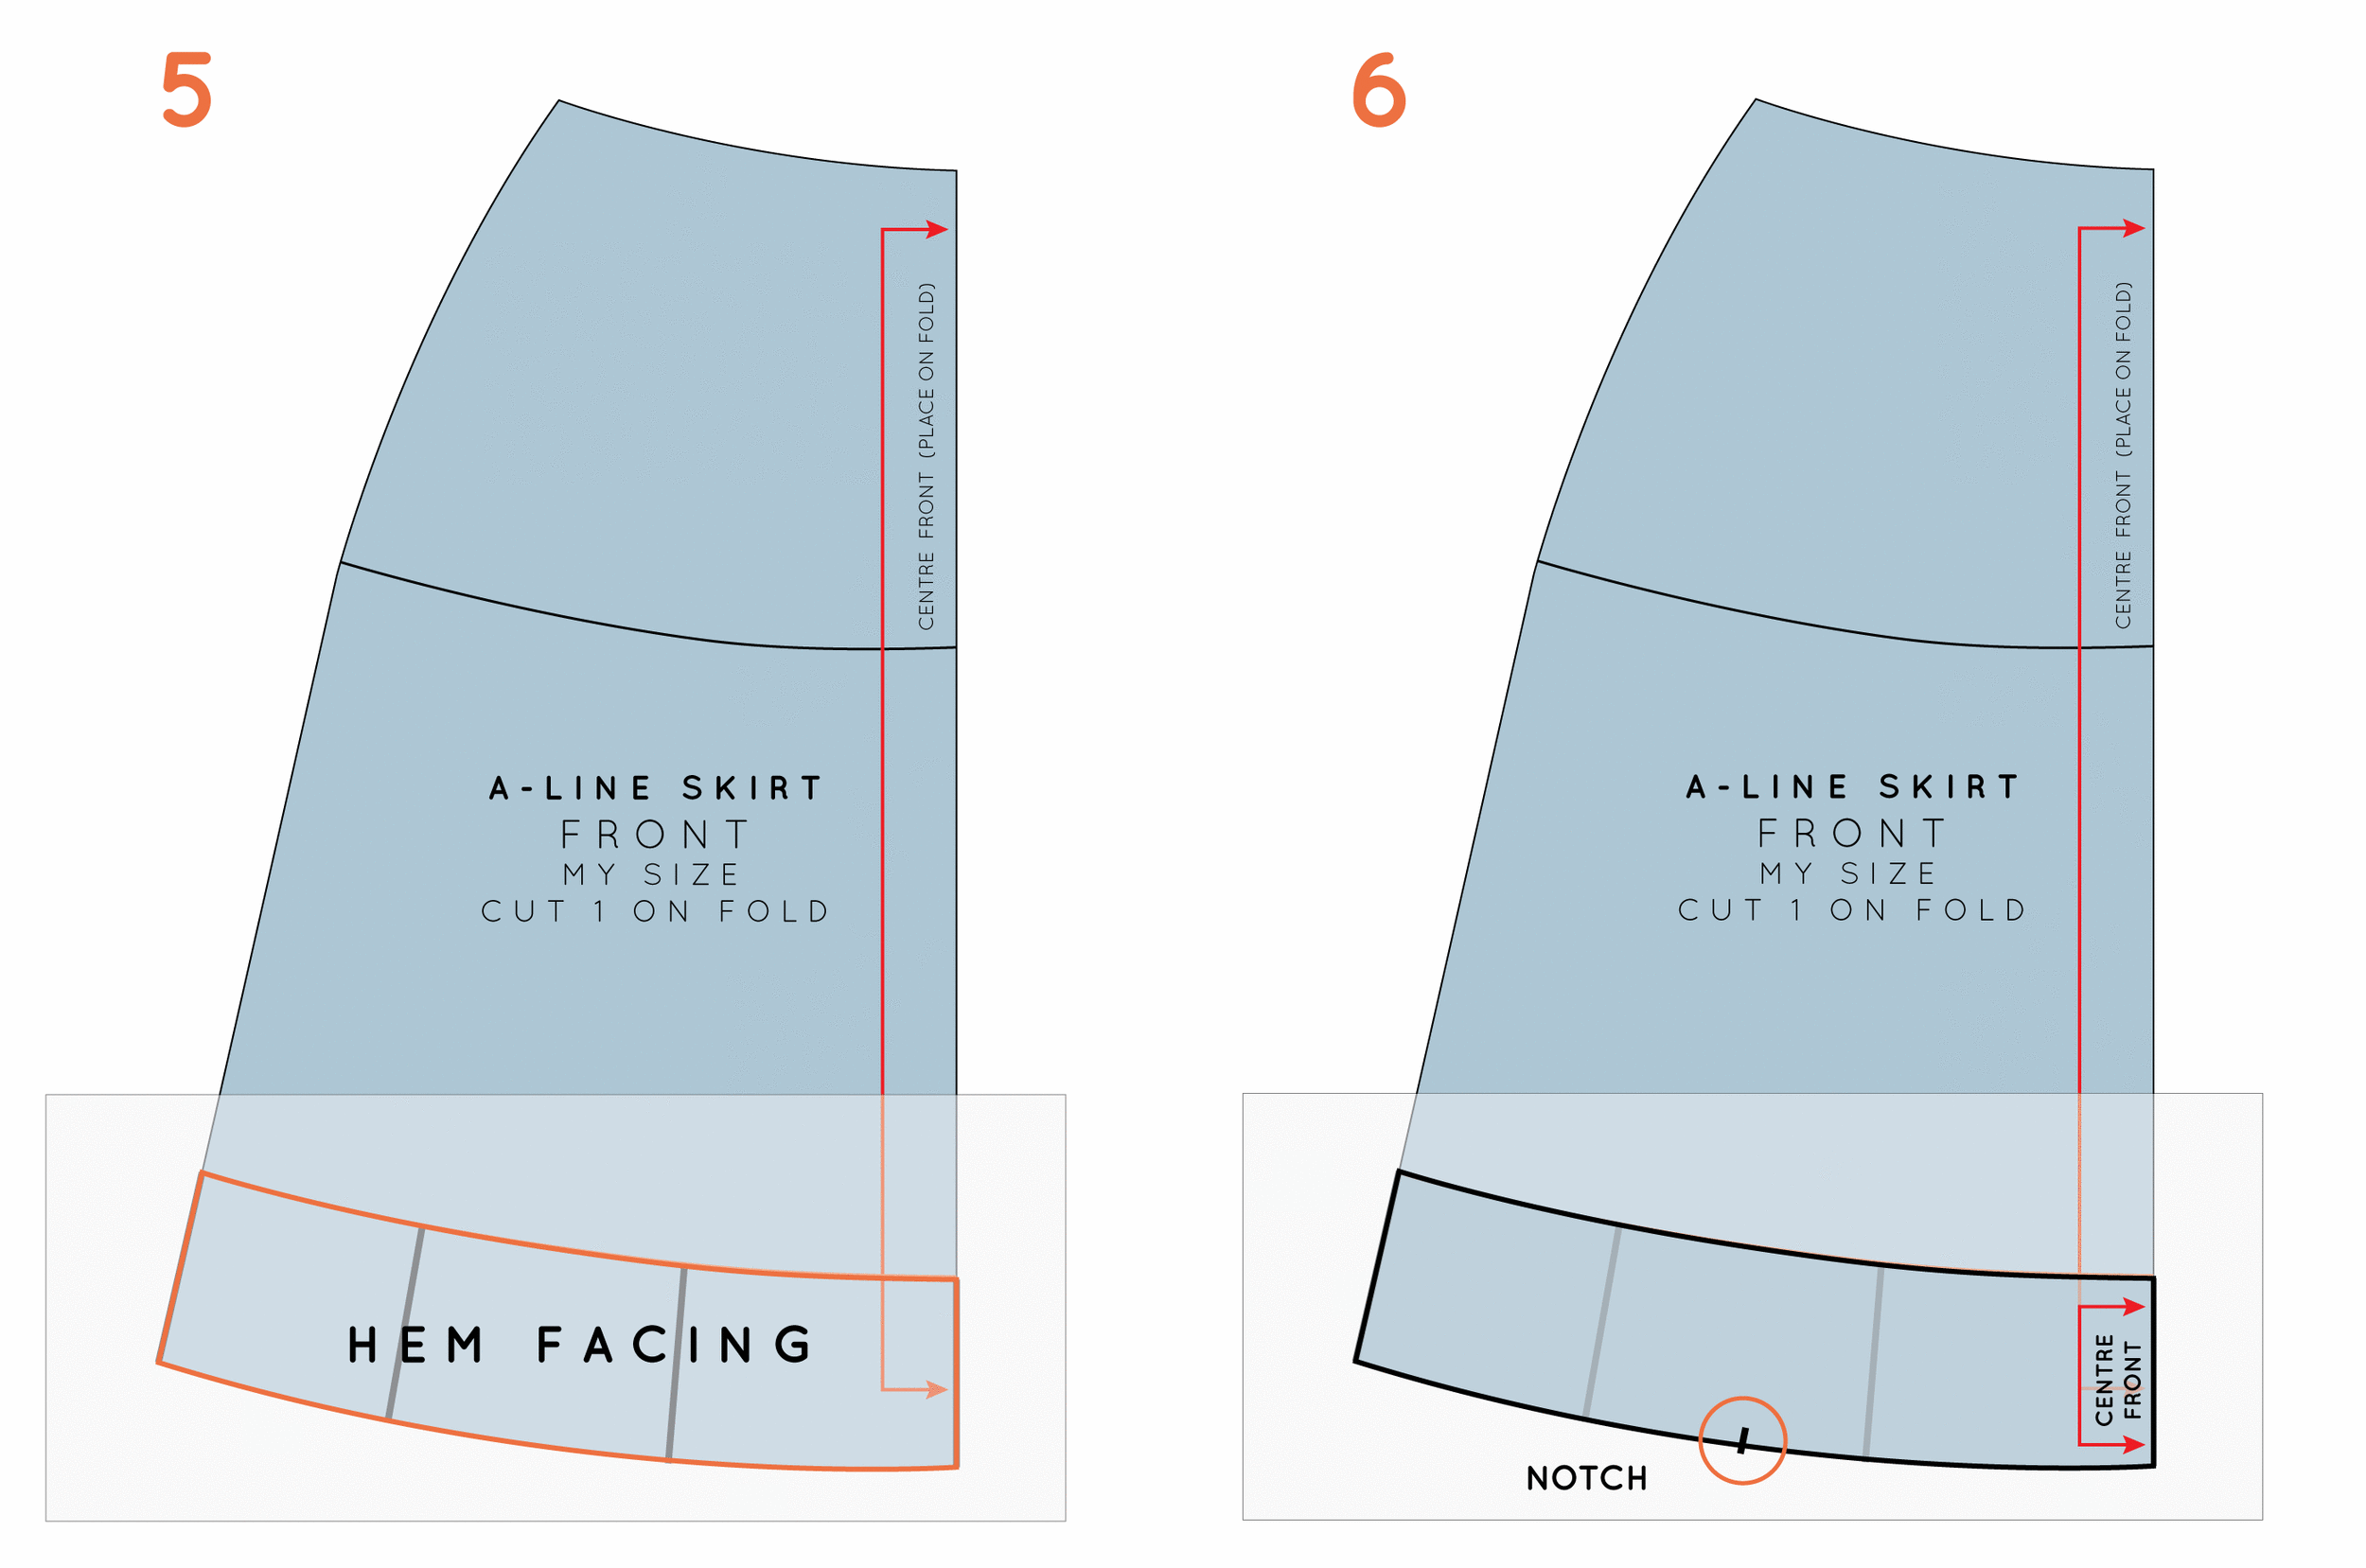
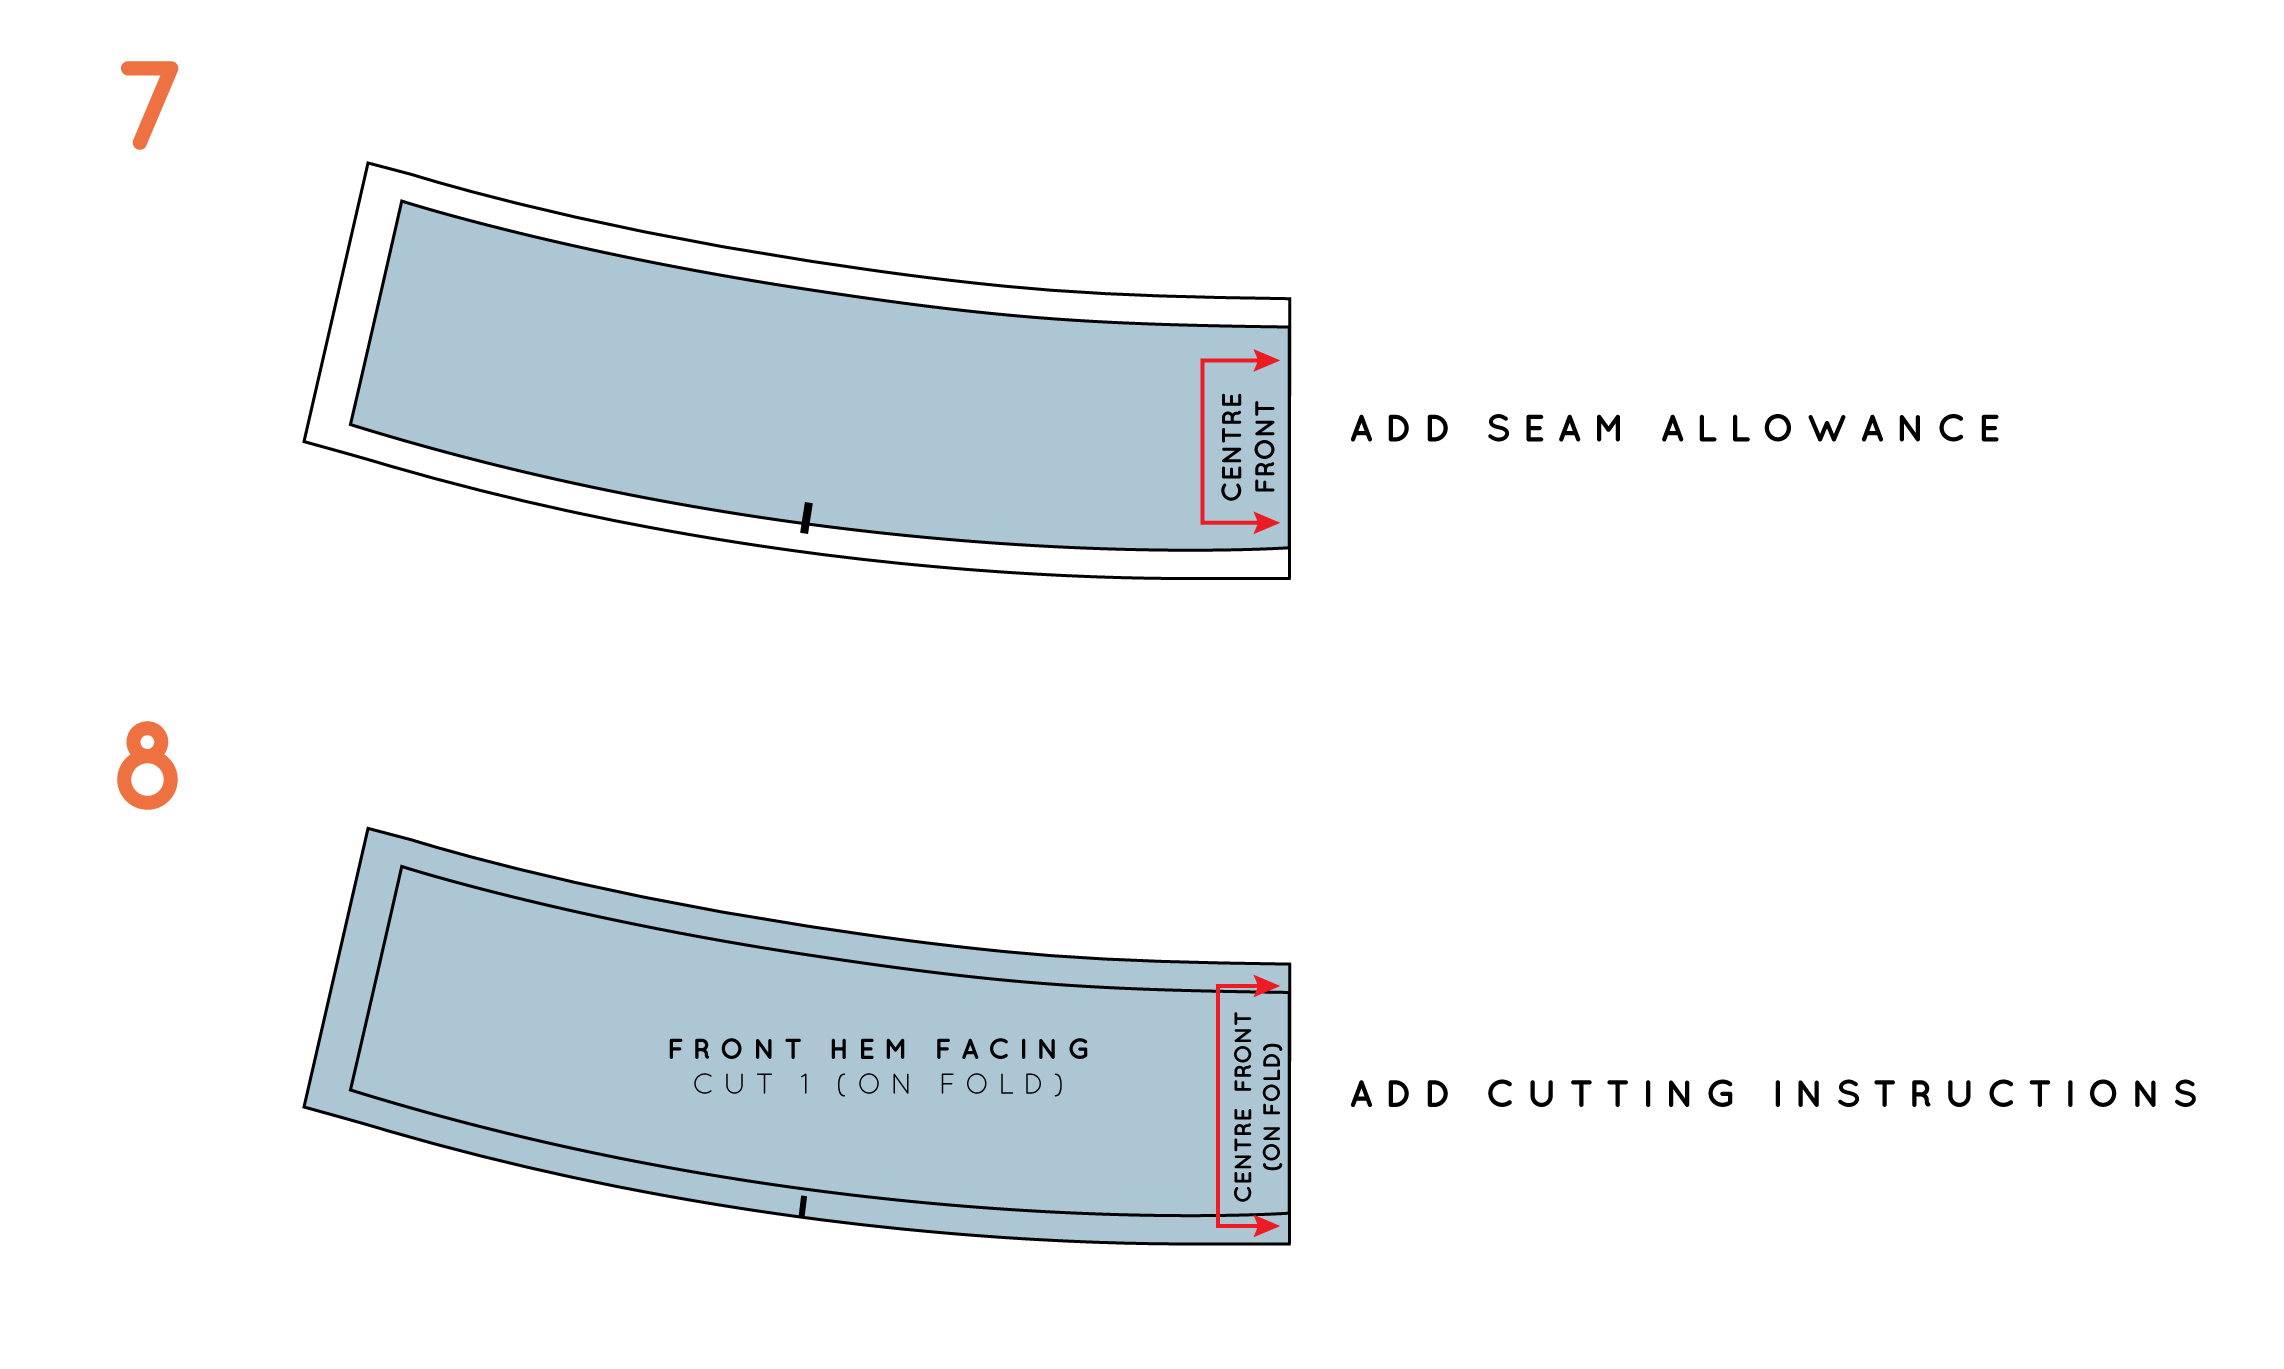
  2. Hem facing - Adding a facing to a shifty fabric like this will give it more structure and help it sit nicely. The concept of drafting facing is pretty straightforward - we shared this tutorial a while back and it can be adapted to any garment edge you’re working on. It's often a good idea to add lightweight interfacing to give the facing stability which will help support the structure of the garment.

We’ve also shared a couple of other posts about working with tricky fabrics, which might be of interest if this is something you’re navigating at the moment. This one is about cutting linen, or other tricky fabrics, and this one has some tips for working with difficult fabrics.

For a minute there I was getting frustrated about the hem, but looking back I feel like I learned more from the mistake than I would have if it had gone smoothly. It also gave me an opportunity to be supported by and cheered on by our community which gave me the boost I needed to get this project over the line. 

Overall, I am so happy with my Kebaya project, but if I’m honest, it’s less about the finished garment and more about the learning journey behind this entire process. 

The Make It Your Own Skills Kit has equipped me with the tools to:

  • Analyse how a garment is constructed. 

  • Accurately copy a loved garment.

  • Draft an accurate and finished pattern.

  • Grade a sewing pattern.

  • Modify a garment by adding ease, cropping length, eliminating darts and changing curves.

  • Pattern hack by drafting additional elements like ties and facings.

  • Make a garment without instructions.

  • Explore optimal finishing methods.

  • Toile methodically in order to fine-tune my vision.

In just a few short weeks I have gained so much more pattern-making knowledge and confidence–I no longer feel I have to rely solely on bought patterns and I'm more inspired to go 'off script' to materialise my ideas into reality.


WHAT YOU’VE BEEN MAKING…

Libby wears her Marden shirt toile in a quilting cotton.

Marden shirt made by Curated by ITF member, Libby.

Cady sits in a red chair wearing her striped Attwood pants.

Attwood pants by Curated by ITF member, Cady.

BEHIND THE SCENES WITH LEANNE: HOW TO USE OUR MAKE IT YOUR OWN SKILLS KIT

The Make It Your Own Skills Kit (part two of our Copy Your Clothes series) is jam-packed full of tutorials to help you individualise your wardrobe. But sometimes we need a little help to understand exactly HOW to use a resource like this. So, I thought it could be helpful to share some of the projects I considered making to share in our Curated by ITF private community.

While I’ve only moved forward on one of these, the rest have been added to my to do list. If you’re in need of a little inspiration, read on!

INSPIRATION FOR HOW TO PERSONALISE READY-TO-WEAR COPIES

Grade loved garments into new sizes

Grading is one of those skills that many sewists wish they knew how to do. (We know because we’ve been asked about it a LOT in our Curated by ITF community!)

And while it is definitely a specialist skill in industry, there’s absolutely no reason why home sewists can’t add it to their repertoire. And it’s the perfect skill to have if you’ve got growing kids who are always in need of the next size up!

I recently inherited a stack of stretch towelling/velour type fabrics in pastel shades, which I knew I wouldn’t wear, but would be perfect for comfy kids trackies. 

If you already own basics like this that you love, consider copying the pattern and just grading it up to the next size. 

Add length for a perfect extra tall fit

At almost 2 metres tall, my husband has a really hard time finding clothes to fit. He needs extra length, but when he sizes up in RTW clothes everything that’s long enough ends up being too wide. It’s very frustrating.

With a bomber jacket that fits fairly well, but is slightly too short, already in his wardrobe, I considered copying the design using the Copy Your Clothes Skills Kit, and then using the tutorials in the Make It Your Own Skills Kit to grade up in size and add the extra length where necessary. And a bomber jacket is a great opportunity to be a bit adventurous with fabric choices - what a fun project!


build your sewing skills with a
curated by itf membership


Trendy two piece

Having already traced off a favourite t-shirt of mine during Copy Your Clothes month, I felt I was already halfway towards a matching set! 

And I knew exactly which much-loved pair of comfy pants to trace off to complete the outfit. The only question was, which fabric? 

Having recently moved to Melbourne I’ve been enjoying discovering local sustainable fashion brands. During my explorations a theme started to emerge–matching sets in stretch velour. Pretty out there, but also kinda cool. 

Alas, the price tags were often quite high, but luckily we sewists possess a certain “I could make that myself” mindset and voila! The idea for a stretch-velour #TwoPieceSpectacular was born. 

I am still very-much inspired to bring this idea into existence, but since both of the RTW garments I would be using as base patterns fit me perfectly, this project offered little opportunity to explore those pattern drafting techniques I’m so keen to learn, such as grading sizes and other fit modifications. 

Plus, I love a good story, and ultimately it was the narrative behind my final idea which sent it straight to the top of the list.

Modernise a sentimental garment and make it more suitable for everyday wear and lifestyle

Thanks to my part Chinese-Malaysian heritage, over the years I have come into the possession of several traditional Peranakan Kebaya blouses, handed down to me from my mother, grandmother and aunties.

These garments have a very special place in my heart, and happily, I got a decent amount of wear out of them while I was a teenager, before I (very sadly!) outgrew them. 

As I was preparing for this month’s project, and considering what garment I’d like to personalise using the Make it your own Skills Kit, I was really inspired to create something very unique to me. 

As someone whose daily life is spent dedicated to caring for a family, my creative pursuits are a chance to be myself in the moment. They’re an opportunity for mindfulness, self-care and self-therapy. A project focused around my Kebaya blouses seemed to be the perfect fusion of all these elements. It would give me the opportunity to express my own personal modern style, while honouring my family’s traditional ceremonies and celebrating my cultural heritage. I also loved the idea that an everyday staple could be imbued with a touch of sentimental nostalgia.

I often find that my most successful projects are a result of a spark of an idea channelled thoughtfully into something with purpose. For me, the best handmade garments are a combination of having an interesting narrative, being aesthetically beautiful and serving a clearly defined function. And this definitely ticked those boxes!

What is a Kebaya?

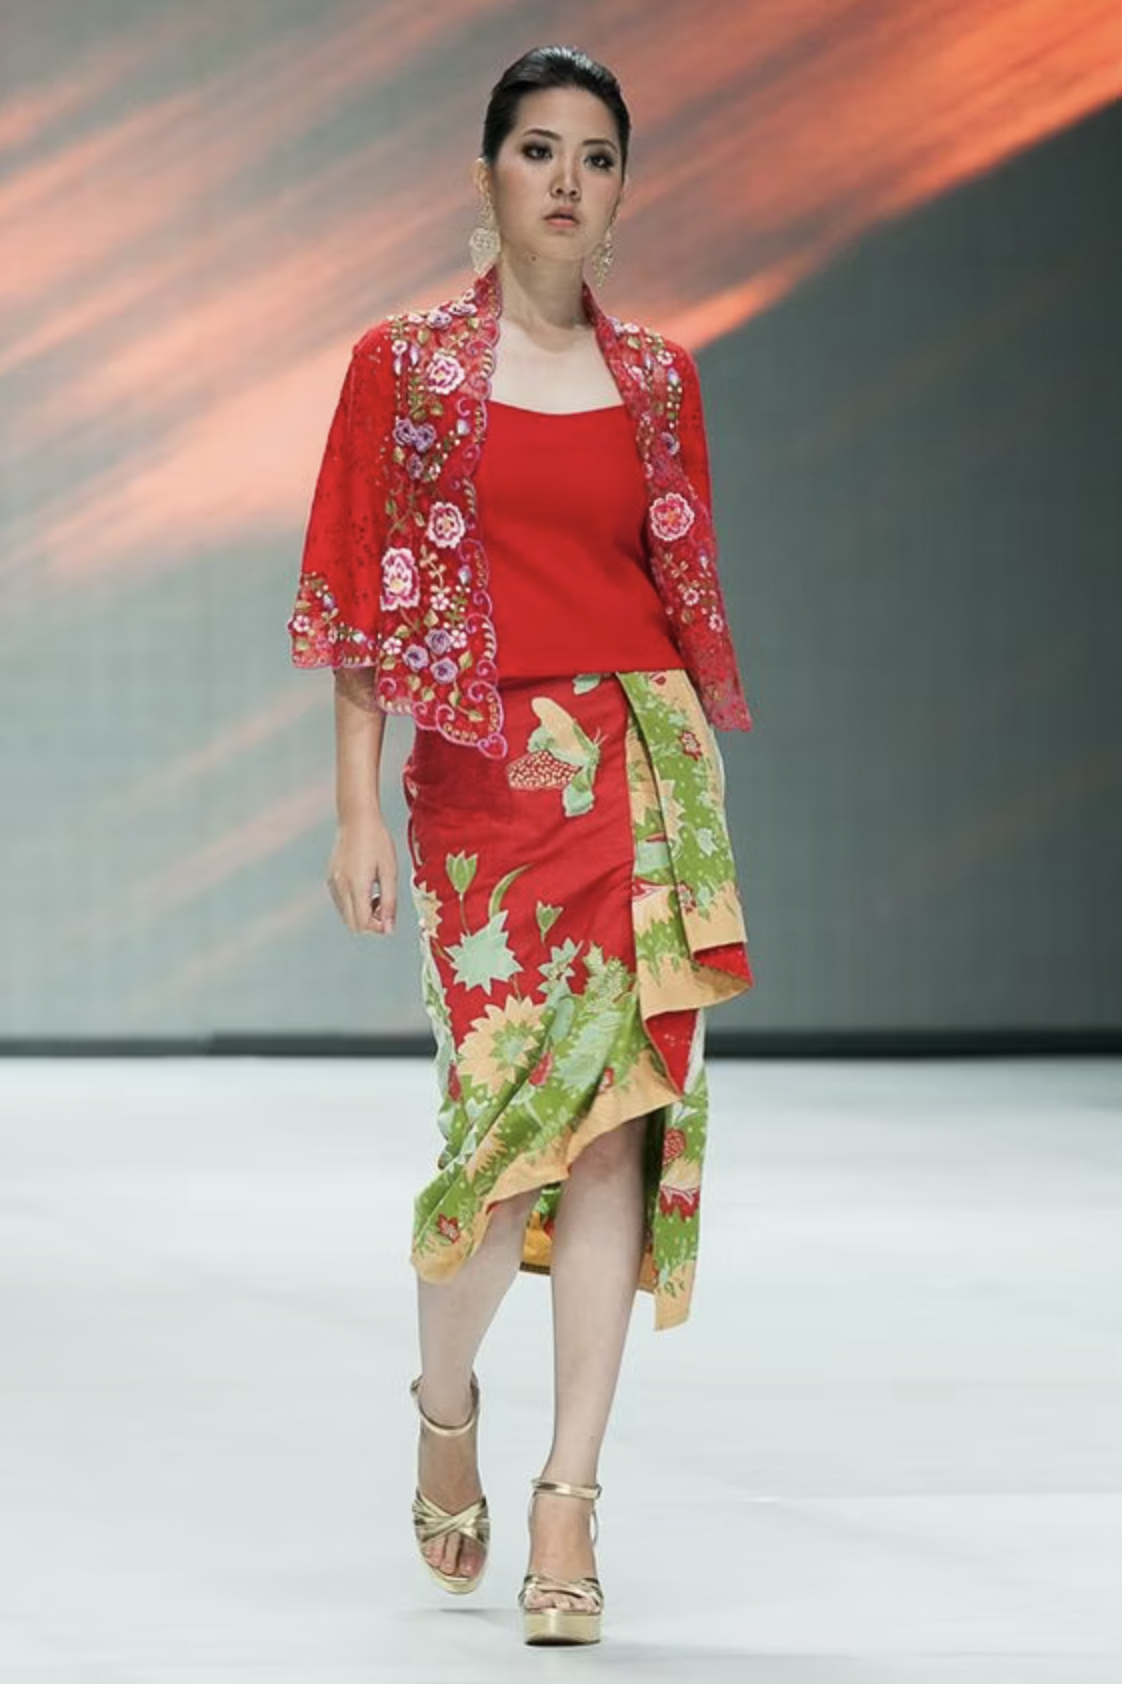
A Kebaya is an elegant blouse worn throughout South-East Asia to formal events and ceremonies. (There are variations of this traditional garment – in my description here I will be referencing the particular ones I have inherited.) It is commonly paired with a sarong skirt, essentially a tube of fabric, tucked to fit.

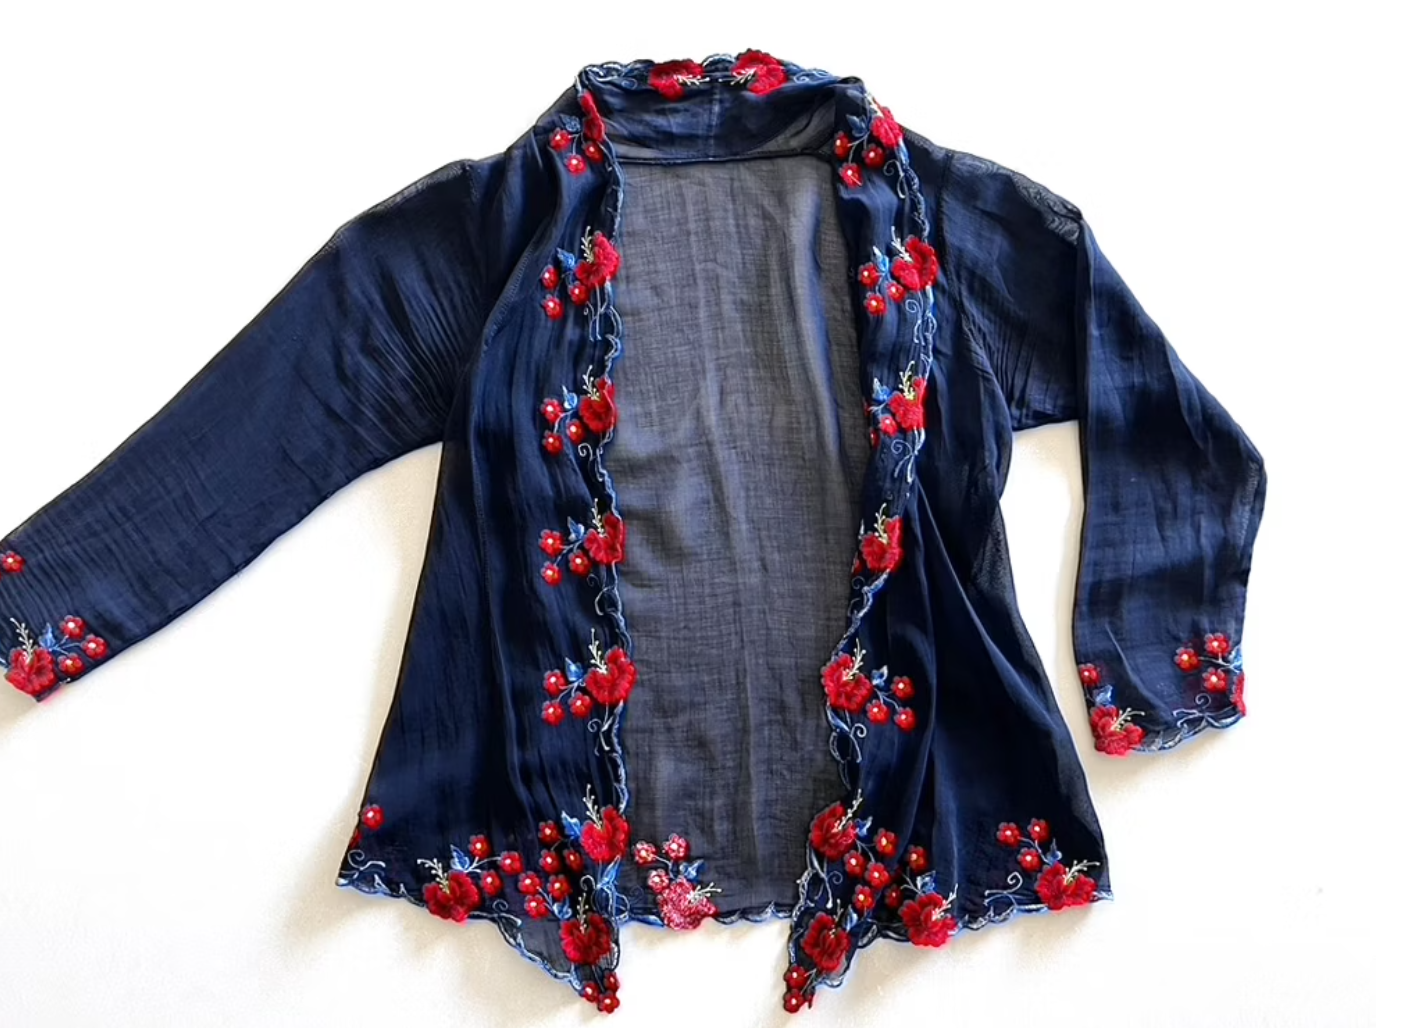
Typically made from sheer materials, like silk, cotton or nylon, and embellished with intricate and often colourful embroidery and lace, a Kebaya has a tailored fit with fisheye darts in the back bodice. It has a deep v-neck and is usually fastened with a brooch around bust height, with the bodice lower front hanging freely and the centre front often tapering to an elongated point. The sleeves are 3/4 length. 

My Kebaya project - Blending tradition, cultural heritage and personal style

Apart from grading up in size to fit my adult body, there were a few must-have modifications that the finished garment needed to include. Using the original and traditional Kebaya pattern as a base, I want to:

  • Create a neutral version suitable for everyday wear and not limited to special occasions. (Sadly no embroidery or delicate/ sheer fabrics.)

  • Potentially incorporate front ties to eliminate the need for a brooch fastening. Brooches don't fit into my daily lifestyle looking after my little kids, and in the past I found the brooch damaged the fabric leaving a visible hole in the garment.

  • Modernise the feel by cropping the length and removing the darts to create a boxier fit. I like the length and feel of the Kebayas below, they seem more casual and jacket-like. I'm going for a light layering piece rather than a form fitting blouse. 

  • Either finish the edges with bias binding to mimic the front ties or draft a facing and possibly leave off the ties.

  • Consider the amount of design ease to take the garment from being a blouse to a light layering piece or outerwear jacket.

Short kebaya with peacock embroidery.
Cropped kebaya in red with floral embroidery.

The Kebaya below is a more recent one I bought when visiting Singapore 5 years ago. It was intended to be a present for my mum but unfortunately it was too small for her, and it's a little snug on me too. This is the one I'm choosing to trace off for my pattern, as it is the one closest in size to my current measurements.


When it comes to sewing garments, the Make It Your Own Skills Kit really opens up a world of opportunities. I hope I’ve given you some ideas for how to use the resource to personalise your wardrobe, and make your garments suit your style and life.

I can’t wait to share the finished Kebaya project with you. Stay tuned!

Happy sewing,

Leanne


WHAT YOU’VE BEEN MAKING…

FIVE MINUTE GUIDE TO SEWING & PATTERNMAKING RULERS

If you’re planning to embark on the journey that is learning how to draft patterns, there are a number of tools you will absolutely need in your toolkit. 

And, while we’re pretty big on making do with what you’ve already got, a good pattern drafting ruler (or two) is an investment we don’t think you’ll ever regret.

Like with all sewing tools these days though, there is a huge range of sewing rulers out there to choose from. 

Is there one ruler to (ahem) rule them all? Or, are they all just a different take on the same story?

Since learning to sew can be an expensive endeavour, we thought it might be helpful if we put together a quick overview of what we think makers should consider when investing in a ruler for sewing and patternmaking.

But first things first.

WHY YOU SHOULD HAVE A GOOD SEWING RULER OR TWO IN YOUR TOOLKIT 

If you’re setting up your sewing toolkit, or have been dancing around whether you should invest in a ‘proper’ sewing ruler, here’s your permission. (Or at the very least, three reasons why we think you should!)

A patternmaking or sewing ruler:

  1. Will improve the overall finish of your garments by enabling you to draw smooth and accurate straight and curved lines, and remove the need for ‘eyeballing’.

  2. Is much more versatile than a regular drawing ruler. Most patternmaking rulers come with a variety of elements included. For example, different shaped curves, a set square and various different measurements and markings for adding seam allowances of different widths (to name a few).

  3. Is absolutely needed when drafting patterns from scratch, making fit alterations or hacking patterns. (There you go, you only need one reason!)


build your sewing skills with a
curated by itf membership


WHICH SEWING RULER SHOULD YOU BUY?

As we said above, there’s always lots of options to choose from, so here’s where we give you our opinions, tell you what you should consider and share what we use.

Grading ruler

A grading ruler looks just like a regular drawing ruler (a long rectangle), but is a lot longer, allowing sewists to draw nice long lines in one go. 

Normally around 50-60cm in length, grading rulers are transparent (making them great for adding seam allowance) and flexible (perfect for measuring and marking curves when turned on the side). 

Some grading rulers have both centimetres and inches marked, and some have commonly used seam allowances (eg. 1.2cm) marked for easy reference.

Pros: 

  • Can be used to draw straight lines and curves

  • Lightweight and flexible

  • Great for adding seam allowances

  • Can be handy to have when doing things such as folding and pressing a hem accurately.

  • Can be used for squaring off 

  • Accessible and affordable - with a quick Google you shouldn’t have any trouble finding one within your budget.

Cons: 

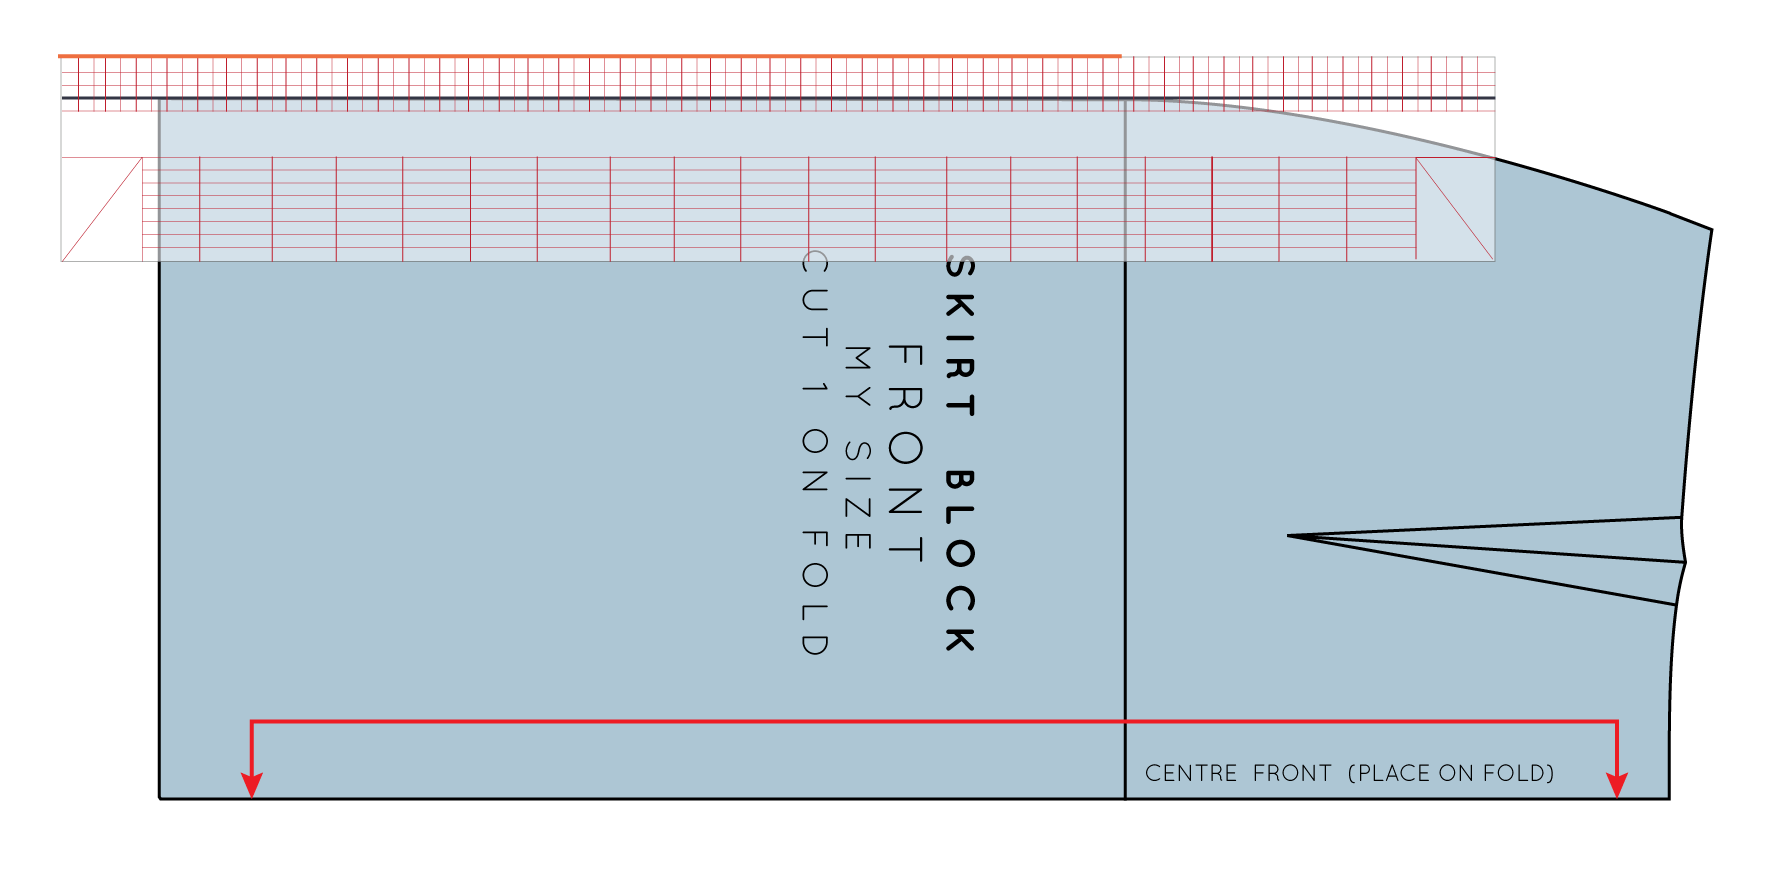
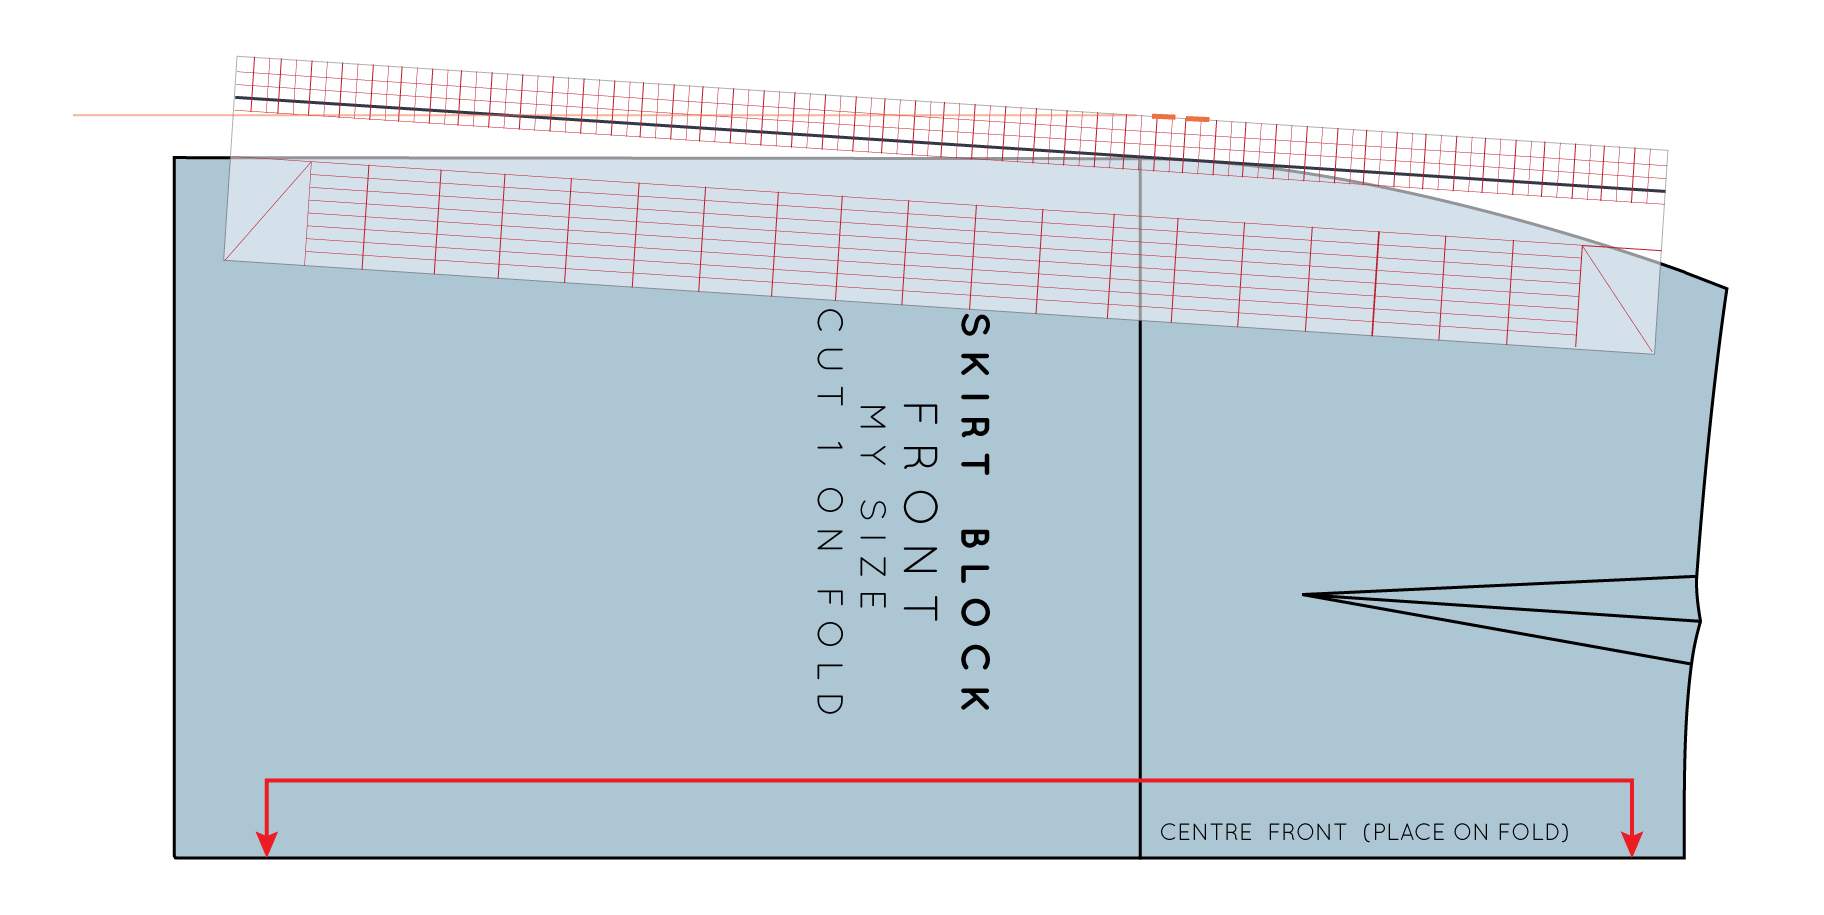
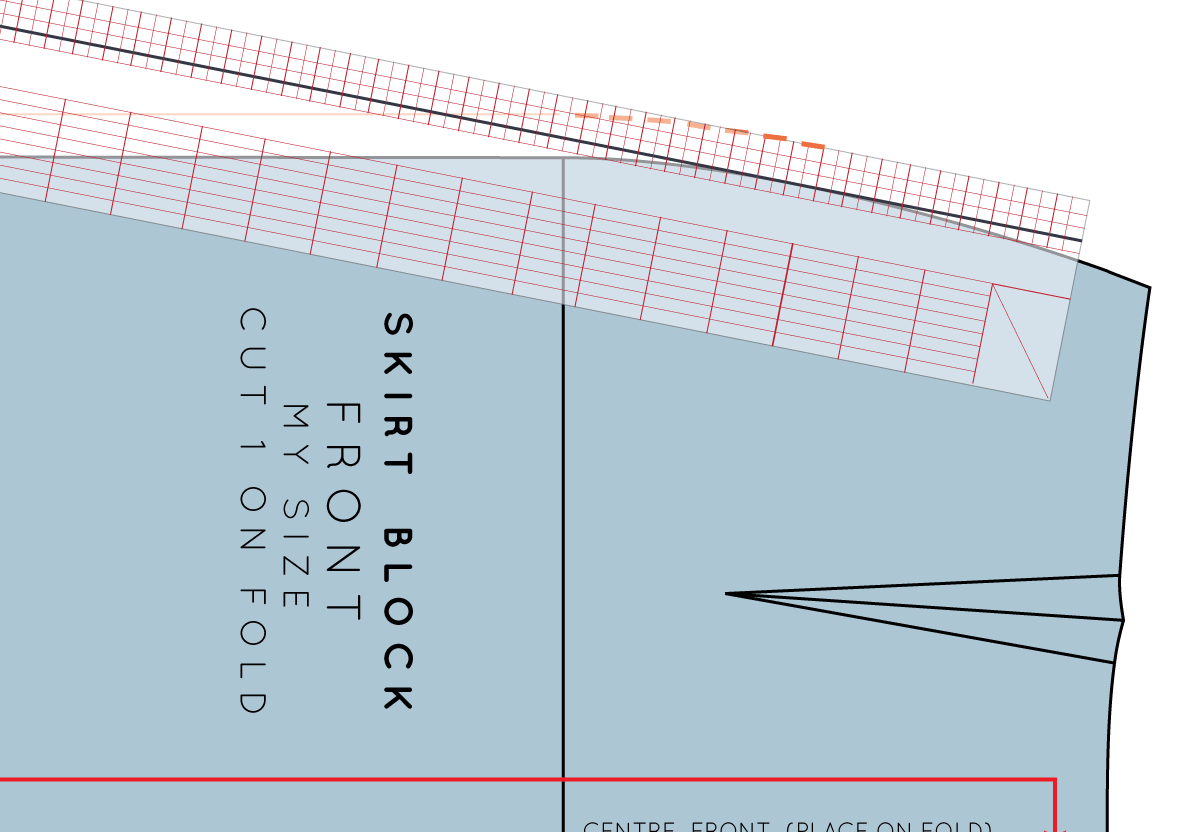
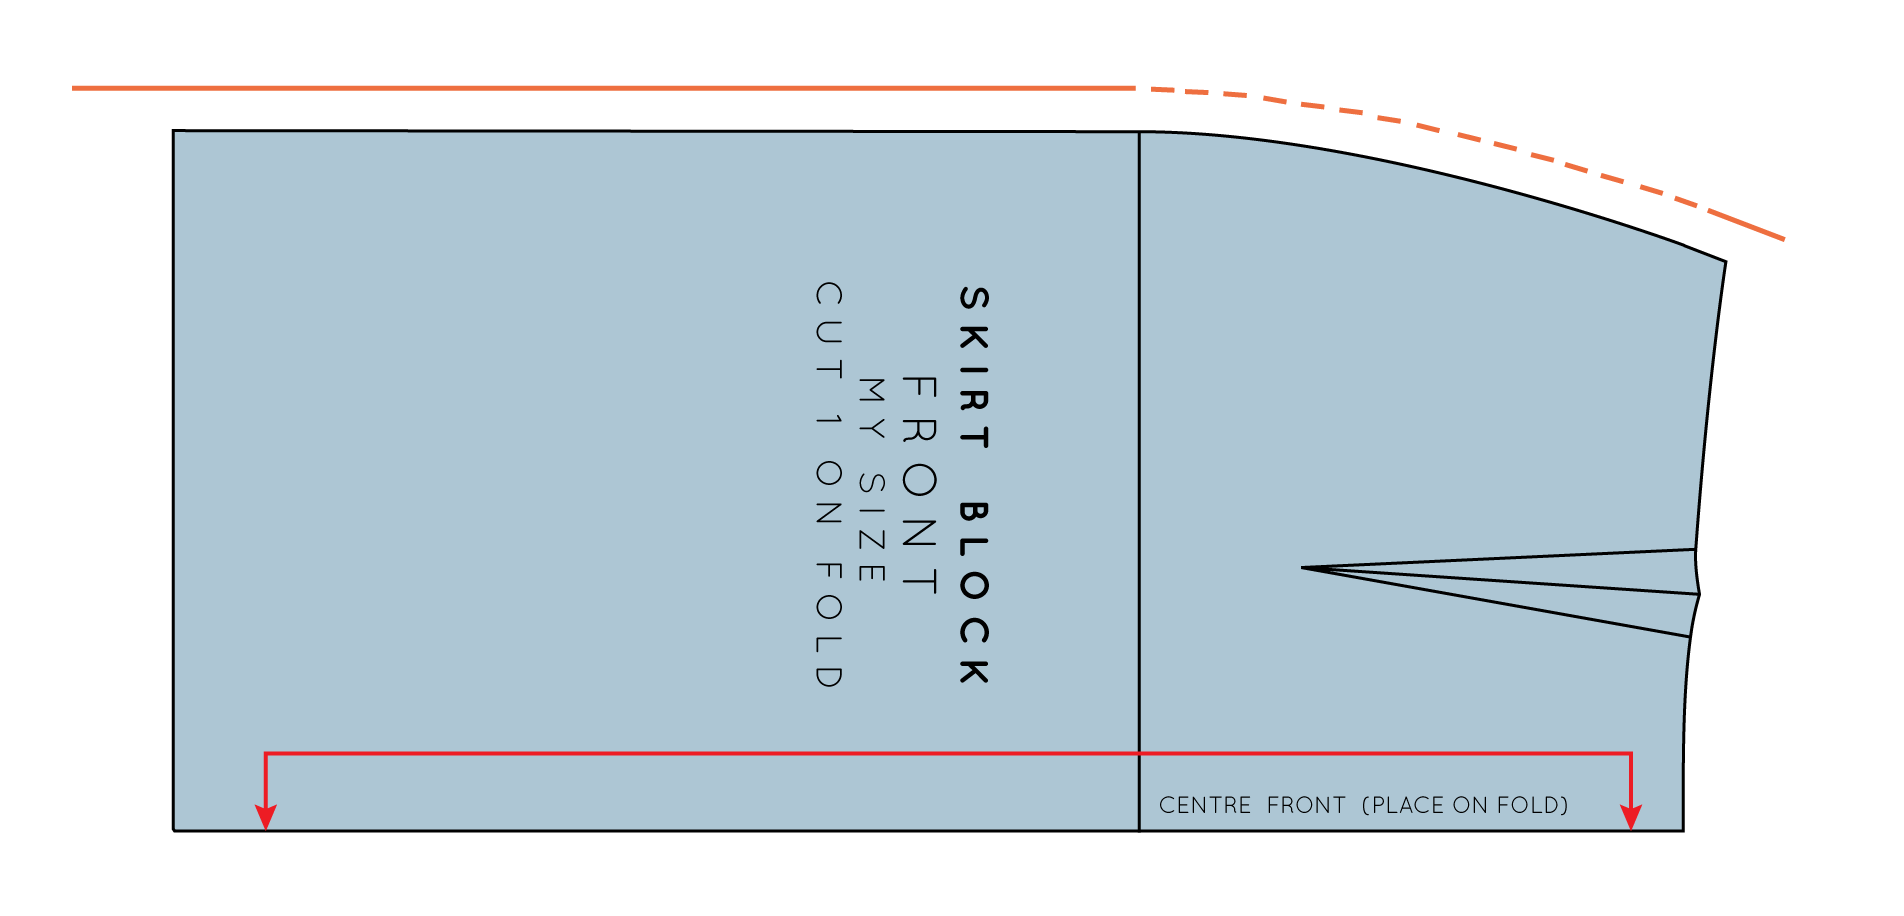
  • Doesn’t have any curves, but you CAN use a straight ruler to draw curves! It takes some practice and might not be for everyone. Check out this tutorial if you’d like to know more about this technique. And FYI - these kinds of tutorials are exactly what we share in Curated by ITF community!

  • Lots of lines and grids can take some time to get used to

  • Bear in mind that some come with metric measurements, while others use imperial. Not necessarily both.

(As a technically trained pattern designer who uses rulers all the time in her daily process, a grading ruler is Emily’s pick!)

French curve

A French curve is a handy tool for drawing necklines, armholes, side seams, hem lines, waist lines and sleeve caps. Any curve a pattern has, for that matter! It’s just a matter of practice. 

If you find it tricky to draw smooth curves, this might just be the tool you need in your patternmaking toolbox. 

Pros: 

  • Very versatile - can be used for drawing straight lines and all kinds of curves.

  • Light and flexible

  • Handy for adding seam allowances to curved seams.

Cons:

  • Can be tricky to get the hang of as it requires practise to master the various curves. (But we don’t think that’s really a reason to not get one!)

Patternmaster

If you only have the space or budget for one pattern making ruler, a Patternmaster is a great choice because it covers so many bases.

Pros: 

  • Versatile - can be used for all kinds of straight and curved lines.

  • Includes a set square which is very handy when drafting your own patterns or checking your patterns.

  • Has a 45 degree marking on it which is handy when making your own bias binding.

Cons:

  • On the heavier side, particularly when compared with a French curve. This may not be a problem for home sewists however, but is definitely something to consider if you’re planning on doing a lot of pattern drafting.

  • Quite thick (which is why it’s weighty). You may see this as a pro as it’s definitely a sturdy tool.

Hip curve

As the name suggests, these rulers are used to draw the hip curve when drafting fitted pants and skirts. They are a softer curve than the French curve and can also be used for hem lines and other areas on your pattern that you might need a softer curve. 

Pros:

  • Lovely gentle curve that can create an accurate hip curve and side seam curve without second guessing yourself

  • Will fill a gap between straight ruler and French curve - just what you need for those gradual curves 

Cons:

  • Limited by what you can do with it.

  • This ruler is likely not a necessity in your kit, as with a little practice most French curves and Patternmasters can be used as a hip curve. (The practice is needed to understand how to pivot the ruler to achieve the correct curve.)


General things to consider when adding to your ruler stash

  • Is it transparent?

  • How heavy is it? How will this impact its use?

  • Does the ruler have the correct measurements for what you need (i.e. centimetres vs inches or do you want both?)

  • Where will you store it? (i.e. does it have a hole or opening so you can hang it on a hook?) Can you accommodate more than one ruler or is an all-in-one ruler more practical?

  • Is it more cost effective to get one Patternmaster rather than multiple single purpose rulers?

  • Do some rulers just feel more intuitive to use?

  • Aesthetics - Rulers come in all different colours and styles, and some colours are more optically pleasing than others. Consider whether you actually enjoy engaging with the object. Is it worth investing a little more for something that will bring you more joy to work with?

Random ruler tips

  • Masking tape can be applied to a ruler at a particular measurement to help you know what to line up with at a a glance.

  • Don’t leave them on the dash of your car. They may melt (Emily learned this the hard way!)

Happy patternmaking and sewing!

Emily


WHAT YOU’VE BEEN MAKING…

The Collins Top Sew-along : Re-drafting the facing (required after full bust adjustment)

front_facing_adjustment_cover.gif

Over the last couple of days I have shown you how to perform a Full Bust Adjustment (FBA) on the Collins Top to start off the Collins Top sew-along. The process is a little different to what you might be used to, due to the fact that the top doesn't have a dart or bust shaping through a panel and it also has a panel line. You can find the tutorial here (this tutorial guides you through the process of creating a bust dart in the centre front panel). If you would like to know how to make the adjustment without the dart, then take a look at this tutorial (you will need to create the dart and then redistribute the fullness of the dart to the hemline). 

In today's post, I'd like to show you how to re-draft the front facing piece. By making changes to the centre front panel and the side front panel of the Collins Top, the original front facing will no longer fit the pattern. You will only need to do this if you are making View B of the Collins Top (the sleeveless version) and have made a Full Bust Adjustment.


Getting Started

re-draft_front_facing_1.gif

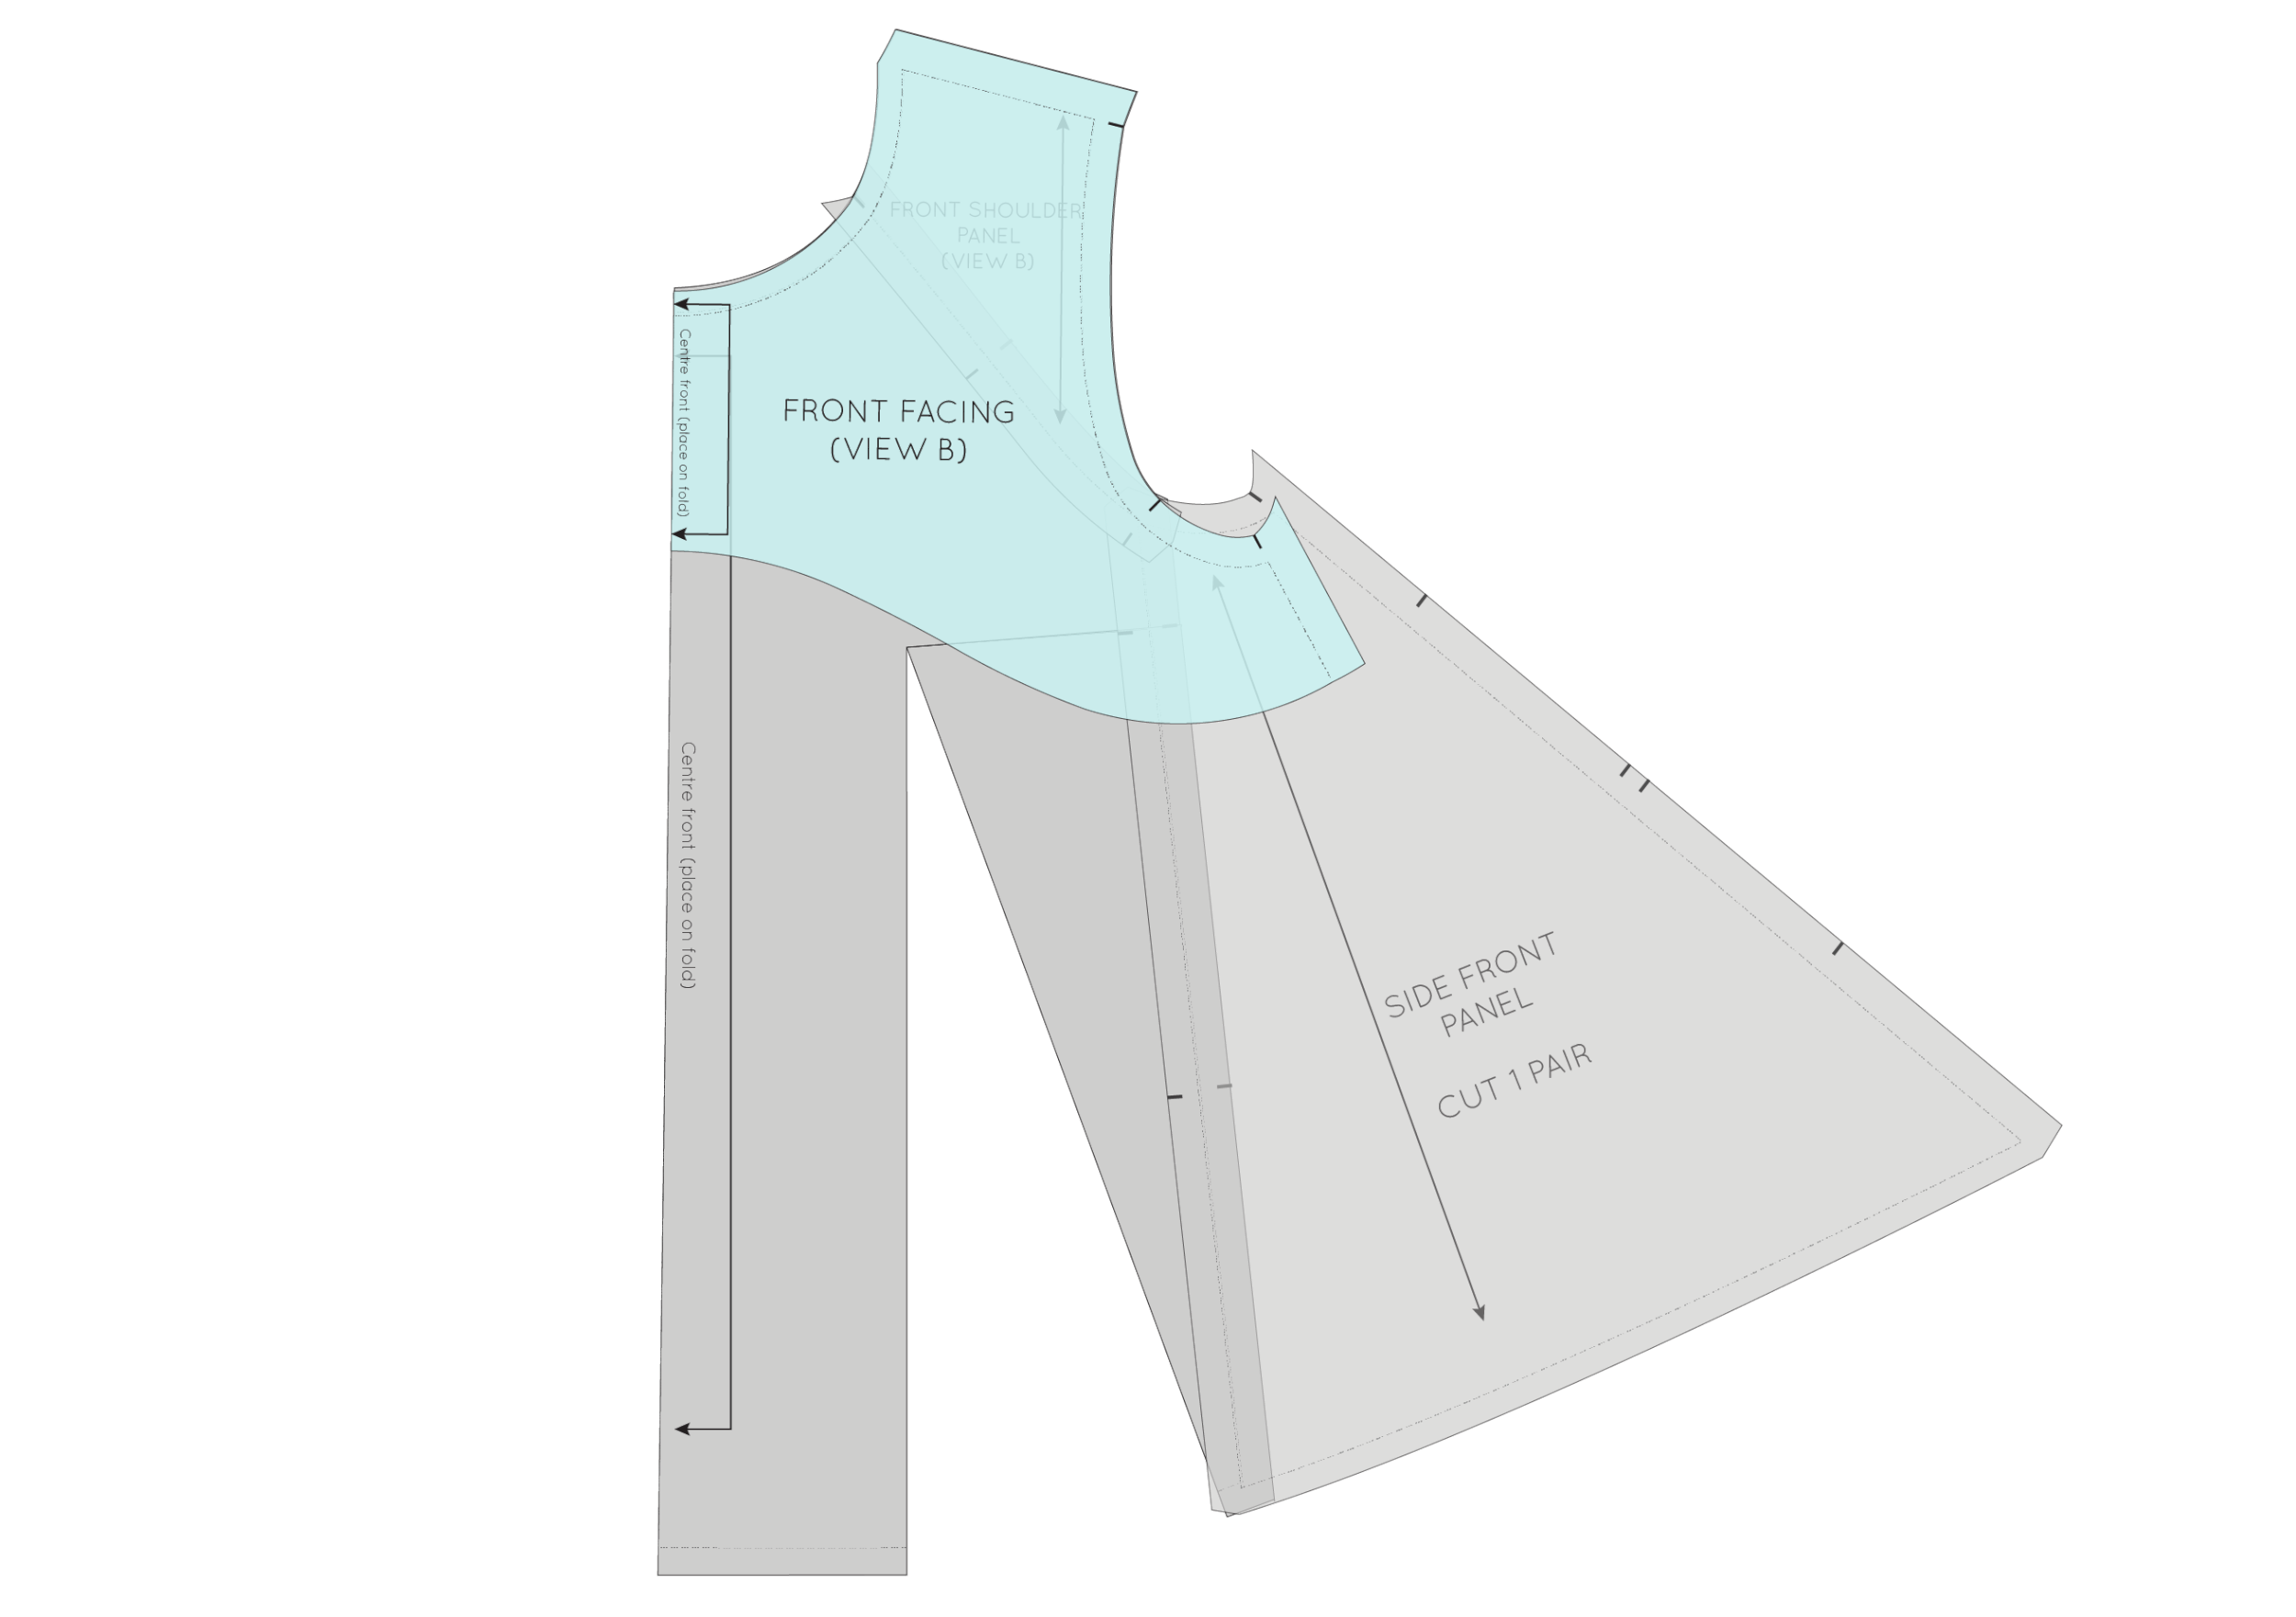
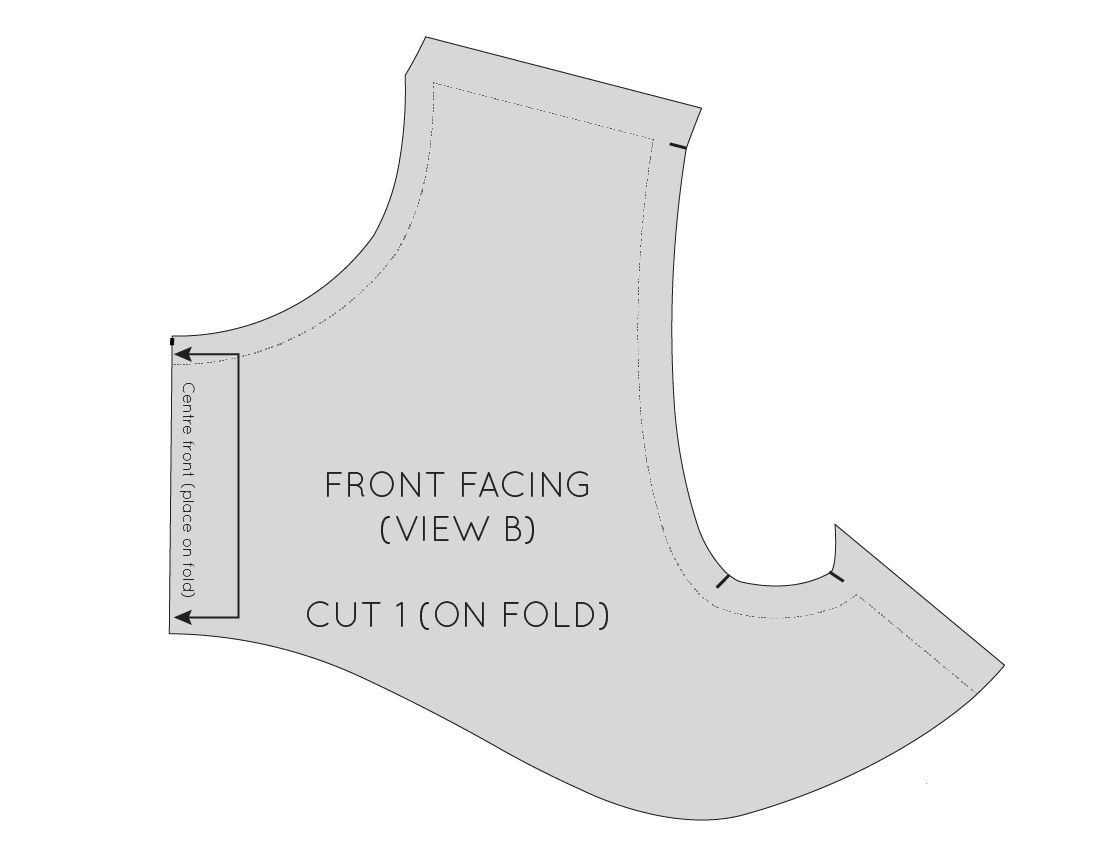
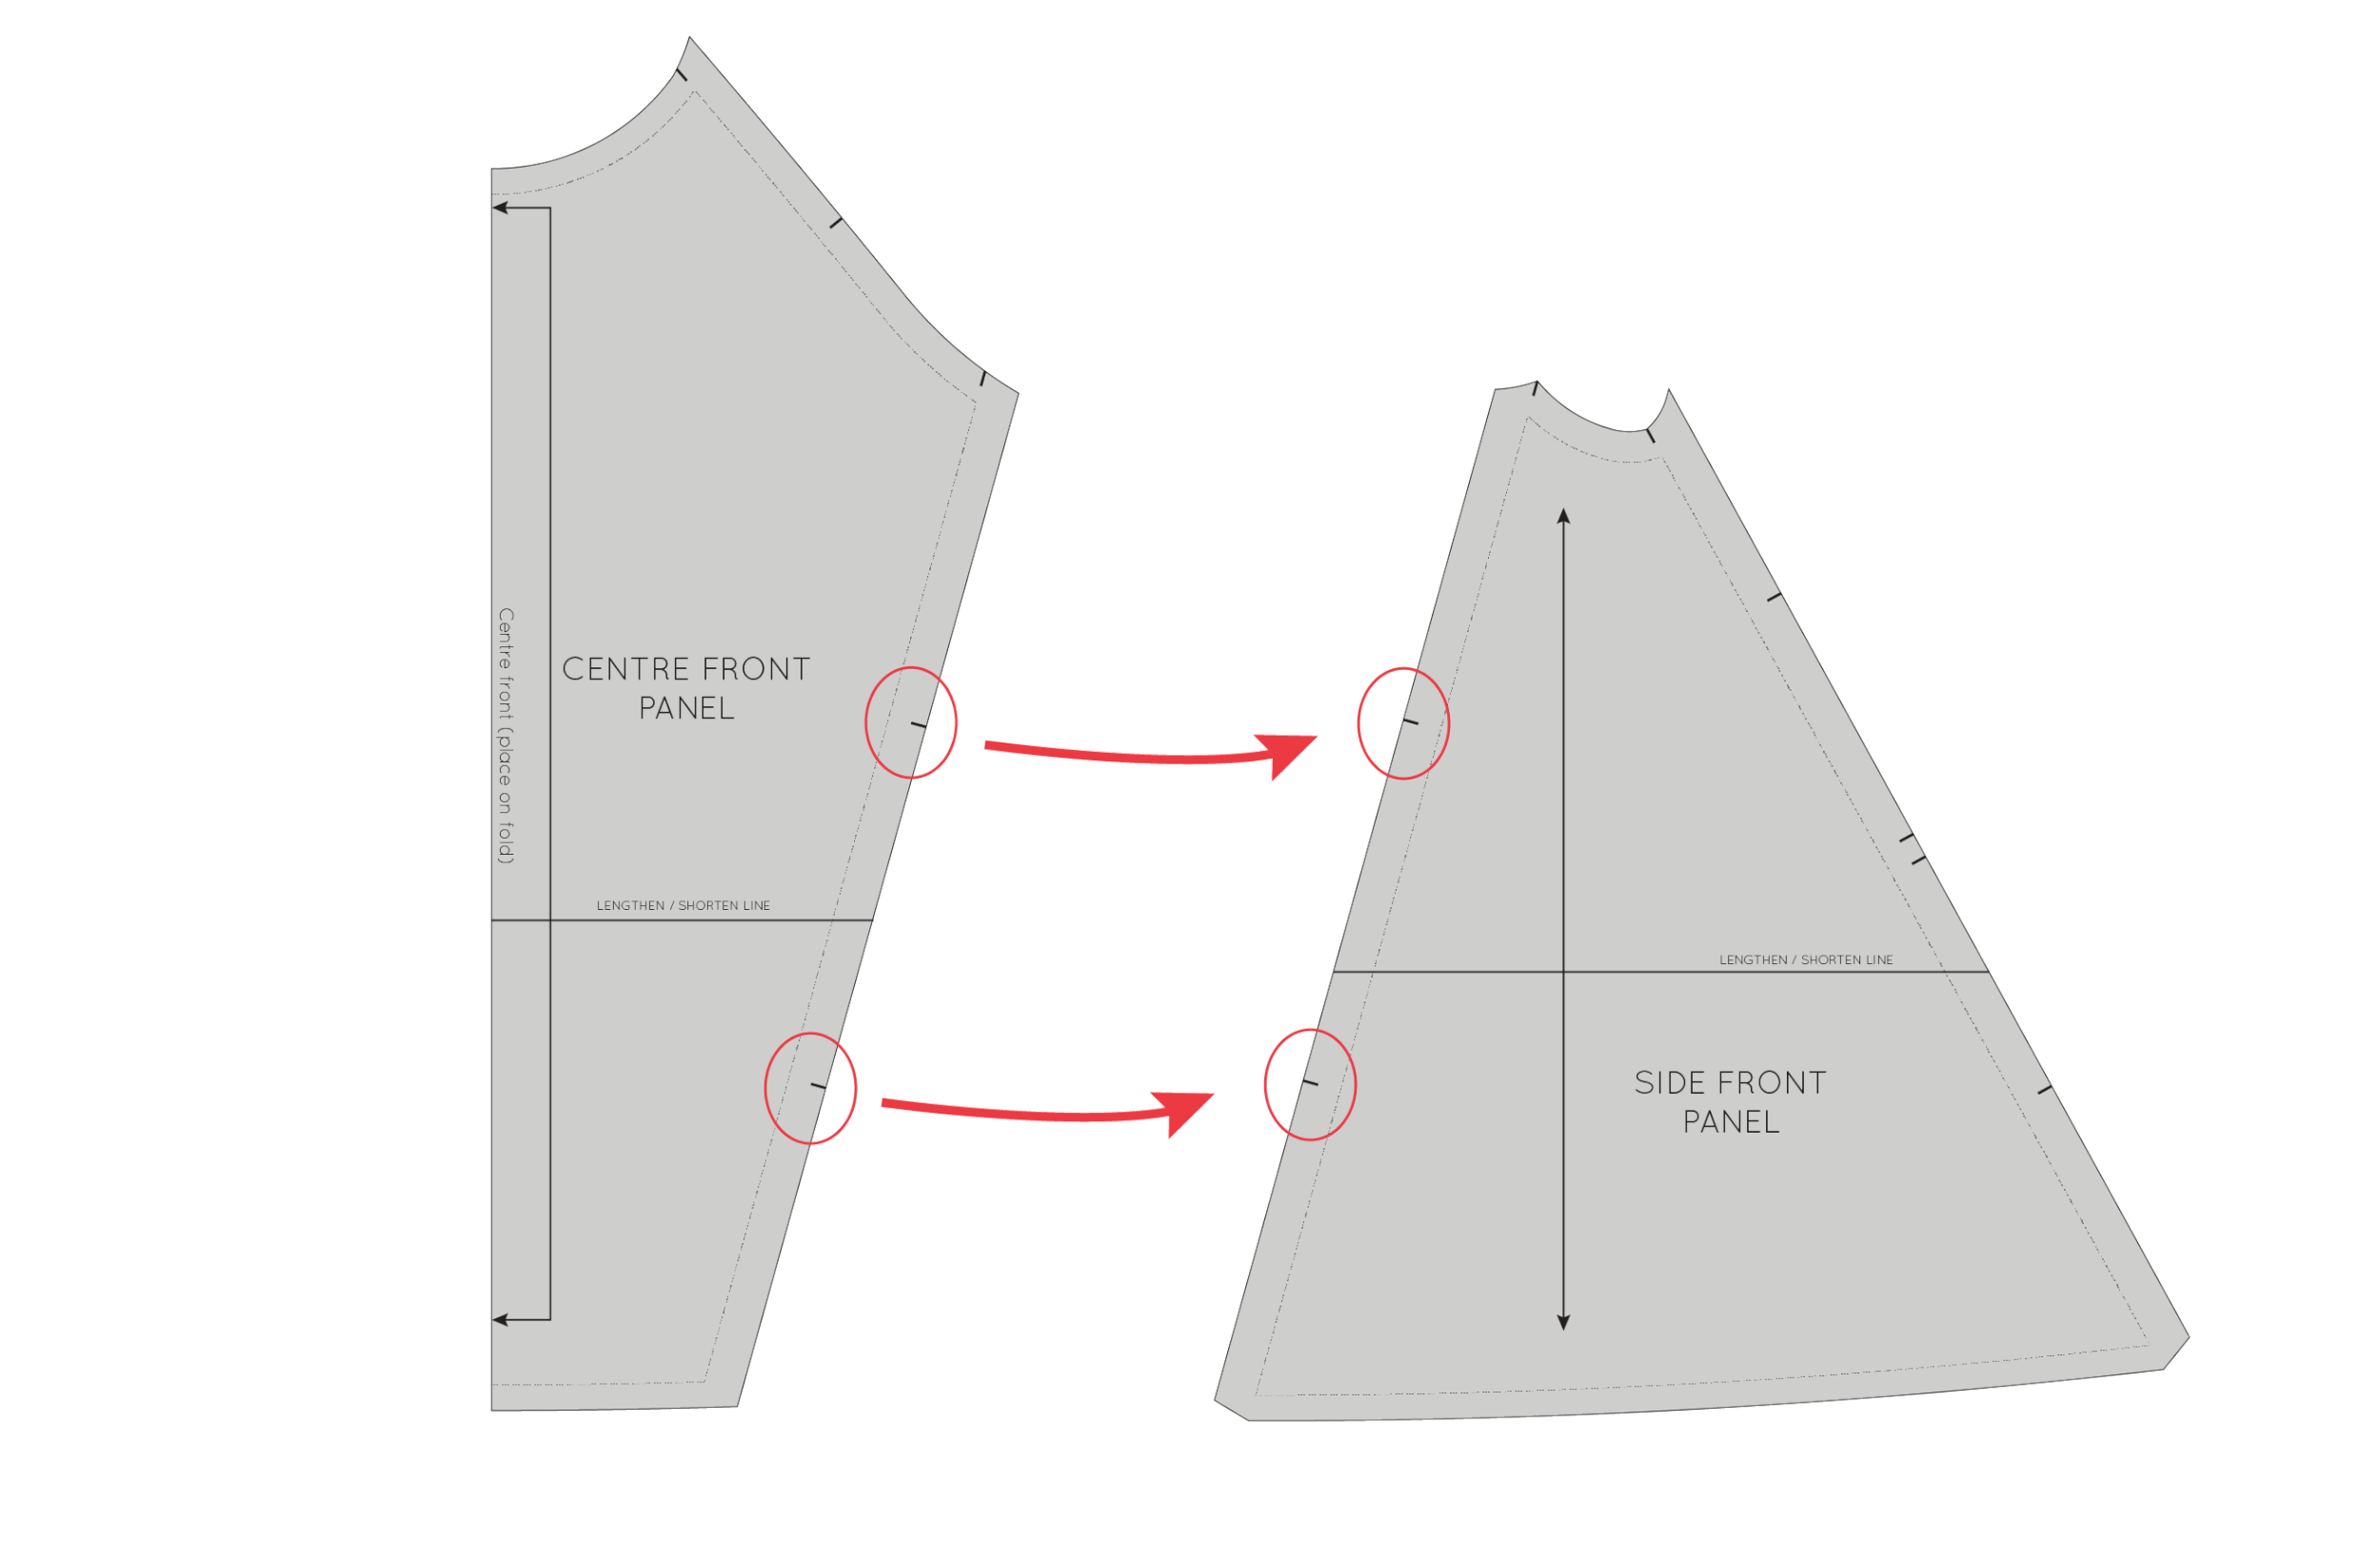
To start, grab your CENTRE FRONT PANEL piece, SIDE FRONT PANEL piece, FRONT FACING and FRONT SHOULDER PANEL piece. These are the pieces you will need to create your new facing piece. 

Relocate the dart (temporarily)

If you have created a dart, we will first need to remove it (don't worry, we will put it back once we make the new facing piece), as where possible, it's best to not have darts in a facing (as it just creates unnecessary bulk). You could fold out the dart - like in this dart shaping tutorial - and then draft the piece, but it becomes quite awkward to do it that way as the centre front piece becomes three dimensional, which makes if really tricky to trace a new piece. The most accurate way to do it is to remove the dart, draft the facing and then put the dart back (don't worry it's less of a cumbersome process than what it sounds like). If you already removed the dart using yesterday's tutorial, then you can simply jump to the next step. 

re-draft_front_facing_2

A : Draw a vertical line (parallel to the centre front line) down from the apex point (the tip of the dart) down to the hem. Cut along this line, from the hemline, up to the apex point. Stop cutting when you are 1-2mm from the apex point. Now cut along the lower dart arm (the one highlighted in the illustration) towards the dart arm. Again, stop 1-2mm from the apex point, creating a small hinge. 

B : Close out the dart by carefully pivoting the lower corner of the pattern so that the lower dart arm overlaps the upper dart arm. Tape in place (I suggest using masking tape so it is easy to remove later on when we want to get our dart back).

If you would like further explanation on this process, check out yesterday's post, where I went into it in a bit more detail.

re-draft_front_facing_3

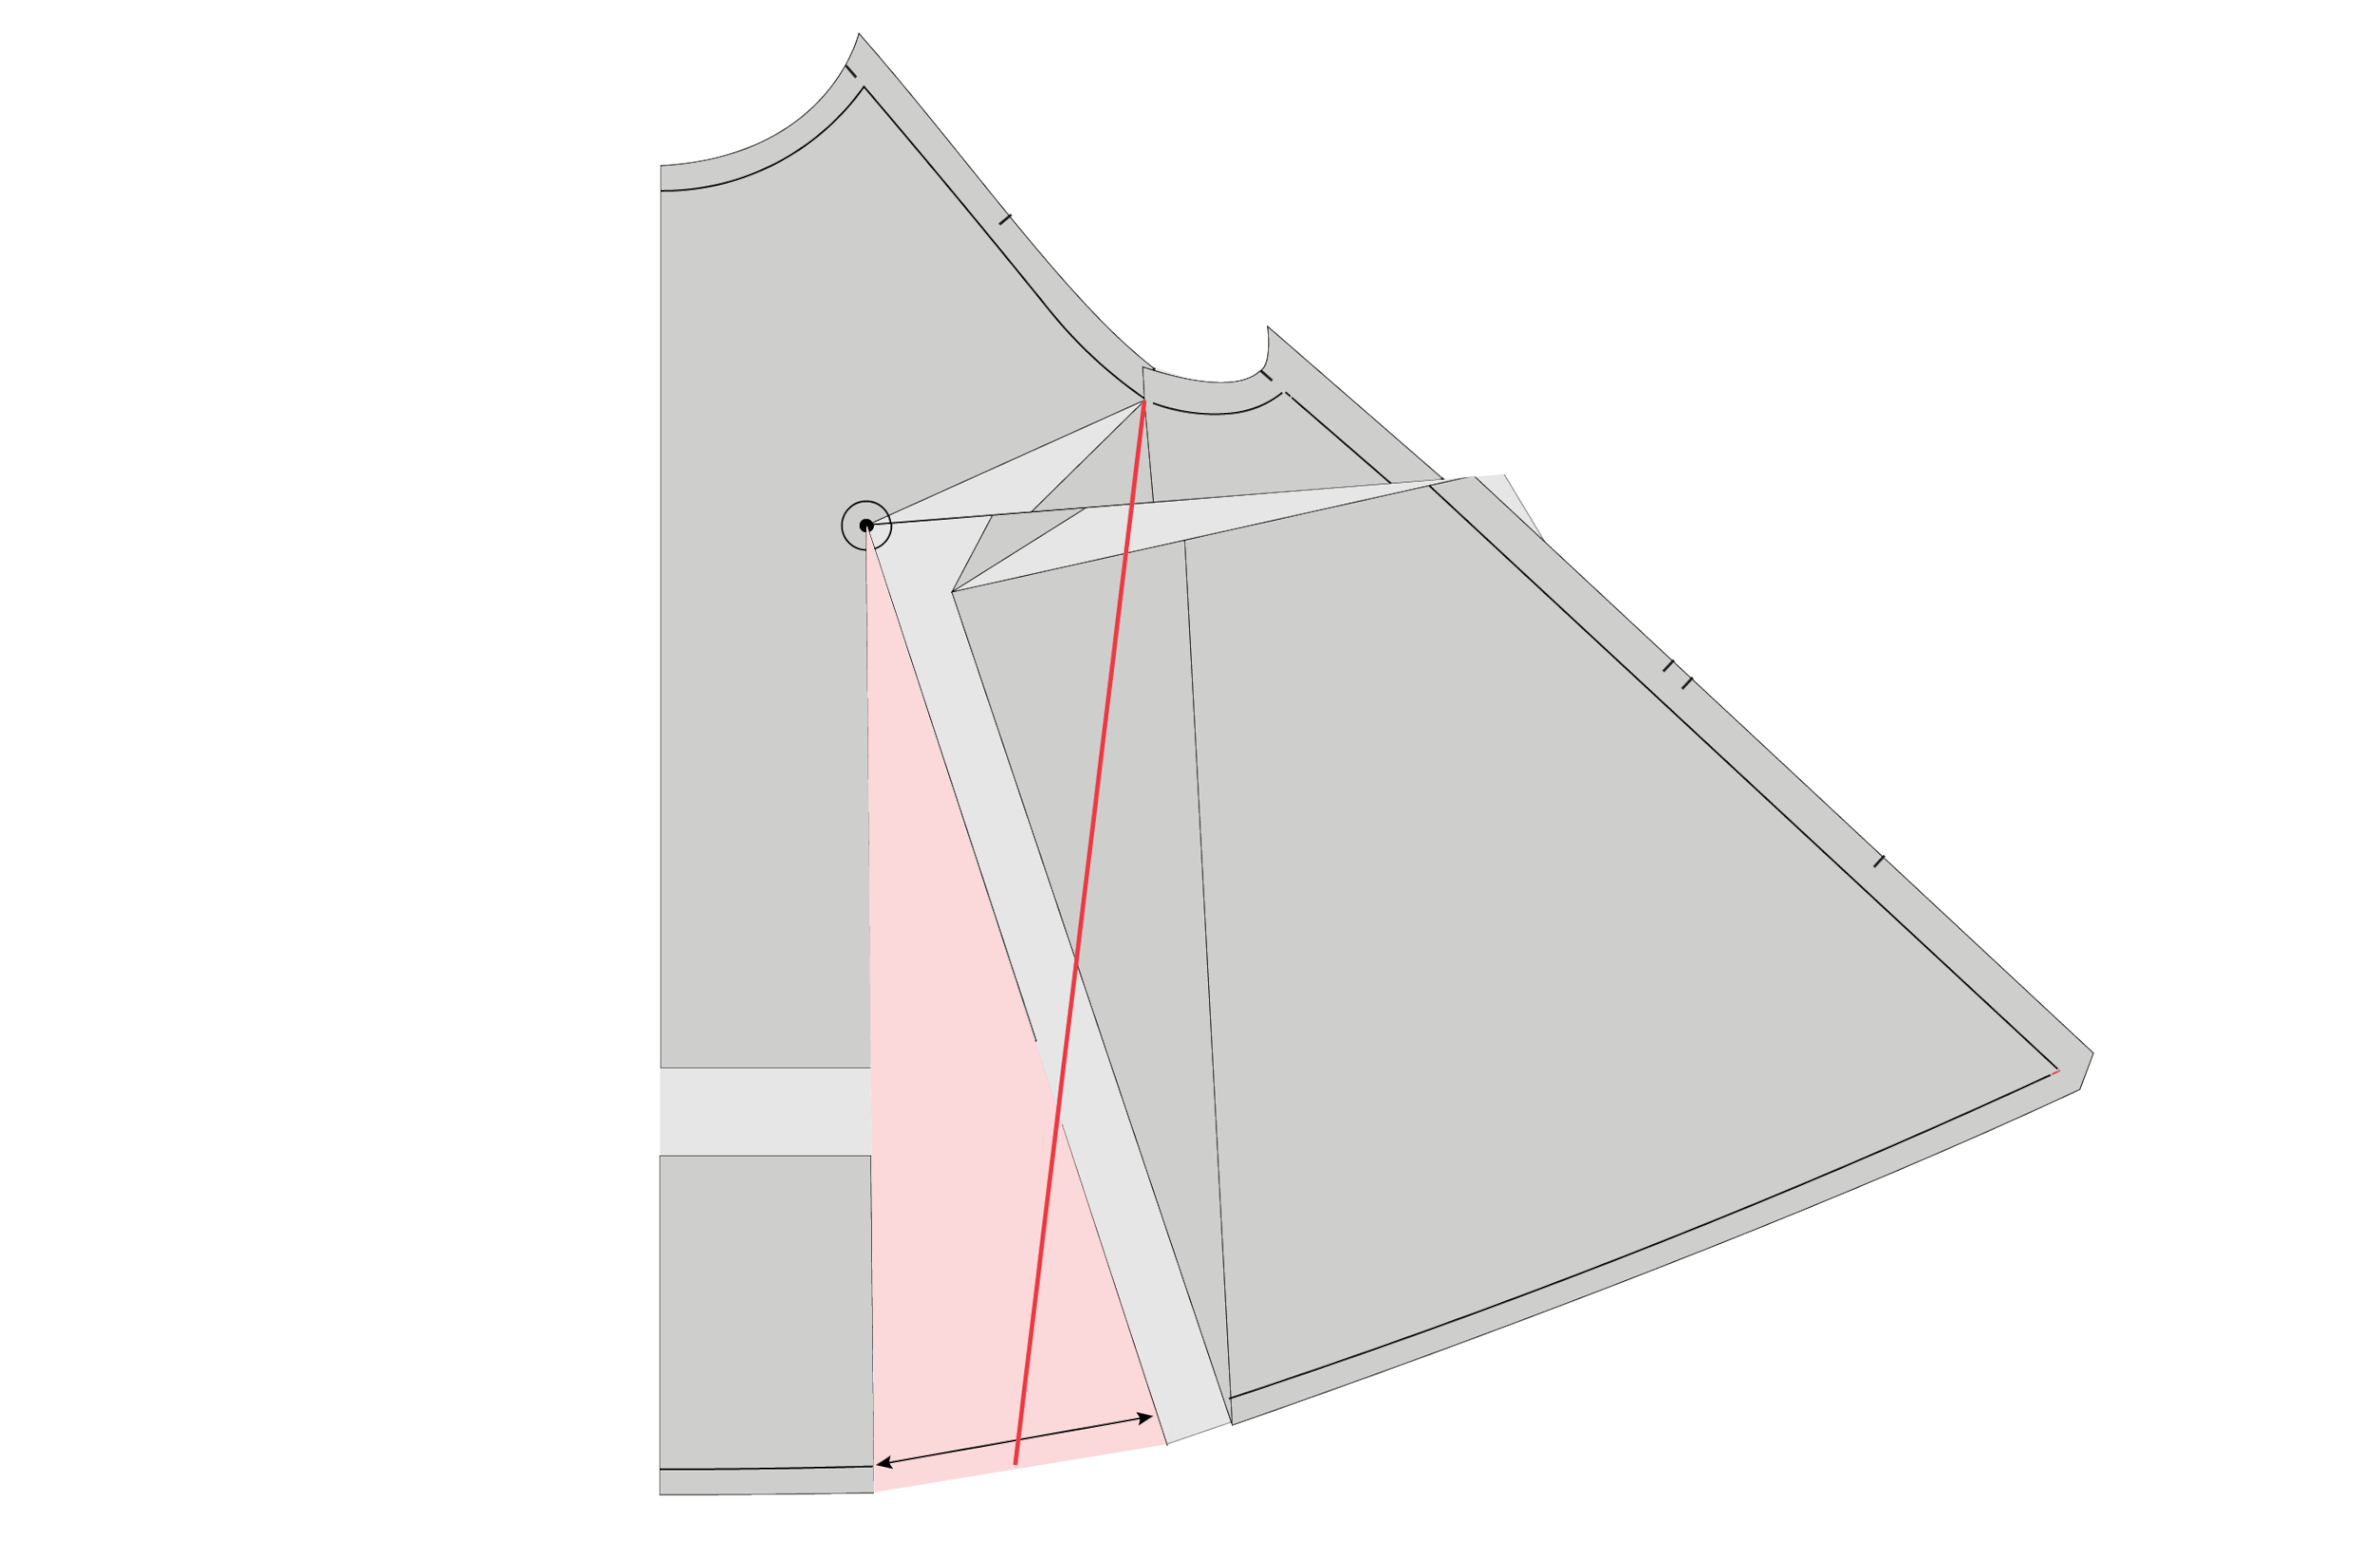
Take the SIDE FRONT PANEL piece and line the stitching line up with the stitching line on the CENTRE FRONT PANEL, as if the two pieces have been sewn together. Hold in place with a couple of small pieces of masking tape (or even pins). You are going to want to be able to detach these pieces later. 

re-draft_front_facing_4

Now, position the FRONT SHOULDER PANEL onto the CENTRE FRONT PANEL, again matching stitch lines as if the two pieces have been sewn together. Tape in place. 

re-draft_front_facing_5

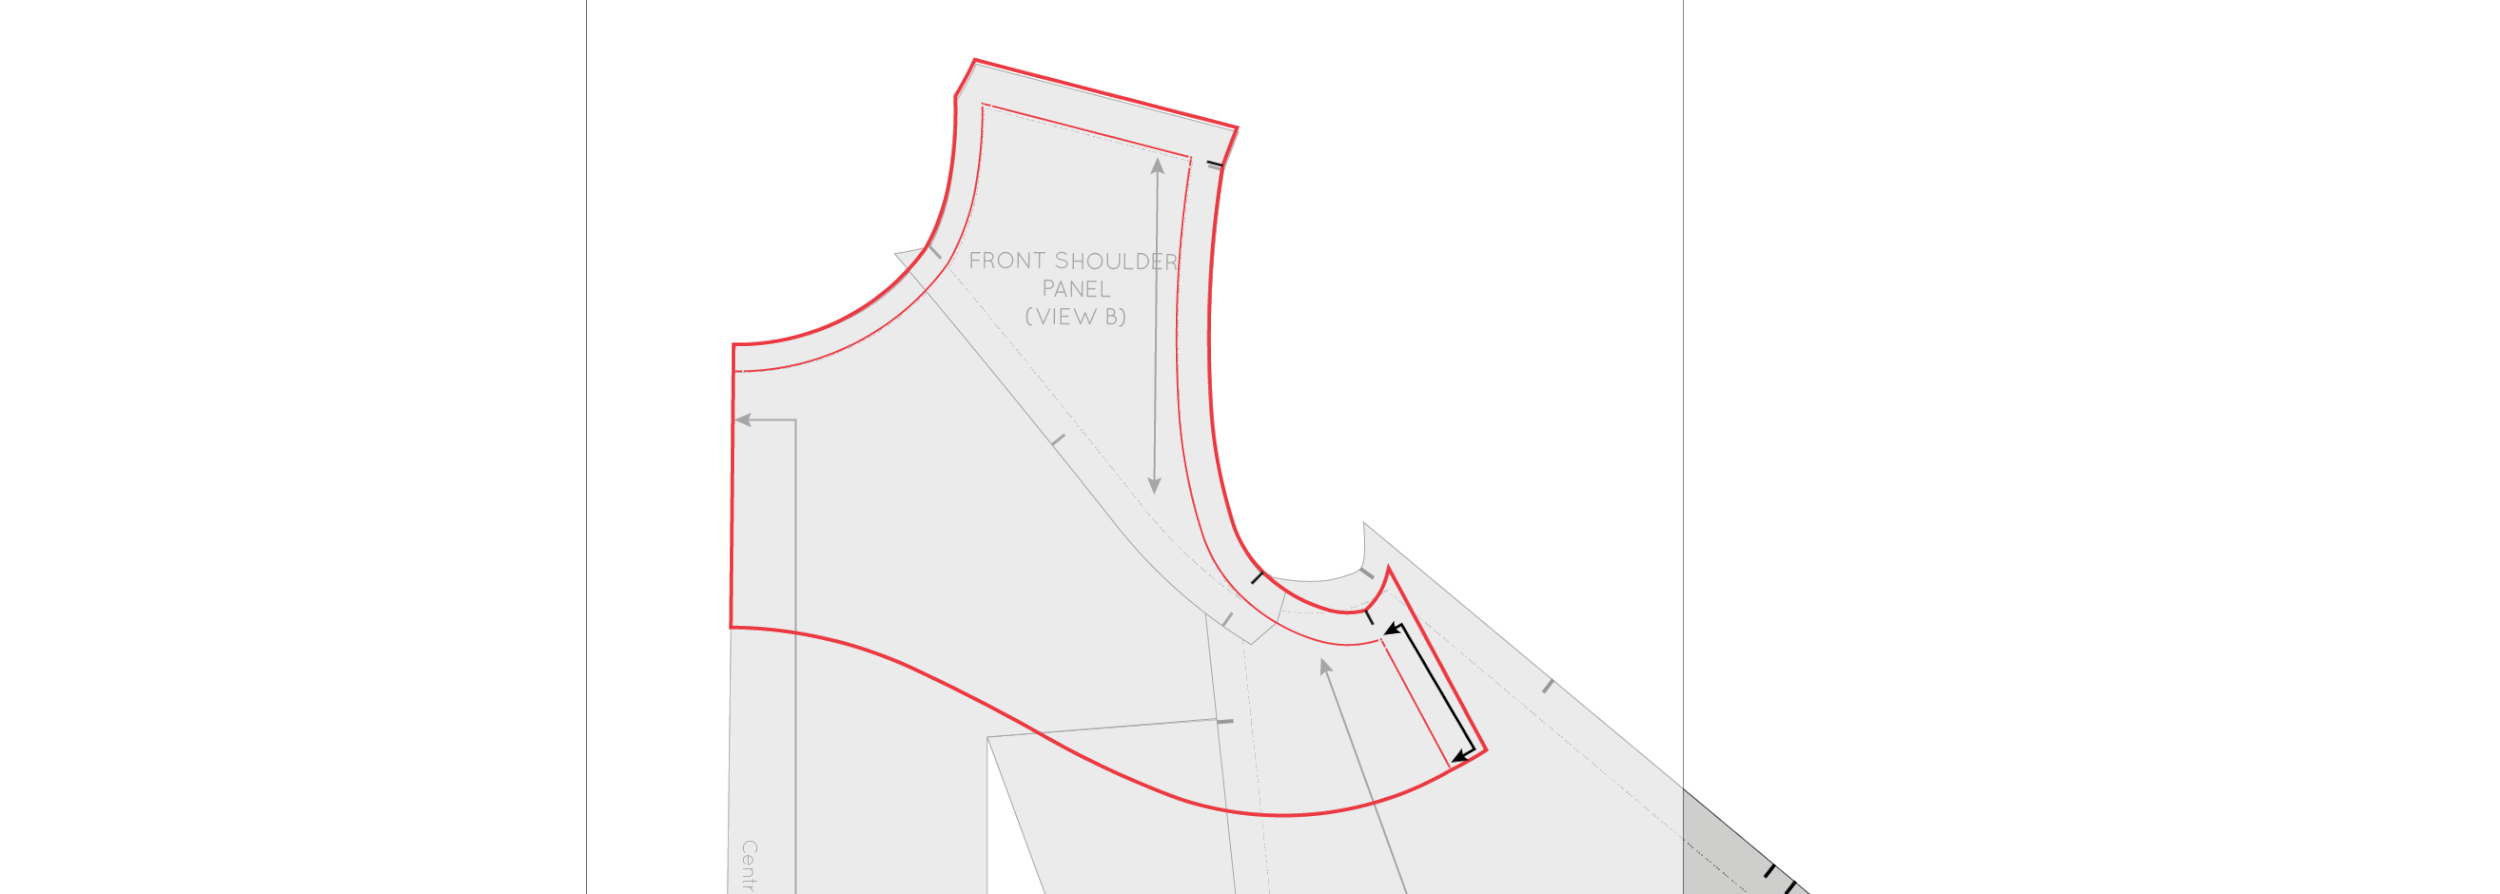
Place the FRONT FACING piece on top of your panels, lining up the neckline, shoulder seam and centre front. You will notice that the front facing no longer matches the pieces it needs to (due to the full bust adjustment we made).

re-draft_front_facing_6

You can see that if we cut this piece we would be missing fabric at the side seam and under the arm. 

Re-draft the facing piece

re-draft_front_facing_7

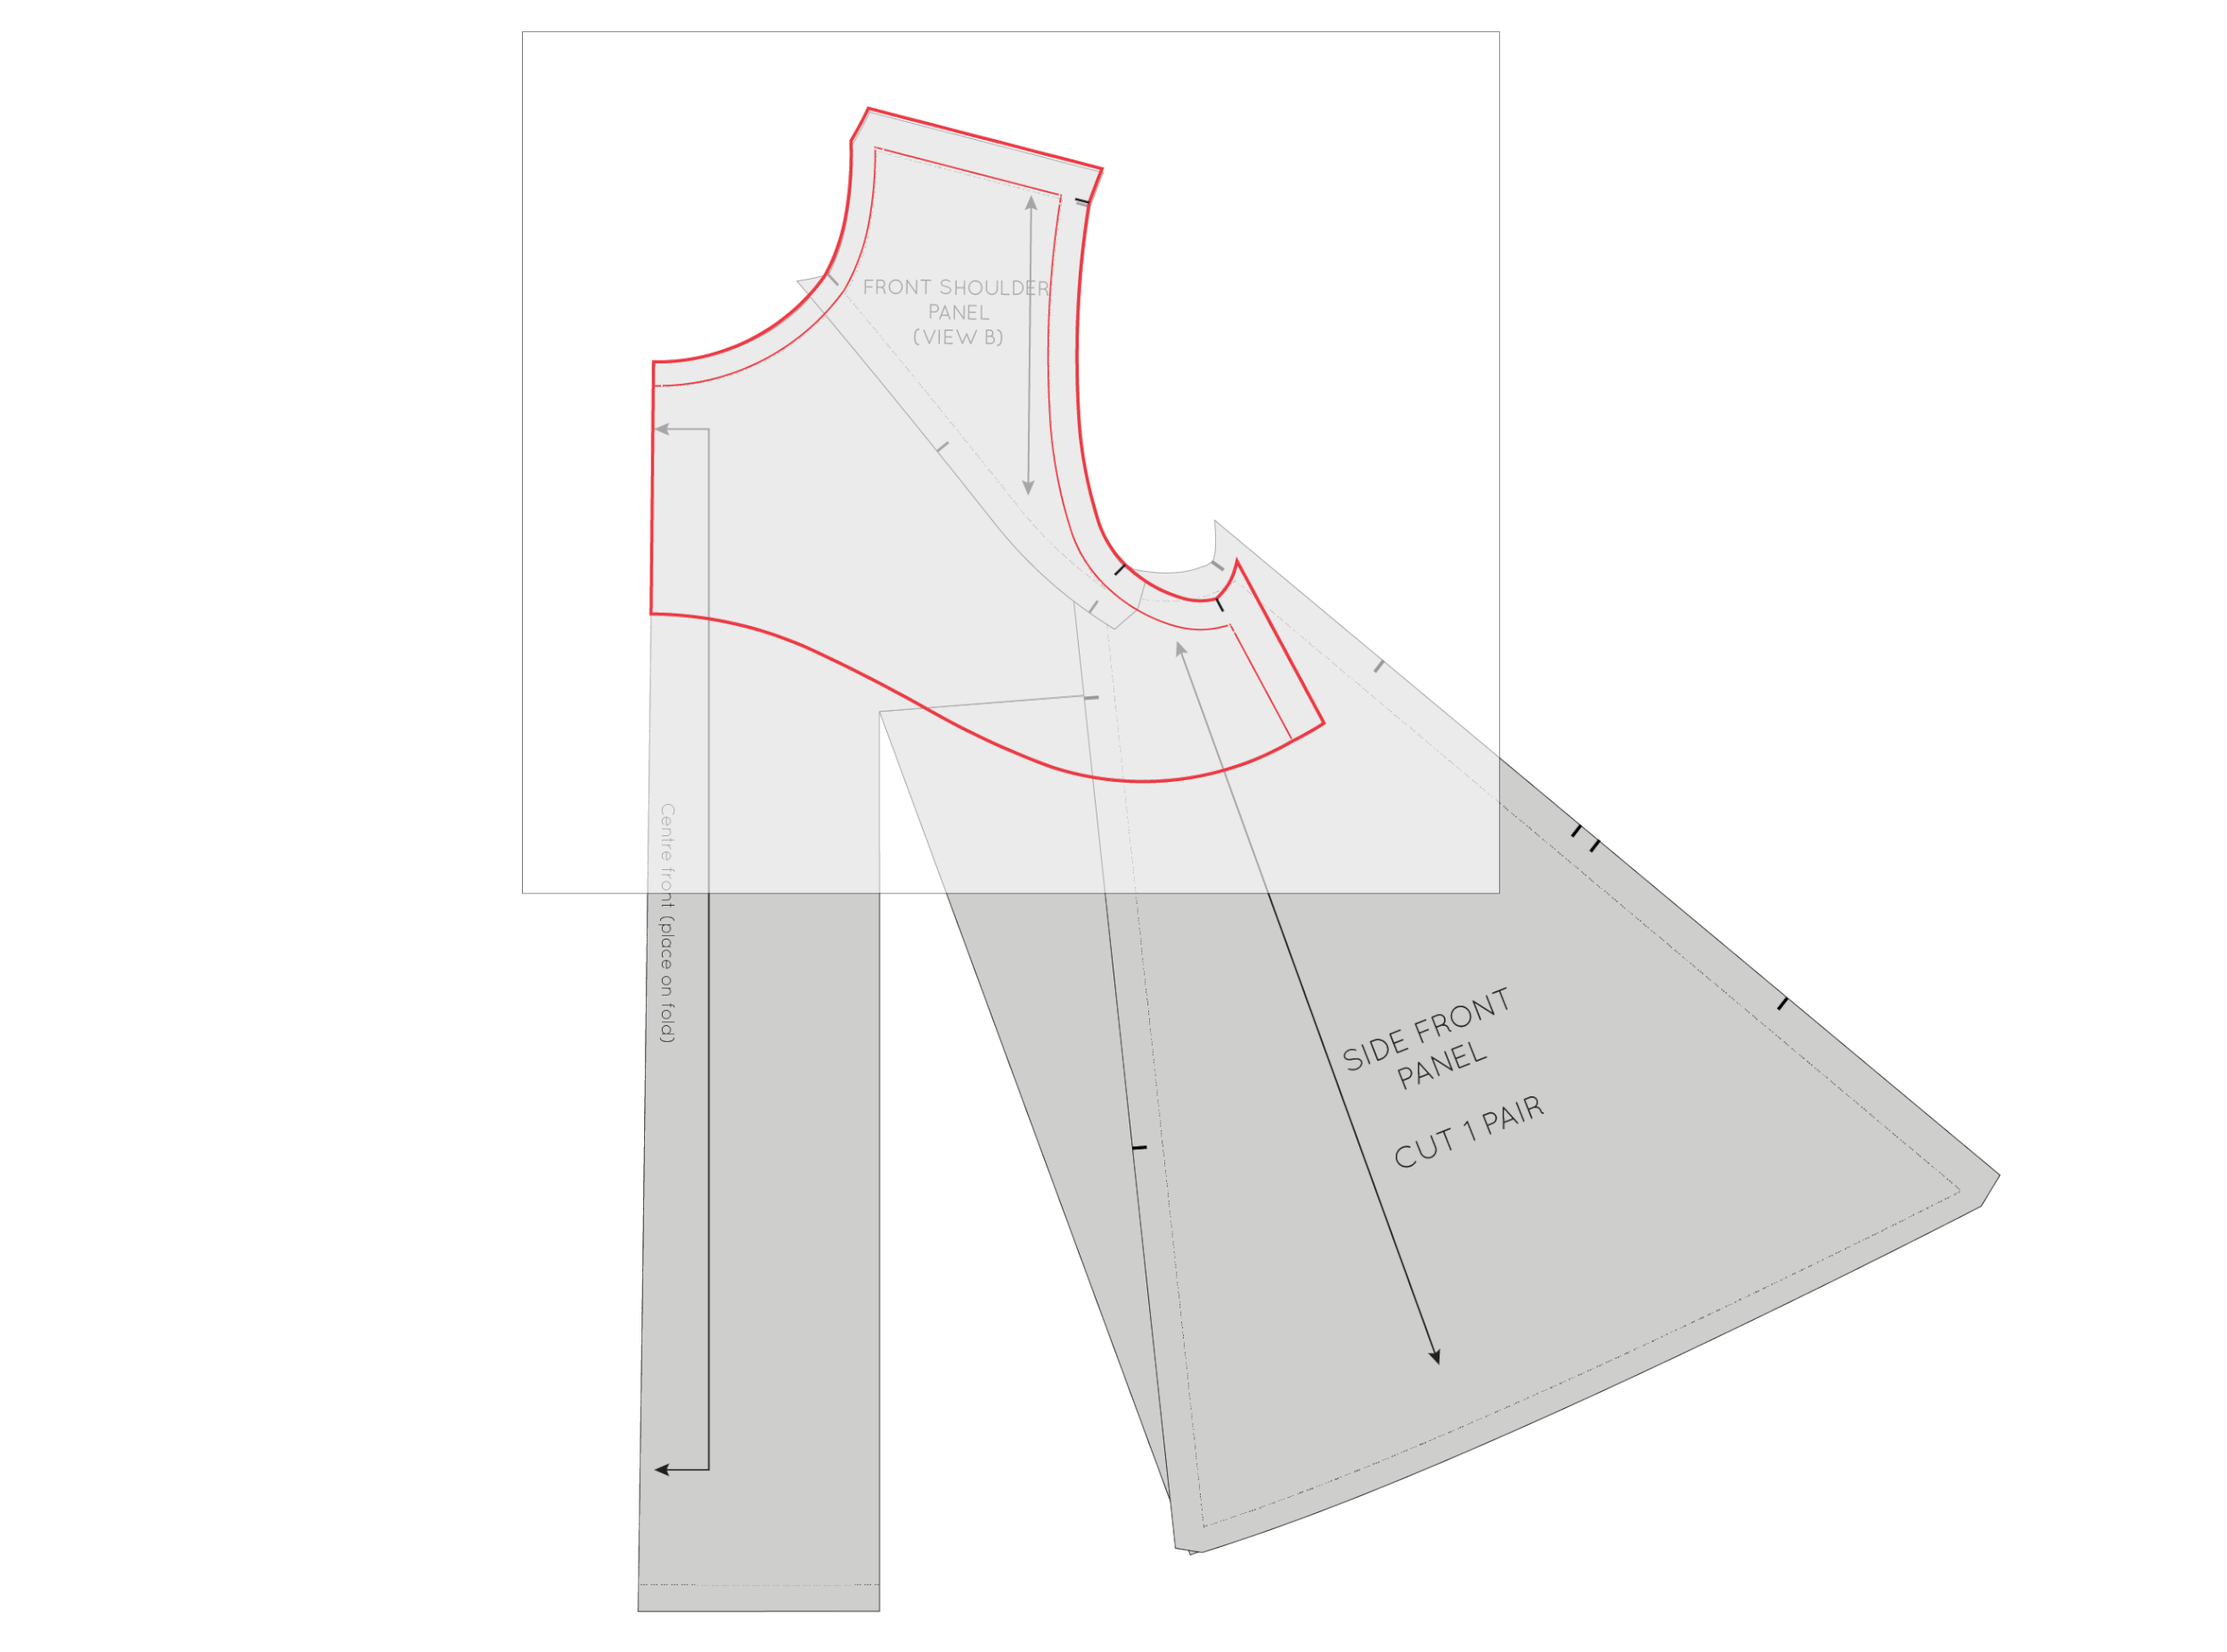
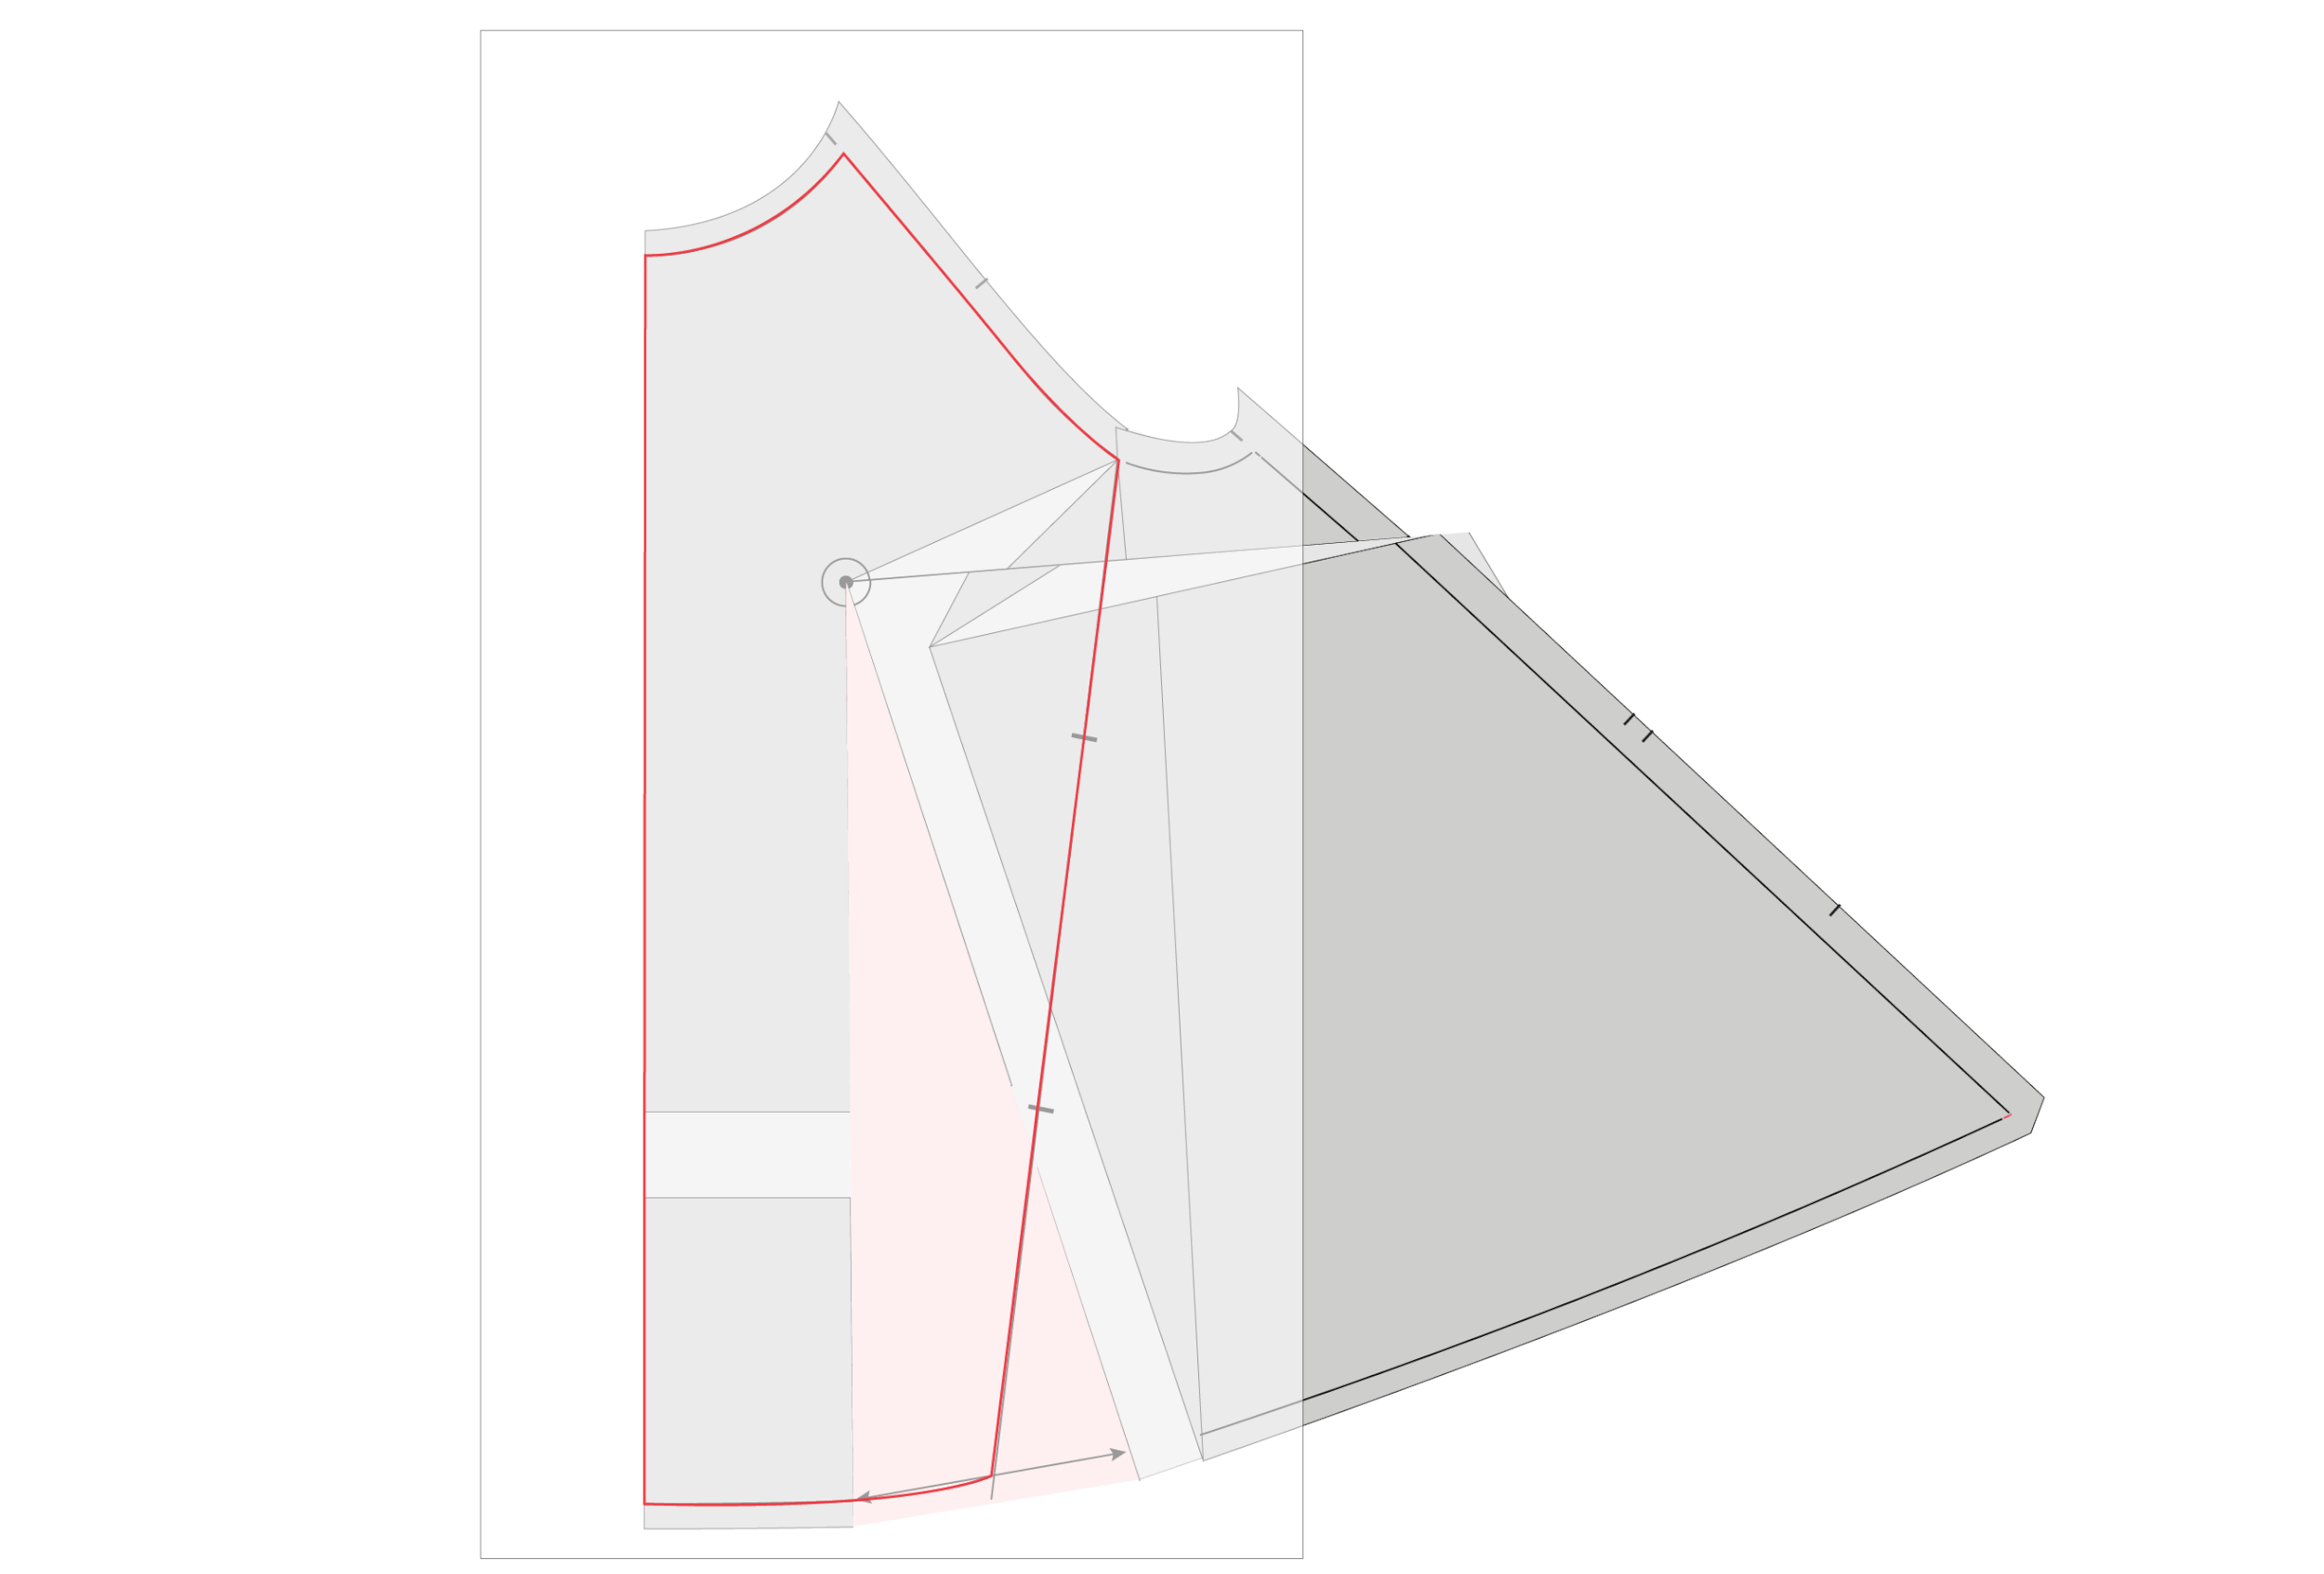
Take a piece of pattern paper and trace off the original FRONT FACING piece in pencil (you are going to need to erase part of the line in a minute), being sure to trace the stitch line and the cutting line, as well as the notches. 

re-draft_front_facing_8

Place the traced FACING piece on top of your panels, again lining up the neckline, shoulder seam and centre front.

re-draft_front_facing_9

We will need to know the length of the side seam on the FACING so that when we make the new piece, it will have the same length side seam as the original, so that it still fits correctly with the back facing piece (that does not need any adjustments). Measure the side seam (on the stitch line) and take note of this measurement. 

re-draft_front_facing_10

Now, erase the lines that do not match the shape of the pattern underneath (the underarm and side seam), so that you can draw the correct shaping on the piece. 

re-draft_front_facing_11

To start, trace the side seam from the SIDE FRONT PANEL, making the line the length of the original facing side seam (found a moment ago).

re-draft_front_facing_12

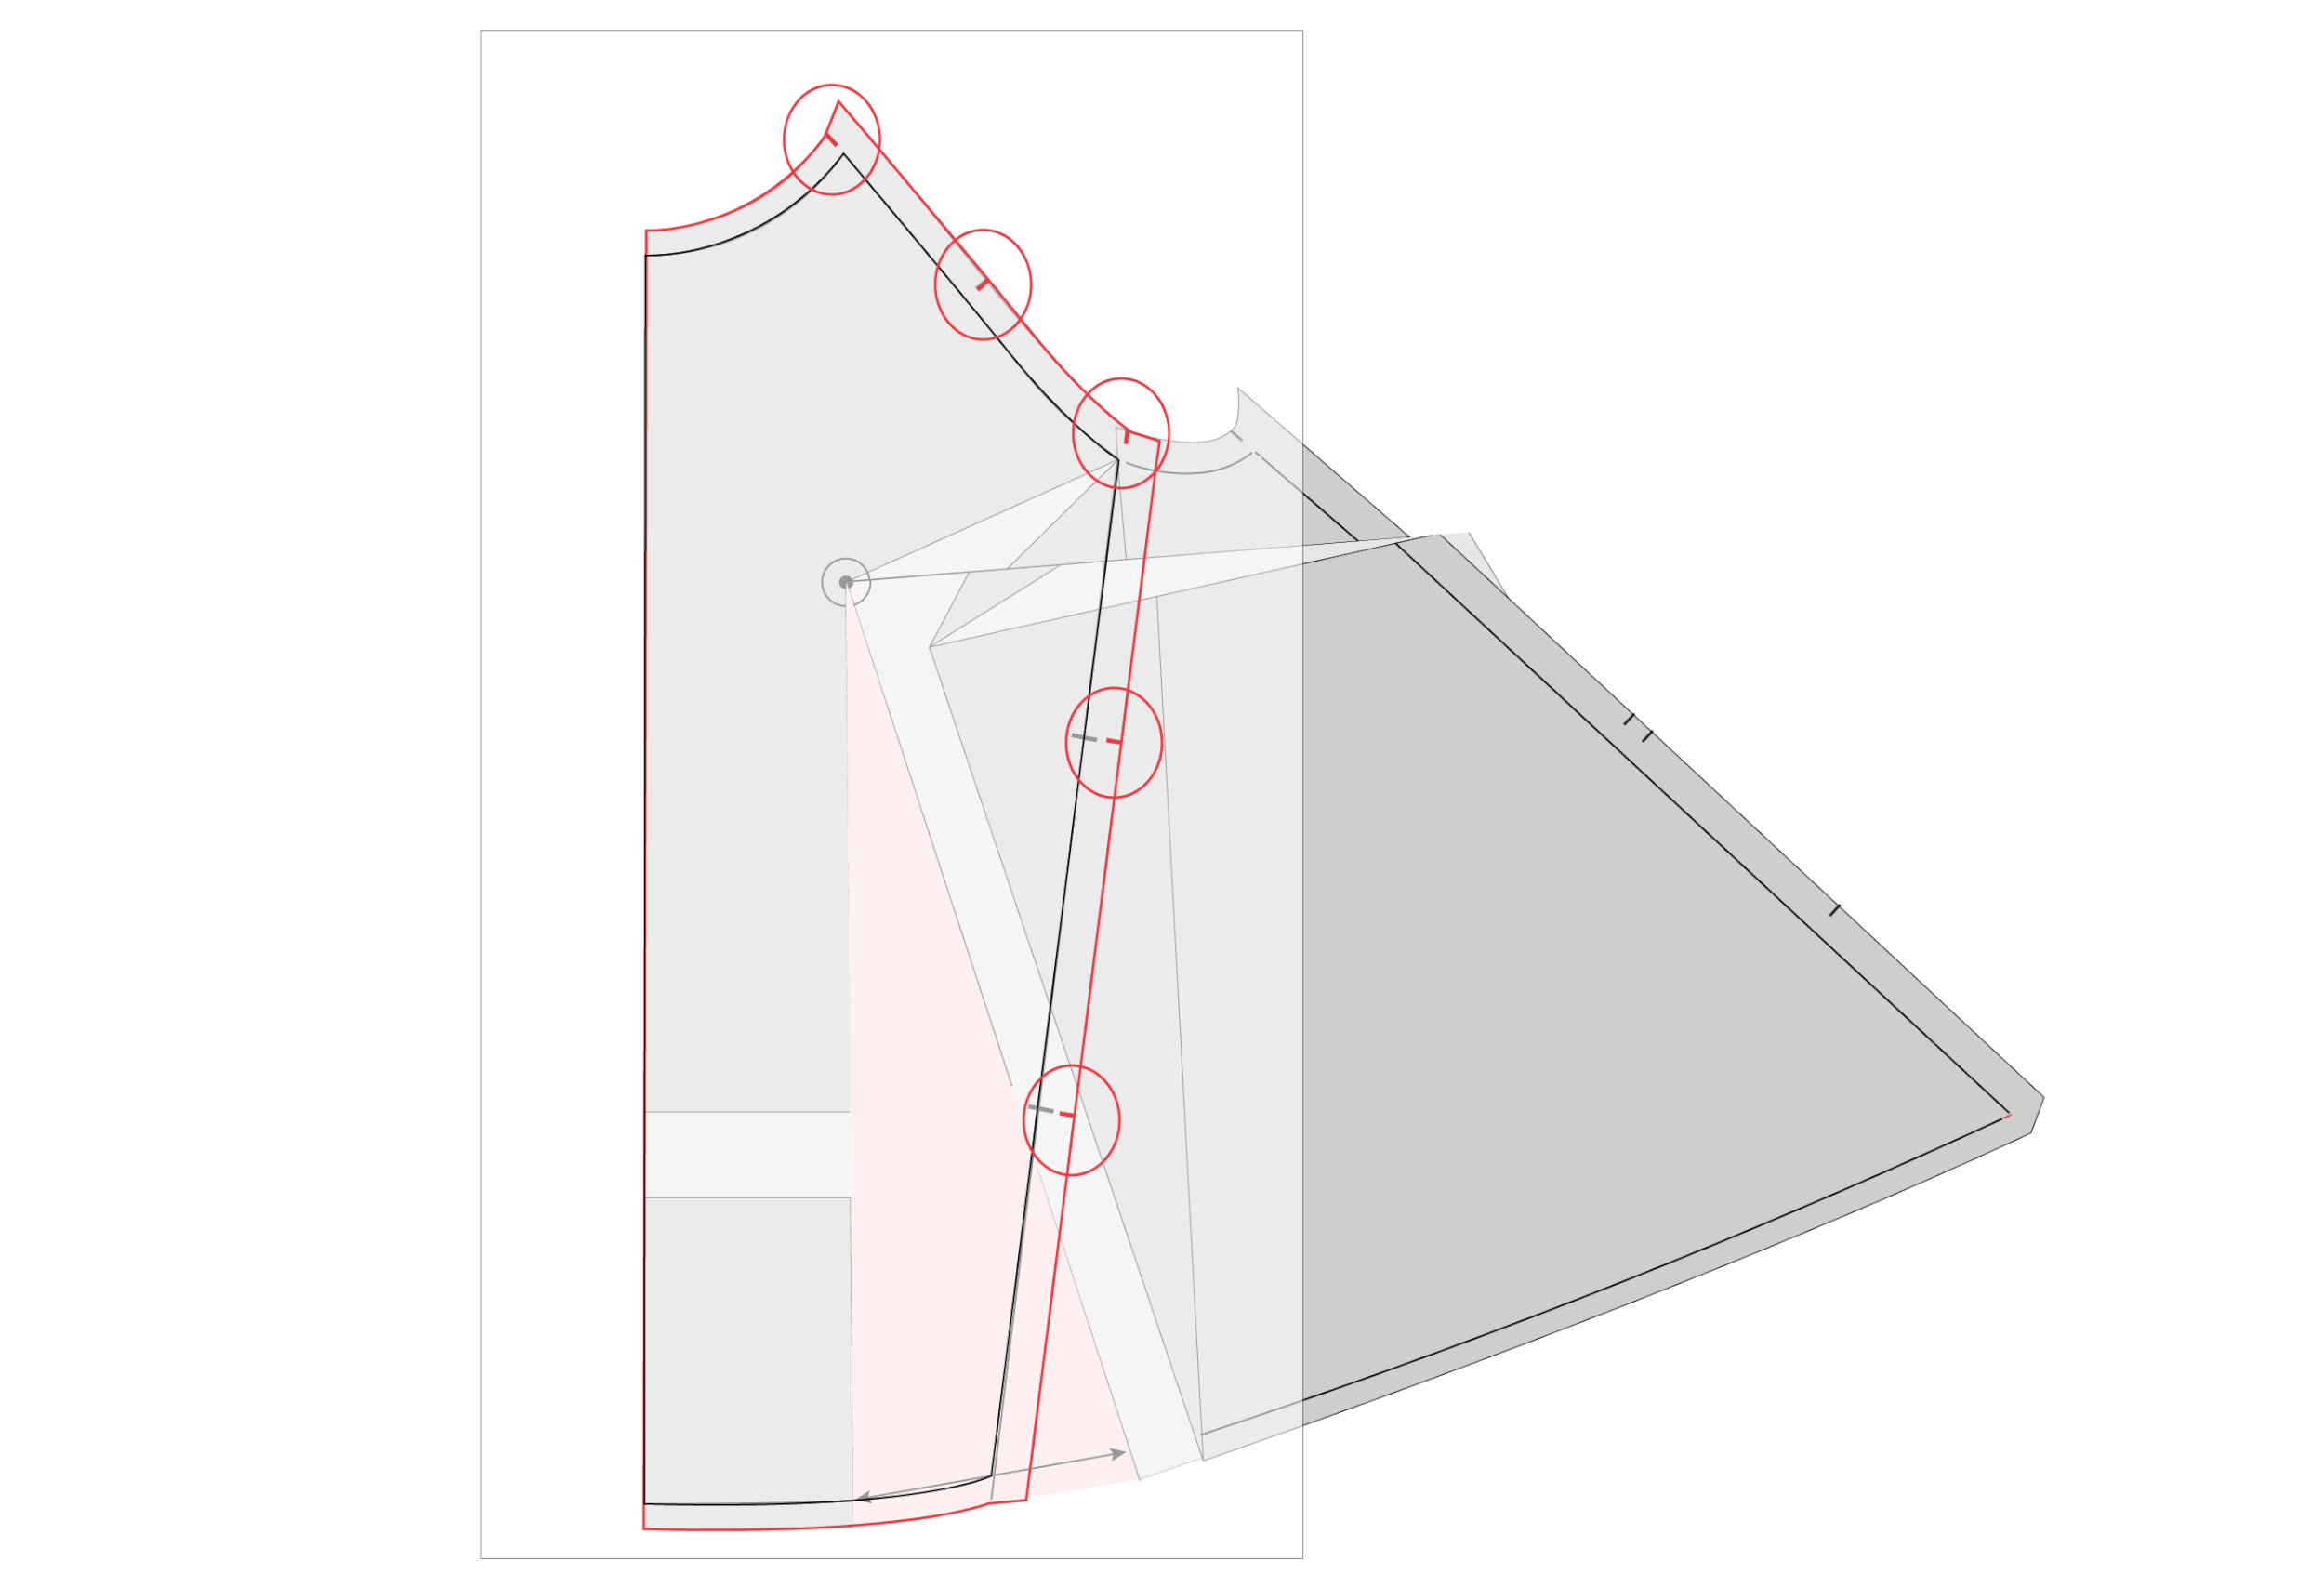
Trace the armhole line as well as the side seam (both stitch line and cutting line) from the pattern underneath. 

re-draft_front_facing_13

Join the endpoint on the side seam with the bottom edge of the facing. You want it to be a nice and smooth curve. 

re-draft_front_facing_14

Transfer notches, cut out the pattern piece and add grainline and cutting instructions.

Go back to your CENTRE FRONT piece and remove the tape from the dart so you can put the dart back in place. 

And voila! You have a new facing piece that fit your adjusted panels. 

See all the posts in the Collins Top Sew-along.


you may also like:

The Collins Top Sew-along : Full bust adjustment - removing the bust dart

full_bust_adjustment_cover.gif

In yesterday's post, I showed you how to do a Full Bust Adjustment (FBA) on the Collins Top pattern to start off the Collins Top Sew-along. The process is a little different to a usual FBA because of the panel line in the front piece, as well as the lack of dart or bust shaping in the pattern. 

In yesterday's tutorial I showed you how to add a dart to the centre front panel of the Collins Top to get some extra width across the bust, if your bust measurement is larger than the B cup In the Folds patterns are drafted for. 

In today's post, I want to show you how to remove that dart, if you would prefer to keep the pattern dartless.

If you have done a little pattern making (or pattern adjusting) yourself though, you will know it is not as easy as just removing a dart. You cannot actually remove a dart, but you can relocate it or redistribute it. So basically, what we are going to do in the case of the Collins Top, is that we are going to relocate the dart to the hemline and then use it as extra fullness in the hem. I have done a tutorial on this process in the past, so if you would like to take a look you can have a look at this tutorial.

I know that the Collins already has quite a bit of ease in the hem (it is a trapeze shaped silhouette after all), so I will also show you how to remove the extra fullness later in the tutorial too. Please bear with me, it is quite a long tutorial, but the process isn't complicated. Just take it one step at a time.


Getting started

remove_dart_fba_1

Step 1 :

Use the first Full Bust Adjustment tutorial to add a dart to your Collins Top. You will only need to follow steps 1 - 14 of the tutorial to get to where you need to be to follow this tutorial.  

Remove the dart

remove_dart_fba_2

Step 2 :

To remove the dart, cut in from the side seam, along the lower dart arm towards the apex point. Stop cutting when you are 1-2mm from the apex point.

remove_dart_fba_3

Step 3 :

Cut up from the hem of the top, along line 2, towards the apex point. Again, stop cutting 1-2mm from the apex point, to create a small hinge. 

Close the dart

remove_dart_fba_4

Step 4 : 

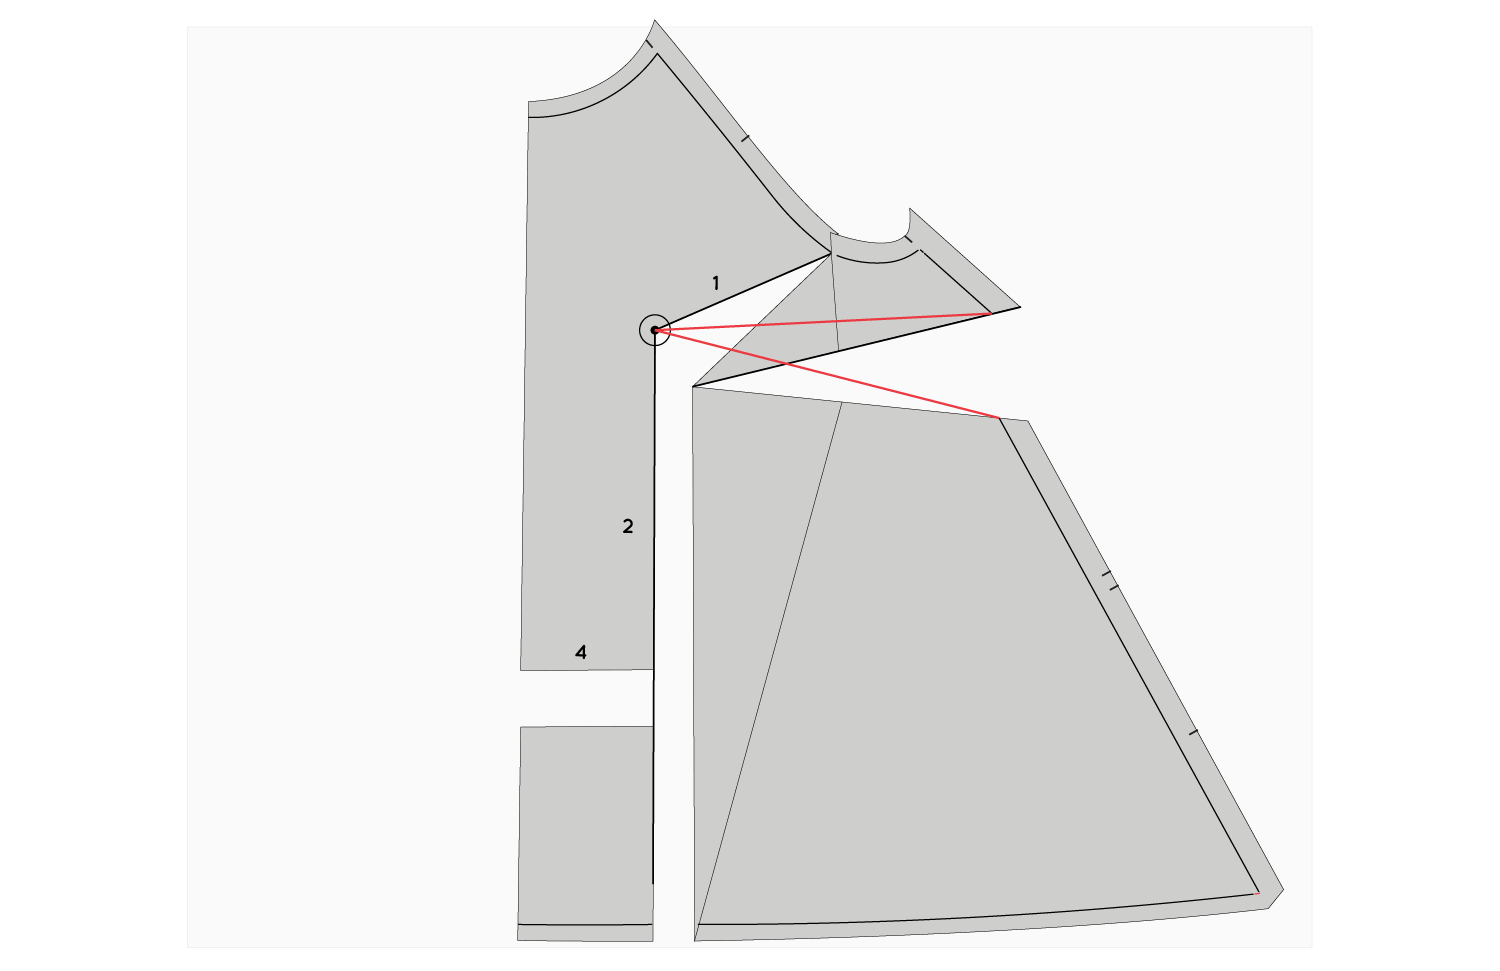
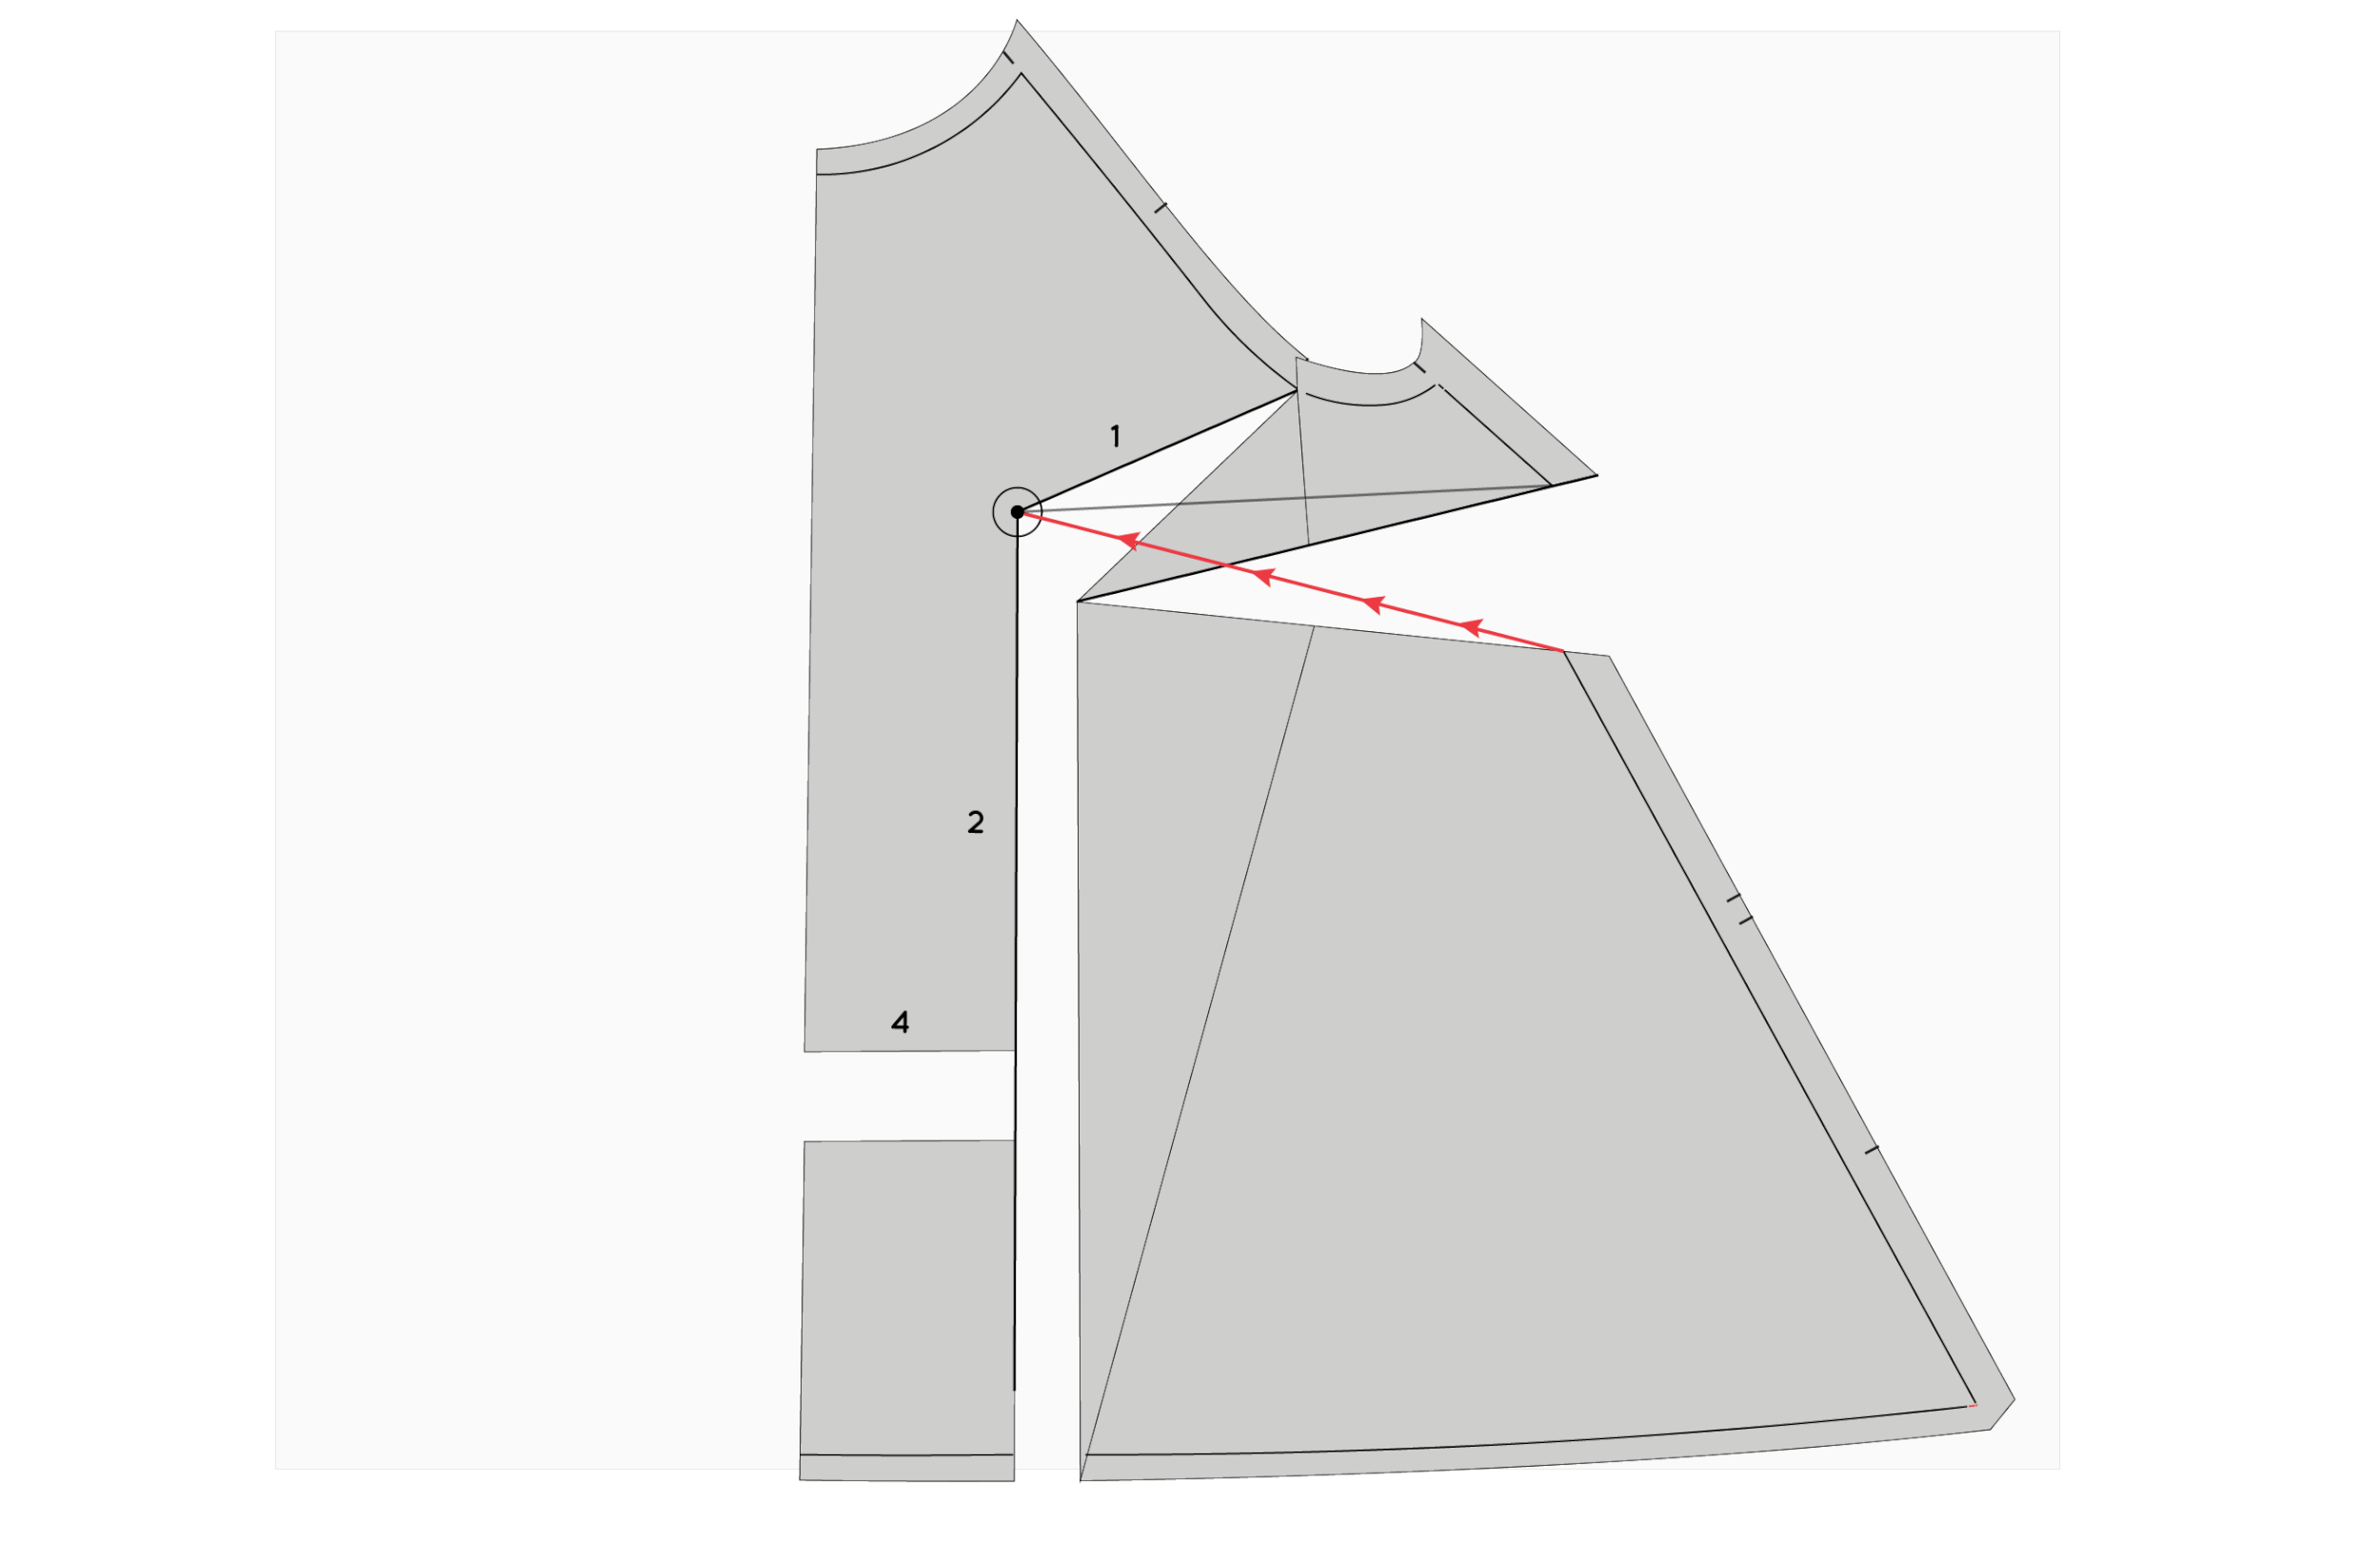
A : Now, swing the side section of the pattern on the little hinge you created, so that the lower dart arm moves towards the upper dart arm. 

B : Continue swinging that section of the pattern around, until the lower dart arm meets the upper dart arm. Once the dart arms are aligned, tape in place. 

remove_dart_fba_5

Step 5 :

As you will know, if you have made pattern adjustments before, there is really no such thing as removing a dart. By closing the dart in the side seam, you are opening up a "dart" at the hemline. You will see that indicated in the illustration above. By closing the dart in the side seam, we have made a large dart in the hem. 

Tape some pattern paper behind the working pattern to fill the gap created in the hemline.

You can choose to leave the top as is - now with the trapeze shape more pronounced or you can choose to remove this extra width from the side seam. If you have chosen to keep the extra fullness, continue working your way through the tutorial. 

If you would like to remove the extra fullness from the side seam, skip the following steps and jump to step 14.

Re-draw the panel line

remove_dart_fba_6

Step 6 :

Measure the opening at the hemline (making sure you take the measurement on the stitch line (1cm / 3/8" up form the edge of the pattern) and take note of this measurement.

remove_dart_fba_7

Step 7 :

We will distribute the added fullness to either side of the panel line, so you will need to mark a point on the hemline at the centre of the opening. 

remove_dart_fba_8

Step 8 :

Draw a straight line from the point you just marked on the hemline, up to the point where the original panel line intersects the armhole. There you have your new panel line!

Mark balance points

Balance points are pointers on your pattern that help you put pieces together correctly, as well as help you when you are sewing a very long, or curved seam.

If you have sewn one of my patterns before, you will know I love a balance point! I really love using them as they basically give you a little reinforcement each time that you are assembling your garment correctly. I loved when one of my pattern testers once said "The notches are like little ticks you get all the way through the process to let you know that you're on the right track." That's exactly what I am going for with all the notches!

remove_dart_fba_9

On the Collins Top, you will notice that there are two single notches on the centre front panel line, so that you know which side of the SIDE FRONT PANEL should be sewn to the CENTRE FRONT PANEL. During the process of the adjustments, we lost those two notches. So now it's time to put them back.

remove_dart_fba_10

Step 9 :

Mark two notches on the panel line. It doesn't really matter where you put them, as these two pieces will be sewn together.

Trace your new pattern pieces

remove_dart_fba_11

Step 10 :

Take a piece of pattern paper and trace your new CENTRE FRONT PANEL piece by tracing around the original neckline, and then down the new panel line. Trace along the centre front line and hemline. 

Add seam allowance + notches

remove_dart_fba_12

Step 11 : 

Add seam allowance to your new pattern piece. You can trace the seam allowance from the neckline, armhole and hem and then add 1.5cm (5/8") to the panel line. For more detail on adding seam allowance to a pattern, check out this tutorial

Transfer the notches onto your new pattern piece, from the working pattern. 

remove_dart_fba_12

Step 12 :

Finalise the pattern piece by adding cutting instructions and grainline.

For more detail about adding cutting instructions to your pattern, take a look at this tutorial.

Side front panel

remove_dart_fba_13

Step 13 :

Repeat process for the SIDE FRONT PANEL. You will notice that you will need to redraw the side seam with a straight line. Draw the line from the top of the original seam line to the bottom of the original seam line. 

True the seam allowances on your new pattern pieces, and check the SIDE FRONT PANEL and the SIDE BACK PANEL still match together properly at the side seam. 

Add grainline and cutting instructions (SIDE FRONT PANEL - CUT 1 PAIR).

And you're ready to start sewing!


Remove fullness from the hem

If you would prefer to remove the extra fullness from the hemline of your Collins Top after your Full Bust Adjustment, then this part of the tutorial is for you!

remove_dart_fba_14

Step 14 :

A : On the stitch line, measure the length of the opening at the hem. Take note of this measurement.

B : Measuring in from the side seam, mark a point the distance found in step A. For example, if the opening is 10cm, mark a point 10cm in from the side seam on the stitch line. 

remove_dart_fba_15

Step 15 :

A : Re-draw the side seam by joining the top of the original side seam to the bottom with a straight line.

B : Now draw a straight line from the point marked on the hemline (in step 14B) to the point on the line you just marked, at the point where you closed out the dart. Extend the line a few centimetres (1" or so) beyond the intersection point. This line will become your new side seam. 

Note : If we simply drew a stright line between the top of the side seam and the new point on the hem, we would lose too much width across the bust from the side seam. 

remove_dart_fba_16

Step 16 :

You will notice that the new side seam deviates from the original side seam a little bit at the top. We need to check how much has been added so we can add that same amount to the front sleeve piece. Take a ruler or tape measure and measure from the original side seam to the new side seam, on the stitch line. In the example, the new side seam is 1.9cm away from the original side seam at the underarm point. This means I need to add 1.9cm to the sleeve piece as well. 

To complete the front and side pattern pieces, draw in your panel line and then trace off the pieces. You can find out how to do this by scrolling back up to steps 6 - 13.


Making the adjustment to the sleeve piece. 

remove_dart_fba_17

Step 17 :

A : Trace a copy of the FRONT SLEEVE pattern.

B : Draw a diagonal line down from the underarm point on the stitch line down to the hem. 

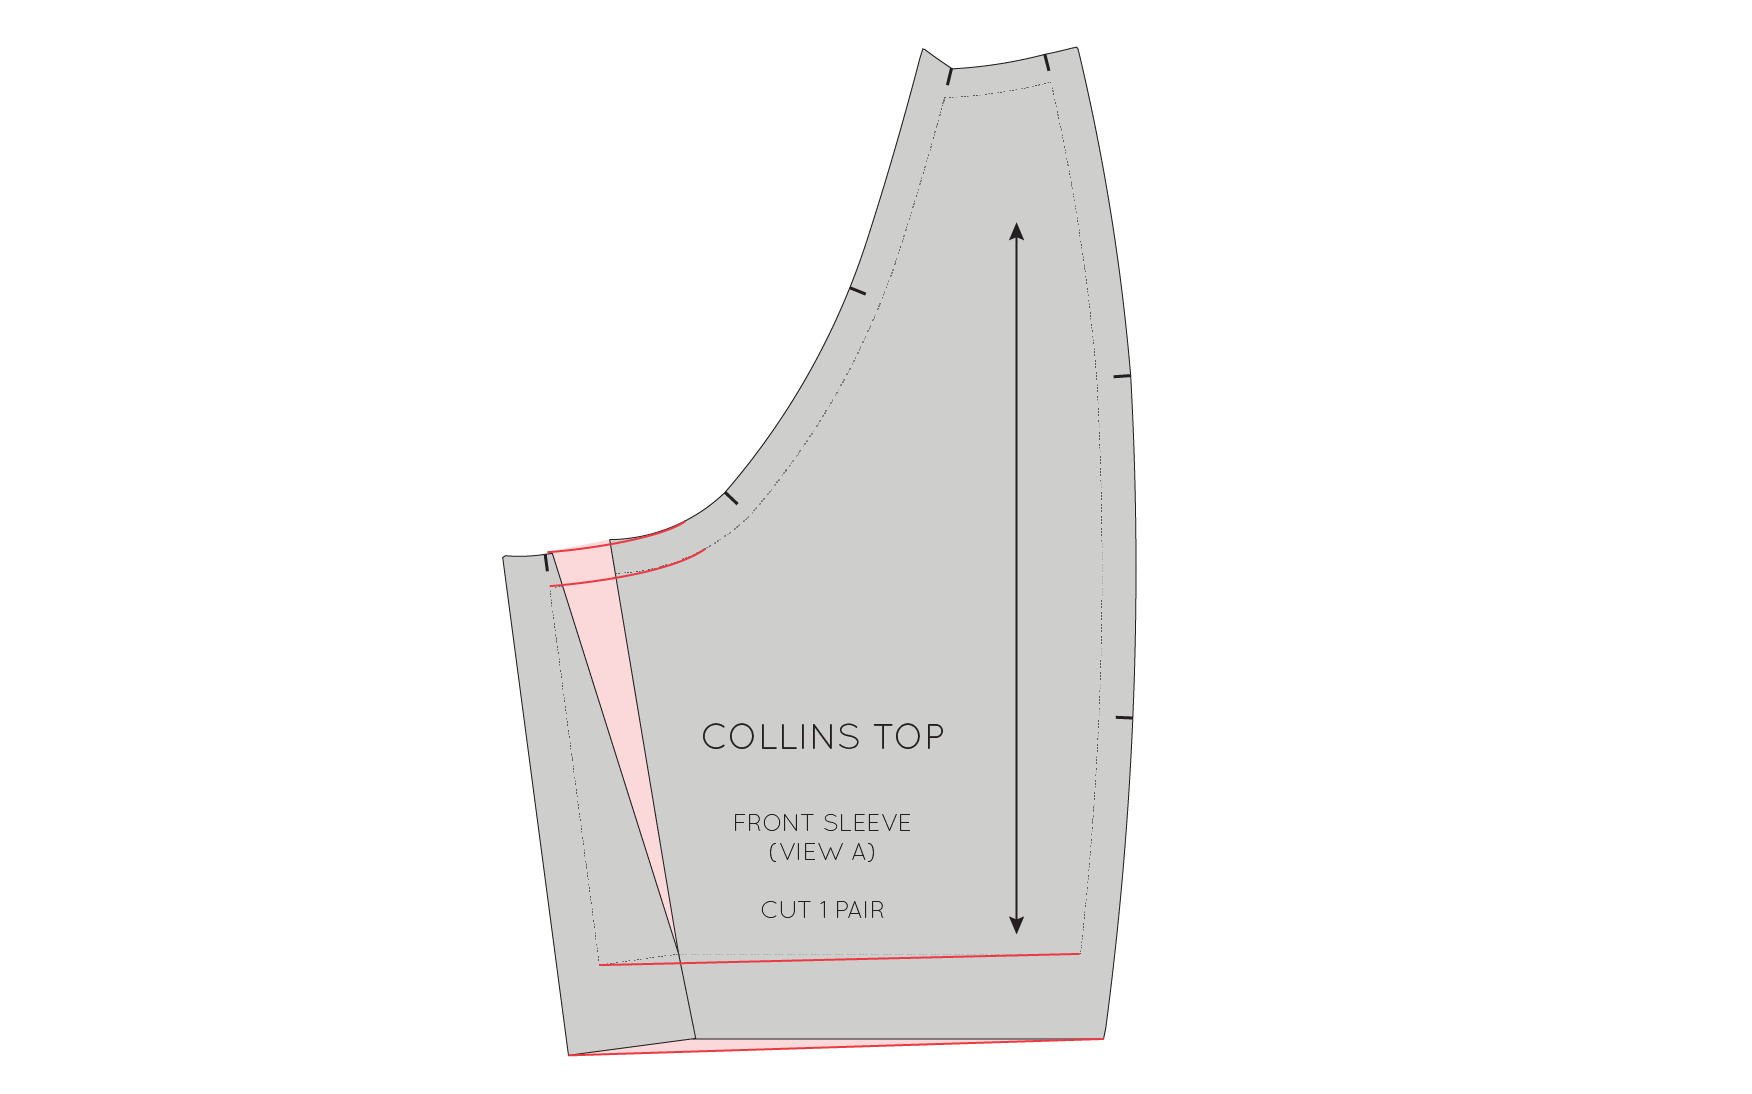
C : Cut down the line from the top towards the hem. Stop when you get 1-2mm from the stitch line at the hem. Cut up from the hem towards the point where you stopped cutting. Leave a 1-2mm hinge in place.

D : Swing open the pattern with the hinge, opening up the sleeve curve by the amount you need to add to the pattern (this is the same technique you learned earlier in this tutorial). For example, 1.9cm was added to my side front panel (step 16), so I will open up this piece by 1.9cm.

remove_dart_fba_18

Step 19 :

Take some scraps of pattern paper and fill in the gaps on your pattern piece. Redraw the armhole curve (and seam allowance) and the hem line (and seam allowance). There you have it. Your sleeve piece will now fit into the armhole on your top. 

If you are making View B of the Collins Top (sleeveless version), tomorrow I'll be going through how to make adjustments to your front facing to fit with your newly adjusted bodice.


You may also like:

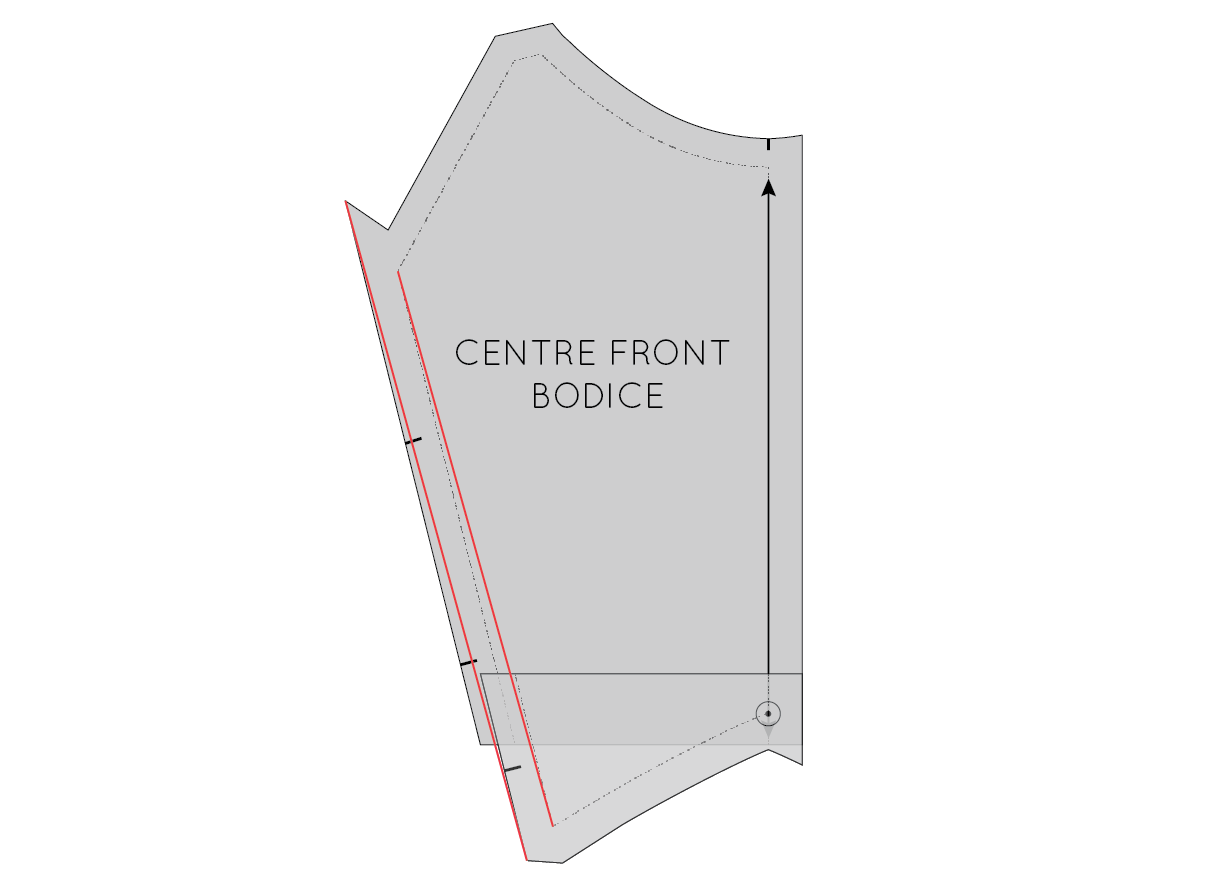
The Acton sew-along : Shorten the bodice (below the bust)

Last week I showed you how to lengthen the bodice on the Acton dress (or any pattern that's similar) for the Acton sew-along, and now it's time for me to show you how to shorten the bodice. 

To start, trace a copy of the CENTRE FRONT BODICE and SIDE FRONT BODIE of the Acton pattern (it's always a good idea to trace a copy of the pattern, rather than using the original, in case you make a mistake. Although with a digital pattern you can always print another copy if necessary!), including all pattern markings (in this case the stitch line, grainlines and notches). 

Normally I suggest removing the seam allowance when making pattern alterations, but when it's as simple as this alteration, there really is no need. 

By referring to your toile, you will be able to know whether you need to remove length below the bust, or above the bust. The method is exactly the same, just the location of the cut is different. This tutorial will show you how to remove excess from below the bust, and later today I'll show you how to remove length from above the bust. 

Getting started 

Draw a horizontal line (perpendicular to the grainline) through each pattern piece between the lower notches. On the CENTRE FRONT BODICE piece, make sure the line is far enough up the piece that it intersects the centre front of the piece and not through the bottom edge.

Cut through the patter

Carefully cut through each line, separating each piece into two. 

Remove the excess length

Work out how much you will be removing from the length of the bodice by referring to your toile.  For the sake of the example, I will be removing 2.5cm (1") from the pattern. Draw a line parallel to the cut, 2.5cm / 1" (or the amount you are removing) on the upper section of the CENTRE FRONT BODICE piece. 

Move the lower section of the piece up to meet the horizontal line. Check that the centre front on both upper and lower pieces are aligned and then tape or glue in place. 

Re-draw the seams

short_3.gif

Redraw the panel line, by drawing a straight line from the original line at the top of the seam and the bottom. Do this for both the stitching line and the cutting line. 

Re-draw the notches

short_4.gif

Re-draw the notches - so that they won't be trimmed off when you remove the excess from the piece. Cutting along the new line to create the new pattern piece.

Make the same changes to the side front bodice

short_5.gif

Repeat the process for the SIDE FRONT BODICE, before moving onto the back panels and repeating the process.

Keep your eye on the blog for more Acton sew-along posts coming in the next couple of weeks (and check out the link to see what I've covered so far). 


You may also like:

How to : Draft a top with yoke

draft_top_yoke_1

Recently I have been well and truly in summer sewing mode, as I have been working on another pattern for Peppermint magazine (see my first pattern for Peppermint here). As it's a quarterly publication, the next release will be in Spring, which makes me feel as though spring is just around the corner. And makes me very excited! I am not a winter person at all, so I have been very much enjoying pretending it's spring and using luscious linen to make the sample. 

So, to keep the dream alive, that it is actually spring (I know I shouldn't whinge as winter in Sydney is very mild) I thought I'd post a follow up post to the post I did a couple of weeks ago on drafting a summer top.

I thought a good place to start would be with a few simple adjustments you can make to your simple top pattern (or even an existing top pattern you have) to add a bit more interest, starting with adding a yoke. 

What is a yoke?

A yoke is a panel that is inserted in the top of a garment to add interest. For example, yokes are often used on the back shoulders of shirts, but can also be found on blouses, tops, skirts and trousers. 

Trace the pattern

draft_top_yoke_2

To start, trace a copy of the pattern you would like to add a yoke too. I am using the simple sleeveless top pattern that I drafted from my basic bodice block

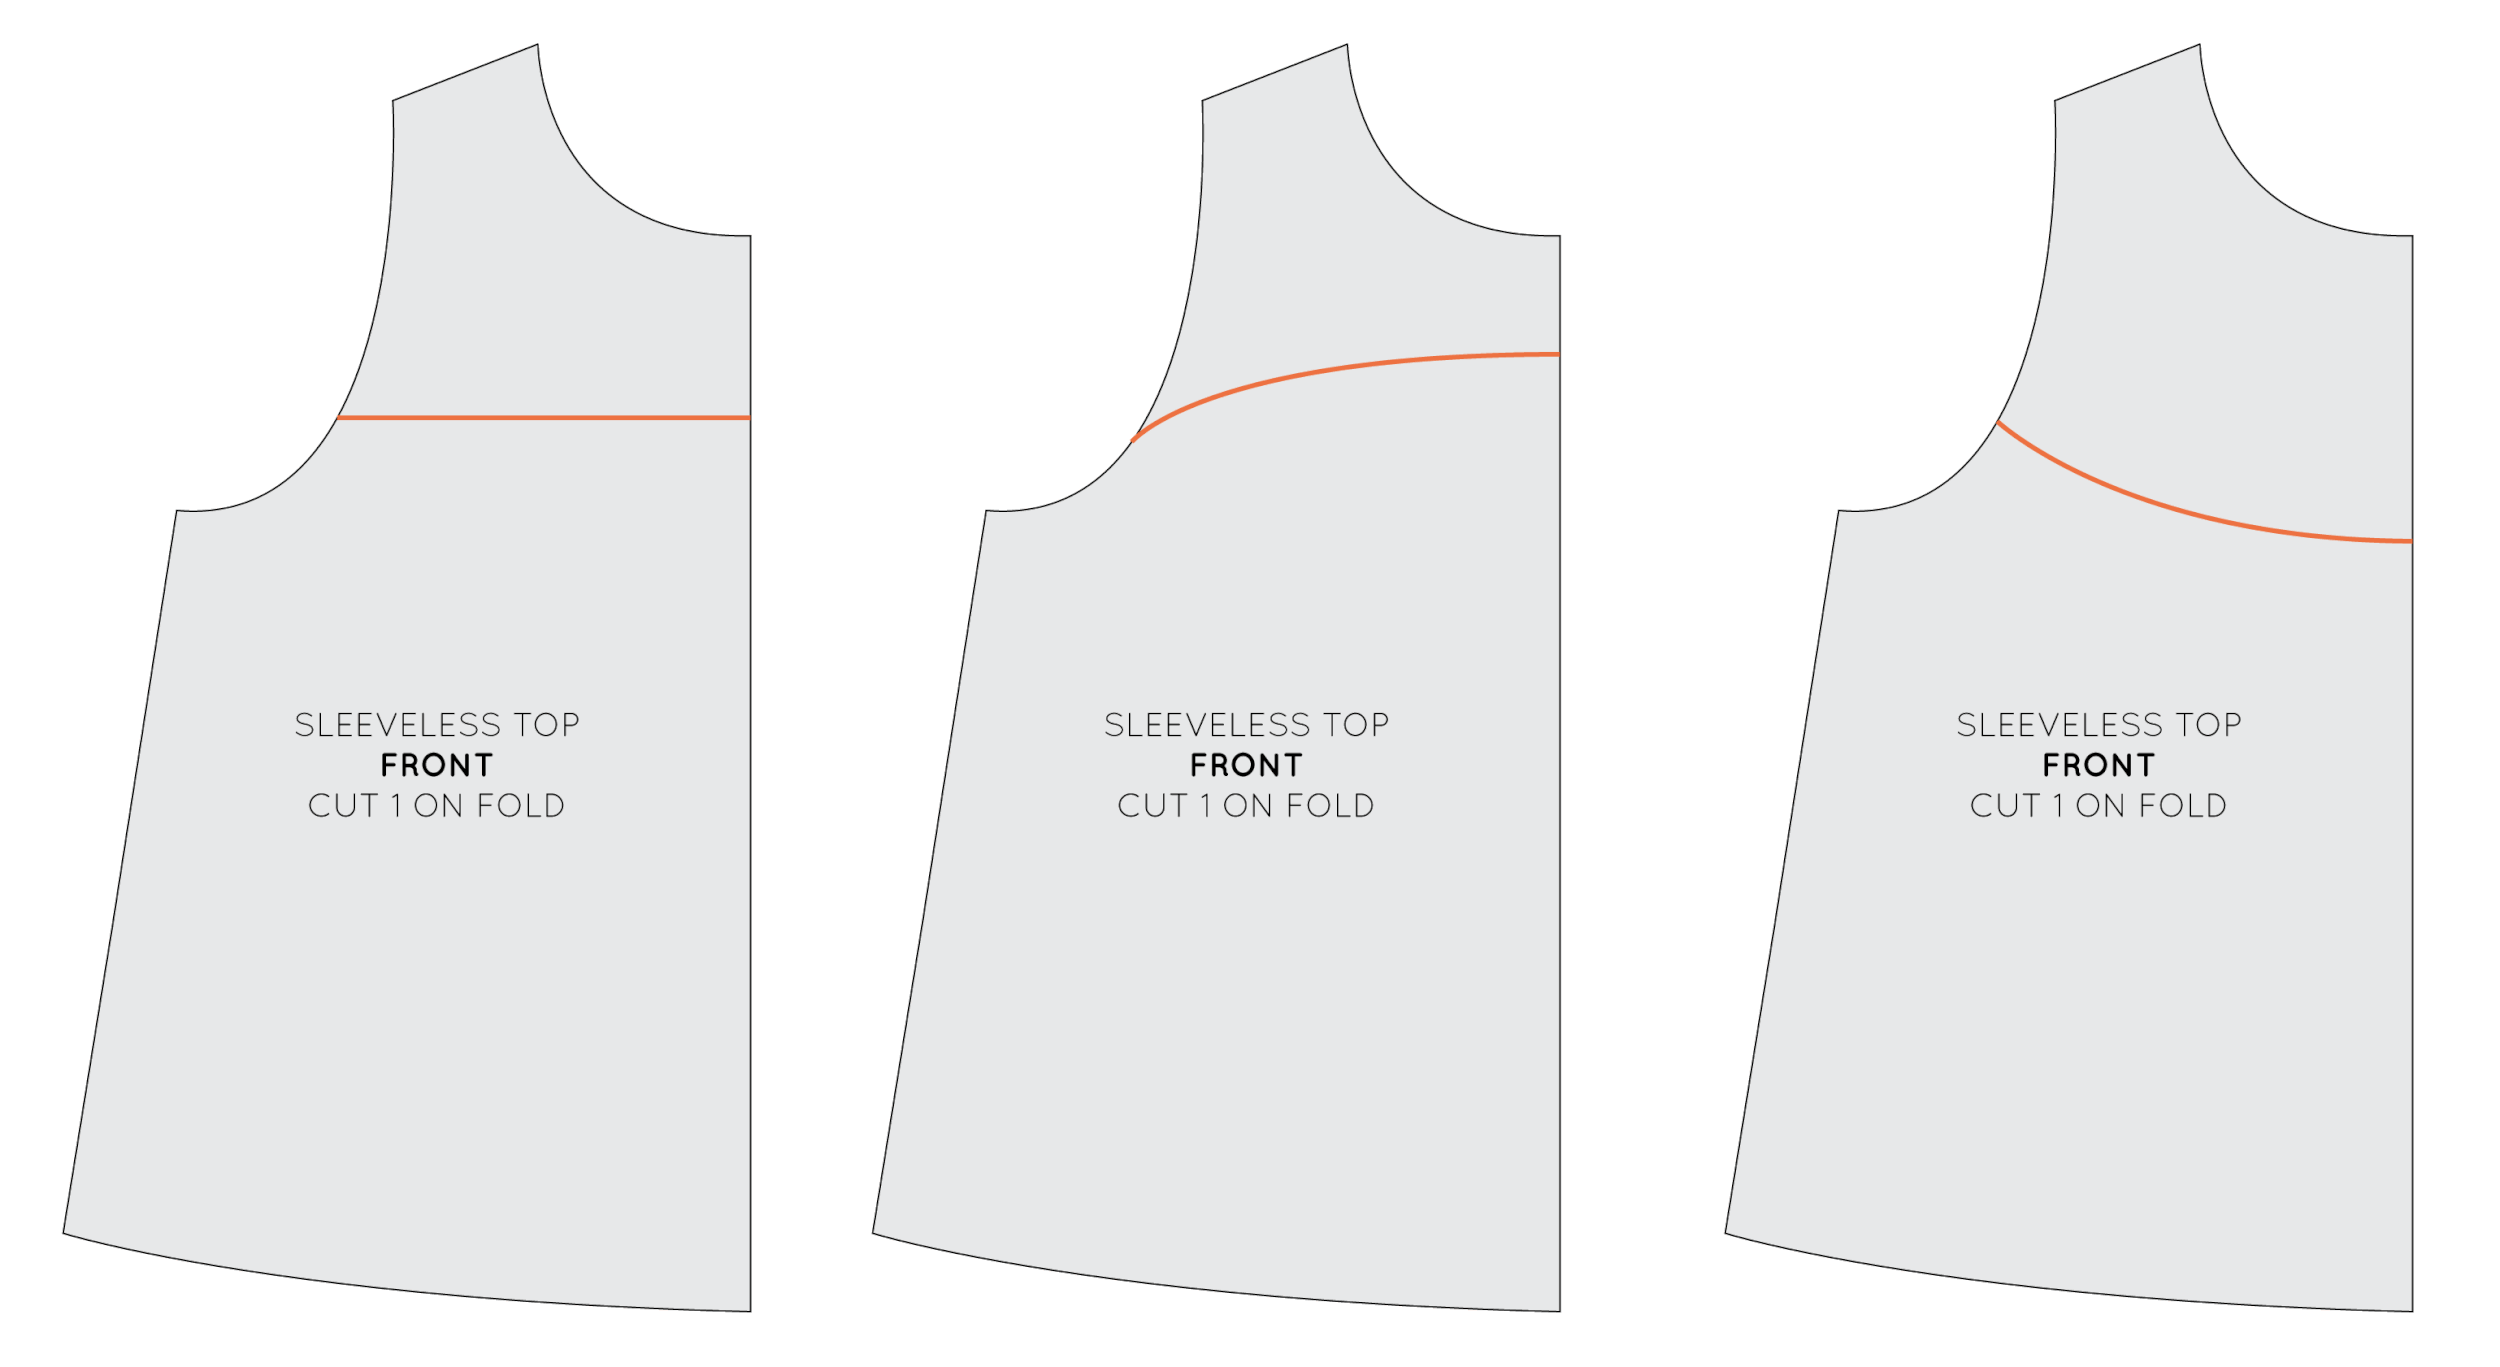
Style lines

draft_top_yoke_3

Think about the shape of the yoke you would like to create, and draw the style line on the pattern. I have included a few examples, but there are countless options of what you could do. Be sure to bring the style line to a right angle at the centre front (more details about this can be found here). 

draft_top_yoke_4

For the sake of the example, I decided to go with a simple straight yoke through the armhole.  Before going any further, put a notch on the style line. This will help match the two pieces back together once they become two separate pattern pieces. 

draft_top_yoke_5

Cut along the style line (or trace each piece onto paper) to create two independent pattern pieces.

What next?

draft_top_yoke_6

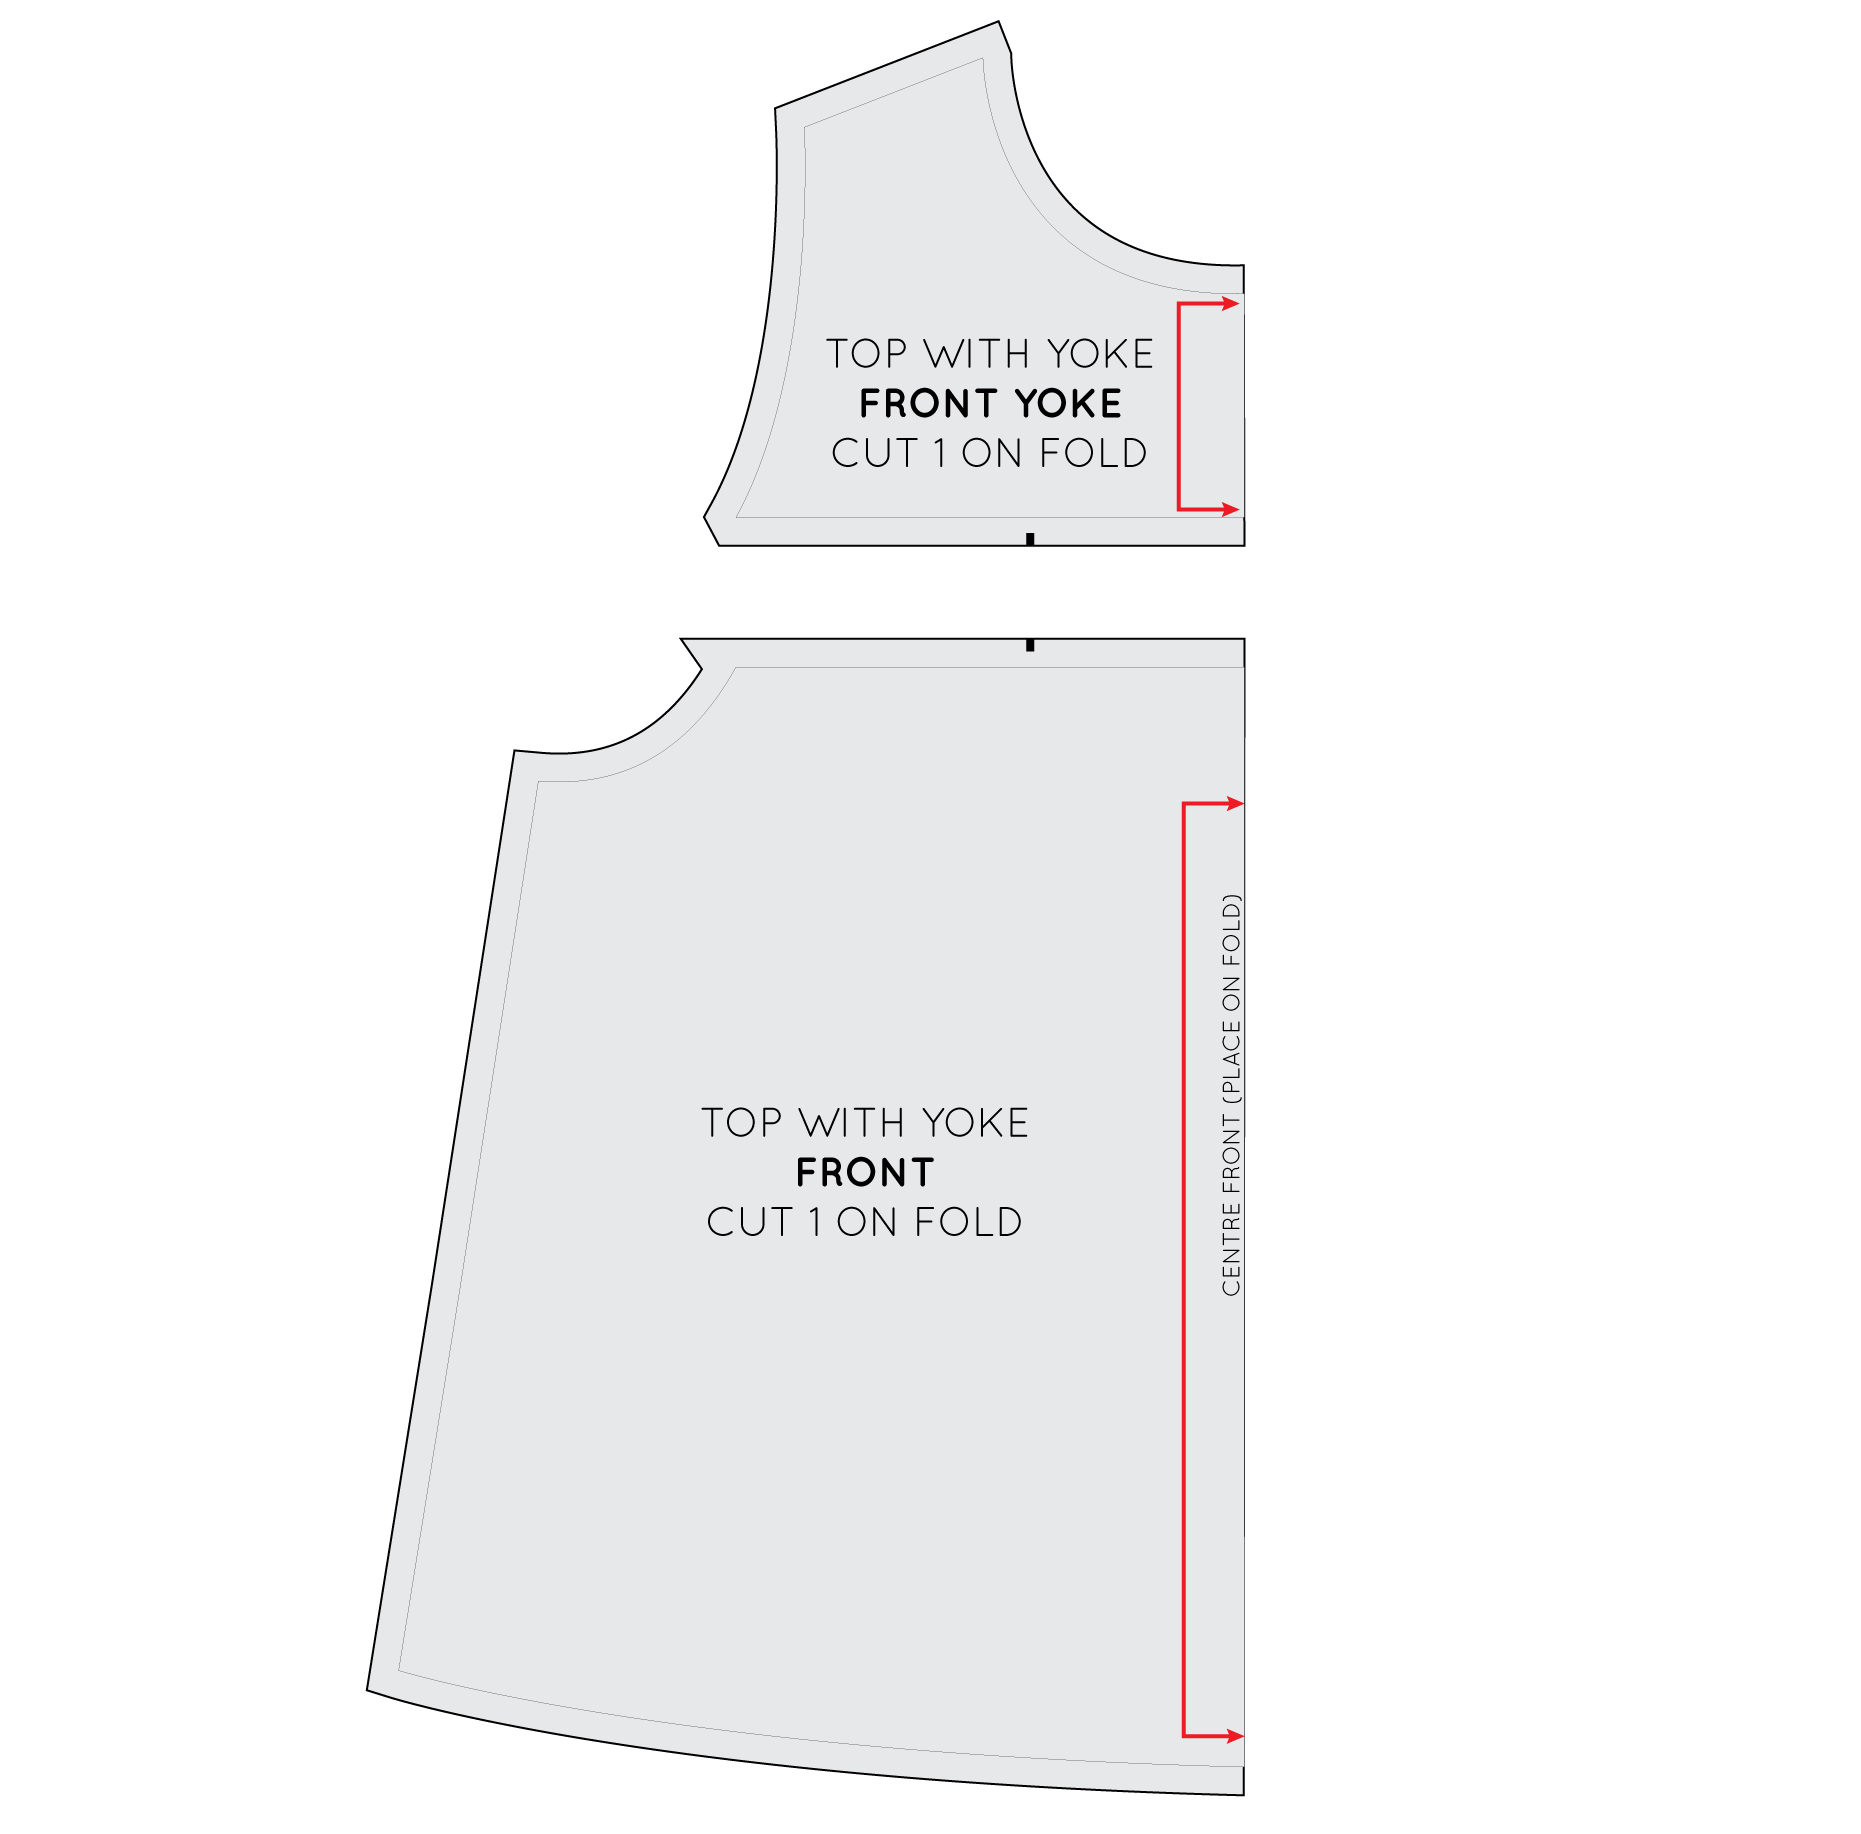
There are a number of things you could choose to do now. You could leave the pattern as is (just add seam allowance and pattern markings) for a simple tank with a yoke panel line (which you could choose to also repeat on the back pattern piece).

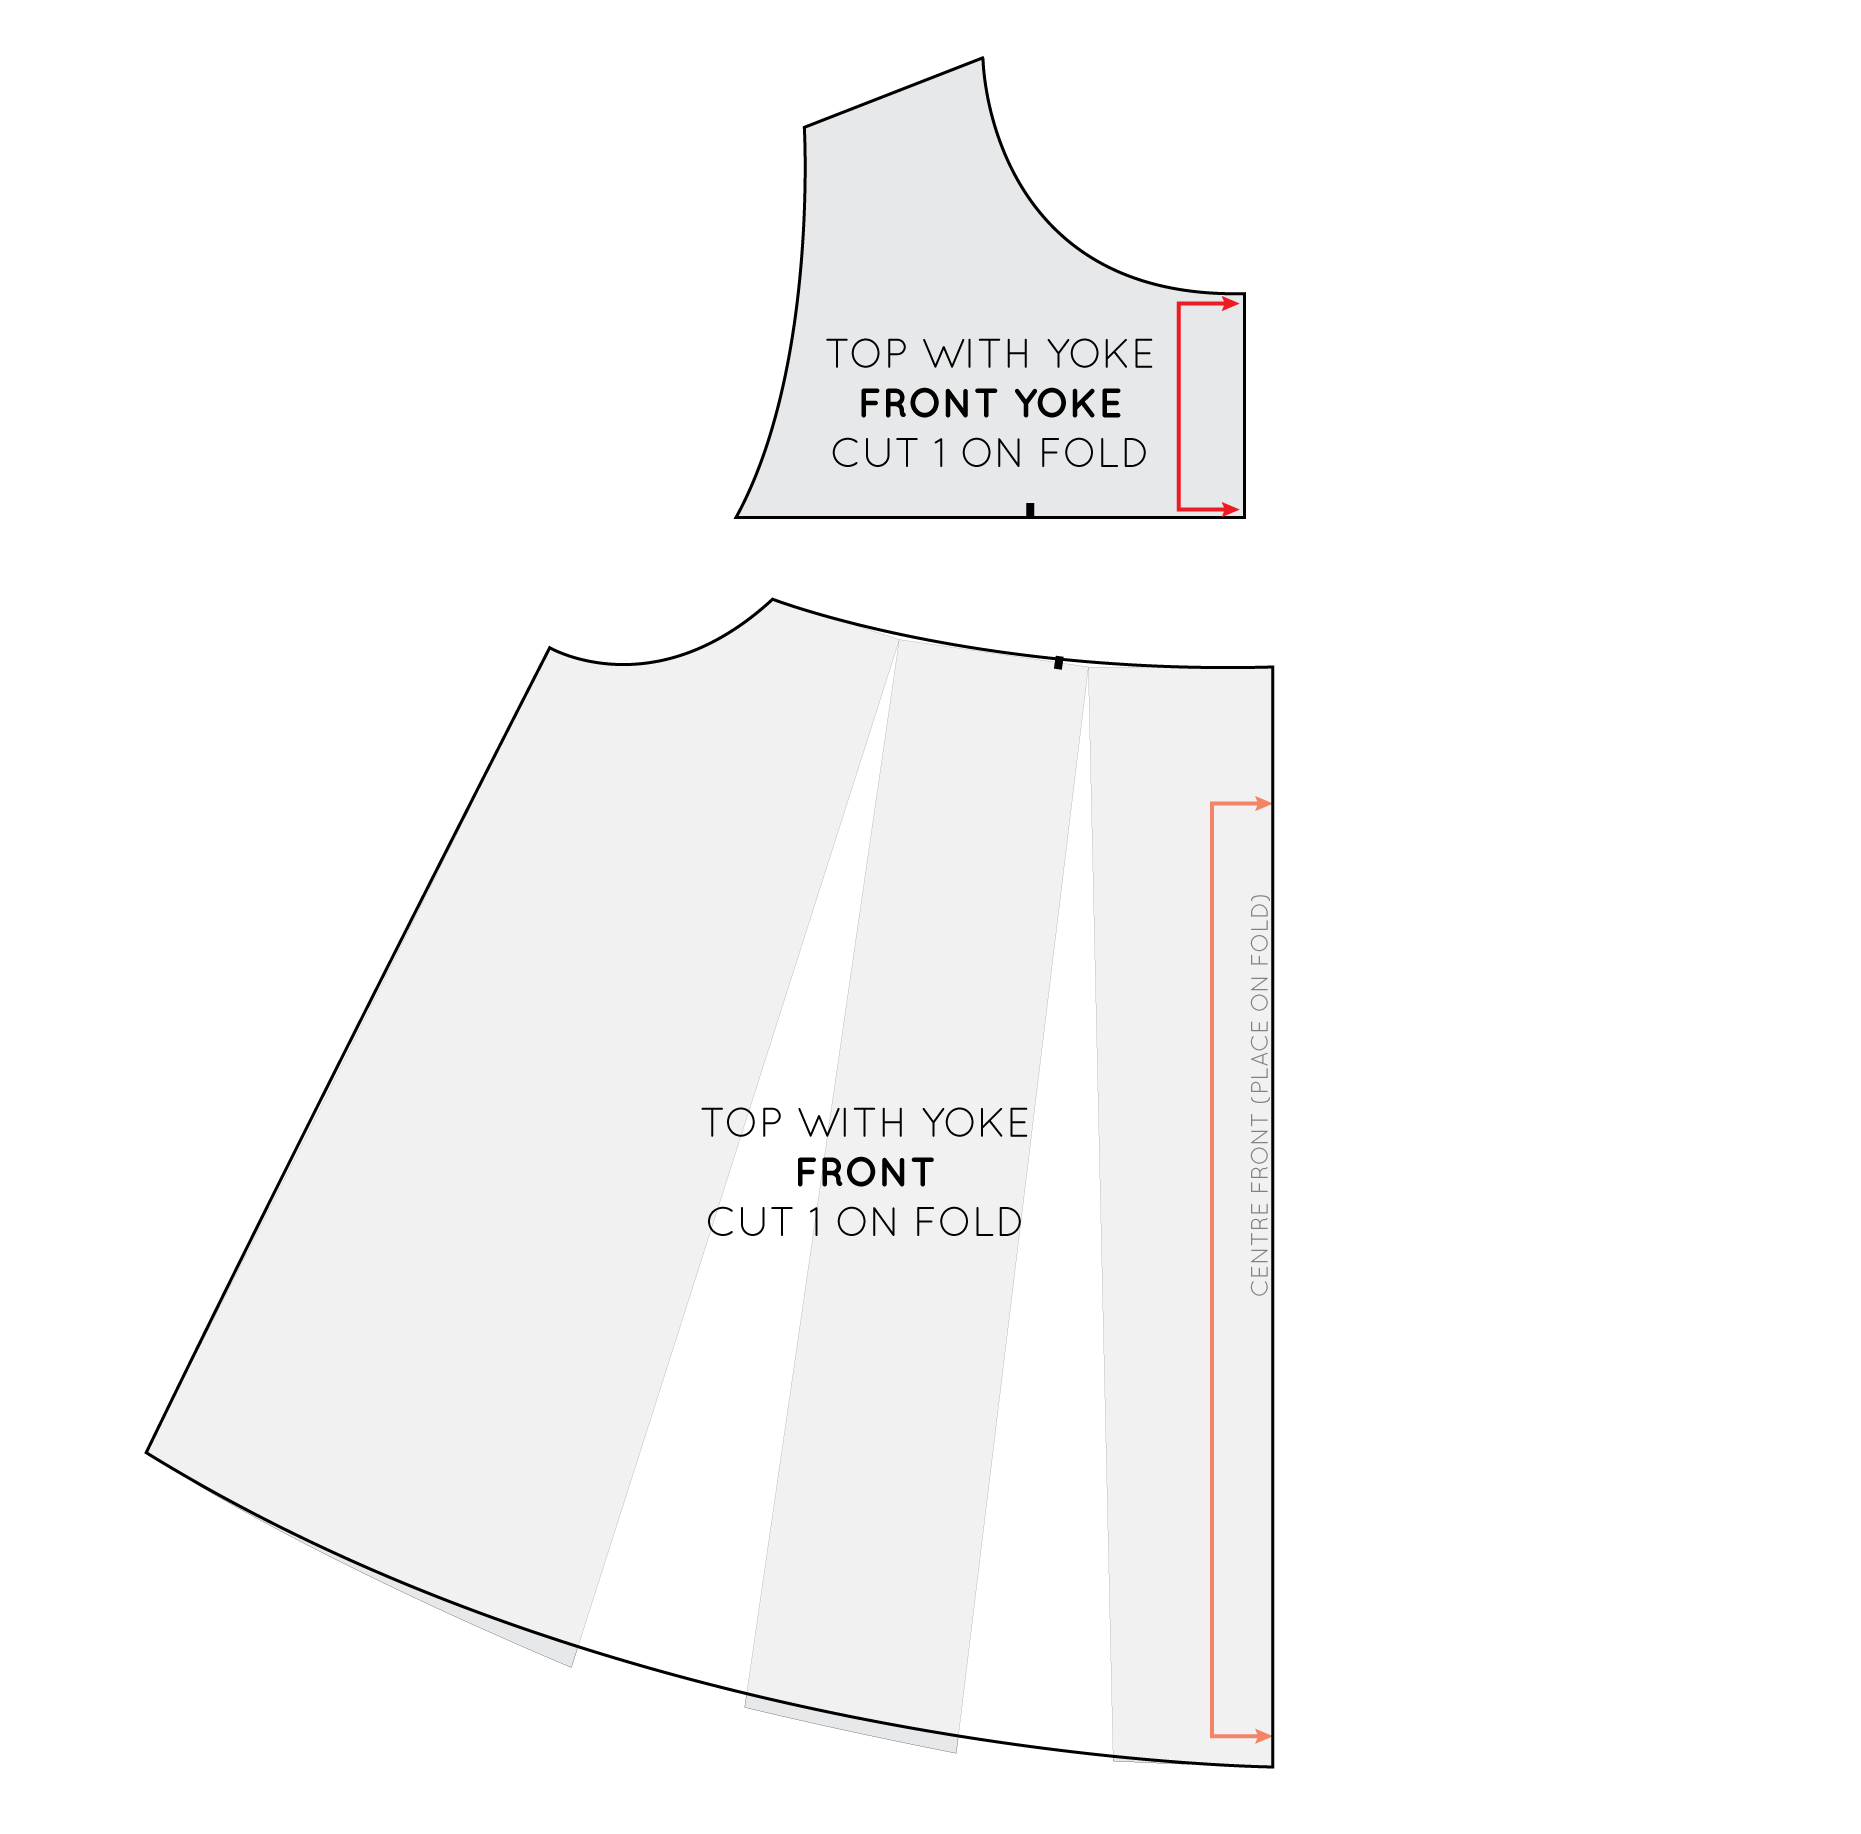
draft_top_yoke_7

You could consider adding volume to the lower panel to create more of a trapeze silhouette. You can do this by cutting and spreading the pattern until you achieve the desired silhouette (look at this tutorial for more details about how to do this).

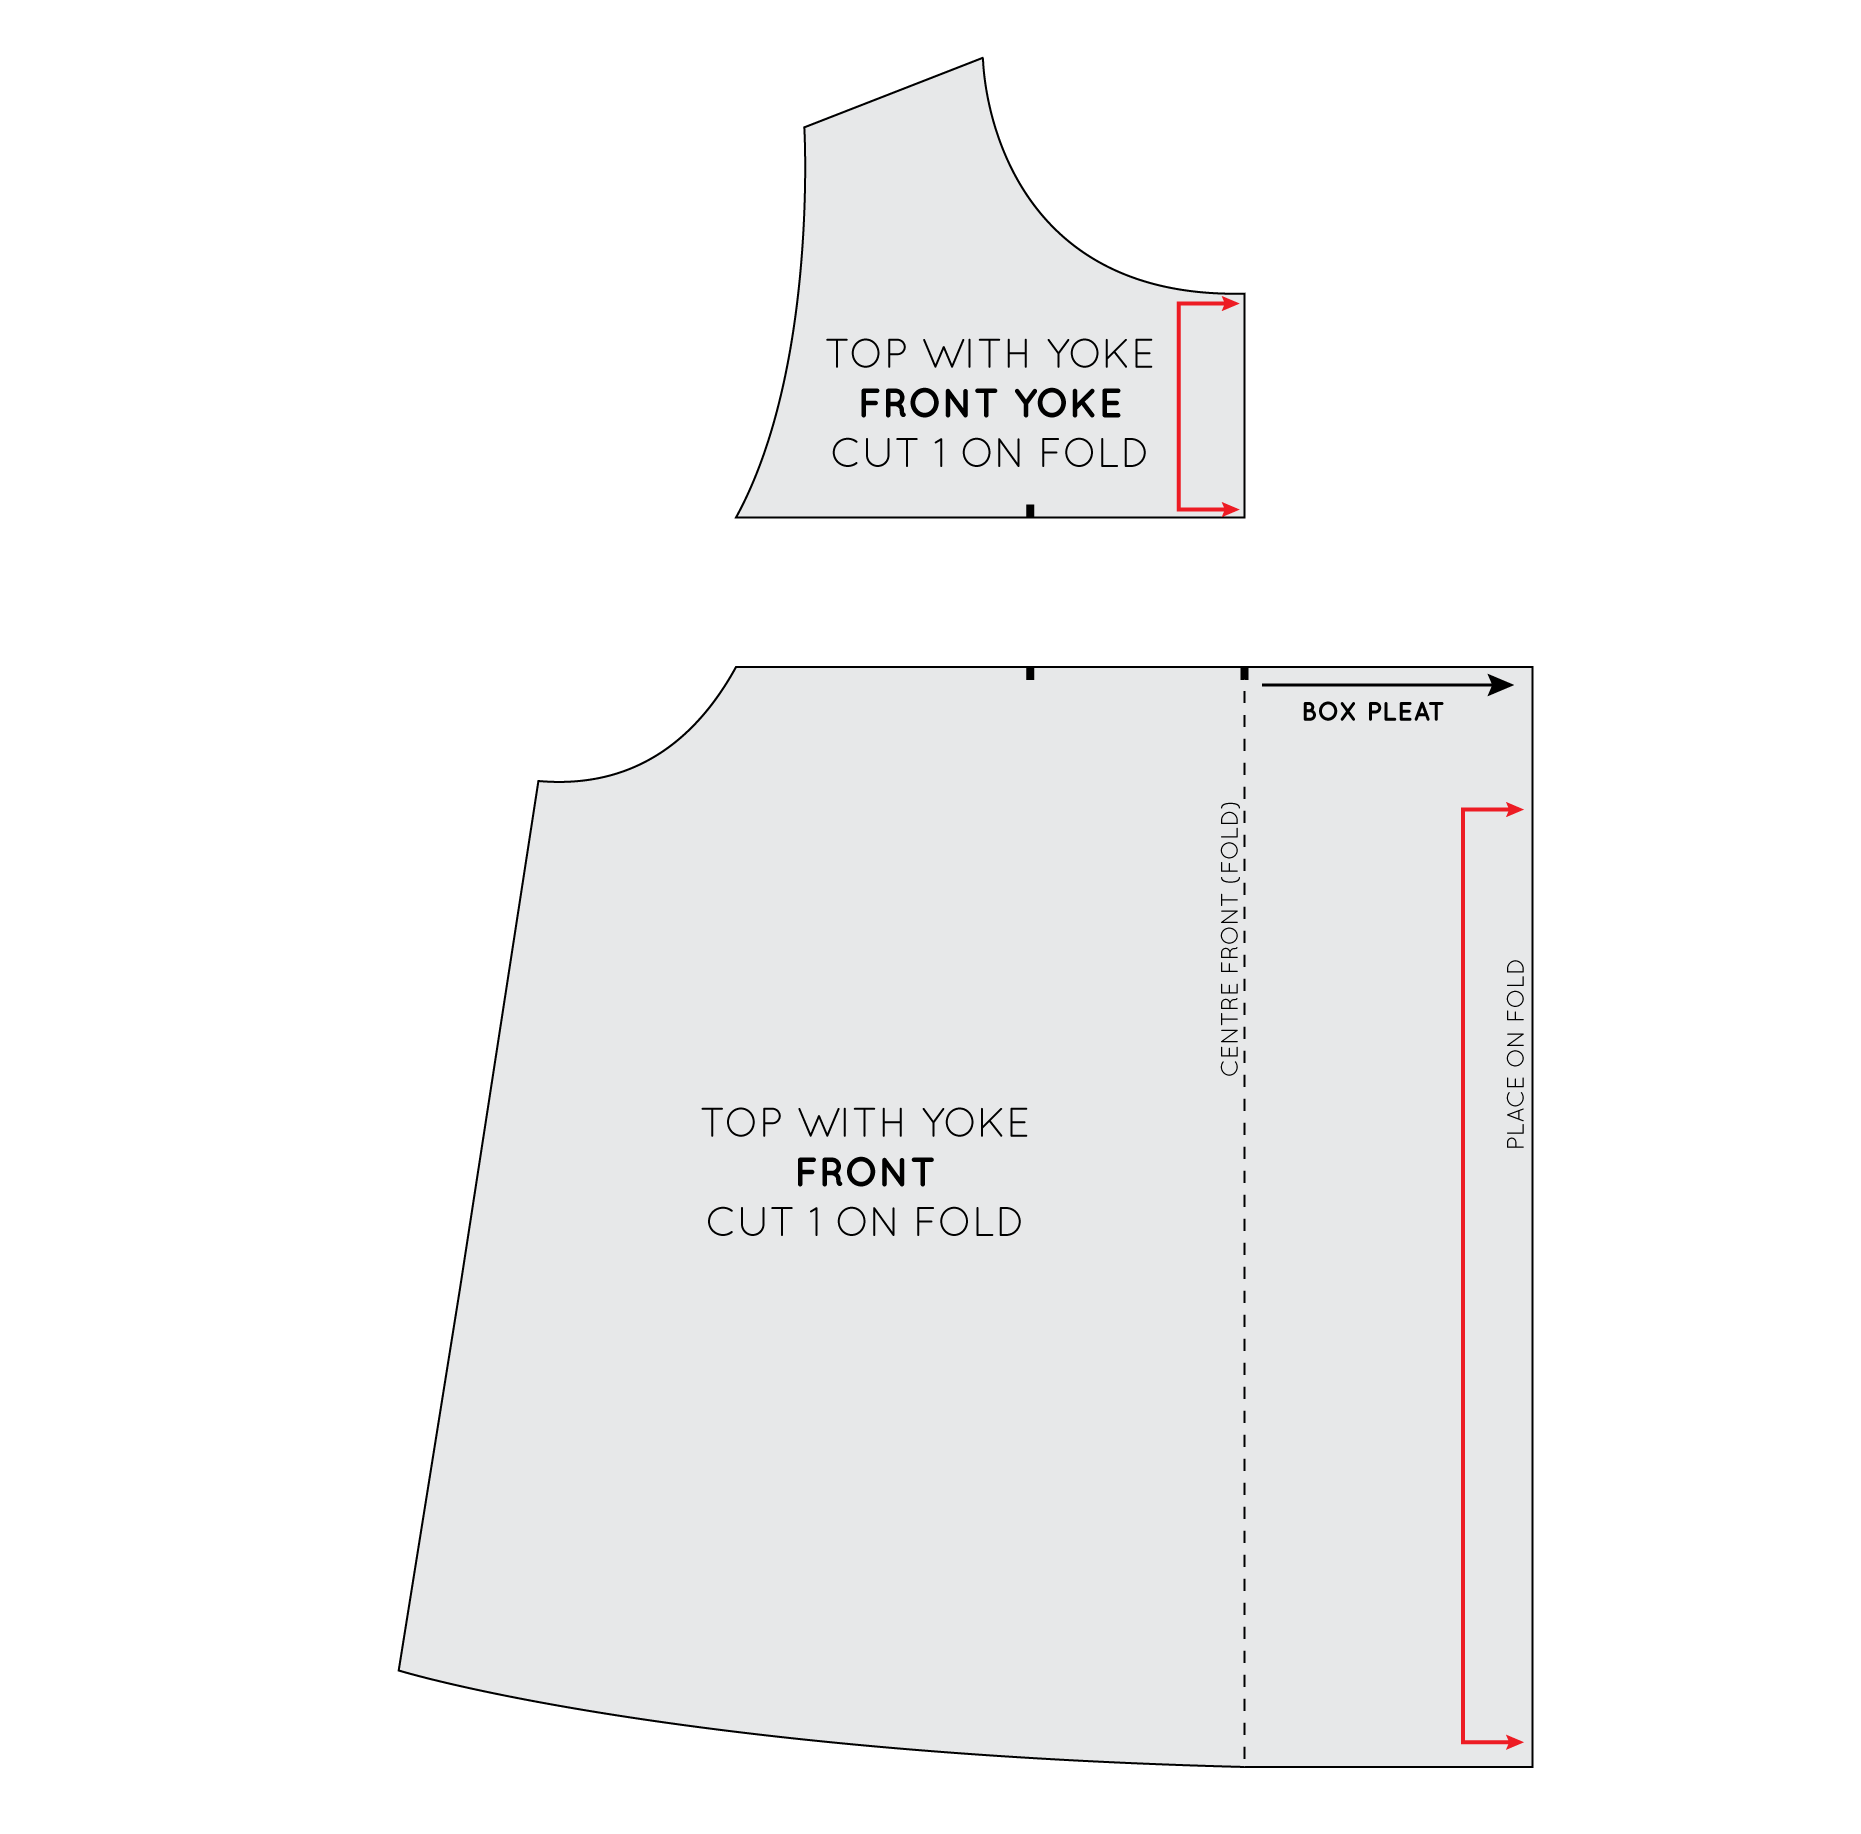
draft_top_yoke_8

Or even consider adding a box pleat at the centre front (this is a personal favourite of mine).

Finish the pattern by adding seam allowance and cutting instructions.


You may also like:


Notes on adding seam allowance

One of the first tutorials I created for this site was about how to add seam allowance to a pattern. If you are going to draft your own patterns, this is really something you are going to need to know how to do (and it's also a greta place to start if you want to learn some basic pattern making principles). In today's tutorial, I'd like to expand on the basics a little. I'd suggest checking out the previous tutorial first if you are unsure how to add seam allowance, and then come back to this tutorial. 

I did work experience with a local fashion designer while I was at university. One day a week I would go to her studio and help out with whatever tasks she needed help with. I learned a lot about things like how to cut fabric, how to trace patterns etc. (which have all really come in handy), but I'd say the best lesson I learned was about marking seam allowances. I remember being asked to add seam allowance to a particularly strange shaped pattern and realising I didn't know what to do when the pattern came to a point at one side. The designer I was working for told me to think about how the piece needs to sit once the seam is sewn and pressed and that should help me work it out. This now seems very obvious, but at the time it was a real 'wow' moment. From that moment on I never struggled, and it is a way of doing seam allowances that I have brought into my patterns. Over time, I have learned this is not always the way it is done and users of my pattern always get really excited about it and see it as a nice little detail in the process, that helps you achieve a really beautiful and professional finish in your hand-made wares. So I thought I'd share it with you today!

An example

Here is an example of what I am talking about from the Rushcutter sewing pattern (as the old saying goes, a picture really is worth a thousand words). This is the pattern piece for the raglan sleeve, and you will notice that at the seam where the sleeve joins to the centre front panel the seam allowance comes to a strange looking point. 

The reason for this is that, after this seam is stitched and then pressed open, with the seam allowance cut like this, it will be able to sit flush with the edge of the sleeve. This will help you get a lovely clean finish when you attach the sleeve to the armhole of the dress. 

How to do it

Take the pattern you are adding seam allowance to. For the sake of the example, I have just used the front pattern piece from a sleeveless top pattern. (which I showed you how to make last week).

Start by adding seam allowance to the straight seams. I'd suggest between 1.2cm (1/2in) and 1.5cm (5/8in).

Add seam allowance to the curves. Curved seams require a slightly smaller than standard seam allowance (as this helps when you are sewing them) so I'd suggest 6mm - 1cm (1/8in - 3/8in). If you're not sure how to add seam allowance to curves, there is information about it in my previous tutorial on adding seam allowances

4.gif

What I didn't go into in the last tutorial was what to do at intersection points. It's not a problem if your pattern piece is made up of straight seams on all sides, but if, like in the example, your pattern has a mixture of straight and curved seams, you will have to add one extra step to the process.

Focus on one particular area to start. I will start with the shoulder seam. Fold along the shoulder line. This is the original shoulder line, not the seam allowance line. By folding along the shoulder line you are able to see what will happen when the seam is stitched and pressed open (which is normally the case with shoulder seams).

Take a tracing wheel (or awl) and trace over the lines that indicate the seam allowance on either side of the shoulder seam (the armhole and the neckline) for approximately 2-3cm (1in).

Unfold the pattern and you will see that you have transferred the shaping to the shoulder seam. 

Use a ruler and pencil to join the dots created by the tracing wheel. 

You will see that when you fold back the seam allowance on the shoulder seam, it now sits flush with the armhole and neckline.

Next, we'll move onto the side seam.

Again, fold along the stitch line. 

Use a tracing wheel to trace along the armhole and hem line (the seam allowance line, not the stitch line) for approximately 2-3cm (1in). 

Unfold to see the lines that have been transferred to the side seam and mark with a ruler and pencil.

Repeat process form all pattern pieces, and that's it, you're done! 


You may also like:

How to : Draft a simple summer top

Summer is here for all of you lucky people in the northern hemisphere, and I thought it would be a great time to show you how to draft a quick and easy sleeveless summer top! You may wonder what I'm thinking, as most of you know I am based in Sydney, where it is currently quite chilly (well at least as chilly as it gets here), but I really wanted to start showing you how to turn your bodice block into a functional garment (as who really wants to wear a bodice block?) and I haven't shown you how to draft a sleeve yet, so sleeveless top it is!

This is a really simple tutorial and a great place to start if you are trying your hand at pattern drafting.

Where to start

1.gif

Trace a copy of your front and back bodice blocks without seam allowance. Be sure to also mark both darts on each piece.

Relocate shoulder darts to the waist

Relocate the shoulder darts on the front and back bodices to the waist, using this method or this method

You won't actually be needing the darts in the waist, so you can redraw the hem with a smooth curve, removing the darts altogether. 

Trace the pattern

Trace the pattern pieces onto a separate piece of pattern paper, leaving enough space in between the pieces for alterations. 

LOWER THE ARMHOLE

It is likely that you will want to lower the armhole of your top for a more comfortable fit. The bodice block is designed to sit right under your arms, and I'd say for a summer top you will want a bit more breathing room. 

Decide how much you would like to lower the armhole by. Mark this distance on the side seam, measuring down from the armhole. Mark this point on both front and back patterns (this is your new underarm point). This is when it's great to have a toile (muslin) to refer to, so you can see exactly how low you want your armhole to be.

It is a good idea to reduce the length of the shoulder seam too. As it stands, it is a decent sized shoulder seam and for a summer top it is likely that you will want something a little slimmer. Remove some of the length from each side (the end close to the armhole and the end close to the neckline) to keep it balanced.

Work out how much you would like to remove from the shoulder and mark this distance on the shoulder seam, measuring in from the armhole. 

Create the new armholes by joining the points marked on the side seam and shoulder seam with a smooth curve. 

Cut along the new armhole line to remove excess from both front and back armholes (or trace off separate to create a new pattern).

LOWER THE NECKLINE

For the same reason I suggested lowering the armholes, I suggest also lowering the neckline. Use the same method used for the armholes. On the front shoulder seam, measure in from the neckline and mark the point where you want your new neckline to be. Mark the same distance on the back pattern piece. Also work out how much you would like to lower the neckline by and mark this point on the centre front and centre back. This doesn't need to be the same distance - you may want a low front (or even a low back).

Re-draw the front and back necklines by joining the points marked on the shoulder line and centre front/back with a smooth curve.

Cut along the new necklines to remove the excess from both front and back pattern pieces (or trace off separate pattern, with lower armhole).

Lengthen the pattern

At this stage, the pattern is still only waist length. If you'd like a cropped tank then you're done, but if you'd prefer some extra length then keep working your way through the tutorial.

The best way to lengthen a pattern is normally to slash the pattern horizontally and then add length through the middle of the pattern, so that the hemline stays intact and the silhouette of the garment doesn't change too drastically. In this case though, I'd suggest just adding length to the bottom of the pattern, as it is likely that you will need a bit of extra width around the hips. 

10.gif

Work out how much you would like to add to the pattern, and extend the centre front, centre back and both side seams by this length. 

Join the lines with smooth curves to create the new front and back hemlines.

Remember to meet each side with right angles so that you get smooth lines when you sew the pattern together. For more on this, check out this tutorial on checking patterns

To complete the pattern, add seam allowance and pattern markings and you're done! 

You may also like:

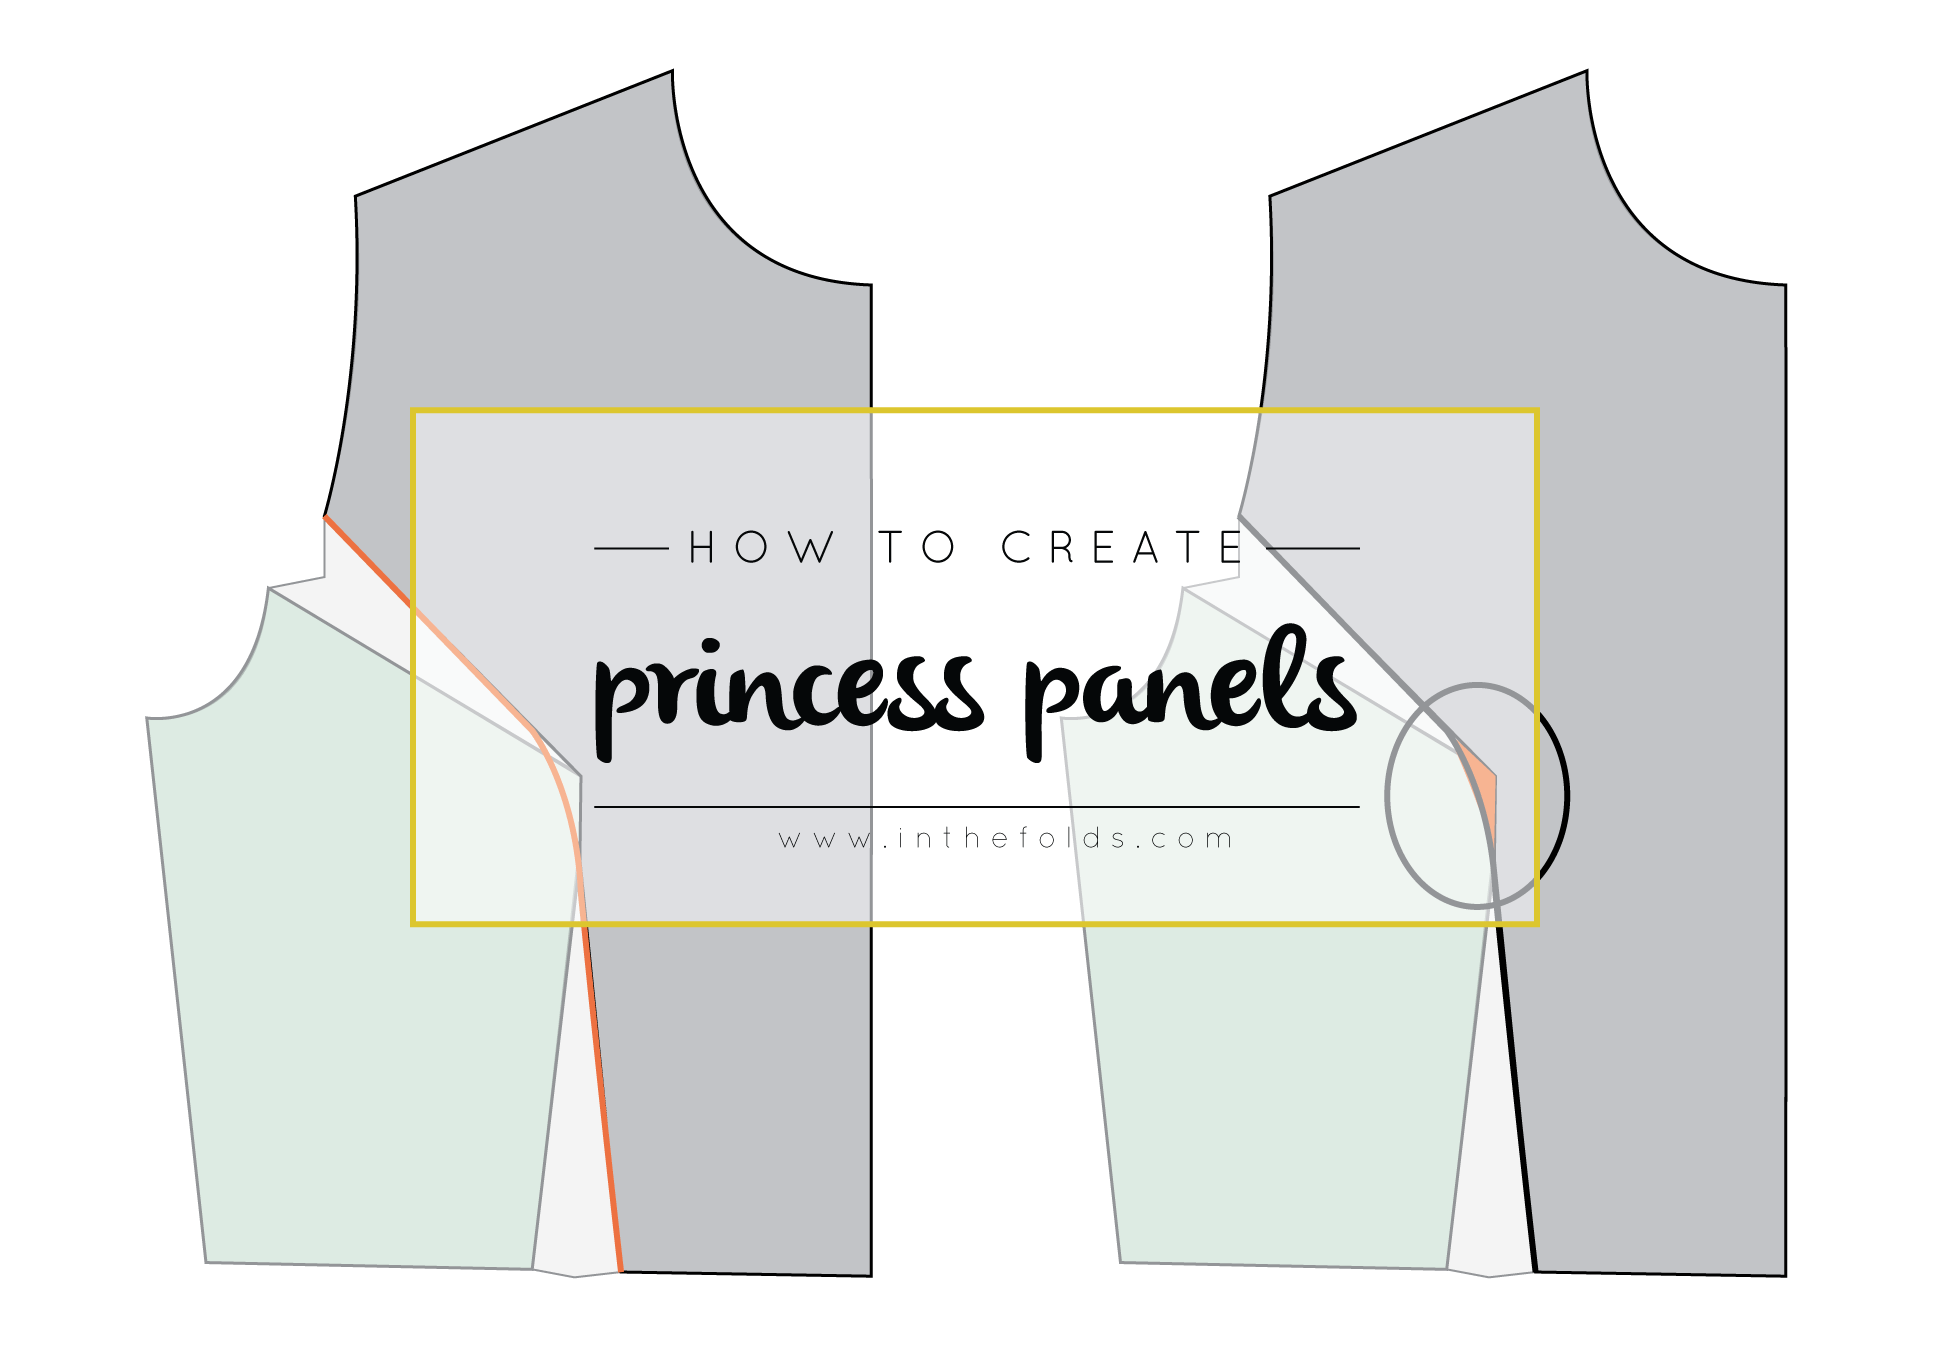
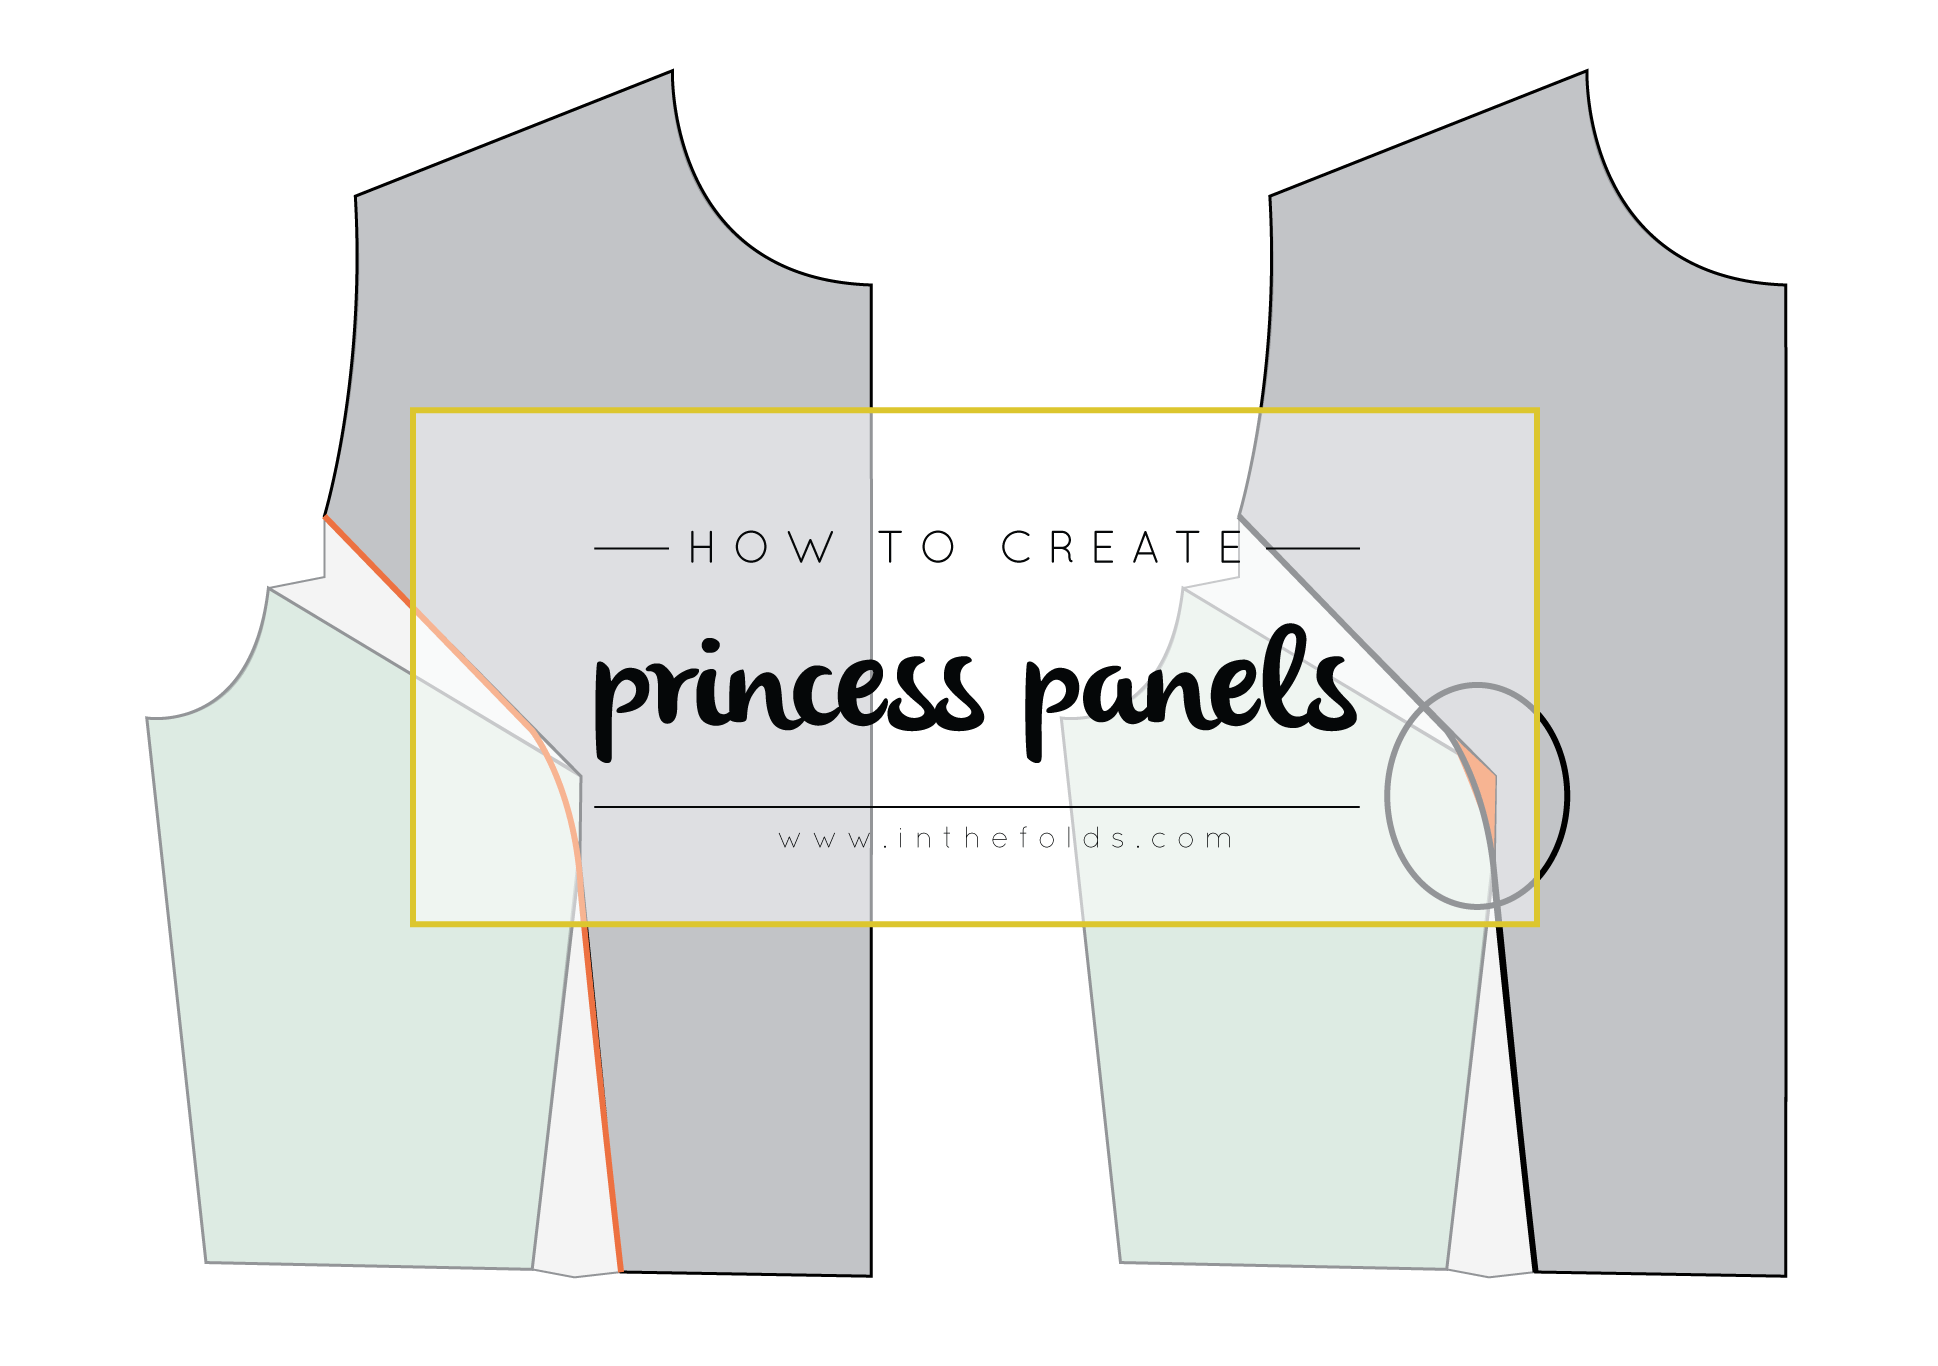
How to: Create princess panels

how_to_draft_princess_panels_1

Including panel lines in a design is a good way to eliminate darts, without losing the fitted shape of the garment. They are also a great way to add interest to a design. There are countless variations, and it is also a great way to include more than one fabric in your design if you would like (if you fancy a splash of contrast fabric like me). 

What are princess panels?

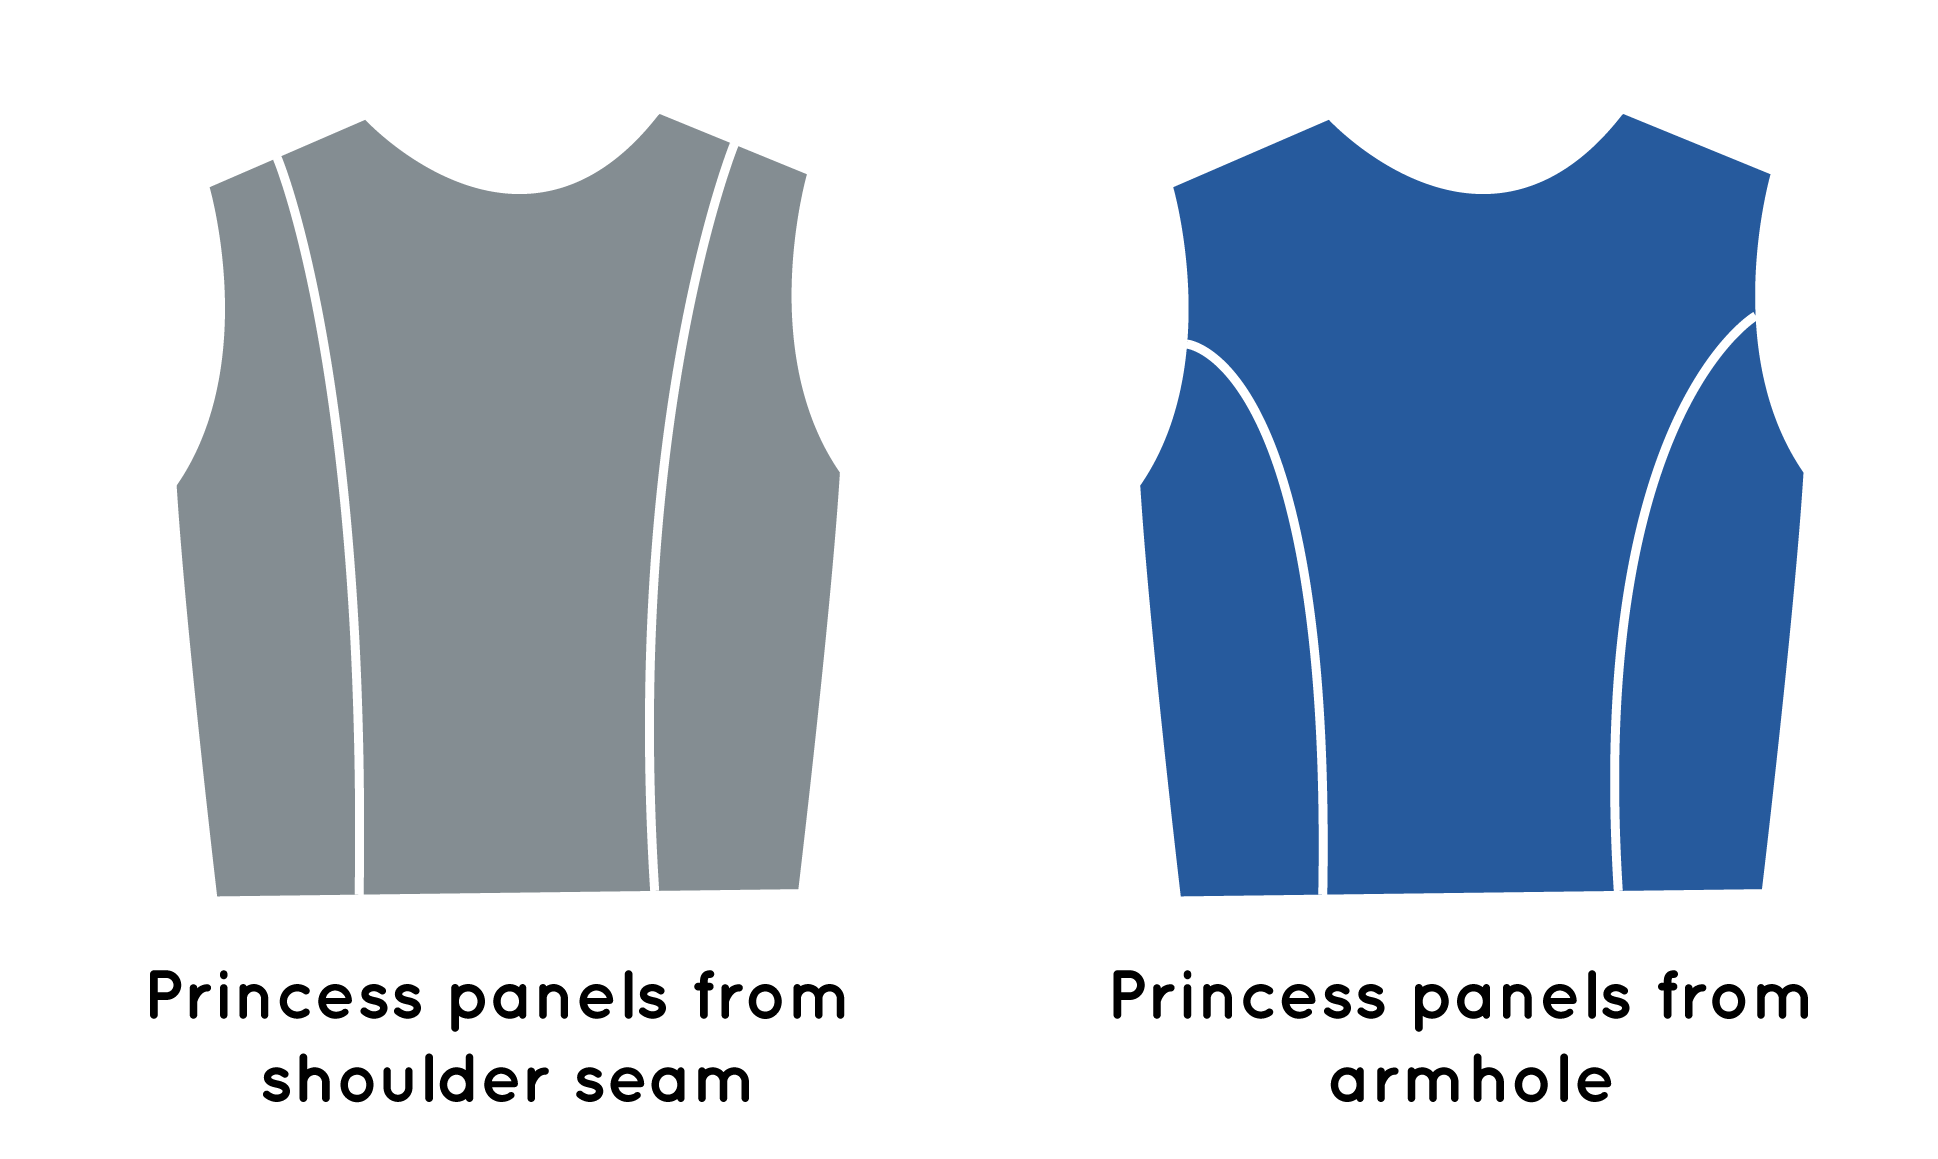
'Princess panels' are panels that are shaped around the bust, to create a nice fit (without the need for darts), but can also be an interesting design detail. 

how_to_draft_princess_panels_2

Princess panels can cut through the pattern from the shoulder line to the waist, or they can cut through the pattern starting at the armhole and running down to the waist. I'll show you how to create both options, although they use basically the same method - and it's really up to you which you would prefer. If you are a beginner, I'd suggest drafting the version from the shoulder seams, as it can be easier to sew. The curve required to have princess panels coming from the armhole can be a little trickier to sew (but totally manageable if you've got some pins and patience). 

I will be using the basic bodice in the example, but you can create princess panels on any fitted top pattern with waist darts. 

Option #1 : Drafting princess panels from shoulder seam

how_to_draft_princess_panels_3

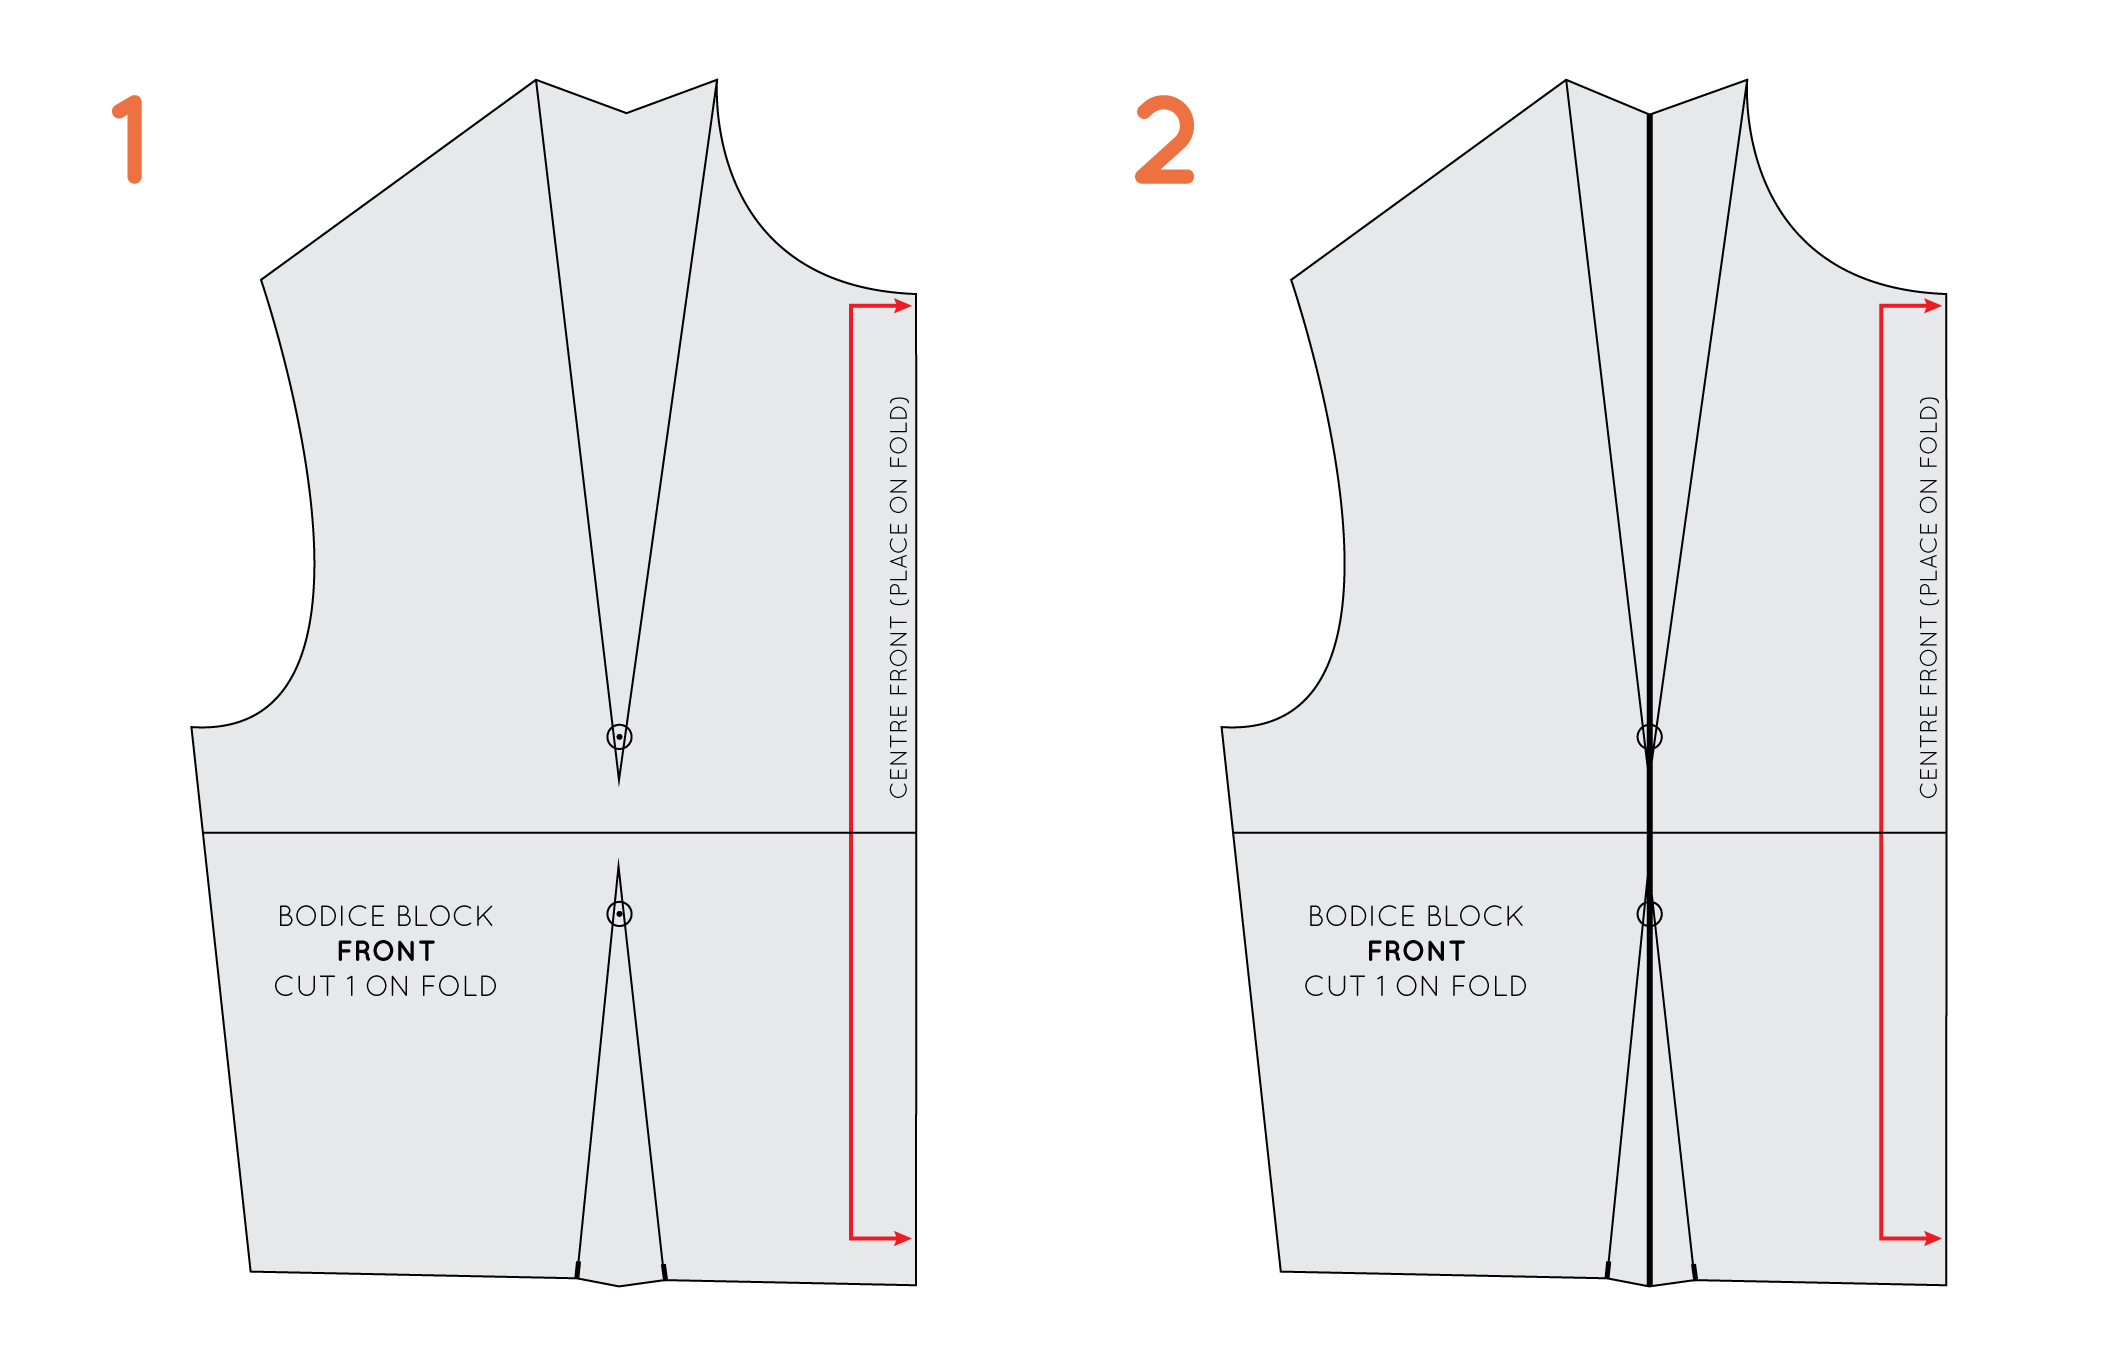
1. Trace a copy of the pattern you will be adjusting.

2. Draw a straight line through the centre of both darts. 

how_to_draft_princess_panels_4

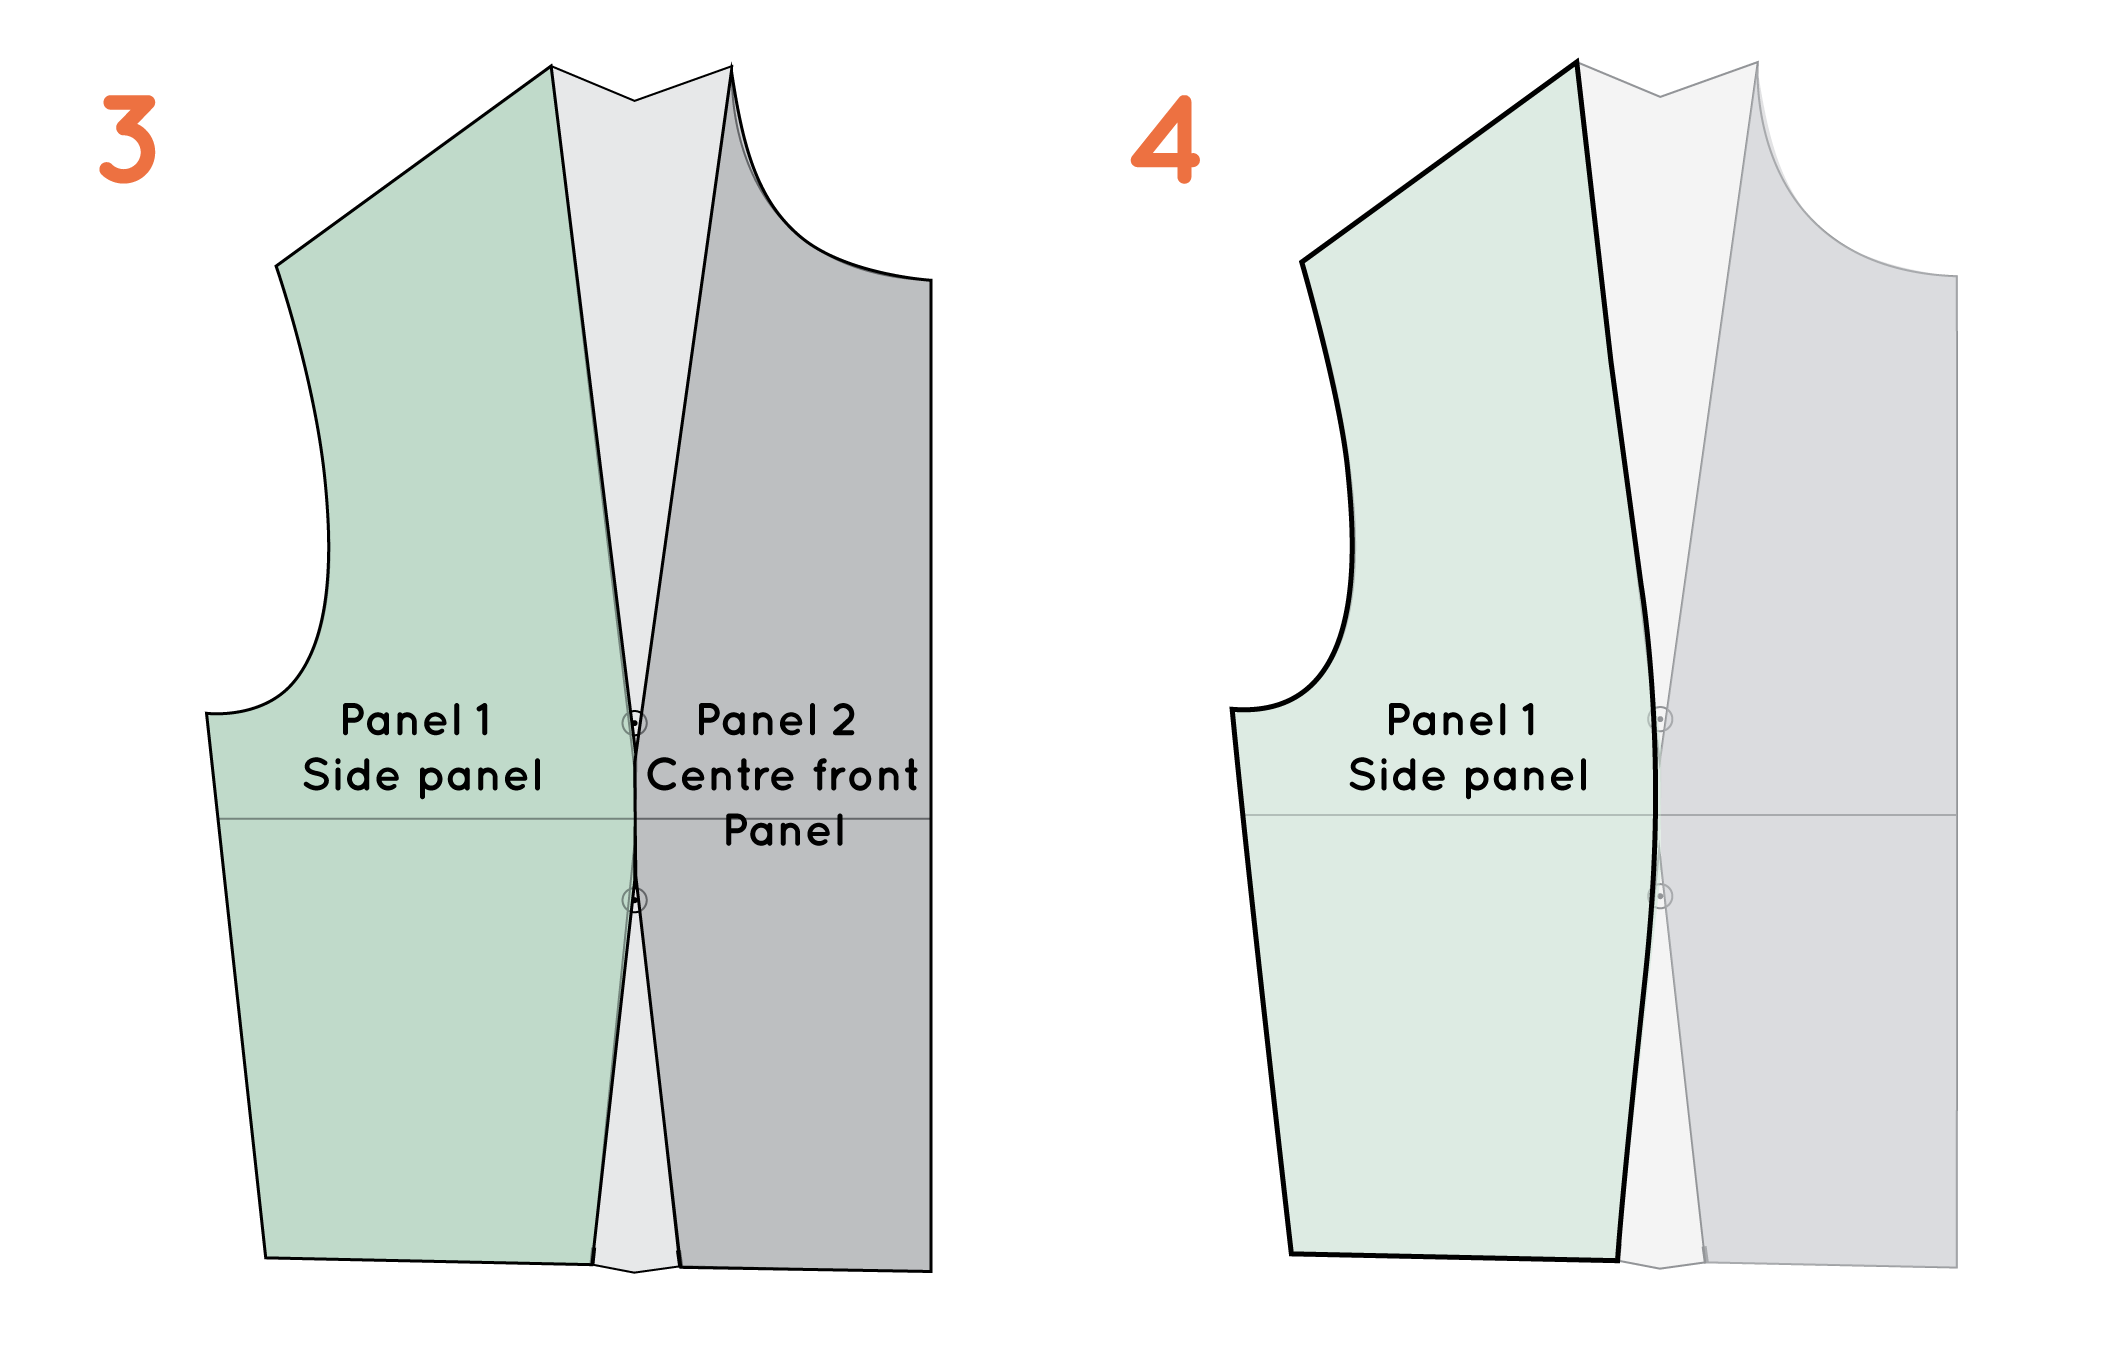
3. You will be separating the pattern into two pieces, and eliminating the darts all together - creating a 'side panel' and 'centre front panel' that are sewn together to create the shaping over the bust.

4. Take a piece of pattern paper and trace the side panel piece. To avoid pointy breasts (and to make it easier to sew), you will need to change the rigid angles of the dart arms into a smooth curve along the panel line.

how_to_draft_princess_panels_5

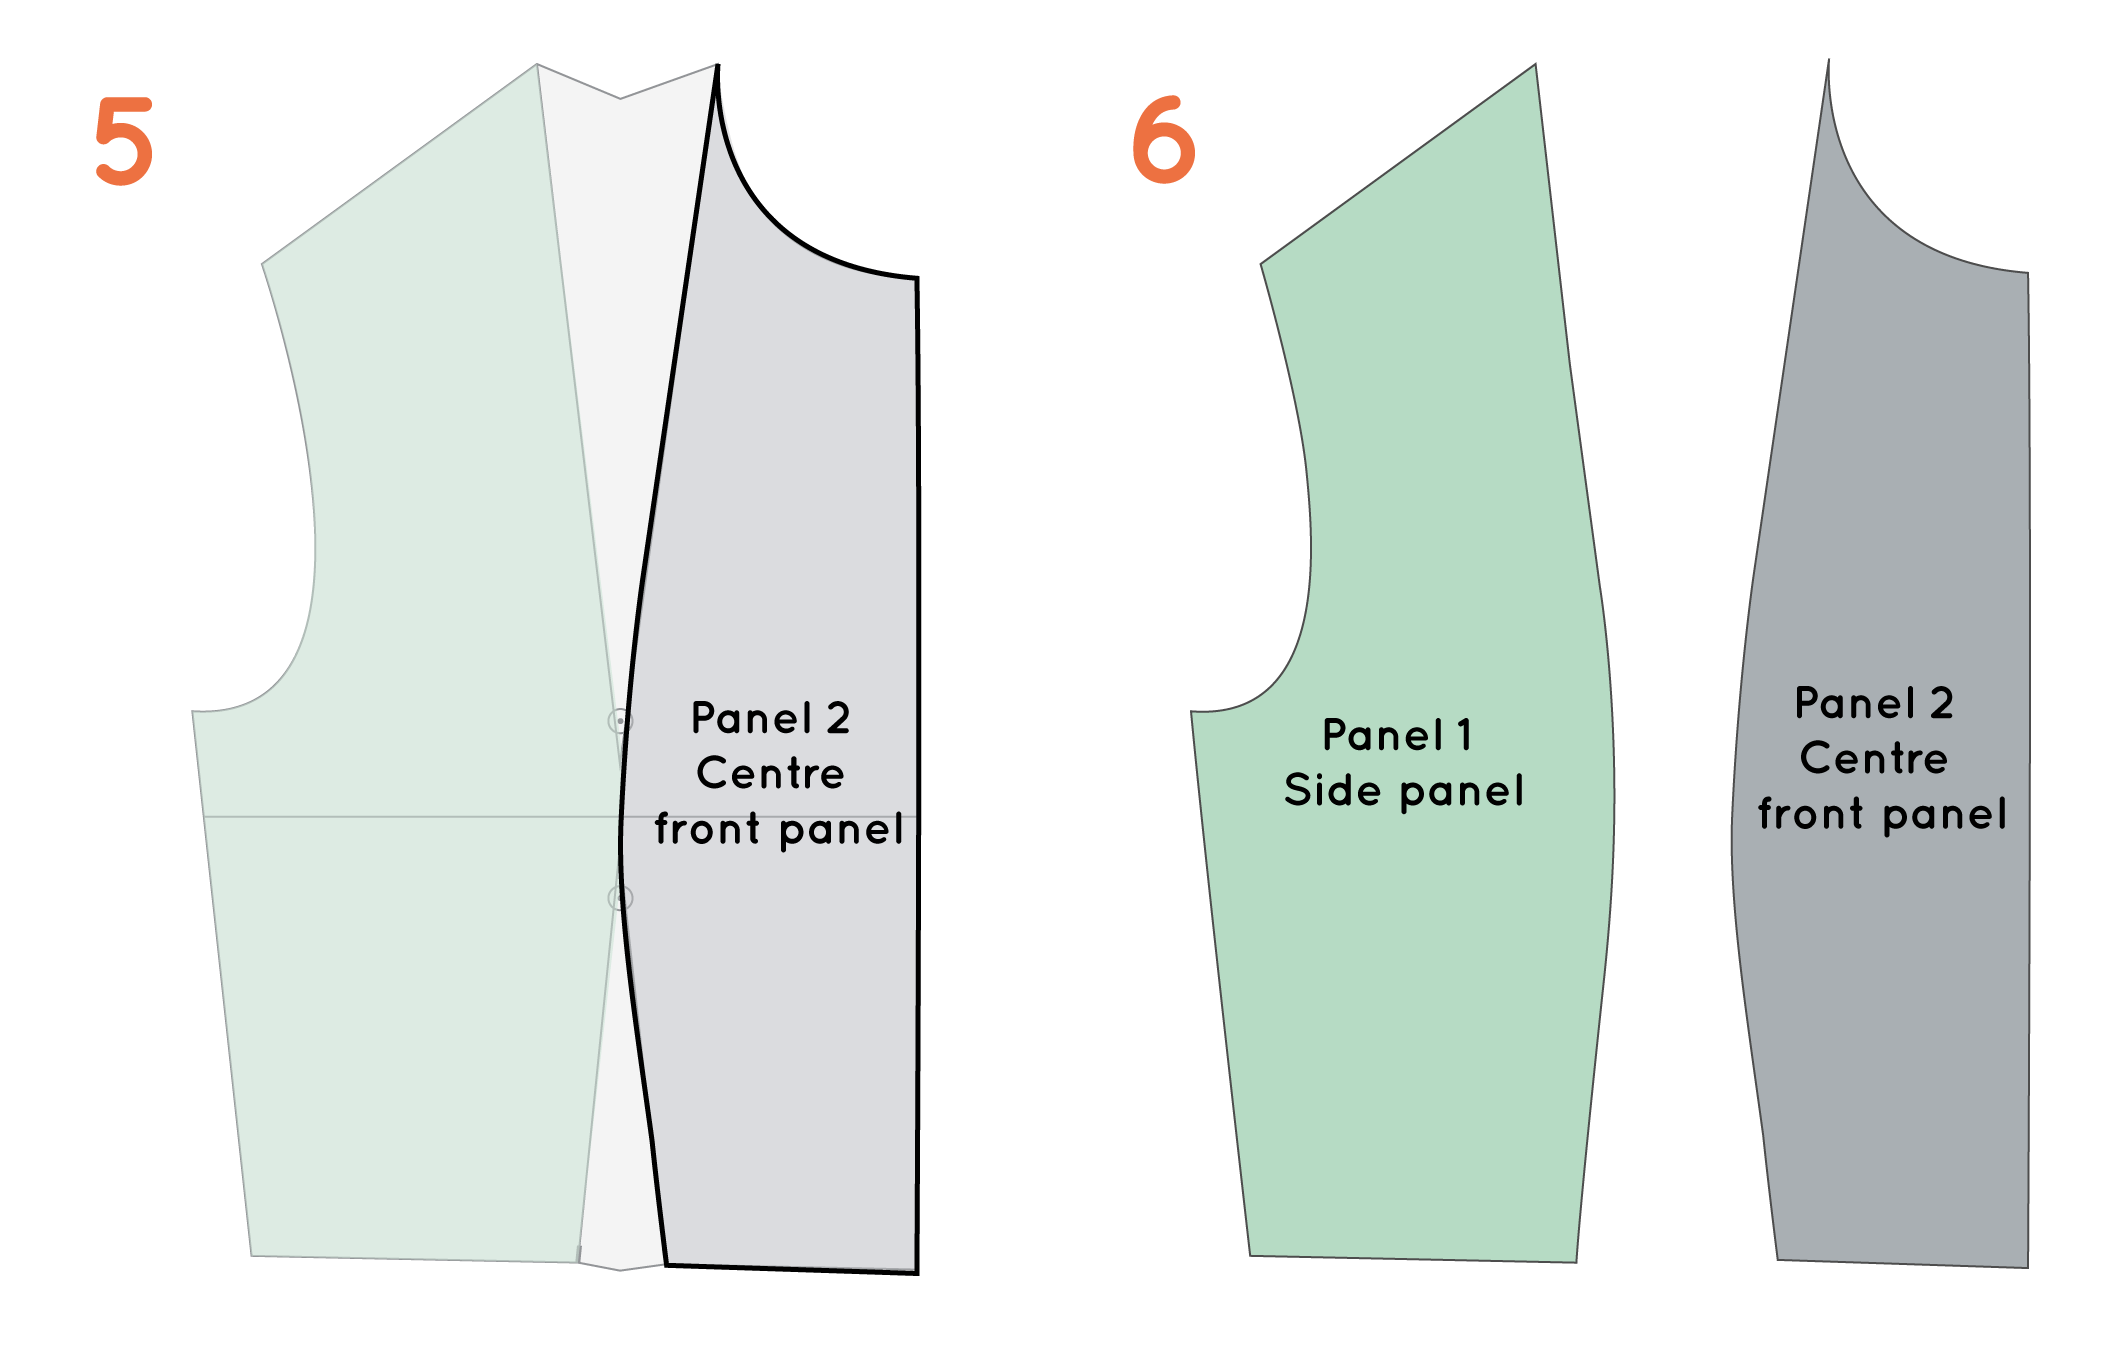
5. On another piece of paper, trace the second panel (centre front panel) once again smoothing out the angles of the dart arms to create a smooth curve. 

6. You now have two separate pattern pieces and no darts!

The next steps are to check that the curves on each piece are the same length (I'll do a post about how to do this next week), add seam allowance and pattern markings (you will need a grainline, cutting instructions, and notches along the curve). 

OPTION #2 : DRAFTING PRINCESS PANELS FROM armhole

If you would prefer to have the panel lines coming from the armhole of the bodice, you will need to start with a dart in the armhole. If your dart is located elsewhere (for example, in the shoulder like it was in the previous example) you will need to start by moving the dart to the armhole. 

how_to_draft_princess_panels_6

1. Trace a copy of the pattern you will be adjusting. I will be using the basic bodice in the example (with darts transferred to armhole), but you can create princess panels on any fitted top pattern with waist darts. 

2. Draw straight lines through the centre of each dart. These lines will intersect at the bust point. 

how_to_draft_princess_panels_7

3. Just like in the previous example, you will be separating the pattern into two pieces, and eliminating the darts all together - creating a 'side panel' and 'centre front panel.'


how_to_draft_princess_panels_8

4. Take a piece of pattern paper and trace the side panel piece. Draw a line that follows the lower dart arm at the armhole, and gradually curves as it approaches the dart point (start curving the line a couple of centimetres back from the dart point). Continue the curved line so that it meets the outside arm of the waist dart and continue tracing along dart arm to the waist.

5. You will see that this new line has removed the sharp corner at the bust point.

how_to_draft_princess_panels_9

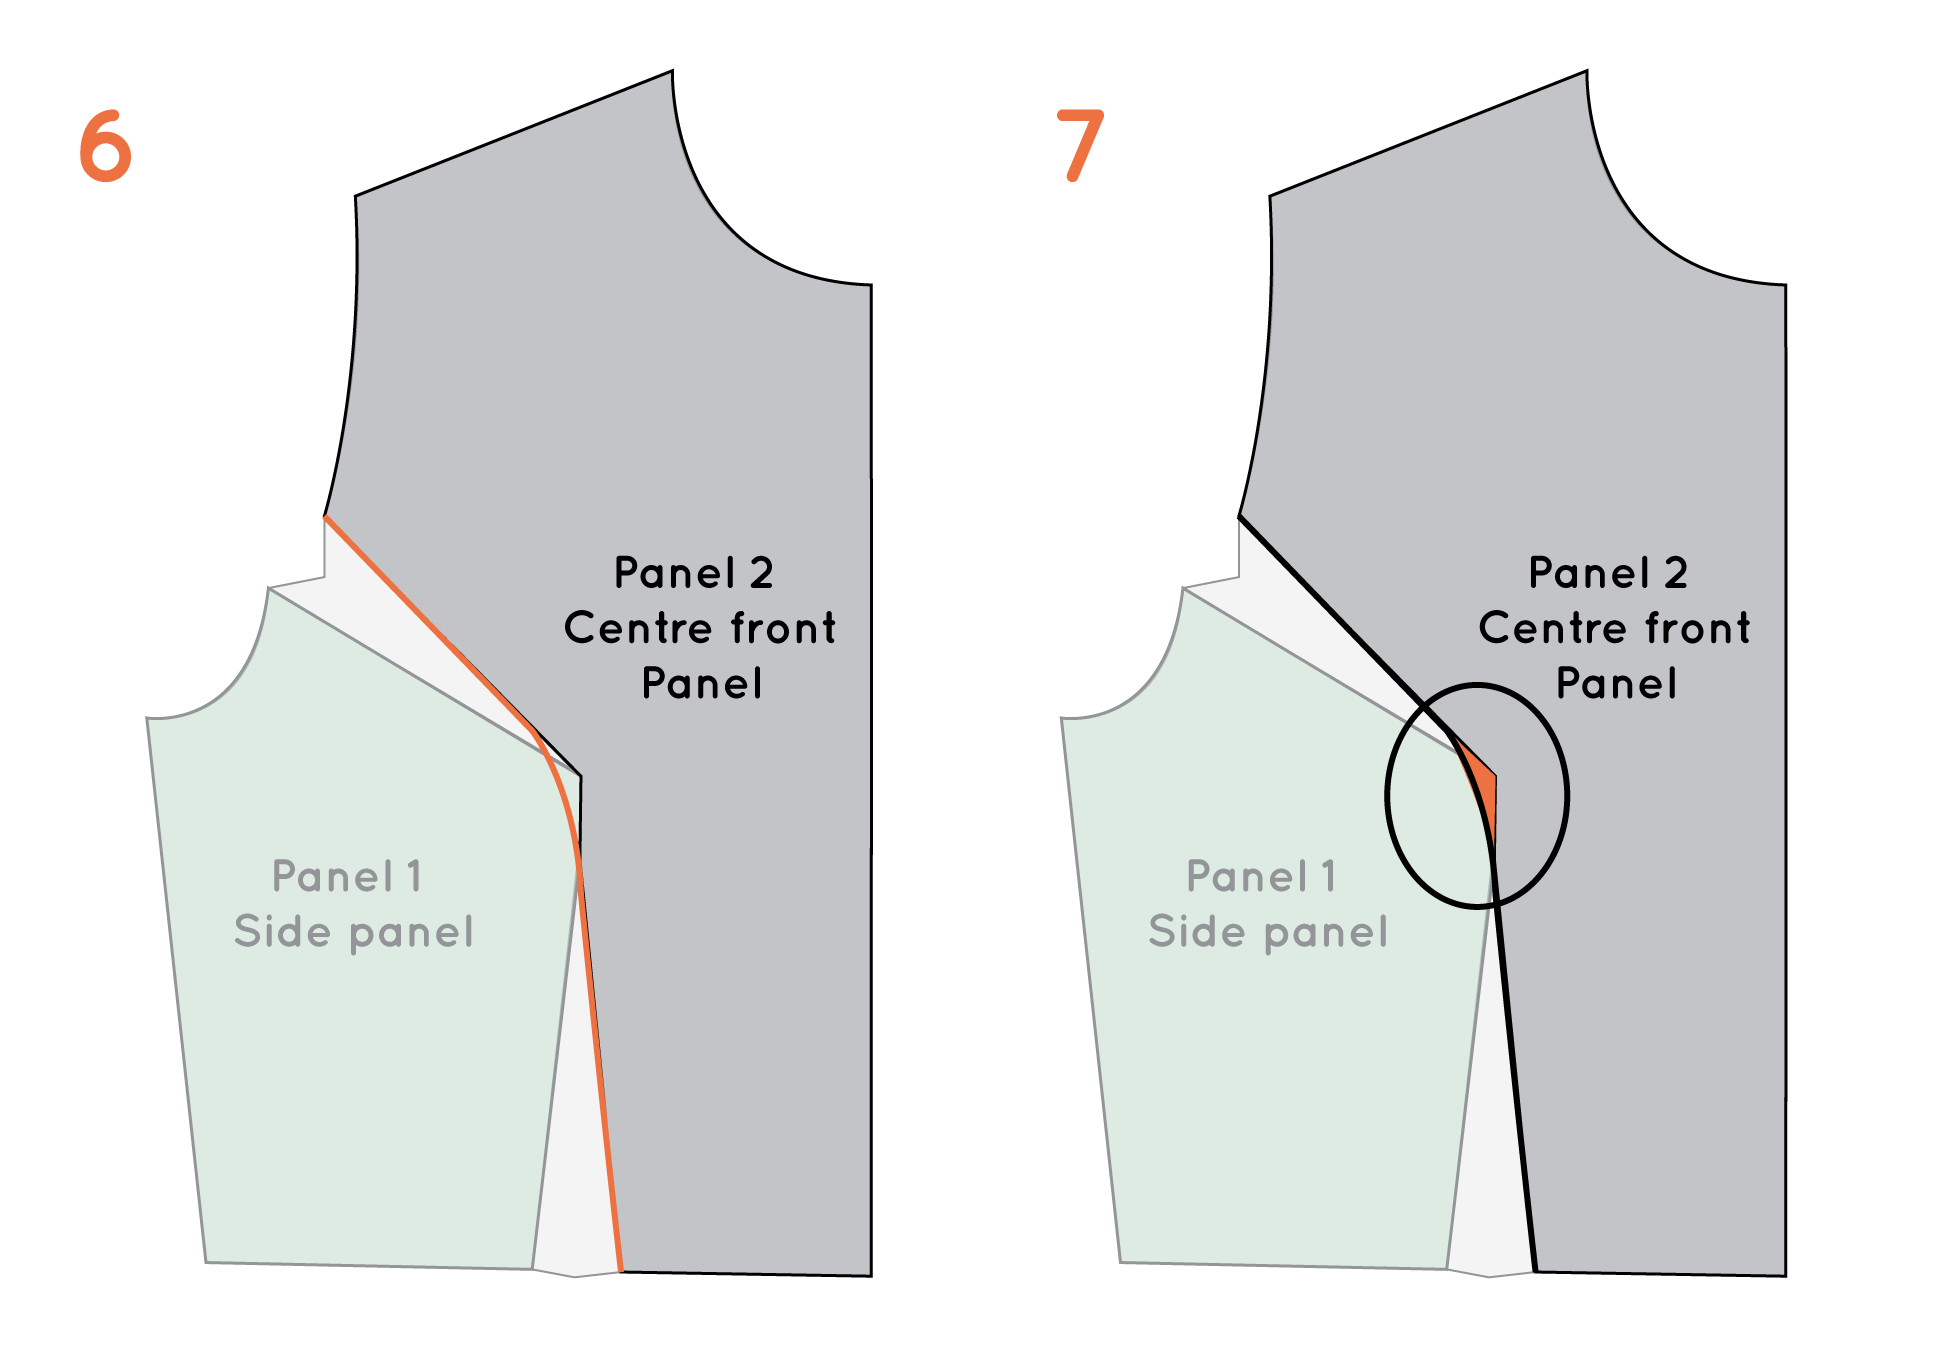
6. Take another piece of pattern paper and trace the centre front panel, once again creating a smooth curve to replace the dart arms. This time the curve will be concave, rather than the convex curve of the side front panel. 

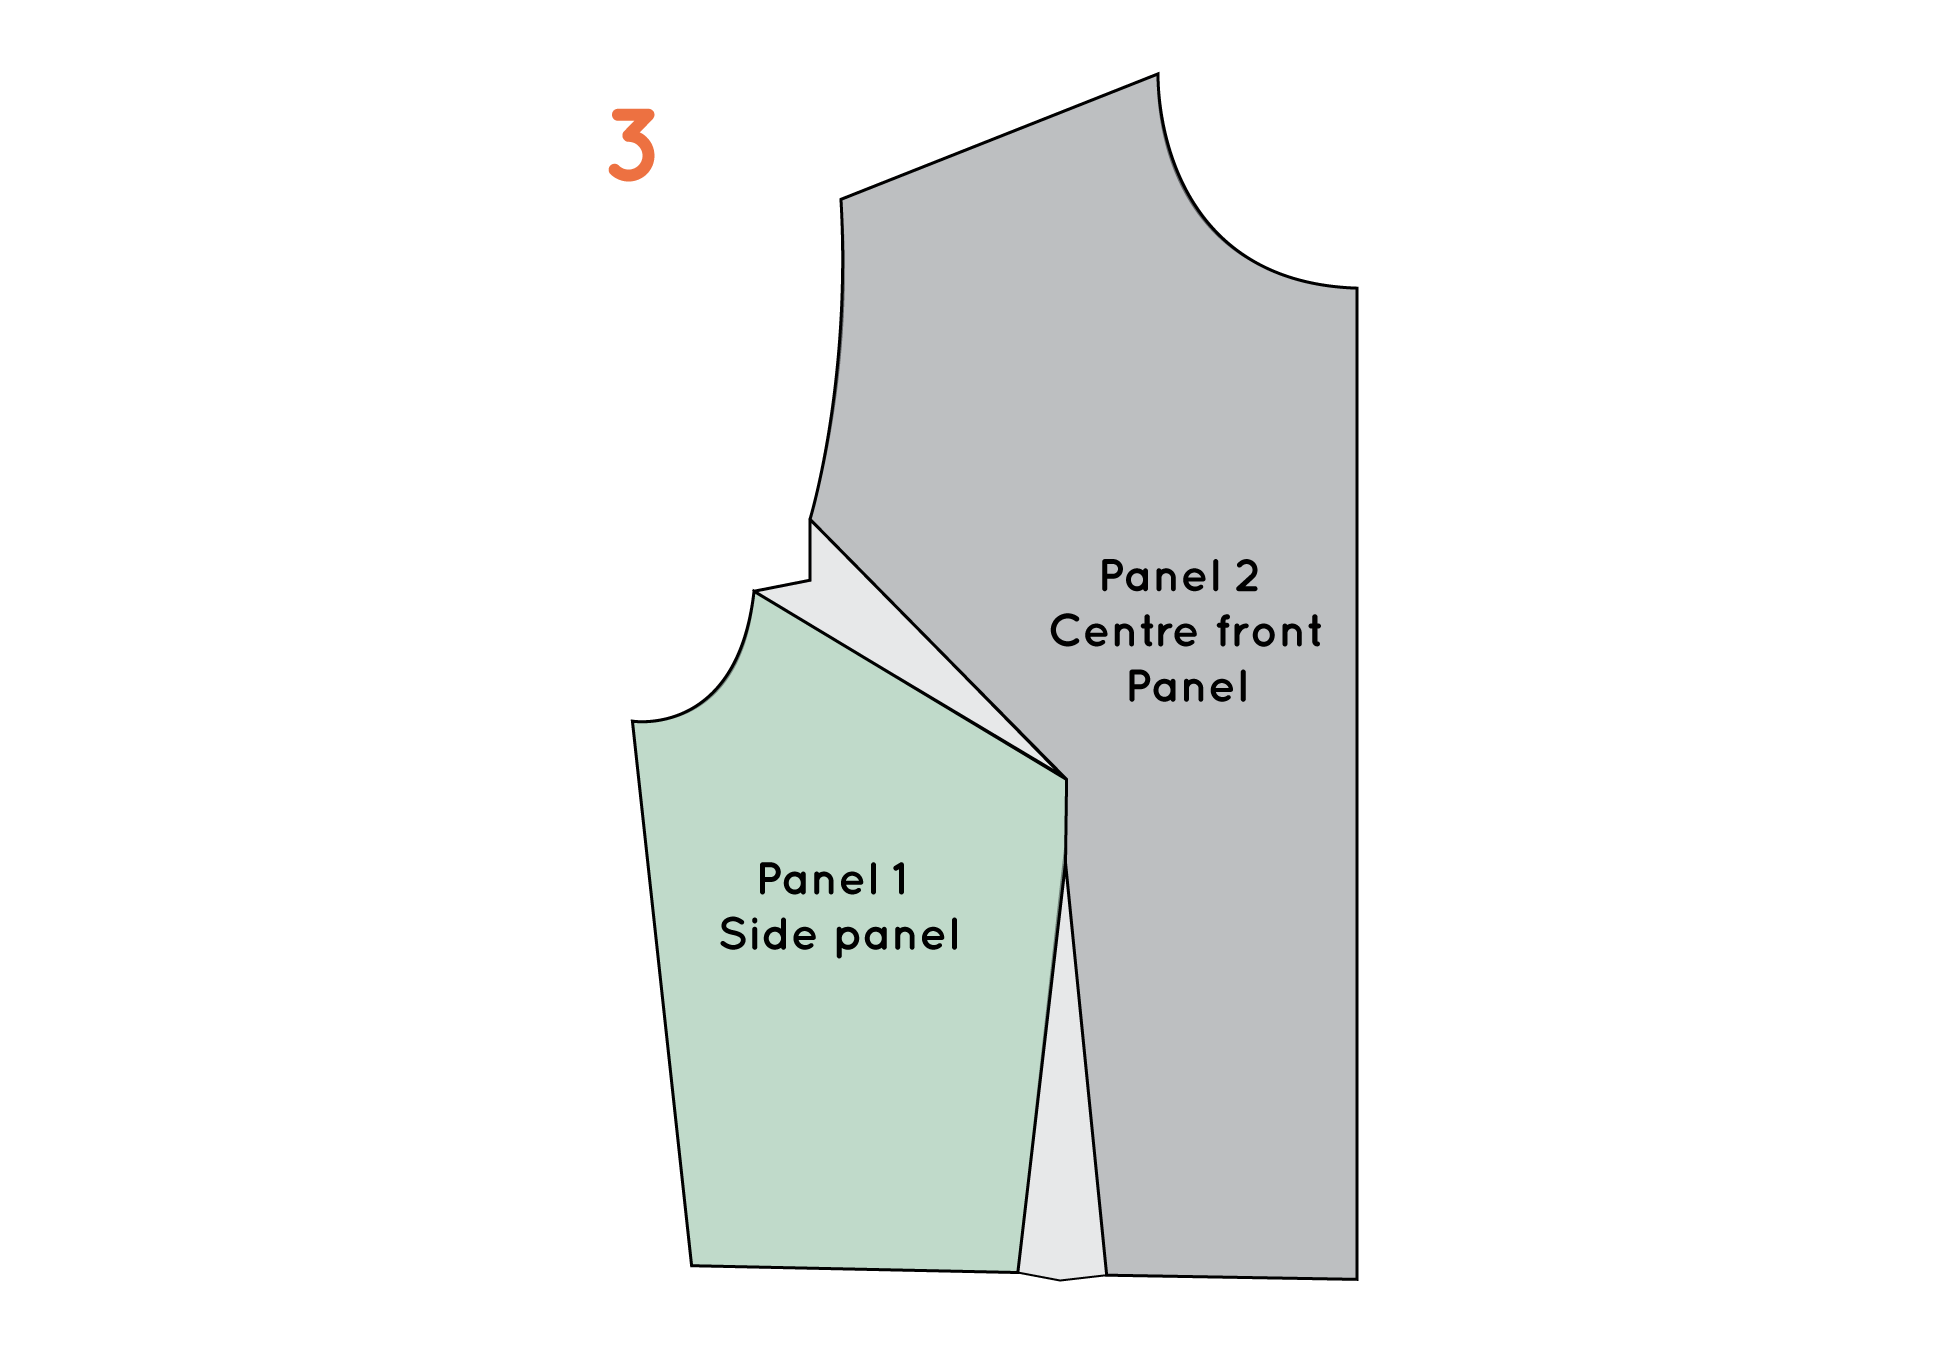
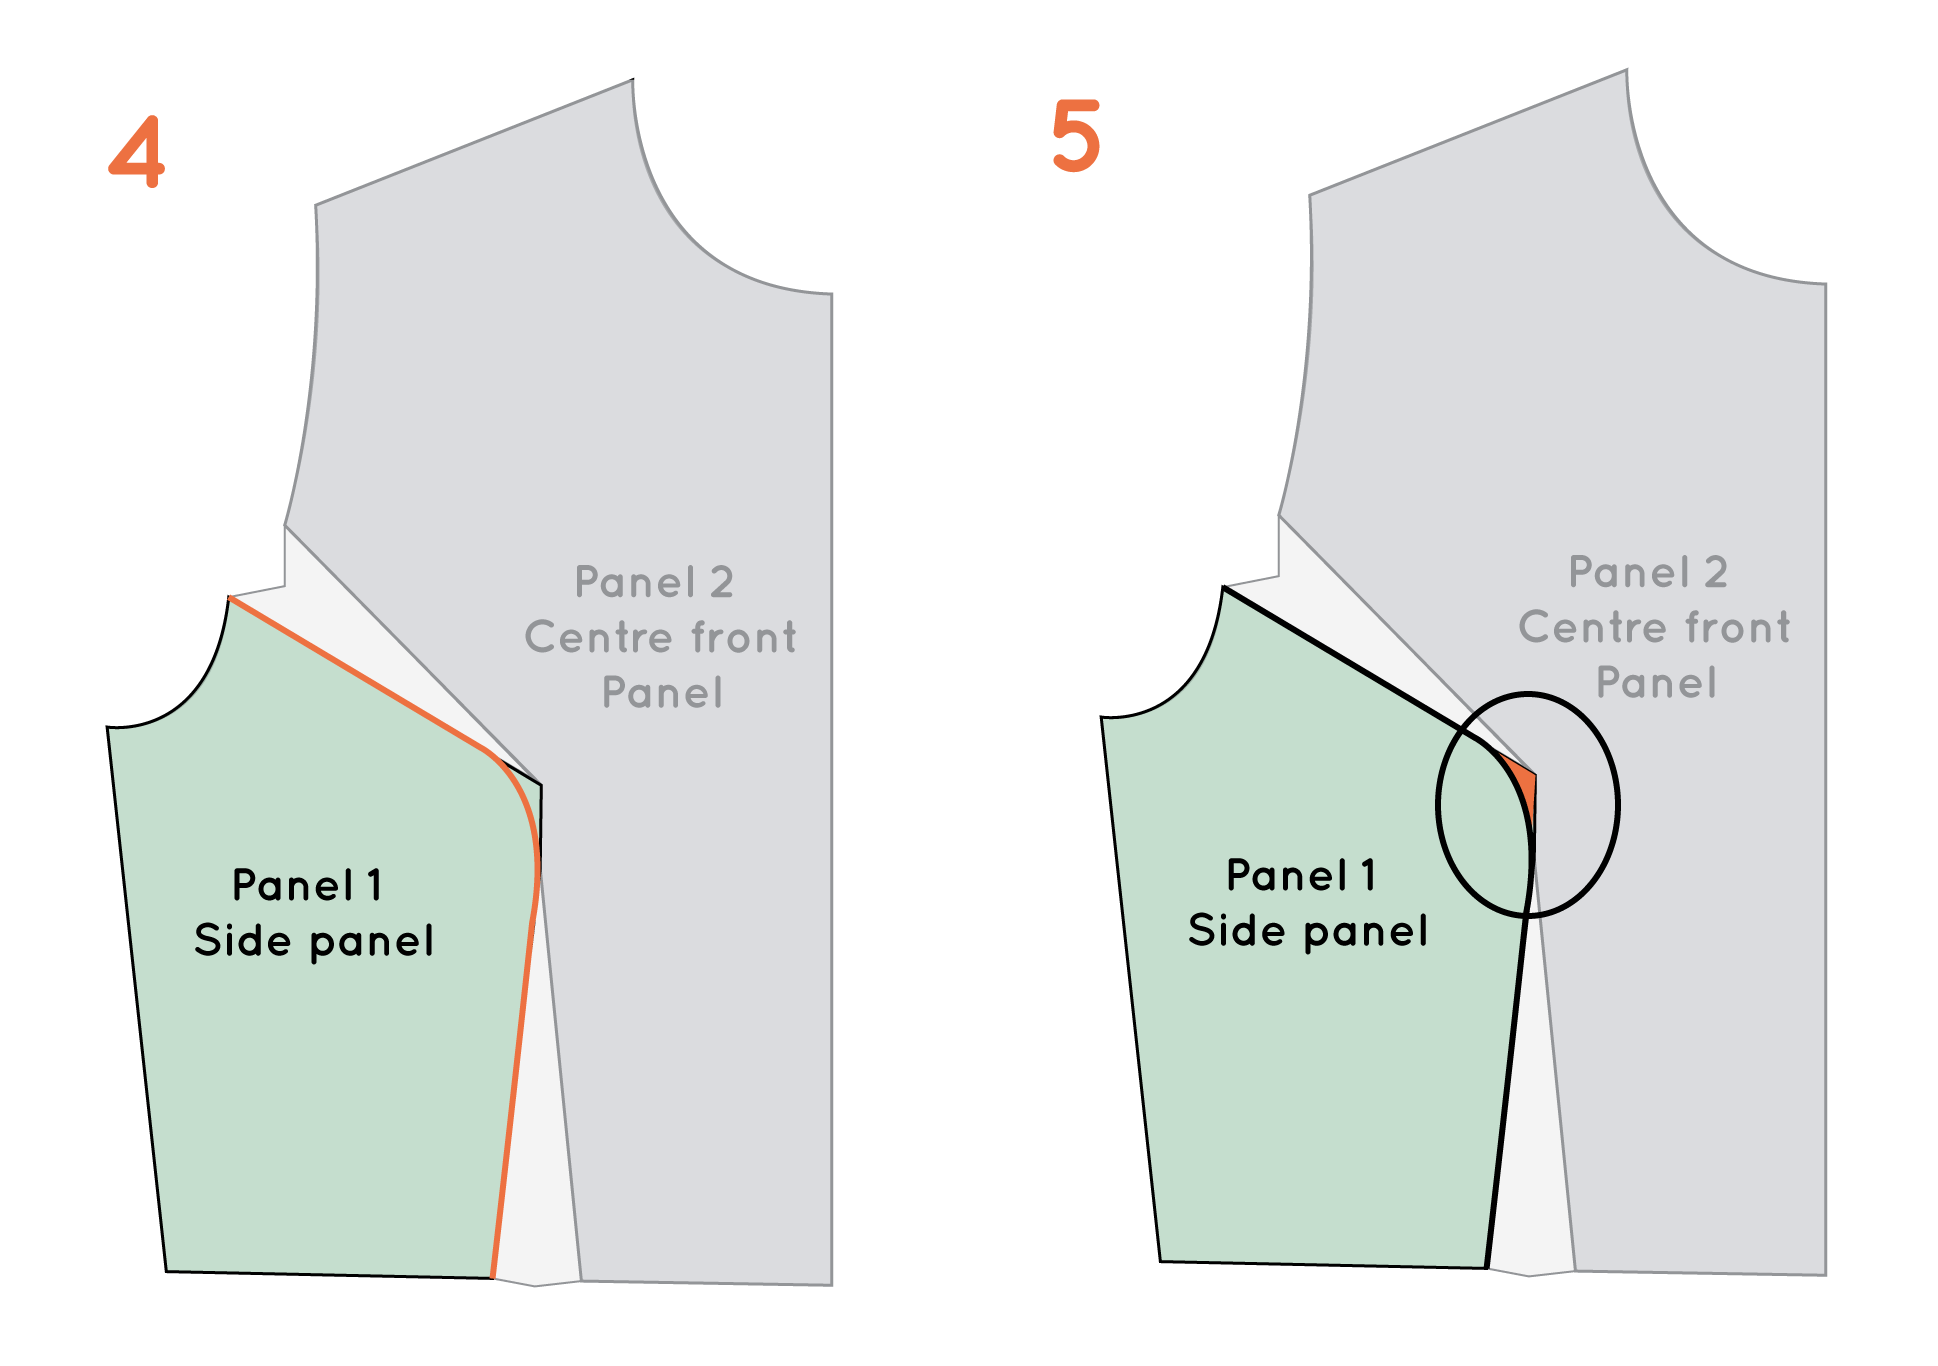
7. As you can see, to make this curve, a small amount will need to be added at the point of the curve. This will even out the amount that was removed from the side front panel (this small triangle has been relocated from one side to the other).

how_to_draft_princess_panels_10

8. To complete the patterns, you will need to check that the curved seams fit together. You will also need to add notches to the curve (which you can find in the same tutorial) to help guide you when sewing the curved seams together (as curves like this can be very tricky to sew and notches can be your saviour!) and add seam allowance (I'd suggest 1cm or 12mm).

And that's it, you have princess panels!


You may also like:

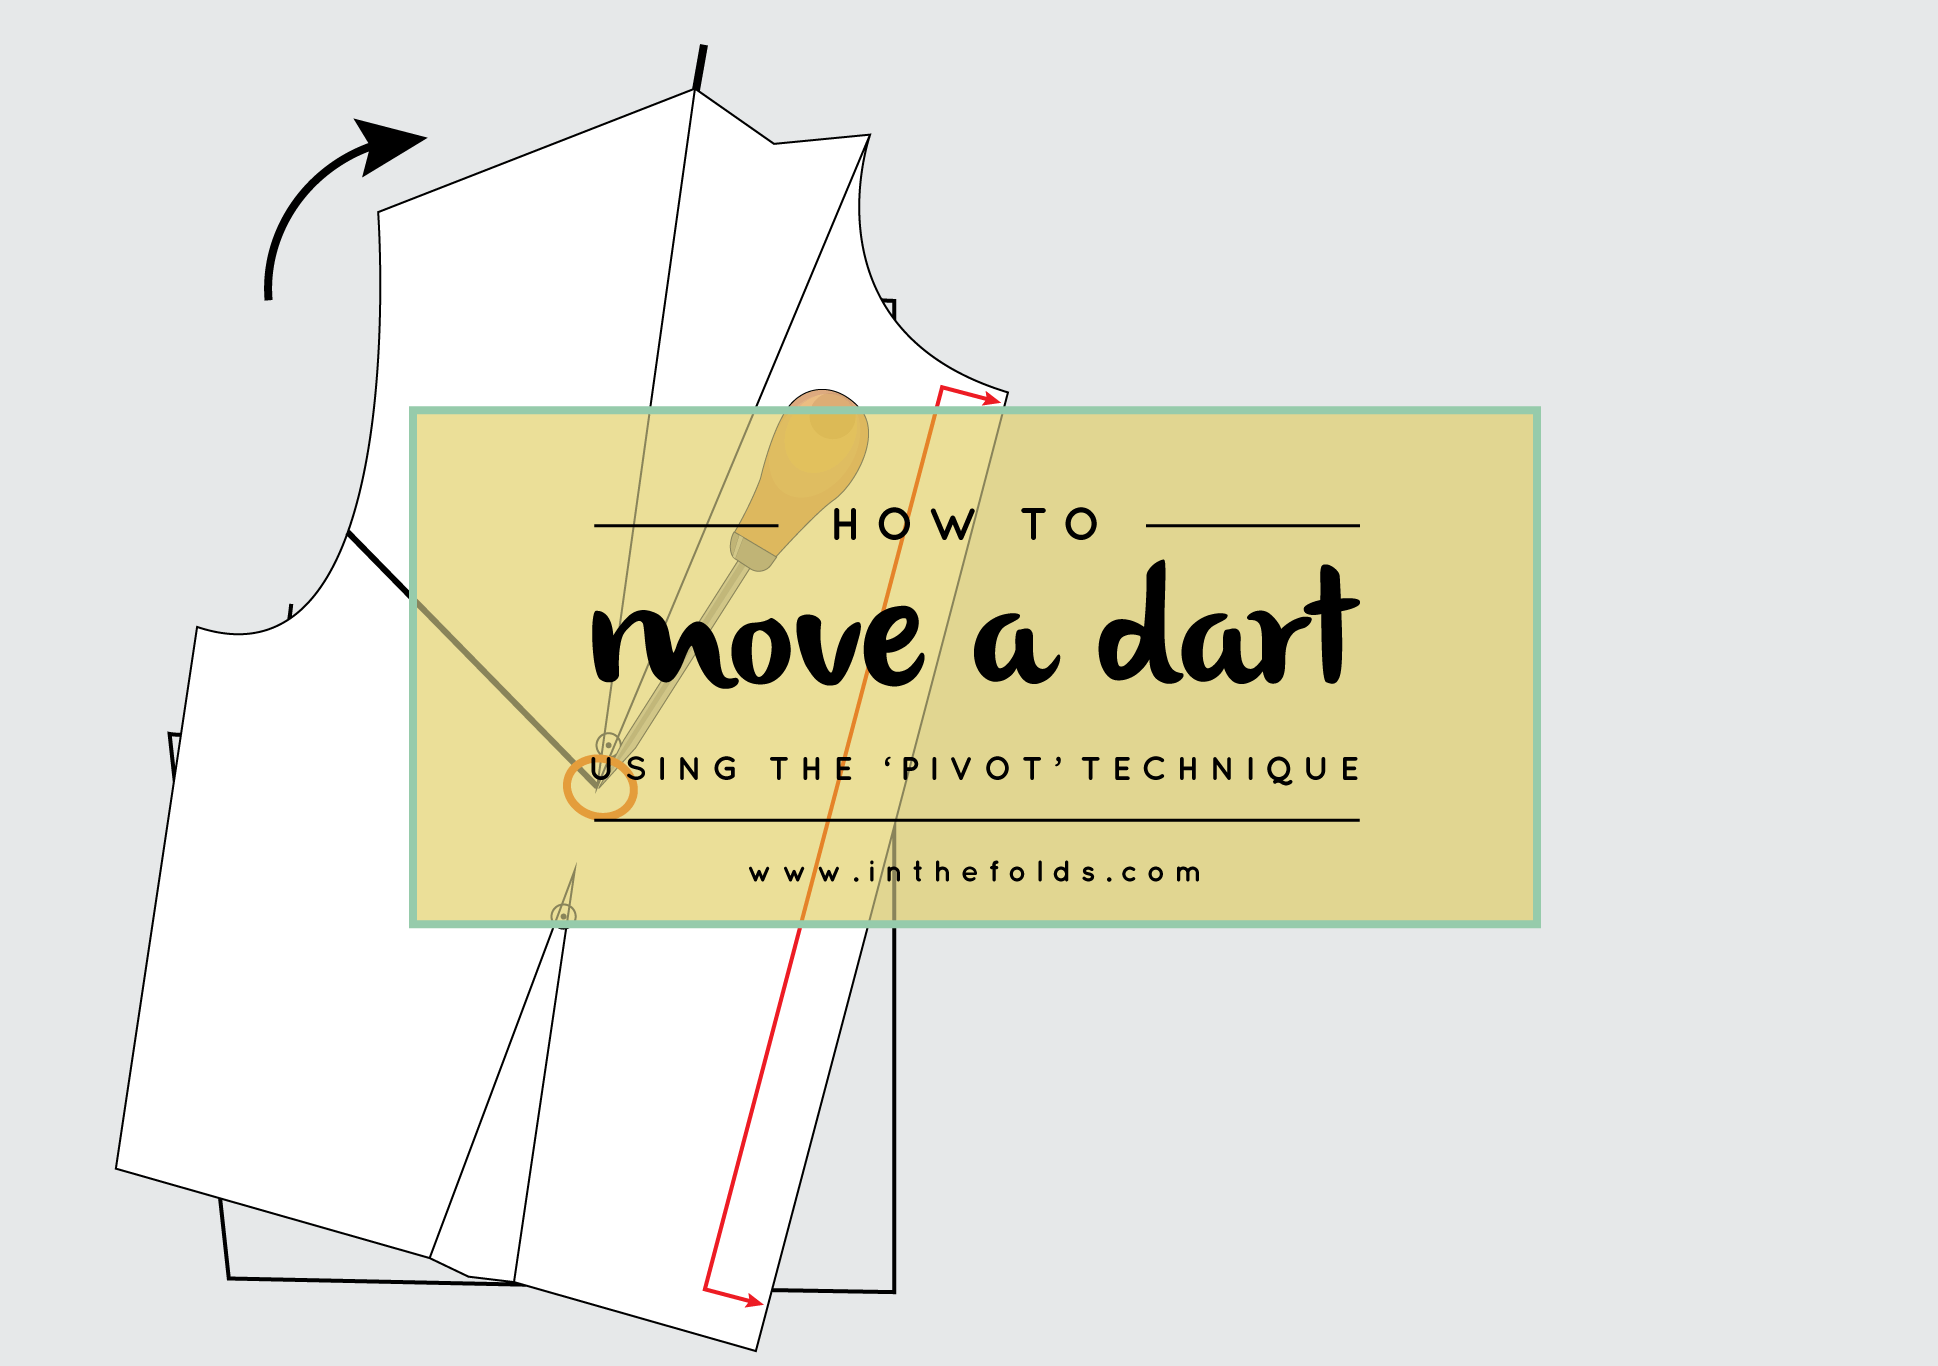
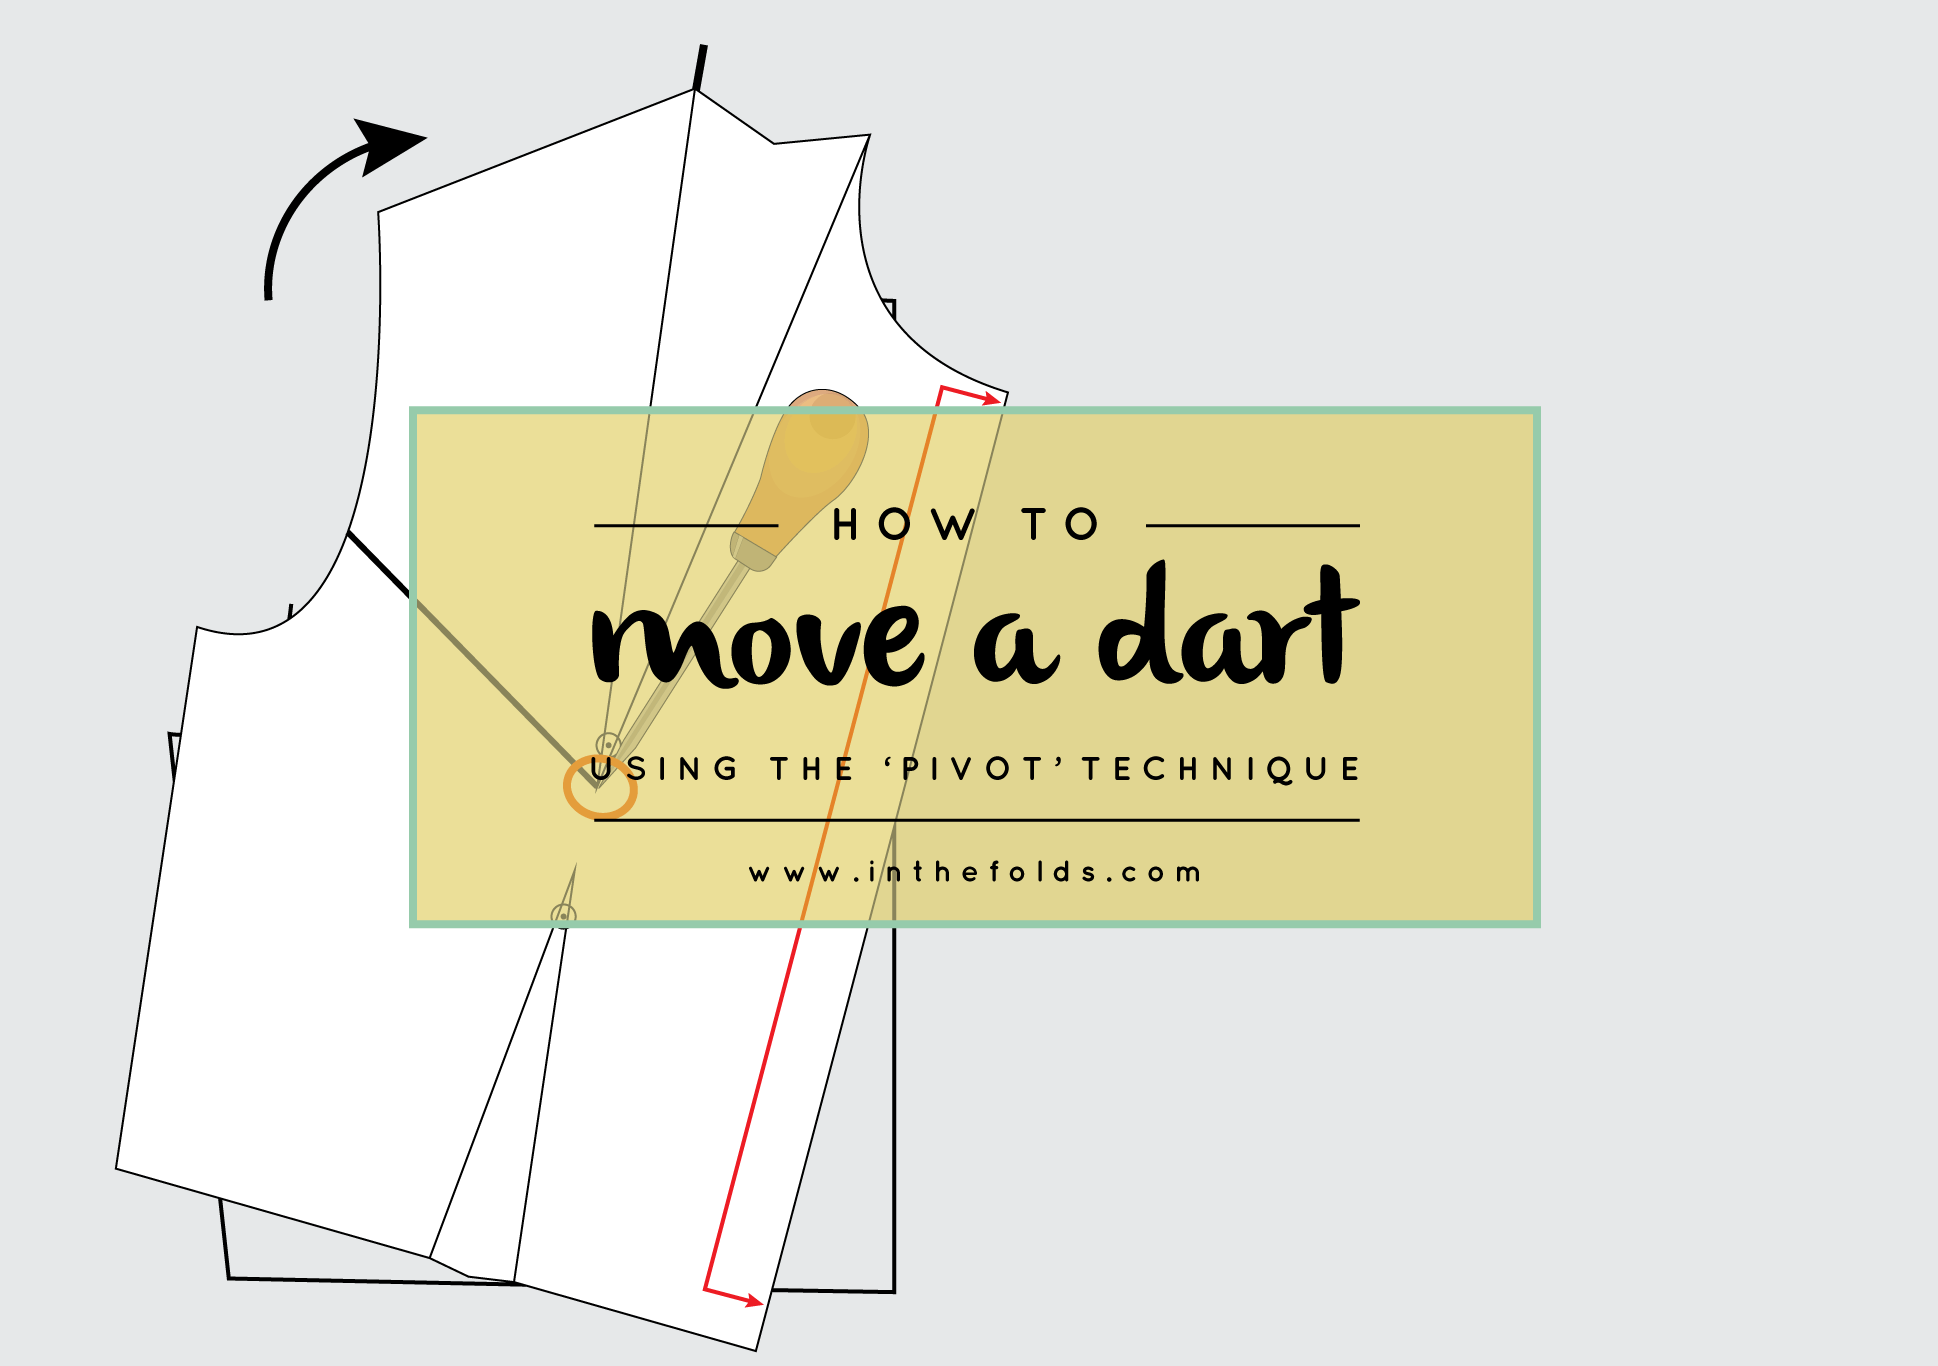
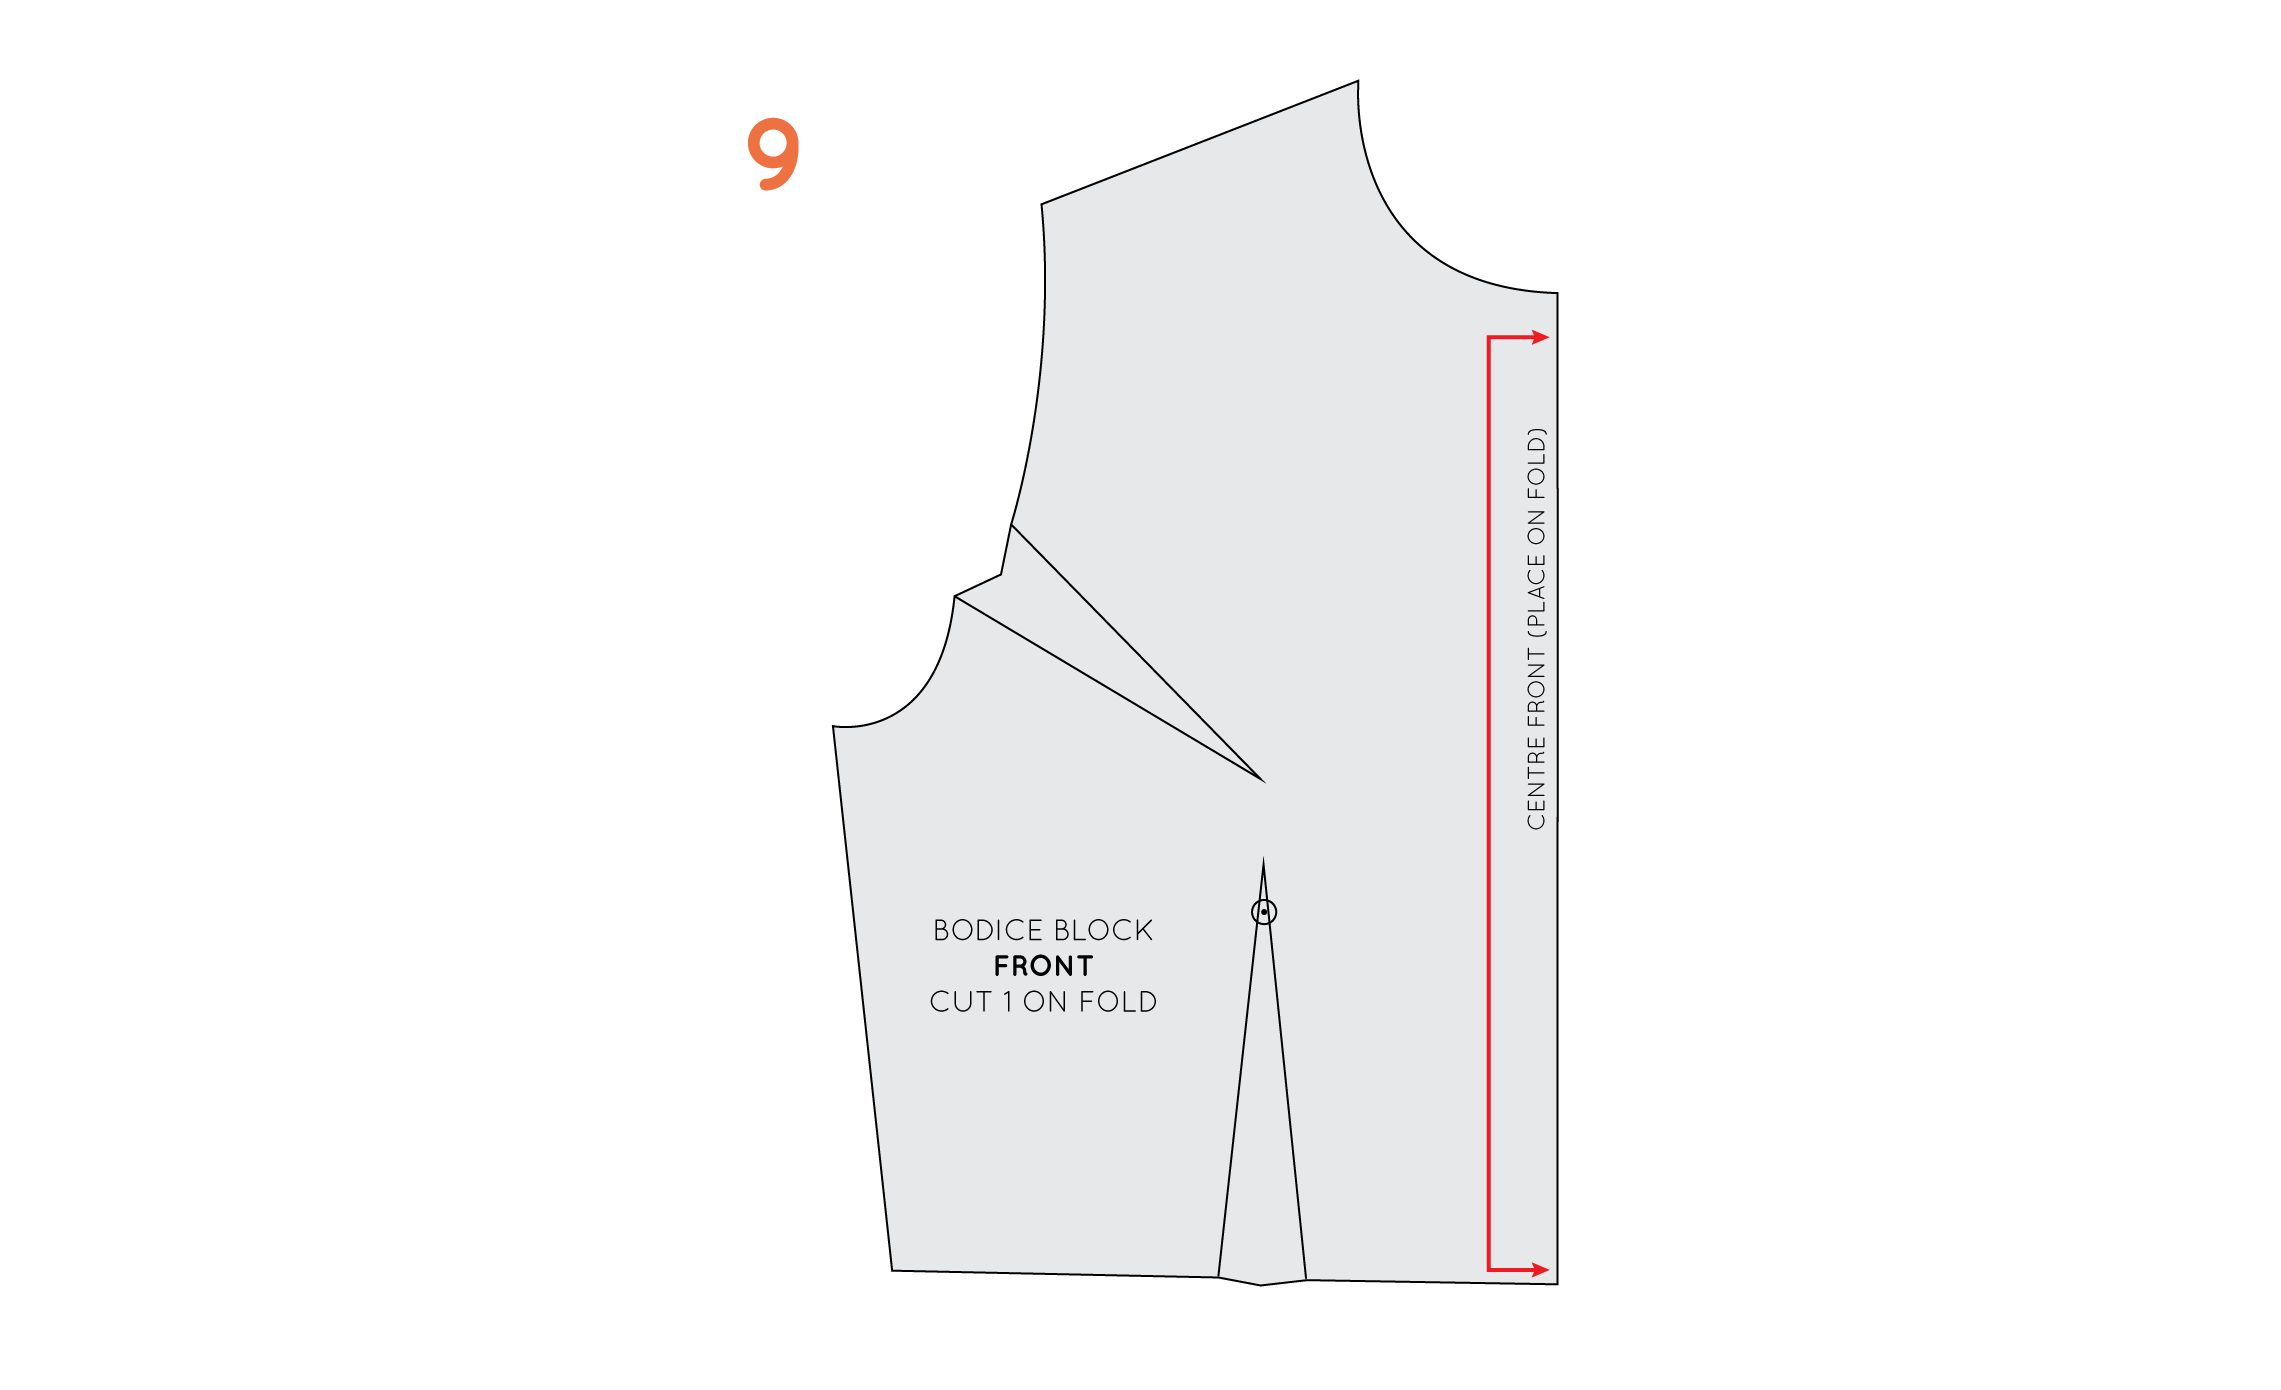
How to : Move a dart (using the 'Pivot' technique)

inthefolds_move_a_dart_1

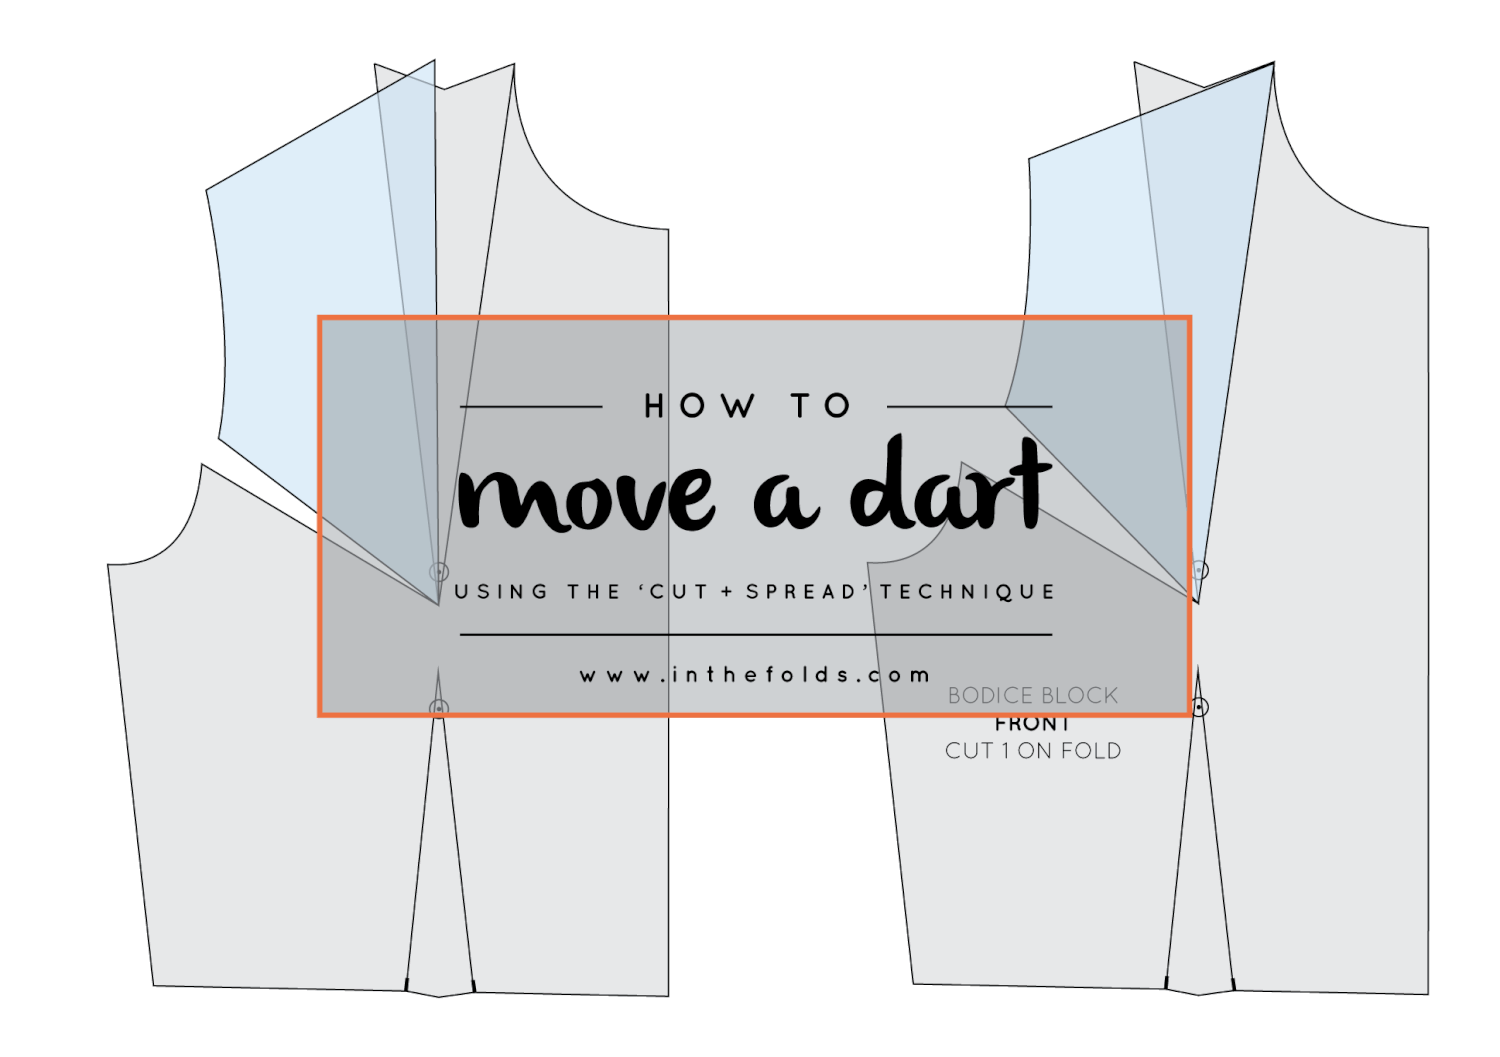
Last week I showed you how to relocate a dart using the 'Cut and Spread Technique.' As the title suggests, this technique involves cutting your pattern piece to move the dart (and can also be used to add fullness to a pattern).

If you would prefer not to cut into your pattern (because it is a master copy, or you want to just experiment before finalising anything) it is a good idea to use the 'pivot' technique to move a dart. The outcome is exactly the same, it's just a different way of achieving it. I use both techniques in practice and it totally depends on what I am doing as to which one I choose to use. 

Tools

To perform this techniques you will need your original pattern (the basic bodice, for example), a seperate piece of pattern paper, a stiletto (also known as an awl) and a pencil.

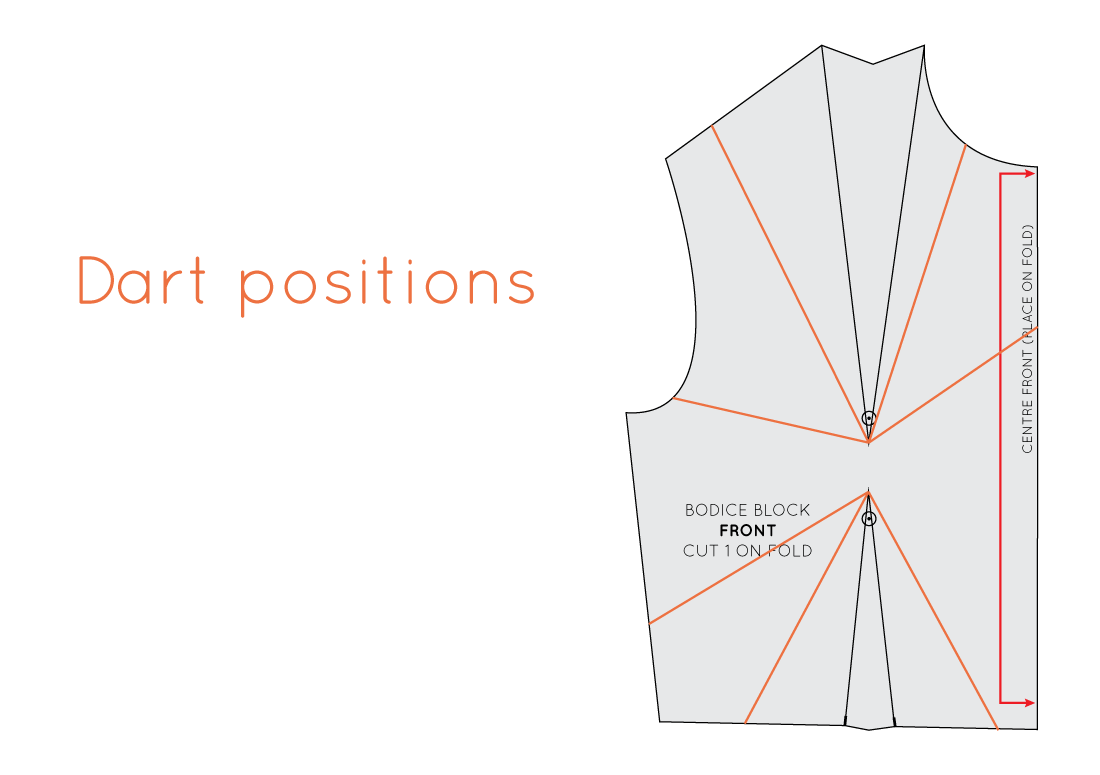
Choose the new dart position

inthefolds_move_a_dart_2

Have a think about where you would like to move your dart/s to. In the image above you can see some suggestions about where you could move the darts to on the front basic bodice. 

For the point of the exercise I have chosen to move the shoulder dart to the armhole but you can use this process to move either dart anywhere. 

Mark the new dart position

inthefolds_move_a_dart_3

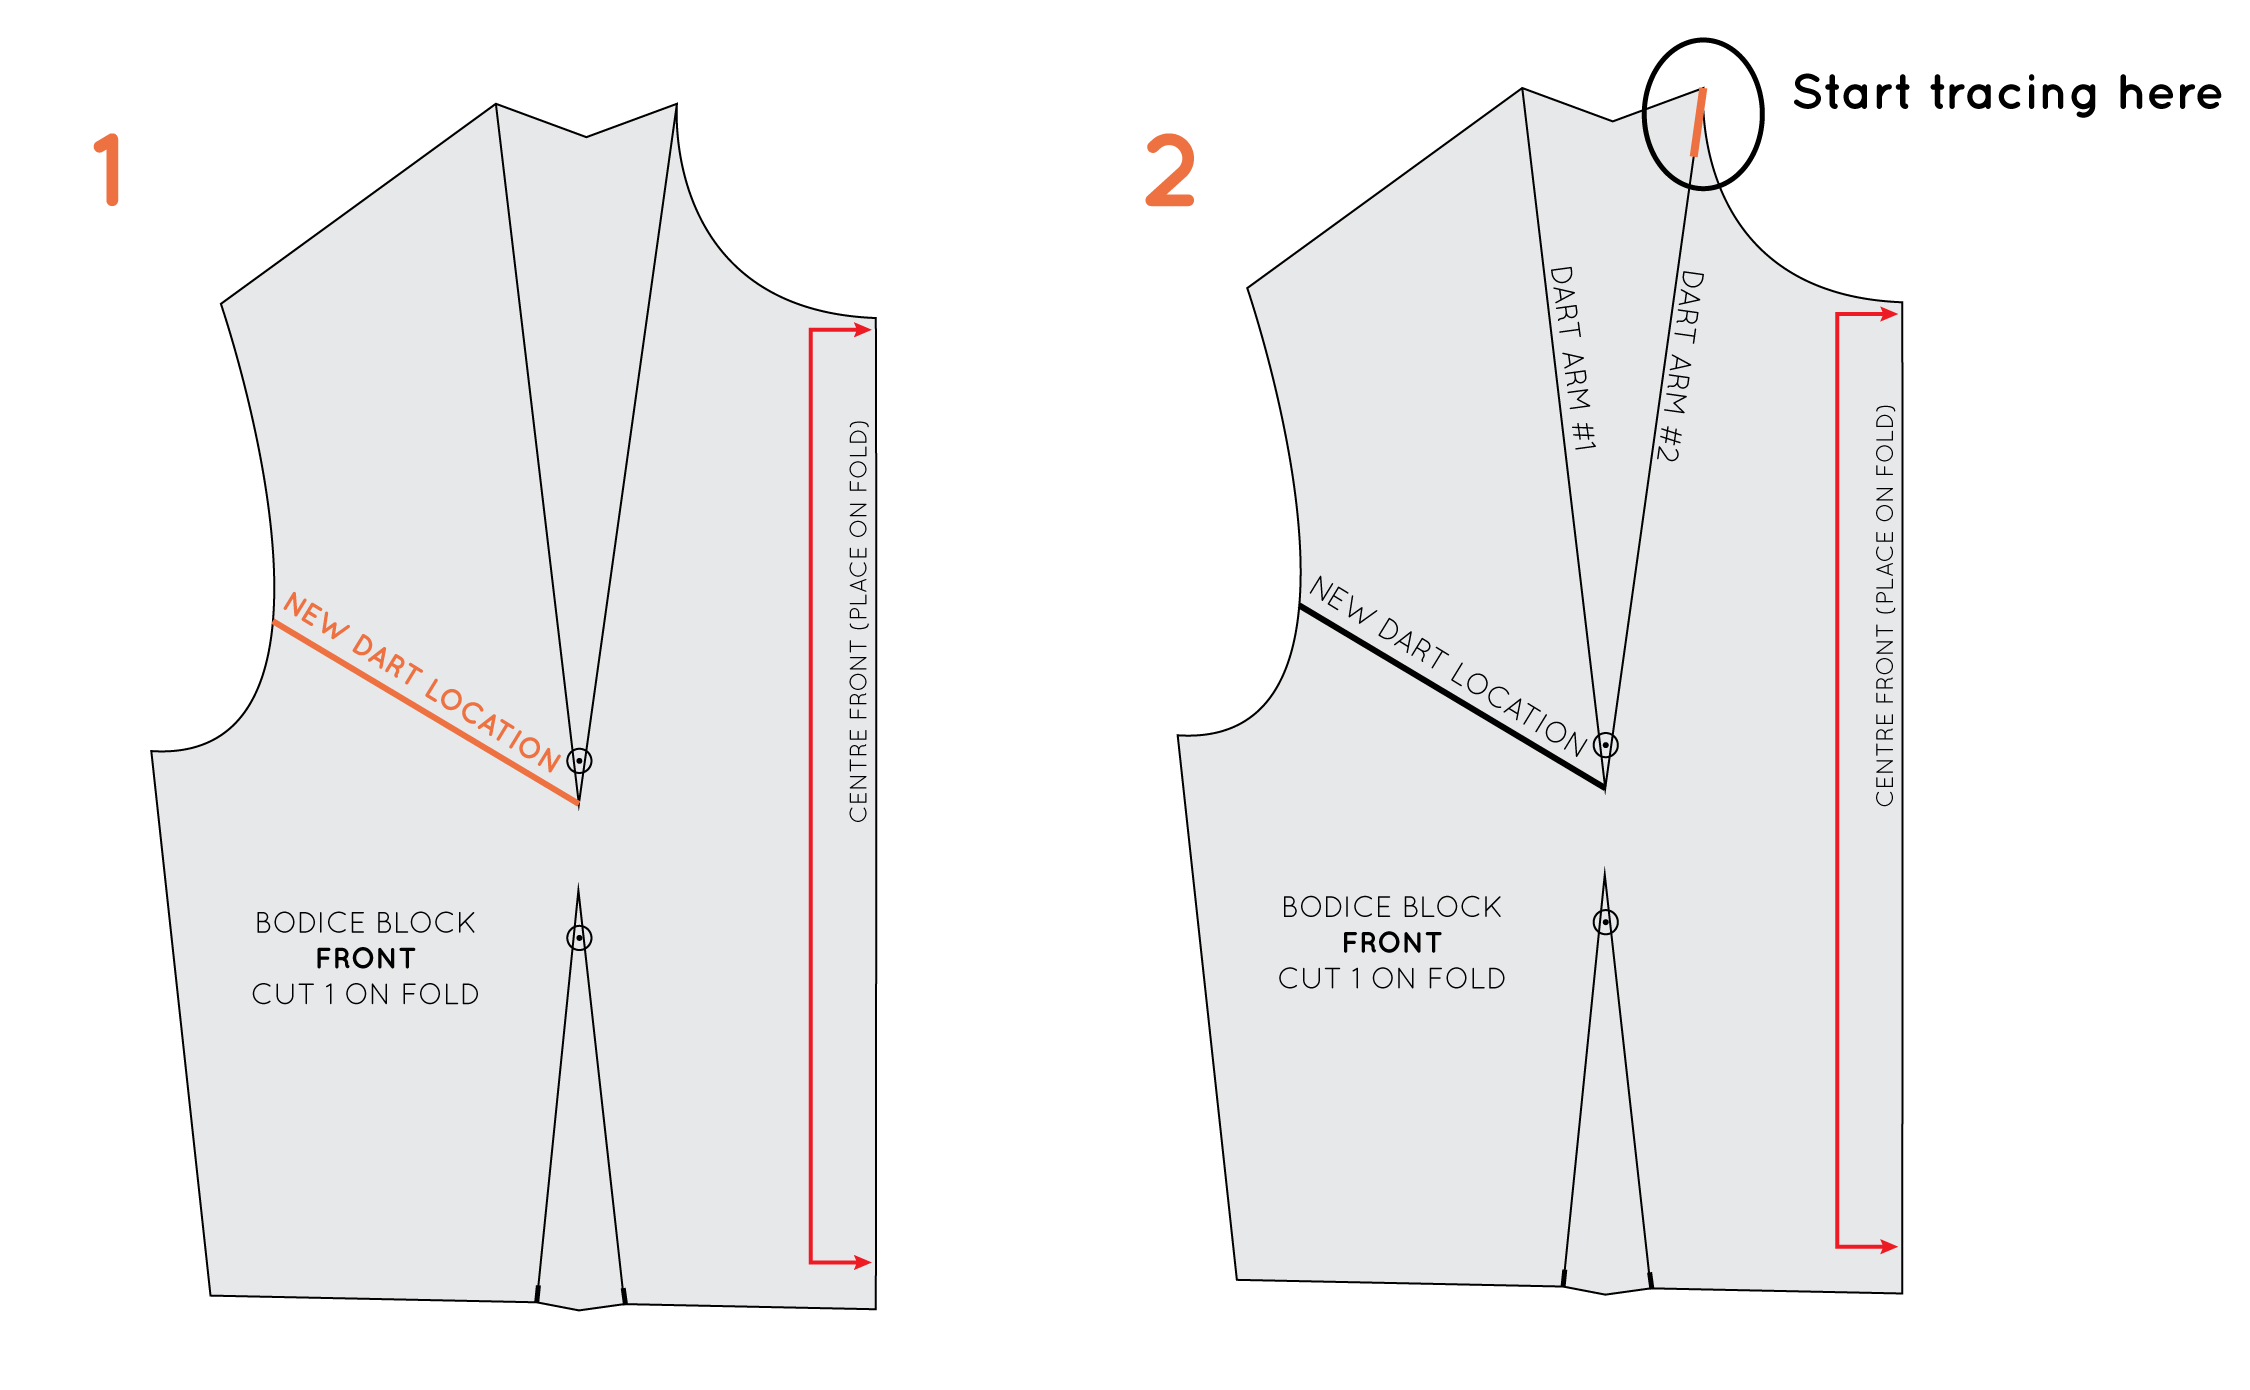
1. Draw a line where you would like your new dart to be placed. The dart point will need to be at the same point as the original dart.

2. Place the pattern onto a piece of pattern paper and hold in place with a pattern weight. Focus on the dart you are moving (which in this case is the shoulder dart) and the dart arm closest to the centre front - this is the point where you will start tracing around the pattern. I have labeled the dart arms 'Dart Arm #1' and 'Dart Arm #2' to help with the explanation. 

Trace the original pattern

inthefolds_move_a_dart_4

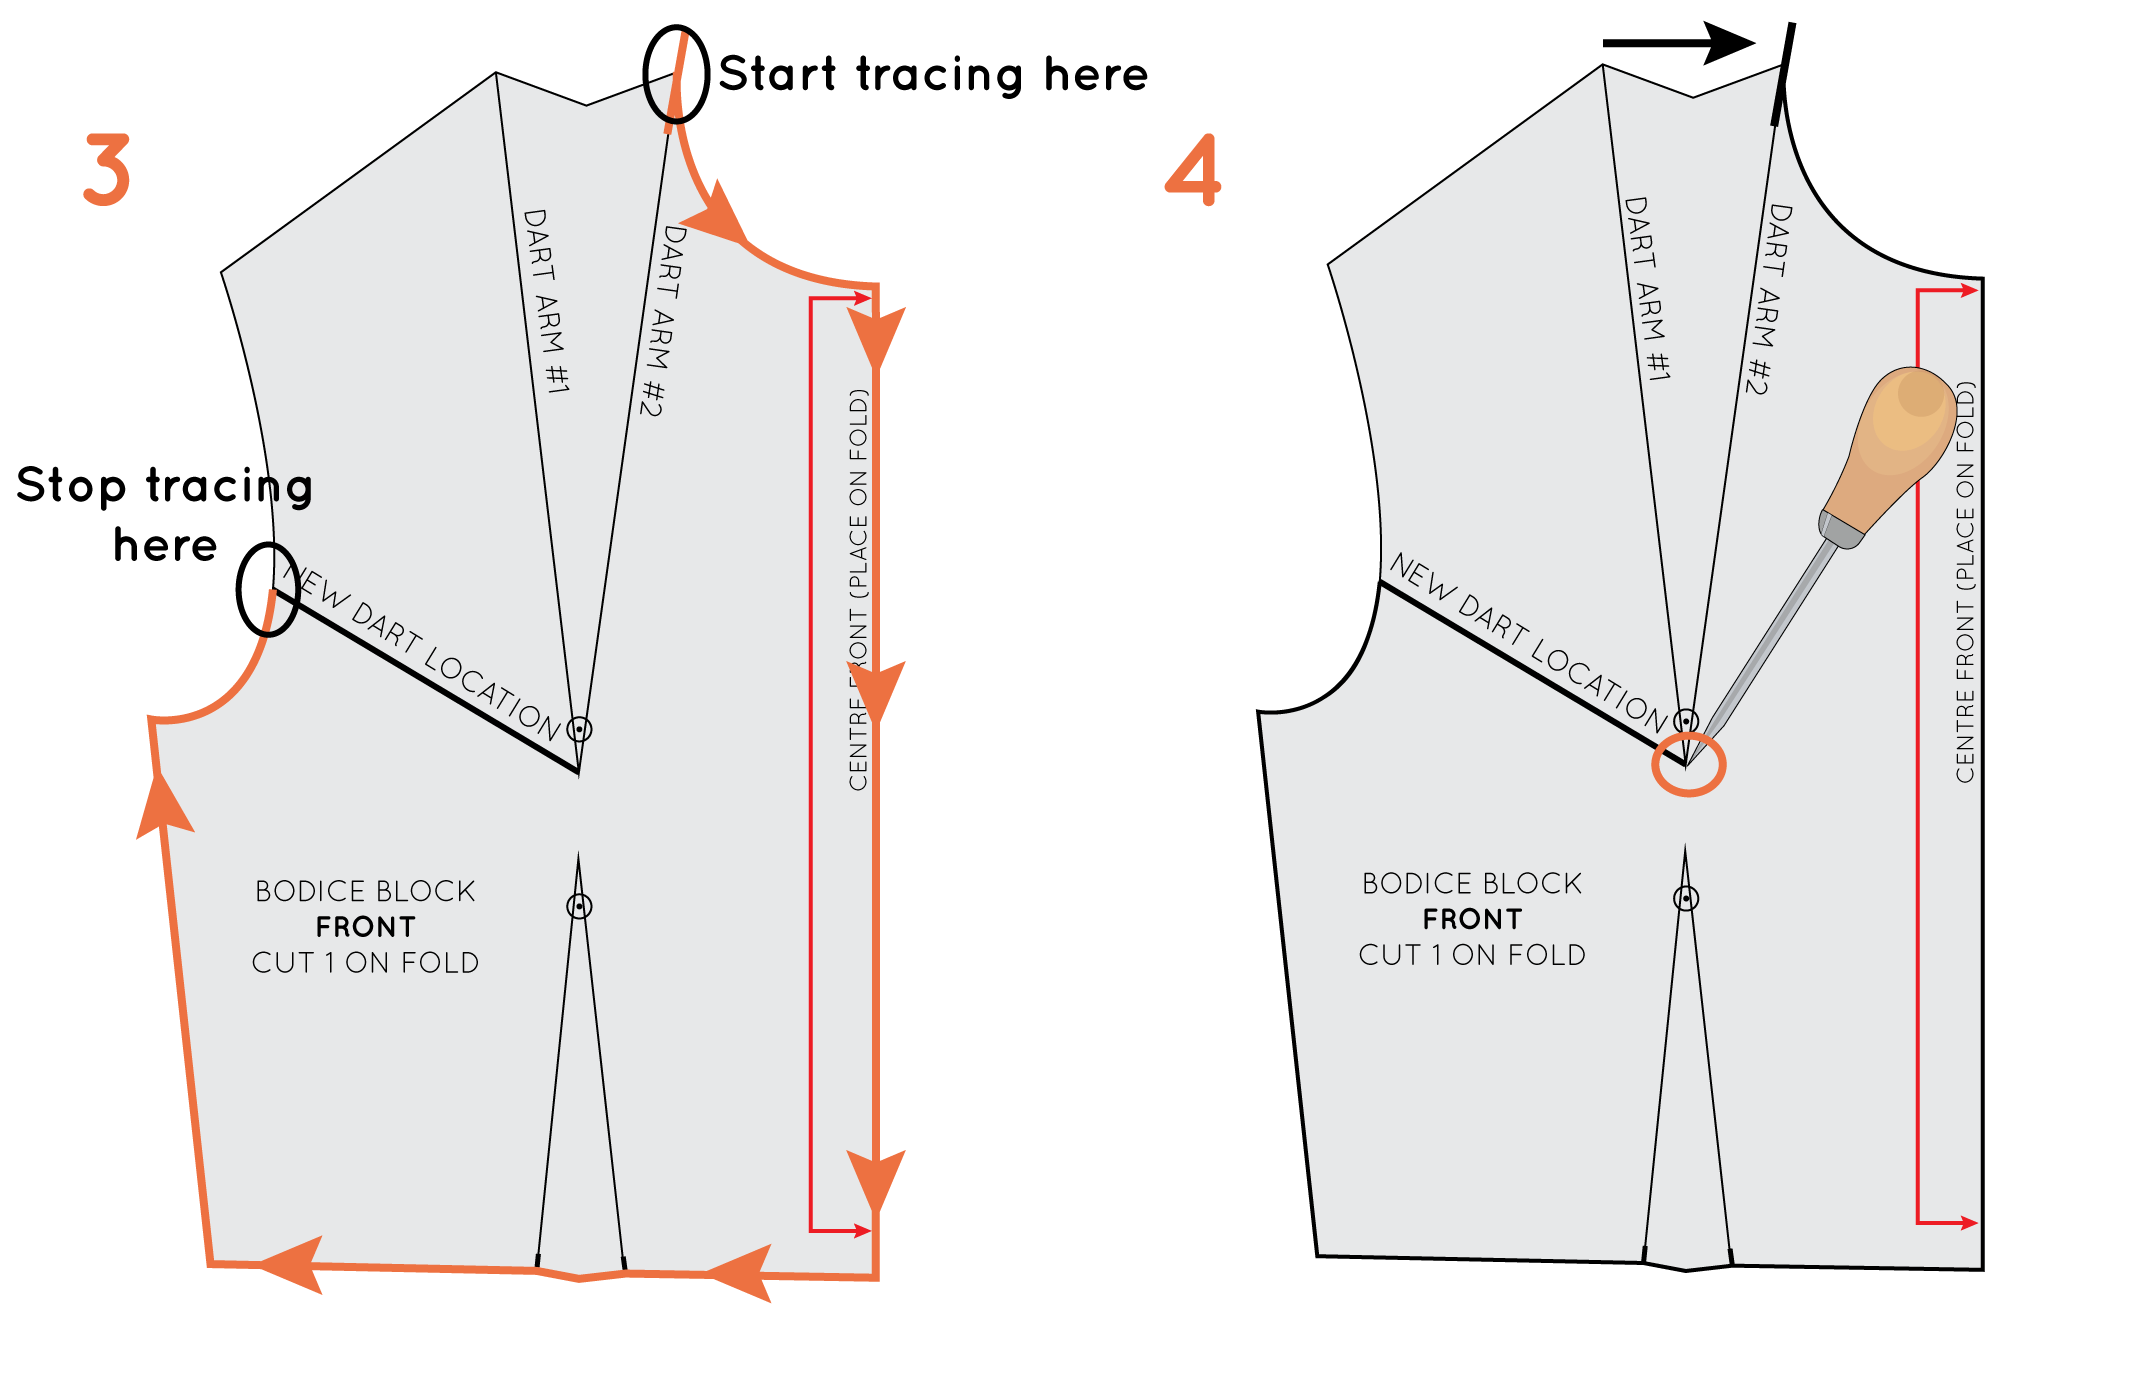
3. Start tracing around the pattern piece from 'Dart Arm # 2' - going down the neckline, centre front, along the waistline, up the side seam and then around the armhole until you reach the new dart location. Stop tracing here. 

As the waist dart is staying where it is, remember to mark the dart point and notches so that when you remove the pattern you are tracing, you can redraw the waist dart in its original position.

4. Now it is time to pivot the pattern to remove the shoulder dart and create a dart at the armhole. Take your stiletto (or a pin or sharp pencil if you don't have one) and insert the point into the point of the shoulder dart. Remember this is not the drill hole (as the drill hole is marked 1-1.5cm from the dart point), but the point itself. In the next step you will be closing out the shoulder dart by rotating 'Dart Arm #1' towards 'Dart Arm #2.' 

Pivot the pattern

inthefolds_move_a_dart_5

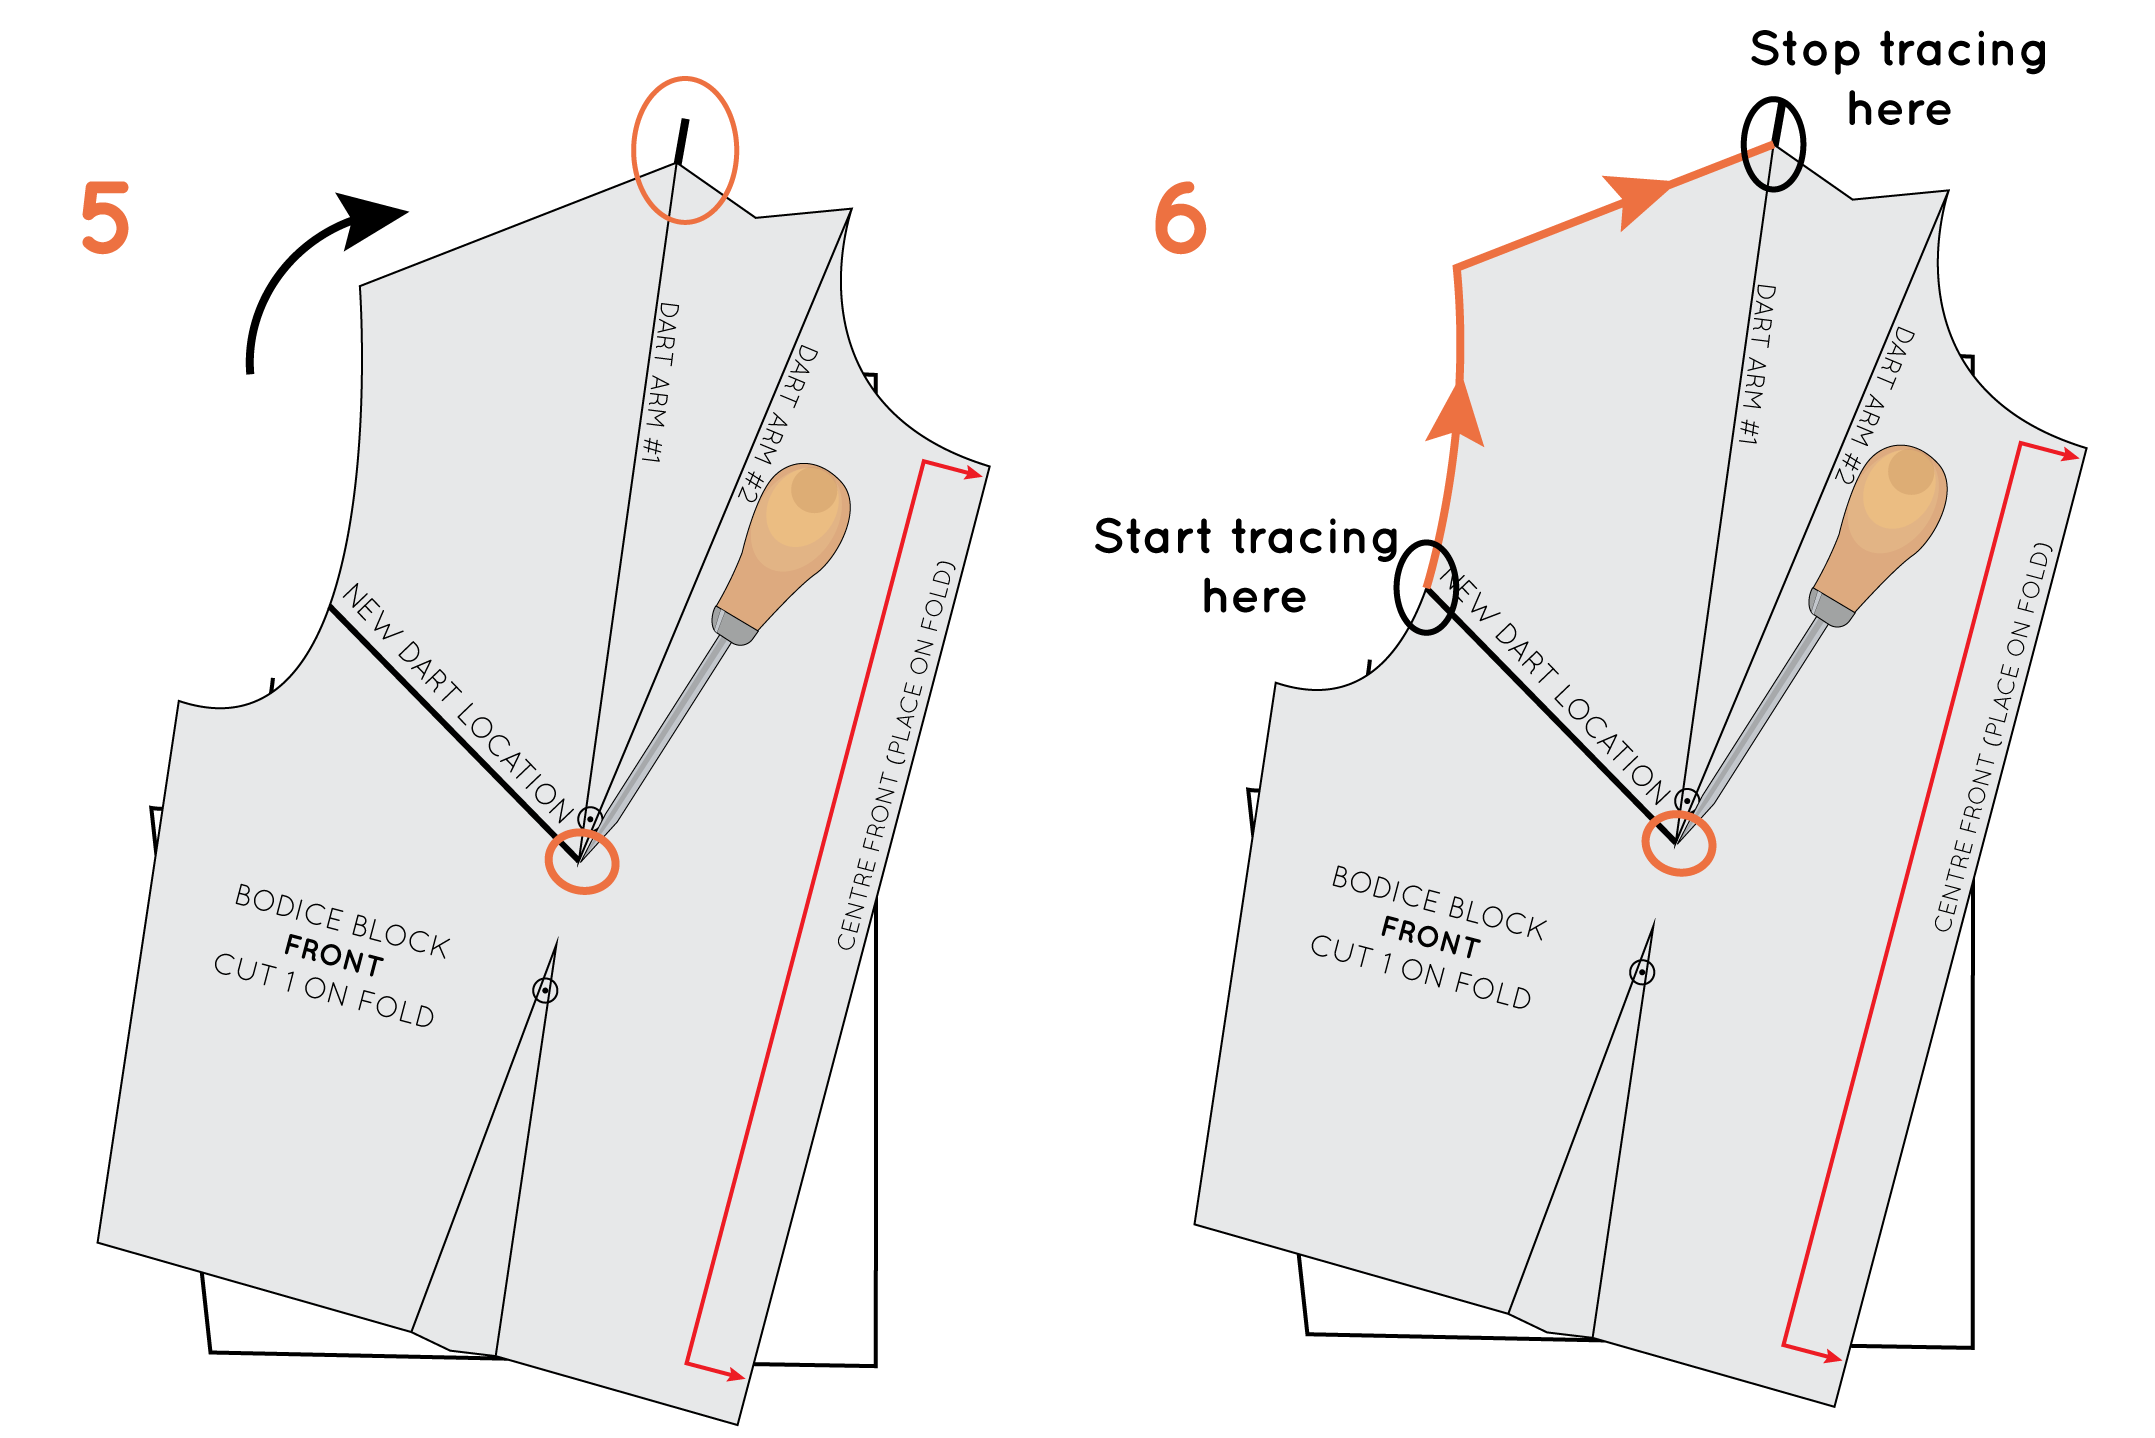
5. Remove the weight from the pattern. With the point of the stiletto securely in the drill hole, rotate (or pivot) the pattern so that 'Dart Arm #1' now lines up with the point where you started tracing the pattern in Step 3 (where 'Dart Arm #2' was originally), being careful to hold the piece of pattern paper that you are tracing onto securely in place. 

6. Place the weight back on the pattern and trace the remainder of the pattern, starting at the point where your new dart is marked and continuing to 'Dart Arm #1.'

Complete your new dart

inthefolds_move_a_dart_6

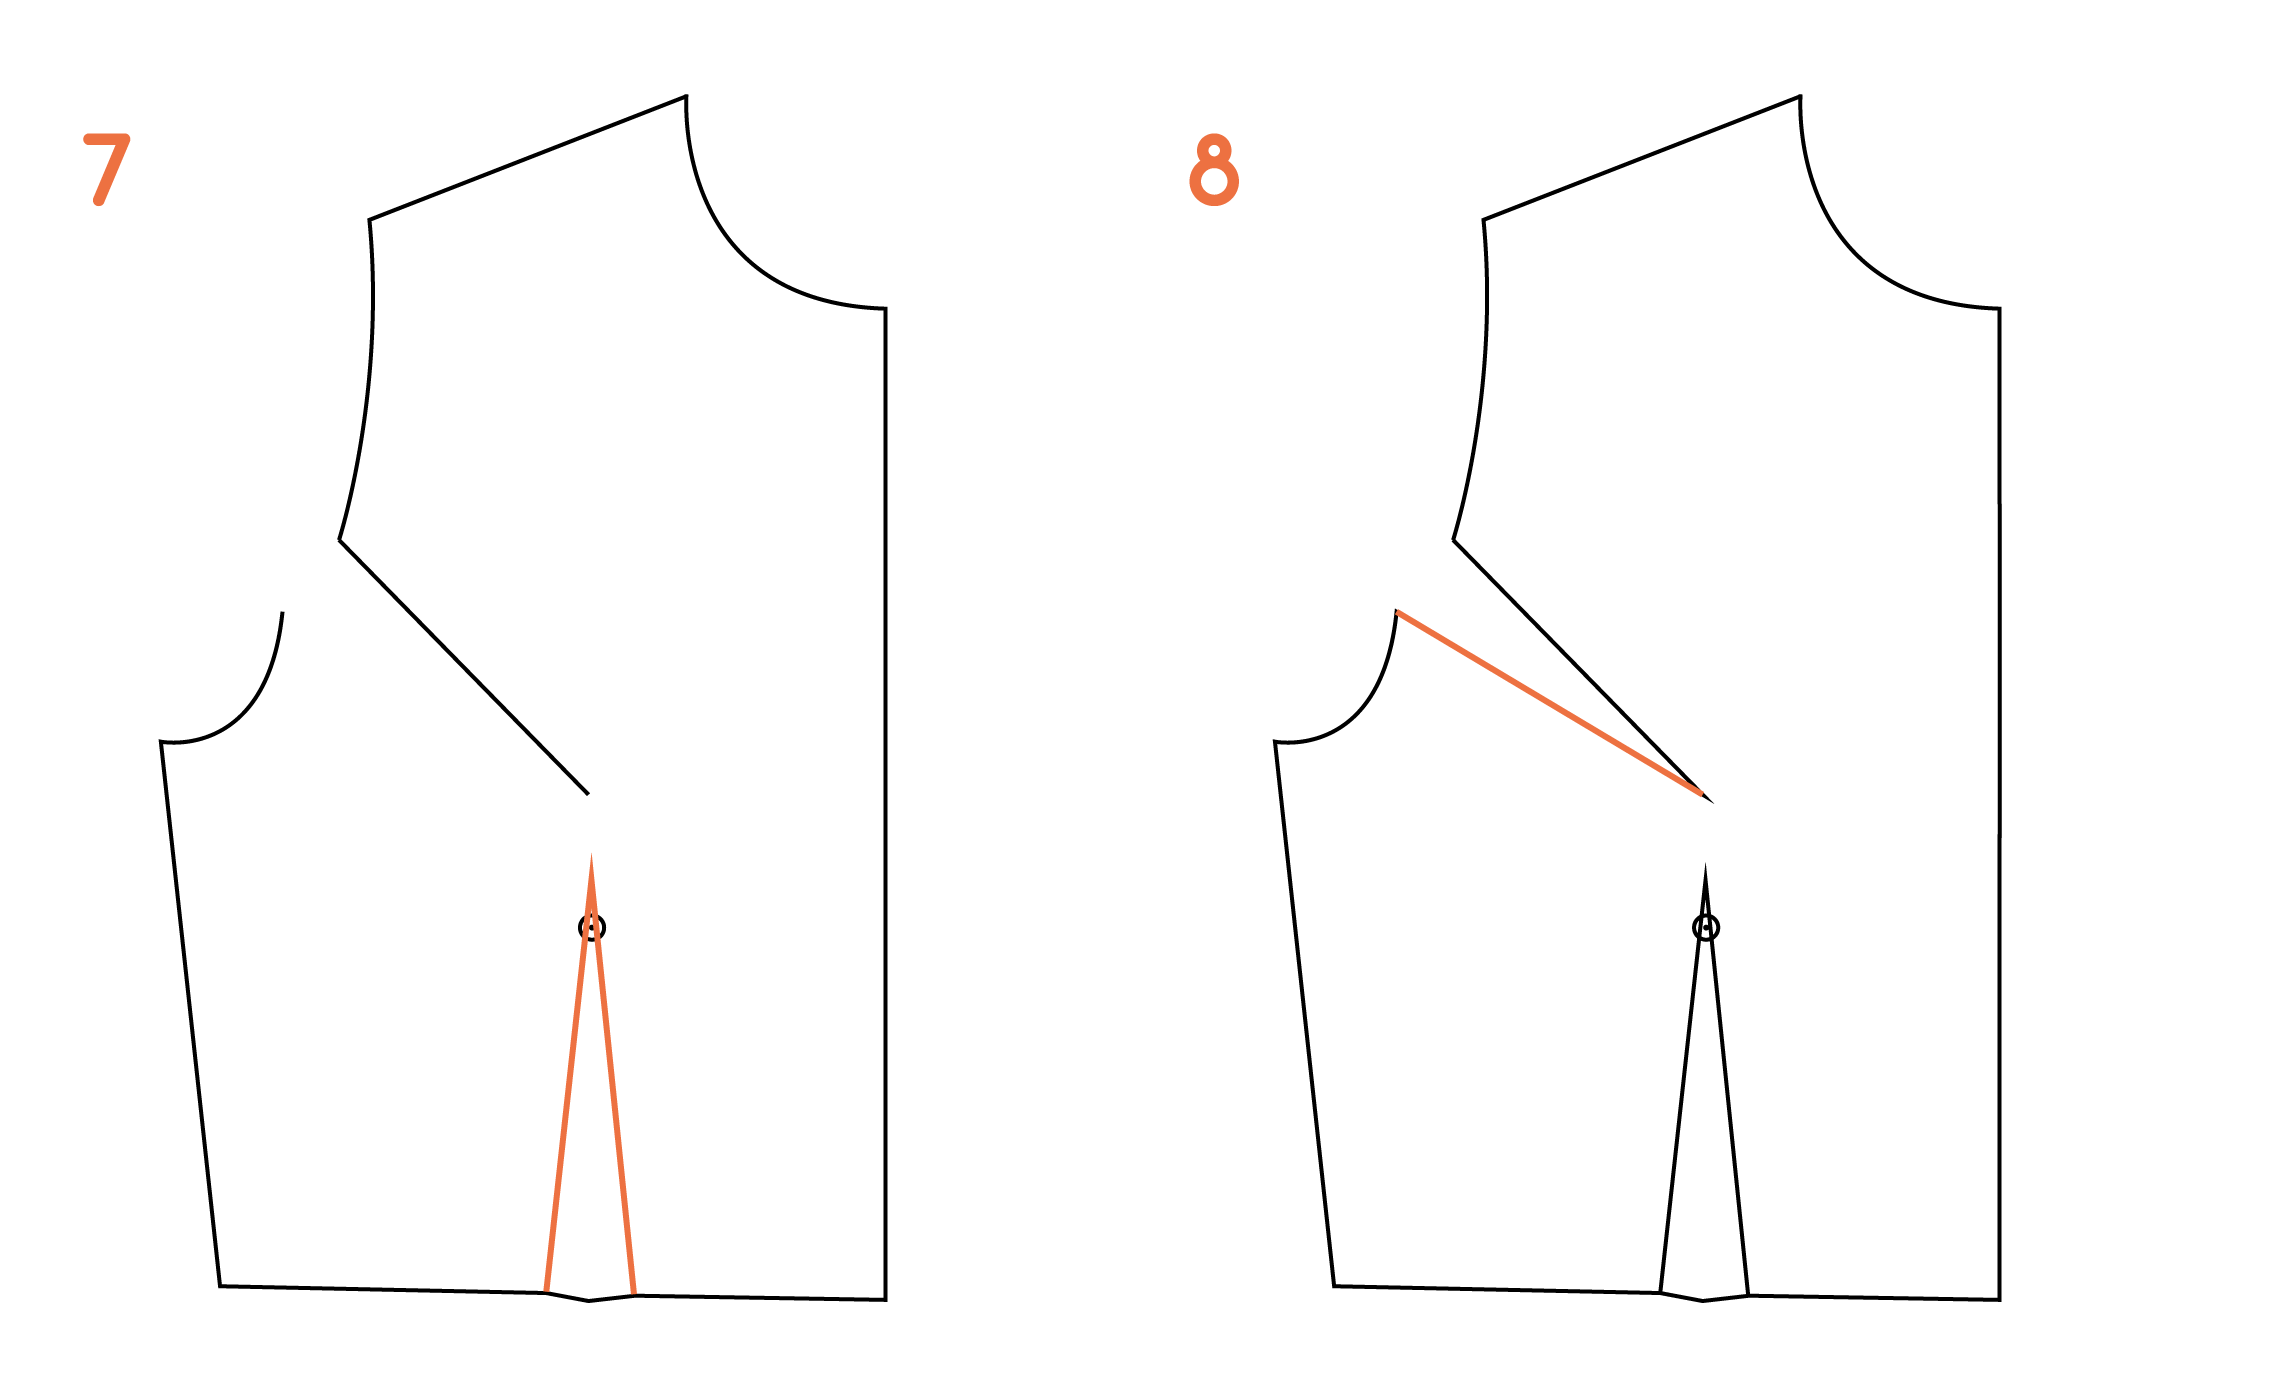
7. Remove the pattern piece you were tracing and re-draw the waist dart (or any design features that you have transferred from the original pattern).

8. Complete the new dart by joining the opening in the armhole to the dart point with a straight line. 

Add markings + cutting instructions

inthefolds_move_a_dart_7

9. Complete the pattern by adding shaping to the new dart, adding pattern markings (in this case notches and the grainline) and cutting instructions as well as seam allowance.

And that's it. Now you have two techniques for moving darts in your repertoire!


You may also like:

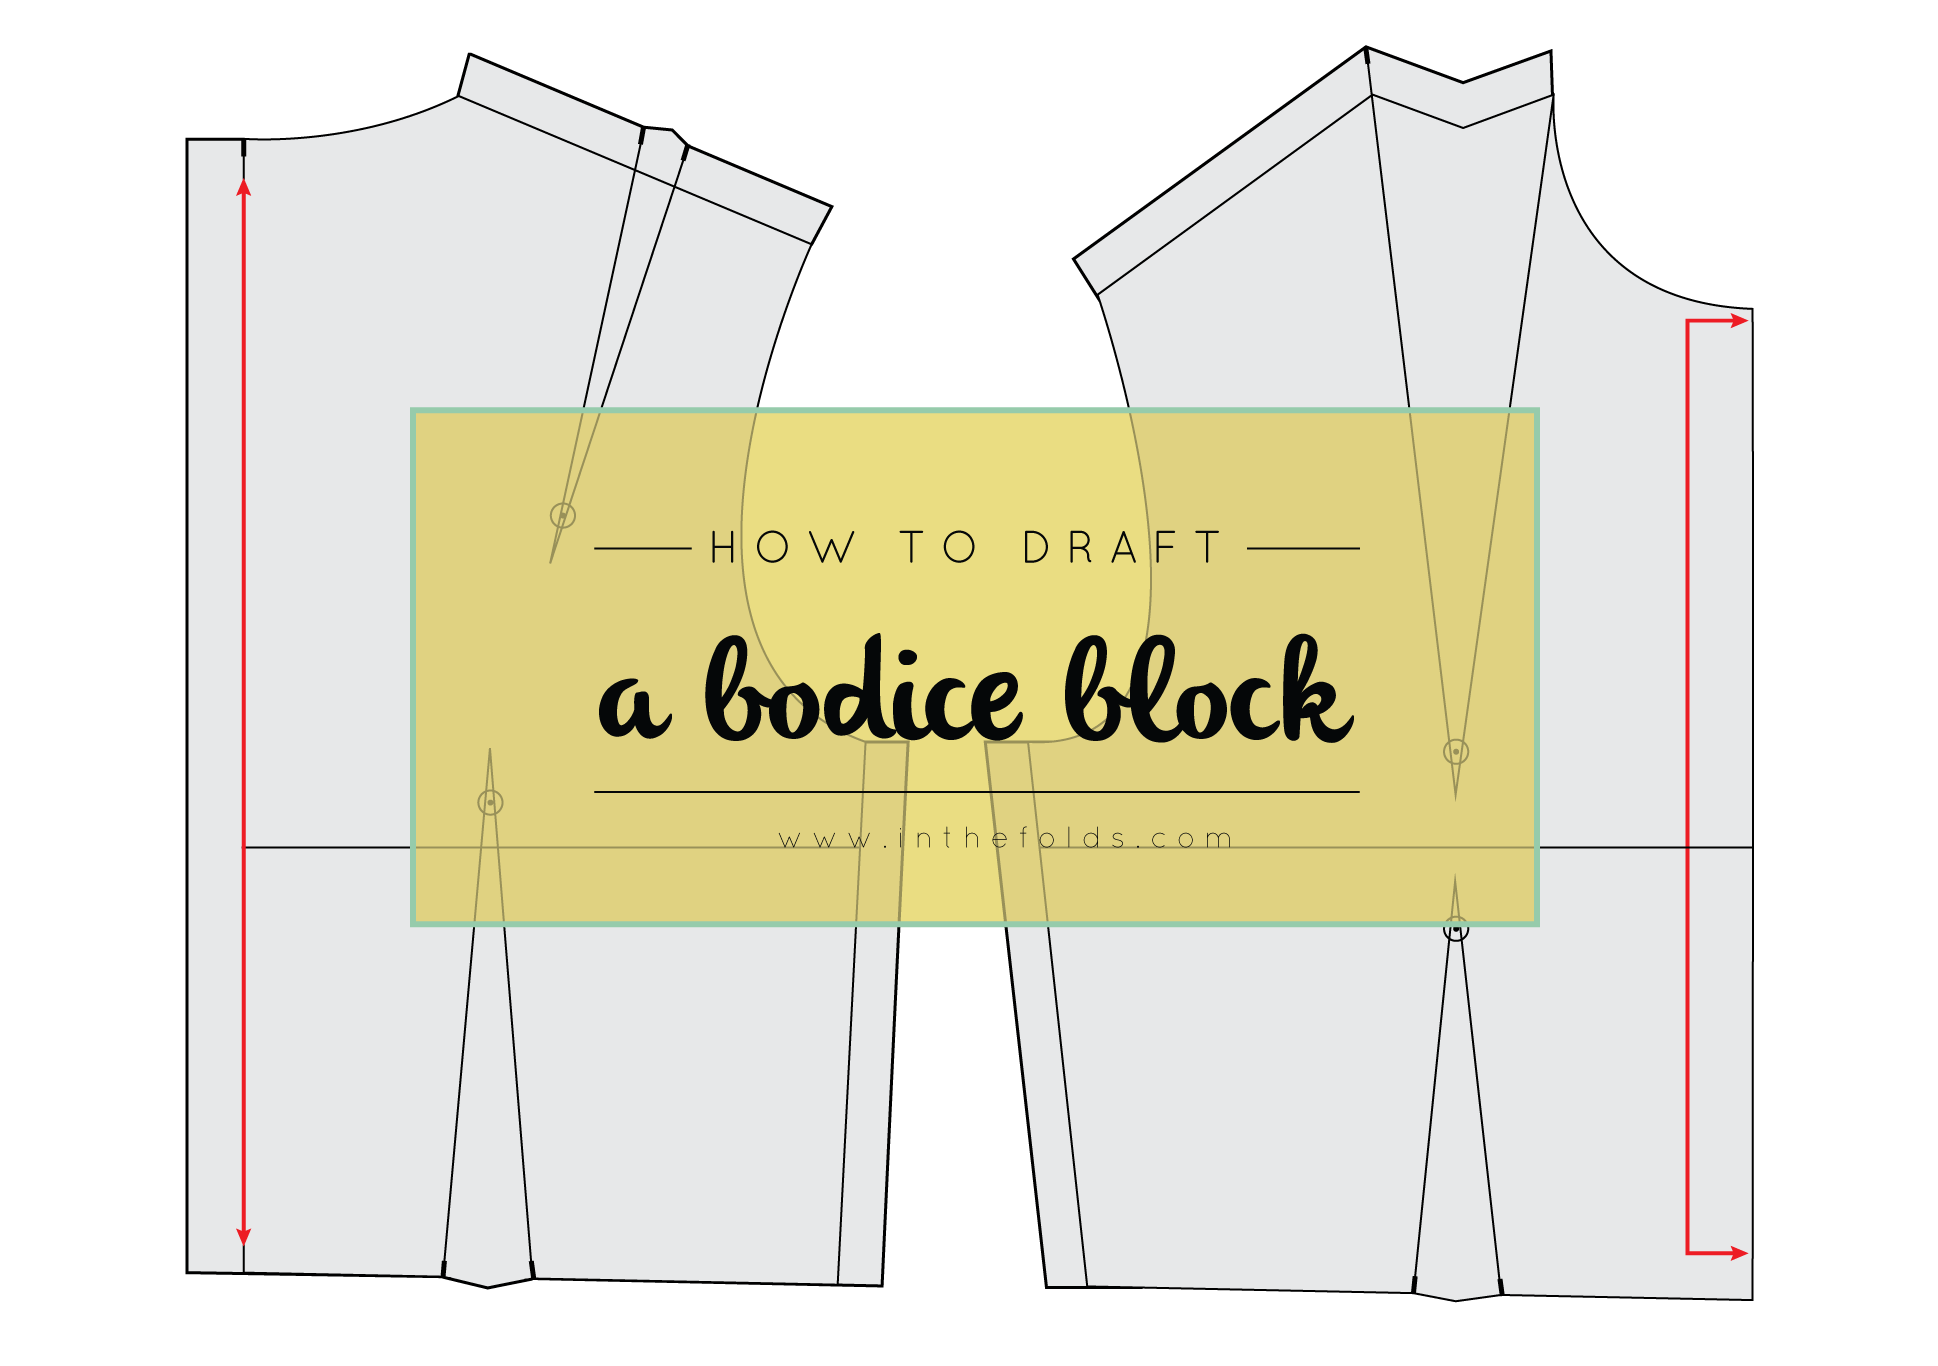
How to : Draft a bodice block

After weeks and weeks (or was it months?) it is time to move on from the Skirt Series, and up to our upper halves! And also for me to get back to blogging. It has been at the top of my To-do list for weeks and weeks, but somehow I've managed to ignore it and find other things to occupy my time (for further reading on why to-do lists don't work, check out this post).

So, without any more rambling from me, it is time to draft a bodice block! 

The bodice block

A basic bodice block is a great starting point for most patterns involving your top half – it can be used to make tops and dresses, and paired with a sleeve block can be used to make shirts, blazers, jackets and coats. Many patterns evolve from this block. So if you are ready to start making your own patterns, then a bodice block to your specific measurements is a great place to start (although, if you want something a little easier, I would suggest starting with the skirt block).

This tutorial has been adapted from this great "how to" on BurdaStyle.com, which was taken from Winifred Aldrich's Metric Pattern Cutting for Women's Wear (5th ed. Blackwell Publishing: Oxford, 2008, pp 215). I changed the order in places and added more measurements, to hopefully create a better fitting bodice and an easier to follow tutorial.

So, even if you are an absolute beginner, with the right measurements, the right tools and a little patience, you will have a great fitting bodice block in no time!

A little note

I originally posted this tutorial a couple of years ago, on my previous blog, Em Makes Patterns. If you saw it there, do not fret. This tutorial is the same. I've just updated the aesthetics of the tutorial. So there is no need to do it all over again!

One thing I did realise though, after posting this, is that this tutorial will only work for you if you have a smallish bust cup size. It hadn't occurred to me that this would be an issue (as I am very small busted), until a woman contacted me to say that her bodice toile had turned out much too short, and we worked out that it was due to her large bust size. So, if you have a bust size any bigger than a C or D cup, I would suggest using this tutorial to draft the basic shape of your block and then doing a full bust adjustment to get the right cup size.


Update September 2021

Thank you so much for all the enthusiasm for this blog post. It has been my most popular blog post of all time! After 5 years of answering questions, I no longer have capacity to answer individual questions regarding bodice drafting. The comments have now been switched off and I will no longer be able to get back to emails regarding this blog post. I’d suggest reading through the comments if you have a question, as it is likely I have answered a question similar to yours over the years. You can also See the post : Drafting the bodice block - Questions + Answers.

Update 2020

When I created this blog post in 2016, I had no idea that was going to become the most popular blog post on my website!

I have received a number of questions lately about the tutorial and I thought it could be a good idea to publish some of these questions and answers as an opportunity to help you on your own learning journey.

I will update the post as I receive more questions, so that hopefully, if you have a question, you will find a relevant answer here and can keep on going with your draft!

See the post : Drafting the bodice block - Questions + Answers


Measurements

The measurements you will need for this project are:

Waist measurement

Your waist is the bit in between your rib cage and your hips. It is often the most narrow point of your torso.

This measurement is one you will need all the time. To find it, simply wrap the tape measure around your waist, ensuring that the tape measure remains level all the way around (horizontal to the floor at both front and back).

Do not suck in your tummy like I accidentally did in this photo! You want to be as natural as possible, so that your clothes fit well. Make sure the tape isn't too loose, or isn't pulling you in either!

You could also tie a piece of elastic around your waist to get the right position and then measure.

Bust measurement

For your bust measurement, find the fullest point of your breasts and take a horizontal measurement from there.

Ensure the tape measure remains horizontal as it wraps around your back, for an accurate measurement (this is when measuring yourself in front of a mirror helps). 

Please note: if your bust cup size is more than a C or D cup (for more info on working out your bust cup size look here), you will likely be better of making the draft as if you have a B cup bust and then doing a Full bust Adjustment.

Armscye depth

The armscye depth is the measurement I initially found the most tricky to get my head around. For one, I am quite certain I had never heard this term until I started reading sewing blogs (I don't think it was mentioned once in the four years I studied fashion design), but since then, it seems to pop up all the time (always the way, right?) It also seems that there are many different ways people suggest to find it. 

When I first drafted my bodice block, I placed three fingers under my arm and then measured down from my last finger to my waist. I don't really know what the direct correlation is between this measurement and the armscye depth, but apparently, due to the ratio of the body, these two measurements are the same.

The more obvious way of finding this distance is to measure down from the nape of the neck to the (imaginary) horizontal line that runs across your back, between the bottom of your armholes.

Nape of the neck to waist

This measurement is a little tricky to take on your own. Start at the nape of your neck and measure vertically down to your waist. 

The easiest way to do this is to toe a piece of elastic around your waist and have someone measure down from the nape of your neck to the elastic on your waist.

Nape of the neck to Bust line

neck-to-bust.jpg

Again, the easiest way to take this measurement will be to tie a piece of elastic around your bust and have someone measure down from the nape of your neck to the elastic.

Neck circumference

To take your neck measurement, wrap the tape measure around the base of your neck, making sure it is not too tight.

Shoulder length

To measure the length of your shoulder, first find the peak of your shoulder (this is the bony bit before your shoulder becomes your upper arm). Now measure between the base of your neck and the peak of your shoulder.

Back width

Your back width is the horizontal measurement of your back, from the bottom of a standard armhole, across to the other armhole.

Shoulder to bust measurement

For the shoulder to bust measurement, hold the tape measure in the middle of your shoulder (approximately where your bra strap sits) and measure down to bust point, following the curve of your breast.

Bust point to point

Knowing the distance between bust points (I like to call this measurement "the nip to nip") can help when adding bust darts or drawing panels that you would like to cut through the bust (princess panels, for example).

Simply take the horizontal distance between your breasts.

Tools

You will need a large sheet of paper (approximately 1m x 0.5m), a sharp pencil or pacer, a long ruler, and french curve or Patternmaster (or a plate if you don't have a french curve). An eraser will also come in handy!

Okay... Let's go!

Drafting the block


CONSTRUCT THE CENTRE BACK

draft_bodice_block_2

With a large piece of pattern paper mark a point A close to the top left corner (always leave some space around the starting point when drafting patterns). From this point, draw a vertical line down the left hand side of the paper that is the length of the nape of neck to waist measurement. Mark the end point as B. This line will become the CENTRE BACK seam of the block and the grainline of your back pattern piece.

draft_bodice_block_2

Extend line AB by 1.5cm (1/2") from A, and label new endpoint as C. This extra 1.5cm (1/2") allows for back neck shaping. Label AB as CENTRE BACK (CB).

CONSTRUCT the bustline

Next, we will indicate our BUST LINE (the horizontal line that runs through both the front and back of the pattern at bust level). Take the nape of neck to bustline measurement. Then, measuring from point A, mark this length as point D on line AB. 

draft_bodice_block_4

Square out from point D with a line that is half of your bust measurement (only half bust is required as we are making the pattern on the half – i.e. the front will be cut on the fold, and a pair of the back will be cut) plus ease. For the example I decided to add 5cm (2") ease to the bust. Remember to halve the amount of ease, before adding it to your half bust measurement,

draft_bodice_block_6

Label end point of this line as E. Mark this line as BUST LINE.

CONSTRUCT THE WASITLINE

draft_bodice_block_7

Square out from point B,  drawing a line the same length as your bust line. Mark endpoint as F. Label this line WAIST LINE.

CONSTRUCT THE CENTRE FRONT

draft_bodice_block_8

Square up from F (passing through E), the length of the CENTRE BACK (including the extension), and mark the end end point as G. Label FG as the CENTRE FRONT (CF). This will also be the grainline of your front pattern piece.

draft_bodice_block_9

Join G to C with a straight line. 

Mark the armscye

draft_bodice_block_10

Take the armscye depth measurement and add 0.5cm (1/4"). Measuring from point A down towards point B, mark this distance on CENTRE BACK. Label this point as H

draft_bodice_block_11

Square out from H and extend the line until it intersects the CENTRE FRONT line. Mark the intersection point as I.

Construct the back neckline

draft_bodice_block_12

Take your neck measurement and divide it by 5. Measuring from point C, mark this measurement on line CJ. Label this point as point J

Join points A and J with a shallow curve  – this curve is the back neckline.


*Tip

draft_bodice_block_13

When working with curved lines, always check that they come to a right angle when they meet a straight seam (for example, the centre front, centre back or side seam). By doing this, you ensure that you will get a nice smooth curve when you cut a pair of a particular piece, or cut it on the fold. 


Construct the front neckline

draft_bodice_block_14

Take your neck measurement, divide it by 5 and then subtract 0.5cm (1/4"). Mark this measurement on line GC (measuring from point G) as point K.

draft_bodice_block_15

On the CENTRE FRONT (GF) mark a point the same length as CJ down from point G (neck circumference divided by 5). Mark the point as L.
 

draft_bodice_block_16

Join K to L with a deep curve – this is the front neckline. As we did with the back neckline, check that the curve of the neckline meets the centre front at a right angle (so that you will get a nice smooth neckline when you cut the piece on the fold).

Drafting the BACK SHOULDER SEAM

draft_bodice_block_17

Take your armscye depth measurement and divide it by 5 and then subtract 0.5cm (1/4"). Mark this distance, measuring down from A on the CENTRE BACK as point N.

Square out from point N. This is just a guideline, so does not have to be a specific length.

draft_bodice_block_18

Take your shoulder length measurement and add 1.5cm (1/2") (this is the allowance for the shoulder dart). With this length in mind (or written down if you have a bad memory like me), use a ruler to pivot from point J until your measurement passes through the perpendicular line drawn from N. Draw a straight line to create your shoulder line. Label the endpoint as O.

Drafting the back shoulder dart

draft_bodice_block_19

Mark the  midpoint of the back shoulder seam (line JO) (i.e. the distance halfway between J and O) as point P.

draft_bodice_block_20

Mark a point 15cm (6") down from point A, on the CENTRE BACK line, and square out from this point. Once again, this is only a guideline, so does not need to be a specific length.

draft_bodice_block_21

From point P, draw a guideline parallel to CENTRE BACK, extending down until it passes through the perpendicular line that you marked in the previous step.

draft_bodice_block_22

From where these lines intersect, mark a point 3cm (1 1/4") towards the CENTRE BACK and label as point Q. Q will become the point of the back shoulder dart.

draft_bodice_block_23

Mark a point 1.5cm (1/2") from P on the back shoulder seam (line JO), towards O. Label this point as point R

draft_bodice_block_24

Join P to Q to create the first dart arm, and point R to Q to create the second dart arm. 


Download The Little Book of Seam Finishes

Would you like to make clothes that are as beautiful on the inside as they are on the outside?

Sign-up to the newsletter to stay in the loop to receive inspiring content that will help you become a more confident maker. And get started with a free e-book!


Mark the bust point

draft_bodice_block_25

Move your attention to you BUST LINE (line ED). Take your bust point to point measurement and divide it by 2 (as we are working on the half) and add 0.5cm (1/4") (allocated ease). Take note of this measurement. From point E, on the bustline, mark a point, the distance you just found from point E. Mark this point as your BUST POINT.

draft_bodice_block_27

Draw a vertical line, parallel to the centre front and centre back, passing through the bust point, intersecting all your horizontal guidelines. This line is the VERTICAL BUST LINE. Where it intersects CG label as point R and point S where it intersects the WAISTLINE (BF). 

Draft the front shoulder dart

draft_bodice_block_28

Mark a point 0.5cm (1/4") up from L on the CENTRE FRONT (line GF) and square out from this point. Again, this is just a guideline, so it doesn't have to be a specific length. 

draft_bodice_block_29

This is one of the equations taken from the BurdaStyle tutorial that is very handy (I am not sure if I would have been able to work this out without this guidance!)

Add or subtract 0.6 cm (1/4") to 7cm (2 3/4") for each 4cm (1 1/2") bust increment above or below 88cm (34 1/2"). For bigger busts you will need a larger dart (add to 7cm), and for a smaller bust you will need a small dart (therefore subtract from 7cm). 

For example, my bust measurement is 84cm (33"), which is 4cm (1 1/2") below 88cm (34 1/2"), therefore I need to subtract 0.6cm (1/4") from 7cm (2 3/4"), leaving a dart width of 6.4cm (2 1/2"). 

Take dart width measurement and mark this distance from K as point T.

draft_bodice_block_30

Move down to the BUST POINT and mark a point 1cm (3/8") above it on line RS (vertical bust line) as point U. This will be the point of your dart. The reason why we lift the dart point a little above the bust point is that if the dart point was right at bust point you would be left with Madonna style pointed breasts! 

Join K and T to U with straight lines to create the front shoulder dart.

Drafting front shoulder seam

draft_bodice_block_31

Take your shoulder length measurement and, with this length in mind, and using your ruler, pivot from point T until your measurement passes through the perpendicular line drawn from above point L. Draw a straight line - creating your front shoulder line. Mark the endpoint as point V.

Please note: it's not a problem if your shoulder lines overlap - just keep working through the tutorial. When you get to the end you will be tracing a copy so that you have separate front and back bodice pieces and can add seam allowance.

Drafting the armhole

draft_bodice_block_32

On line HI mark a point that is the length of half of your back measurement plus 0.5cm (1/4”) (allocated ease), from H. Label point as W.

draft_bodice_block_33

Square up from point W until the line intersects the perpendicular line drawn from N. Mark the intersection point as X.

draft_bodice_block_34

Find the midpoint of line XW. Mark as point Z.

draft_bodice_block_35

Take the distance from the CENTRE FRONT to BUST POINT (i.e length from E to BP or half bust apex to apex measurement plus 0.5cm) and mark this distance on line HI, measuring from the dart arm closest to CENTRE back. Mark point as A1.

draft_bodice_block_36

Square up from point A1 so that the line intersects the front shoulder seam (line VT).

draft_bodice_block_37

Take the armscye depth measurement and divide it by five. Mark this length on the line just drawn from A1, as point A2.

draft_bodice_block_38

Find the midpoint of the line between W and A1 and mark as A3. Square down from this point so that the line intersects waistline (line BF). Mark intersection point as A4

draft_bodice_block_39

Draw diagonal lines (lines drawn at a 45 degree angle) inwards from points W and A1. From W the line needs to be 2.5cm long (1") (mark endpoint as B1), and from A1 1.5cm long (1/2") (mark endpoint as B2). These diagonal lines will help in the next step, when we are at the stage of drawing in the curve of the armhole.

Join O to Z to B1 to A3 to B2 to A2 to T with straight lines.

draft_bodice_block_40

creating darts

At this point, the waist measurement is the same as the bust measurement. For a lot of us, our bust measurement is larger than our waist measurement. To remove this excess width from the waist and to create a well fitting block you will add waist darts (one in the back waist and one in the front waist – remember this is on the half so when you make your block there will be two in the back, and two in the front. We will also slightly taper the side seam, which we will also treat as a dart at this stage).

To work out how much width you will need to remove with your darts, take your waist measurement and add 2cm (7/8”) ease. Subtract this measurement from your bust measurement and divide your answer by 2.

Divide this number by three, so that it can be distributed evenly throughout back dart, front dart and side seam.

DRAFT THE BACK WAIST DART

draft_bodice_block_41

To mark the placement of the back waist dart, find the midpoint of line HV and label as C1. Square down from this point so that line intersects the WAIST LINE (BF). Mark the point of intersection as point C2. This will become the centre of your back dart.

draft_bodice_block_42

Distribute the dart width evenly either side of C2 and join endpoints to C1 to create dart arms. 

Draft the side seam

draft_bodice_block_43

For simplicity, at this stage, treat the side seam (line A3-A4) as a dart at this point. Distribute one third of the dart width to the back of the bodice and two-thirds to front of the bodice, either side of A2. Join the endpoints to A3 to create the front and back side seams. 

Draft the front waist dart

draft_bodice_block_44

Distribute dart width evenly either side of S and join the endpoints to a point 1cm (3/8") down from BP to create dart arms. 

Balance the waistline

draft_bodice_block_46

At this point the waistline of the pattern is straight. But as the front of our bodice must pass over the fullest part of our chest (our bust), we need to add a little extra length to our CENTRE FRONT, to prevent this part of the waistline from riding up when the bodice is made.  

Mark a point 0.5cm (1/4") to 1.5cm (1/2") down from point F as point C1.

(0.5cm (1/4") for small bust / 1cm (3/8") for medium bust / 1.5cm (1/2") for large bust)

 Join point B to point C1.

Trace the pattern

draft_bodice_block_47

With a second piece of pattern paper, trace off the back pattern piece – being sure to include all important details (i.e. bust line and darts). 

draft_bodice_block_48

Leaving a space between the pieces, trace the front pattern piece.

Add seam allowance to the pattern

draft_bodice_block_49

To finish, add shaping to the darts (following this tutorial) and then add seam allowance to the pattern. As it is a bodice block, I find that it is handy to have it available without seam allowance (as when you are making alterations or adjusting a pattern it is far easier to do so without seam allowance), but as you will need to make a toile to see how it fits, add seam allowance to the seams that will be sewn - the side seams, centre back and shoulder seams. The other seams - the neckline, armholes and waistline - can be left without seam allowance so that you can get a true indication of what it will look like without having to finish these seams or add a facing etc. I went for 1.5cm (1/2") seam allowance on the shoulders and side seams, and 2cm (7/8") on the centre back. For more details on adding seam allowance, you can take a look at this tutorial

Add pattern markings and cutting instructions

draft_bodice_block_50

Add pattern markings to the pattern – being sure to mark drill holes (I always mark my drill holes 1 - 1.5cm (3/8" - 1/2") above the dart point and notches.

And voila! There you have a basic bodice block to your very own measurements!

Sew it up (in calico or something similar you may have hiding in your sewing box), see how it fits and then you are ready to start getting creative making your own patterns!


Have a question about this tutorial?

Please check out these Frequently Asked Questions about the tutorial before getting in touch. I do love hearing from you, but you are likely to find your answer faster than we are able to get back to you.


profile pic.jpg

Did you enjoy this tutorial?

It is our vision to empower you to make a wardrobe that you will wear, love and cherish - long into the future.

If this tutorial has helped you, it would be greatly appreciated if you could give thanks with a small donation. This will help us to continue to create content like this tutorial and continue offering it for free - so it can be accessed by all.

We greatly appreciate your support!


You may also like:

How to : Draft a fit and flare skirt

how_to_draft_a_fit_and_flare_skirt_1

Over the last couple of weeks I have been writing blog posts about drafting skirts - from drafting a block to your own measurements, adding the correct markings to the pattern and adding seam allowance. Since the block was completed, I have been showing you ways that you can manipulate the pattern to create your own designs.

Last week I did a little round-up of all the posts so far, and asked if there was a specific style anyone wanted to learn how to make. 

Carol got in touch:

The skirt I would love to see as I fell in love with it when I first saw it, was from a blog post by Yoshimi. They call it a mermaid skirt. I think 6 gores with a flare at the bottom. I haven't seen a pattern like this and have a pic of it saved on my hard drive just to look at.

I was excited to get a suggestion, but also a little apprehensive about the skirt suggested. The term 'mermaid skirt' brought ball gowns to my mind... Which you may have noticed, is not really my style!

[ Image posted with permission from Yoshimi - http://yoshimitheflyingsquirrel.blogspot.com.au/2011/03/mermaid.html

But it was a lovely surprise when I found the skirt in question. It's lovely - sleek and simply, and a perfect skirt for a beginner to draft. So thank you very much for the suggestion Carol!

Drafting a flared skirt with panels

It may be difficult to see in the images, but the skirt is made up of 3 panels in the front, and 4 in the back (as the centre back has a seam for the zip). You could use this method with as many panel lines as you like, as it is a matter of preference, but I will draft it the same way as the source image.

To start this pattern, you will first need to add panels to your skirt block - which is one of the tutorials already in the series

Trace the pattern

Trace a copy of each of the pieces, without seam allowance. For the example, I will only be using the two front pattern pieces, as the process is exactly the same for the back.

how_to_draft_a_fit_and_flare_skirt_3

Mark flare point

1. Have a think about what point you would like the skirt to flare from. I wanted my pattern to be the same as the example from Yoshimi, so I measured down from my waist to the middle of my upper thigh, to find the right measurement for me (22cm [8 1/2in] down from the waist). Another way you could do this, is by putting on your skirt toile and marking the point you would like it to flare out. 

When you have the measurement, mark it on your pattern pieces, measuring down from the waistline. Draw perpendicular lines through each pattern piece at this point.

how_to_draft_a_fit_and_flare_skirt_4


2. You will be cutting through the pattern pieces at the horizontal lines. Before cutting, label each pattern piece so that they don't get mixed up.

I chose to label my pieces as 'Upper panel - side front,' 'Lower panel - side front,' 'Upper panel - centre front' and 'Lower panel - centre front.' It doesn't really matter what you call each piece - as long as you can remember what's what!

Cut pattern into sections

3. Cut along the horizontal lines so that you have four seperate pattern pieces.

Cut and spread

how_to_draft_a_fit_and_flare_skirt_4

4. We will be cutting an spreading to add volume (and create the flare) to the lower section of the skirt. Draw vertical lines through the the lower panels. It is up to you how many lines you would like to draw (and will depend on how many panels your skirt has), but I think 4 in the side panel and 2 in the centre front is a good place to start. Keep the spacing between the lines as consistent as possible. 

Have you cut and spread before? It is a really simple way to add volume (or remove) to a pattern. I wrote a tutorial here, if you would like a closer look at this technique


how_to_draft_a_fit_and_flare_skirt_5

5. You now need to carefully cut along each of the lines, starting from the hemline, and cutting up towards the top edge. Don't cut all the way through the piece, leave 1-2mm (1/16in) at the top to act as a "hinge" (a small strip of paper that will hold the pieces together, but also allow movement).

how_to_draft_a_fit_and_flare_skirt_6

6. Now it's time to spread! Carefully spread each cut line by the desired amount (this will depend on your preferences. I'd suggest 3-5cm [1 1/4 - 2in]). Be careful to spread each cut line by the same amount. You can play around until you are happy with the amount of fullness you have added. 

how_to_draft_a_fit_and_flare_skirt_7

7. You can now stick the lower pieces back on to the upper pieces, to create single pattern pieces. As the top edges of the lower pieces have become curved, the pieces may need to overlap a little (as seen in the example).

Trace the pattern

how_to_draft_a_fit_and_flare_skirt_8

8. Now take a piece of pattern paper and trace each pattern piece. Instead of the point that is created at the joint of the two pieces, draw a smooth curve. 

Add pattern markings

how_to_draft_a_fit_and_flare_skirt_9

9. Be sure to mark the grainline on each pattern piece, as well as cutting instructions.

The final thing to do, is to check that the seams fit together correctly. But I'll leave that bit for tomorrow!

I want to finish up by saying a huge thank you to Yoshimi for allowing me to use her images for this post! You should definitely head over to her blog for a look around - she has made some beautiful stuff, and her instagram is very nice too. 


Once again, thank you Carol for suggesting today's blog topic. Is there a skirt you would like to know how to draft? Please let me know and maybe it will be your suggestion next!


You may also like:

Throwback Thursday : How to draft a hem facing

how_to_draft_a_hem_facing_1

It's Thursday (somehow another week is coming to an end), which means it's time for a Throwback Thursday post! As I am still solidly in skirt mode from the skirt series I've been sharing with you lately, I thought it would be a good time to talk hem facings.

What is a hem facing?

A hem facing is a seperate pattern piece that is used to finish the hem of a garment (rather than just turning up the hem as you often do when hemming).

When should I consider using a hem facing?

A hem facing is a good way to finish a hem if you have a curved or shaped hemline (in the case of an A-line skirt or circle skirt, for example). It can also be used to finish a straight hemline if you would like to add weight to the hem (can help with the fall and drape of a garment), or just prefer this finish.

how_to_draft_a_hem_facing_2

If you have sewn The Rushcutter, you will know that I included a hem facing in the pattern, to help you achieve a lovely clean finish.

Why can't I just do a normal hem?

how_to_draft_a_hem_facing_3

The reason you cannot simply add a hem allowance to a curved hemline (left hand image) by extending the pattern beyond the side seam and centre front, as you often would to create a hem, is that when you have a curved line, the circumference of the cut edge will become larger than the hemline. When you fold up the hem (right hand image), there will be too much fabric and the hem will be unable to sit flat.

To avoid this, you will need to create a separate pattern piece - a hem facing.

How to draft a hem facing

how_to_draft_a_hem_facing_4

1. To get started, take the pattern you will be making a facing for. I am using the basic skirt block, that has been adapted to an A-line shape. You can find how to do this, by looking at this tutorial

The process is the same for the front and back patterns, so I will just use the front pattern piece for this example.

2. Decide how wide you would like the hem facing to be. Anything from 3 - 15cm (1 1/4in - 6in) is okay (this is obviously a very broad spectrum, which will depend on your design and the fabric you are using). If you want anything less than 3cm (1 1/4in), I would suggest using bias binding instead. If you are not sure of what width to use, have a look at your ready to wear clothes, to get an idea. 

Mark the width you would like your facing to be on the centre front, measuring up from the hemline. Mark this distance on the side seam too. 

how_to_draft_a_hem_facing_4

3. You will then need to mark the width of the facing at regular intervals between the centre front and side seam (every 10-15cm or so). Be sure to draw these lines perpendicular to the hemline.

4. Join the endpoints of all these lines with a smooth, sweeping curve. You have now created the shape of your waist shaping.

how_to_draft_a_hem_facing_5

5. Take a seperate piece of pattern paper, and trace off the shape of the hem facing.

6. Before removing the tracing, mark a notch close to the centre of the hem curve (if you have a very wide hem, you may consider adding an extra notch or two), and transfer onto the skirt pattern with a tracing wheel. This will help when you are sewing the pieces together later (it is not crucial if you are making a narrow skirt, but if you are making a full circle skirt, then you will thank your past-self for being so diligent when notching the hemline!)

 Transfer the grainline onto the hem facing (which will be parallel to the centre front).

how_to_draft_a_hem_facing_6

7. Add seam allowance to the body of the pattern (if you have not done so already), as well as the facing. I suggest 1cm (3/8in) along the long edges (the hem edge and the top edge) and 1.5cm (1/2in) on the side seam. You will not need seam allowance at the centre front, as the piece will be cut on the fold. For the back pattern piece, you can also cut on the fold, which will minimise bulk at the centre back seam. 

8. Add cutting instructions

Depending on the fabric, you may want to add interfacing to the pattern when you get to the cutting stage of the project - just keep this in mind.


You may also like:

Drafting a waistband

draft_a_waistband_1

In the last couple of weeks I've been showing you how to draft a skirt block to your own measurements, as part of The Skirt Series. In today's post I am going to show you how to draft a waistband for the skirt. If you have just made the skirt block and need to make a toile to see how it fits, I wouldn't bother making a waistband. You are better off whizzing up a quick toile, checking how it fits, and then once you are happy with it, making the waistband.

Two types of waistbands

Most waistbands on skirts or trousers are based on these two basic waistband shapes:

draft_a_waistband_2

A straight waistband - which is a long rectangle that generally does not have side seams. 

draft_a_waistband_3

A shaped waistband - which may, or may not, have side seams. 

Should I draft a straight waistband or a shaped waistband?

Either option can be drafted for the skirt block, and which is better for you comes down to individual preference and body shape. For me, I am a little too curvaceous in the lower half to feel comfortable in a straight waistband.

In today's post I will show you how to draft a straight waistband, and then next week I will get to shaped waistbands. And then you can work out which one is for you! The good thing about drafting your own waistband, is that you will be able to use it whenever a waistband is called for, and you know that you will get a great fit every time. 

Take measurements

draft_a_waistband__4

To start, take your skirt block and take note of some measurements. Remember to measure along the stitch line, not the edge of the pattern.

Measuring along the waistline, on front pattern:

1 - Centre front to first dart arm

2 - Second dart arm to side seam

On back pattern:

3 - Side seam to first dart arm

4 - Second dart arm to centre back

Waistband construction

draft_a_waistband_5

Add the four measurements taken in the previous step together to find the length of the waistband. Remember this measurement gives you half the waistband, as the pattern piece can be cut on the fold. Draw a line as long as this measurement. 

draft_a_waistband_6

Decide how wide you would like your waistband to be - consider a measurement between 2 and 6 centimetres. Draw a perpendicular line from either end of your original line, the height of your waistband.

draft_a_waistband_7

Complete the rectangle by connecting the end points of the lines drawn in the previous step.

So now you have the basic shape, it's time to get some markings onto your pattern piece.

draft_a_waistband_8

Going back to your original measurements (from your skirt block), measuring from the right hand side of your waistband, mark in each point of interest with a perpendicular line. You want to mark the location of your front dart, the side seam and back dart. You can also label each end as the centre front (right hand side) and centre back (left hand side).

Add seam allowance

draft_a_waistband_9

Add seam allowance to the top and bottom edges (I suggest 1 - 1.5cm). You can also add seam allowance to the centre back. I usually add 2cm to the centre back, to allow for the zip. Remember that the seam allowance you use on the waistband pattern, but be the same as the seam allowances you added to the skirt block, as you will be sewing these pieces together. 

Add notches

draft_a_waistband_10

Add notches to the pattern. You will want notches at all points of interest on the bottom edge (side seam, both darts and centre back), while on the top edge I would suggest only notching the centre back and then one other point that is not in line with the darts on the bottom edge. This will help you know which way up the pattern should go when you are sewing. This may not seem necessary as the piece is symmetrical, but if you are using a directional print, it will help make sure you don't end up with an upside down print! When cutting I would also suggest notching the centre front on both edges. 

Add pattern details

draft_a_waistband_11

Add pattern details and the grainline (runs vertically through the pattern), indicating that the centre front needs to be cut on the fold.

Button extension

draft_a_waistband_12

If you would like your zip to run straight through the waistband like this, then your waistband pattern is ready to go and you can get sewing!

draft_a_waistband_13

But if you would prefer the zip to stop at the waistline and then have a button to close the waistband, you will need to add a button extension to your pattern piece (which will only take a second).

Adding a button extension

draft_a_waistband_14

The extension will only be added to one end of the waistband, so you will need to fold the pattern in half (down the centre front) and trace the pattern to create a full pattern piece. Do not add seam allowance to the centre back on the second side. At the centre back you will be wanting to add the button extension. The length of this will depend on the size of your button, though I would say 3-4cm should be fine. Add seam allowance to the extension and now it's done!


What are your thoughts on waistbands? Do you prefer a shaped waistband, or does a straight waistband do the trick?


You may also like:

Throwback Thursday: How to add seam allowance to a sewing pattern

Last week, I showed you how to draft a skirt block from your own measurements, and then how to add shaping to the darts at the waistline, as part of The Skirt Series.

add_seam_allowance_to_a_pattern_inthefolds_2

Before going ahead and making a toile to see how it fits, you will need to add seam allowance and pattern markings (which will be in tomorrow's post). 

What is seam allowance?

add_seam_allowance_to_a_pattern_inthefolds_3

Seam allowance is the extra space you add around the edge of a pattern piece so that it can be sewn together.

If you do not plan to make up a toile of your pattern (in the case of pattern blocks), then there is no need to add seam allowance. When you are using a block to create a pattern it is much easier to use it without seam allowance and then add seam allowance once the pattern is complete. 

How do I add seam allowance?

I find that the easiest way to add seam allowance is with a long transparent ruler. Not to worry if you don’t have one though, you can just use and ordinary ruler and mark the seam allowance width at intervals along the seam and then draw the line through all the points.

I have two different rulers, which I find super helpful. One only shows centimetres, but also has lines to indicate the millimetres in between. This one is very handy for when I'm adding 6mm seam allowance to a neckline or 12mm to a seam.

add_seam_allowance_to_a_pattern_inthefolds-4

The other, which I have used for this tutorial, only show has a line for every 5mm. If I am using a 1cm / 1.5cm / 2cm seam allowance, then this is definitely the one I reach for, as there are a lot fewer lines to get confused by!

Before getting started

Before getting started, have a think about the seam allowances you plan to use. I know some commercial patterns use the same seam allowance on every seam, but I think you are much better off changing the allowance depending on the seam. This will help you get a much cleaner and more professional finish.

The seam allowance required will have a lot to do with the fabric you are using, and how you will be finishing the seams too. For example, if you are making a silk chiffon top, it is best to use a narrow seam allowance, so you are not left with bulky seams that show through. A silk chiffon top is a delicate piece of clothing, that is not worn everyday and is normally hand washed, so it can afford to have smaller seam allowances. But, if you are making a pair of trousers or a coat, you need seams that a stronger (particularly in places where tension is put on the seams - e.g. the crotch of trousers) and therefore need a seam allowance that is wider than what you would use for your chiffon top. 

Standard seam allowances

I have put together a table to help guide you with how much seam allowance to add, but as I said, it is up to you! If you click on it, you can download a printable version of the table. It may be handy to put up on the wall in your sewing room!

Adding seam allowance to your skirt block

This tutorial will show you the method I use for adding seam allowance to a pattern, using a skirt block as an example. This method can be used to add seam allowance to any pattern.

add_seam_allowance_to_a_pattern_inthefolds-6

Decide on how much seam allowance you will be adding (using the table above if needed) and find where the line is that indicates that width on your ruler. 

add_seam_allowance_to_a_pattern_inthefolds-7

Lay that particular line (the width of your seam allowance) along the side seam of your pattern.

add_seam_allowance_to_a_pattern_inthefolds-8

With a sharp pencil, or pacer, draw in your seam allowance, being careful to keep your ruler in place. Be sure to extend the line past the original line by a couple of centimetres (this helps when we add seam allowance to the other seams).

add_seam_allowance_to_a_pattern_inthefolds-9

After marking the side seam, it's now time to move on to the hip curve.

If the seam you are adding seam allowance to is curved (which it is in this case) you will need to mark the seam allowance with a broken line. Line up your seam with the ruler and draw a small line (in this case, two lines).

add_seam_allowance_to_a_pattern_inthefolds-10

Then pivot your ruler to you next point (I tend to do this every 1 – 1.5cm) and continue marking the seam allowance with a broken line.

For tight curves (such as the bodice neckline) mark your seam allowance guidelines closer together to ensure a smooth and accurate curve.

add_seam_allowance_to_a_pattern_inthefolds-11

Continue pivoting until you have gone around the whole curve.

add_seam_allowance_to_a_pattern_inthefolds-12

Next, on to the waistline. Before starting to add seam allowance, extend both dart arms, as well as the centre line, by a few centimetres. This will help when you are adding seam allowance to the top of the dart.

add_seam_allowance_to_a_pattern_inthefolds-13

Mark the seam allowance on the waistband, and then follow the angle of the dart, when you get to the first dart arm. Repeat for the other side.

add_seam_allowance_to_a_pattern_inthefolds-14

Continue along the waistline, towards the centre front, pivoting the ruler when necessary. 

add_seam_allowance_to_a_pattern_inthefolds-15

The centre front does not need seam allowance, as you will be cutting this piece on the fold. Just extend the centre front line a little beyond each edge, so that it can intersect with the seams on the other sides. 

add_seam_allowance_to_a_pattern_inthefolds-16

Mark the hem allowance by measuring down the centre front and side seam from the stitching line. 

add_seam_allowance_to_a_pattern_inthefolds-17

Join the points to create the hemline. 

add_seam_allowance_to_a_pattern_inthefolds-18

By this stage, you should have worked your way around the whole pattern.

add_seam_allowance_to_a_pattern_inthefolds-18

Now to do something about those broken lines. 

Draw in your curve by joining the broken lines to form a smooth curve. You can do this by carefully pivoting your ruler, using a French curve or something else round (like a large mug or plate depending on the shape of the curve). A good way to check if your curve is smooth is, with the pattern flat on a table, to crouch down and look at the curve at eye level. You will quickly see if there are any sharp points!

add_seam_allowance_to_a_pattern_inthefolds-19

Repeat for the back pattern piece. And you are done, your pattern now has seam allowance!


I would love to know if I have convinced any of you to try doing some pattern making yet?


You may also like: