Recently I have been well and truly in summer sewing mode, as I have been working on another pattern for Peppermint magazine (see my first pattern for Peppermint here). As it's a quarterly publication, the next release will be in Spring, which makes me feel as though spring is just around the corner. And makes me very excited! I am not a winter person at all, so I have been very much enjoying pretending it's spring and using luscious linen to make the sample.
So, to keep the dream alive, that it is actually spring (I know I shouldn't whinge as winter in Sydney is very mild) I thought I'd post a follow up post to the post I did a couple of weeks ago on drafting a summer top.
I thought a good place to start would be with a few simple adjustments you can make to your simple top pattern (or even an existing top pattern you have) to add a bit more interest, starting with adding a yoke.
What is a yoke?
A yoke is a panel that is inserted in the top of a garment to add interest. For example, yokes are often used on the back shoulders of shirts, but can also be found on blouses, tops, skirts and trousers.
Trace the pattern
To start, trace a copy of the pattern you would like to add a yoke too. I am using the simple sleeveless top pattern that I drafted from my basic bodice block.
Style lines
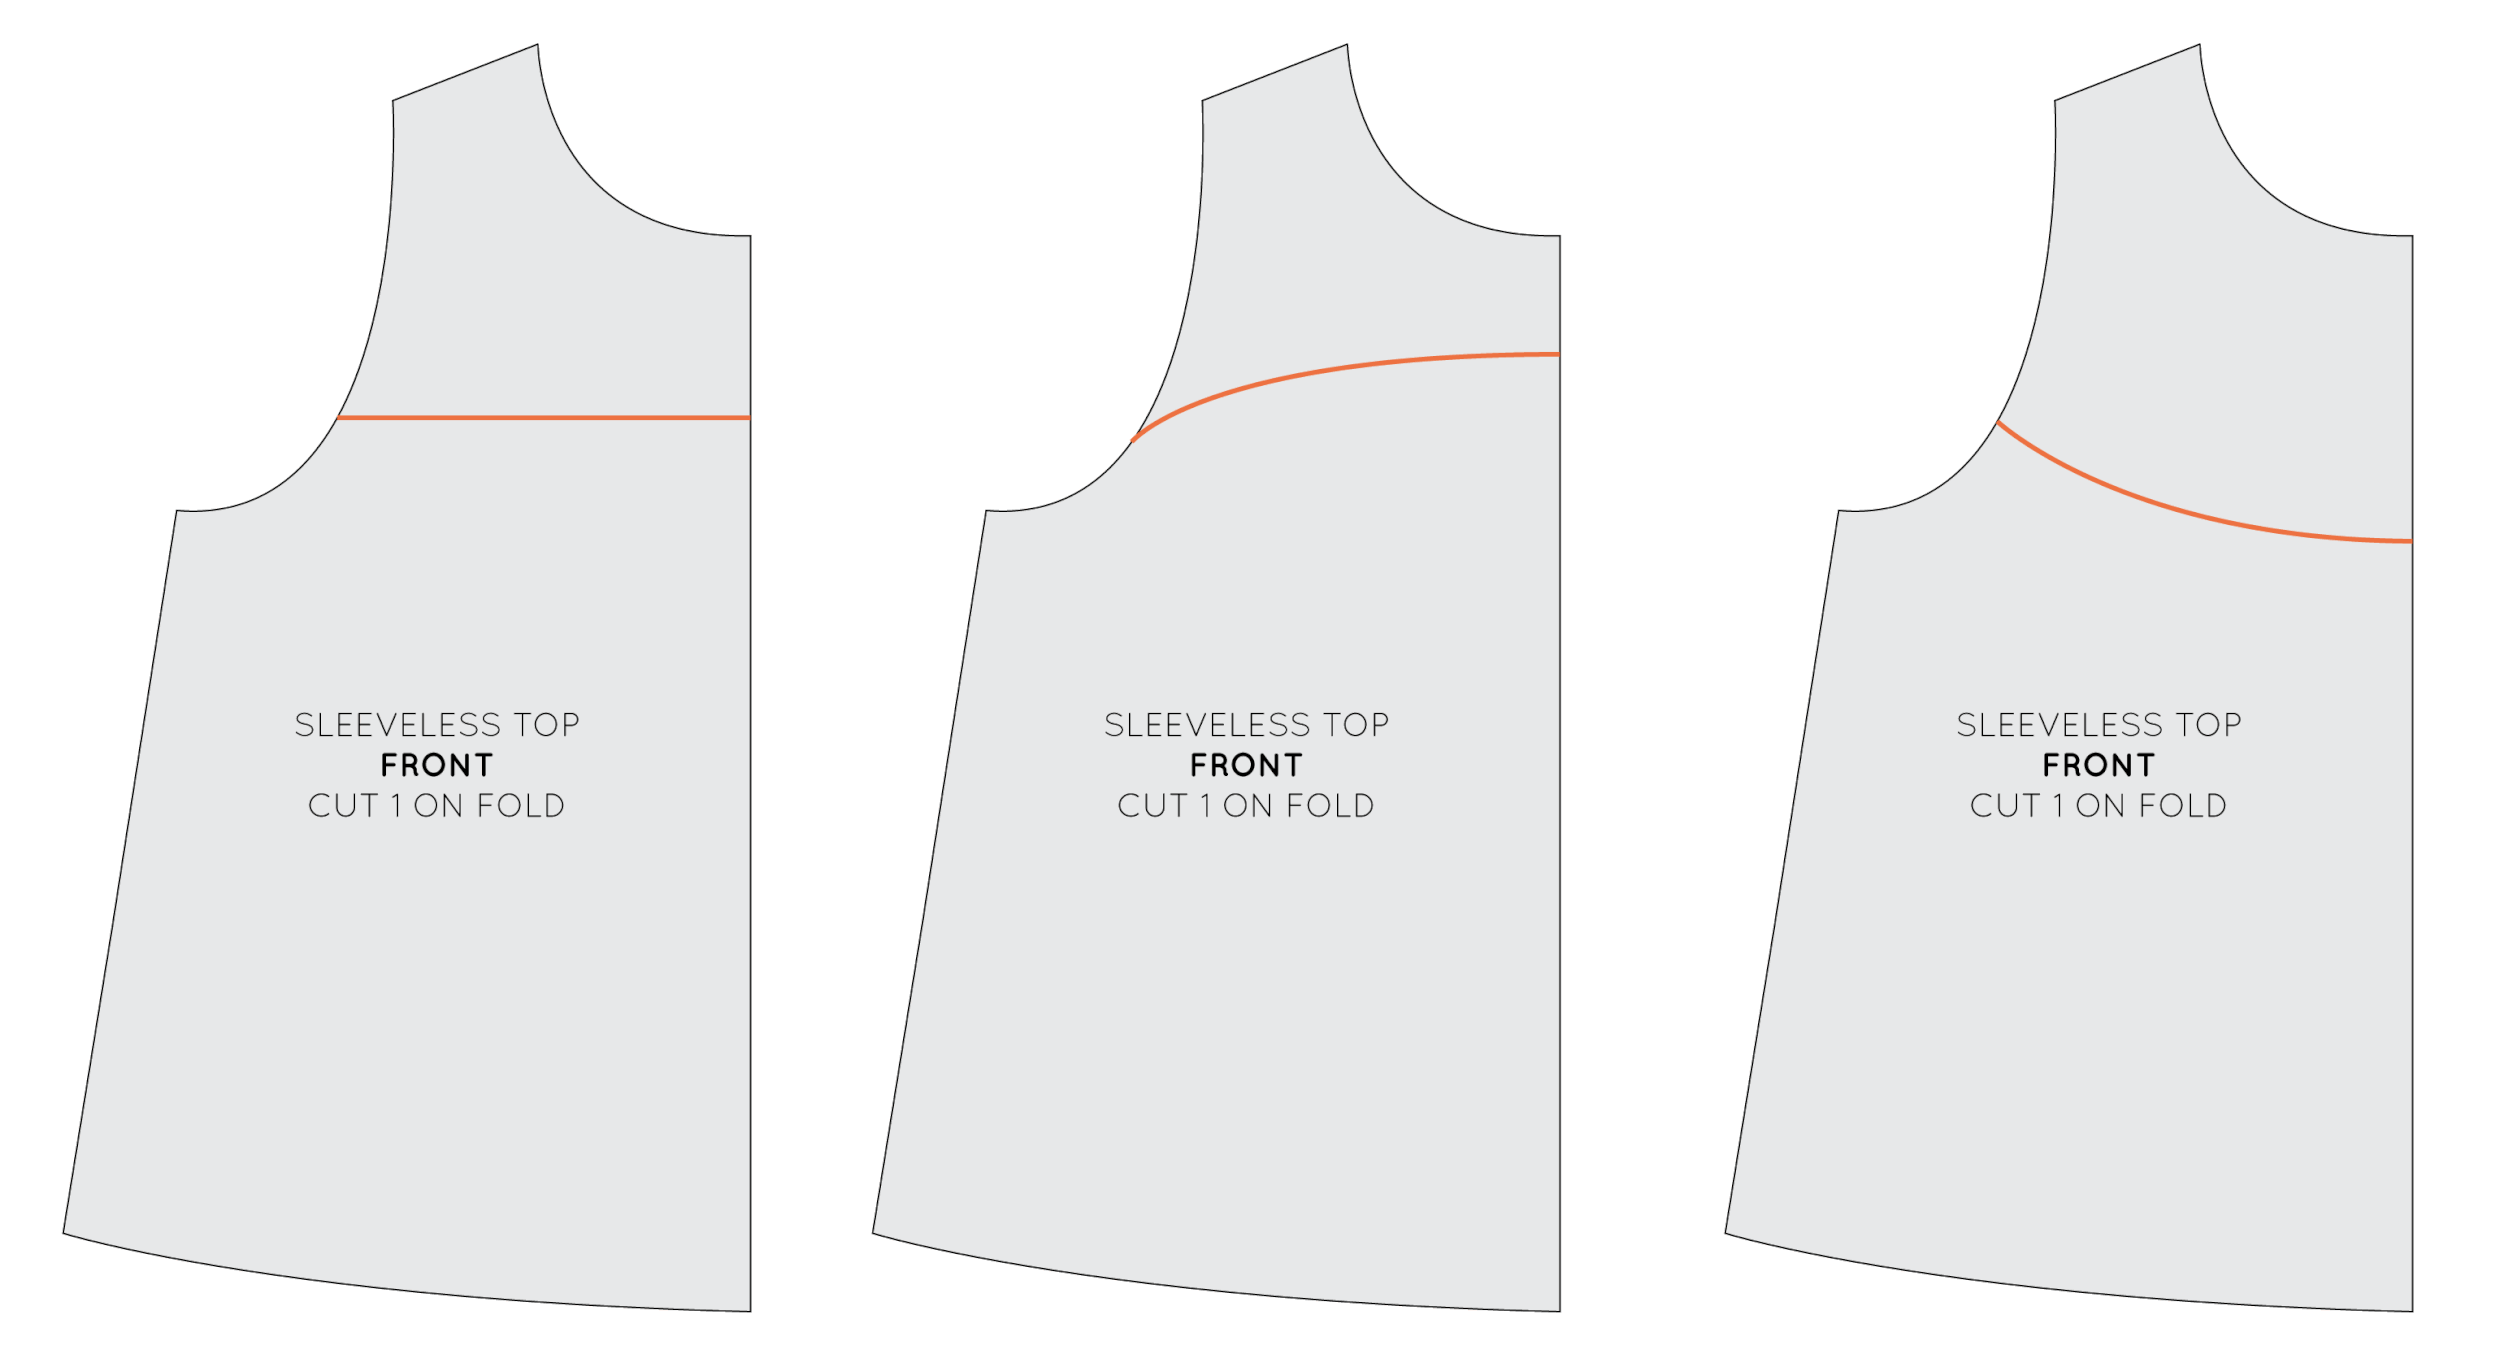
Think about the shape of the yoke you would like to create, and draw the style line on the pattern. I have included a few examples, but there are countless options of what you could do. Be sure to bring the style line to a right angle at the centre front (more details about this can be found here).
For the sake of the example, I decided to go with a simple straight yoke through the armhole. Before going any further, put a notch on the style line. This will help match the two pieces back together once they become two separate pattern pieces.
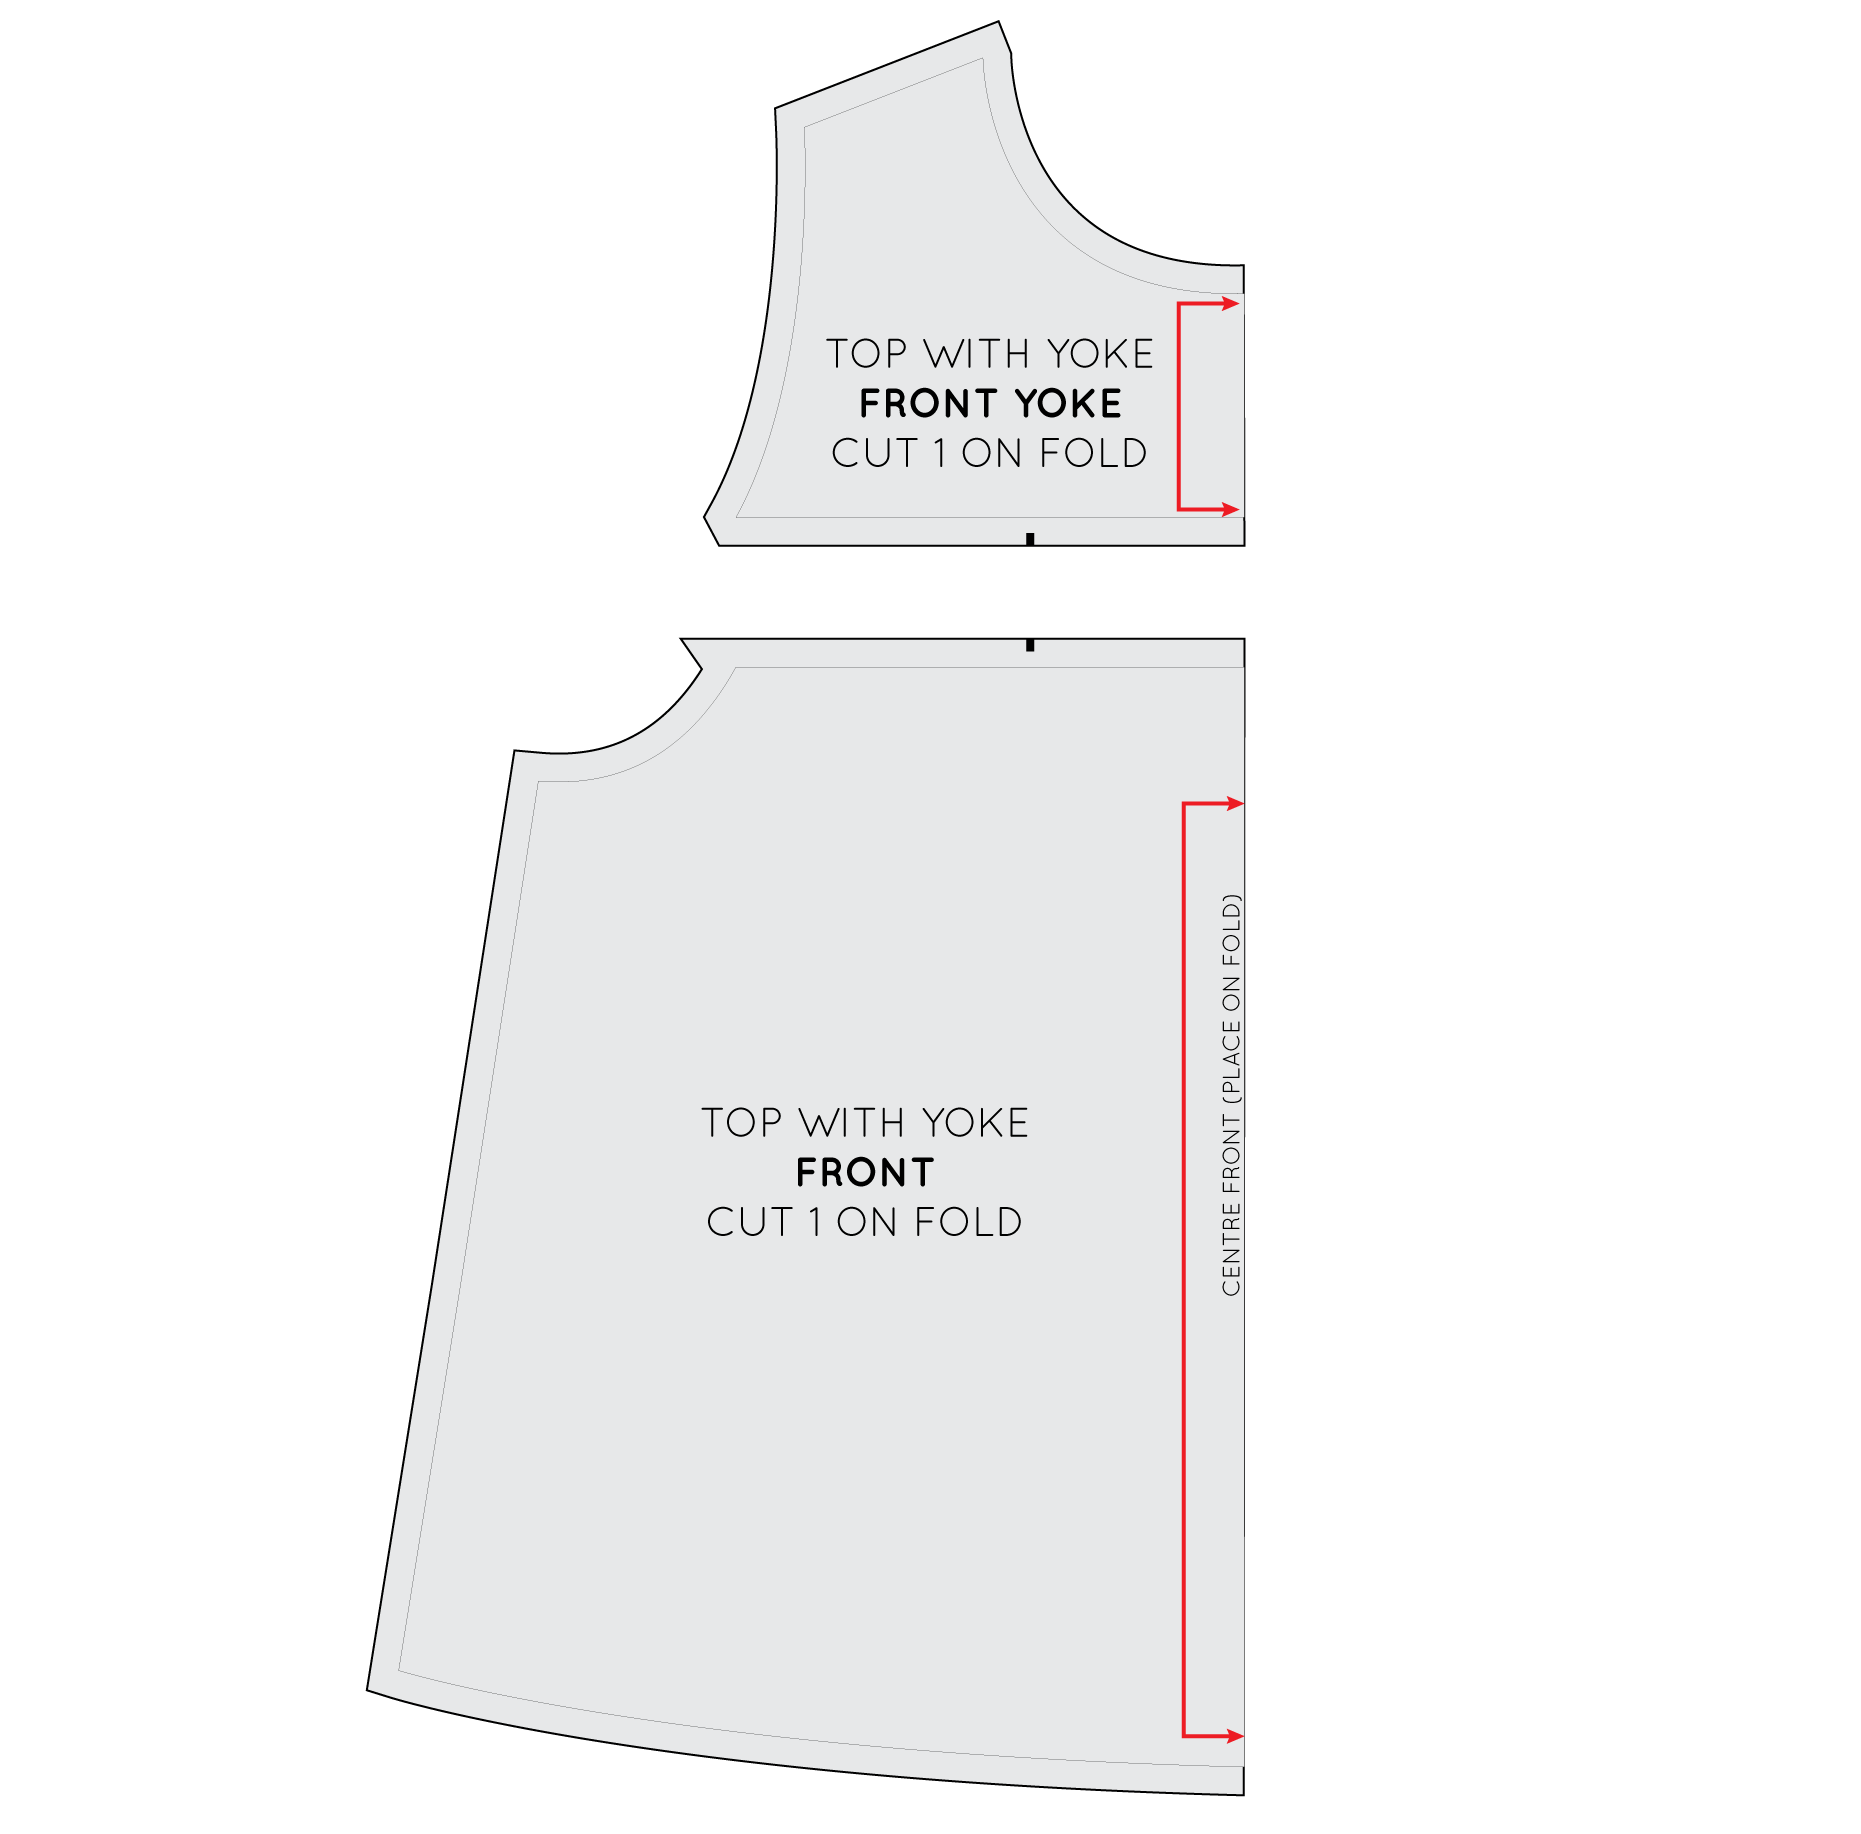
Cut along the style line (or trace each piece onto paper) to create two independent pattern pieces.
What next?
There are a number of things you could choose to do now. You could leave the pattern as is (just add seam allowance and pattern markings) for a simple tank with a yoke panel line (which you could choose to also repeat on the back pattern piece).
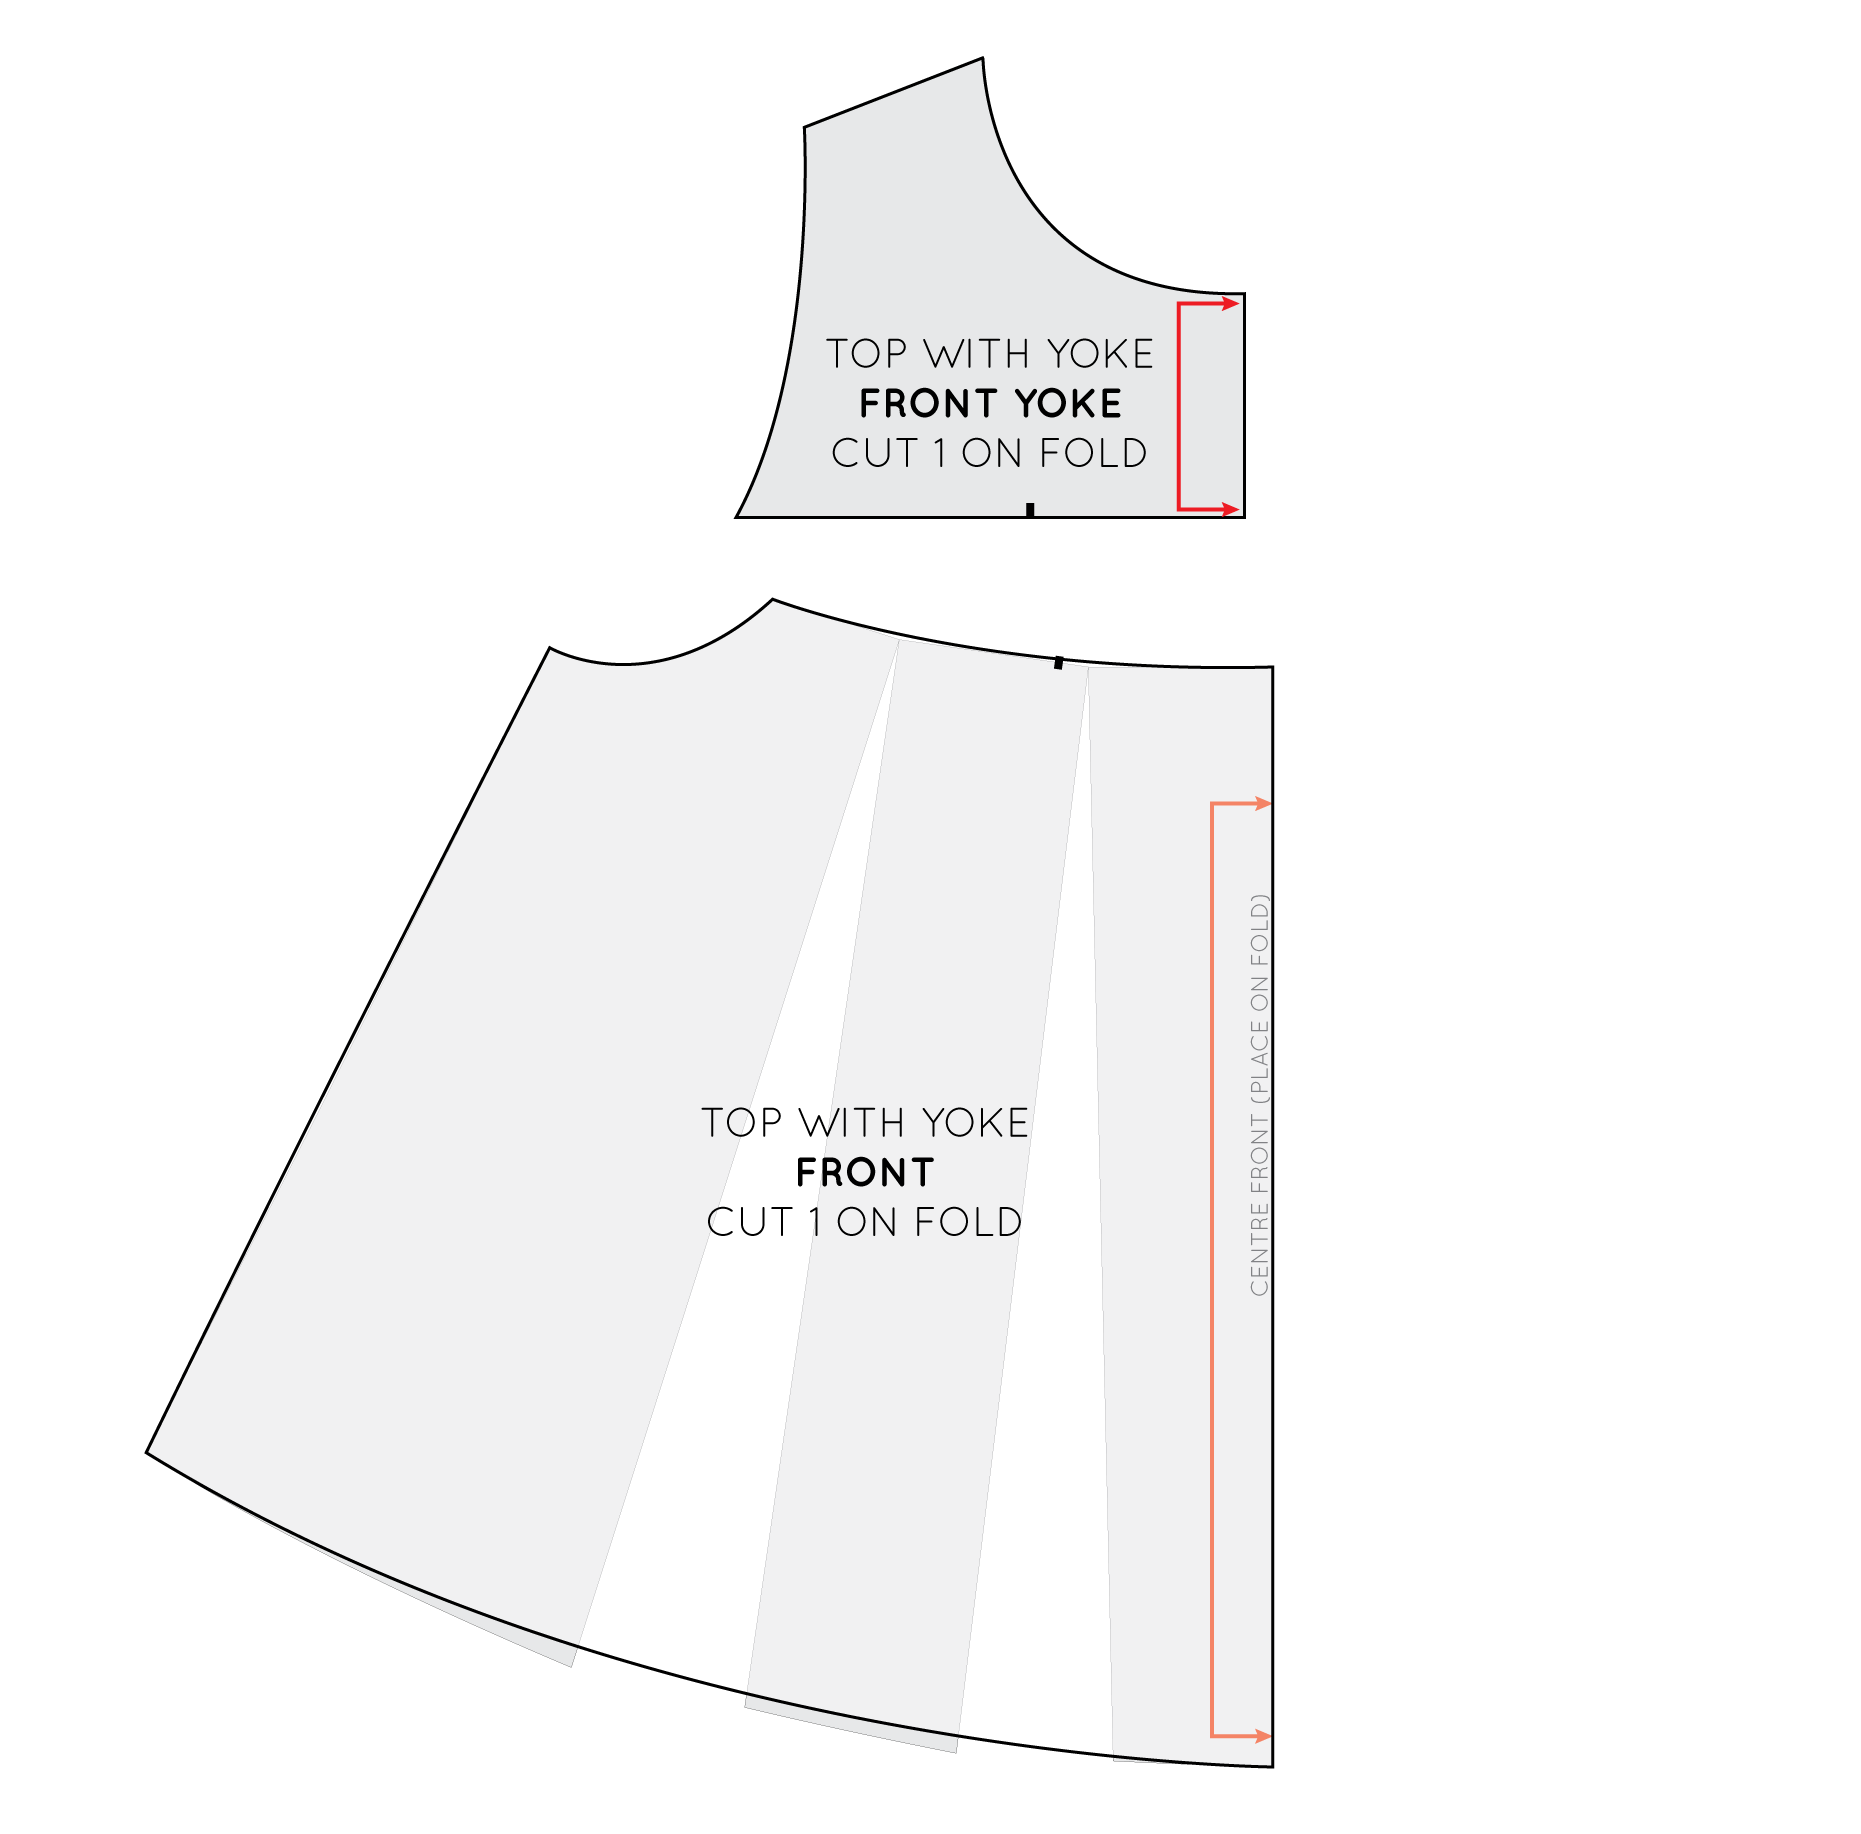
You could consider adding volume to the lower panel to create more of a trapeze silhouette. You can do this by cutting and spreading the pattern until you achieve the desired silhouette (look at this tutorial for more details about how to do this).
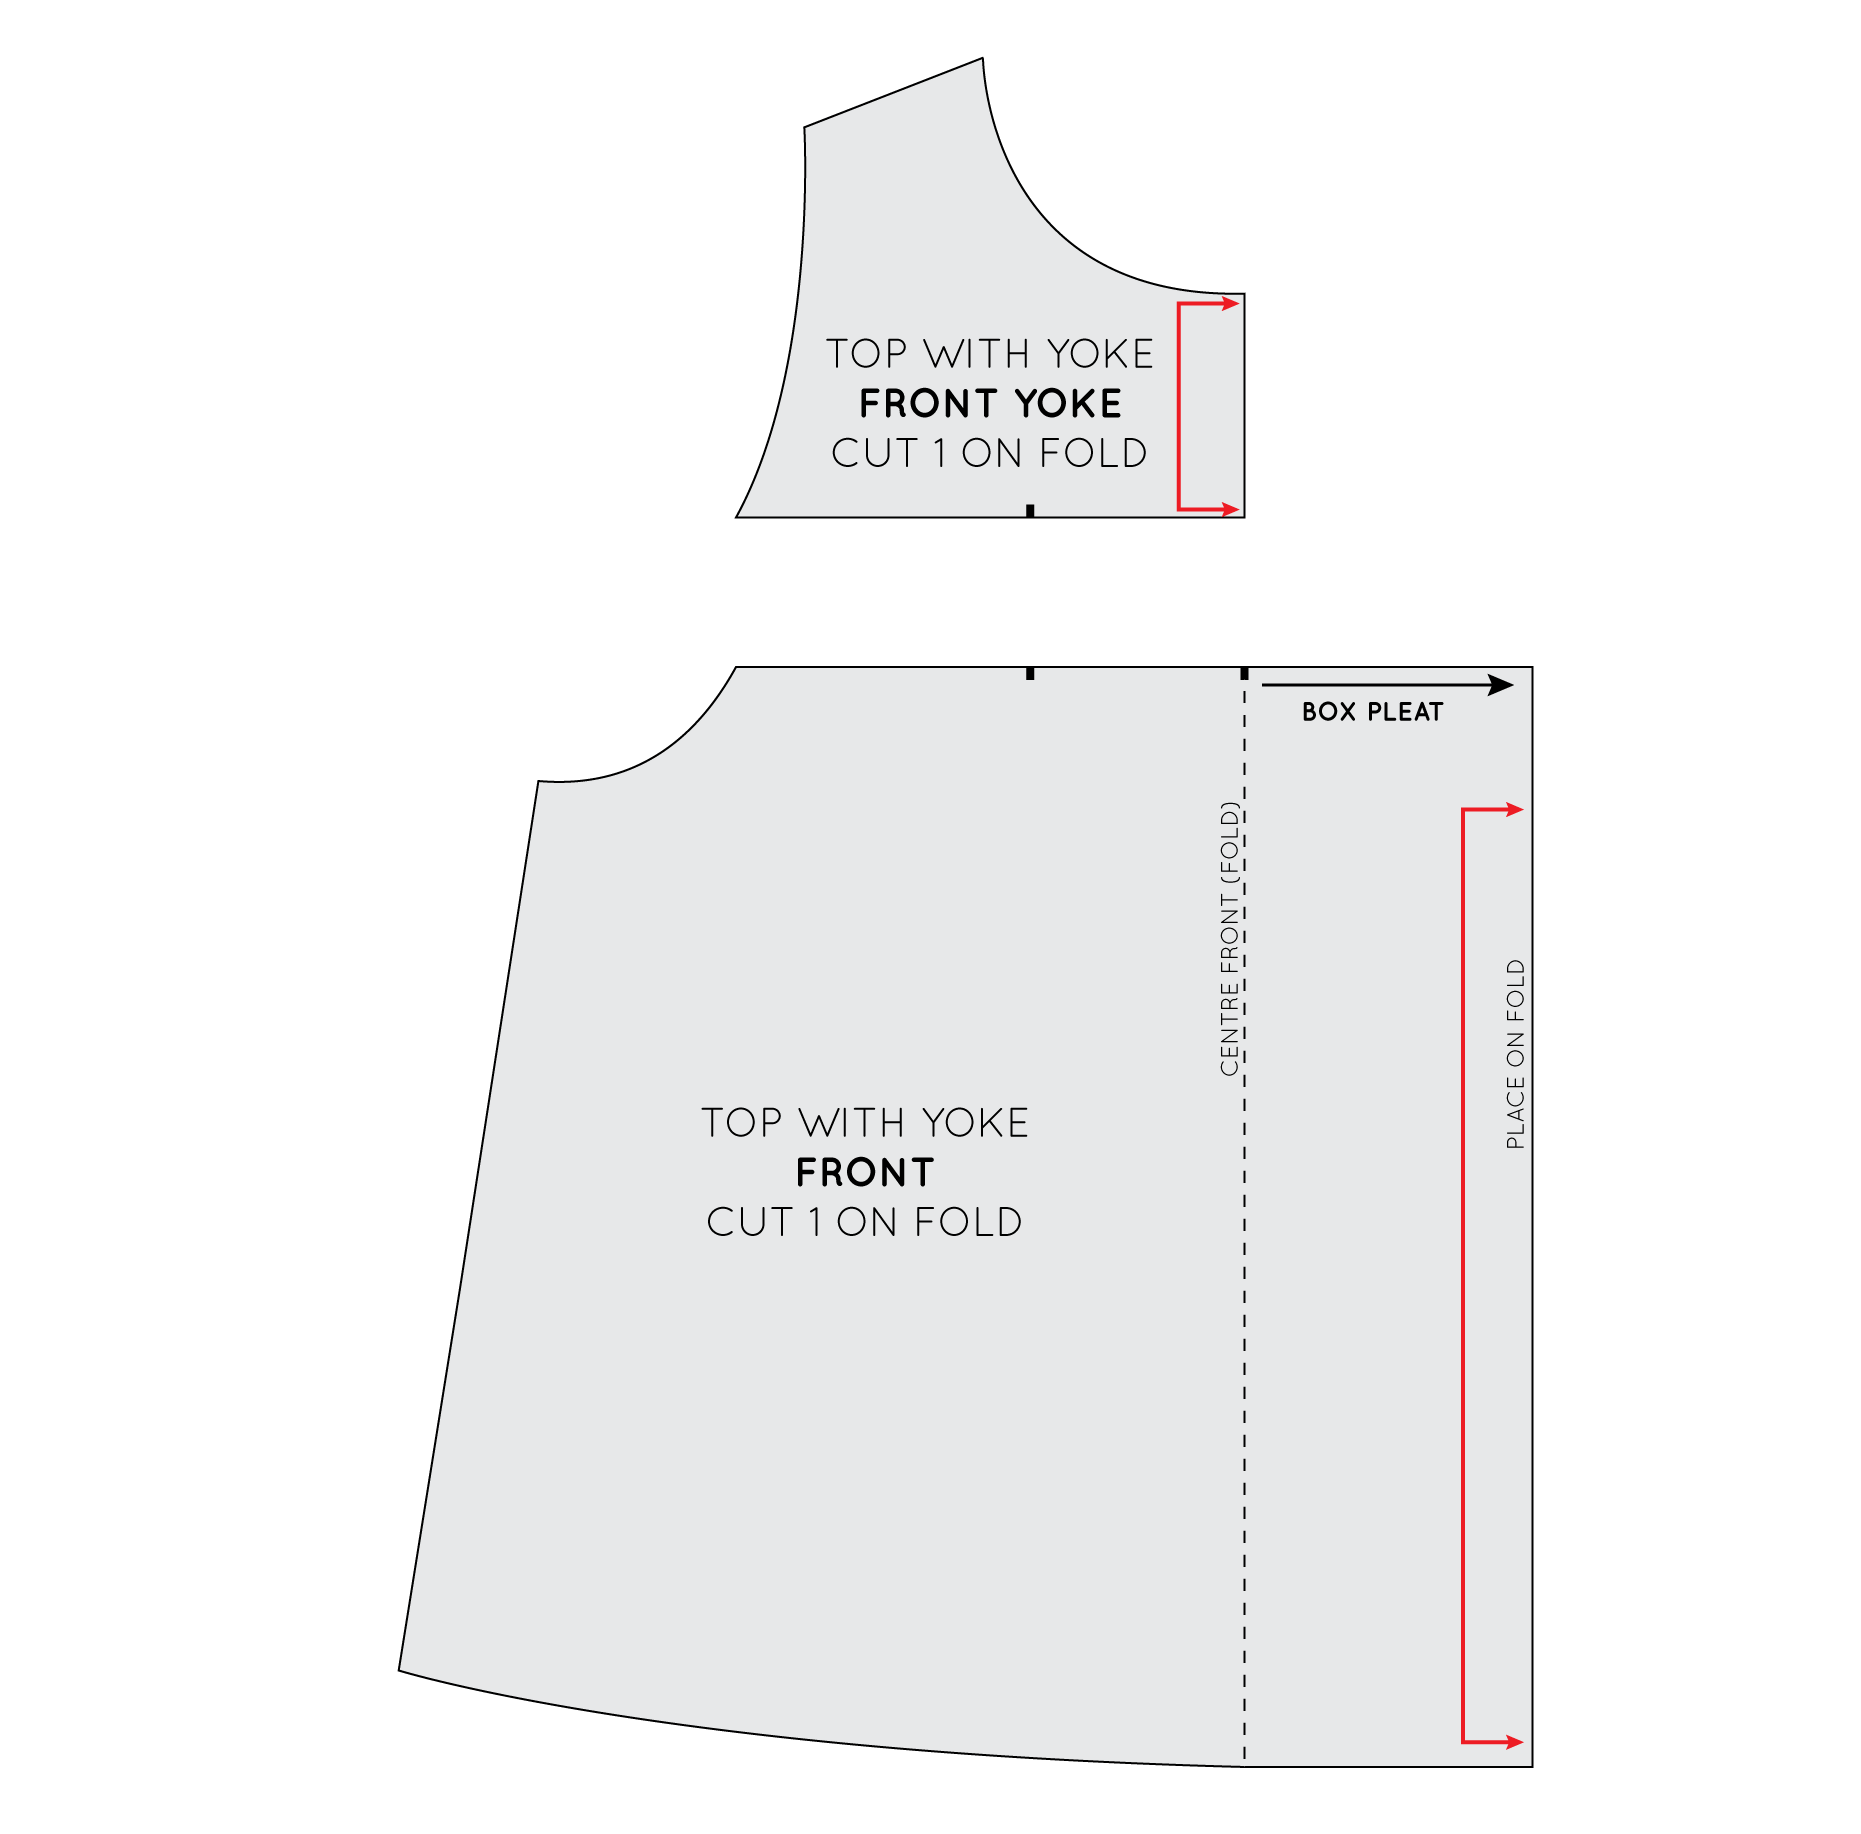
Or even consider adding a box pleat at the centre front (this is a personal favourite of mine).
Finish the pattern by adding seam allowance and cutting instructions.
You may also like:


