Welcome back to the Acton sew-along! Yesterday we got started on the wrap version of the Acton dress, and today we'll be continuing by adding the waist ties and finishing up the side seams on the wrap.
Make the waist ties

Take the waist tie pieces and fold in half lengthways, right sides together. Stitch along the length of the strap with a 1cm (⅜in) seam allowance. Trim the seam allowance down to 3-4mm (⅛in) before using a safety pin (or bodkin) to turn right side out. Use a pin to tuck one short edge of the tie inside itself and stitch close to the edge to enclose.
Attach waist ties + finish side seams

Take the dress and with it right side out, pin the skirt side seams together, using the notches to guide you. Take the raw end of the waist tie and pin the tie in place at the top of the seam, overlapping the side seam by 1-2cm (⅜ - ¾in). I know this looks a little bit strange, but I promise it will work!

Stitch the side seam with a 6mm (¼in) seam allowance. Trim down the seam allowance by 2-3mm (⅛in).
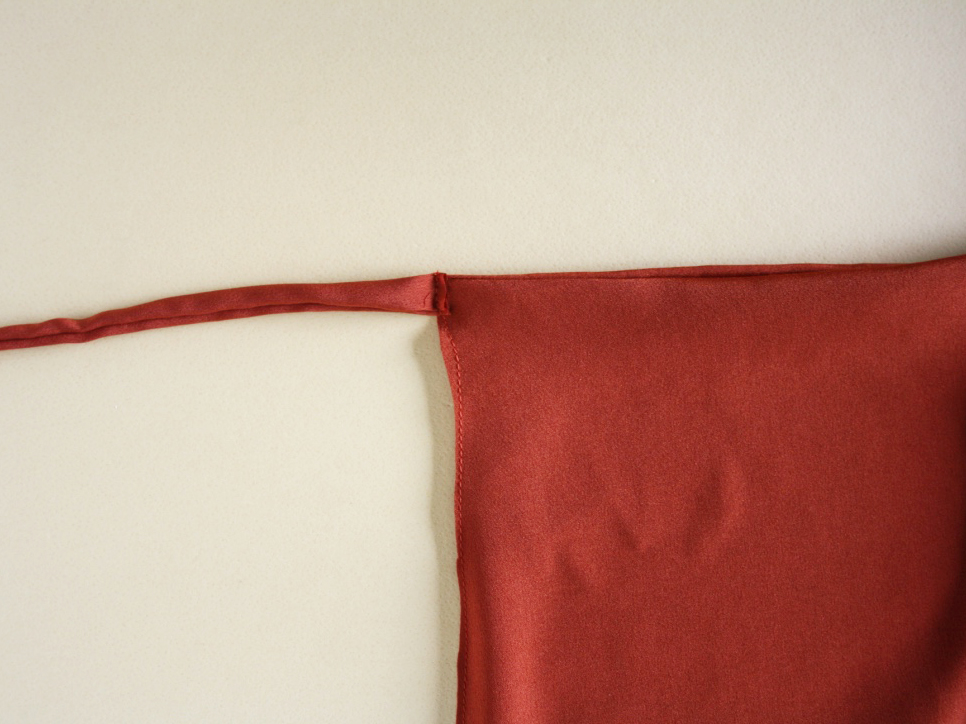
Trim back the raw edge of the waist strap by the same amount. Repeat on the other side.

Turn the dress inside out and press the seam flat, being careful to check that the waist ties remain
straight. Pin in place, before stitching with a 6mm (¼in) seam allowance. Repeat on the other side.
And that's it for today's post! Next week we will be finishing up by sewing on the straps, attaching the bodice lining and hemming.