Last week we assembled the bodice (it's the same process as the A-line version) and attached the skirt to the bodice. Before working tour way through this post, you will need to insert the invisible zip. The tutorial is for View A, but the process is exactly the same - you just have different back bodice pieces to attach.
Attach the straps

When the zip is inserted, it's time to make the straps. Use the same method as we did for View A (these straps are just much shorter).
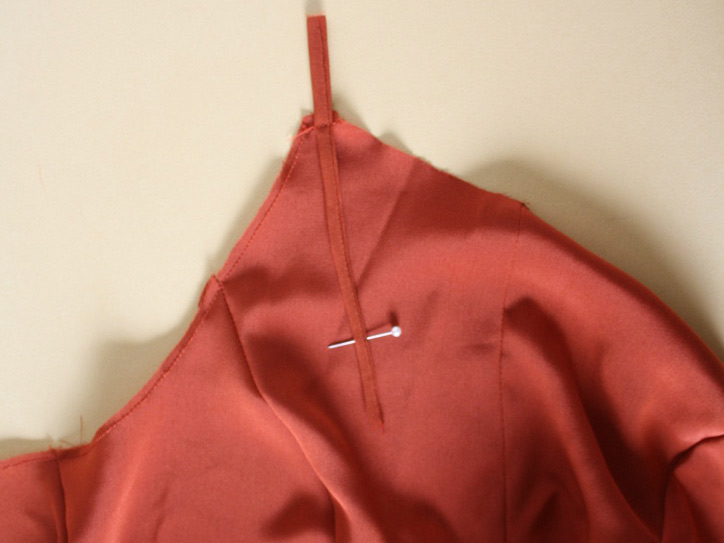
Take the straps and place them face down on the front of the bodice, pinning them in place between the neckline and the armholes. The straps need to be positioned with the short end sticking up beyond the top edge of the bodice (it will become right way up when the bodice is lined). Stitch in place 6mm (¼in) from the top edge.
TRY ON THE DRESS
Try on the dress and pin the straps in place at the back (this is when an extra set of hands really helps), at the length that they feel comfortable. Strap positioning is very important, so have a play around to ensure you have got it right. The peak of the princess seam on the bodice should sit on the peak of your bust. If you are struggling with this, it may help to check out some of the tester versions of the dress, to see how the bodice sits on a range of different figure shapes.
Take the dress off and use a horizontal pin to mark the correct length on the back end of each of the straps, before taking off the dress.
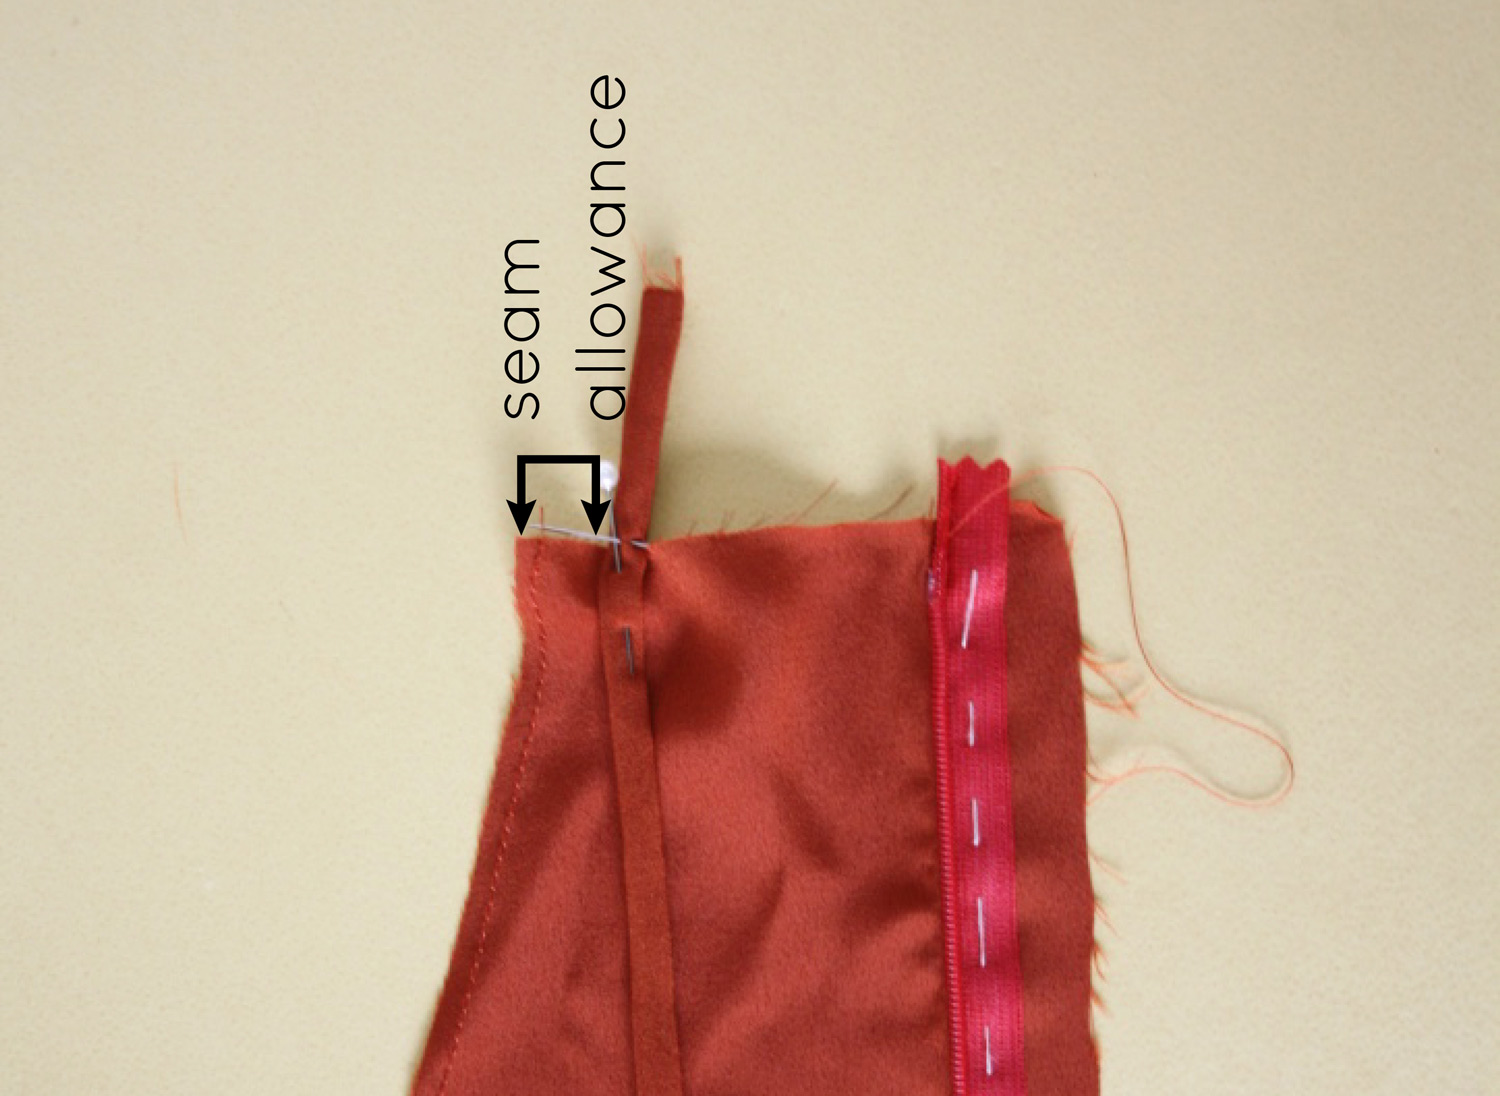
Being careful not to twist the straps, pin the straps in place on the back of the bodice. When attaching the strap to the back, be sure to remember that there is a 1cm (⅜in) seam allowance around the armhole, and the strap will need to sit clear of that. Stitch in place 6mm (¼in) from the top edge.
I was planning on showing you how to line the bodice today too, but I have just realised, that would create a very very long blog post! So, as not to overwhelm you, I'll leave that until tomorrow.