So now that we are all feeling inspired (hopefully) and have chosen our fabric, it is time to think about sizing. The Rushcutter sewing pattern is available in sizes A - K (approximately equivalent to AU size 6-24).
Take your measurments
To select the appropriate size, first take your measurements.
It is best to take your measurements while wearing only underwear, or otherwise very tight clothing, so that you can get true measurements. Get someone to help you, if you can. Otherwise take your measurements in front of the mirror, so that you can check that your tape measure remains parallel to the floor, and is not twisted.
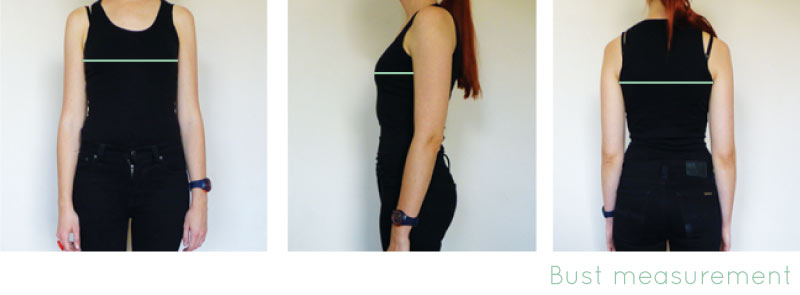
First, measure your bust and take note of the measurement.

Measure your waist... and don't suck in your tummy like me!

And then measure your hips.
Body measurements
Now look at the size chart and circle where your measurements lie. Your measurements may lie across several sizes or between sizes.
Rushcutter finished measurements
You should also look at the finished measurements of the Rushcutter. This dress is designed to be oversized, so there is A LOT of ease included (14cm at the bust, 43cm at the waist, and 28cm at the hip). If your bust measurements fit one size and then your waist and hips are another, it is likely that you can go with the size of your bust, but do check the finished measurements and make a decision based on them. It is no problem if your size ranges between multiple sizes. It is very easy to grade between sizes, as the pattern is nested, and I will show you how to do this next week in the sew-along.

Take note of which size/s you need to print, as the pattern has been made with embedded layers so that you can just print the size/s you want! Layers make it much less confusing to cut the right size, and also saves on ink (and paper, in some sizes).
In the next post in the sew-along, I will show you how to print and assemble your PDF pattern.


