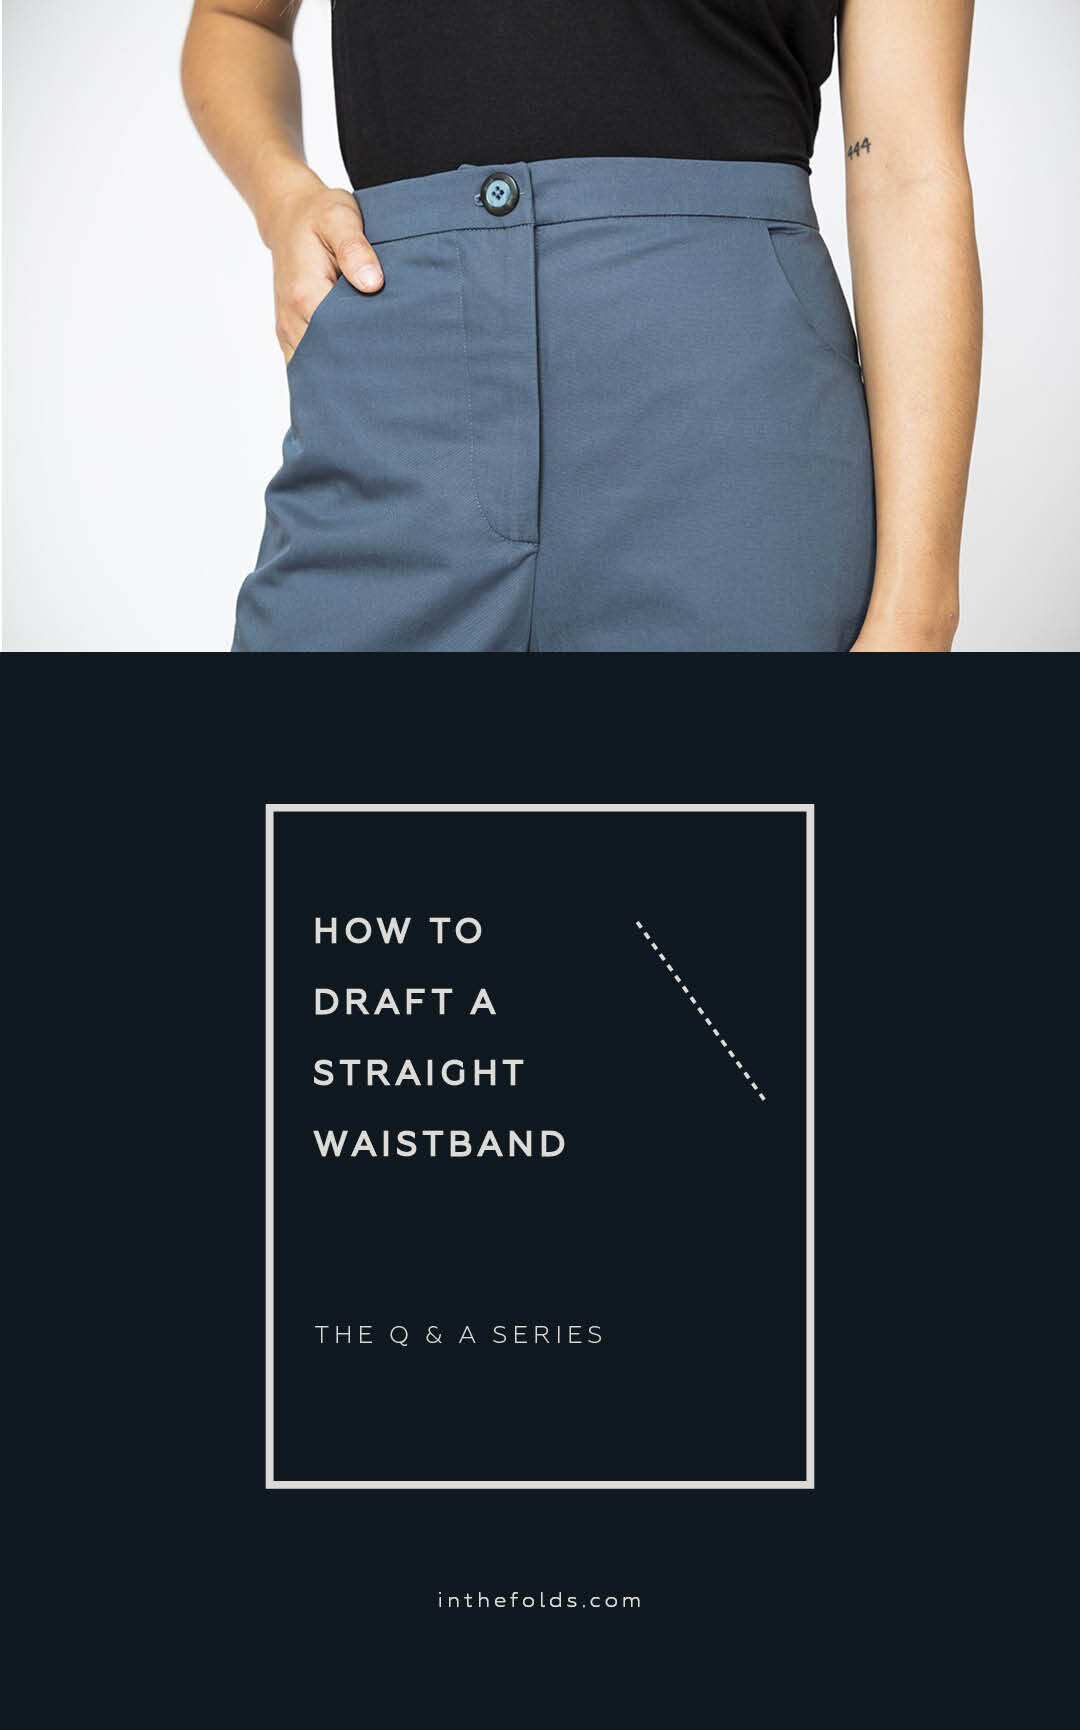
THE Q & A SERIES - HOW TO DRAFT A STRAIGHT WAISTBAND
Hi Emily,
I have plans to make the Peppermint Wide Leg pants. If I were to change this from a curved waistband to a straight one, how would I go about doing that??
Best,
Swetha
Oakland, United States.
Hi Swetha,
This is a great question! All the patterns I have released so far that have a waistband, have a shaped waistband, so for any of you who prefer a straight waistband, this will be a great tutorial for you to have saved.
STRAIGHT OR SHAPED WAISTBAND?
The type of waistband you're going to want to use will depend on your body shape and the way you like your clothes to fit. If your body is fairly straight up and down in the waist / hip area, a straight waistband may be your best bet. If you are quite curvy between your waist and your hip, it is likely that you will achieve a more comfortable fit with a shaped waistband.
PREPARE YOUR PATTERN

Step 1
Take FRONT LEG [1], BACK LEG [2], POCKET BAG [4] and FLY [6] pieces from the Peppermint wide leg pants pattern.
Please note: if you are using this tutorial for another pattern and it does not have the stitch lines marked, you will need to mark in your stitch lines / seam allowance in the relevant areas.

Step 2
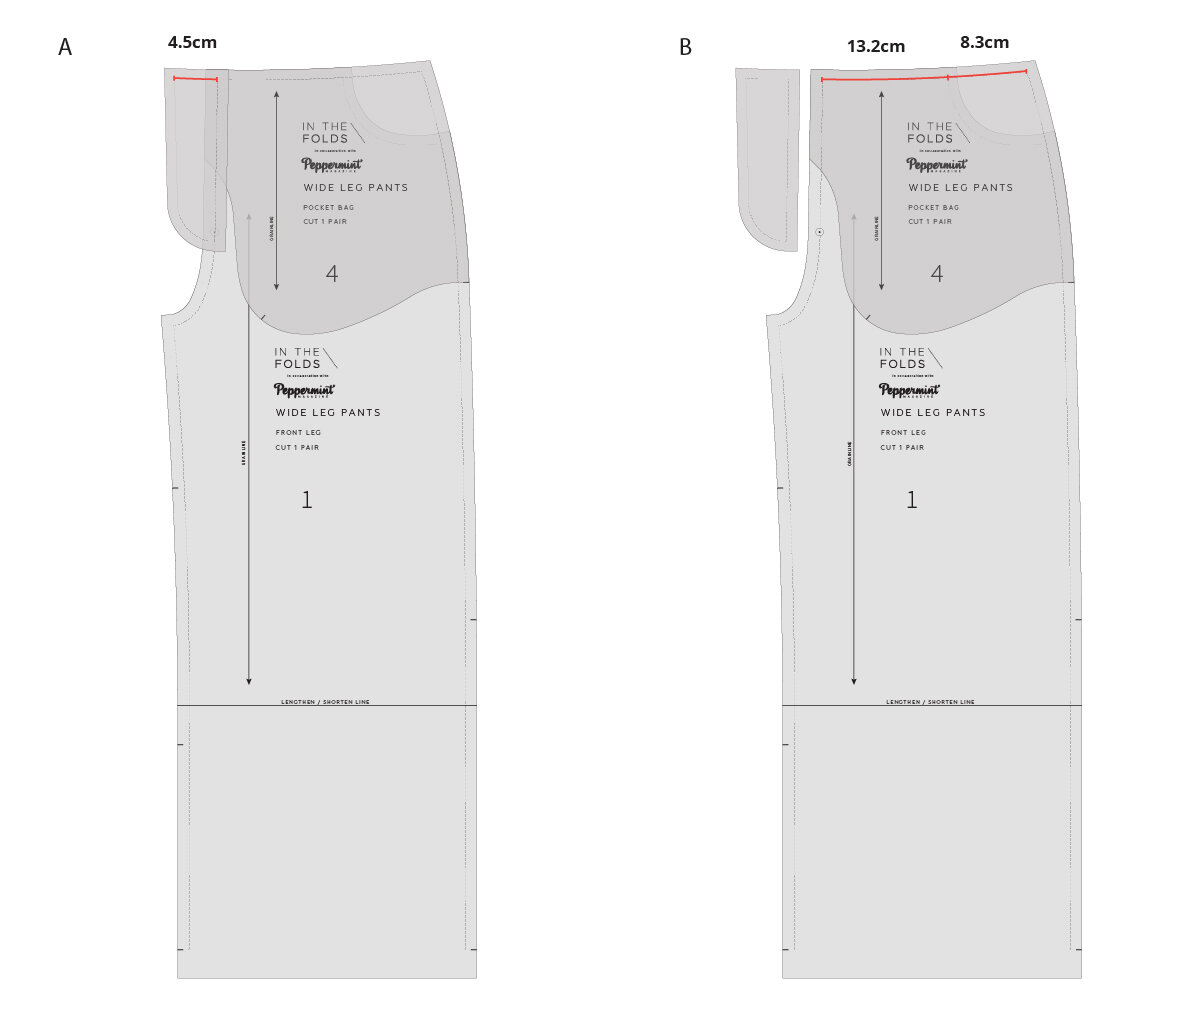
A. Place POCKET BAG [4] on the FRONT LEG [1] piece, lining up the front crotch, waistline and side seam (this lines things up as if the pieces have been sewn together). You can hold the pieces in place with masking tape, pins or pattern weights.
B. Flip the FLY [6] pattern piece and place it on the front crotch - lining up the stitch lines (grey lines) along the crotch and waist edge - again, lining things up as if they had been sewn together.
MEASURE FRONT WAIST
Step 3
A. Take a tape measure and measure the stitch line on the FLY [6]. Take note of this measurement. I find it handy to write this directly on the pattern piece - close to the stitch line that was measured.
B. Move the FLY [6] piece out of the way and measure the front waistline. First, measure from the front crotch to where the pocket curve intersects the waist line (you might need to put the pattern pieces up to a window or lightbox if your paper is not transparent) - again measuring on the stitch line. Take note of this measurement. Next, measure from this point to the side seam and take note of the measurement.
MEASURE BACK WAIST
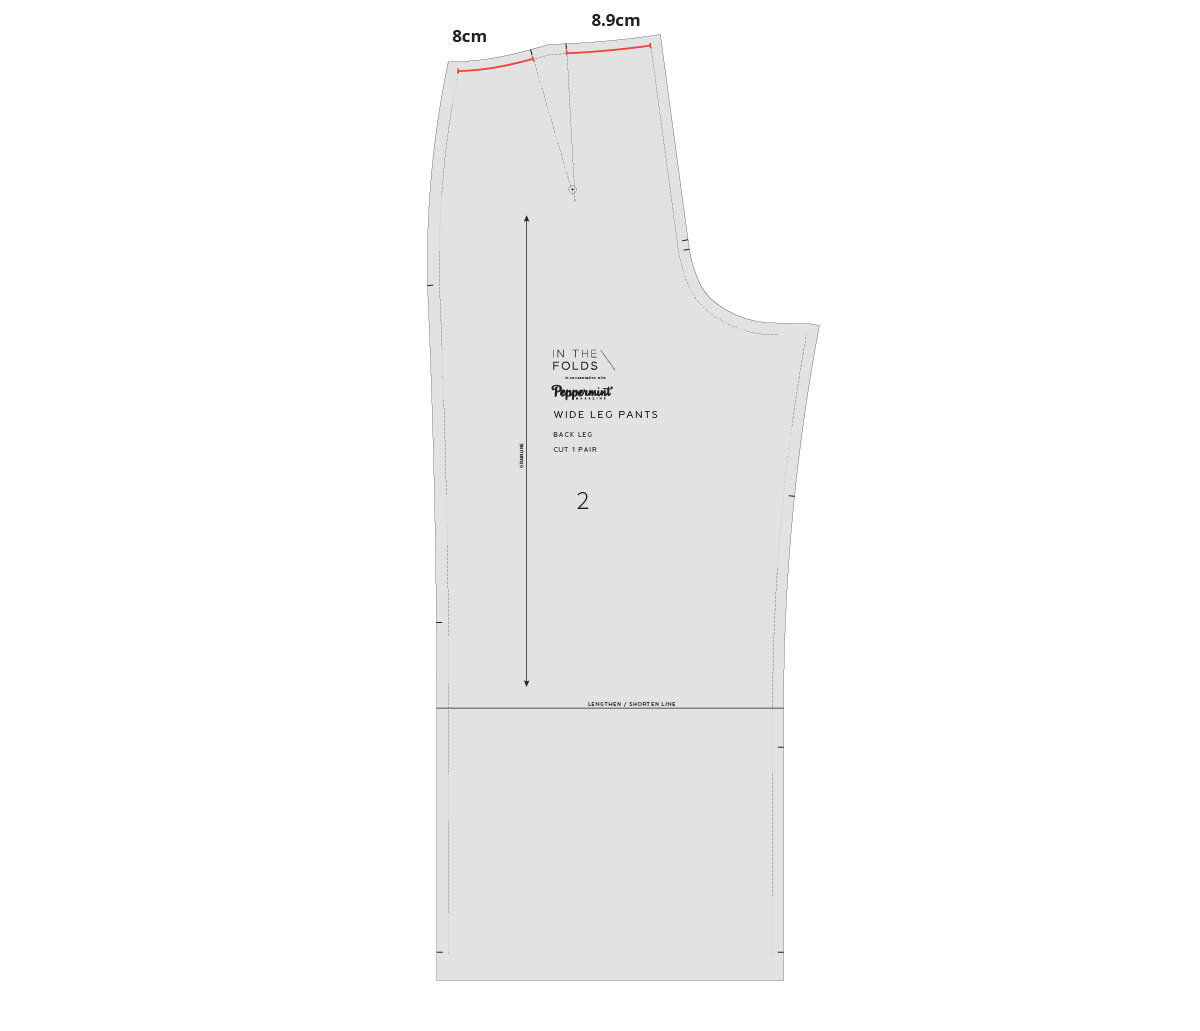
Step 4
Take the BACK LEG [2] and measure the waist edge on the stitch line. The dart will be sewn closed, so you need to measure each side of the dart and take note of these two lengths.
DRAFT THE WAISTBAND

Step 5
Add all the measurements found in Steps 3 and 4 to find the length of one half of your waistband.
Take a piece of pattern paper and draw a line the length found above - using a ruler. Draw your line on the left side of the paper, as you will need the remainder of the sheet of paper for the right hand side of the waistband. It's always a good idea to cut a piece of paper that is larger than what you need, so that you have some space to work around your pattern piece.

Step 6
At the end of the line (on the right hand side), draw a line that will become the centre back of your waistband - perpendicular to the original line. Make this new line the width you would like the finished waistband, multiplied by 2. For example, I would like the waistband to be 3.5cm wide when the pants are finished, so the perpendicular line will be 7cm.
Label the perpendicular line as the CENTRE BACK.

Step 7
Take the measurement found in Step 4 - the measurement from the back crotch to the dart - and mark this length on the horizontal line - measuring from the CENTRE BACK. I find it really helpful to label these points as I go - they don't need to be on the final pattern, but can be handy during the drafting stage.
Label this point as BACK DART.

Step 8
Take the other measurement found in Step 4 - the measurement from the dart to the side seam - and mark this length on the horizontal line - measuring from the BACK DART point.
Label this point as SIDE SEAM.

Step 9
Take the measurement found in Step 3B - the measurement from the side seam to the pocket - and mark this length on the horizontal line - measuring from the SIDE SEAM point.
Label this point as POCKET.

Step 10
Take the other measurement found in Step 3B - the measurement from the pocket to the front crotch - and mark this length on the horizontal line - measuring from the POCKET point.
Label this point as CENTRE FRONT.

Step 11
Take the measurement found in Step 3A - the fly extension measurement - and mark this length on the horizontal line - measuring from the CENTRE FRONT point (it should get you to the end of the line, if you have done your maths correctly).
Label this point as FLY EXTENSION.

Step 12
Draw a straight line up from the FLY EXTENSION point, the same length as the centre back line (the width of the waistband multiplied by 2).
Join the top of the FLY EXTENSION line to the top of the CENTRE BACK line, creating a rectangle.

Step 13
Fold the paper in half along the CENTRE BACK line and transfer the markings to the other side of the paper. You can do this by tracing the pattern (if your paper is transparent enough, or you have a lightbox - or a nice bright window), or taking a tracing wheel and transferring the markings. Transfer both the rectangle outline and the markings along the bottom.

Step 14
Unfold the paper. Label each side of the pattern - LEFT HAND SIDE and RIGHT HAND SIDE.
On the right hand side of the waistband, draw a line straight up from the CENTRE FRONT point. The waistband only requires an extension for the fly one one side (the left hand side), so you can remove the extension from the right hand side of the waistband at this point (just use an eraser / cross out the lines, rather than cutting it off, as you will need to add seam allowance on this side in the next step).
ADD SEAM ALLOWANCE

Step 15
Add seam allowance to all edges. The amount will depend on the pattern (as the amount you add to the long edge of the waistband needs to be the same amount as what is on the waist edge of the pants). In the case of the Peppermint Wide Leg pants, the seam allowance on this edge is 1cm (3/8in). For more detail on adding seam allowance to a pattern, see this tutorial.
ADD NOTCHES

Step 16
Add notches to the pattern by turning each of the points marked in Steps 7-11 into notches. Notches should be no more than 6mm (1/4in) long. Also add a notch at the CENTRE BACK and CENTRE FRONT. For more information on marking notches, see this tutorial.

Step 17
Add notches to the other long side of the pattern piece. You won't need all the same notches that are on the bottom edge, as it will be the bottom edge that is attached to the top edge of the pants first (having more notches on one side of the piece will prove helpful when working out which side to attach to the pants first).
On the top edge of the waistband, mark a notch at both CENTRE FRONT points, the CENTRE BACK and on the left side to indicate the 1cm seam allowance on that edge.
ADDING PATTERN MARKINGS + CUTTING INSTRUCTIONS

Step 18
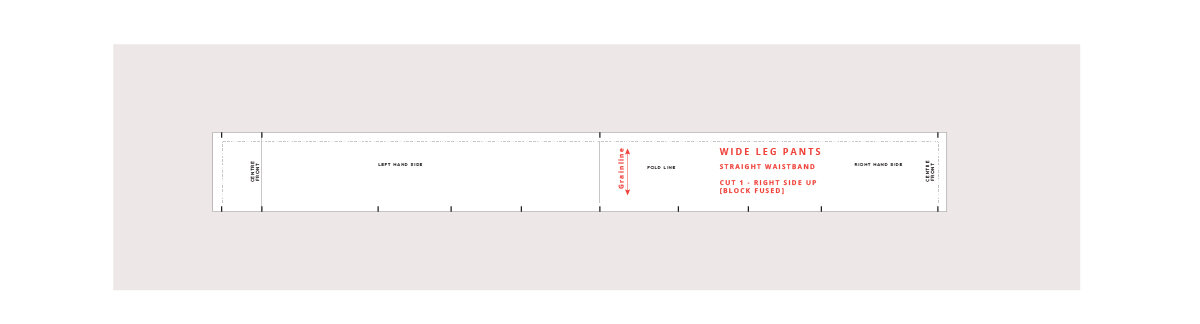
A straight waistband is cut as one piece and then folded in half. Mark the fold line on the pattern - straight down the middle (horizontally). You can find the centre by measuring the midpoint on the CENTRE BACK and CENTRE FRONT lines and joining them with a straight line, or folding the pattern piece in half lengthways.
Mark the fold line with a broken straight line.
Step 19
Finalise the pattern by adding cutting instructions and grainline.
The cutting instructions should be:
STRAIGHT WAISTBAND
CUT 1 - RIGHT SIDE UP
(BLOCK FUSED).
For more information on cutting instructions, see this tutorial.
If you would like to give this a go yourself, you can download the Peppermint Wide Leg pants pattern here for free.
Happy sewing,
Emily
resources mentioned in this issue
The Peppermint Ruffle Sleeve top pattern can be downloaded for free here.
The Collins top pattern can be found here.
The Rushcutter dress pattern can be found here.
The Acton dress pattern can be found here.
Full Bust Adjustment (FBA) on princess panels (from the Acton dress sew-along). Tutorial can be found here.
The In the Folds sizing chart can be found here.
How to : Check and true sewing patterns. Tutorial can be found here.
How to: Draft an all-in-one facing. Tutorial can be found here.
P.S. Would you like to know what the Q & A series is all about? This page tells you a little bit more about the motive behind the series. Past issues from the Q & A series can be found here.
Don't have a question, but found this newsletter helpful? I'd love to hear from you! Get in touch and say hi.
What you’ve been making

Peppermint wrap skirt made by @korriekorrie

Hacked Peppermint jumpsuit made by @ingrids_sewing_space

Peppermint wrap top made by @im_sew_lazy

Lengthened Collins top made by @mamasuesews


