Learn the difference between pattern hacking and patternmaking, and discover how each can build your skills, confidence and creativity in sewing.
ISSUE 196 Q&A - WHY DO ITF PATTERNS HAVE THE STITCH LINE MARKED?
issue 193 - HOW TO ADD BUTTONS TO THE PEPPERMINT WRAP SKIRT

THE Q & A SERIES
ADD BUTTONS TO THE PEPPERMINT WRAP SKIRT
Hello there!
I am a subscriber to your wonderful monthly Curated by In the Folds and I really love how much you are happy to share your knowledge with us. Your Fit Guides are so good for me to review and learn from every time I begin a project.
I have a question regarding the Peppermint Wrap Skirt which I bought a few years back (a contribution to the community was made) and I have yet to make it!!! However, I am thinking of making it, but I wondered how difficult would it be to use buttons as opposed to the tie to close the skirt? I know that I would need an internal button to hold the underlying front skirt, but any suggestions as to how best to position the outer button would be good?
Thank you very much.
Zoe, Australia
Hi Zoe!
This is such a great question, which I’m sure many makers will also appreciate the answer to. Our Peppermint Wrap skirt pattern, a collaboration with Peppermint Magazine many moons ago, has been one of our MOST popular designs.
Sometimes designs are a classic for a reason, right?
You may also have seen that our Malvern culottes pattern uses a similar closure technique, so I’m excited to be able to add the tutorial to our resources!
And what makes it even better is that this hack won’t take any patternmaking wizardry and is perfect for anyone wanting to give a little pattern hacking a go without being overwhelmed.
how to change a tie to buttons on a wrap skirt

Step 1
Take the WAIST TIE - LEFT SIDE [5] and identify the outer notch. This is the notch that lines up with the edge of the wrap on the left side. The rest of the piece is what makes the tie on that side.

Step 2
Draw a line straight up from that notch. Perpendicular to the edge of the piece.

Step 3
Repeat on the other side - WAIST TIE - RIGHT SIDE [4], again using the outer notch. This time it’s on the other side of the piece.

Step 4
Move the pattern info (piece name and cutting instructions) and grainline over to the section with the notches, otherwise it will be removed when you cut off the tie section of the piece.
Cut through the lines marked in Step 2 and Step 3. You can discard these pieces as you won’t be needing them.

Step 5
Add seam allowance to the cut edge on each side of the waistband. This will now be closed like a regular waistband. 1cm (3/8in) is sufficient.

Step 6
You may be able to remove the centre back seam in the waistband due to the reduced width. Place the CENTRE BACK STITCH LINE on one piece on top of the other. The CENTRE BACK is indicated with double notches on each piece.
Measure the width of the piece. If it is less than the fabric width you plan to use then you can tape it in place. If you do this, add a notch at the CENTRE BACK STITCH LINE to indicate the CENTRE BACK. This will help you when you are pinning the waistband to the skirt. You can also update the pattern label.
If your fabric isn’t wide enough, that’s okay, just keep the CENTRE BACK seam.

Step 7
Now that the tie has been removed, I’d recommend block fusing the whole waistband to help it hold its structure and give it more stability where the buttons and buttonholes are. Add BLOCK FUSE to the pattern pieces so you remember when cutting.
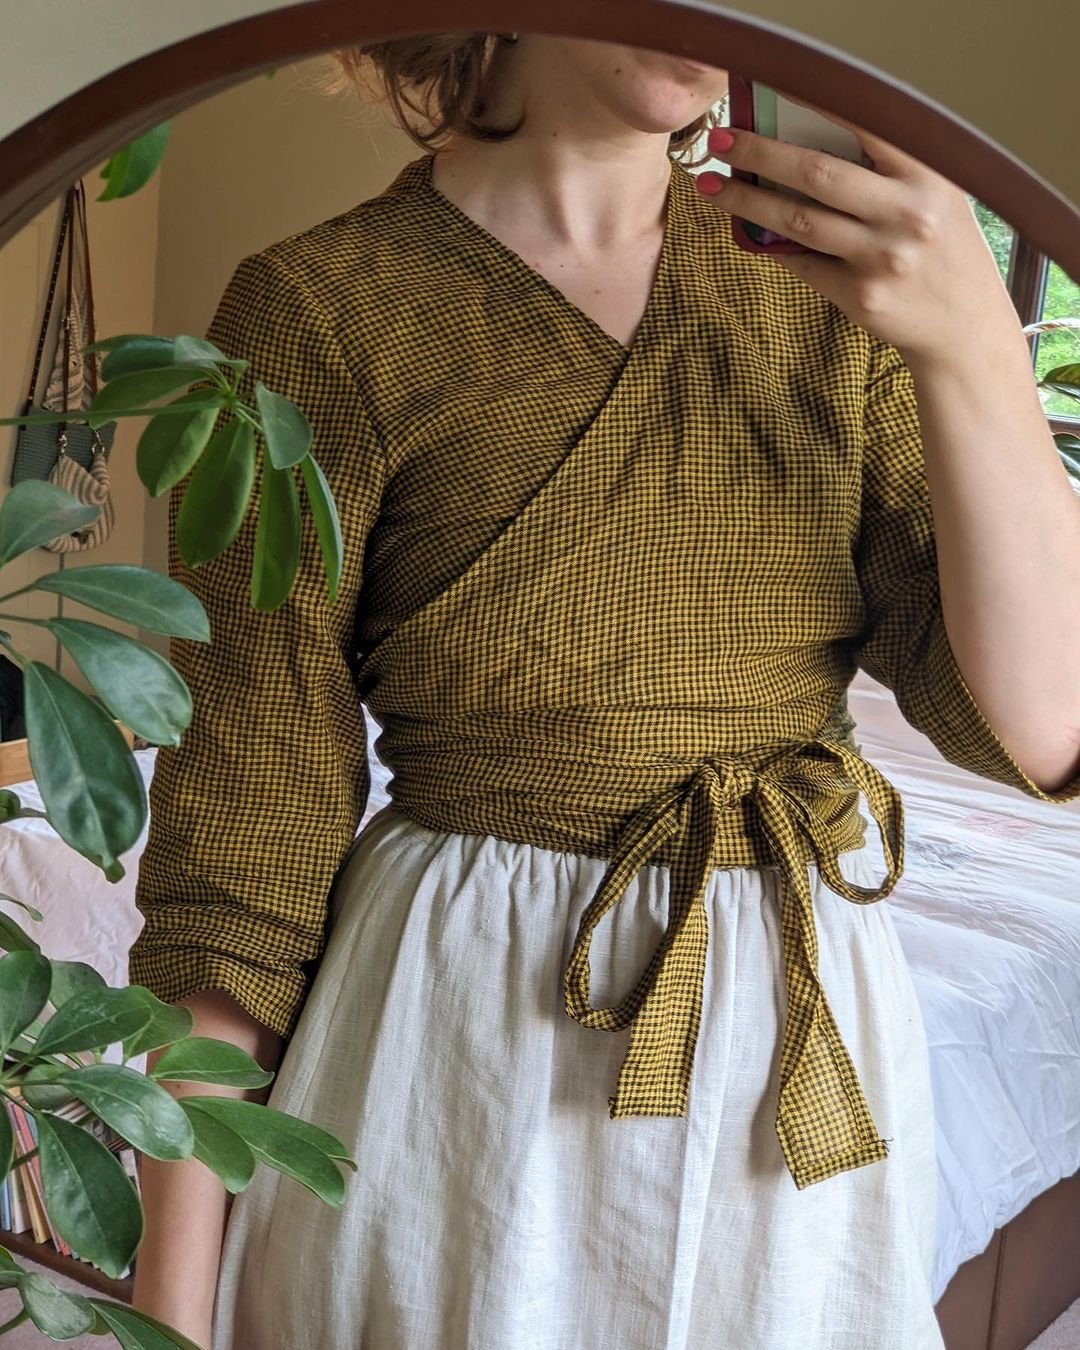
As for working out where the buttons and buttonholes need to go, this also left me scratching my head too! It’s much easier to work out once you have the skirt and waistband in front of you. I got out my lovely linen wrap skirt to have a play and worked out how I’d do it.
What I suggest you do is just make it and then work out the button and buttonhole positions once it’s complete. The beauty of wrap skirts is that they are quite forgiving in terms of fit so there’s room for you to work out the best place for you to have your buttons.

Step 8
If I were to make this hack, I would put concealed buttons on the side of the wrap that ends up on top and then button holes on the “under” wrap. To work this out, wrap the waistband around you and use chalk to mark the ideal position of the buttons. You will definitely want a button and buttonhole close to the edge of the waistband, while the second one will depend on you.
I hope this helps you on your patternhacking journey!
Happy sewing,
Emily
For more issues of the Q & A series, you can check out the archive here.
WHAT YOU’VE BEEN MAKING

Darlow bag made by Curated member, Lise.

Attwood pants made by @tenderfoot.sewing
MORE POSTS IN THE SERIES


ISSUE 188 - HOW TO HACK THE MALVERN CULOTTES INTO A SKIRT
I made two pairs of the Malvern culottes. Second one I shortened. I'm wearing them a lot and love the look but don't like how low the crotch is. I love culottes for the skirt look without the thigh rub.
How can I adjust these to bring the crotch up or make them a skirt??
In our last Q&A we explored why culottes have such a low crotch and how to raise it for a closer fit at the crotch.
But what if we take things a step further? What if we could transform the Malvern Culottes into a skirt?
That question got my patternmaking brain buzzing, and I couldn’t resist giving it a go. In this instalment, I’ll walk you through the process of modifying the Malvern culottes into a skirt, while keeping the same beautiful silhouette.
Let’s dive into some pattern hacking magic!
HOW TO HACK THE MALVERN CULOTTES INTO A SKIRT

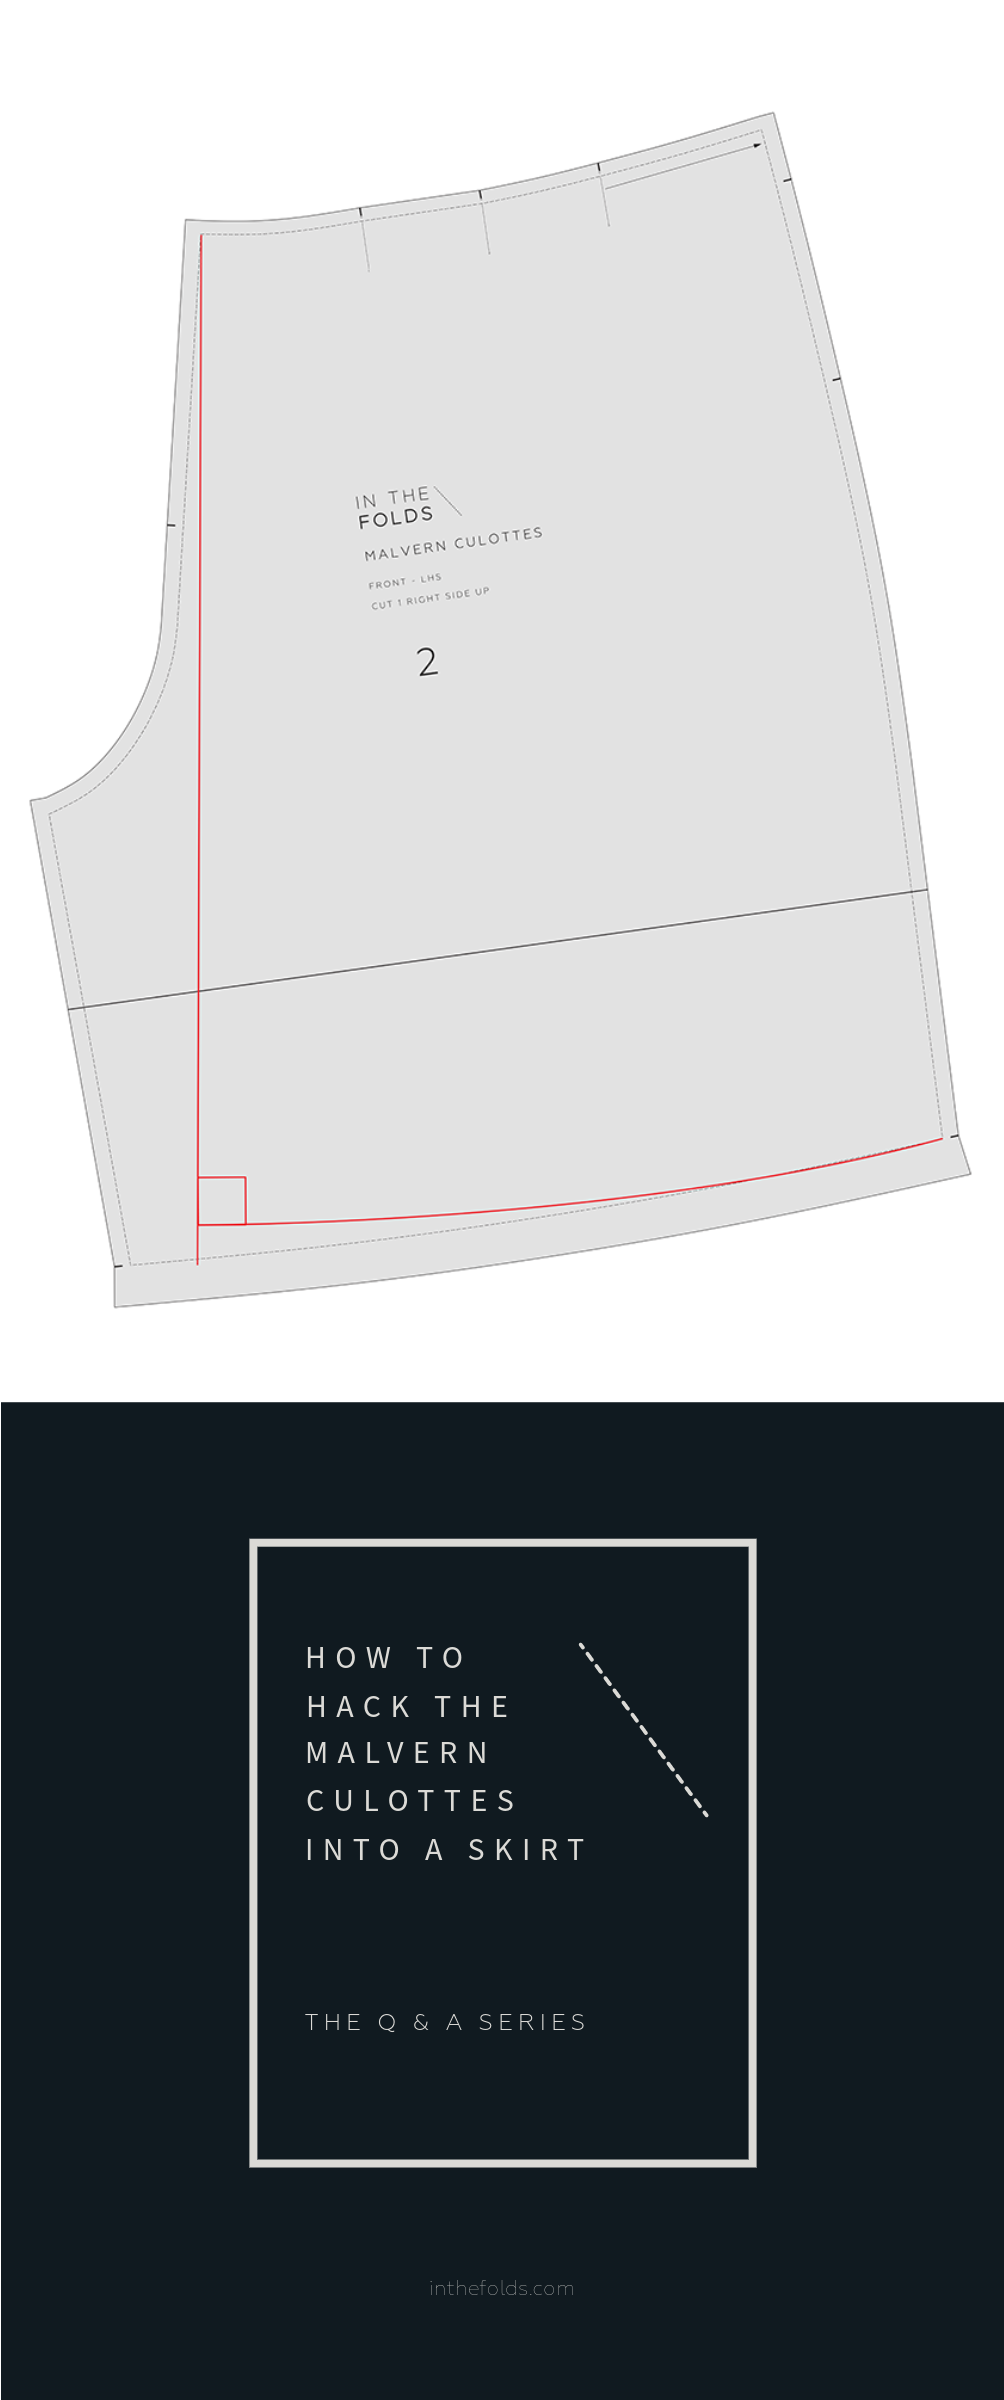
Step 1
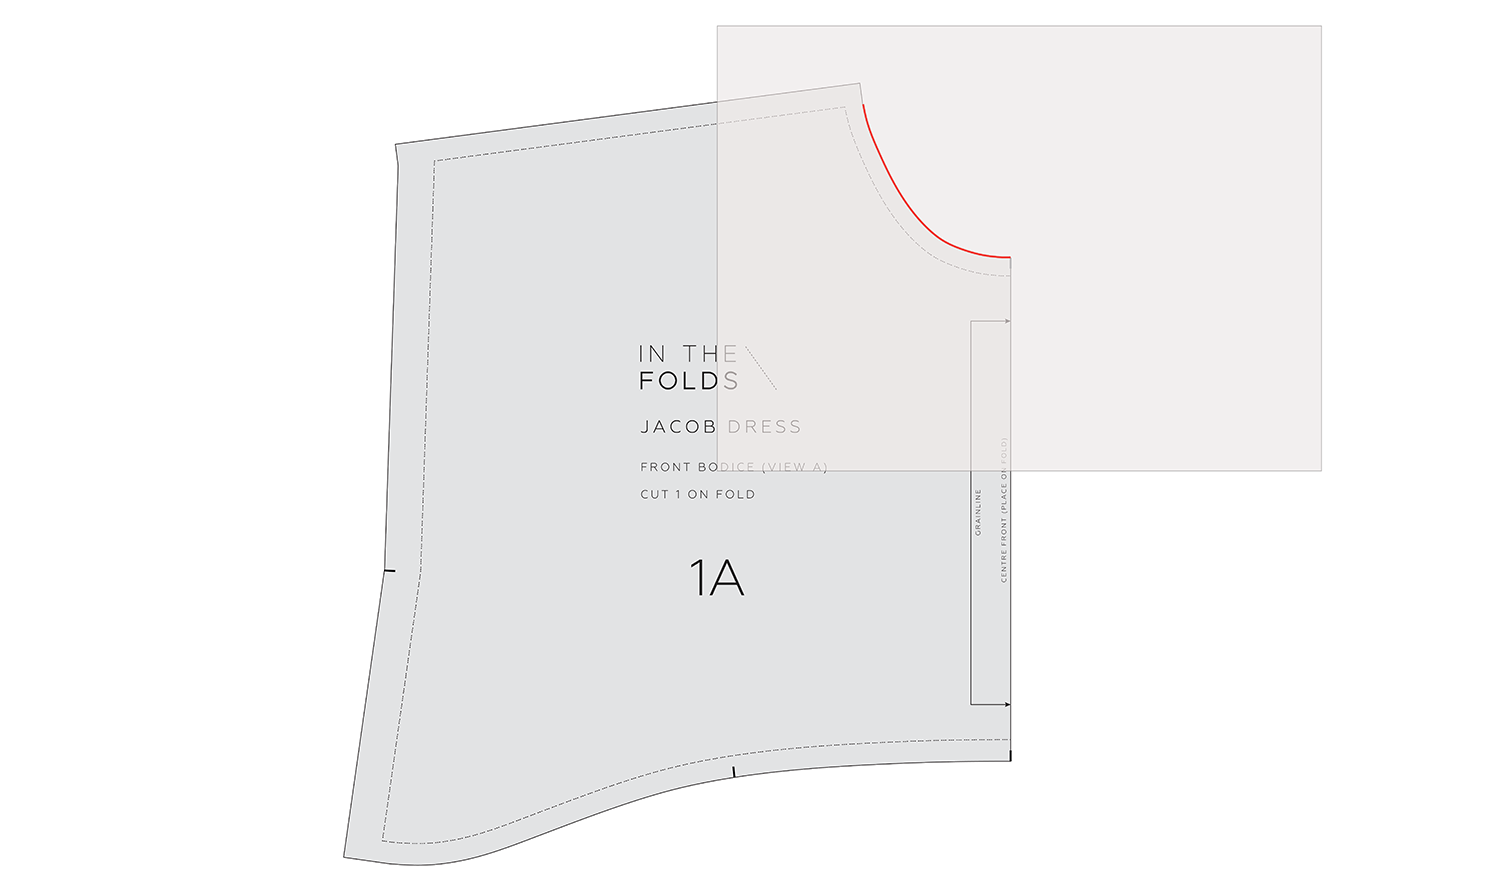
Take the FRONT - LHS [2] and draw a straight line down from the waist STITCH LINE through to the hem STITCH LINE. It needs to meet the CENTRE FRONT waist at a right angle. (See the red box in the image above.)

Step 2
The line marked in Step 1 will become the new CENTRE FRONT of the pattern. Rotate the pattern piece so that the CENTRE FRONT is vertical. Draw a new hem line that meets CENTRE FRONT at a right angle and meets the STITCH LINE at the bottom of the side seam.

Step 3
Take the FRONT - RHS [1] and flip the FRONT - LHS [2] so that the crotch seam and inner leg seam line up. Transfer the new CENTRE FRONT line and part of the new hem line onto the FRONT - RHS [1] with a tracing wheel.

Step 4
Draw a smooth curve from the bottom of the CENTRE FRONT to the STITCH LINE at the bottom of the side seam. It needs to meet CENTRE FRONT at a right angle.
On both FRONT pieces, add seam allowance to the new CENTRE FRONT and hem line. Cut off excess paper.

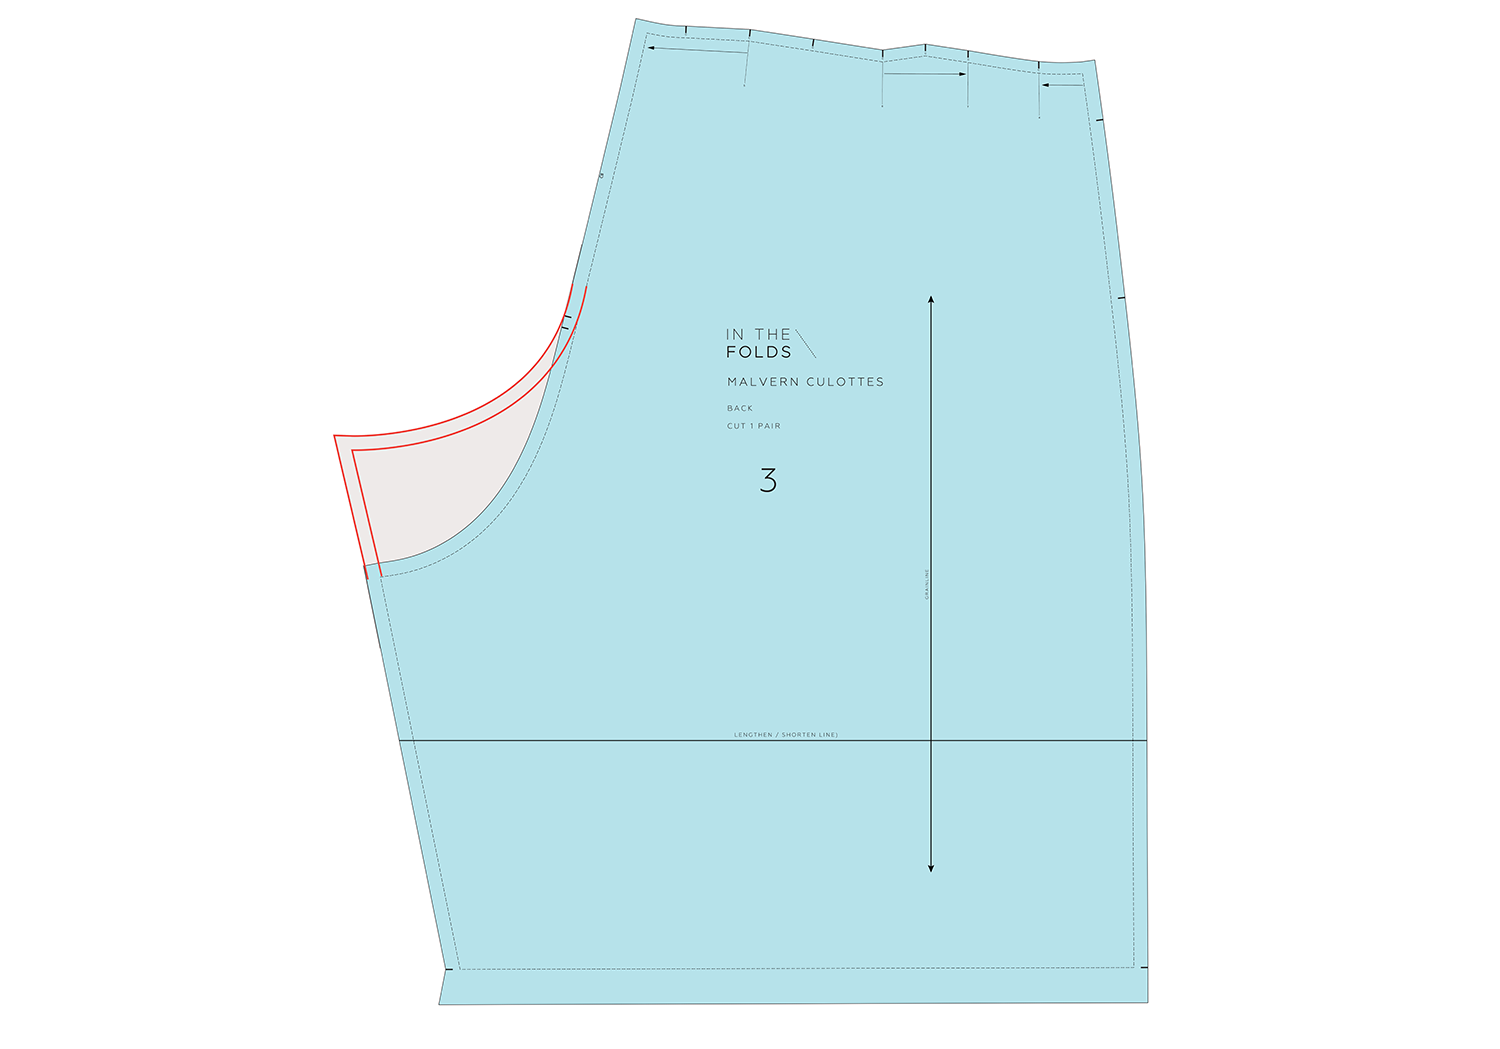
Step 5
Move to the BACK and draw a straight line down from the waist STITCH LINE through to the hem STITCH LINE. It needs to meet the CENTRE FRONT waist at a right angle.

Step 6
The line marked in Step 5 will become the new CENTRE BACK of the pattern. Rotate the pattern piece so that the CENTRE BACK is vertical. Draw a new hem line that meets CENTRE BACK at a right angle and meets the STITCH LINE at the bottom of the side seam.
Add seam allowance to the new CENTRE BACK and hem line. Cut off excess paper.
You can now follow the instructions for making the Malvern culottes, but instead of sewing up the front and back inner leg seams and then joining the crotch seam, join the FRONT pieces together at the CENTRE FRONT and the BACK pieces together at the CENTRE BACK.
You can see some photos of my Malvern skirt toile here.


We’d love to see your Malvern skirts if you give this hack a go! Remember to tag us if you share them on Instagram!
Happy hacking (and sewing),
Emily
RESOURCES MENTIONED IN THIS ISSUE
The Malvern culottes pattern - digital pattern available here.
For more issues of the Q & A series, you can check out the archive here.
WHAT YOU’VE BEEN MAKING


MORE POSTS IN THE SERIES
ISSUE 187 - HOW TO RAISE THE CROTCH ON CULOTTES

I made two pairs of the Malvern culottes. Second one I shortened. I'm wearing them a lot and love the look but don't like how low the crotch is. I love culottes for the skirt look without the thigh rub.
How can I adjust these to bring the crotch up or make them a skirt??
Oh what a great question! This one really got my brain ticking.
At first, I realised I actually didn’t know why the crotch on culottes is so much lower than regular pants and it’s something I have just taken for granted, assuming it had something to do with wanting them to look like a skirt.
I have this problem when I wear culottes too. (I usually wear thin cotton bike shorts under them to prevent the thigh rub, which is what I wear under dresses and skirts.) So, I felt like this topic needed a deep dive as I’m sure we’re not the only ones!
What are culottes?
Culottes are a type of garment that looks like a skirt but are actually pants. They are usually wide-legged and can be knee-length, mid-calf, or even full-length. Some look more like pants and some look more like skirts (like the Malvern culottes).
What the experts say about culotte design
I went through one of my old patternmaking books - Patternmaking for Fashion Design (4th Edition) by Helen Joseph-Armstrong - to see what it says about culottes. This is what I found:
Culottes were developed when women started riding bikes. It was seen as unfashionable (maybe even improper) for women to wear pants, so a new garment type needed to be developed… which were culottes!
Culottes hang away from the stomach and bum so have a wider crotch extension in comparison to traditional slacks or trousers. I also learned that “slacks” and “trousers” are different things and shouldn’t be used interchangeably.
Culottes have the largest crotch extension (in comparison to other pant styles) because “the pants is the greatest distance from the figure at crotch level.” (p 546)
In Armstrong’s book she suggests that culottes are drafted from a skirt block (normally an A-line) rather than a pants block.
Crotch depth for culottes is suggested as actual crotch depth (I will tell you how to find that below) plus at least 2cm (but often more).
What is crotch depth?

Crotch depth refers to the vertical distance from the waist to the crotch.

On a pattern, you can find this by measuring from the waist seam to the crotch seam.

The easiest way to find this distance on your body is to wrap something around your waist and sit on a chair. Measure the vertical distance from your waist to the chair.
Comparing crotch depth

In the diagram above I have overlapped the CENTRE FRONT waist on the Peppermint wide leg pants and the Malvern culottes to compare the difference in crotch depth. As you can see it’s significant - 15cm.
HOW TO RAISE THE CROTCH ON A CULOTTES PATTERN
I knew I’d need to make a toile so that I could check how a large change like this would feel on the body. I decided to lift the crotch by 11cm.
Here’s what you need to do to alter the crotch depth on a culottes pattern:

Step 1
Attach some paper to the crotch area of one of the FRONT pieces. Due to the asymmetric nature of the pattern there are two FRONT pieces. Extend the inner leg seam STITCH LINE by the desired amount.

Step 2
Draw a smooth curve to create a new crotch curve that transitions into the original crotch curve at the notch. A French curve will be helpful here if you have one.

Step 3
Add seam allowance to the new STITCH LINE. In this case it’s 1.2cm.
Step 4
Transfer the same shape to the other FRONT piece. The Malvern culottes are asymmetrical so there are two different FRONT pieces, if you are working with another pattern and the FRONT is cut as a pair then you don’t need to do this step.
Step 5
Repeat process on the BACK. The BACK curve will not be the same as the FRONT. Cut off excess paper.
the outcome

They feel good!
And they still look like a skirt so the design hasn’t been lost. I actually think I could bring them up another few centimetres to completely erase the thigh rub and they’d still look good.

Here you can see the toile on a dress form. Please note that the waistband overlaps more on the dress form than it should. I wanted to make them in my size so I could feel them on my body, but my dress form is a few sizes smaller than me.

And here is a pattern comparison so you can see how much closer it is to a regular pants pattern - now just a 4cm difference.
The second part to your question also got my brain whirring… a Malvern skirt? That sounds interesting too! In the next Q&A I’m going to give it a go, so stay tuned!
Happy patternhacking!
Emily
For more issues of the Q & A series, you can check out the archive here.
WHAT YOU’VE BEEN MAKING
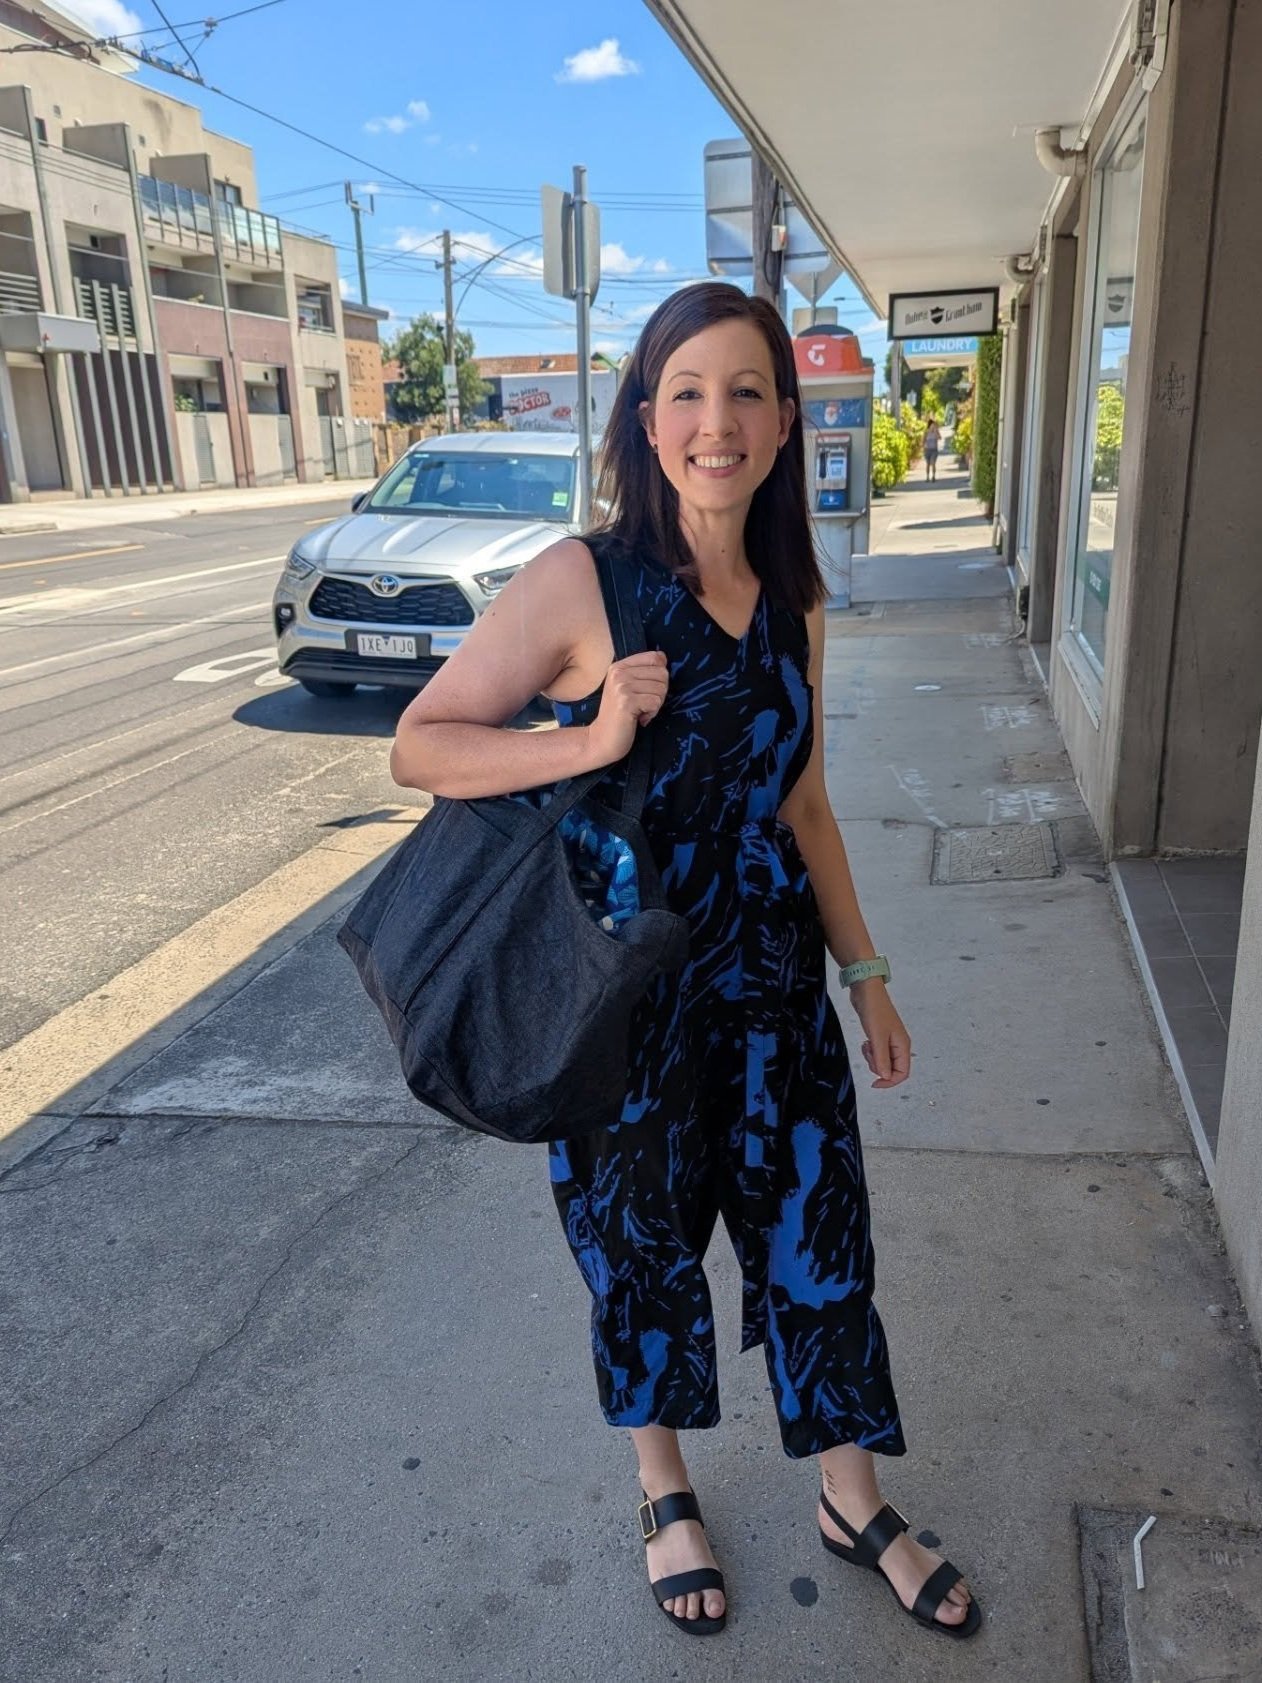
Peppermint jumpsuit made by @eliza.sew

MORE POSTS IN THE SERIES
ISSUE 186 - THREE THINGS TO CHECK WHEN COPYING RTW GARMENTS
THE Q & A SERIES
three things to check when
copying rtw garments
I love that you covered creating a pattern by copying an existing garment. I have done this a few times - sometimes it works, sometimes it comes out too big. What am I doing wrong?
Thanks,
Carrie
Hi Carrie,
Thanks for reaching out!
It's great that you've tried copying garments before. It can be such a useful skill, but it does take some trial and error to get accurate results.
If your copied garment sometimes comes out too big, here are a few things to check:

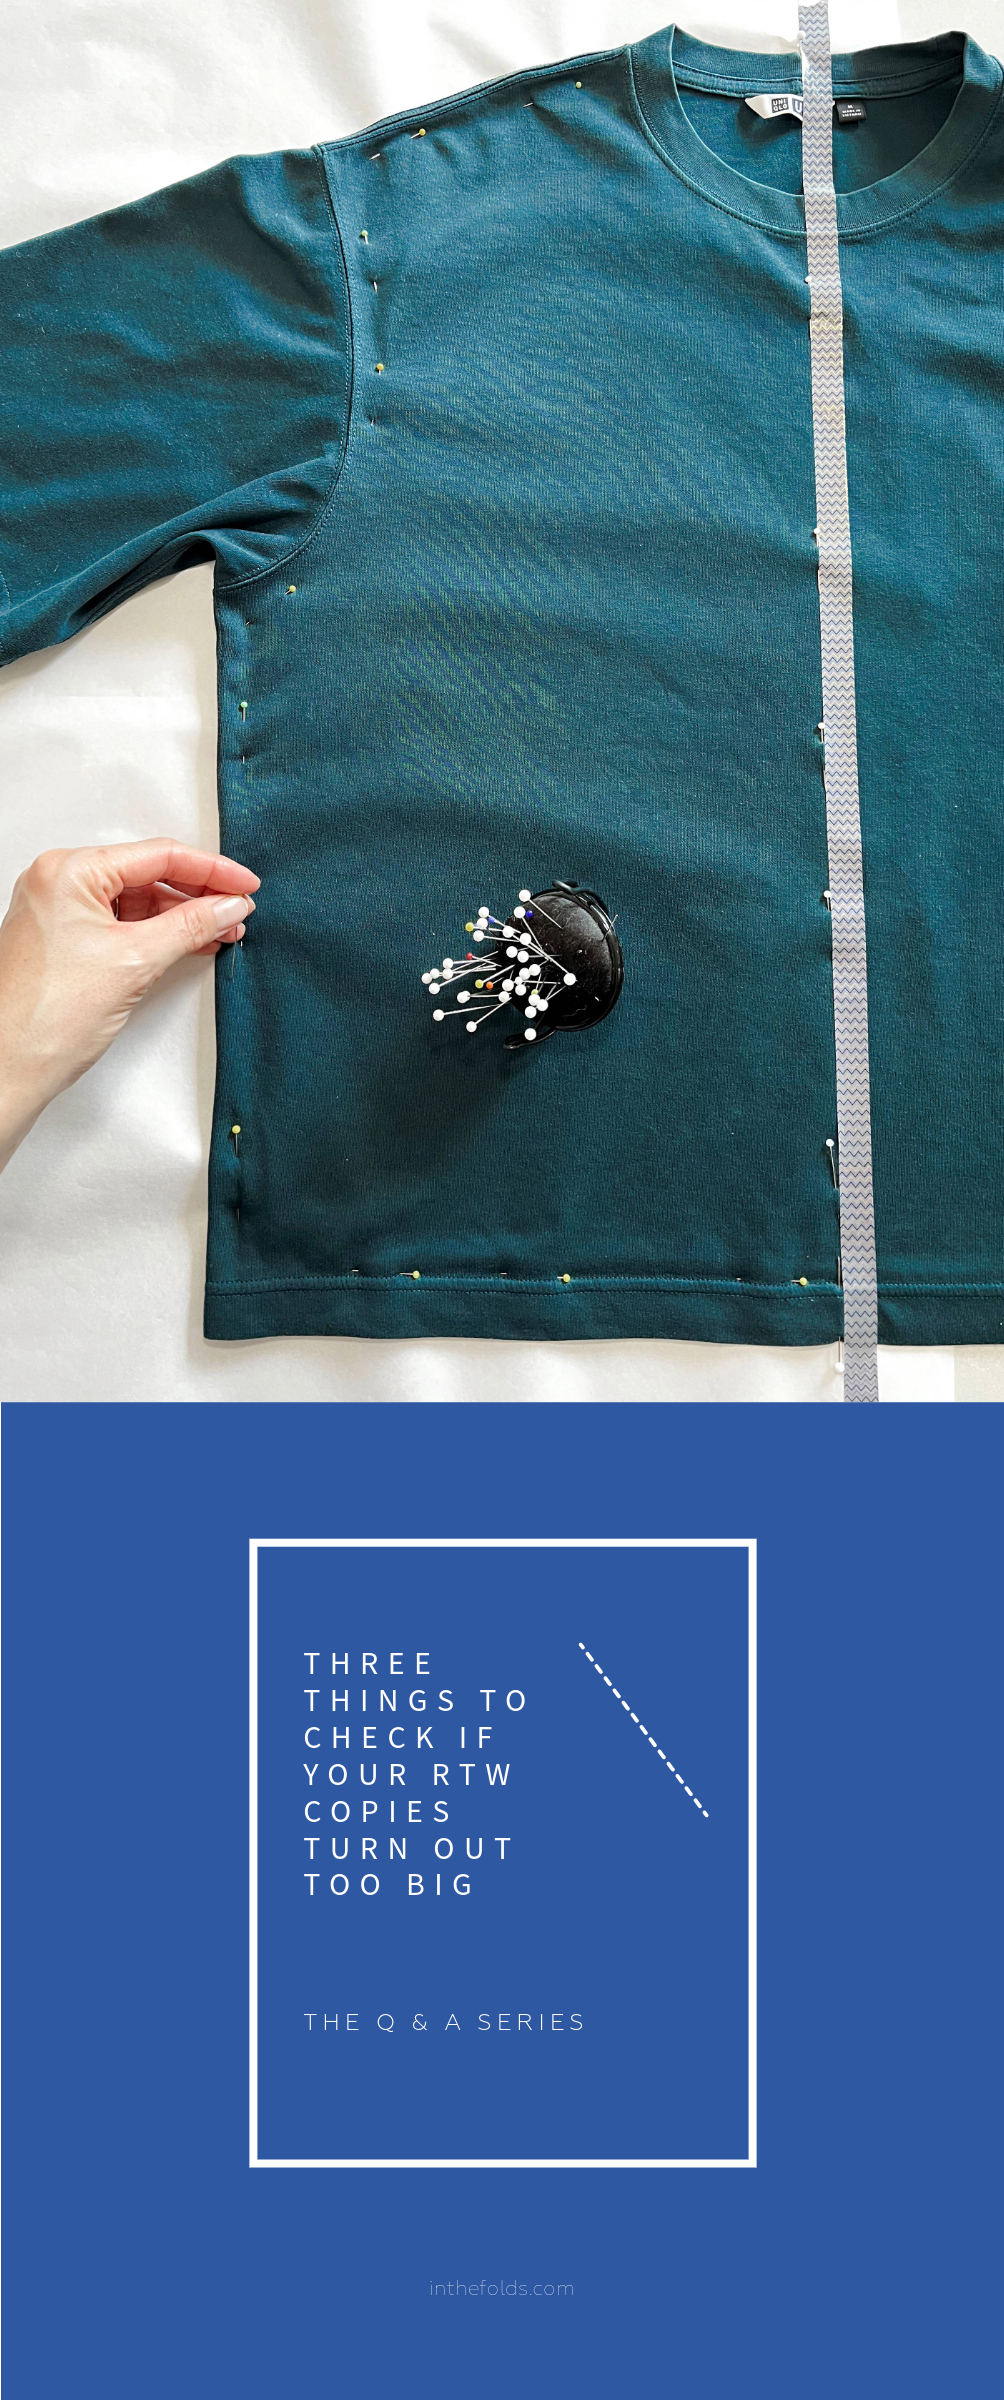
1. Seam lengths
After tracing, measure the seam lengths on your pattern and compare them to the original garment. If they don’t match, there may have been slight distortions while tracing or transferring the pattern.
Check the traced pattern pieces against your original RTW piece to see if you can figure out where you went wrong. If you can, alter the fabric pieces you’ve cut out. If this isn’t possible, you will need to retrace the pattern pieces from the RTW garment, taking extra care to ensure the RTW garment is laying flat.

2. Fabric type
The original garment's fabric might have different stretch, drape, or thickness compared to what you're using. This will affect the finished result of the copied garment, and it may not fit or fall the same way as the original RTW piece.
When you’re just starting out copying garments, I recommend using fabrics that are similar to those used in the the RTW piece. This way, you know you’re eliminating one potential problem area. Once you get more confident with the process and you’re happy with how your copied garments are turning out, you can get more adventurous!
3. Seam allowances
Always double-check that your seam allowances are consistent. If you marked them on the pattern but then sew with a smaller allowance (which is so easy to do, especially if you’re rushing from excitement at what you’re doing!), the final garment will end up bigger.
If you’re able to pinpoint the issue using these steps, you should get more consistent results in the future!
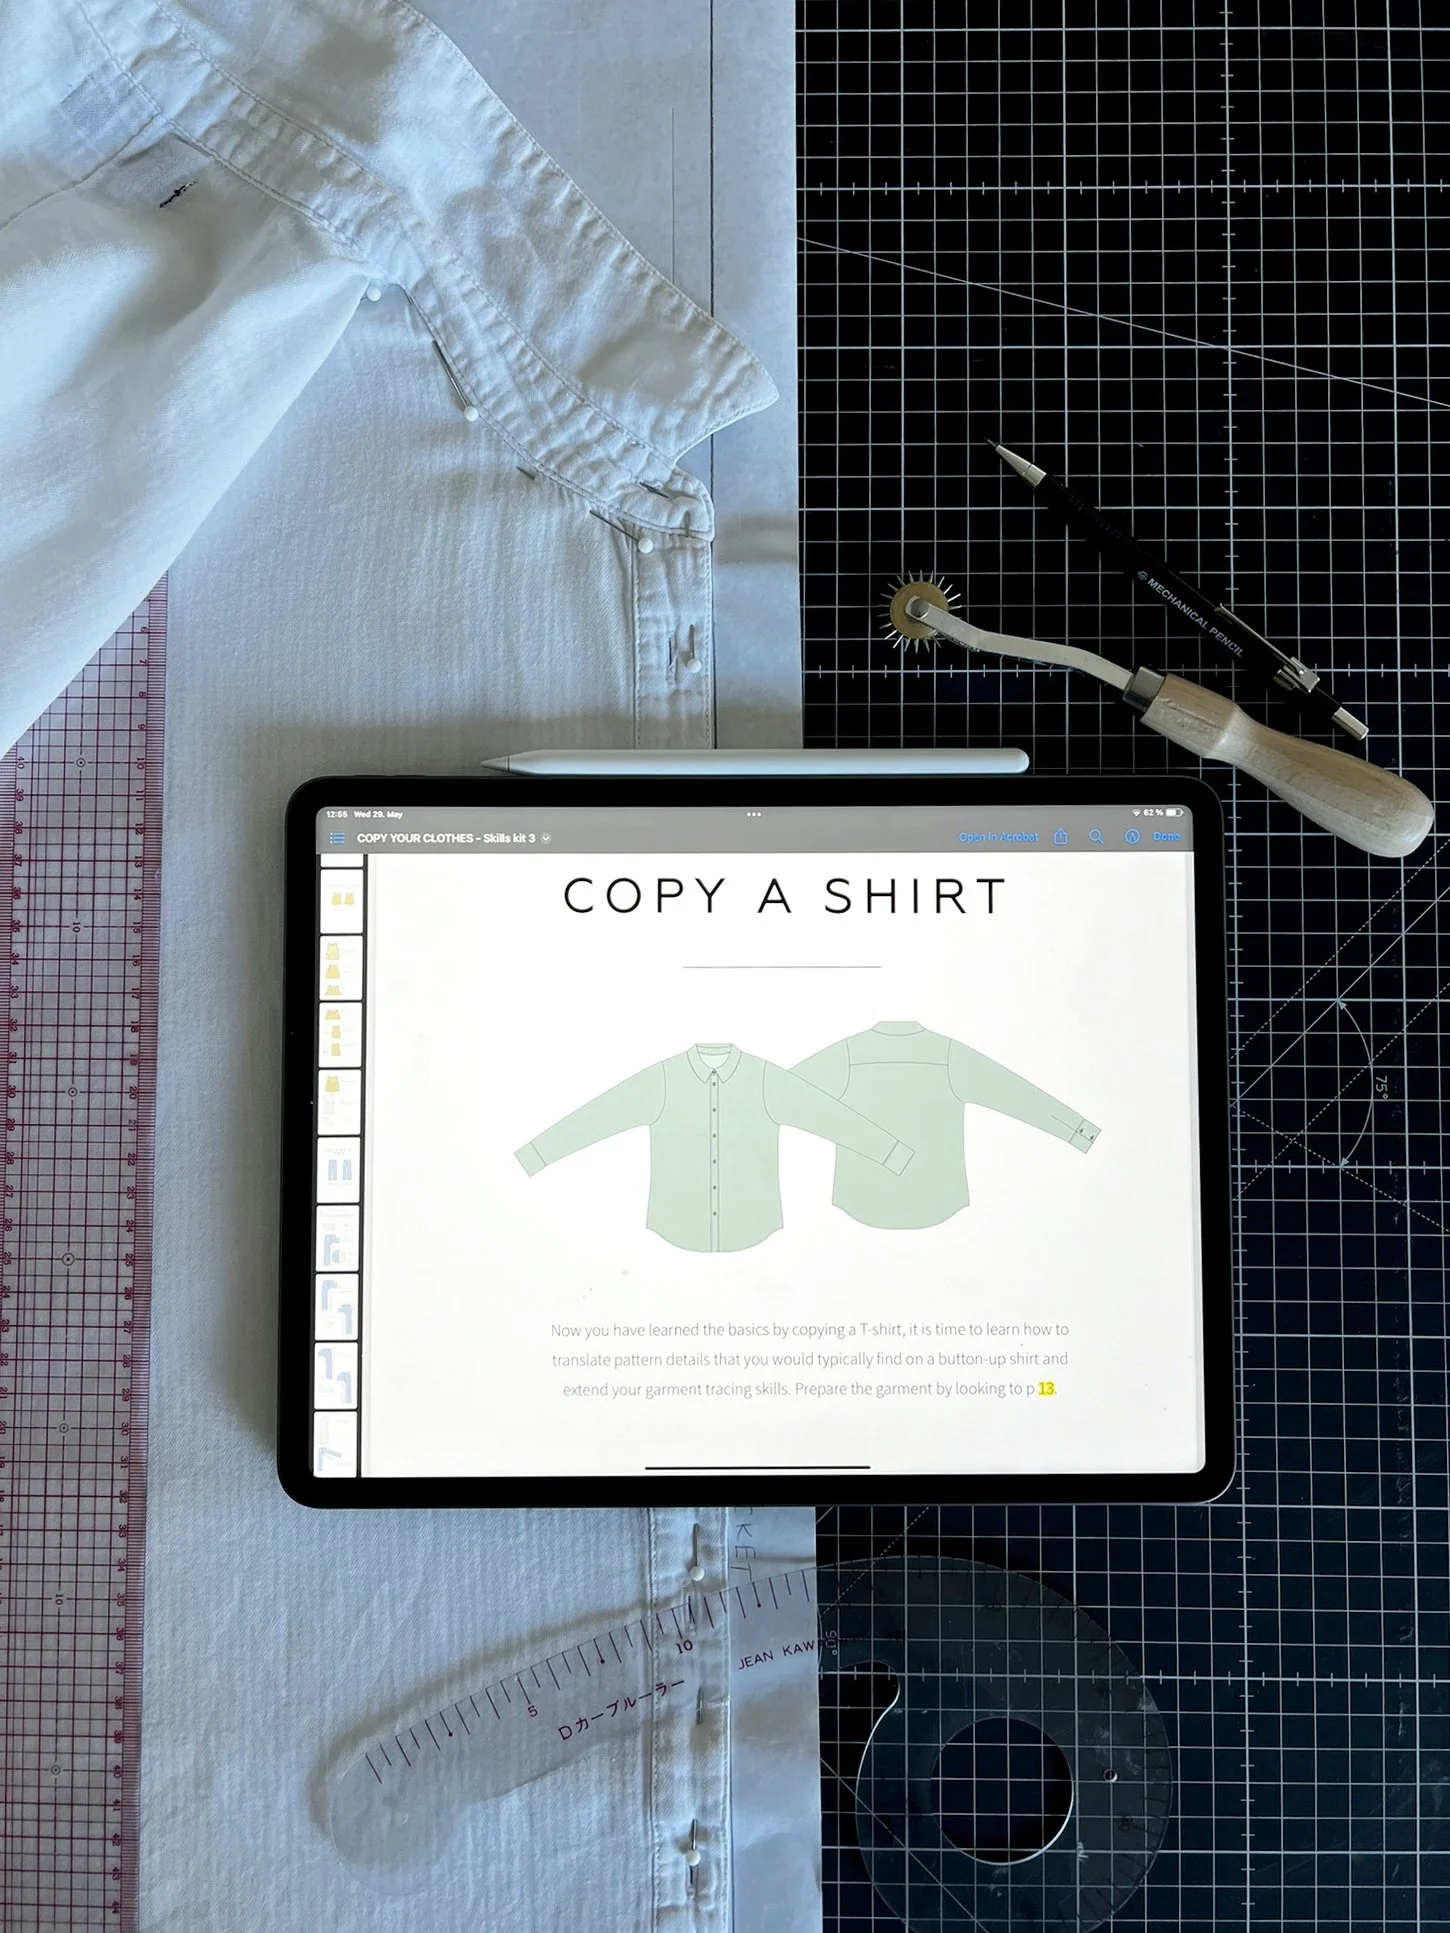
Let me know if you need more help. Or, check out our Copy Your Clothes Skills Kit. It covers the exact tools and techniques required for copying RTW garments (plus how to use them), and then shows you how to apply them to garment of increasing complexity - a basic T-shirt, a button-up shirt and pants.
Happy patternmaking,
Emily
RESOURCES MENTIONED IN THIS ISSUE
The Copy Your Clothes Skills Kit is part one of our Copy Your Clothes Series. Available here.
For more issues of the Q & A series, you can check out the archive here.
WHAT YOU’VE BEEN MAKING

Jacob dress made by @shuaychong

MORE POSTS IN THE SERIES
ISSUE 184 - Fabric inspiration for the jacob dress pattern

THE Q & A SERIES
How to sew a flat neckline with vilene shields
Hi Emily,
I am making the top out of very slippery material. I successfully cut it out using tissue paper but am really struggling to get the curve of the neck to lie flat. I pressed it ok but when I sew, especially along the neckline it puckers out of shape. Any tips?!
Anne
Altrincham, United Kingdom
Hi Anne,
What is probably happening is that the neckline is stretching, which makes it almost impossible to get it to lie flat. When working with slippery or delicate fabrics, as well as staystitching the neckline, it can be a good idea to use Vilene tearaway shields to help your neckline remain flat
WHAT IS A VILENE SHIELD?


Tear-away Vilene shields are a sewing aid used to prevent stretching in areas like necklines and armholes, during garment construction.
WHEN TO USE VILENE SHIELDS
In a lot of cases, staystitching provides enough stabilisation to prevent a curve from stretching, but if you are using a fabric that is prone to stretching, is particularly delicate, or have seams cut on the bias or close to the bias, your fabric may need extra stability. That's when Vilene shields come in handy. It also provides an opportunity to check that your fabric hasn't stretched - and if it has, you can use the Vilene shield to guide you when steaming the seam back to its original shape.
HOW TO CREATE VILENE SHIELDS
Some patterns will include the shield pattern ready for you to use. At other times you may feel the need for one and it hasn't been provided. Or, if you’ve hacked the pattern the original shield pattern may no longer work.
It's safe to say that when working with fabrics prone to stretching, curved areas like necklines will require Vilene shields. You can draft these at the cutting stage. But you might also find the need for one once you start sewing the project and notice particular areas stretching. You can always go back to the pattern, draft the shield and then steam the fabric back into shape.
You can draft the pattern on pattern paper so you have it to use in the future or can draft directly onto the Vilene and cut.
HOW TO DRAFT A VILENE SHIELD PATTERN
Step 1
Place a piece of paper onto the neckline. If you would like to make a full piece (as opposed to a piece that will be cut on the fold), leave enough space to create the full piece. Use pattern weights or pins to hold the paper in place. Trace the neckline CUT LINE. Use a French curve if you have one.
Step 2

Draw straight lines from the neckline down the shoulder STITCH LINE and CENTRE FRONT line the width you would like the shield to be. We suggest making it 2.5cm - 4cm (1in - 1½in) wide.
Step 3

Measuring from the neckline, mark the shield width in regular intervals between the two lines marked in STEP 2.
Step 4

Join the broken line with a smooth curve. Fold in half and transfer the lines to the other side or pin through the paper and cut it out.
Step 5

Label the pattern piece - FRONT VILENE SHIELD CUT 1 TEARAWAY / VILENE ONLY. Mark at CENTRE
FRONT neckline. Repeat this process for the BACK to create the back neck shield.
Step 6

When making shields for other seams, consider the order of construction when creating the shield.
For example, for the shoulder on the Jacob dress, the hems are sewn before the shoulder seams are joined (due to the drawstrings) so the shield needs to stop at the armhole STITCH LINE.
HOW TO SEW WITH VILENE SHIELDS
Step 1

Staystitch the neckline on the FRONT 6mm (¼in) from the edge. Start at the shoulder on each side and stitch towards the CENTRE FRONT.
Repeat on the BACK neckline.
Step 2

Follow instructions to join shoulders and any other elements required before finishing the neckline.
Step 3

Turn the bodice inside out. Pin FRONT NECK VILENE SHIELD to the inside of the neckline, lining up
the CENTRE FRONT notch and the edges with the shoulder seams.
Repeat on the back with the BACK NECK VILENE SHIELD.
Step 4

Attach binding / facing using the method given in the instructions. We have a tutorial about how to bind a neckline here.
Step 5
Carefully remove the Vilene shields before you trim, clip and grade the seam allowance.
I hope that’s helpful, Anne!
You may also like to have a look at these blog posts about cutting tricky fabrics - Issue 7 - Cutting linen (and other tricky fabrics) and Issue 87 - Tips for working with delicate fabrics.
Happy sewing!
Emily
RESOURCES MENTIONED IN THIS ISSUE
The Jacob dress pattern is currently only available in our Curated by ITF subscription. It will be released as a standalone resource later in 2025. More information about our Curated by ITF subscription can be found here.
Cutting linen (and other tricky fabrics) - blog post here.
Tips for working with delicate fabrics - blog post here.
How to bind a neckline - blog post here.
For more issues of the Q & A series, you can check out the archive here.
WHAT YOU’VE BEEN MAKING

Sawtell dress made by @mamasuesews

Peppermint Everyday dress hacked into a tunic by @netty.hayes.sews
MORE POSTS IN THE SERIES
ISSUE 183 - HOW TO DRAFT A LINING FOR THE ELWOOD DRESS

THE Q & A SERIES
HOW TO DRAFT A LINING FOR THE ELWOOD DRESS
Hi,
Lining or not lining that is the question I ask myself since I bought the Elwood dress pattern. I want to make it sleeveless and I bought a wool linen with a geometric pattern.
Since I plan to wear it in the winter with tights or leggings, I think it would be more comfortable if I sewed a lining. Would you have any recommendations about how to do this?
Thank you very much. Bien amicalement,
C
Hi C,
Although our Sewing Linings project series (check it out in our Past Issue catalogue here) is over, I thought this was a great question to share with our community as we move into the more extreme seasons of the year.
For those in the northern hemisphere like you, lining a garment is a great way to stay comfortable when using warmer fabrics like wool. For those in the southern hemisphere, you may be thinking of making a garment out of a lightweight or sheer fabric that needs a lining to give the garment a bit more weight or to make it opaque.
When it comes to drafting a lining for the Elwood dress the first thing you want to do is remove as many of the panel lines as possible. This post covers why we remove panel lines from a pattern when creating a lining pattern. And, if you’re interested in learning more about removing panel lines, this post covers it in relation to our Acton dress and Attwood pants patterns.
HOW TO DRAFT A LINING PATTERN FOR THE ELWOOD DRESS

Step 1
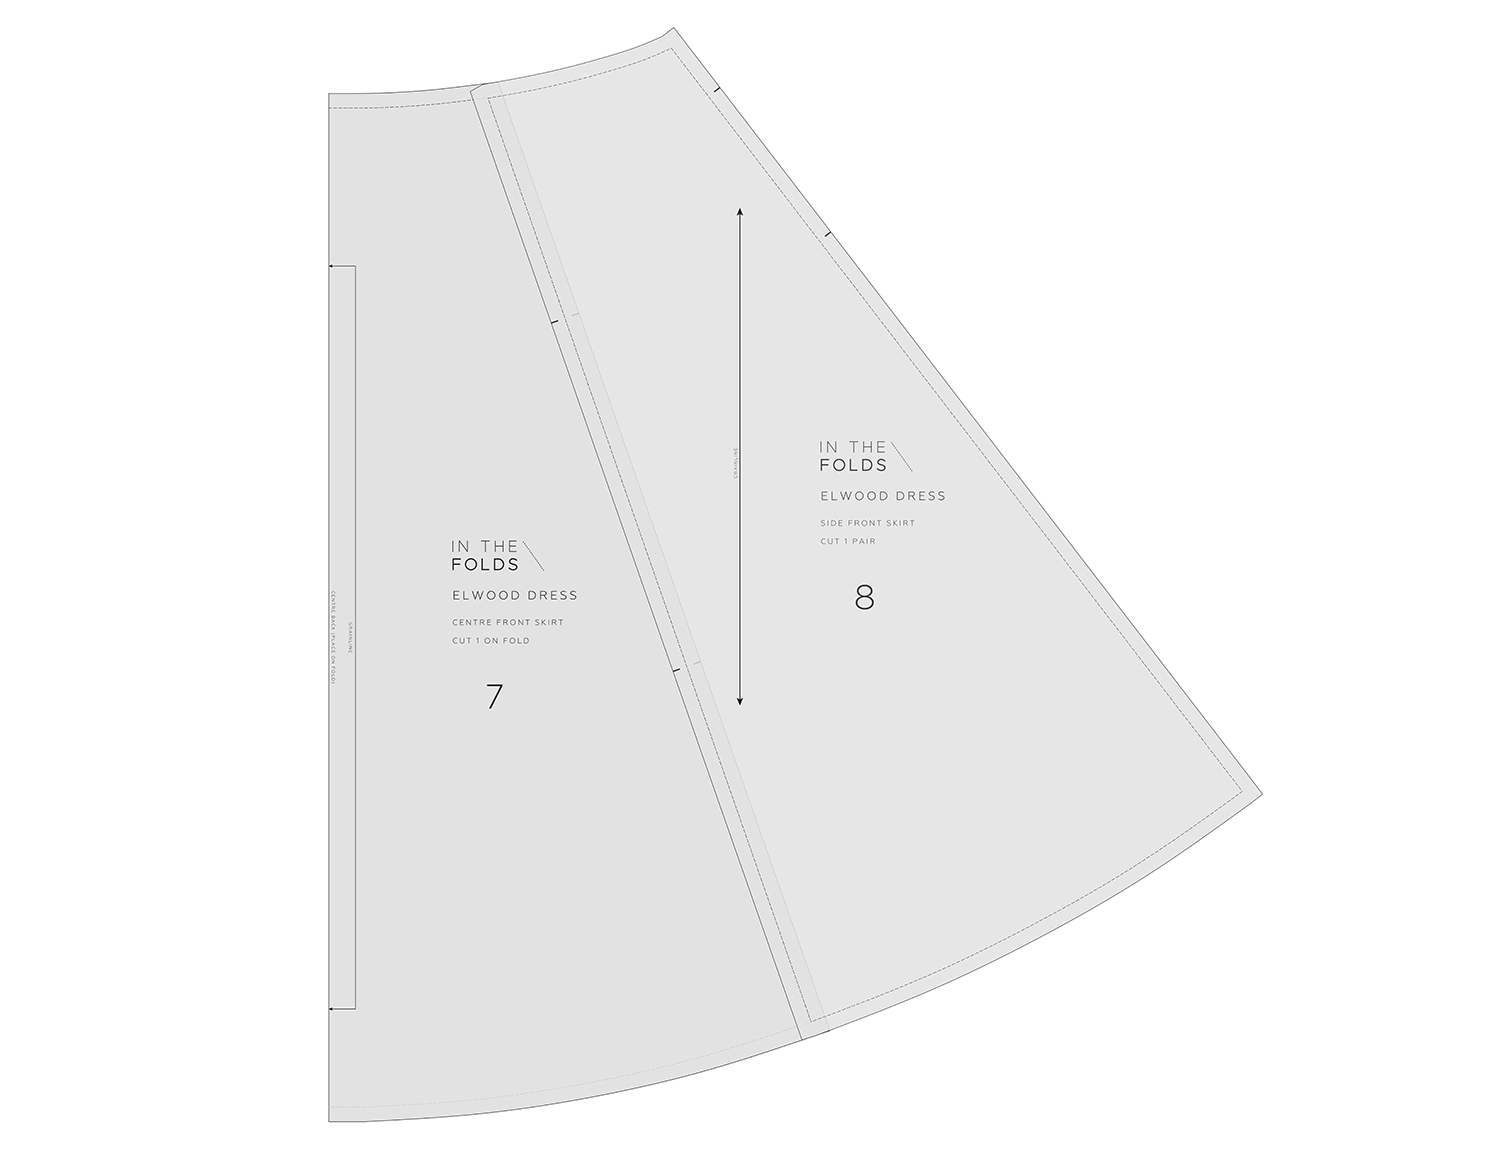
Place the SIDE FRONT PANEL [2] on the CENTRE FRONT PANEL [1], lining up the STITCH LINES as if they have been sewn together. Pin in place (this is when pins without heads are useful) or use a small piece of tape that can easily be removed.

Step 2
Place the FRONT SHOULDER PANEL [15] on the CENTRE FRONT PANEL [1] again lining up the STITCH LINES.

Step 3
Place a piece of pattern paper on top. Trace the STITCH LINES, ignoring the panel lines.

Step 4
Add seam allowance onto the pattern. The amount to use is the same as what is on the original pattern - 1cm (3/8in) on the neckline and 1.2cm (1/2in) on the other seams. The CENTRE FRONT seam no longer requires seam allowance as we are removing that seam too.

Step 5
Add notches to the CENTRE FRONT - at the top and bottom of the seam. Add a notch on the armhole where the panel line is and on the waist seam where the panel line is. The armhole notch will help you when attaching the lining to the dress and the waist notches will help you when attaching to the skirt lining.

Step 6
Add new pattern markings and labelling. Cutting instructions on lining patterns are written in green pen / marker so that lining pieces can be quickly and easily identified.

Tip for midweight or heavier fabrics
When lining sleeveless garments, to prevent the lining (or facing) from rolling out at the armhole and
becoming visible, you can shave off a small amount from the armhole. You can do this on the pattern, or on the cut garment (this option works well if you haven't chosen your fabric at the time of drafting). At the shoulder point, remove 3mm (⅛in) and then smooth into the original armhole curve around the notch.
Repeat the process for the back pieces to create the BACK BODICE LINING.
Step 7
Take the front skirt pieces and place together STITCH LINE on STITCH LINE.
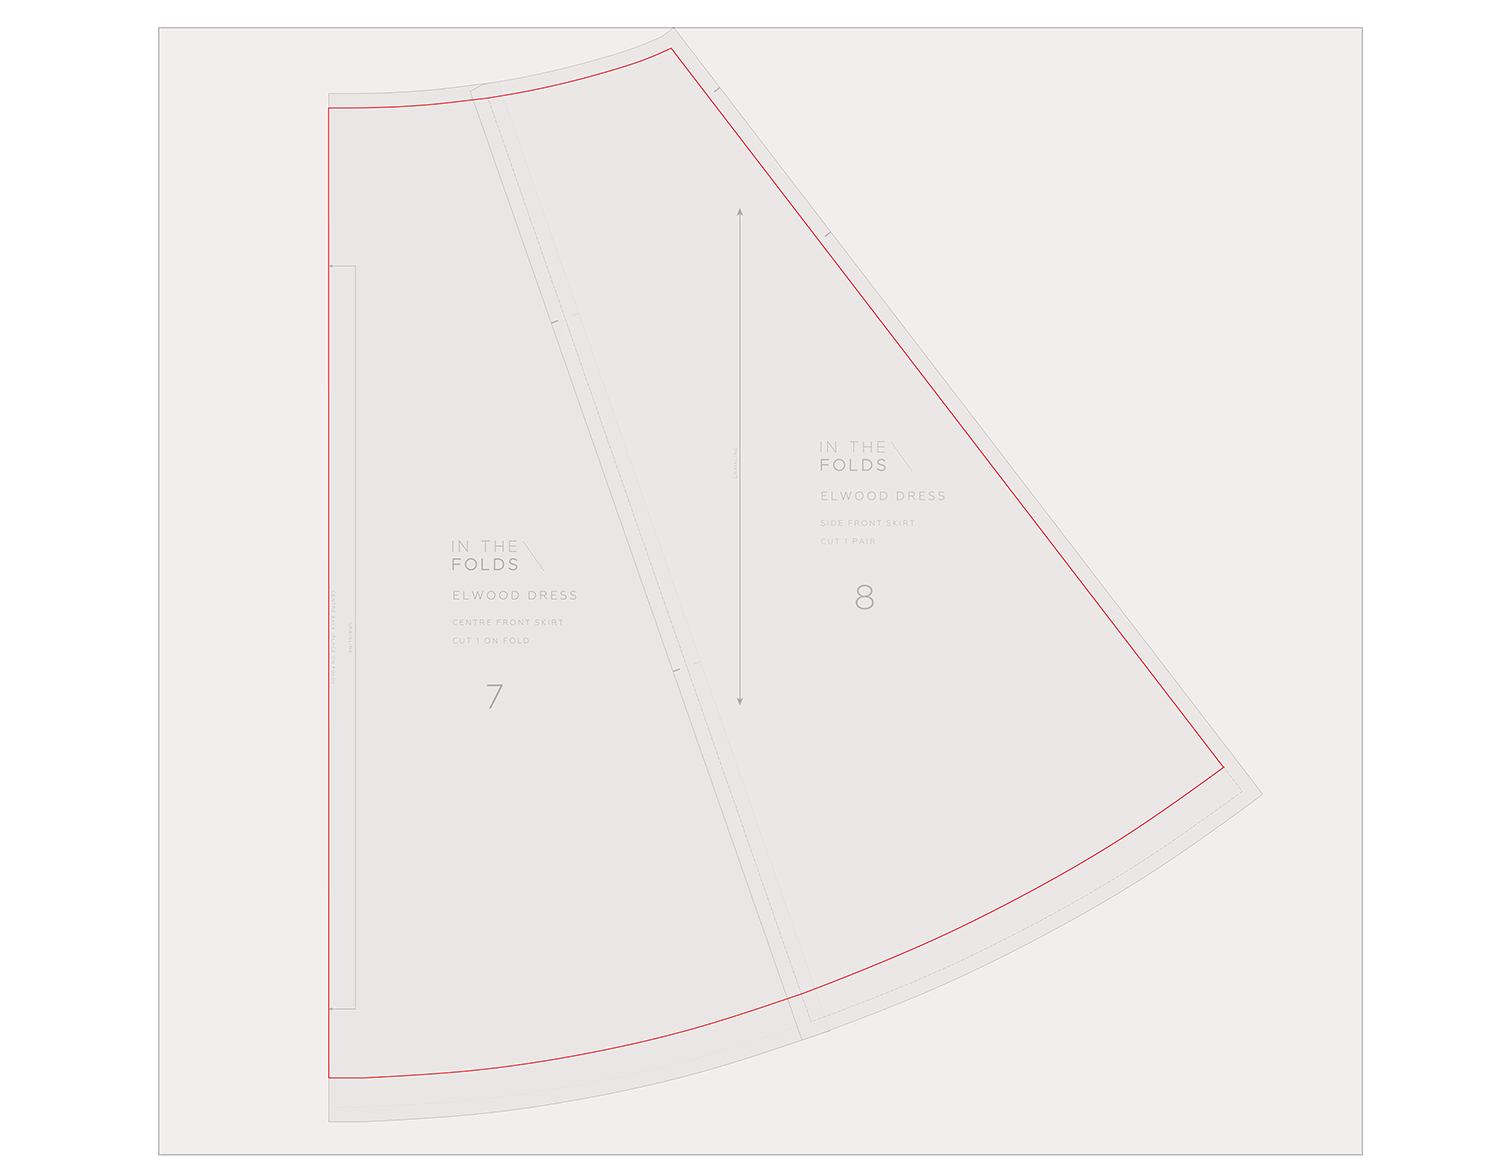
Step 8
Trace the STITCH LINE onto a separate piece of paper. Shorten the hem by 2.5cm (1in). This prevents the lining from showing beneath the dress.

Step 9
Transfer notches onto the skirt pattern and label the pattern. Repeat on the back skirt.
Happy sewing,
Emily
RESOURCES MENTIONED IN THIS ISSUE
The Elwood dress pattern can be found here.
How to remove panel lines from a pattern - tutorial can be found here.
How to draft a skirt lining for the Acton dress - tutorial can be found here.
The Sewing Linings Series is currently only available in our Curated by ITF Past Issues catalogue. It will be released as a standalone resource in 2025. More information about our Curated by ITF subscription can be found here.
For more issues of the Q & A series, you can check out the archive here.
WHAT YOU’VE BEEN MAKING

Barkly skirt made by @denise.does

Marden shirt made by @lisamcohen
MORE POSTS IN THE SERIES
ISSUE 182 - HOW TO SEW A back-to-front WRAP TOP

THE Q & A SERIES
HOW TO SEW A reverse WRAP TOP
Hi!
First thank you so much for all your tutorials!
I want to make a Peppermint Wrap top but I would like it to be reversible (worn with the back in the front if I make sense). Do you think the pattern is already reversible as is or should I make some alterations ? (To the neck line maybe?)
Thanks a lot!
Clara
Hi Clara,
This might seem a strange place to start with an answer, but bear with me… In a meeting this week, we were chatting about necklines, and how they are usually lower at the front than they are at the back. This then led to how our kids often put their shirts on back-to-front and how the tell-tale sign is that the neckline at the front sits much too high, but even though it appears to be choking them, they don’t seem to notice or care. (We’re all mums, so these kinds of discussions aren’t unusual. Ha!)
Which brings me to the start of my answer to your question…
Yes, you’re right, one of the problems you’ll run into with reversing the Peppermint Wrap top is that the neckline at the back will be higher. And while you may be able to get away with it, keep in mind that it also has bust darts, which you may not like having on your back.
If you really want a top that has the wrap section at the back, what I’d suggest you do is draft something specifically for this purpose. That way you’ll get your bust darts where you need them and the correct neckline shape.
HOW TO DRAFT & SEW A reverse WRAP TOP
Rather than using the Peppermint Wrap top as the base, I suggest you start with the Peppermint Ruffle sleeve top. The reason for this is that the wrap has altered the shape of the front of the wrap top and it’s difficult to reverse if you haven’t got much patternmaking knowledge (and I like to write these tutorials so that they appeal to makers of all levels). If we start with the Peppermint Ruffle sleeve top, we have a more solid base that requires less tweaking to get started.

Step 1
You will need the Ruffle sleeve top BACK and the Wrap top FRONT. We will be taking the wrap section from the Wrap top and transferring it onto the Ruffle sleeve top. You will need to flip one of the pieces so they line up correctly (i.e. the armholes are on the same side).

Step 2
Place the Ruffle sleeve top BACK onto the Wrap top FRONT, lining up the high shoulder point STITCH LINE (the point where the shoulder line meets the neckline) and making sure the grainlines are parallel. Pin or glue in place.

Step 3
Trace the neckline STITCH LINE and CUT LINE from the Wrap top onto the Ruffle sleeve top.

Step 4
We now need to blend the hems. I decided to keep the length of the Ruffle sleeve top, so I have drawn a curve that blends from the side seam on the Ruffle sleeve top to the tie section of the Wrap top.

Step 5
Add hem allowance. This should be the same amount that is on the Wrap top, which is 1.2cm (1/2in).

Step 6
Cut along the new lines, removing the excess paper. Cut along the Ruffle sleeve top shoulder line, armhole and side seam. We have now created the new BACK pattern pieces.
You could use the FRONT of the pattern as it is, but from your question it sounded like you liked the idea of the round neckline that you would get by turning the Wrap top back-to-front.

Step 7
Stick some paper behind the neckline of the FRONT Ruffle sleeve top. Extend the CENTRE FRONT up onto the paper and redraw the neckline as a smooth curve. The neckline needs to meet the CENTRE FRONT at a right angle.

Step 8
Add 1cm (3/8in) seam allowance to the neckline. You will notice that the neckline on the BACK has a different seam allowance (1.2cm (1/2in)). This is due to the construction method used on the Wrap top neckline and wrap.
Alter the hem line to match the BACK - changing it to 1.2cm (1/2in).

Step 9
Cut off excess paper by cutting through the new CUT LINES at the neckline, hem and CENTRE FRONT.

Step 10
The back neckline on the Wrap top is finished with a facing, so we will need to draft one for our FRONT. It is helpful to refer to the facing piece while drafting the new one.
Place a piece of pattern paper over the neckline of the FRONT. Trace the neckline, CENTRE FRONT and shoulder. Make the facing 5cm (2in) wide. Add seam allowance to correspond with the original piece - 1cm (3/8in) at the neckline and 6mm (1/4in) at the shoulder (this is much smaller than what would be used on a shoulder and is due to the construction method used for the top that is sewn with French seams).

Step 11
Complete the pattern by taking the WAIST TIE from the Wrap top. You will need to use the SLEEVE from the Ruffle Sleeve top to correspond with the armholes we used. If you would prefer the length / style of the Wrap top SLEEVE, you can transfer this from one to the other by laying the pieces on top of each other.
To construct the top, follow the instructions from the Wrap top, swapping the FRONT and BACK.
I hope you have fun making yourself a back-to-front wrap top!
Happy patternmaking and sewing,
Emily
For more issues of the Q & A series, you can check out the archive here.
WHAT YOU’VE BEEN MAKING

Collins top made by @allysondykhuizen

Peppermint wrap top made by @suzannemade
MORE POSTS IN THE SERIES
ISSUE 181 - HOW TO DRAFT A LINING FOR THE PEPPERMINT PLEATED SKIRT

THE Q & A SERIES
DRAFT A LINING FOR THE PEPPERMINT PLEATED SKIRT
Hi Emily,
I have a short question for you. I would like to add a lining to the Peppermint Pleated skirt and I’m wondering whether I should make an A-line lining based on the pleated outer skirt, or pleat the lining as well.
What would you do? Looking forward to your reply.
Many thanks in advance!
Kind regards,
Marjon
Hi Marjon,
Great question! In the last two issues of Curated by ITF, we've been exploring all things linings.
When creating a lining, you want to replicate the shape of the original pattern while creating the simplest pattern possible. So, we’ll often remove decorative elements like seam lines and pocket pieces etc, and this includes pleats.
Removing the pleats in the lining not only makes it easier to sew, but also helps to avoid bulk in the waist seam and throughout the body. So, an A-line skirt, as you suggested, is a great idea!
There are a few different methods to create the skirt lining pattern.
HOW TO DRAFT AN A-LINE SKIRT LINING
If your pattern is complex with lots of pleats or details, you may find it easiest to draft an A-line skirt from scratch (or use a pattern/block you already have). You can find information about drafting a skirt block here and how to turn it into an a-line skirt pattern here.
When using this method, make sure that:
The top of the lining is the same length as the top of the original pattern (once pleated), as they will sew into the same seam or waistband. You can use this measurement rather than your waist measurement when drafting the skirt block.
The hem width is similar or less than the original pattern, and you have enough space when walking.
The lining is shorter than the original so it is hidden.
As there aren’t too many pleats in the pleated skirt pattern you’re using, you can use the pattern as a base and remove the pleat volume, which I’ll demonstrate in today’s tutorial.
HOW TO DRAFT A LINING FOR THE PEPPERMINT PLEATED SKIRT

Step 1
Place the pocket bag behind the front piece using the notches to guide you. We’ll treat this piece as one going forward, as the lining will sit behind the pocket.

Step 2
Trace the front and back patterns without seam allowance, including the notches and pleats.

Step 3
Draw a line from either side of each pleat to the hem.

Step 4
On the front, starting at the top edge, cut down one of the lines until you are 1-2mm from the hem to create a hinge.
Tip - If your pattern isn’t cut out, you’ll also need to cut from the bottom of the paper and stop 1-2mm before you reach the other side of the hem, to allow the paper to move.

Step 5
Overlap the pattern at the top to remove the pleat volume and tape in place.

Step 6
Repeat for the rest of the pleats.

Step 7
Lay some paper on top and trace the pattern, including any notches. You can redraw the grainline parallel to the CENTRE FRONT.

Step 8
Remove 2.5cm (1in) from the hem. This will prevent the lining from showing below the hem. You could consider making the lining shorter if you like.

Step 9
Repeat process for the BACK. Remove the same amount from the hem on the BACK as you have on the FRONT.
Step 10
Check the seams match and flow together nicely and then add seam allowance.
If your fabric is wide enough, you can remove the centre back and centre front seams and place the patterns on the fold to remove any excess bulk.

Step 11
Label the pattern pieces with the new cutting instructions - Cut 1 pair lining.
Fun fact to up your patternmaking game…
In industry cutting instructions on lining patterns are written in green pen / marker so that lining pieces can be quickly and easily identified.
I hope you enjoy this tutorial and it helps you get the outcome you’re hoping for!
Happy sewing,
Emily
RESOURCES MENTIONED IN THIS ISSUE
More information about our Curated by ITF subscription can be found here. Sign up during the month of October to get part one of our Sewing Linings Series, the Sewing linings Skills Kit, delivered straight to your inbox.
The Peppermint Pleated skirt pattern can be found here.
Drafting a skirt block - tutorial here.
How to use the cut & spread technique to draft an A-line skirt - tutorial here.
For more issues of the Q & A series, you can check out the archive here.
WHAT YOU’VE BEEN MAKING

Ormond chore coat made by @tandarady

Acton dress made by @erincharter
MORE POSTS IN THE SERIES
ISSUE 179 - How to line the Collins top

THE Q & A SERIES
HOW TO LINE THE COLLINS TOP
How do I line a garment? I'm new to sewing, and recently bought the Collins top pattern, but the fabric I bought for it ended up being a bit more sheer than I would feel comfortable wearing. Do I double up fabric and sew as indicated in the pattern, or can I make this pattern reversible?
Emma
Davis, US
Hi Emma,
The situation you find yourself in is such a common one! I can certainly relate to falling in love with a fabric, only to find that it needs to be lined, except the pattern I want to use doesn’t include a lining. It’s a bit annoying!
Thankfully, as sewists who are focused on learning new skills (like patternmaking) we’re not limited to what a pattern provides.
four ways to line the collins top
When it comes to lining the Collins top specifically, you have a couple of options.
OPTION ONE: UNDERLINING
Underlining a garment is the simplest way to stop a fabric from being see-through.
What is underlining?
Underlining is a technique in which a second layer of fabric is cut and sewn together with the outer fabric pieces before the garment is constructed. Unlike a traditional lining (which is a separate layer added after the main garment is assembled), underlining is treated as one with the outer fabric when the garment is constructed.
You may choose to underline the entire garment, or just part of it. For example, you may decide to only underline the sleeves in a jacket or coat so it is easy to slide the garment on and off.
In the case of the Collins top, you may choose to underline the front and back pieces only and leave the sleeves unlined. A great example of this is when sewing with broderie anglaise. You might leave the sleeves unlined to show off the cut-outs in the fabric, but line the bodice.
OPTION TWO: CREATE A LINING PATTERN
The next option is to create a separate lining pattern for the garment, which is drafted using the original pattern as a base.

How to create a lining pattern for a garment
To start, it’s a good idea to remove any seams you can. In the case of the Collins top, this means removing the panel lines.
To do this, place the pieces together with STITCH LINE on STITCH LINE and trace a copy. Make sure to trace all the important markings such as the grainline and notches.

Some panel lines cannot be removed. For example, the sleeve panel seams create shaping through the shoulder so they cannot be removed.
However, if you want to minimise bulk, you could consider combining the pieces and using darts to create the shaping instead of panel lines.
Consider how you would like the lining to join to the outer garment. In the case of a top or dress, this means considering how the two will meet at the neckline.

OPTION THREE: LINING A GARMENT ‘EDGE TO EDGE’
Lining ‘edge to edge’ refers to a garment construction technique where the lining is sewn directly to the outer fabric along the edges, such that the lining reaches and is attached to the very edge of the garment, rather than being connected to a facing.
This method is often used if the main fabric (fabric that the garment is made in) is bulky or scratchy. By removing the facings, the main fabric will not touch the skin. It is also a good option for sheer fabrics where you don't want to see a facing or seam through the outer fabric. You can also use this method if you would like a quicker method of lining a garment, as it removes the need to draft a lining pattern and the time it takes to attach the facings.
With this option, you may consider adding interfacing to the neckline and armholes (for sleeveless styles) to prevent stretching. If the pattern has facing pieces, you can use these as the pattern pieces for cutting interfacing. Alternatively, trace the armhole / neckline shape and then cut 5cm (2in) width of interfacing as if you were drafting a facing.
If you would like to use this method, you can use the pattern to cut the lining pieces without drafting a new lining pattern.
OPTION FOUR: ATTACH A LINING TO FACINGS
Attaching the lining to a facing or multiple facings can give the inside a clean and professional look. It also has the added bonus of providing extra structure in areas that are prone to stretching, such as necklines and armholes, which can maintain the garment's shape over time.
Facings help to prevent the lining rolling to the other side, ensuring the garment stays in place and the lining is not visible from the outside.
If you’re interested in learning how to draft a facing for the Collins top, we wrote a post about it here for another Emma. If you would like to draft a neck facing only (which is what we’d suggest you do for the neckline on the Collins top) you can find instructions in the Drafting Linings Skills Kit.
Additional tips for sewing a lining for the Collins top
Alter the hem length.
The hem of the lining needs to be shorter than the outer so that it doesn’t extend beyond the hem. When drafting a lining pattern, shorten the lining by 2.5cm (1in) from the hem.

The other thing to keep in mind when sewing a lining for the Collins top is that the pattern has a high-low hem. This means that you may be able to see the inside of the back of the garment when it is worn. So keep this in mind when choosing the best option for the fabric you are working with.
CAN YOU MAKE THE COLLINS TOP REVERSIBLE?
The idea of a reversible Collins top is very interesting! We haven’t got any resources about making a garment reversible at this stage, so thought we’d link to this great post which covers the things to consider if it’s a project you’re keen to have a crack at.
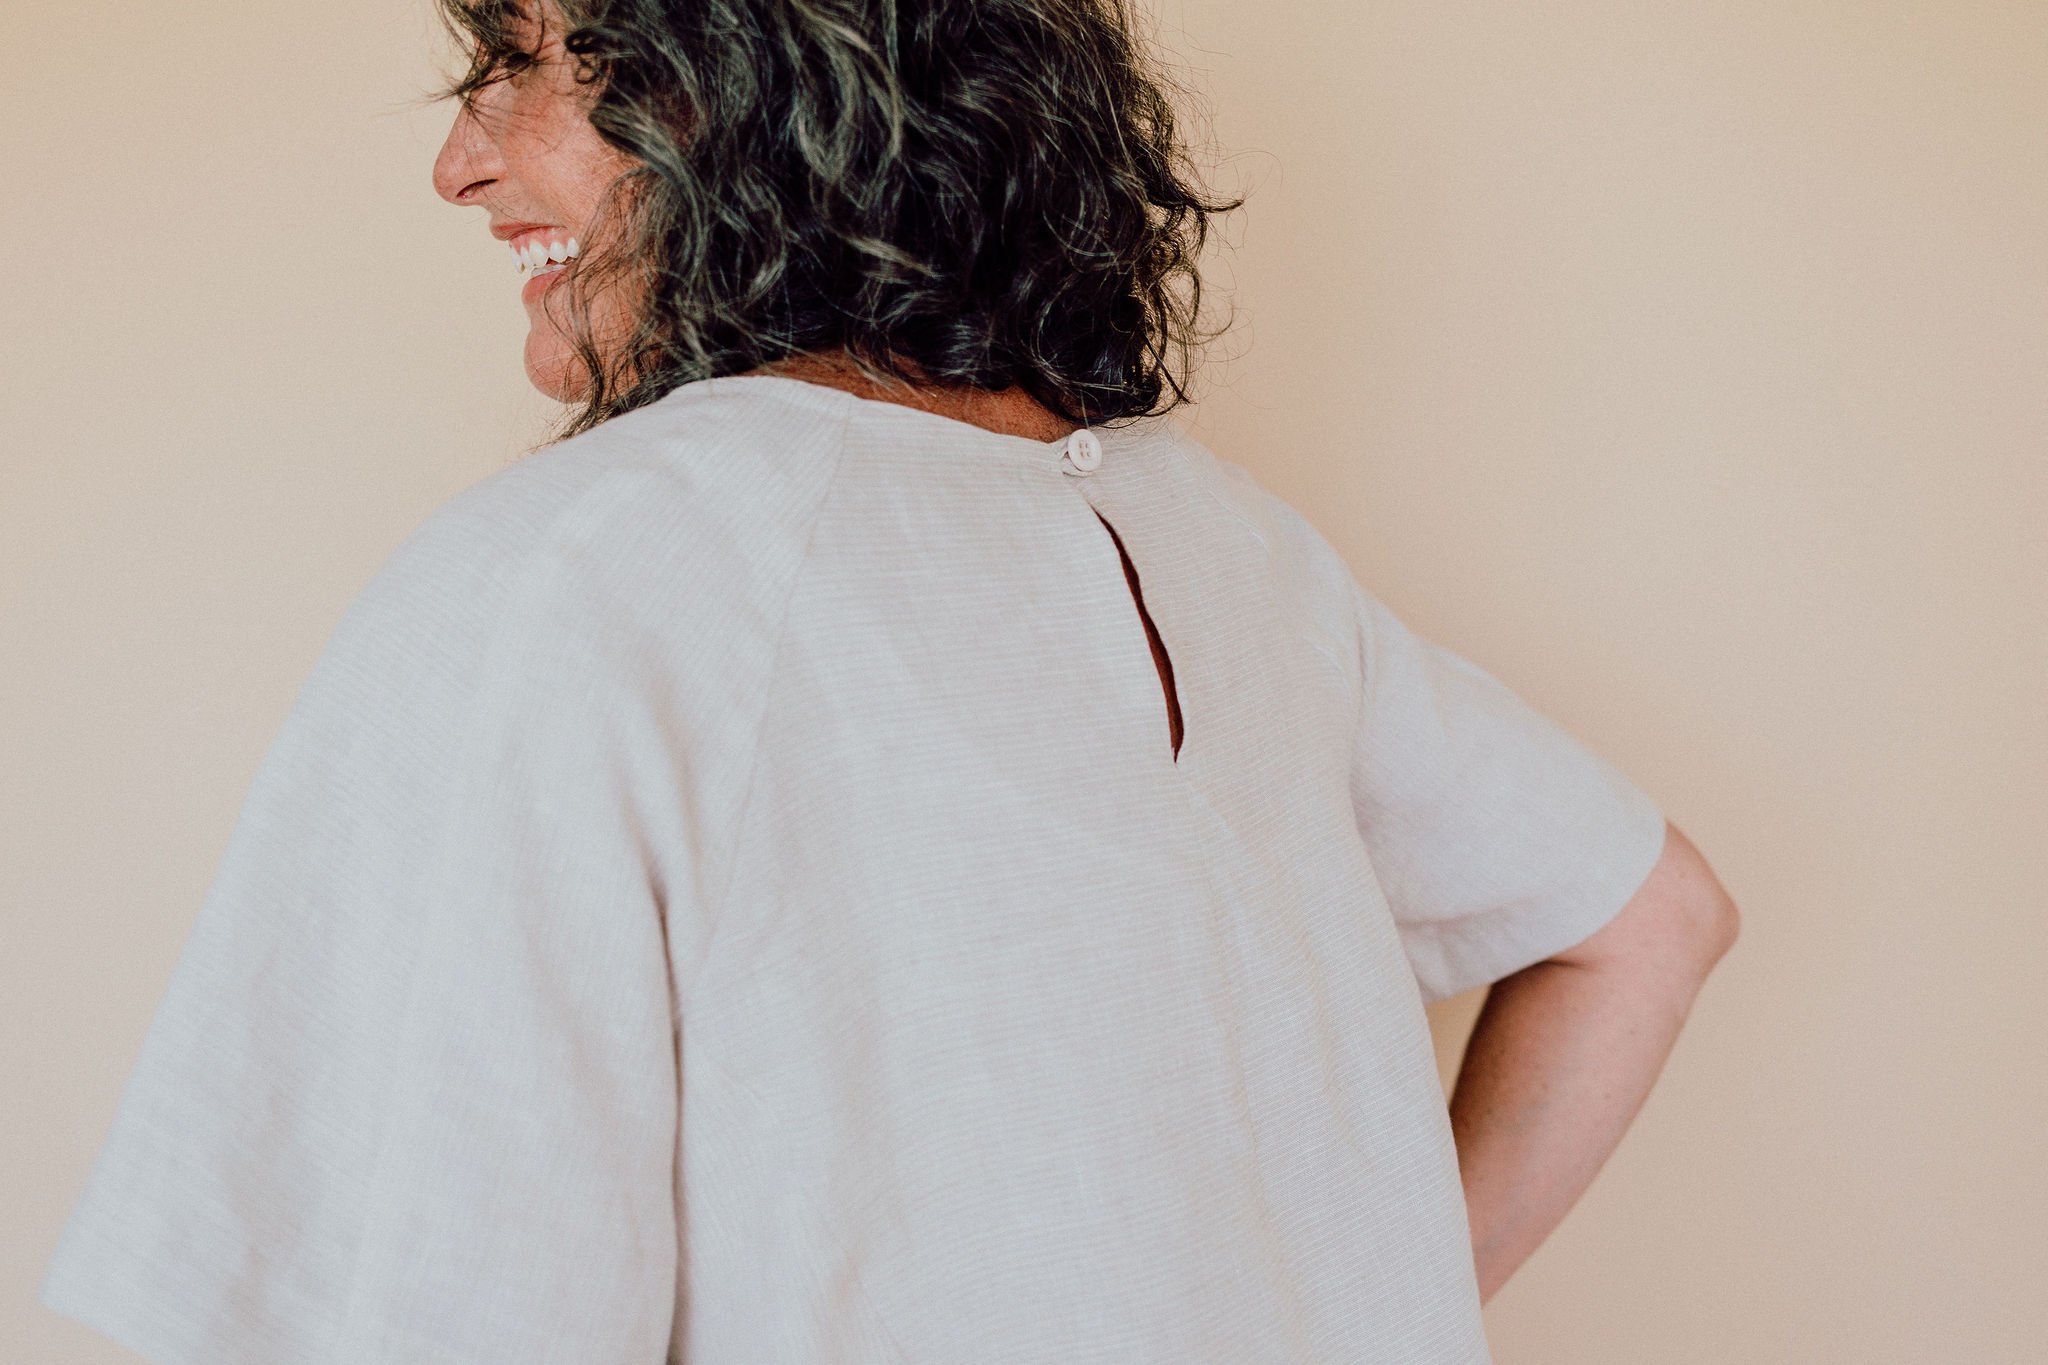
One thing to consider with making it reversible is how the closure at the neckline will work. In the case of the Collins top, which has a button and loop closure at the centre back, you could consider two buttons, one on the inside and one on the outside. Be sure to choose nice flat buttons so they don’t create bulk. The other option is to remove the closure altogether. Some makers have chosen to do this and haven’t had any problems getting the top on or off. As always, I recommend making a toile to check it works for you!
Happy patternmaking,
Emily
RESOURCES MENTIONED IN THIS ISSUE
The Collins top pattern can be found here.
The Stow dress pattern can be found here.
How to draft a facing - tutorial can be found here.
Seamwork article - Make it reversible - can be found here.
More information about our Curated by ITF subscription can be found here. Sign up during the month of September to get part one of our Sewing Linings Series, the Drafting Linings Skills Kit, delivered straight to your inbox.
For more issues of the Q & A series, you can check out the archive here.
WHAT YOU’VE BEEN MAKING

Sawtell dress made by @sarahissewcrafty

MORE POSTS IN THE SERIES
ISSUE 178 - HOW TO DRAFT A SKIRT LINING FOR THE ACTON DRESS

THE Q & A SERIES
HOW TO DRAFT A SKIRT LINING FOR THE ACTON DRESS
Hi Emily,
If one would want to add a lining to the skirt, how should the pocket construction go? (in reference to the Acton dress).
Giulia
Hi Giulia,
We thought this would be a great question to answer this week as we just released the first instalment of our two-part Sewing Linings Series. I’ll give you a few pointers on how to draft the lining pattern for the Acton dress, but if you want more help with drafting and sewing linings, I recommend you join our Curated by ITF subscription!


When it comes to pockets, you actually don’t need to worry about them in relation to the lining. The pocket will be sandwiched between the outer fabric and the lining.
Construct the dress and pockets as usual and then attach the lining, making sure you don’t attach the lining to the skirt.
One thing that you may do differently is leave the seams raw. When it comes to the linings, if your fabric doesn’t fray too much then you can leave the seams unfinished too.


The Acton dress design includes a number of panels in the skirt. To draft a lining, we begin by removing the panel lines from the pattern.
5 reasons to remove panel lines from a lining pattern
Removing panel lines reduces the number of pieces you need to sew together, simplifying the
construction process and the time it takes to assemble the lining. Fewer seams also means less chance of errors or misalignment during construction.
Eliminates unnecessary seams, reducing bulk and potential discomfort. Seam allowances add bulk, and fewer seams mean a smoother, more comfortable lining against the skin.
Every seam is a potential weak point that can experience stress and wear over time. By reducing the number of seams, you minimise the areas where the lining could potentially tear or fray.
A lining with fewer seams allows the outer fabric to drape more naturally and smoothly, without the interruption of seam lines.
Fewer seams create a cleaner, more polished look inside the garment. This is particularly important for high-end or tailored pieces where attention to detail is crucial.

WHY IS THE LINING ON SKIRTS LEFT UNATTACHED TO THE OUTER SKIRT?
There are several very good reasons why the skirt linings are usually left unattached to the hem of outer skirt:
Independent movement - Leaving the lining to hang freely allows it to move independently of the outer skirt. This prevents restriction and ensures that both layers can flow naturally, enhancing comfort and ease of movement.
Avoiding constriction - If the lining were attached to the hem, it could constrict the outer fabric, causing awkward bunching, pulling, or riding up as you move.
Smooth silhouette - Attaching the lining to the outer hem can create bulk at the bottom of the skirt, disrupting the smooth silhouette and clean lines of the garment. An unattached lining maintains a sleek appearance.
Facilitates alterations - If alterations are needed, having an unattached lining makes it easier to adjust either the outer skirt or the lining independently without affecting the other layer.
Enhanced breathability - An unattached lining can enhance breathability, as it allows for better air circulation between the layers, contributing to overall comfort.

HOW TO DRAFT A SKIRT LINING FOR THE ACTON DRESS
Step 1
To get started, trace a copy of your skirt pattern and remove any panel lines or unnecessary design details. If the panel lines provide shaping, transform the panel line into a dart or tuck. Be sure to transfer any notches from the pattern onto the lining pattern.
Step 2
Alter the length for the lining. A skirt lining is typically left unattached (not joined to the hem) from the outer skirt hem. This means that the lining pattern needs to be shorter than the outer skirt so that the lining cannot be seen when the skirt is worn.
We recommend shortening the length by 2.5cm (1in). The length should be taken from the hem (not from within the pattern piece as you do when removing length for variation in height between your measurements and the pattern).
Step 3
Add seam allowance to the pattern.
Step 4
Finalise the pattern by adding a grainline and cutting instructions. It's also a good idea to label the CENTRE FRONT and CENTRE BACK.
Industry tip! Cutting instructions on lining patterns are written in green pen / marker so that lining pieces can be quickly and easily identified.
Happy sewing,
Emily
RESOURCES MENTIONED IN THIS ISSUE
The Acton dress pattern can be found here.
The Acton dress sew-along can be found here.
More information about our Curated by ITF subscription can be found here. Sign up during the month of September to get part one of our Sewing Linings Series, the Drafting Linings Skills Kit, delivered straight to your inbox.
For more issues of the Q & A series, you can check out the archive here.
WHAT YOU’VE BEEN MAKING

Sawtell dress made by @sarahissewcrafty

Collins top made by @megmadesewing
MORE POSTS IN THE SERIES
ISSUE 177 -HOW TO SLIM DOWN THE WIDE LEG PANTS PATTERN

THE Q & A SERIES
HOW TO SLIM DOWN THE PEPPERMINT WIDE LEG PANTS PATTERN
Hi Emily,
I had a question about the Peppermint Wide Leg pants.
They are drafted straight from the hip. If I wanted them to narrow around the thigh and be straight from there down, how would one do that? Might be too complex to tackle, but thought I'd ask!!
(Also, I'm just 2 seams from finishing my first Flynn jacket and I wanted to tell you this much. I completely love and appreciate that pattern and instructions!!! It is probably my favourite pattern to date.)
Nina
Hi Nina,
I have a pair of jeans that I made from this pattern and I also made the exact alteration you are planning to make!
I found the easiest way to get the leg shape I wanted was to first make a toile in calico. So, here’s my tips!
TIPS FOR SLIMMING THE LEG OF THE PEPPERMINT WIDE LEG PANTS PATTERN
I recommend you make the toile with a long stitch length in a contrasting colour so you can easily see and unpick seams needed.
Don't bother putting in the zip.
Just cut one set of waist band pieces so you can pin the pants closed and get them to sit in the correct position on your waist.
Put the pants on inside out so you can see the stitch lines. (This is where the contrasting thread is useful!) Play with the seams until you figure out how much you want to take off the side seams and inner leg seams. With the toile on, use a marker to mark directly onto the fabric. (Alternatively, you could use pins to hold in place, but sometimes this can be a little painful when you’re wearing the toile and fitting on yourself!)
When you take off the pants, use a ruler and marker to mark in your new stitch lines. You will need to unpick the crotch seam either side of the inner leg seam to make any alterations to that seam.
Stitch along the new lines (again with a long stitch length in case you need to unpick them again), and try them on again. Continue this process until you are happy with the shape.
If you have a number of stitch lines by the end, take a coloured marker and trace along the stitch lines to mark the new stitch line on the fabric.
Unpick the pants so you have the front and back piece and then transfer the changes back to the pattern.
It is likely that you will need to skim off some of the pocket pieces at the side seam, so be sure to transfer the shape of your new pattern piece to the pockets too.
And that’s it! Sometimes, making changes to a pattern can take a little time when you do a toile, but in my experience toiling is never something to be regretted.
If you’d like to continue learning more about sewing pants, I highly recommend our very popular Pants Making Series, which the Pants Sewing Skills Kit, Pants pattern and Fit Kit, plus the Pants Design Kit.
Happy sewing,
Emily
For more issues of the Q & A series, you can check out the archive here.
WHAT YOU’VE BEEN MAKING

Acton dress made by @crafty_enthusiast

Sleeveless Flynn jacket made by @damselfly.ca
MORE POSTS IN THE SERIES
ISSUE 175 - HOW TO FIGURE OUT FABRIC REQUIREMENTS

THE Q & A SERIES
HOW TO FIGURE OUT FABRIC REQUIREMENTS WHEN COPYING READY-TO-WEAR
Many sewists are used to working with sewing patterns that tell them everything they need to make a garment. Construction method, notions, sizing, fabric requirements… Everything is covered in explicit detail and you just need to follow the instructions.
But what about when you’re copying a ready-to-wear garment?
Or if you’re doing a major hack to a pattern in your stash?
How do you know how much fabric to buy!?
It’s a question we get asked a lot!
We’ve been so excited to see our Curated by ITF members diving into the resources from our Copy Your Clothes series and learning how to copy ready-to-wear garments that they love and can’t bear to part with. And while many of them have been using fabric from their stash to learn these new skills (which we applaud, btw!), we figured it would be helpful to know what to do if they do want to head to a fabric store (because it’s inevitable, right?).
HOW TO FIGURE OUT FABRIC REQUIREMENTS WHEN COPYING A READY-TO-WEAR GARMENT
The following methods can be used when copying a ready-to-wear garment or when pattern hacking.
Method 1 - Measure each pattern piece loosely and calculate the required fabric.
Take the pattern pieces and loosely measure them as if they were rectangles. To do this, measure the longest and widest points. As you can see in the example we have given a little extra in both width and length, just to be safe. Remember to keep things straight and the right way up, as this is how the pieces will be cut on the fabric. Take note of the dimensions of each piece.


Consider the width of the fabric you are buying. Common fabric widths are 115cm (45in) and 150cm (60in), although there is a lot of variation, so be sure to check.
For the example, our FRONT [1] piece measures 37cm (14½in) wide and 140cm (55⅛in) long. Our BACK [2] measures 45cm (17¾in) wide and 140cm (55⅛in) long. We will need to cut a pair of each.
For a fabric width of 115cm (45in) we will need to cut the pieces one on top of the other (lengthways), as we won't be able to cut more than 2 pieces for the width (2 fronts = 74cm (29⅛in) and 2 backs = 90cm (35½).
For a fabric width of 150cm (60in), we will have more room to play (see image below). We could cut a pair of backs and a front on the width - leaving one front to cut. This does mean you will need a similar length of fabric, but you will have more fabric to spare from the 150cm (60in) width, which you could use for another project. Remember, this example does not include any additional pieces, such as facings and pockets. See cutting plan examples on the following page. (See image below.)
Remember, fabric may shrink a little during pre-washing, so consider getting a little bit more fabric to account for this.

Method 2 - Create a tape mockup of your fabric width on your floor
Take some masking tape and tape a line on the floor / table the width of the fabric you are considering using.
Lay out the pattern pieces, ensuring they fit within the fabric width. Take a tape measure and measure the length of your mock cutting plan.
Remember, fabric may shrink a little during pre-washing, so consider getting a little bit more fabric to account for this.
I usually use the second method, and place a tape measure so I can quickly move the pieces around and calculate the total.
The example below is as if the fabric is on the fold. Always make sure you read the pattern labels so you know if you need to cut 1 pair or cut 1 on fold etc.

Whether it’s with copying your ready-to-wear garments or hacking patterns, I hope this helps you on your sewing journey!
Happy patternmaking,
Emily
RESOURCES MENTIONED IN THIS ISSUE
More information about our Curated by ITF subscription can be found here. Sign up during the month of July to get part two of our Copy Your Clothes Series, the Make it your own Skills Kit, delivered straight to your inbox.
For more issues of the Q & A series, you can check out the archive here.
WHAT YOU’VE BEEN MAKING
Flynn jacket made by @thecrookedhem

Acton dress made by @sewbee73
MORE POSTS IN THE SERIES


ISSUE 174 - HOW TO ALTER A DROPPED SHOULDER TO A SET-IN SLEEVE

THE Q & A SERIES
HOW TO ALTER A DROPPED SHOULDER TO A SET-IN SLEEVE
I prefer fitted button down shirts, but the trend for women's shirts right now tends to be ‘oversized’ with the shoulder hitting in the middle of the bicep instead of the top of the shoulder. Is it possible to buy one of those patterns and change where the shoulder hits? And if it is, how does that affect the rest of the pattern, especially the sleeves?
Thanks for your help.
Sage
Toronto, Canada
Hi Sage,
We had a few community members with this exact question when we released the Marden shirt, so I thought it was a good one to answer.
Your question touches on two things:
The difference between a dropped shoulder sleeve and a set-in sleeve
What these two sleeve types have to do with the overall fit of a shirt.
So let’s dive in!
the difference between a set-in sleeve and a dropped shoulder sleeve

Our Cartwright dress and top pattern has a set-in sleeve, while our Marden shirt pattern has a dropped shoulder.
Set-in Sleeve
Construction - The sleeve is sewn into the armhole, aligning with the natural shoulder line.
Fit - More fitted and structured, following the natural contours of the shoulder and arm.
Appearance - Provides a tailored, polished look, as the sleeve cap fits snugly around the shoulder.
Use - Common in more formal and tailored garments, such as blazers, dress shirts, and fitted tops.
Dropped shoulder
Construction - The shoulder seam extends beyond the natural shoulder line, often ending halfway down the upper arm.
Fit - Looser and more relaxed, giving a casual and oversized look.
Appearance - The sleeve is attached lower on the arm, creating a slouchy, laid-back silhouette.
Use - Frequently seen in casual and oversized clothing, such as sweatshirts and t-shirts.
Due to how far the shoulder seam extends beyond the shoulder, the dropped shoulder has a boxier fit.

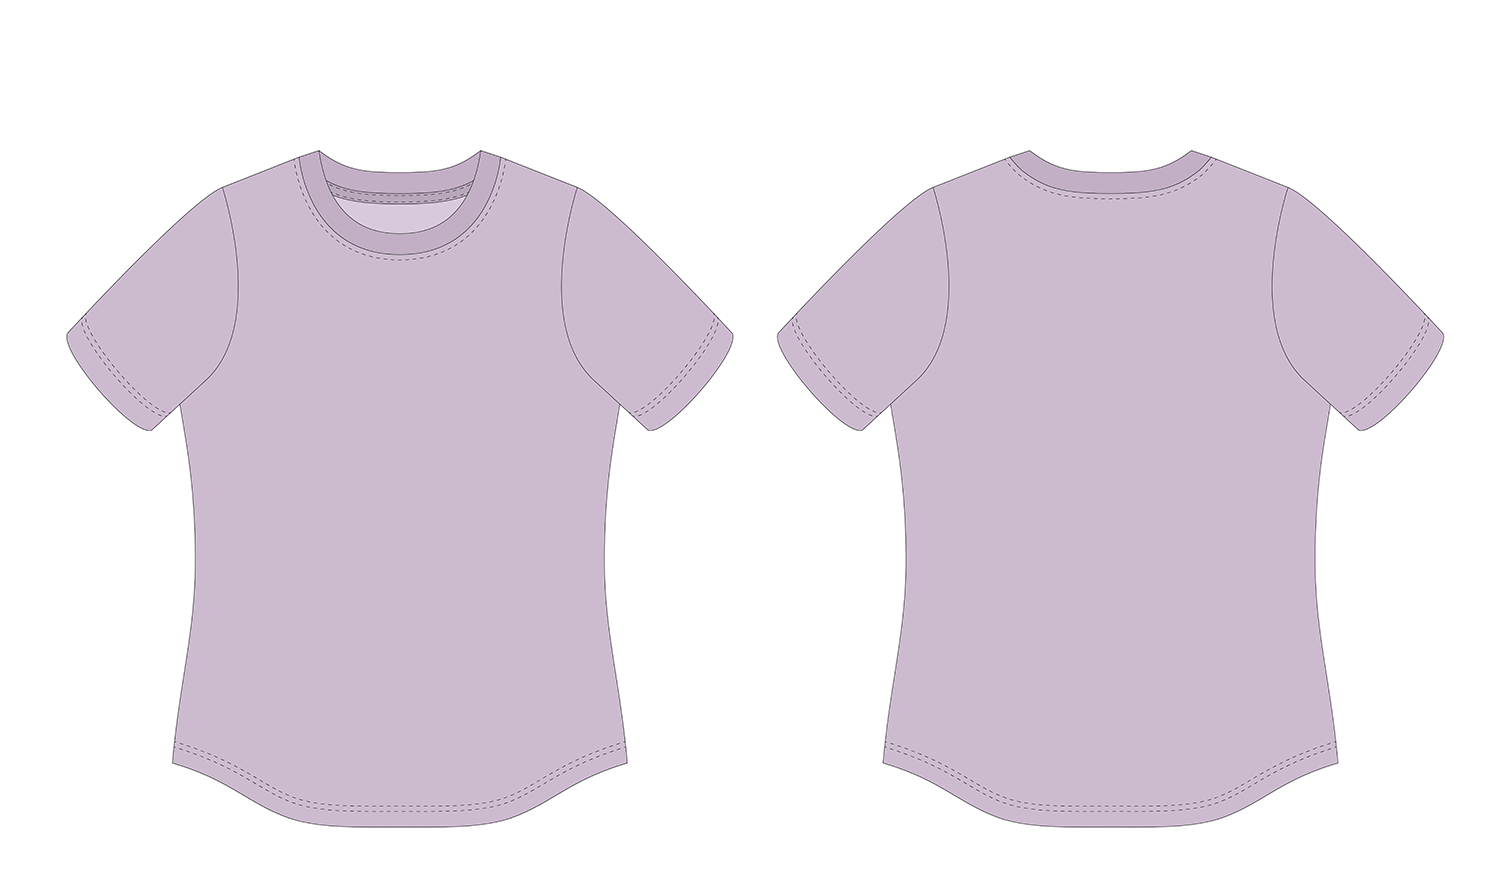
Above is a comparison of the front pattern pieces.
As you can see, the dropped shoulder pattern on the right is much boxier. The shoulder seam in our Marden pattern is longer and curved, although this isn’t always the case for dropped shoulder patterns. It can be straight, depending on the fabric it will be made of and the design. The side seam is straight and the armhole is much smaller.
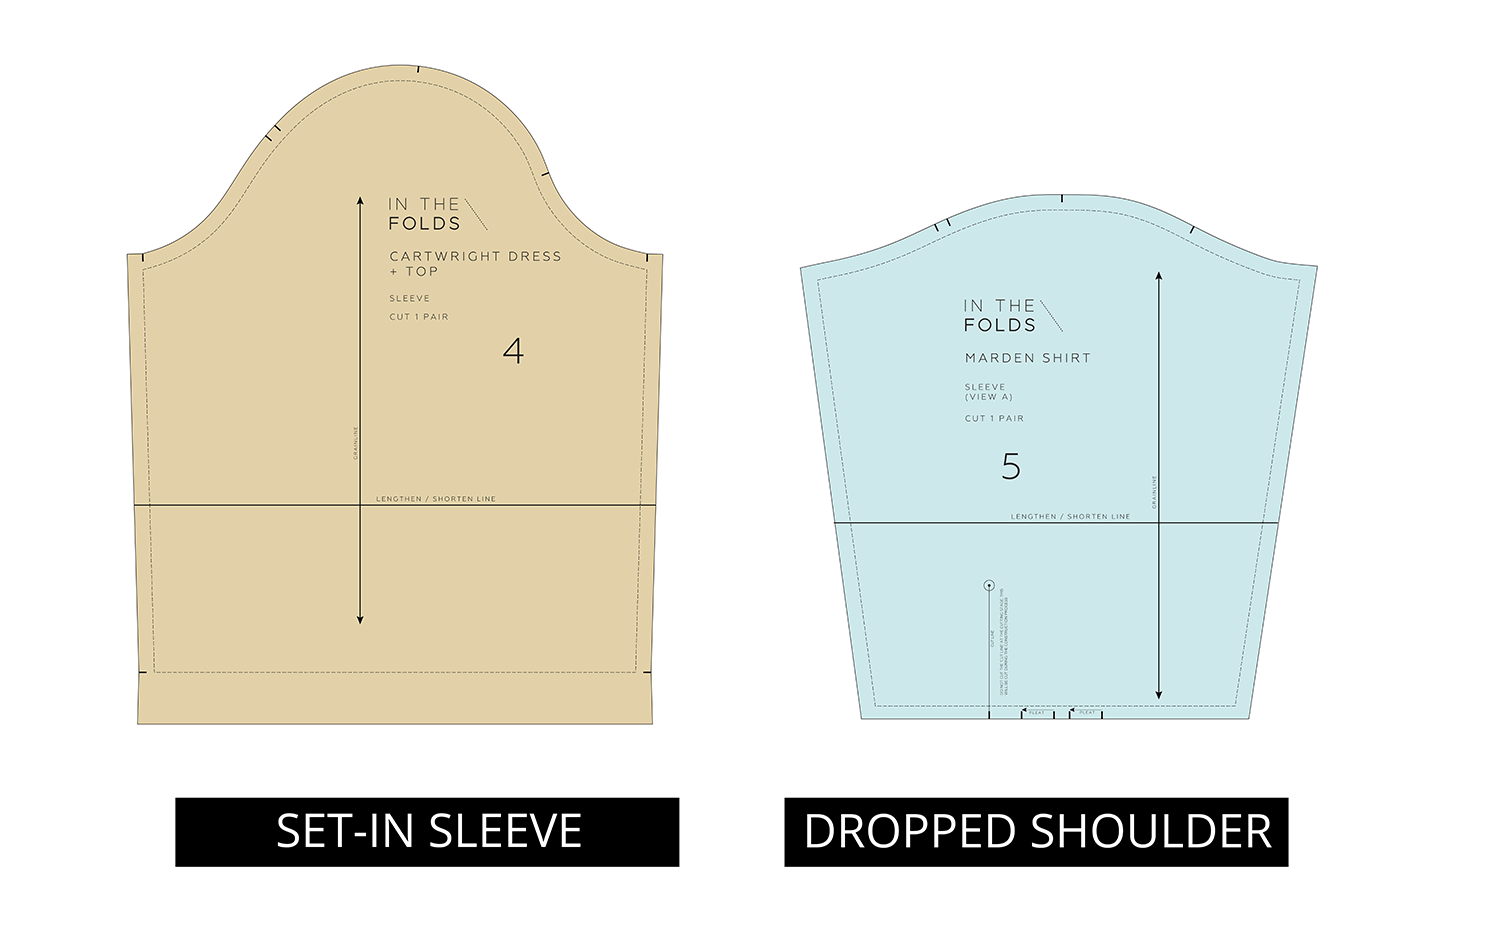
The sleeve required for a dropped shoulder (on the right) has a much lower sleeve cap as it doesn’t need to reach the shoulder. From the bicep line down there is not a huge difference.
In the case of these specific patterns, the Marden shirt sleeve is more tapered to accommodate the cuff.
Is it possible to buy a dropped shoulder pattern and change where the shoulder seam hits?
The answer is yes, you can definitely purchase one of these patterns with a dropped shoulder and alter the pattern. And we love that you’re considering pattern hacking! Adding these types of skills to your repertoire opens up a whole new world of opportunities when you’re sewing, and it’s what we’re all about at In the Folds.
However, drafting a set-in sleeve from a dropped shoulder sleeve pattern is quite complicated and I wouldn’t suggest you try this.
Instead, if you like elements of a dropped shoulder pattern, but you don’t like the dropped shoulder part, here’s what I recommend. Rather than remove the dropped shoulder sleeve, mash the two patterns together so you can take the elements from each pattern that you want.
This will be MUCH simpler than trying to draft a set-in sleeve from a dropped shoulder sleeve. The other way around is manageable, but going back is much more difficult.
Below is a step-by-step tutorial of how to do this with the Marden and Cartwright patterns.
How to remove a dropped shoulder from a pattern
For this tutorial I will be transferring the set-in sleeve from the Cartwright dress over to the Marden shirt.

Step 1
To begin, we need to check we have the CENTRE FRONT marked on both patterns. This will give us a point to match across both patterns.
Due to the button placket on the Marden shirt, to mark the CENTRE FRONT we need to add to the FRONT pattern piece half the width of the button placket, as the CENTRE FRONT on a button-up shirt is in the middle of the placket where the buttons are placed.

Step 2
Transfer the neckline from the Marden shirt to the Cartwright dress. This will allow us to attach the Marden collar pieces to this altered pattern.
Place one pattern piece on top of the other, lining up the CENTRE FRONTS. Slide the pattern that’s on top up or down until the STITCH LINES at the shoulder (where it intersects with the neckline) line up. Hold in place with a pattern weight.

Step 3
Slide some pattern paper under the neckline of the pattern you are altering and stick in place. Trace the neckline onto the paper.
In this case you will see that we have to trace part of the shoulder seam as well. This is because the Cartwright dress has a lower neckline than the Marden.

Step 4
Trace the seam line down the CENTRE FRONT. This means you will be able to attach the placket (sometimes called a button band) from the dropped shoulder pattern to the more fitted pattern.

Step 5
Transfer any other details from the dropped shoulder pattern onto the more fitted pattern. In this case we need to trace the horizontal seam from the Marden shirt onto the Cartwright dress.

Step 6
The lower panel on the Marden shirt would also need to have the width reduced so it matches the new more fitted version of the pattern.
Line up the STITCH LINE on the LOWER PANEL with the horizontal seam line marked on the altered pattern. By lining up the side seam STITCH LINE we can just remove the width from the CENTRE FRONT area.
Step 7
Complete the pattern by repeating the process on the back and reflecting the changes onto any other pattern pieces that are impacted.
In the case of this example, we would also need to alter the LOWER BACK PANEL and the hem facing pieces. Once those pieces are altered we can then use the collar pieces, sleeve, placket, cuff and button placket from the Marden shirt pattern.
Step 8
When the pattern is complete, be sure to make a toile to check you are happy with the fit.
If altering patterns to better suit your preferences is something you have been hoping to learn, this month’s issue of Curated by ITF might be the one for you!
Happy drafting,
Emily
RESOURCES MENTIONED IN THIS ISSUE
More information about our Curated by ITF subscription can be found here. Sign up during the month of July to get part two of our Copy Your Clothes Series, the Make it your own Skills Kit, delivered straight to your inbox.
The Cartwright dress and top pattern can be found here.
The Marden shirt pattern can be found here.
For more issues of the Q & A series, you can check out the archive here.
WHAT YOU’VE BEEN MAKING

Acton dress made by @annamadeitmn

Hacked Peppermint peplum top made by @_rubysthreads_
MORE POSTS IN THE SERIES
ISSUE 173 - OUR FAVOURITE PATTERNMAKING & GRADING RESOURCES

THE Q & A SERIES
OUR FAVOURITE PATTERNMAKING & GRADING RESOURCES
Hello Emily,
I am a fan of your pattern drafting tutorials and as an aspiring pattern cutter. I would like to know what books you recommend for pattern cutting and grading. I’m American, but I live in Madrid, Spain (my husband is Spanish) and I have been taking an industrial pattern cutting course here. I love the technical part of it, but unfortunately, I find the course really lacking in a lot of information so I have been trying to find good reference books or technical online courses to help fill in the gaps. Any recommendations would be greatly appreciated. Thanks so much for all of the information you provide on making patterns. It is so helpful and I haven’t found another website that offers such clear and useful tutorials about the technical side of pattern drafting.
All the best,
Marlena
Hi Marlena,
I am pleased to hear you are enjoying our tutorials! And, great to hear you are doing a patternmaking course. I really think this is the best way to learn, as it gives you a foundation to work from. It makes it a lot easier to look at books or resources and know whether they are worth using.
I don't use patternmaking books that often, but the main one I refer to is the one that we were told to buy for university - Patternmaking for Fashion Design by Helen Armstrong. The book has a good foundation on many patternmaking techniques and is a great place to start. Some of the drafts seem a overly complicated for the techniques being achieved, but with a bit of knowledge under your belt, you should be able to discern that.
I have since purchased Metric Cutting for Women's Wear by Winifred Aldrich and I find this one a bit easier to follow. It’s a small book, but it has a lot of information in it!
Helen Armstrong’s book covers more of the basics and leaves less up to you to work out yourself, while Aldrich’s book is great if you already feel confident with basic pattern making principles like slash and spread.
I don't think the Armstrong book has anything about grading in it, but the Aldrich one has a little. I feel that in general, there is very limited information about grading available. We did it for just one patternmaking class in my whole fashion degree! If you would like to understand the basics of grading you can check out this tutorial. And we’re going into more depth in next month’s issue of Curated by ITF, with the Make It Your Own Skills Kit.
The other book I like is How Patterns Work by Assembil. It's a big book, so I haven't managed to even scratch the surface with it. It's beautifully done and the creator of that book went to the same university as me, so it makes sense to me as it's written in the same way as I was taught to draft.
Garmenta Apparel is also a great site with lots of good information if you’re interested in the professional side of patternmaking and grading. Her blog and Instagram are definitely worth a look.
I hope that helps! Best of luck with your course.
Emily
RESOURCES MENTIONED IN THIS ISSUE
More information about our Curated by ITF subscription can be found here. Sign up during the month of June to get Part One of our Copy Your Clothes Series, the Copy Your Clothes Skills Kit, delivered straight to your inbox.
For more issues of the Q & A series, you can check out the archive here.
WHAT YOU’VE BEEN MAKING

Hacked Attwood pants made by @thatsewannabel

Collins top made by Emily, a Curated by ITF member.
MORE POSTS IN THE SERIES
ISSUE 172 - EMILY'S TIPS FOR COPYING YOUR CLOTHES

THE Q & A SERIES
EMILY’S TIPS FOR COPYING YOUR CLOTHES
Hi Emily
I am really trying to improve/ learn how to cut a pattern from a much loved garment. I manage reasonably with children’s simple clothes but struggle with mine. I’d love to hear any tips you have.
Thanks,
Clare
Hi Clare,
Can I just say first up - you are not the first person who has loved a garment and wanted to know how to copy it so that they could wear it forever. We’ve heard this question SO MANY TIMES in our community.
Because, if you’re someone who has the skills to make your own clothes, it’s highly likely that you’ve thought at some point… “I know how to sew. I can copy that. I mean… how hard can it be?”
And you would be right to think that you CAN copy clothes. Even without unpicking them! (Which is the approach we teach. Seam rippers, begone!)
What most makers don’t realise is they’re actually embarking on a journey that is, while related to sewing a garment, a completely unique skill set. Obviously, there is a lot of overlap between sewing a garment from a pattern and sewing a garment from a pattern you’ve drafted from a finished garment. The knowledge you have from sewing garments from patterns will most definitely help you as you starting to learn patternmaking skills, but there are some pretty important patternmaking foundations that you won’t necessarily be able to ‘figure out’ just because you’ve sewn a few garments from patterns.
Which is exactly why we took a deep dive into the whole process in our Copy Your Clothes Skills Kit.
As you probably know, it’s all about the details for In the Folds. We’re big on learning skills and having strong foundations because this is what helps you get a really beautiful finish. And that’s what gets you making clothes you REALLY love and REALLY love to wear.
WHY COPY YOUR CLOTHES?
What's great about copying clothes you already own is that you know exactly how the garment fits from the original item. When starting with a pattern, you can get a rough idea of how it's going to fit by checking the garment measurements, but it still leaves a lot up to guesswork (which is why we ALWAYS encourage you to make a toile). By using an existing garment as a base pattern, you will have a good idea of how the garment will fit your body. Once you have a pattern, you can then adjust it to fit your body better or alter the design to suit your style or preferences (more on that in the upcoming issue of Curated).
The other great thing about drafting a pattern from an existing garment is that you have a garment to refer to to check seam finishes and details. It’s a great opportunity to learn patternmaking skills without having to start from scratch!
Tips for successfully copying your clothes
Start with a simple garment
Garments can be made from woven or knit fabrics. Choose a garment that does not have design details such as darts, panel lines, tucks or gathers for your first copy. We recommend starting with a T-shirt and then working your way up to more complex patterns. Garments that do not lay flat will be more difficult to trace, so we encourage you to leave those until you have completed a few patterns using this process
And, while a t-shirt might seem like a very simple garment, please don’t be fooled!
Taking a pattern from a t-shirt will teach you a range of techniques that are foundational to patternmaking. It’s really important that you understand why they are done and learn how to do them well when taking a pattern from an existing garment. Remember, any errors that you make on a pattern will be transferred to any and all garments you make from that pattern. So take it slow and learn it well and properly!
It’s a good place to start as you don’t have to deal with elements such as darts or gathers etc. but it will give you a chance to trace straight seams, curved seams and sleeves.

Have the right tools on hand
A needle point tracing wheel is the most important piece of equipment when copying your clothes. There are various types of tracing wheels available, but for patternmaking it is important you get one with needle points. Ones with smoother or flatter points won’t have the desired effect, and are used for different processes in sewing. A needle point tracing wheel is sharp enough to transfer markings through the garment without damaging your clothes.
If you’re intent on learning patternmaking skills and you don’t have a tracing wheel already, it is a good piece of equipment to add to your toolbox.

You will also need pattern paper and a patternmaking ruler. We suggest a curved ruler too, such as a French curve or Patternmaster.

Consider the condition of the garment you are copying
You can copy a garment in any condition. Don’t worry if it’s a newer garment, or something you can still get a lot of wear out of. For the process we use, we won’t be unpicking the garments to create a pattern so you’ll still be able to wear it afterwards. Bonus!
The better the condition, the easier the garment will be to copy. When clothes begin deteriorating, they often stretch and warp out of shape, so this may make it difficult to trace an accurate pattern. If it’s something you love though, it’s well worth giving it a go, even if it is in poor condition. As you have pattern alteration skills (and if you don’t you should definitely join Curated by ITF!), you will likely be able to tweak any issues that come about due to stretched or warped fabric.
If your garment is in poor condition, we recommend choosing something in better condition for your first attempt to get used to the process and work your way up to the garment in poorer condition.
Prepare the garment to make it as easy as possible to trace
This means:
Launder the garment. It is important that the garment is in good shape so that the trace is as accurate as possible.
Iron the garment. Use steam to ensure any areas that have stretched are as flat as possible.
Get to know the garment. Look over the garment and ask yourself some questions about how it's made:
Is the garment symmetrical?
How is it constructed? (i.e. what seam finishes are used?)
How are openings finished? For example, how is the hemline finished, how are the necklines / armholes finished?
Does the garment have any special details I need to consider?
The basics of copying your clothes

Start by marking the CENTRE FRONT / CENTRE BACK
Find the CENTRE FRONT by folding the T-shirt in half with the front facing out. Align the shoulder seams and the side seams. Lay the piece flat and smooth out any wrinkles.
The fold is the CENTRE FRONT. Place a vertical pin in the CENTRE FRONT at the neckline and the hem. If the back neckline extends above the front neckline, which is common for T-shirts, place the pin through the back neckline.

Take a length of masking tape and place it along the fold from the top of the garment to the bottom, with one edge right up against the fold. Use multiple pieces if required (it doesn’t have to be one length).
Leave the pins in place so it is clear which side of the tape is the CENTRE FRONT.

With a tracing wheel, carefully trace along the seam lines
Methodically work your way around the garment so that you don't miss a seam.
When using the tracing wheel you need to apply enough pressure for the wheel to leave markings on the paper underneath the garment. Roll the tracing wheel back and forth in the same spot a couple of times before moving along the seam.
If you make a mistake, go over the seam again, pressing harder with the tracing wheel. This means when you lift the garment it will be clear which markings are the correct markings to follow.

You can use a ruler for straight seams and trace along them with the tracing wheel or just use the tracing wheel and straighten out the line later when you are tracing the markings.
For seams that are on the the outer edge of the garment (e.g., shoulder seams and side seams in the case of a T-shirt) you can choose whether you would like to trace the seam shape with the tracing wheel or a pencil.

Use a ruler on straight seams to help you get a straight line.
Alternatively, mark each end of the straight line with a pencil and then join the points when you remove the garment.

To mark a curved line with a pencil, use a broken line to transfer the shape onto the paper.

Check and true your pattern pieces
As you trace your pieces, check them against the pieces they will attach to to check that the seams are the same length and there is smooth flow through from front to back. This will ensure the pieces fit together accurately and you won’t get any surprises at the sewing machine.
Make a toile
Even though you’ve made a pattern from a garment you already own, if you’re not sure about anything, a toile is ALWAYS a good idea and a great way to check before cutting into your ‘good’ fabric.
Happy skill-building,
Emily
RESOURCES MENTIONED IN THIS ISSUE
More information about our Curated by ITF subscription can be found here. Sign up during the month of June to get the Copy Your Clothes Skills Kit delivered straight to your inbox.
For more issues of the Q & A series, you can check out the archive here.
WHAT YOU’VE BEEN MAKING
Peppermint Wrap top made by @marfasmakes

Darlow pants made by @kristinkoury
MORE POSTS IN THE SERIES
ISSUE 171 - HOW TO LENGTHEN AN A-LINE PATTERN

THE Q & A SERIES
HOW TO LENGTHEN AN A-LINE PATTERN
Hi there,
I'm writing regarding the lengthening of the Rushcutter dress. I'd like to make it at least 10" longer than it is, however I see that there is a flare to all of the panels in the dress, and I wanted your advice regarding this alternation. I know that the side panel is likely to be a bit heavy due to the pocket added on top. I see the lengthening line on the panel pieces, so that's where I would add the extra length. Best advice on this please?
Thanks,
Dawn
Hi Dawn,
Great to hear you’re planning to make the Rushcutter dress. It is the very first pattern we released, so it holds a special place in our hearts!
Over the years, we’ve seen makers have a LOT of fun with this pattern. If you’d like to find some inspiration you should definitely check out the Instagram hashtag #rushcutterdress.
We love it when makers want to make changes to our patterns, and whenever we can we are happy to help! Adding length to the Rushcutter dress has been done before (check out this one by Oak Fabrics!), but you’re right, the pockets are definitely a consideration.
Here’s what you need to do.
How to lengthen the Rushcutter dress

To lengthen the pattern, definitely use the LENGTHEN / SHORTEN lines that are on the pattern. Use the CENTRE BACK and CENTRE FRONT lines to ensure you’re lining the lower section up correctly and the grainline on the SIDE PANEL.

Normally when you add or remove length from a pattern using the LENGTHEN / SHORTEN line, you draw a line of best fit over the alteration. In the case of the Ruschutter, which has straight seam lines, this means ruling a straight line over the alteration. If the pattern you’re adding length to has curved seams then you need to mark in the new seam line as a curve.

As you can see, to draw a straight line to the lower sections we need to cut a little bit of the width off (I’ve made these yellow in the illustration).
In a pattern with quite a lot of ease in this area, like the Rushcutter dress, this may not be a problem, but it will depend on your measurements in relation to the finished garment measurements. In this case we will be losing about 10cm (4in) ease in this area if we go ahead with this pattern alteration, so be sure to check your measurements before you make the cut!


If you would prefer to not lose this width, the alternative is to follow the lines on the upper section when adding length (a) and then joining the new line to the original hem line (b). As you can see, this adds some width to the hem circumference.

If you’re making View A (with the patch pocket), once you’ve added length, you then need to decide what to do with the pocket. The way the pocket is constructed on the Rushcutter is that it becomes part of the side panel.

By adding length to this panel, the pocket will end up sitting very low and you wouldn’t be able to reach it. Alternatively, you can lengthen the pocket in the same way we lengthened the pattern which will keep the design integrity intact, but then you have a very long pocket. You’d be able to put things in it, but may not be able to reach in to get it back out!

You have two options here. The first is to keep the pocket in its original size and keep it in its original position. This means that you will need to fold up the bottom edge of the pocket and attach it to the SIDE PANEL. This approach means you will see a line of stitching and the bottom of the pocket.
The other option is to lengthen the pocket so it goes all the way to the hem, and then make a lining to attach to the inside of the pocket. This way from the outside it will look like the pocket goes all the way to the hem, but on the inside, you will have a shorter pocket bag to catch things so they don’t go all the way to the hem too.
Which option you choose is really a matter of design preference. It’s up to you!

To do this:
A Lengthen the pocket so the top of the pocket sits in the original position.
B Make the pocket lining piece by removing the hem allowance from the top of the original pocket piece.
C When constructing the pocket, slide the pocket lining under the hem of the new pocket so that when you stitch the hem you catch the pocket lining.
D Attach the pocket to the SIDE PANEL, sewing the bottom of the pocket lining in place first, then attaching the edges of the pocket lining and pocket to the SIDE PANEL. You can then construct the dress as normal.
Hope this helps your Rushcutter sewing adventure, Dawn. And if you have any other questions about the Rushcutter sewing process, we recommend you check out our Rushcutter sew-along here.
Make sure you share your finished make with us too - it’s one of our favourite parts!
Happy sewing,
Emily
For more issues of the Q & A series, you can check out the archive here.
WHAT YOU’VE BEEN MAKING
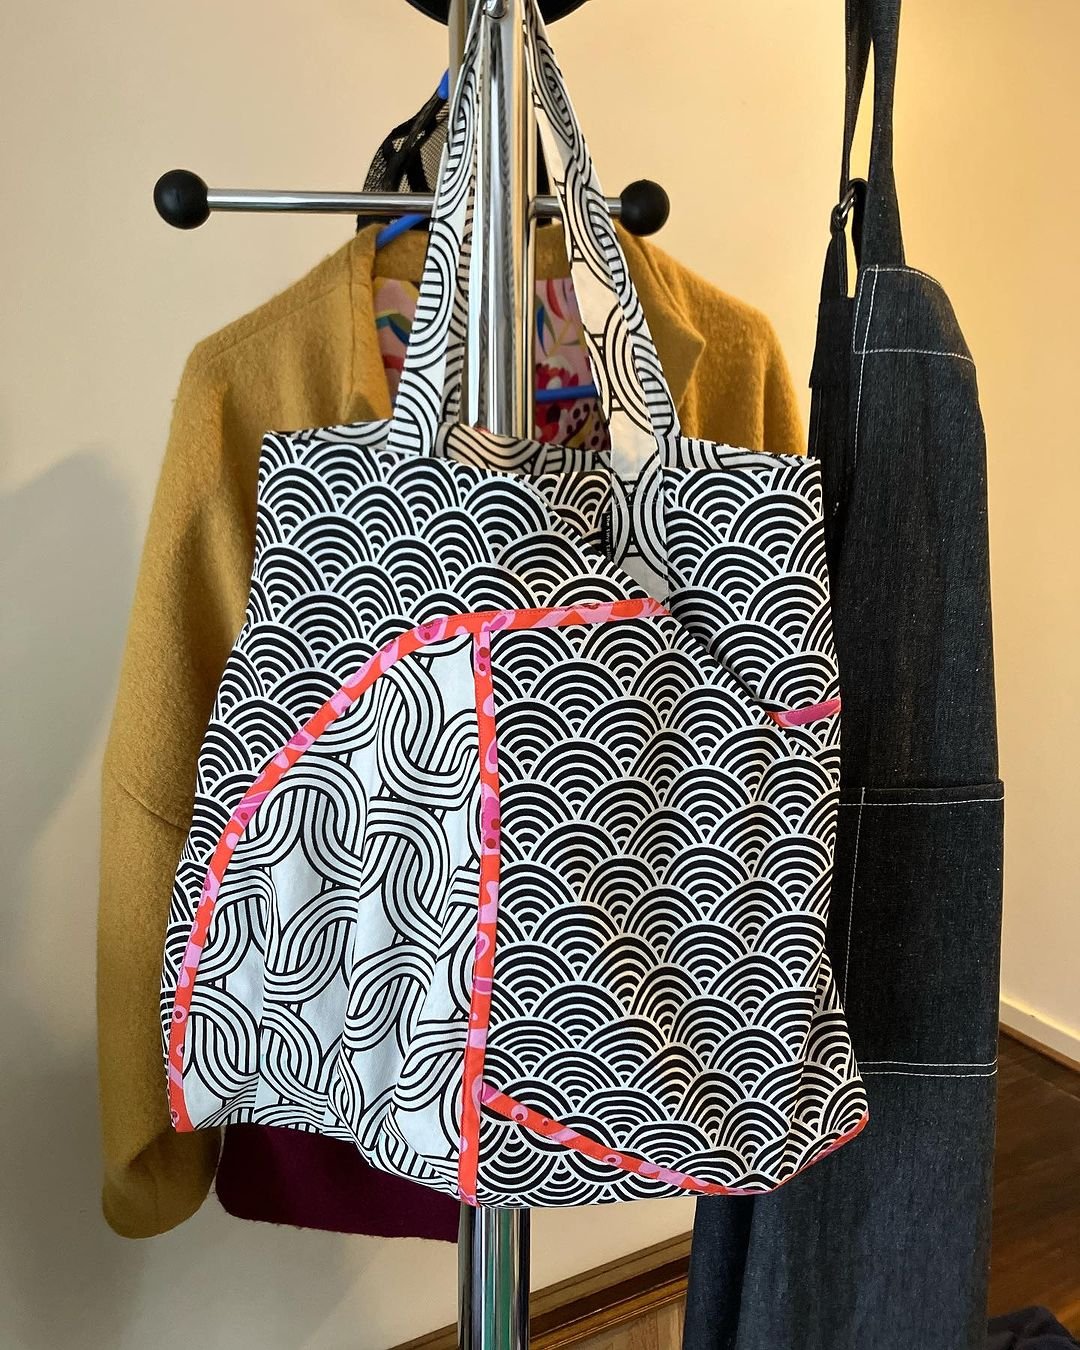
Hove tote made by @the.tiny.tailor
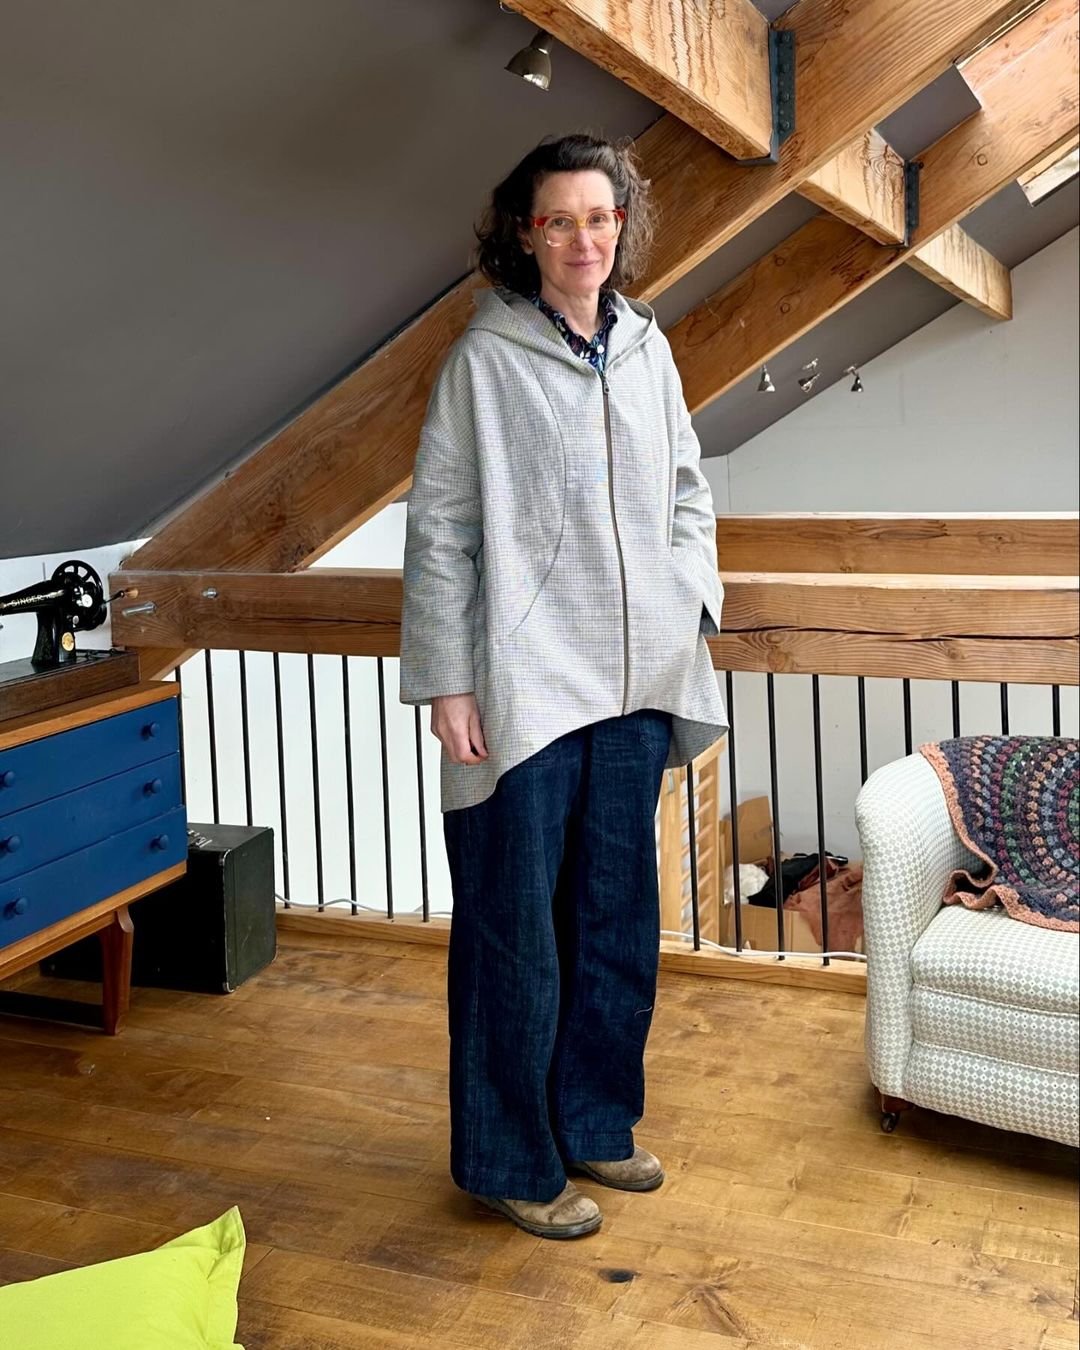
Hove jacket made by @sewquietly
MORE POSTS IN THE SERIES
ISSUE 168 - REMOVING PANEL LINES FROM A PATTERN

THE Q & A SERIES
HOW TO REMOVE PANEL LINES FROM A PATTERN
On the Acton dress the centre front bodice is not cut on the fold, although the seam is straight and so it could be. I'm wondering if there is any structural purpose to having a seam down the centre front, or whether I could cut on the fold so I don't have to pattern match my tricky fabric.
A
Sydney, Australia
Hi there!
I’ll answer your question specifically, as well as give you some pointers about removing seams in general for anyone else reading along that may have this question in relation to another pattern.
In general, if a seam line is straight, it’s normally fine to remove it.
For example, in our Attwood pants we used a lot of panel lines to create a design feature. The design intention of the different panels allows makers to play with the pattern and use fabric in different ways (like colour blocking or directional prints) to create different looks. When made in a solid colour, the panel lines add a point of difference so that the pants are more than ‘just’ a plain pair of pants. But, the panel lines aren’t a necessary part of the Attwood pants’ ‘constructability’ and can be removed if you want a basic pair of pants with the same fit as the Attwoods.

If you look at the centre seam lines on the Atwood pants you can see they are straight.
HOW TO REMOVE PANEL LINES FROM THE ATTWOOD PANTS PATTERN
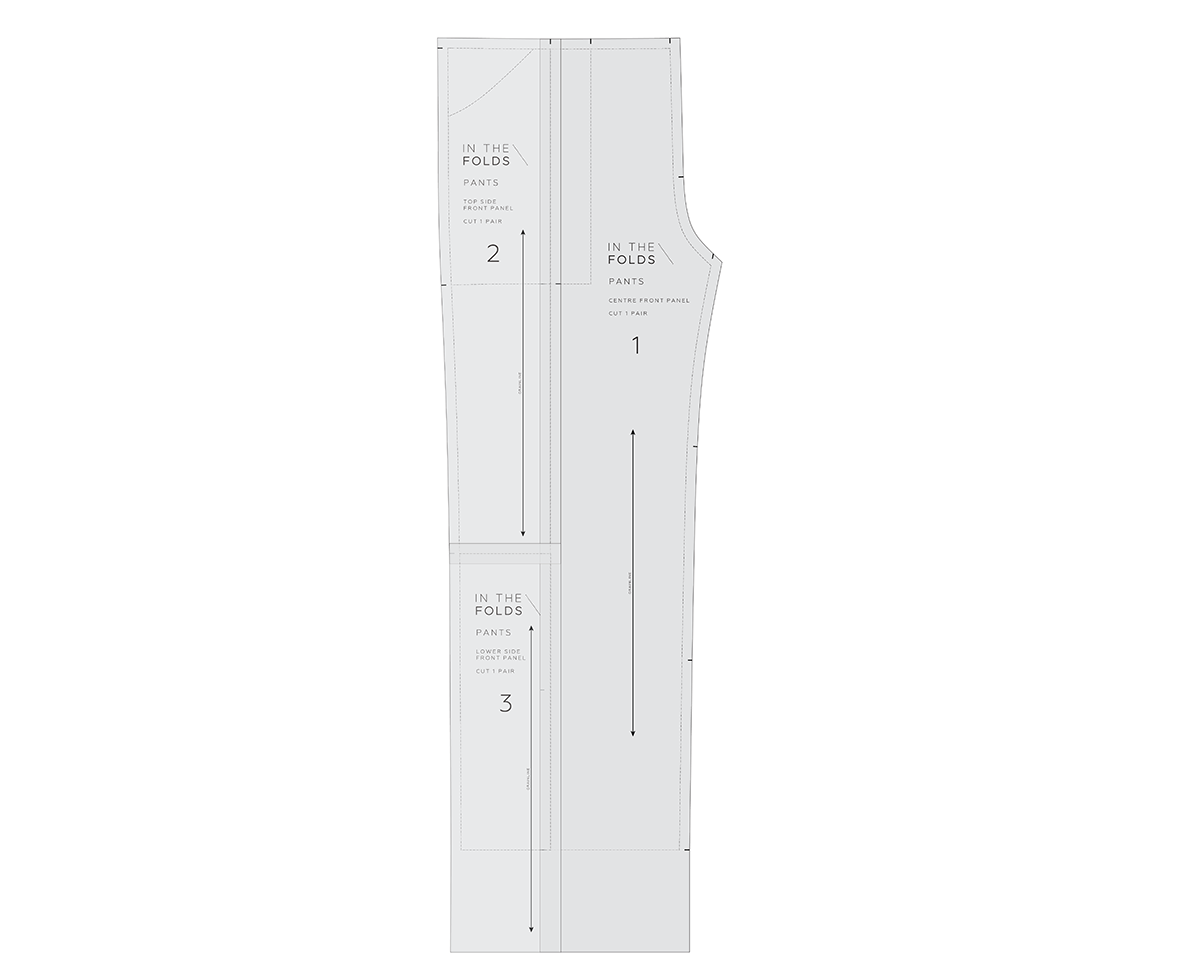
Removing the panel lines from the Attwood pants pattern is very straightforward.
Line up the corresponding panel pieces with STITCH LINE (grey line on our patterns) on STITCH LINE. Tape or glue in place.
Done!
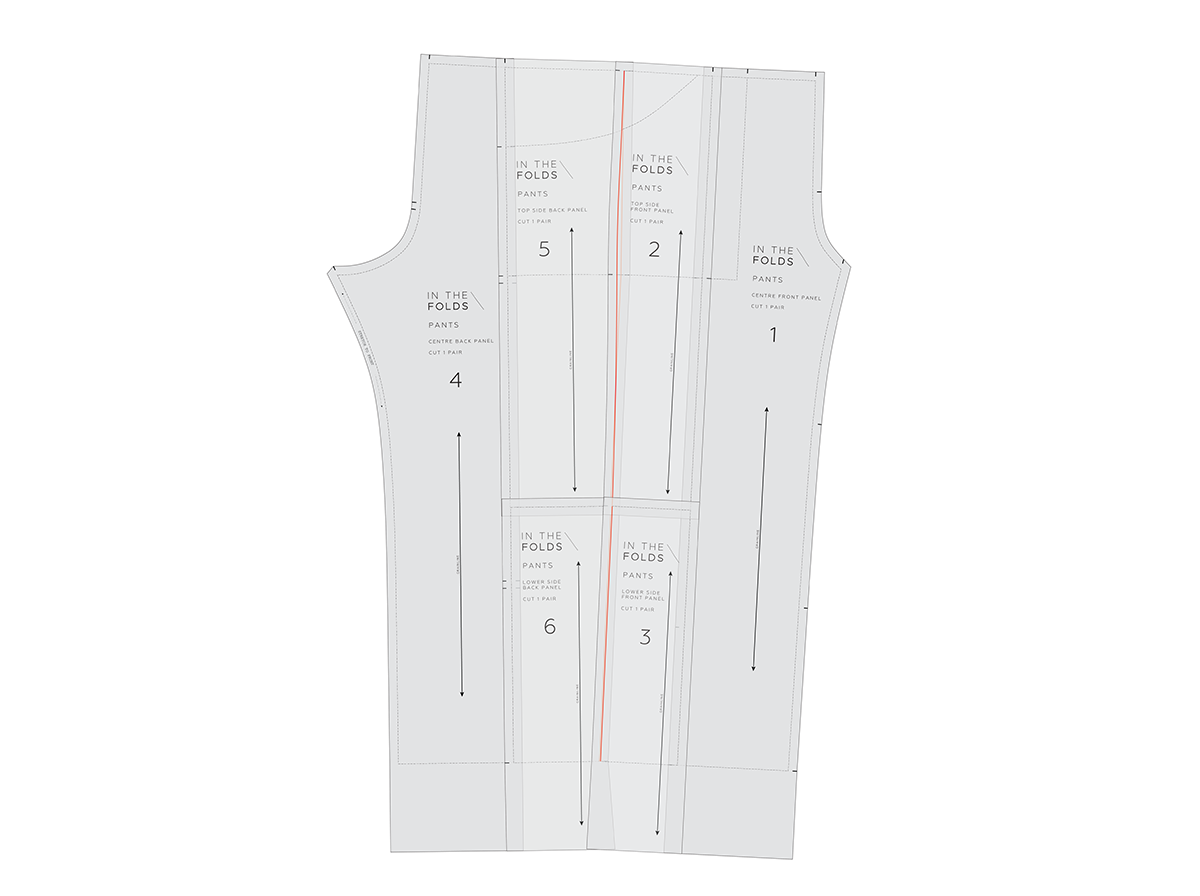
In the case of the Attwood pants, you could even do this to remove the side seams!
In most cases there will be shaping in the side seam, but due to the wide leg and elastic waist of the Attwoods pants pattern, the side seam is almost straight.

Shown above is the CENTRE FRONT BODICE panel and the SIDE FRONT BODICE panel of the Acton dress pattern.
Shaping is created for the bust through a princess panel. (If you’d like to learn more about princess panels, read this blog post.)
As you can see, although the seam lines on the CENTRE FRONT BODICE (piece 1) are straight, the curve on the SIDE FRONT BODICE (piece 2) is what creates the shaping. We can’t remove this panel line as a result.

However, the CENTRE FRONT SEAM LINE on piece 1 is straight, so it can be removed.
When determining if a seam can be removed, the other things to check for are design details or markings. In this case you can see there is a drill hole on the CENTRE FRONT STITCH LINE.
What is a drill hole?
Drill holes are small holes marked on a pattern. They are used to indicate a dart point or other design feature, such as the location of patch pockets, belt loops or pivot point - any feature that is located in an area where you are unable to notch a seam. They are marked on fabric with chalk or a tailor's tack. You can read more about drill holes here.

In this case the drill hole indicates where you need to stop stitching when joining the CENTRE FRONT BODICE pieces together.

An opening is required to join the bodice to the skirt due to the V shape of this seam line.

The opening in the seam allows flexibility so that both sides of the bodice can be pinned accurately to the skirt. So you can see that this drill hole marking is important to the pattern and needs to be included in any design changes made.
HOW TO REMOVE PANEL LINES FROM THE ACTON DRESS PATTERN

Step 1
To remove the panel line from the CENTRE FRONT BODICE, remove the seam allowance from the centre front seam by cutting along the STITCH LINE. Remember that you still need the drill hole marking.
Alter the cutting instructions so this piece is cut on the fold rather than as a pair.
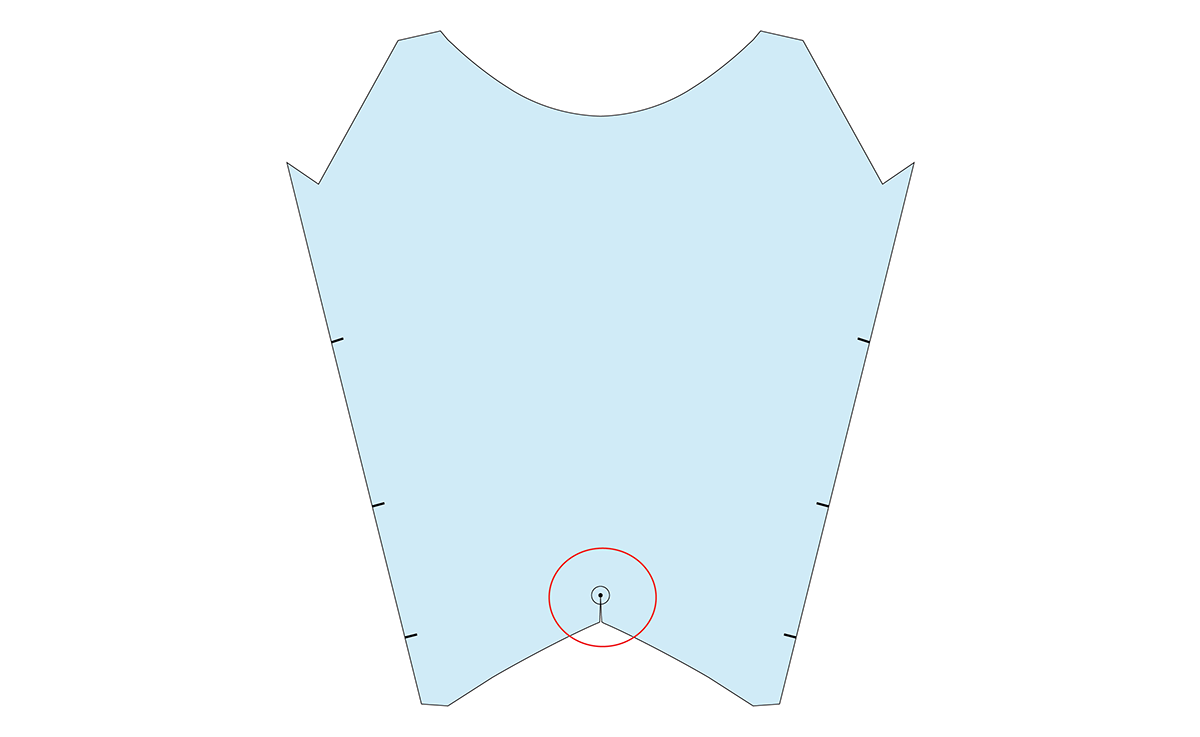
Step 2
When you cut the piece, mark the drill hole and cut along the fold from the bottom of the piece to the drill hole to create the required opening in the centre front.
And that’s it!
Happy Acton and Attwood sewing!
Emily
For more issues of the Q & A series, you can check out the archive here.
WHAT YOU’VE BEEN MAKING


Rushcutter dress made by @hodgepodgefarm
MORE POSTS IN THE SERIES
ISSUE 166 - THE BASICS OF GRADING PATTERNS: PART TWO

THE Q & A SERIES
THE BASICS OF GRADING PATTERNS: SHIFT METHOD
Hi there!
I recently got some vintage pattern but unfortunately they’re not all my size:(. I think that means it’s time for me to learn how to resize patterns, if you could please help me, even if it’s just some tricks or things to look out for, I’d be so very appreciative!
Sadiya Coovadia
Toronto, Canada
Following on from part one of our answer (which you can read here), this week I’m going to show you how to grade patterns using the Shift method.
If you’re new to pattern grading, I’d suggest giving the Slash and Spread method a go first, as it will familiarise you with the concepts involved. This is an important part of learning how to make pattern alterations.
WHY USE THE SHIFT METHOD OF PATTERN GRADING?
The Shift method of pattern grading is a good option if you don’t want to cut up your pattern pieces, and is the method professional patternmakers use when grading manually.
how to grade patterns using the shift method
For this method, you will need the stitch line marked on the pattern. (Note: All In the Folds patterns come with the stitch line marked, however not all patterns do. Read more about this here.)
You can either have the seam allowance on the pattern or not. If you do have seam allowance on the pattern you will need a tracing wheel to transfer the pattern lines onto the pattern paper.
Step 1
To get started, prepare your pattern in the same way you did in steps 1 to 3 of the Slash and Spread method. You need the lines marked on the pattern piece.

Step 2
On a piece of pattern paper mark a vertical line and label it CENTRE FRONT. Mark a horizontal line, perpendicular to the first, towards the top of the line. These lines will help you keep things accurate as you move the pattern piece.

Step 3
Line up the CENTRE FRONT of the pattern piece with the CENTRE FRONT line on the paper. Line up the upper grading line on the pattern with the horizontal line on the pattern paper. Hold in place with pattern weights.

Step 4
Starting at the CENTRE FRONT neckline, trace the neckline up to the vertical grading line onto the paper using a tracing wheel. If your pattern doesn’t have seam allowance, just trace the edge of the pattern.

Step 5
Using a ruler, extend the grading line onto the paper at the top and bottom of the pattern piece.

Step 6
Mark a second line, ¼ of the grade amount from the first (See Part One for how to work this out).

Step 7
Carefully slide the pattern piece over so that the grading line on the pattern piece lines up with the second line. Use the horizontal line to ensure the piece stays level. Hold in place with a pattern weight.

Step 8
Continue tracing the pattern stitch line until you reach the next grading line.

Step 9
Again, extend the grading line onto the paper and draw a second line to the left of the first, ¼ of the grade amount.

Step 10
Slide the pattern piece over and continue tracing the piece up to the next grading line.

Step 11
For the vertical lines, do the same thing. Mark a second line below the first and slide the pattern piece down to line up with the new line.

Step 12
Continue the process until you get back to the CENTRE FRONT. Remove the pattern piece.
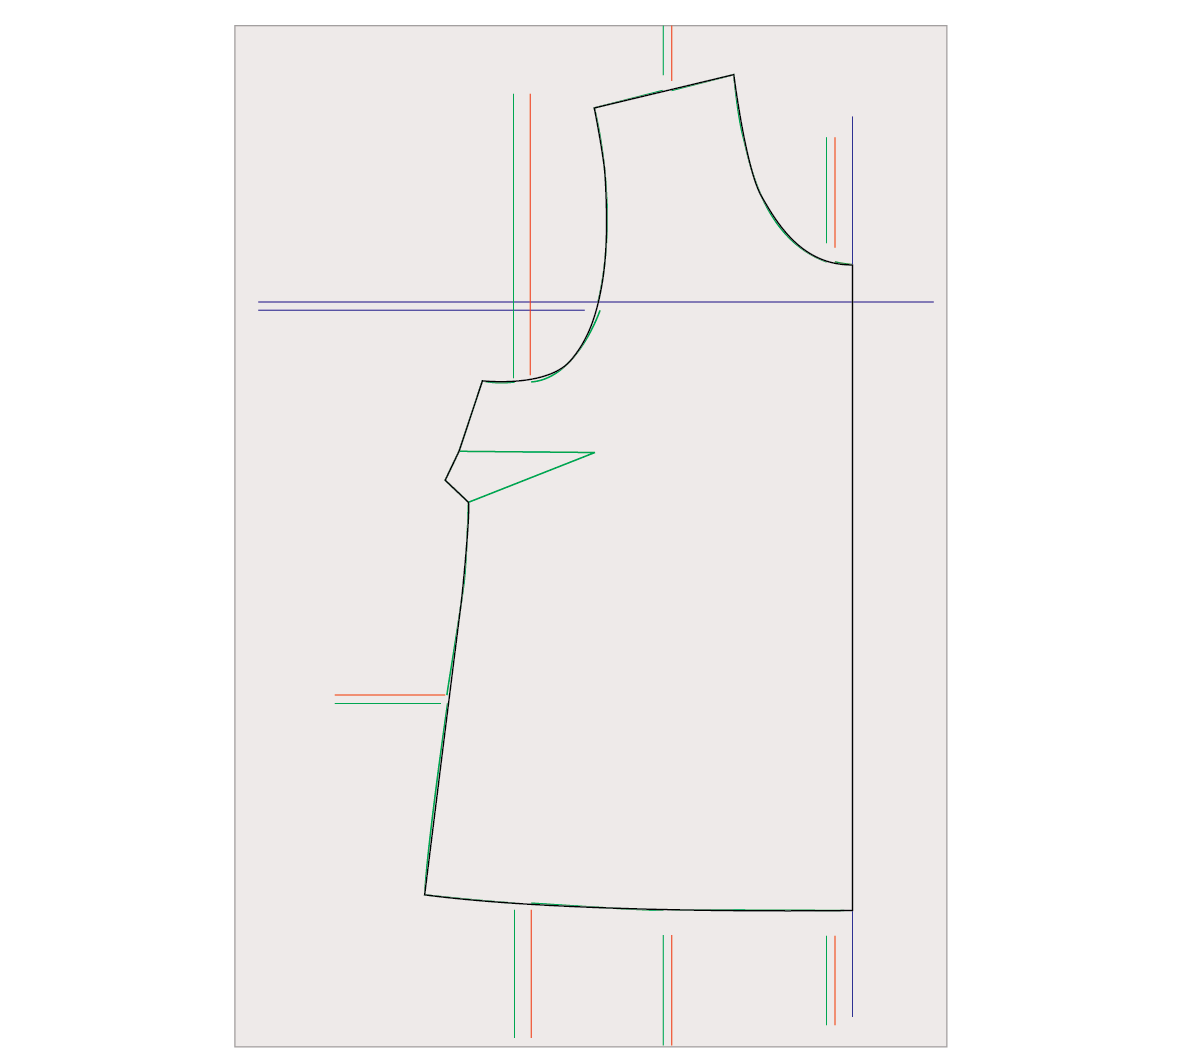
Step 13
Finalise the pattern piece by drawing nice smooth lines over the traced lines. Add seam allowance and pattern markings. Repeat for the remainder of the pattern.
Finally, check and true the pattern.
Happy sewing,
Emily
For more issues of the Q & A series, you can check out the archive here.
WHAT YOU’VE BEEN MAKING

Acton dress made by @janice.makes
