THE Q & A SERIES
Altering the neckline on a pattern
Hi Emily,
Really loving your question and answers.
I would love to know any tips you have for altering the back and front of necklines and how they blend back into the shoulders. How you go about drafting the facing?
Thank you in advance
Love
Emma xx
- Hackney, United Kingdom
Hi Emma,
Lovely to hear that you are enjoying the Q&A series!
This is a great question. Being able to alter the neckline on a garment offers a lot of possibility. You will be able to create garments that better suit your needs and preferences and it also gives you a chance to extend the lives of patterns you already have in your stash.

I thought I'd demonstrate how to do this on a specific pattern (a hacked version of the Neale jumpsuit), but you will be able to apply this technique to any pattern.
What shape neckline to draft?
I will show you how to change the round neck to a v-neck, but you can choose the shape you would like to draft. I'll show you a couple of examples at the end of the tutorial that might give you some other ideas.
If you're not sure how you would like your new neckline to look, you can have a look through your wardrobe for some inspiration or print a copy of the garment technical drawing and try drawing in some different neckline options until you come up with one you are happy with.
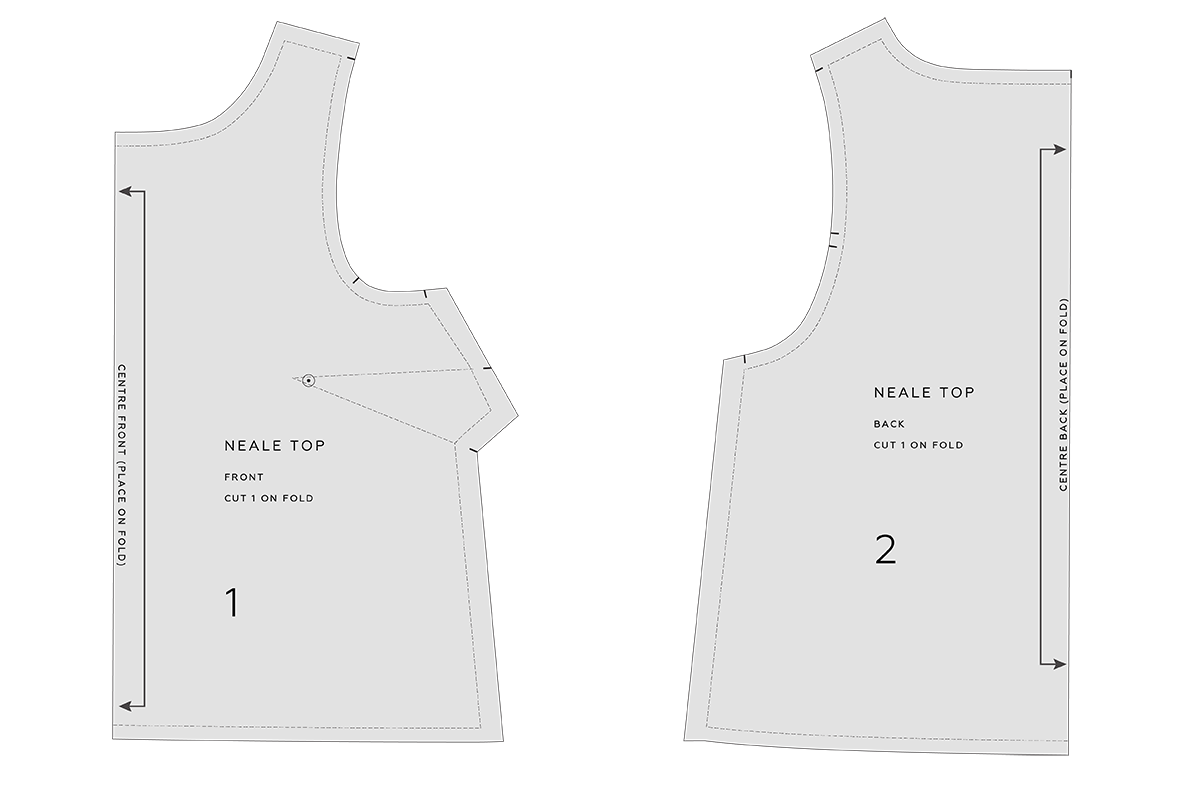
Step 1
Trace a copy of your pattern. Mark in both the stitch line and the cutting line. If your pattern doesn't have the stitch line printed on it, you can take a clear ruler and mark in the stitch line, by marking the lines as if the seam allowance has been removed from the pattern.

Step 2
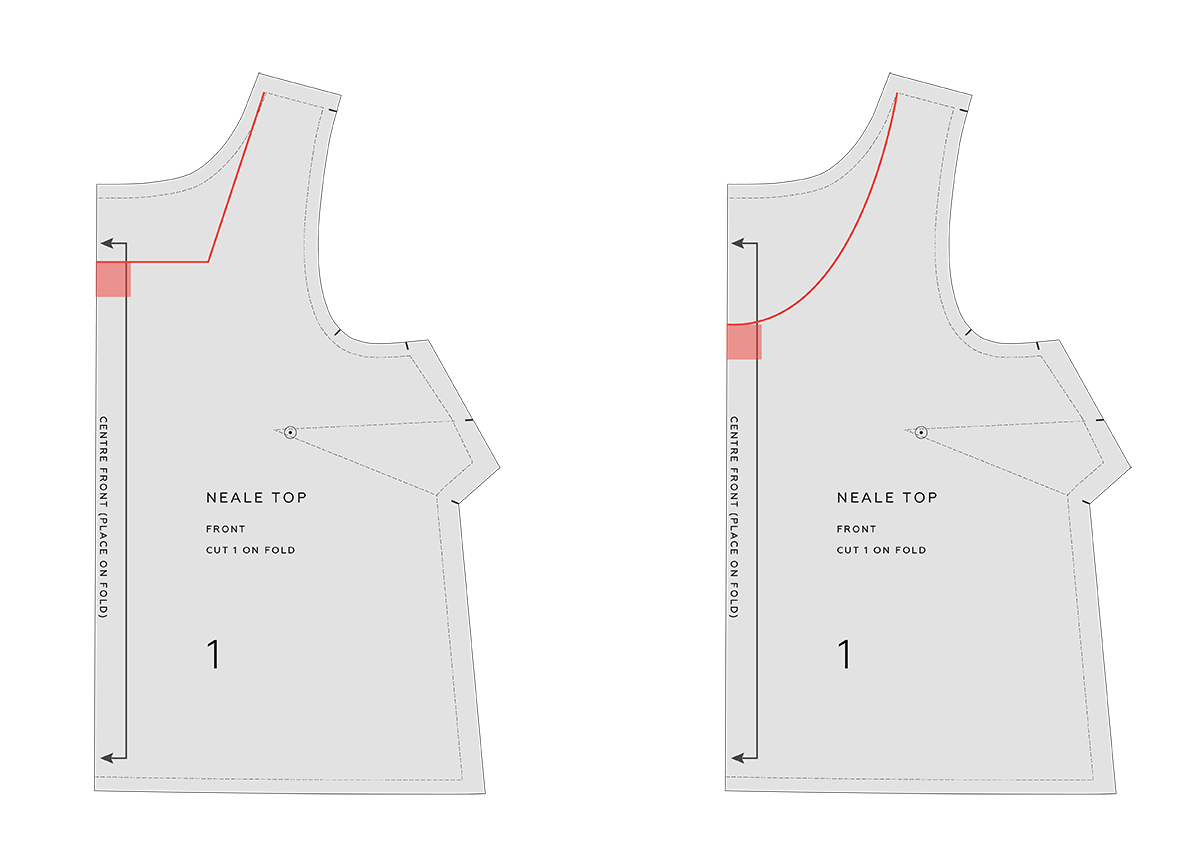
Measure 10.5cm (4 1/8 in) down from the neck STITCH LINE, on the CENTRE FRONT line.
This will be the finished depth of your v-neck. Hold the pattern up to your body to check the depth. You can also reference other patterns or garments in your wardrobe if you have a v-neck you love and alter the depth accordingly.
We will call this point A.

Step 3
With a ruler draw a faint broken line from point A to the point where the shoulder STITCH LINE intersects with the neck STITCH LINE. We will use this as a guideline when drawing our v-neck.

Step 4
Find the halfway point of the line marked in STEP 3 and mark a point. From this point, draw a 1cm (3/8in) line towards the armhole, perpendicular to the line. We will call this point B.
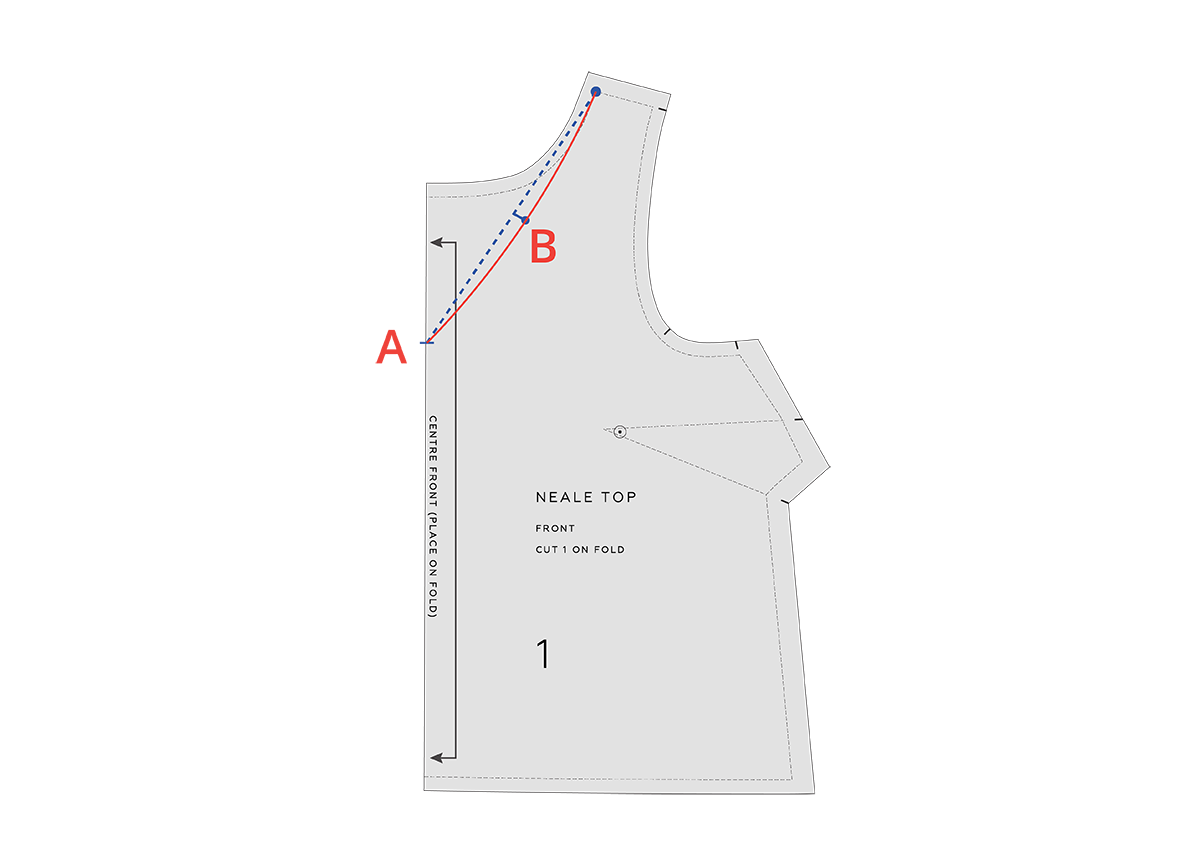
Step 5
Draw a new curved line from the inside shoulder point to point A, intersecting through point B. The line should be a gentle curve.
If you have one, a French curve will help you get a nice smooth line.

Step 6
Add 1cm (⅜in) seam allowance to the neckline (or the amount of seam allowance required to match the back neckline on your pattern). Cut away excess paper.
Check flow-through between front and back neckline
Before cutting any pattern you have altered from fabric, be sure to check the alteration against the pieces it will be attached to.
In the case of the example, we need to check how the new neckline connects to the back neckline.

Step 7
Place the FRONT on the BACK, lining up the STITCH LINES as if the two pieces have been sewn together. Check that the seam lines are the same length and that there is nice flow through from front to back. In the example, I am happy with the shape of the line, so would not need to alter it.

If you do need to alter it, draw a line of best fit through the transition point. This might mean adding a little bit to one side and removing some from the other.
If you would like to know more about checking and truing patterns, you can see this post or this post (checking curved seams).
Create a new facing
You will need to draft a new facing to fit your new neckline. I'll show you how to do that next week!
Try other neckline shapes
Use this method to draft other shapes of necklines. If you are drafting a straight or curved neckline (such as the above neckline shapes), you need to make sure your new neckline meets the centre front (and centre back, if you are altering the back) at a 90 degree angle. This will allow you to get a nice and smooth line at the centre front / centre back with no dips or bumps in your neckline.
I hope you are feeling confident to try this technique on your next garment!
Happy sewing,
Emily
For more issues of the Q & A series, you can check out the archive here.
What you’ve been making

Neale jumpsuit made by @storyof.stitches

Neale jumpsuit made by @mamasuesews

Hove jacket made by @melissalowrydesign

Neale jumpsuit made by @thatsewannabel