
THE Q & A SERIES
HOW TO TRUE A DART
Hi there,
Just wondering if you can help me with what I need to do to a pattern after I’ve added in a dart. I can’t quite wrap my head around how to make the points on the seam edge that you see on patterns…
Thanks,
Janice
With the release of our Marden shirt Hack Kit this month (part three of our Sewing Shirts Series - check out part one and part two), we thought this was a timely topic to address.
Sometimes when you’re learning a new skill there’ll be strange words and techniques to learn that won’t mean anything to you at first and this may be one of those times!
If you’ve got no idea what it means to true a dart, but you’re keen to learn, you’ve come to the right place!
But let’s start at the beginning…
When you first start learning the skill of pattern making, it’s helpful to remember that your aim is to turn a flat object into something with shape and curves.
To do this, we have to manipulate fabric by folding or gathering it, essentially tucking excess fabric into seams in one area (which are then stitched in place) in order to create shape or volume in another area.

what is a dart?
Darts are one approach garment designers use to make something two dimensional (like fabric) fit around something three dimensional (your body).
Although they are most commonly used to create shape around areas of the body that are curved, such as the bust, shoulders, elbows and waist, they can be used pretty much anywhere, whether purely for fit or as a design detail.
WHAT IS DART SHAPING AND WHY DO WE NEED TO THINK ABOUT IT?
You may have put a dart in a garment before and noticed that it changed the shape of the seam that it lies on and it’s no longer the smooth line it once was. We don’t want to just leave it like this as the additional fabric in that area may affect the fit and finish of the garment.
So, we add something called dart shaping. Dart shaping is a technique used to manage the extra fabric that’s been added into a garment and ensure that once the dart is sewn, the seam it's on will remain a nice smooth line, which ultimately means we’ll get a nice clean garment finish (something we love at In the Folds!).
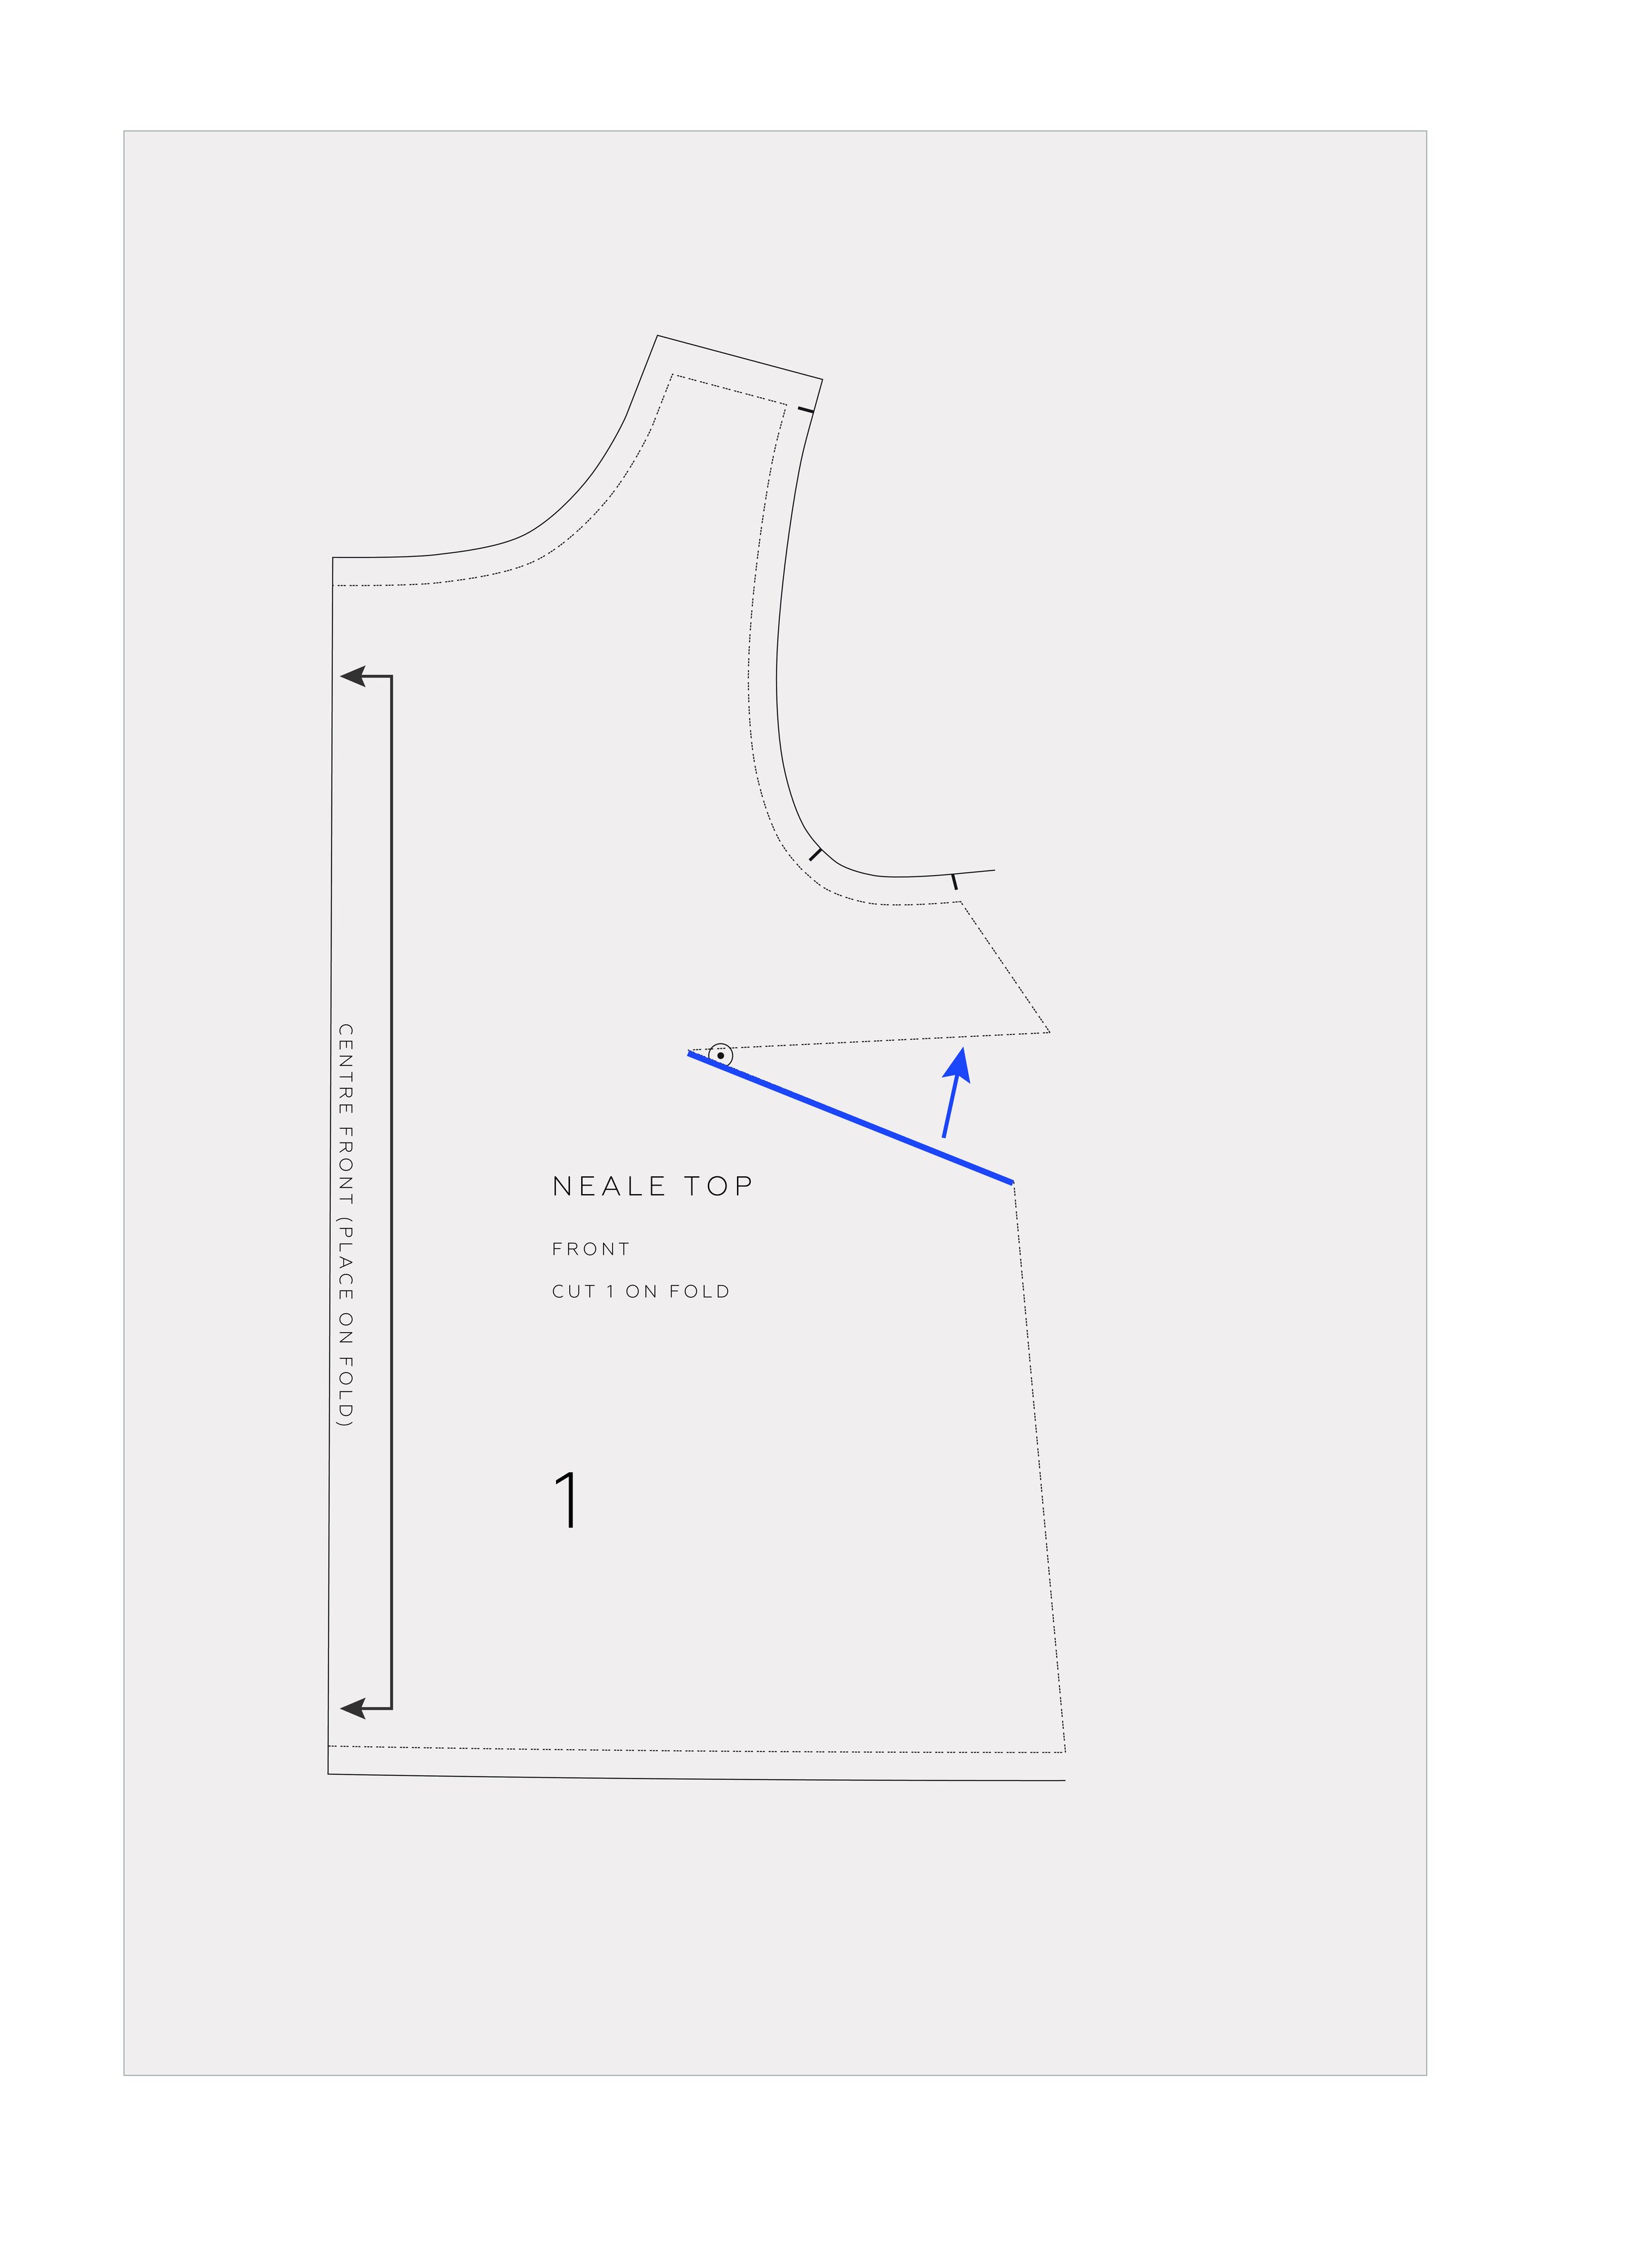
how to add dart shaping

Note that in the example above, we have added seam allowance to all seams except for the side seam. We cannot add seam allowance to the side seam until we have trued the dart and added dart shaping.
Be sure to leave excess paper on the seam with the dart, as we will need this for the dart shaping.
STEP 1
Take the pattern piece that requires dart shaping.
Fold the dart so you can predict what will happen to the shape of the seam when you sew the dart from the fabric.
Think about which direction the fullness of your dart will be pressed once it is sewn. This will decide which dart arm you need to fold. Generally, vertical darts are pressed towards the centre front (in the case of front darts) and the centre back (in the case of back darts). For horizontal darts (like the one pictured), the bulk of the dart is pressed down.
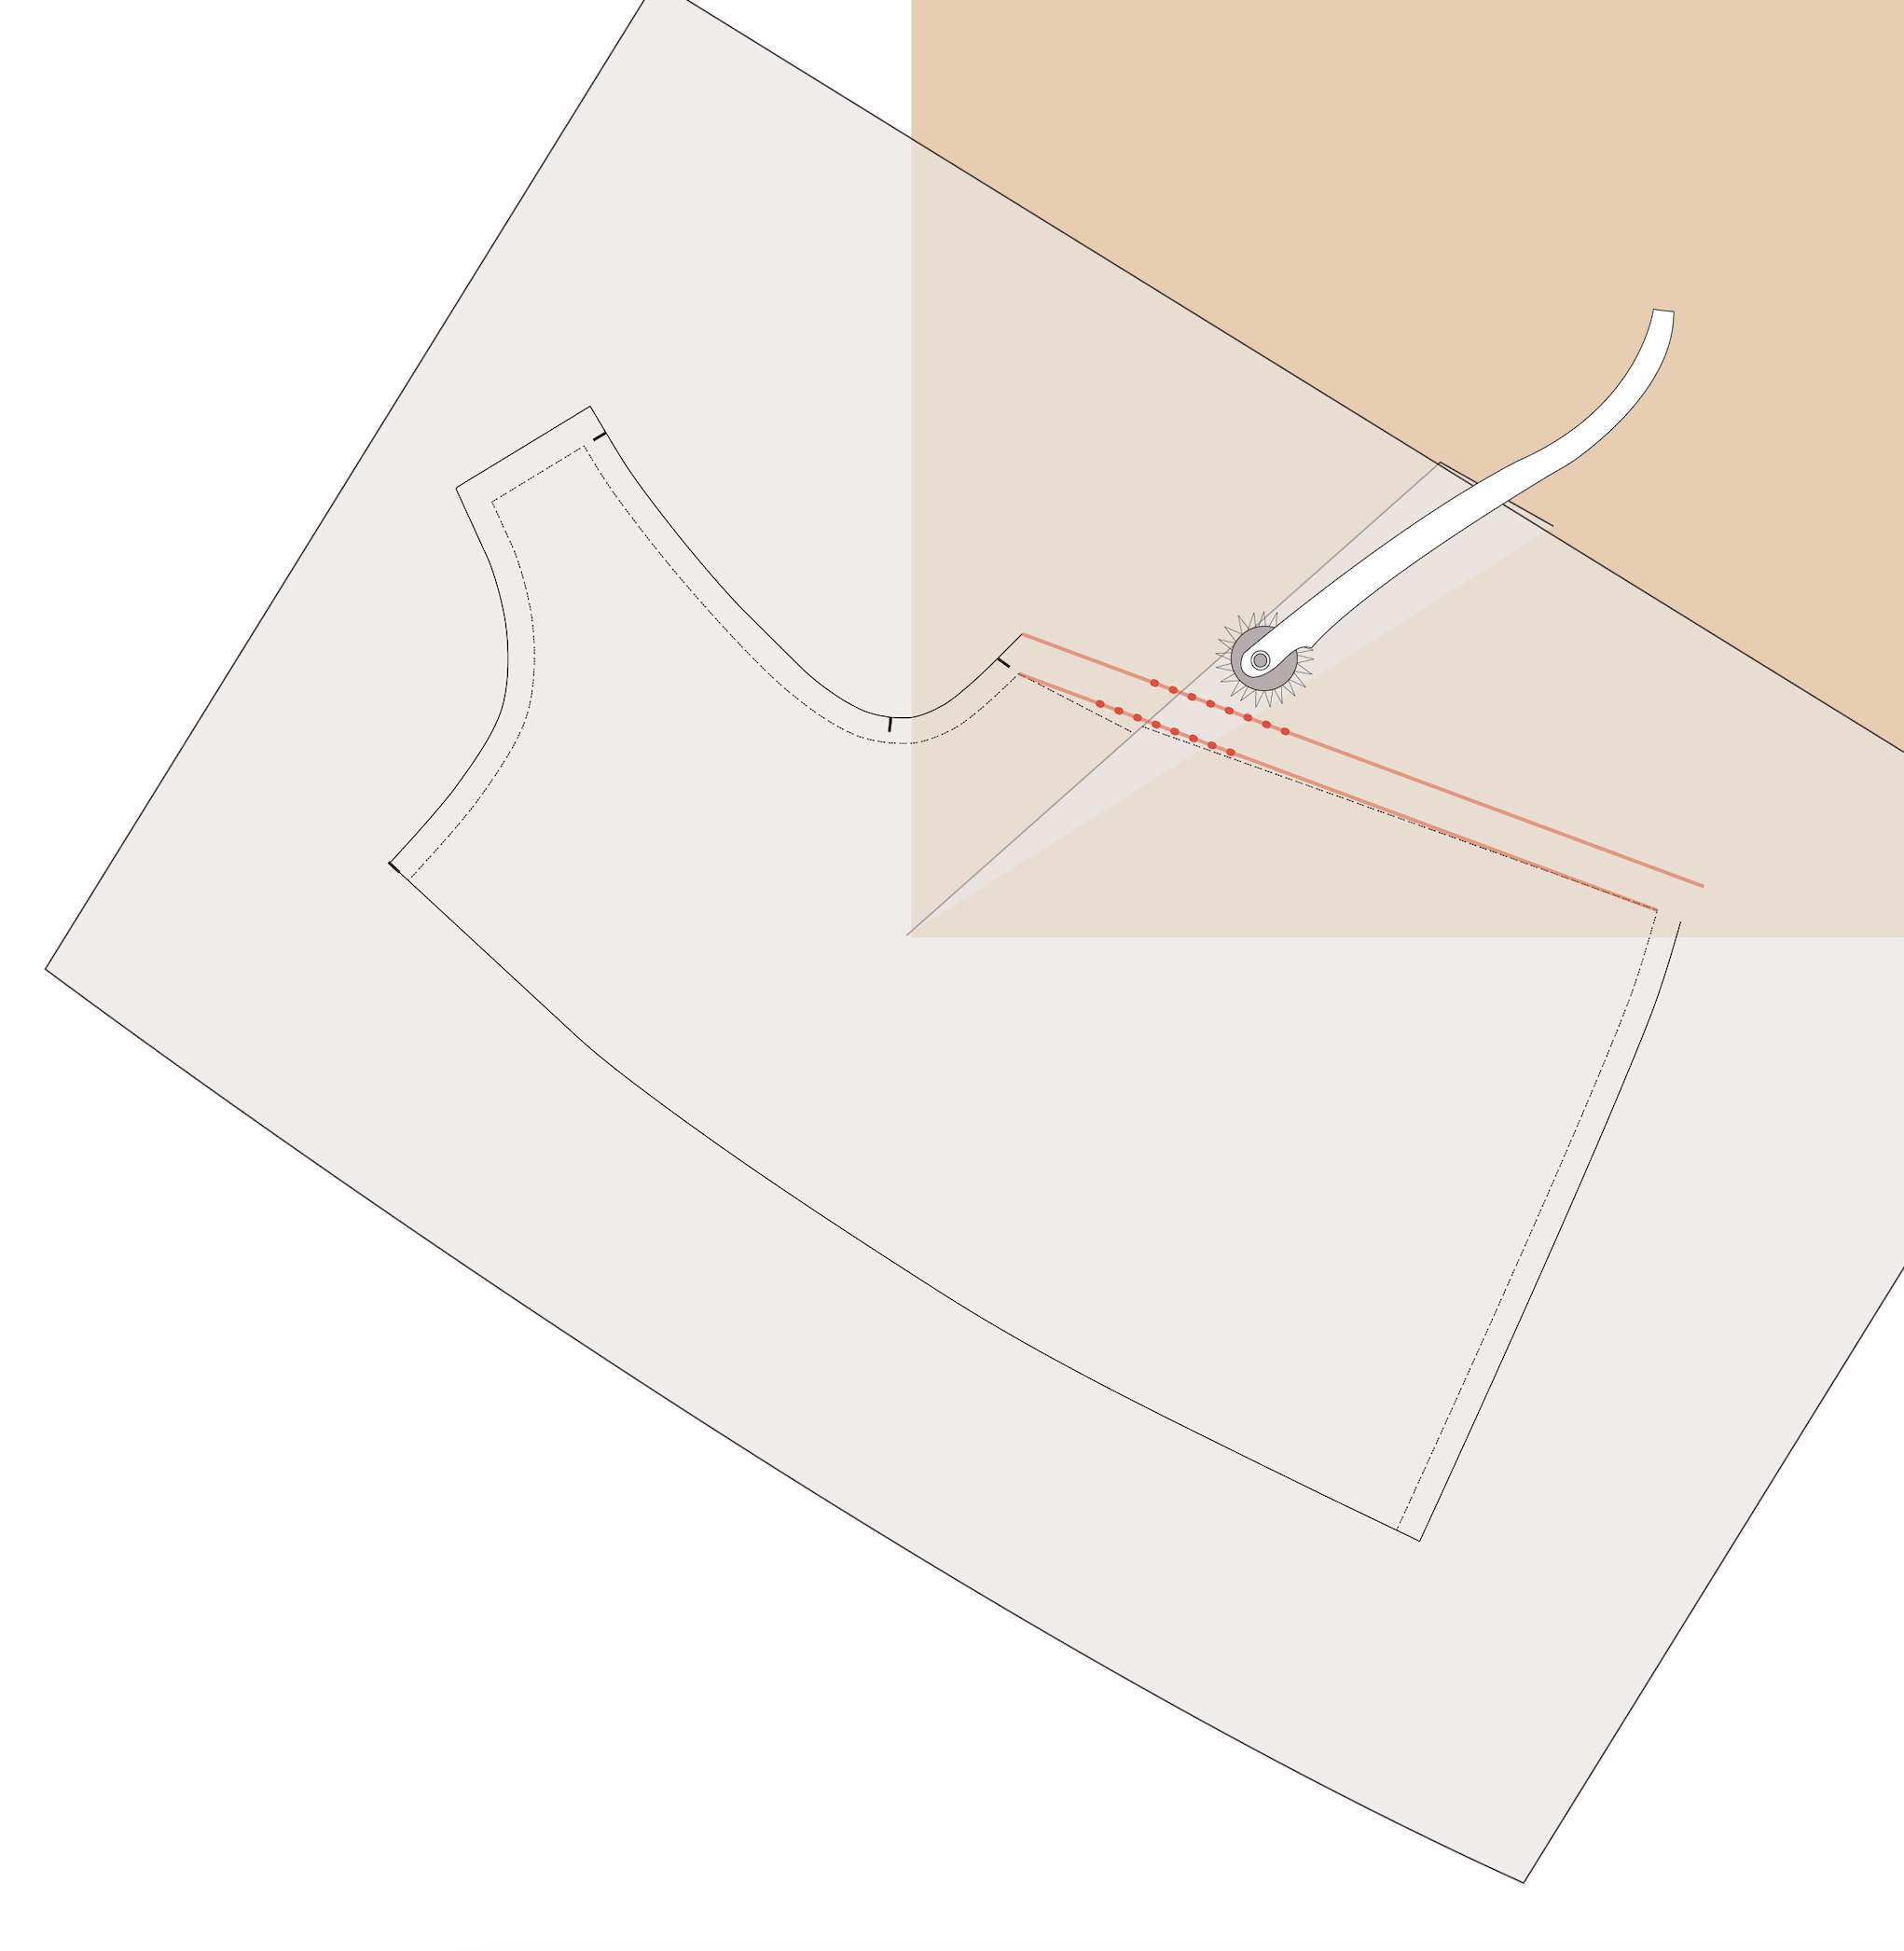
Tip - You will be using a tracing wheel in the following steps, so it’s a good idea to slide a cutting mat under the pattern so you don't damage your table.
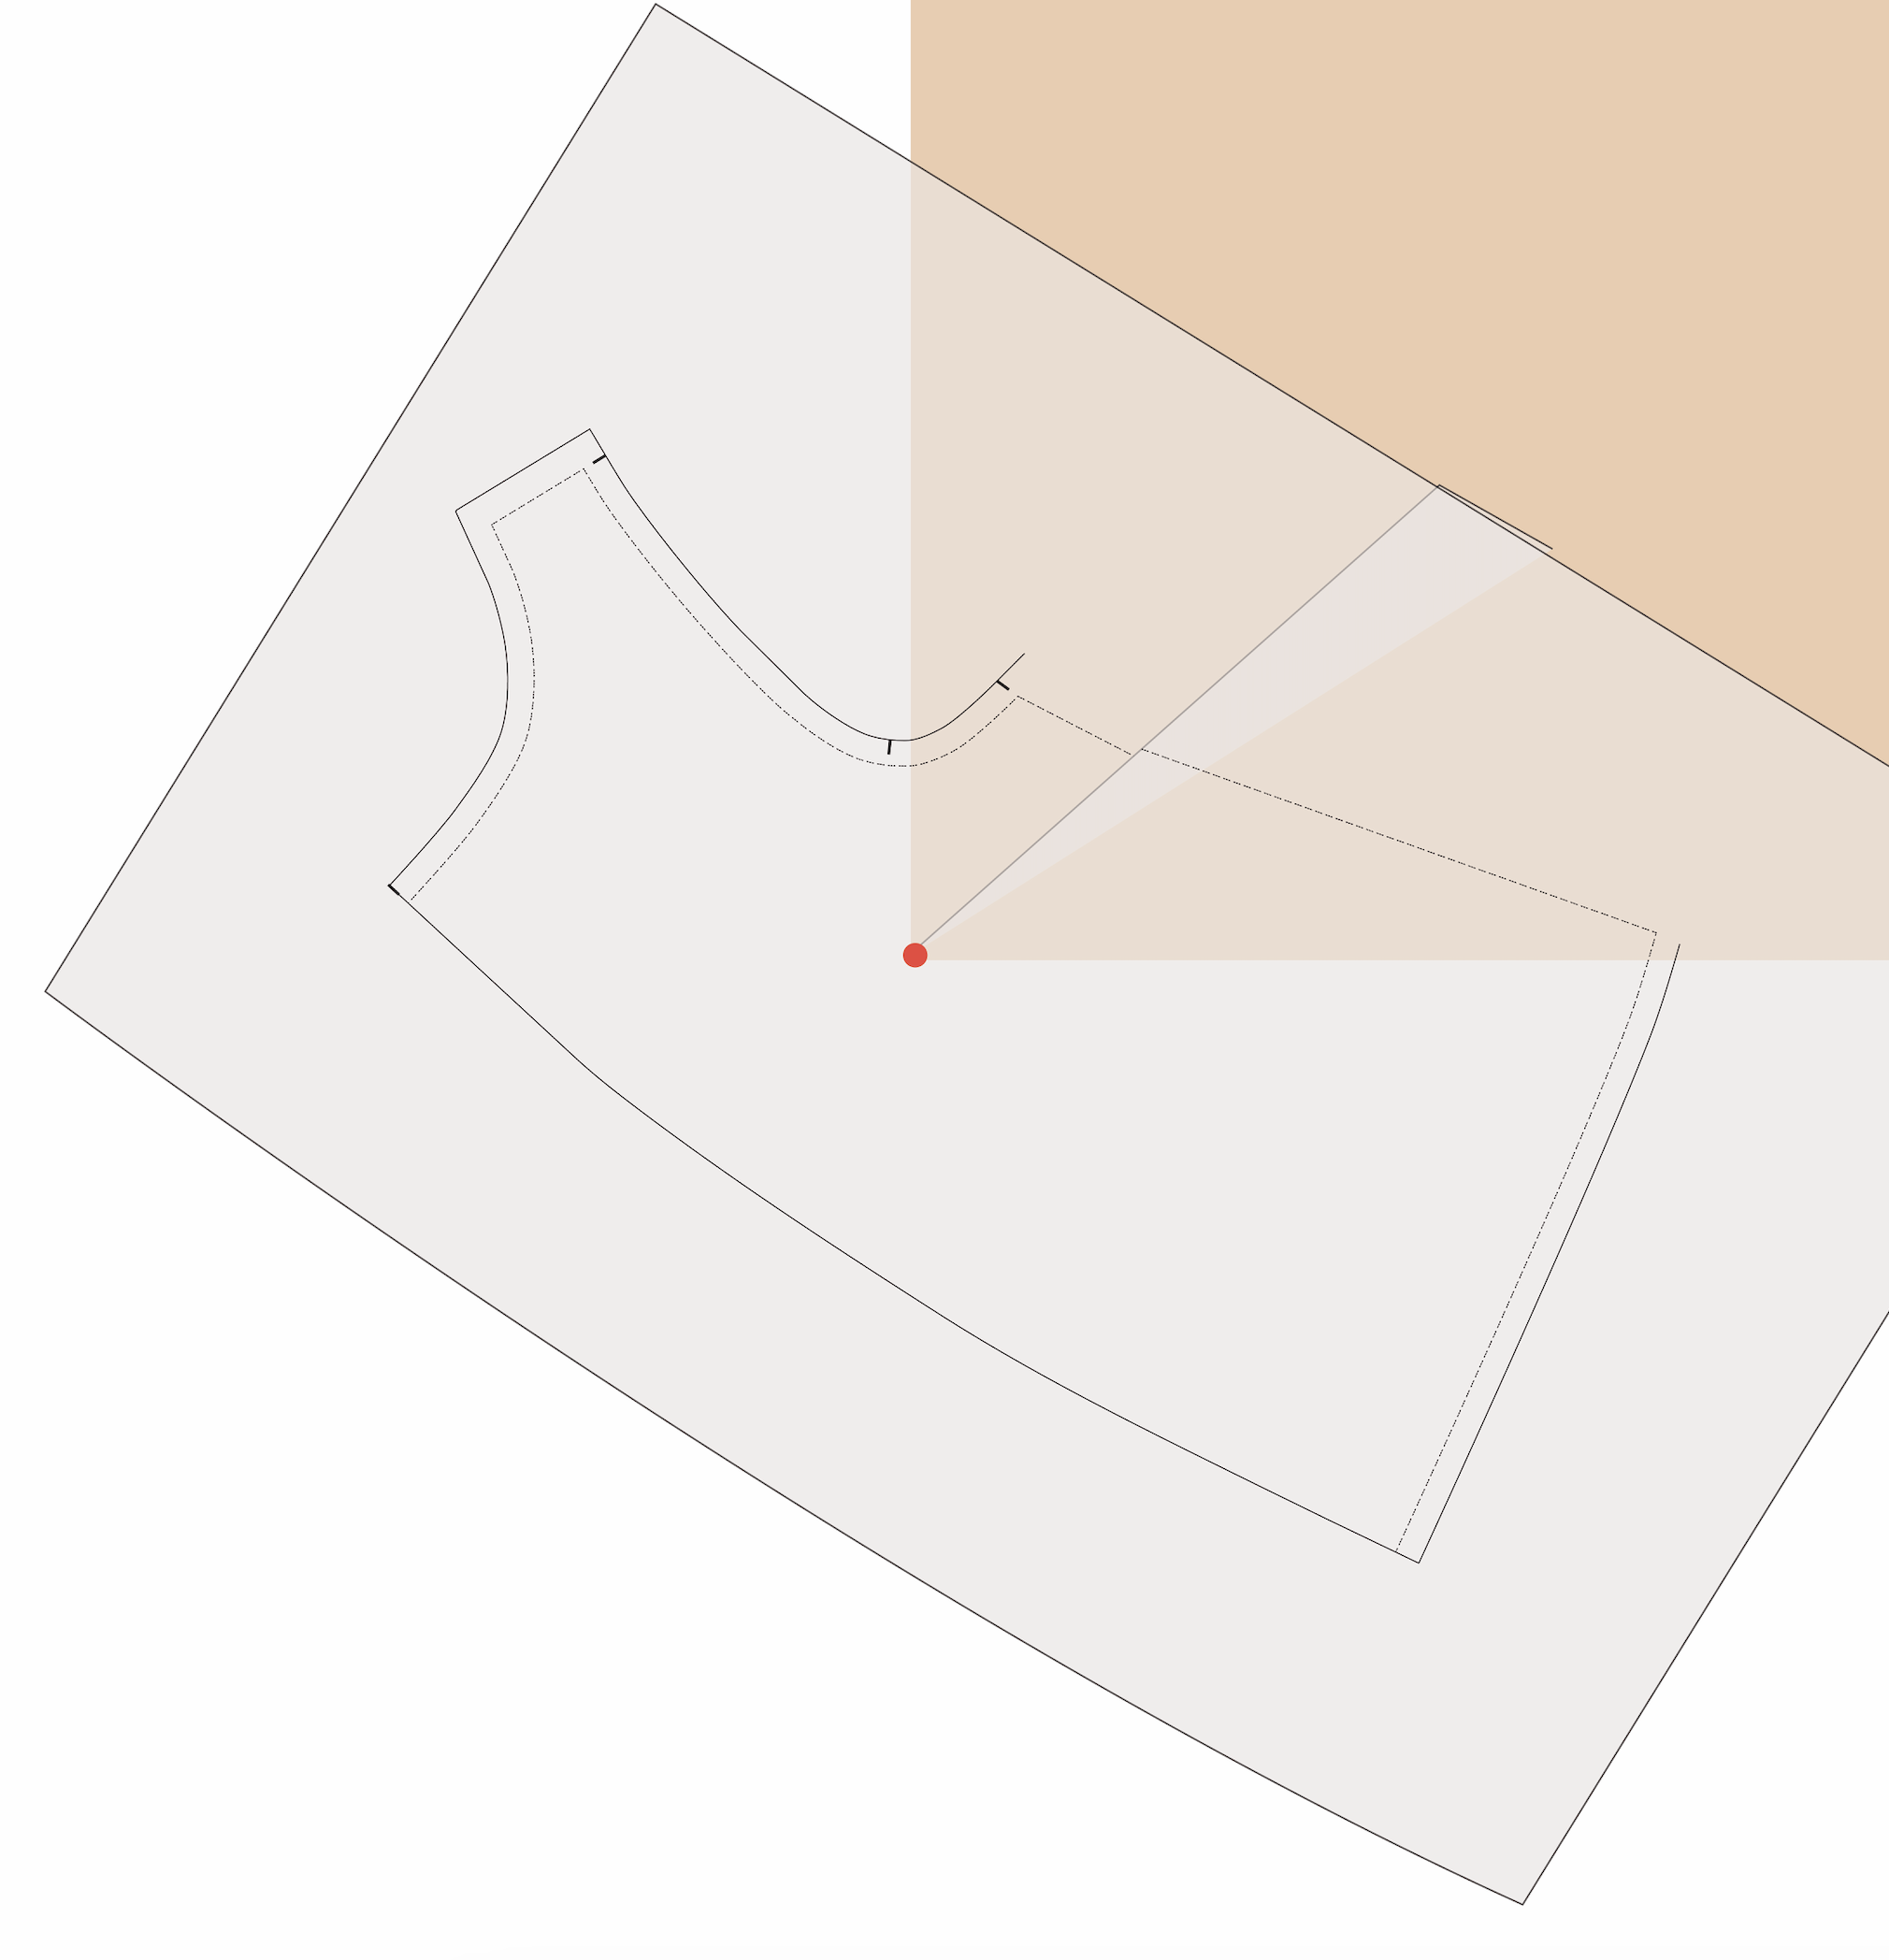
STEP 2
Folding a dart on a flat surface is not possible, as we are making a two dimensional pattern three dimensional.
Place the tip of the dart on the corner of a table (or a large book also works) and fold the lower dart arm so that it meets the upper dart arm.
As you can see in the example, the side seam line doesn't match up on either side of the folded dart. We will correct this before marking the dart shaping.
Hold the folded dart in place with a pin or pattern weight.

STEP 3
Take a ruler and draw a straight line from the top of the side seam, down to the hemline. This is the new side seam STITCH LINE. If the seam had previously been a curve, you would draw in a smooth curve.

STEP 4
Use a tracing wheel to transfer the new side seam STITCH LINE onto the folded section of the dart. This will give you the shaping you need for the dart. If you don't have a tracing wheel, poke small holes along the stitch line using a stiletto, pin or similar.
STEP 5
Add seam allowance to the side seam. Use a tracing wheel to transfer the seam allowance line onto the folded section of the dart.

STEP 6
Unfold the dart. You will see the dots made by the tracing wheel. Take a ruler and join the dots to form a nice smooth line.

STEP 7
Add notches at the side seam by extending the dart arms through the seam allowance. Mark notches.
video - truing a dart
If you’re someone who learns by watching, take a look at this video where I walk you through the process of creating dart shaping.
Happy patternmaking,
Emily
RESOURCES MENTIONED IN THIS ISSUE
The Sewing Shirts Series is a three-part series that includes the Sewing Shirts Skills Kit, the Marden shirt pattern and the Marden shirt Hack Kit, which are available through our Curated by ITF subscription. Past issues are now available for purchase by current subscribers.
The Neale top pattern is a hack from the Neale jumpsuit Hack Kit, which can be purchased by current members of Curated by ITF as a Past Issue here.
Video - Dart shaping - can be found here.
For more issues of the Q & A series, you can check out the archive here.
WHAT YOU’VE BEEN MAKING

Acton dress made by @alyant79

Neale jumpsuit hack made by @thatsewannabel


