Sewing Linings Series

LINED VS UNLINED: COMPARING ORMOND AND BARKLY


If you’ve been following us for a while you probably know we love an unlined garment. (Need evidence? Please see Exhibit A, Exhibit B & Exhibit C.) 

For us, there’s just something special about seam finishes (think French seams, Hong Kong bind and bias binding) that our unlined garment patterns tend to include. They have a way of elevating a design, and make it feel a bit fancy. Like, if someone looked on the inside of the garment they’d give an appreciative ‘Ooooh!’. Something that overlocking just doesn’t quite encourage. Plus, we think they’re fun to sew!

However, we fully appreciate that sometimes a lining may be exactly what a garment needs. In fact, linings offer a number of benefits to a garment, including:

  • Improved comfort

  • Enhanced durability

  • Improved fit and structure

  • Concealment of inner details

  • Ease of wear

  • Allowing for inclusion of additional features, like pockets and boning.

  • Improved finish

  • Ease of make.

Which is why we decided to create our latest series, Drafting & Sewing Linings. Across two in-depth resources, the Drafting linings Skills Kit and the Sewing linings Skills Kit, we teach you everything you need to know to draft and sew linings for a coats, skirts and tops and dresses, using our Barkly, Ormond, Cartwright and Stow patterns as the teaching patterns.

Today, we thought it would be great to give you a visual comparison of the Barkly skirt and Ormond chore coat, before and after lining, so you know exactly what you can expect to achieve with either approach.

Barkly skirt - Lined vs unlined

From the outside, it’s not obvious whether the Barkly skirt is lined or not. Unlike a jacket, which opens to expose the internal finishes, the inside of a skirt is probably going to remain unseen. 

What’s the purpose of lining a skirt? 

One of the main reasons is improved comfort. 

A skirt lining made from a slippery material allows the outer fabric to slide over the top, preventing clinging or bunching (both of which can cause chafing - ouch!) when moving. 

Skirts made of woollen fabrics are often lined with satin to create a barrier between the scratchy wool fibres and sensitive skin. Slippery skirt linings might also prevent static cling when wearing pantyhose or stockings.

On the other hand, skirts made from natural fibres (like cotton canvas or denim, and the Barkly skirt example above) may not require a lining because the fabric has enough inherent structure to not cling or bunch. 

But, any of the reasons we outlined above might be why you choose to line a skirt.

You might simply prefer the look of a lined garment. As you can see in Leanne’s Barkly skirt below, the finish is so beautiful that you could almost wear it inside out and no one could tell the difference!

Ormond chore coat - Lined vs unlined

When deciding whether to line a coat, some key things to consider are style and intended use. 

Is it a casual coat that’s going to be worn regularly, possibly all day, while working, doing chores or running errands? If so, an unlined coat with bound or flat-felled seams (like that in our original Ormond coat pattern above) may be preferable. (If you’re interested in learning more about seam finishes and their uses, check this post out.)

In our Ormond chore coat, the denim lends itself to an unlined design. The contrast of the right and wrong sides of the denim when the sleeves are rolled up may be a feature you want to show off. 

Is it a dressy coat that will be worn out to dinner, over the top of other garments and possibly taken on and off regularly?

Like with a skirt, a slippery lining will make it easier to take a coat on and off over the top of other garments. It also adds a level of refinement to a garment, and keeps ‘unsightly’ elements like pocket bags and seams hidden. (We don’t really think these things are unsightly, but some people do!) 

So, what do you think? Is a lined garment your preferred approach, or are you happy either way?


WHAT YOU’VE BEEN MAKING…

BEHIND THE SCENES: THE PROS AND CONS OF DESIGNING PATTERNS IN HALF SCALE

When I first started planning our Sewing Linings Series (which kicked off this month with part one!), I decided I wanted to cover a lot of ground. As I delved into exploring everything to do with linings, I realised there were three main areas that I felt were important to cover - lining jackets and coats, linings skirts, and lining tops and dresses with and without sleeves.

And then I realised it was going to be a lot of work. Suddenly a project that I had envisaged as a one month project became a two month project - one month to work on drafting linings and one month to work on sewing linings. And even then it was still A LOT of content to create!

WHY WORK ON DESIGNS IN HALF SCALE?

I started thinking it might be a good idea to work in half scale to create the patterns and the sewn samples. This way I could save time on assembling patterns, cutting samples, drafting and sewing. As my patterns are already digitised, it’s easy enough to jump into Adobe Illustrator and transform them to half scale. I was overloaded with work at the time and asked a lovely friend, Melanie, who is also a patternmaker to get started on the project by drafting the Ormond coat lining patterns.

In terms of drafting in half-scale, the process is simple enough. If working with measurements or seam allowances, you simply halve the measurement for the smaller pattern. For example, if adding a 1.2cm (1/2in) seam allowance, this becomes 6mm (1/4in) in half scale.

Drafting in half-scale to be used as a reference for creating tutorials was great. If Melanie had been drafting in full scale it would have been difficult to photograph the pattern pieces and show all the details. Especially for the longer version of the Ormond coat that has quite large pieces. In half scale I could very easily see what was happening on the pattern and create the digital illustrations.

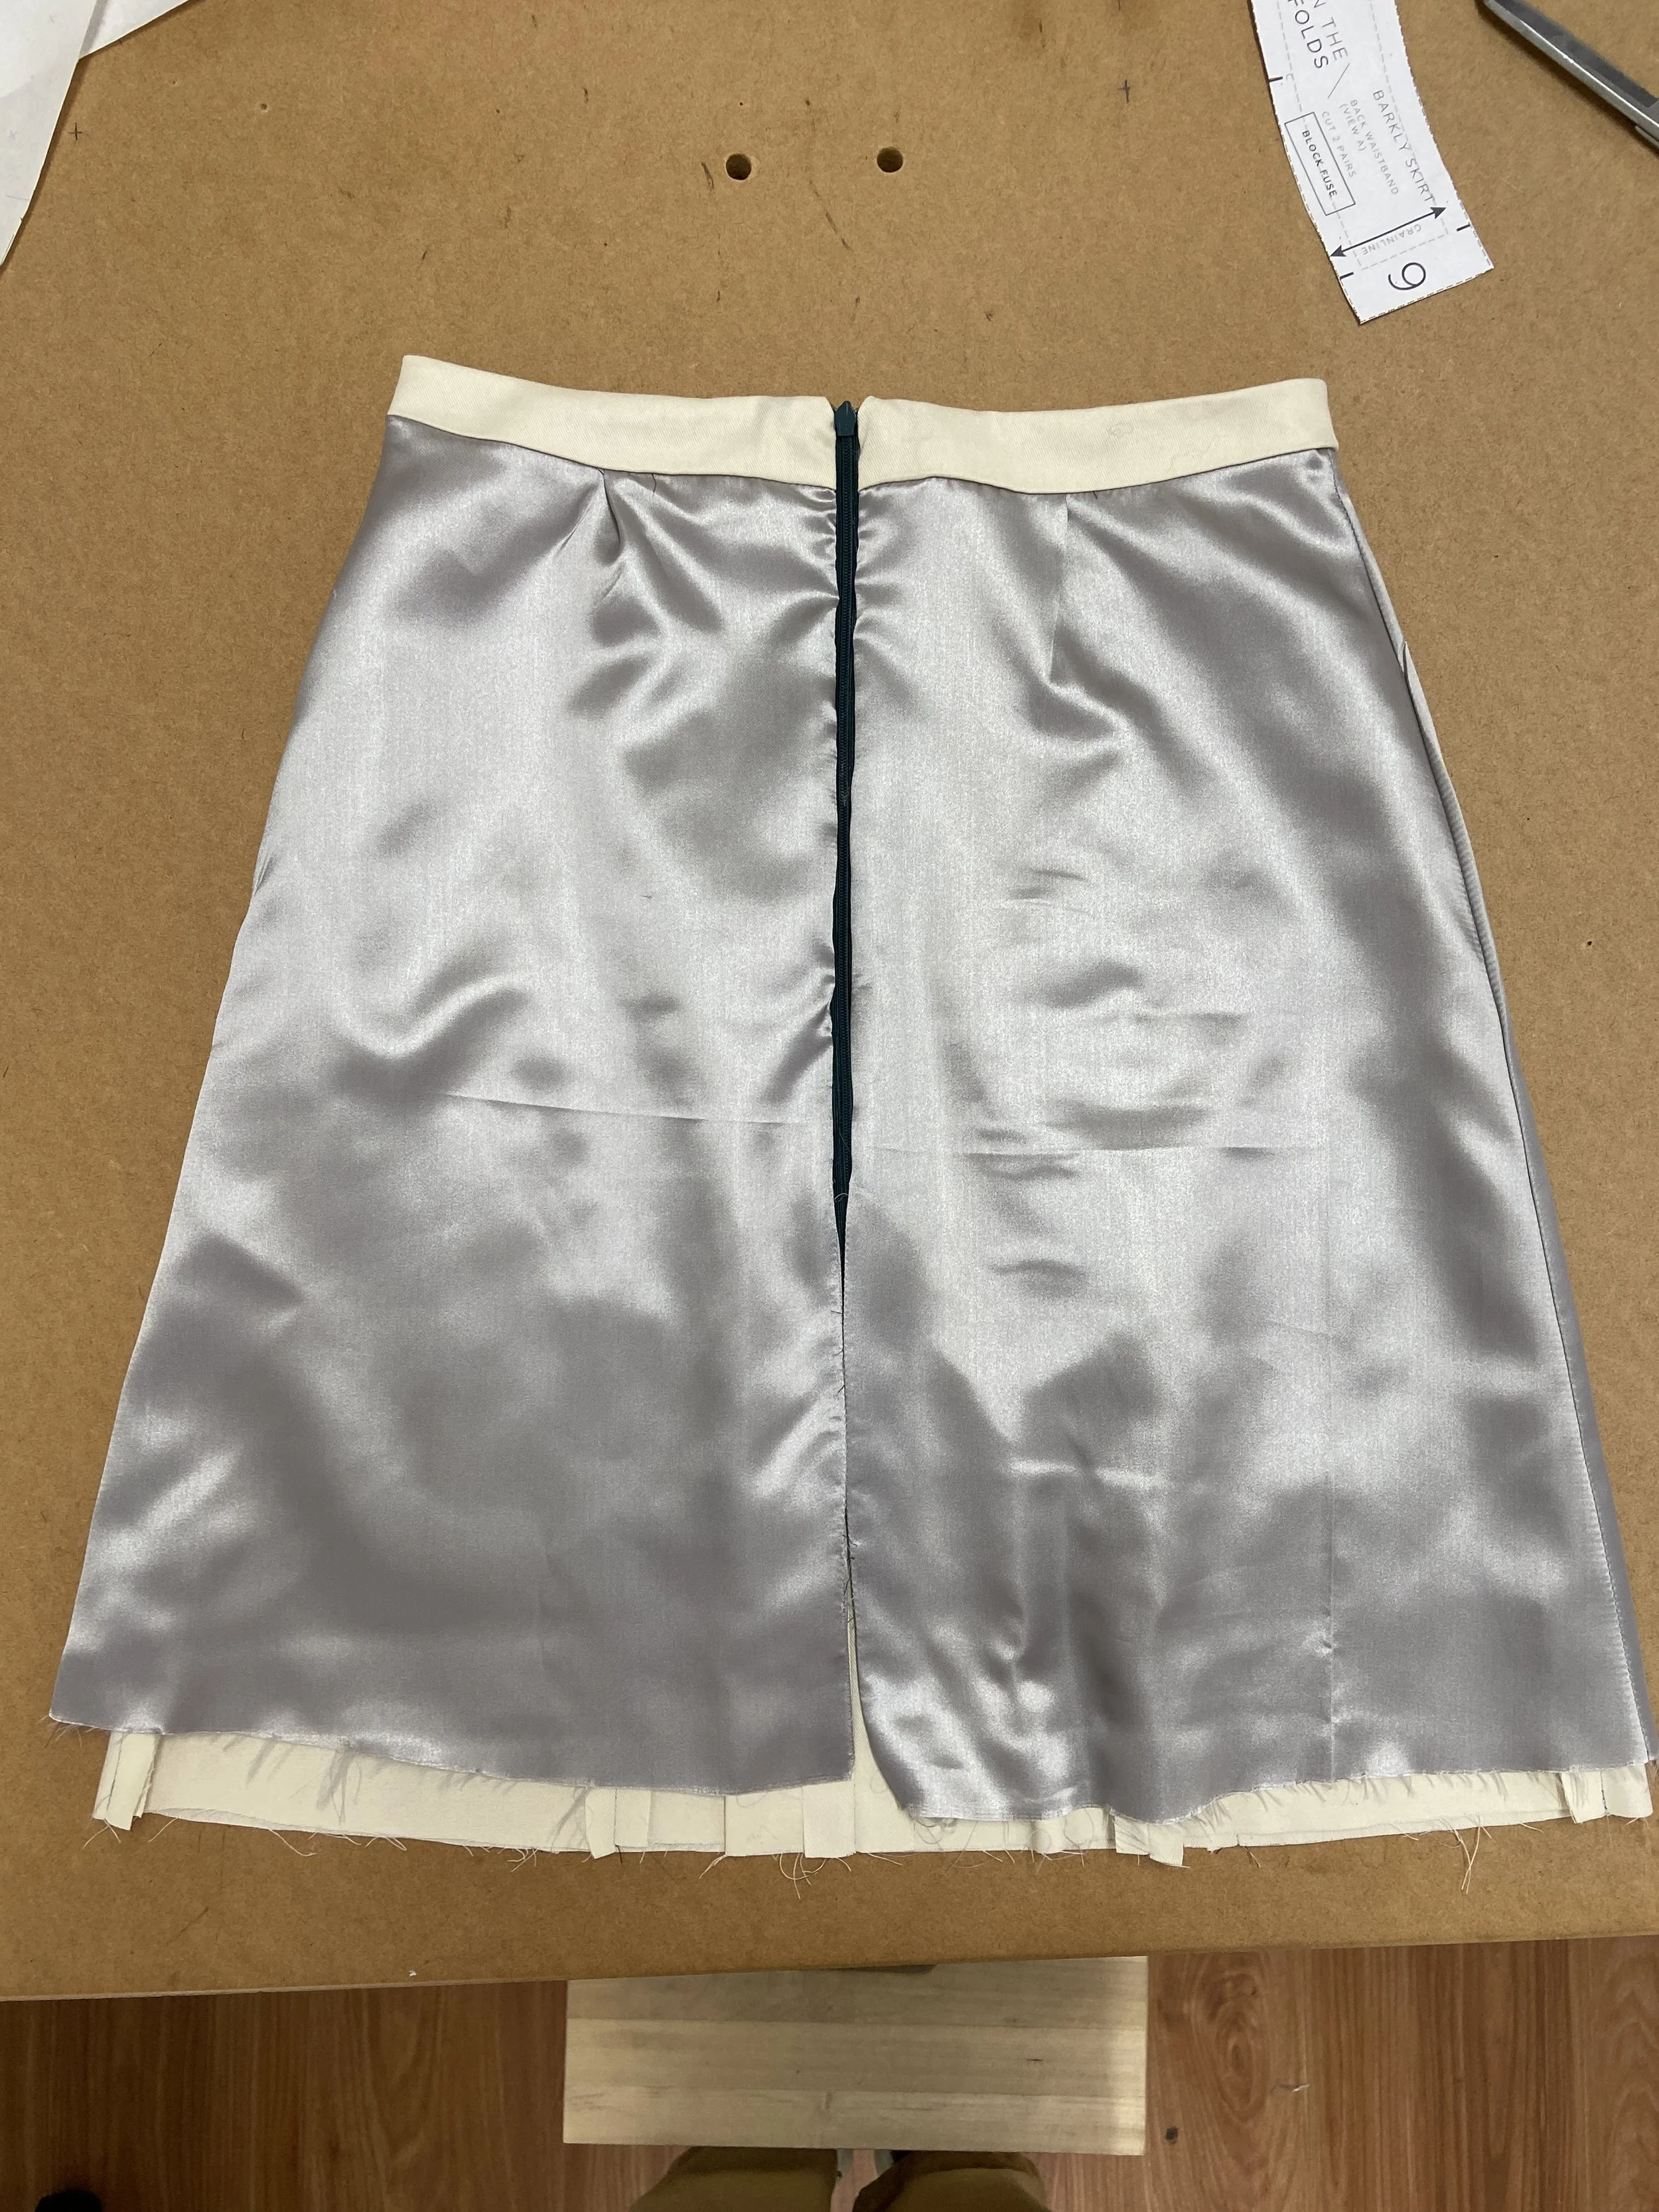
The next phase of the process was to make a sample, photograph the steps and take notes as we went. The notes were then sent to our illustrator who created all the illustrations for our sewing instruction booklets. When it came to sewing, the early stages were easy enough, and again, it was easy to take photos of all the pieces, a task which can be difficult in full scale. I often climb up onto a step stool to try to fit in as much of the sample in the shot.

However, as the process went on it got more and more difficult to sew with the small seam allowances. A 6mm (1/4in) seam allowance is only 2mm (1/8in) in half scale, which is almost impossible to sew! When I checked in on Melanie at this stage she said she would have preferred to sample in full scale as it would have been a lot easier and potentially taken the same amount of time as things would have come together more smoothly, but at this point it was too late and the patterns were already drafted in half scale.

Thankfully, Melanie has a little half scale mannequin, which not only meant we could see the little tiny jackets on a body (how cute!) but also catch any problems as we went. As you can see in the photo above of the Ormond coat, when the coat is worn open the point where the lining joins to the facing is visible. By catching this on the sample we were able to update the instructions to include a section on altering the facing so this would not happen.

When it was my turn to work on content (I did the Barkly skirt, Stow dress and Cartwright dress) I decided to stick with half scale (even though Melanie had warned me how tricky it was!). I was short on time and also had some figuring out to do while sewing the samples so thought it would be helpful. I could check things easily enough and if I needed or wanted to take a different approach I could easily re-cut the pieces and start again.


build your sewing skills with a
curated by itf membership


For View B (the version with the side split), I wasn’t sure what the best way was to cleanly finish the lining at the side split. I made the half scale sample and when I got to this point I realised the lining was sitting much too close to the top of the side opening. By making the sample in half scale, I could quickly cut out another one and work on a different approach to the side split and compare the two. 

When it was time to make the Stow dress, sewing in half scale did speed things up, but what I hadn’t thought about was how impossible it is to turn out a facing / lining using the burrito method with a very narrow shoulder. It was almost impossible to feed the dress through the shoulder to get a clean finish at the armhole. As these photos are just used to send to our illustrator (who is a patternmaker and has all the skills needed to interpret these photos) I didn’t worry too much about the sample not being finished correctly at the armhole, as I knew in full scale this would be fine.

So would I create project content in half scale again?

It depends. 

What I have taken away from this process is that patternmaking in half scale is the best way to ensure all the details are clear in the photos, and I feel it makes the process of creating tutorials easier. 

As for the sewn samples, I think this depends on the garment. For more complex garments like the Ormond coat, working in full scale would have been much easier and cut down on frustration. I would also make the Stow dress in full scale if I were to do it again. But the Barkly skirt and Cartwright dress worked a dream in half scale so I’d stick with that

As a sewist, there are some advantages of working in half-scale. If you want to learn a new skill but are not sure you’d use the pattern, then following the tutorial in half scale is a great idea. You’ll learn the skills without having to use all the paper, time and fabric it would normally take to work in full scale. Working in half scale is also handy if you want to try something out but you’re not sure how it’s going to work. I often do this if I am testing out an alteration on a specific pattern and I need to see what will happen to the design lines. Once I’m happy with how it’s working I can do it in full scale and not waste any time or get any nasty surprises.

So what do you think, will you try your next patternmaking project in half scale?

Happy patternmaking!

Emily


WHAT YOU’VE BEEN MAKING…