We’ve always got one eye open for Curated by ITF member creations we can share in our Spotlight posts that might spark some creative inspiration in someone else.
This week we’re excited to share what Deborah made using our Ormond coat pattern!
Deborah has been a Curated member for a while now. She first joined way back at the start of 2022 with the release of our Sawtell top pattern. Since then we’ve loved seeing her share her makes, ask questions and just be a wonderful community member all round. But what we’ve loved most of all is how she embodies the essence of In the Folds - that of slow and steady skill-building while making clothes she loves to wear.
This essence is perfectly expressed in her Ormond coat journey. With her first Ormond make she focused on the skills, and then with her second Ormond make she took the opportunity to add her own spin - and we love it!
WHAT DEBORAH SAID ABOUT HER FIRST ORMOND COAT

“I finally finished my Ormond coat! Such a great pattern, the collar sewed up beautifully, and I made a size F with a few cms off both the length and the sleeves.
I learnt so much:
Sewing with heavy duty fabric
The vent and the pocket techniques, so much fun and came out so well, especially after practicing on the apron
Sewing fabric with a nap

This project took many months, mainly because of a kitchen renovation and after toiling I took ages to decide on fabric…. This is Merchant and Mills cotton twill 410gsm in Otto green from Pattern Scissors Frock. I’m glad I took so long because this fabric is amazing to wear. Lovely and stiff, so holds the shape to make it look more like a cocoon coat from the back, and yet soft to the touch with a wonderful nap that is very luxurious.
I also took ages to decide on buttons and then I just went with a simple plain black to keep it classic.
The buttonholes are not great looking, they are even and straight but I think I need that anti-fraying stuff, or I need to go over them by hand. Otherwise, definitely one of the best things I have ever made!!”
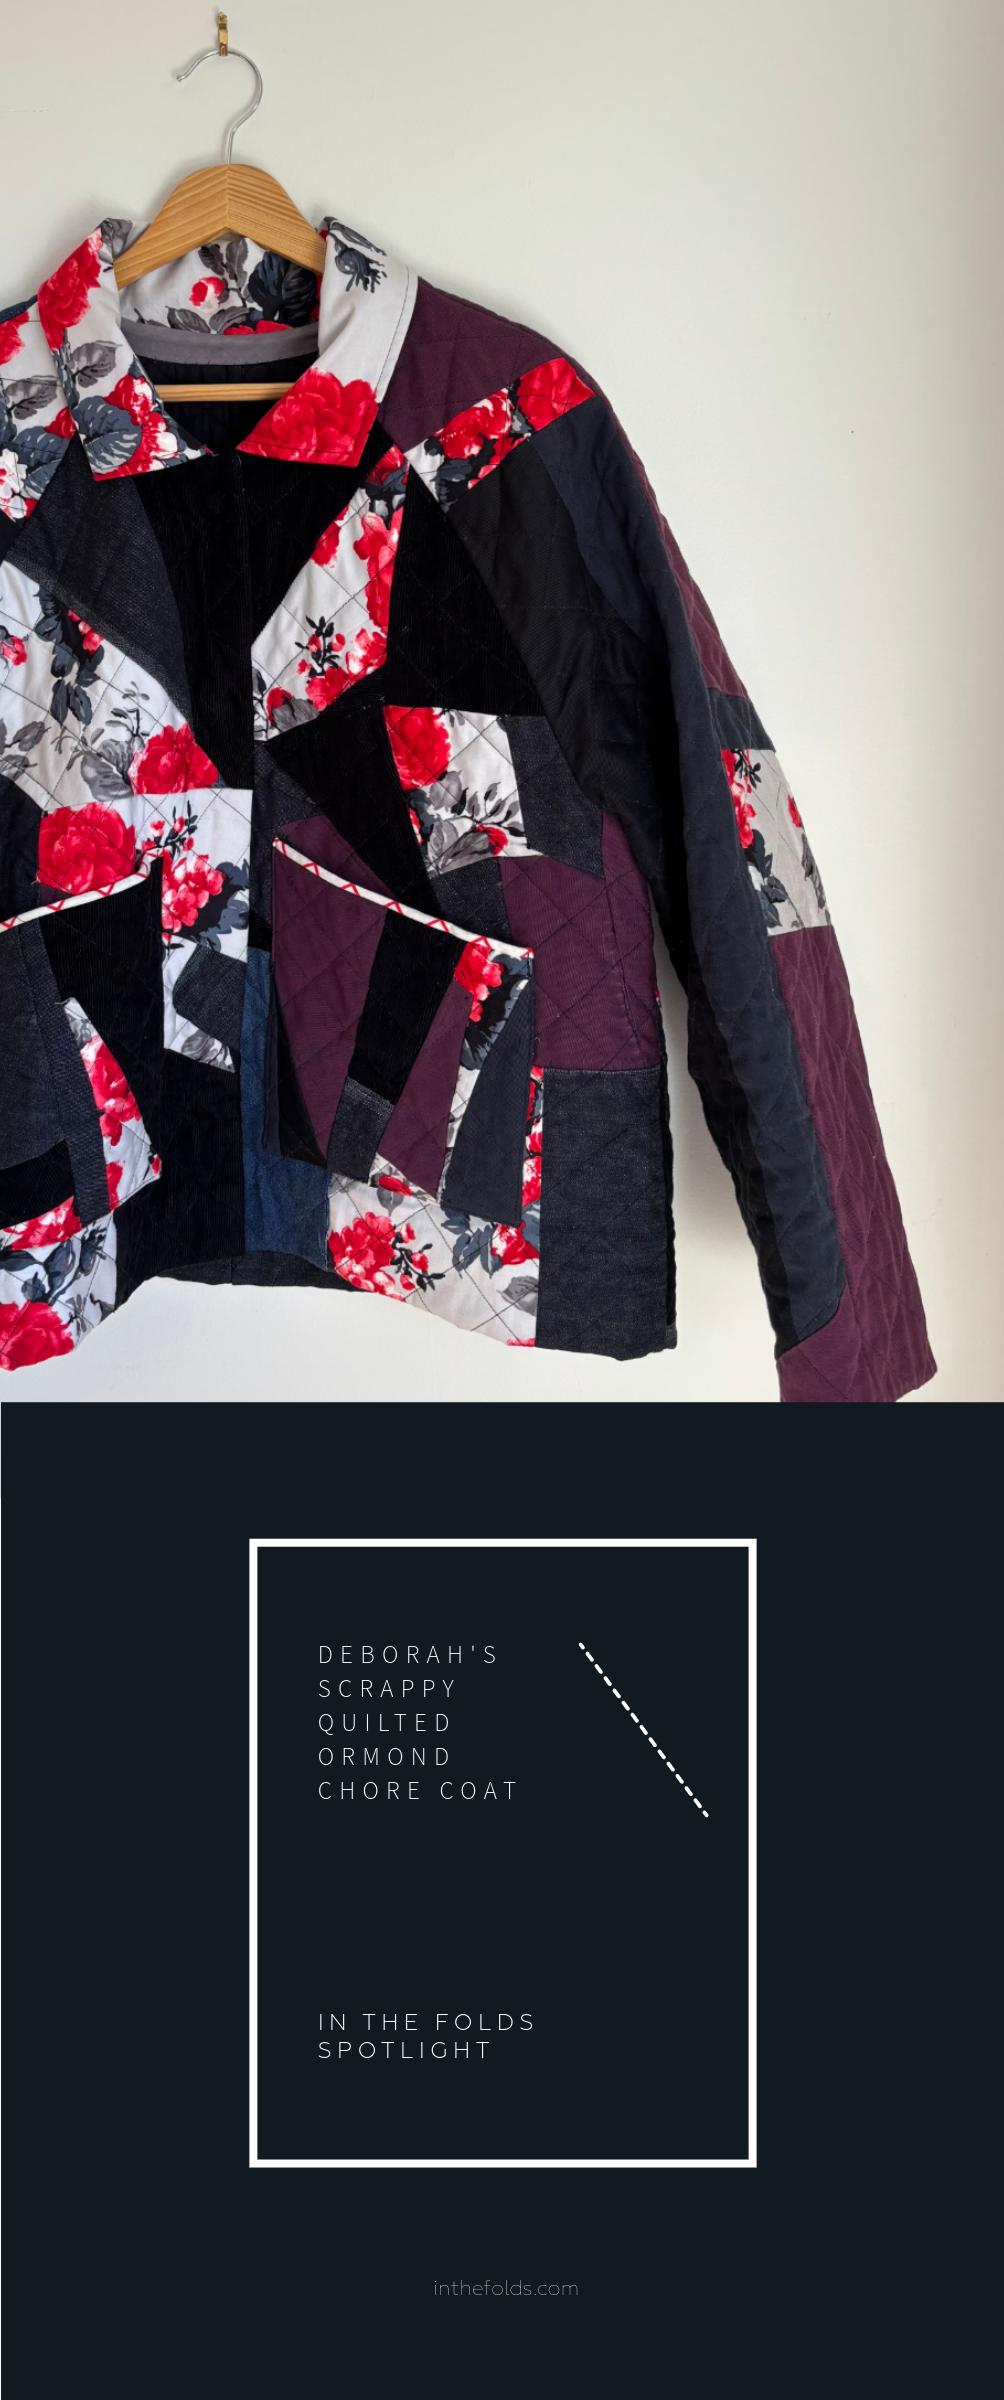
DEBORAH’S SCRAPPY QUILTED ORMOND CHORE COAT
Deborah’s Ormond coat journey didn’t stop there. And to be honest, it’s a trait that many of our Curated by ITF members have - the desire to get the most they can out of each pattern the own.
We love how thrifty Deborah was with the project, using up what she had and figuring out how to make it work. If you’ve got a pile of fabric scraps you’d like to make use of, this could be your next project!
Here’s what Deborah shared about her second Ormond coat in our private, online Curated community.

“I have been trying to use up lots of scraps lately and had slowly been working on some random scrap quilt blocks. I recently turned them into and Ormond shirt jacket.
This probably took about 4 months all up.

I like the back better than the front. I actually used an old toile of Darlow pants for the sleeves when I ran out of matching smaller scraps. Still not sure if a single piece for the collar was the best idea..
Things I changed to make it work:
Just used binding around the neck, front centre and bottom as well as the sleeve, instead of the facings.
Did a sort of faux flat felled seam on the interior. A normal seam, trimmed down and then hand sewn to the lining so you can’t see it on the front.
Used giant press studs instead of button holes in case I want to wear it inside out.
No top stitching, the quilting stitches were enough.

The inside is a black cotton voile/lawn. I used up binding I had.

If you’ve made something particularly inspiring from an In the Folds pattern, we’d love you to share it with us so we can share it with our community! Send us an email, or tag us on Instagram @inthefolds.