It's Thursday (somehow another week is coming to an end), which means it's time for a Throwback Thursday post! As I am still solidly in skirt mode from the skirt series I've been sharing with you lately, I thought it would be a good time to talk hem facings.
What is a hem facing?
A hem facing is a seperate pattern piece that is used to finish the hem of a garment (rather than just turning up the hem as you often do when hemming).
When should I consider using a hem facing?
A hem facing is a good way to finish a hem if you have a curved or shaped hemline (in the case of an A-line skirt or circle skirt, for example). It can also be used to finish a straight hemline if you would like to add weight to the hem (can help with the fall and drape of a garment), or just prefer this finish.

If you have sewn The Rushcutter, you will know that I included a hem facing in the pattern, to help you achieve a lovely clean finish.
Why can't I just do a normal hem?
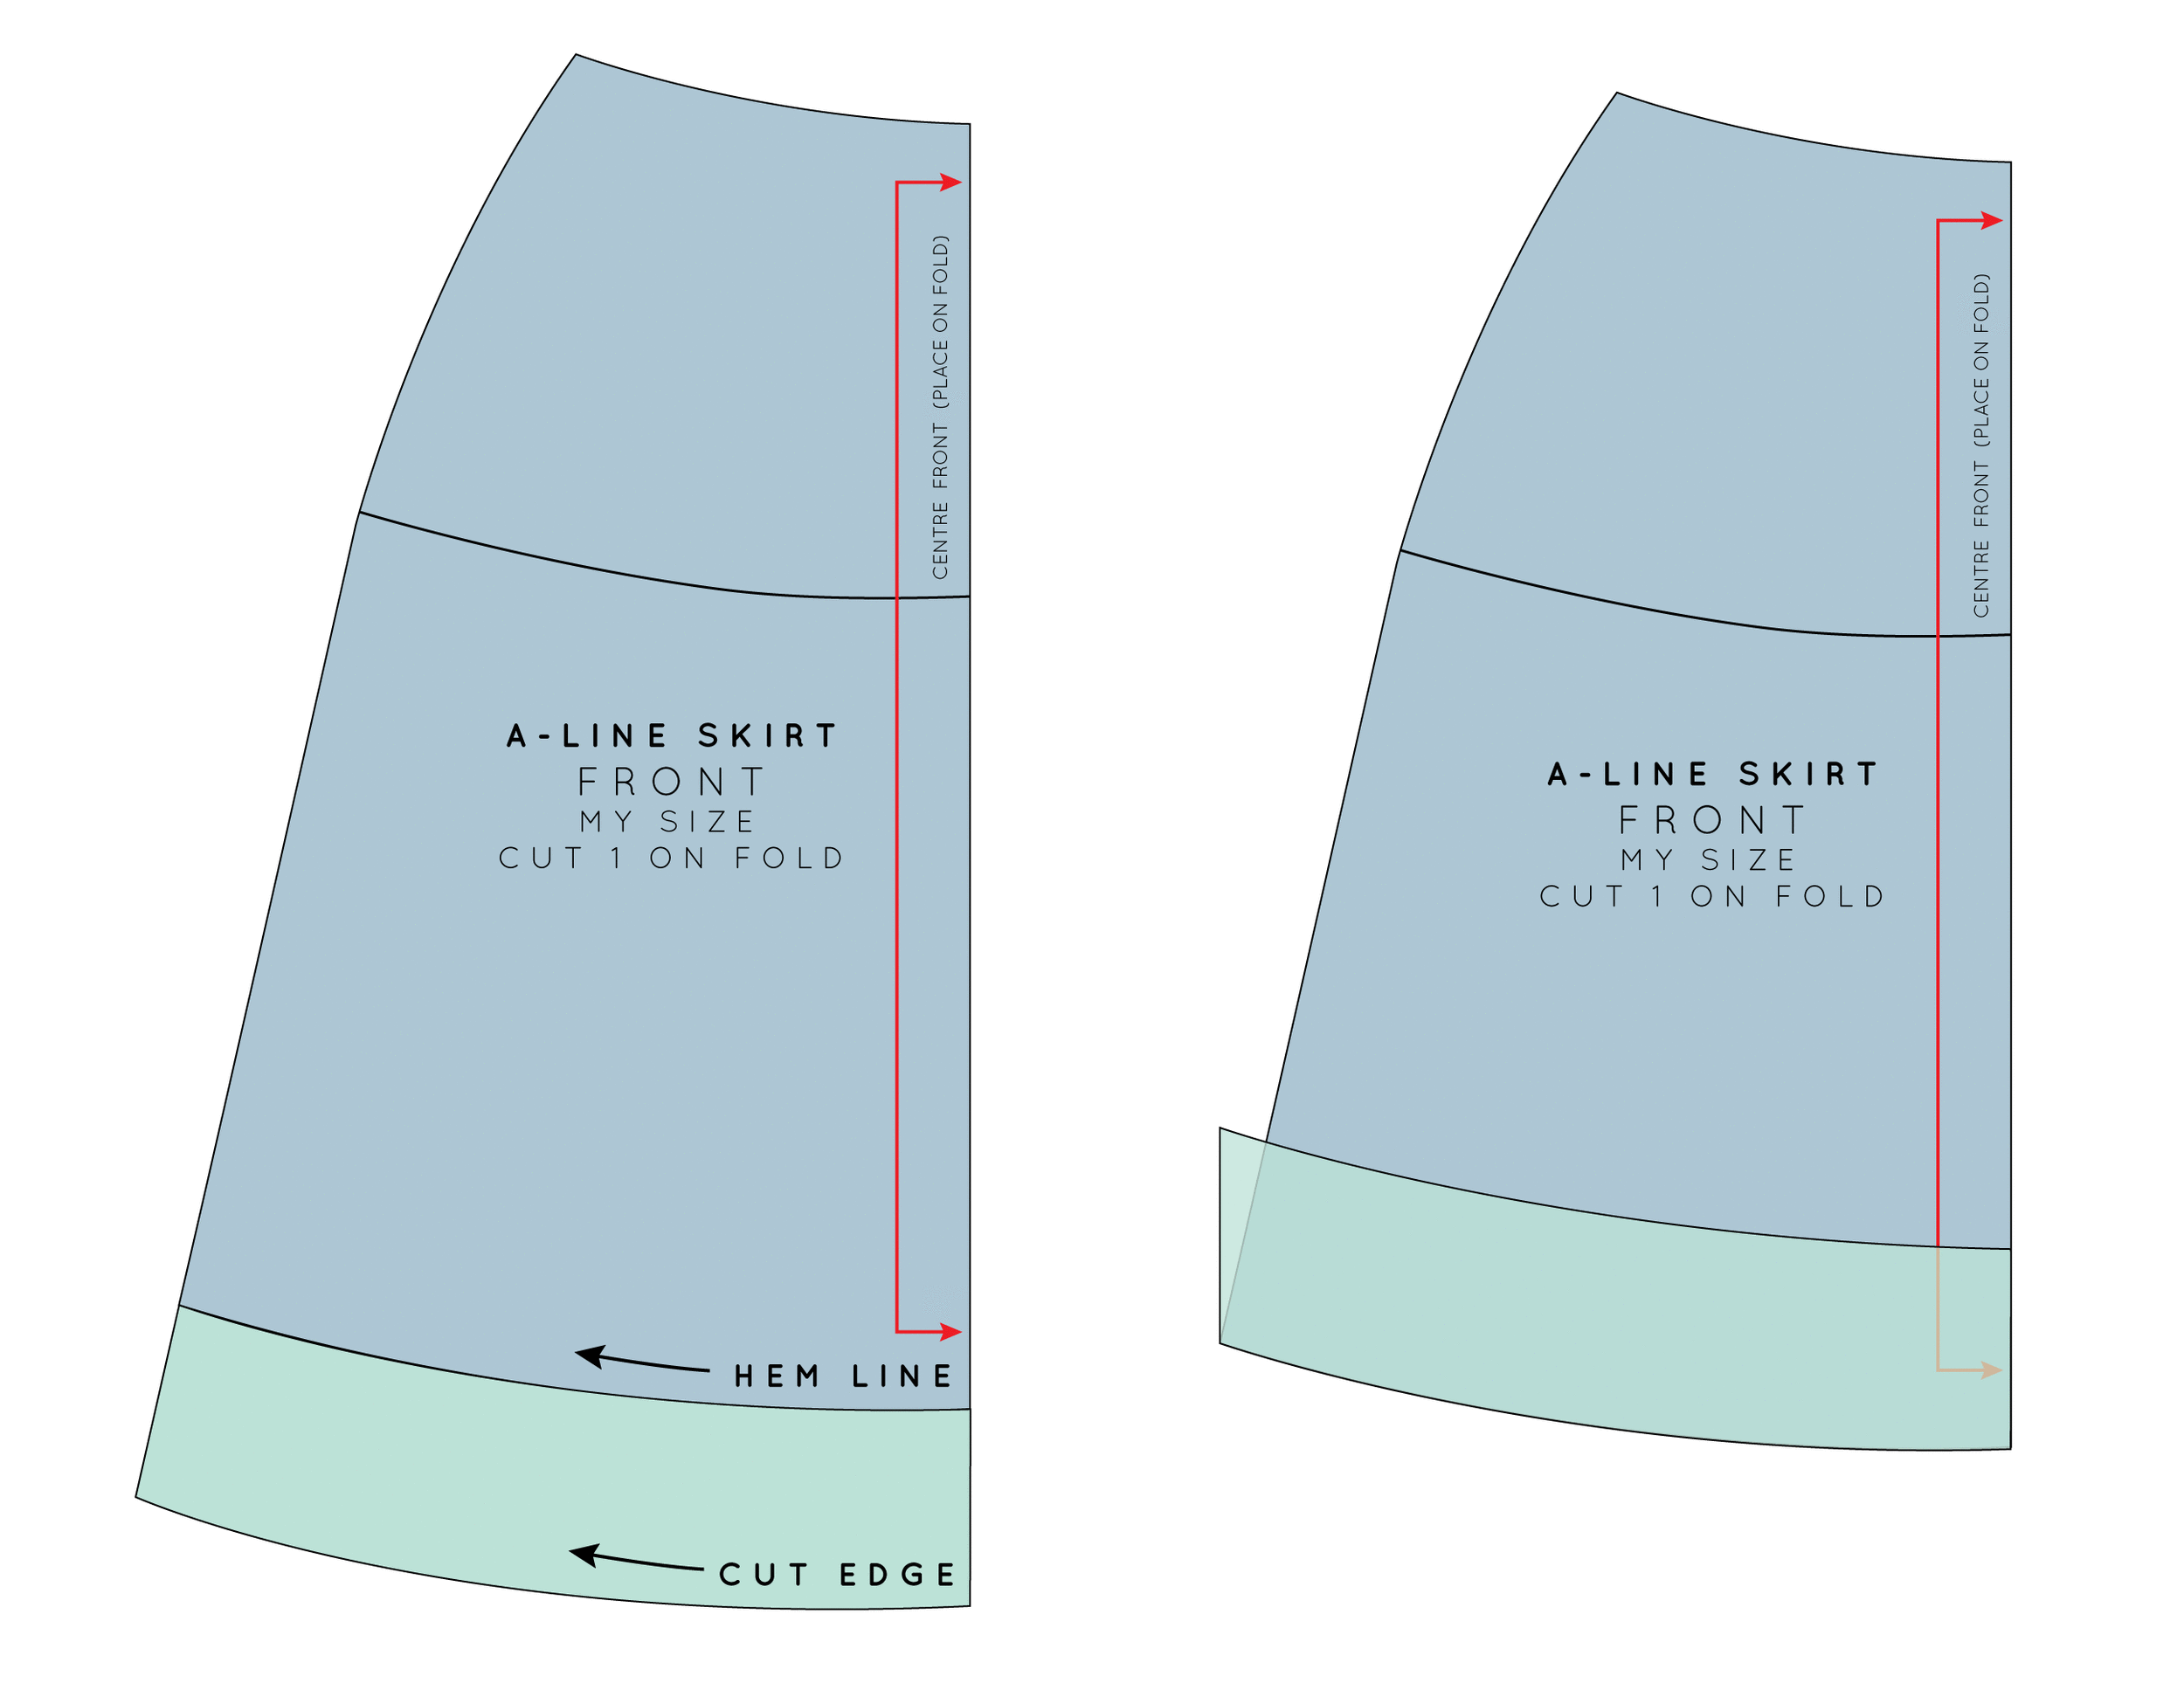
The reason you cannot simply add a hem allowance to a curved hemline (left hand image) by extending the pattern beyond the side seam and centre front, as you often would to create a hem, is that when you have a curved line, the circumference of the cut edge will become larger than the hemline. When you fold up the hem (right hand image), there will be too much fabric and the hem will be unable to sit flat.
To avoid this, you will need to create a separate pattern piece - a hem facing.
How to draft a hem facing
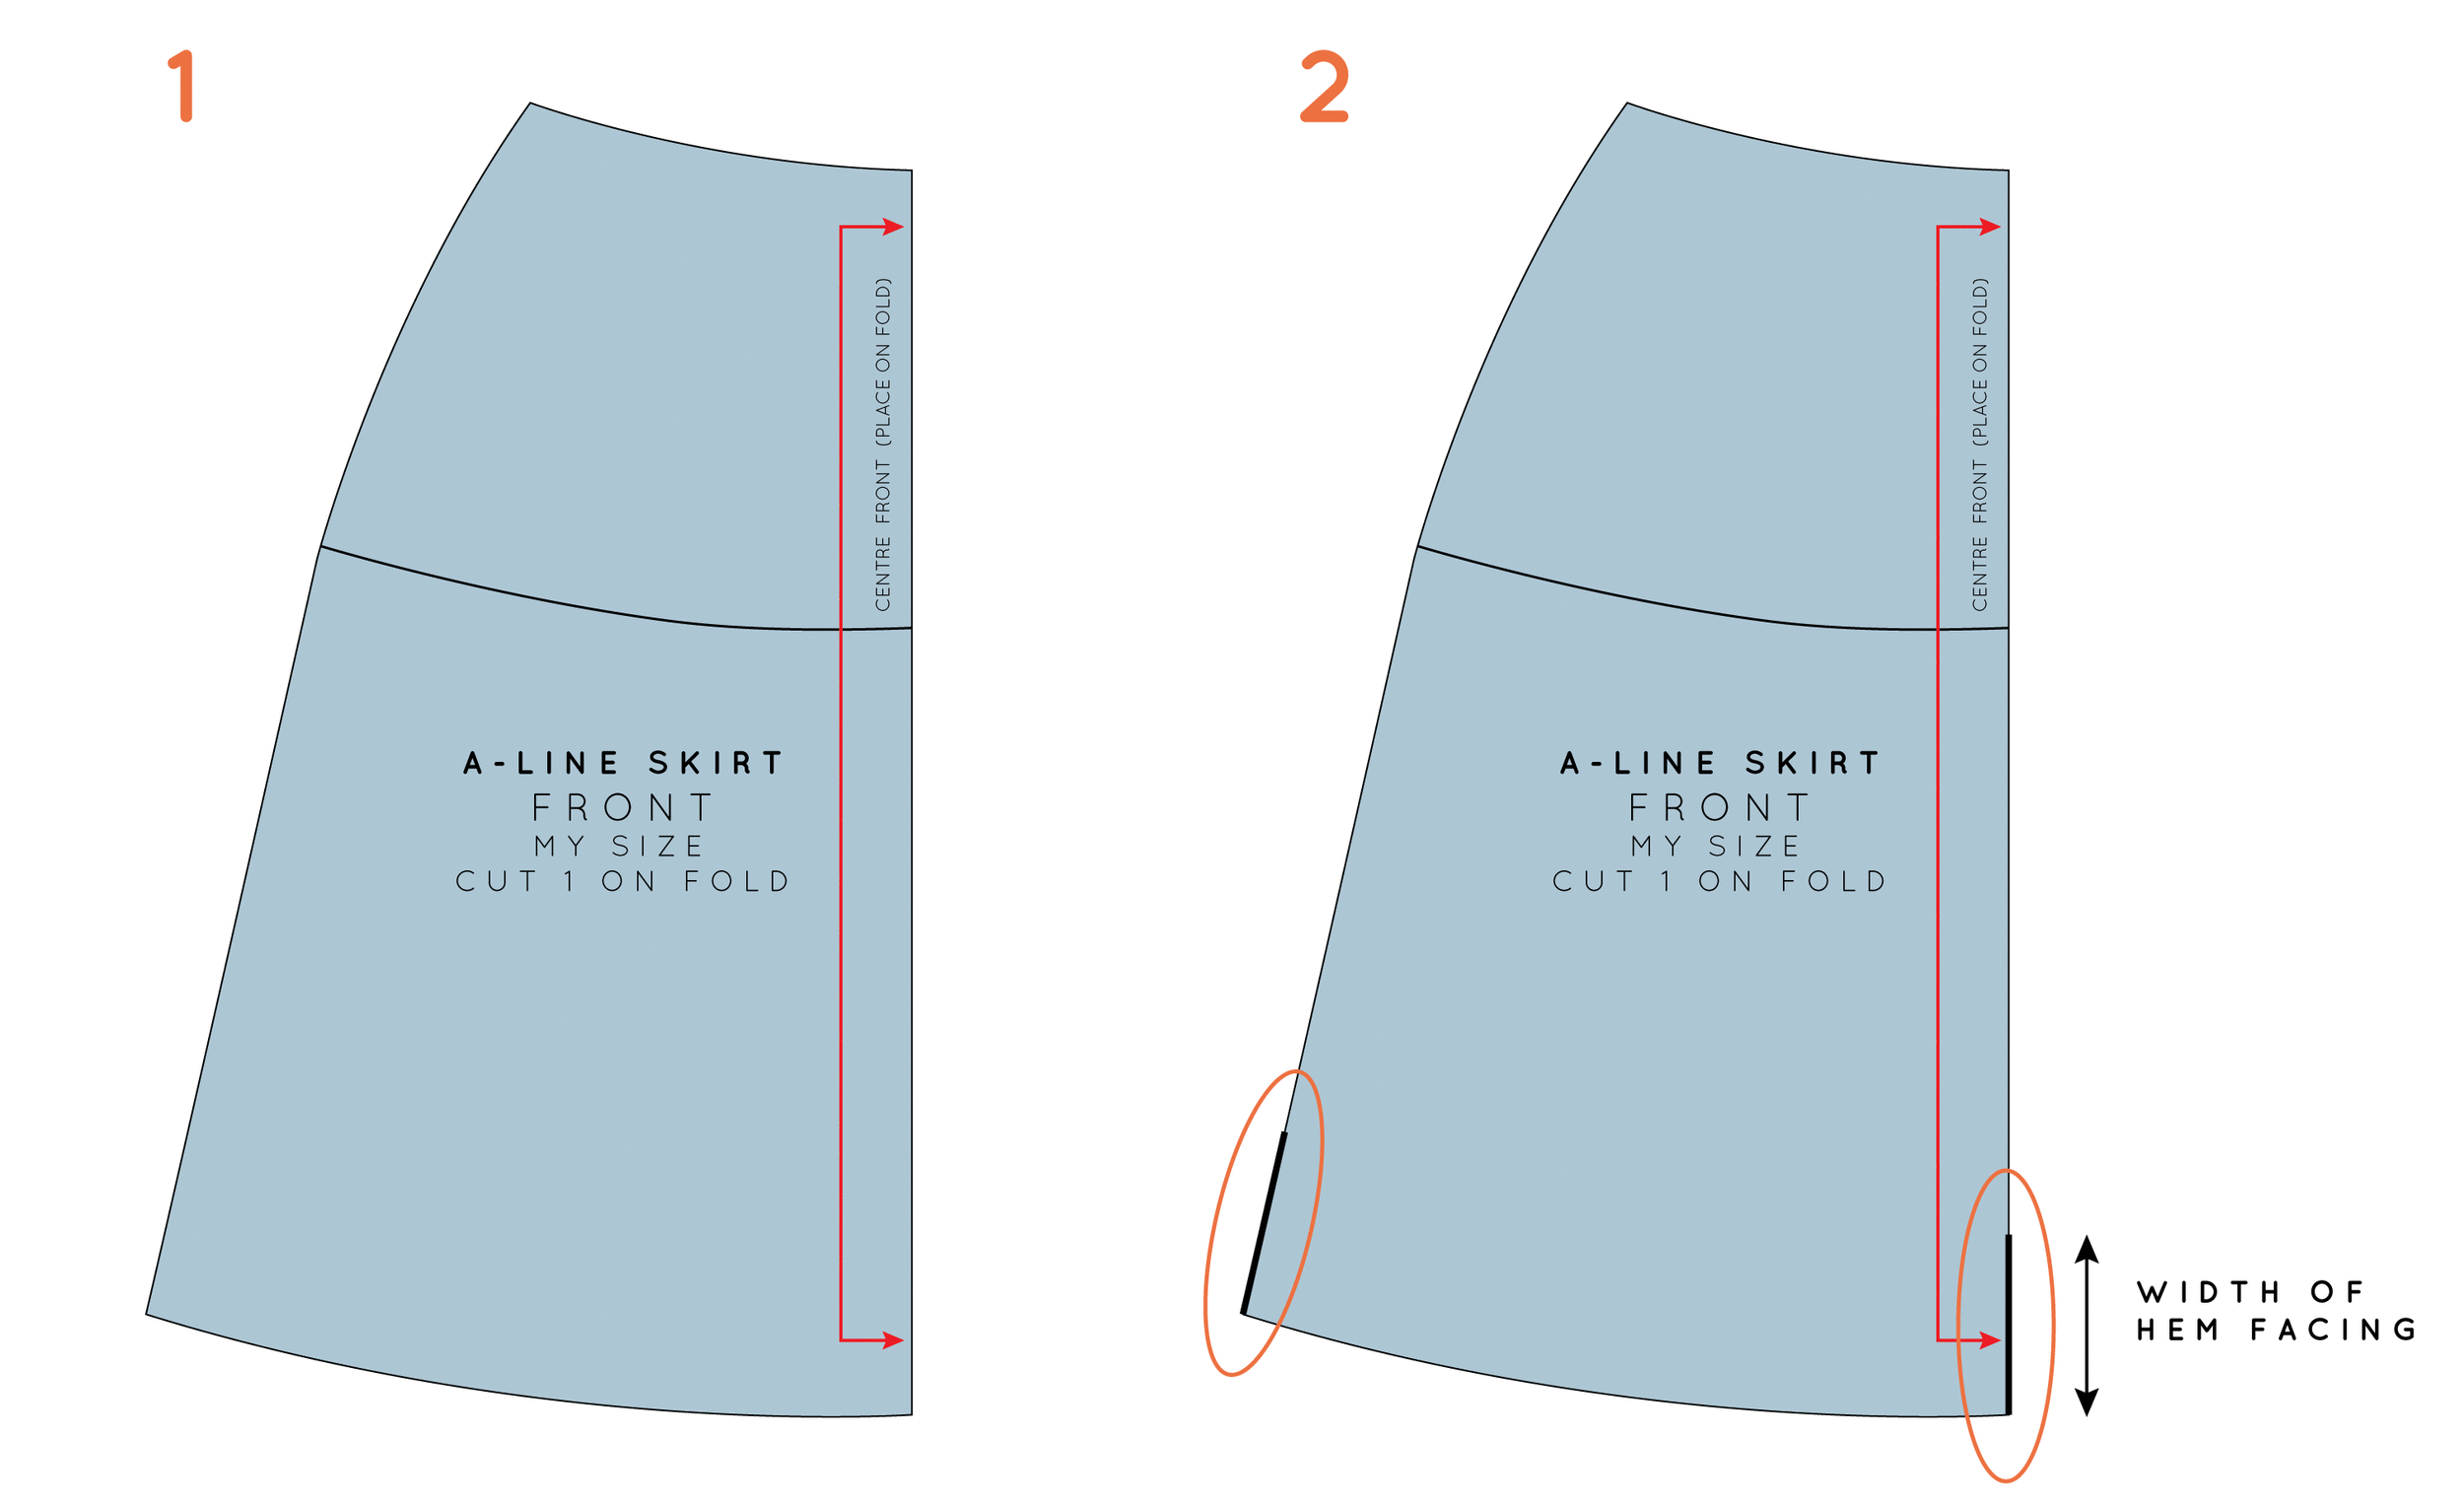
1. To get started, take the pattern you will be making a facing for. I am using the basic skirt block, that has been adapted to an A-line shape. You can find how to do this, by looking at this tutorial.
The process is the same for the front and back patterns, so I will just use the front pattern piece for this example.
2. Decide how wide you would like the hem facing to be. Anything from 3 - 15cm (1 1/4in - 6in) is okay (this is obviously a very broad spectrum, which will depend on your design and the fabric you are using). If you want anything less than 3cm (1 1/4in), I would suggest using bias binding instead. If you are not sure of what width to use, have a look at your ready to wear clothes, to get an idea.
Mark the width you would like your facing to be on the centre front, measuring up from the hemline. Mark this distance on the side seam too.
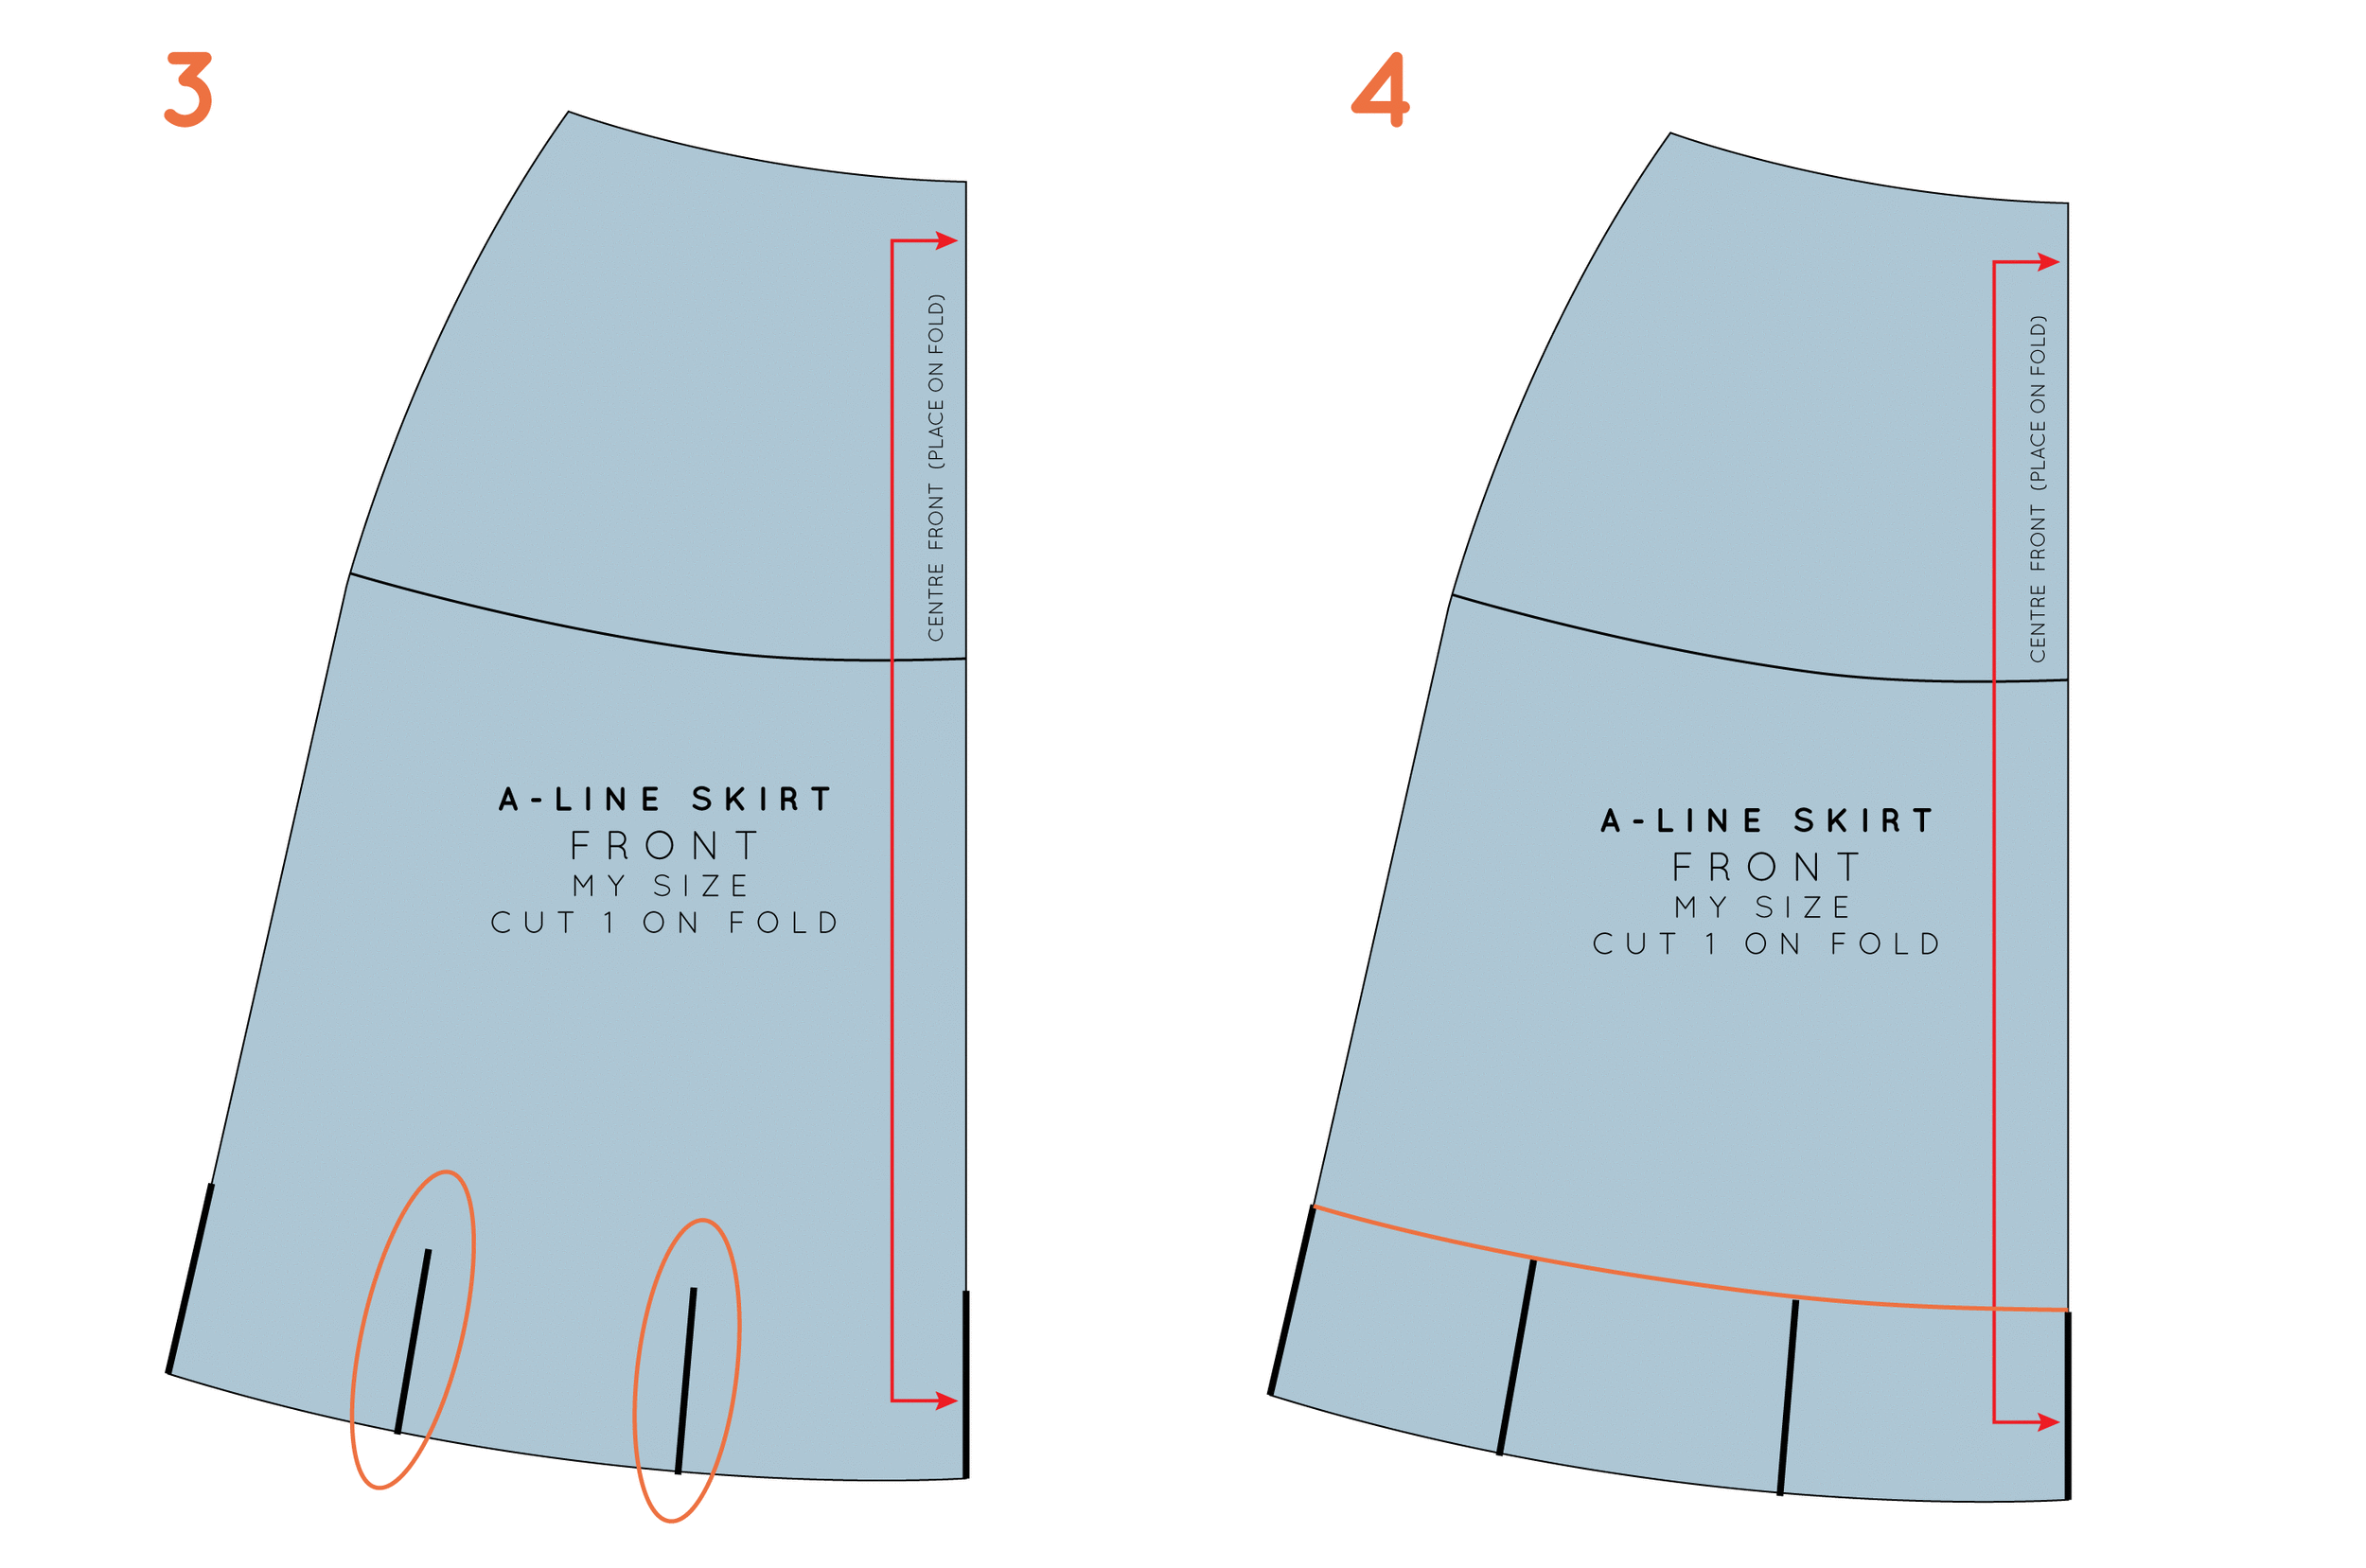
3. You will then need to mark the width of the facing at regular intervals between the centre front and side seam (every 10-15cm or so). Be sure to draw these lines perpendicular to the hemline.
4. Join the endpoints of all these lines with a smooth, sweeping curve. You have now created the shape of your waist shaping.
5. Take a seperate piece of pattern paper, and trace off the shape of the hem facing.
6. Before removing the tracing, mark a notch close to the centre of the hem curve (if you have a very wide hem, you may consider adding an extra notch or two), and transfer onto the skirt pattern with a tracing wheel. This will help when you are sewing the pieces together later (it is not crucial if you are making a narrow skirt, but if you are making a full circle skirt, then you will thank your past-self for being so diligent when notching the hemline!)
Transfer the grainline onto the hem facing (which will be parallel to the centre front).
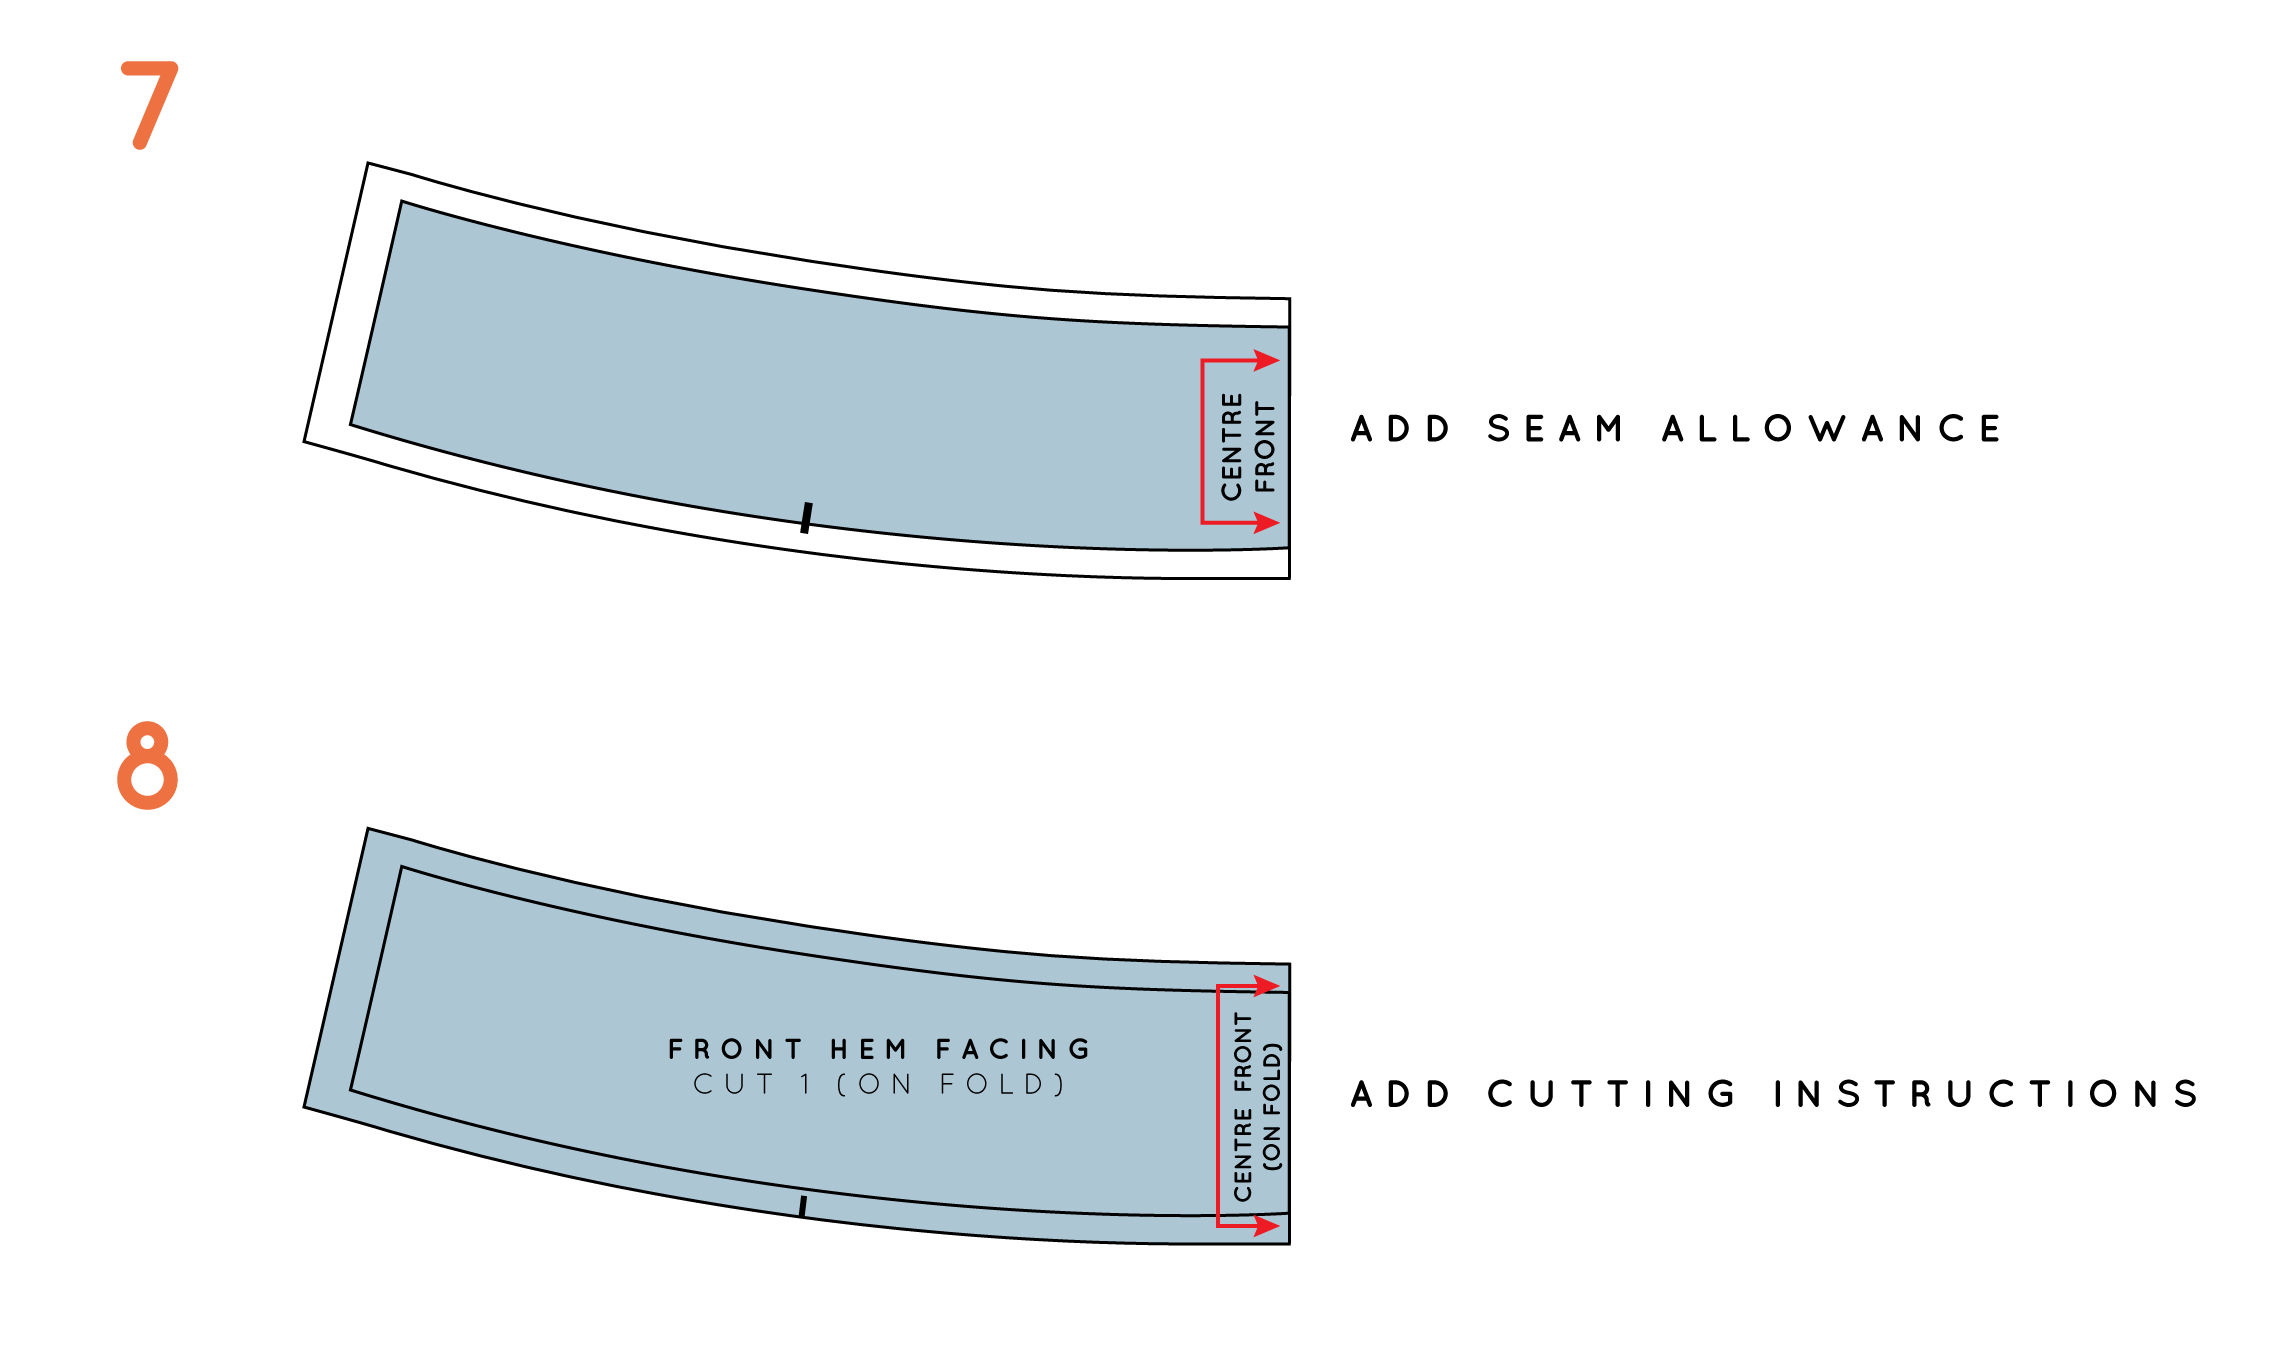
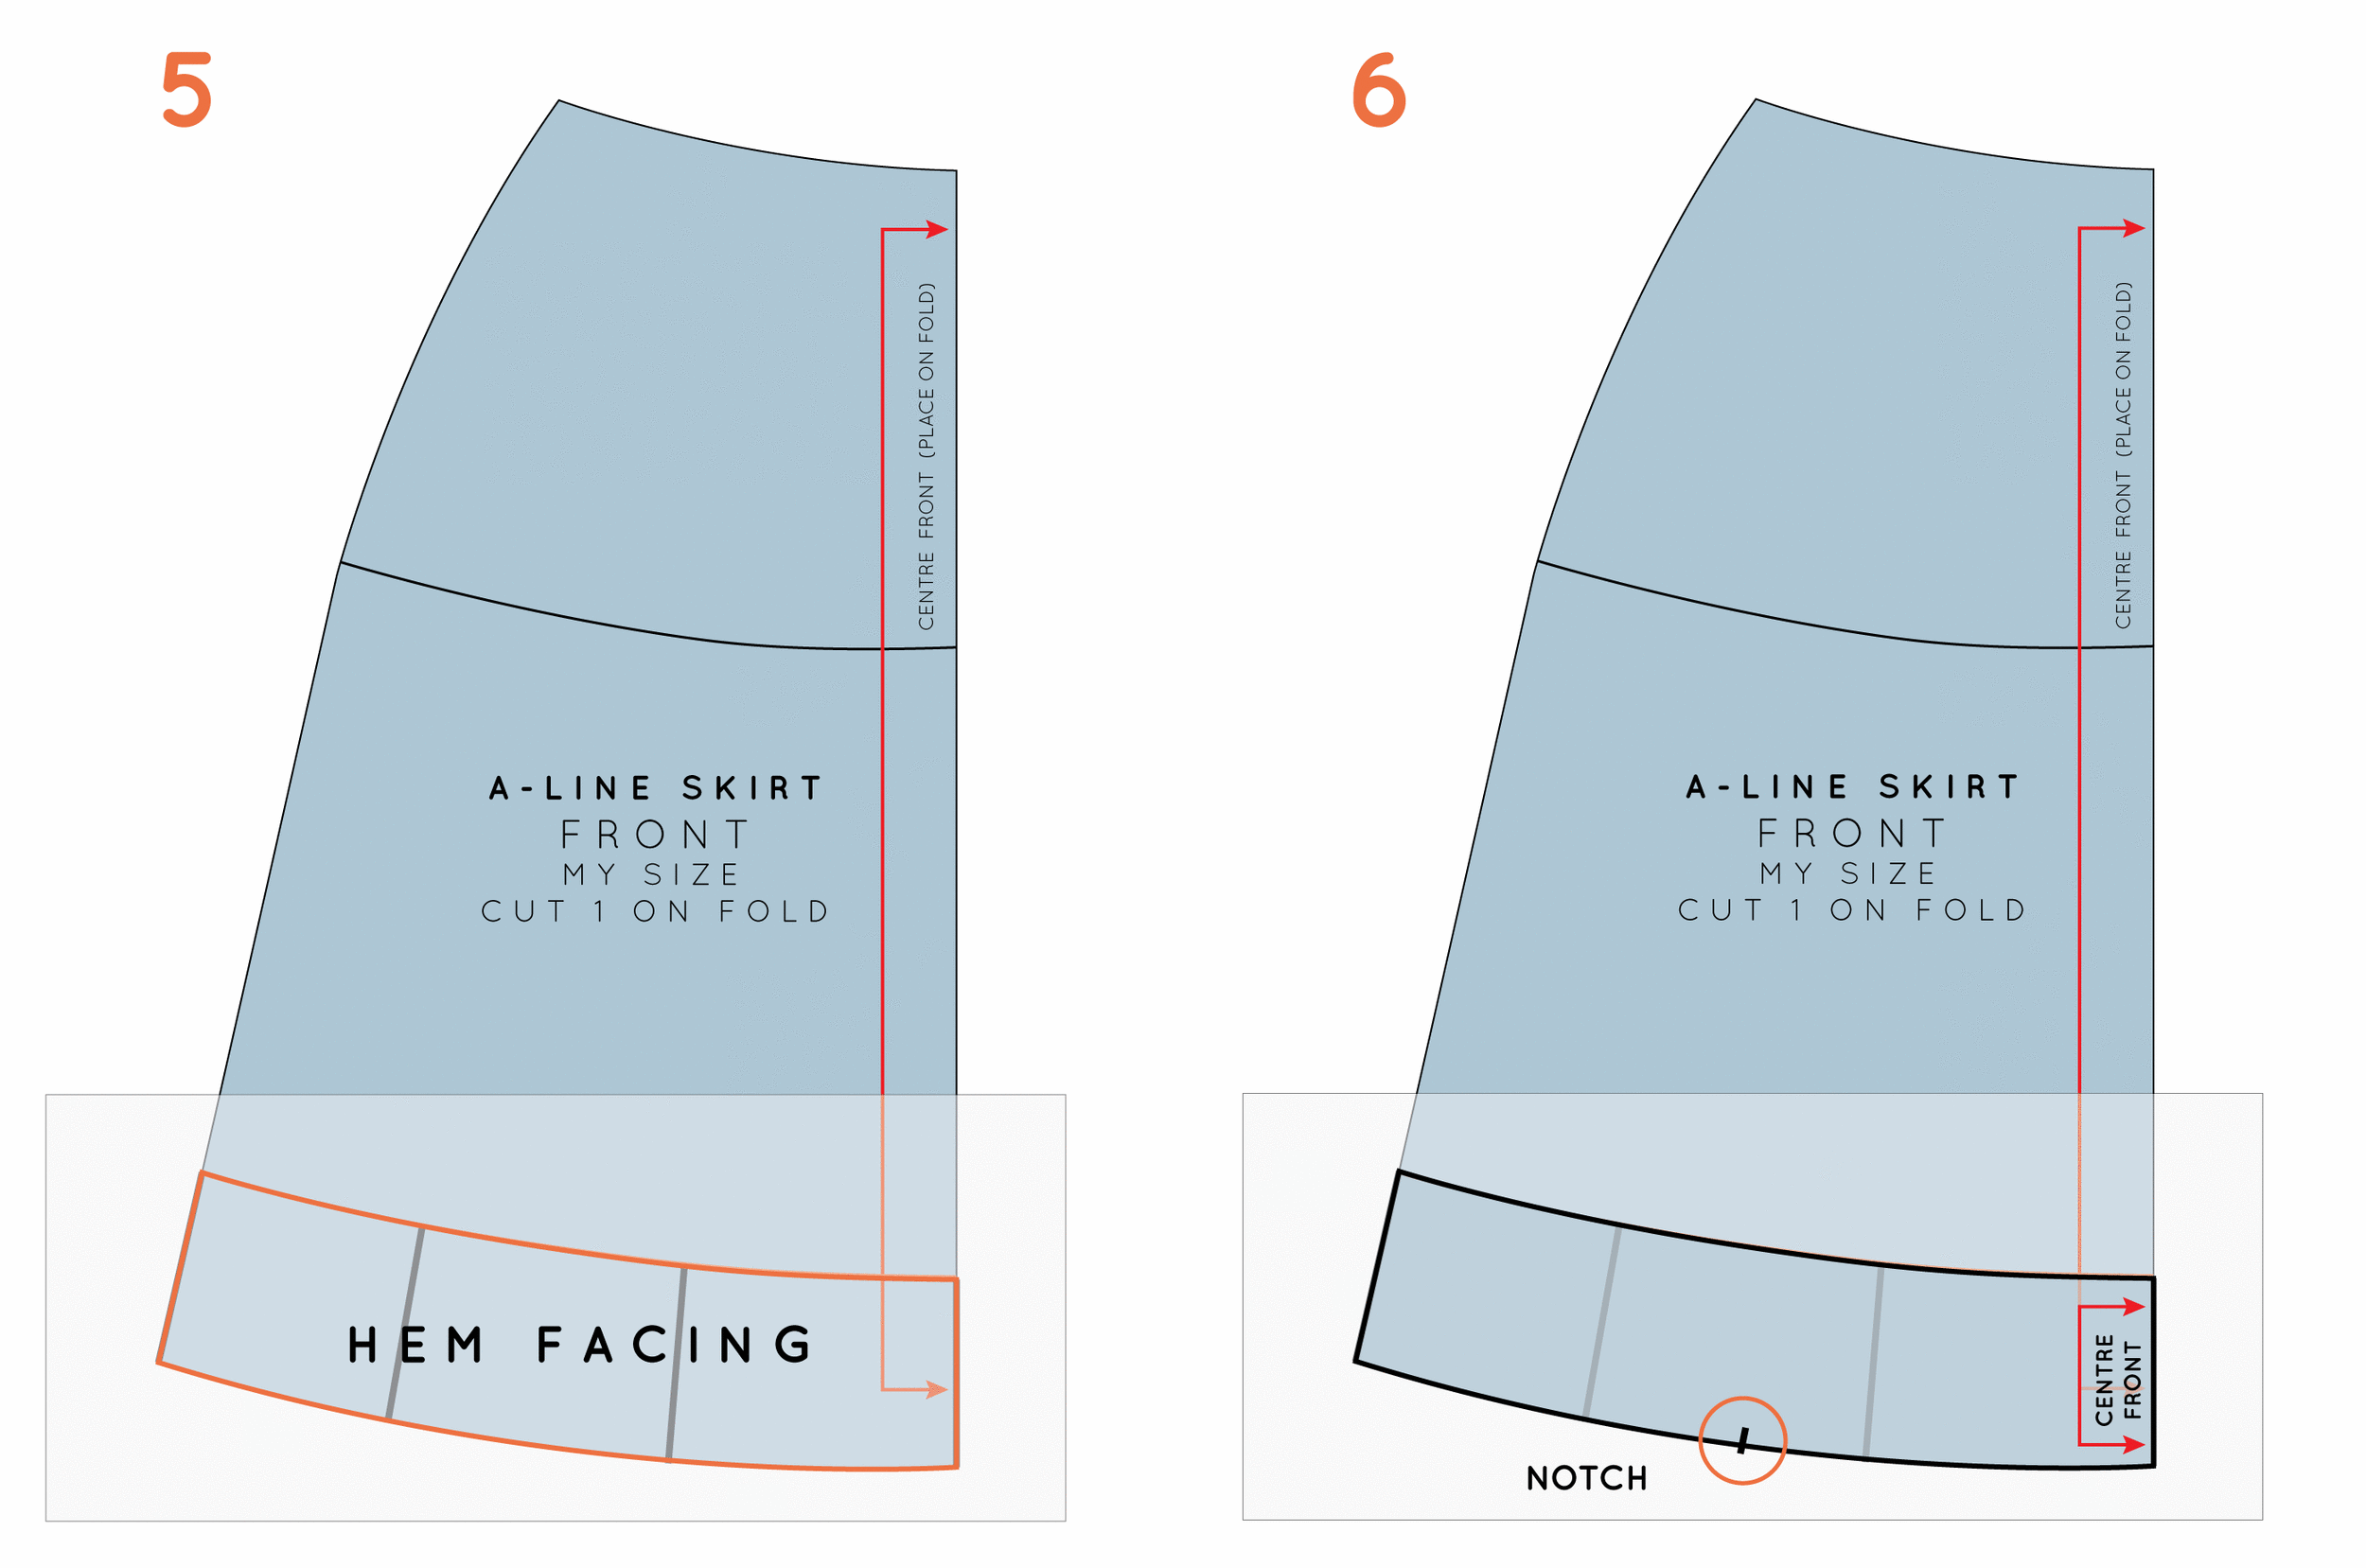
7. Add seam allowance to the body of the pattern (if you have not done so already), as well as the facing. I suggest 1cm (3/8in) along the long edges (the hem edge and the top edge) and 1.5cm (1/2in) on the side seam. You will not need seam allowance at the centre front, as the piece will be cut on the fold. For the back pattern piece, you can also cut on the fold, which will minimise bulk at the centre back seam.
Depending on the fabric, you may want to add interfacing to the pattern when you get to the cutting stage of the project - just keep this in mind.