finishing touches

Throwback Thursday : How to draft a hem facing

how_to_draft_a_hem_facing_1

It's Thursday (somehow another week is coming to an end), which means it's time for a Throwback Thursday post! As I am still solidly in skirt mode from the skirt series I've been sharing with you lately, I thought it would be a good time to talk hem facings.

What is a hem facing?

A hem facing is a seperate pattern piece that is used to finish the hem of a garment (rather than just turning up the hem as you often do when hemming).

When should I consider using a hem facing?

A hem facing is a good way to finish a hem if you have a curved or shaped hemline (in the case of an A-line skirt or circle skirt, for example). It can also be used to finish a straight hemline if you would like to add weight to the hem (can help with the fall and drape of a garment), or just prefer this finish.

how_to_draft_a_hem_facing_2

If you have sewn The Rushcutter, you will know that I included a hem facing in the pattern, to help you achieve a lovely clean finish.

Why can't I just do a normal hem?

how_to_draft_a_hem_facing_3

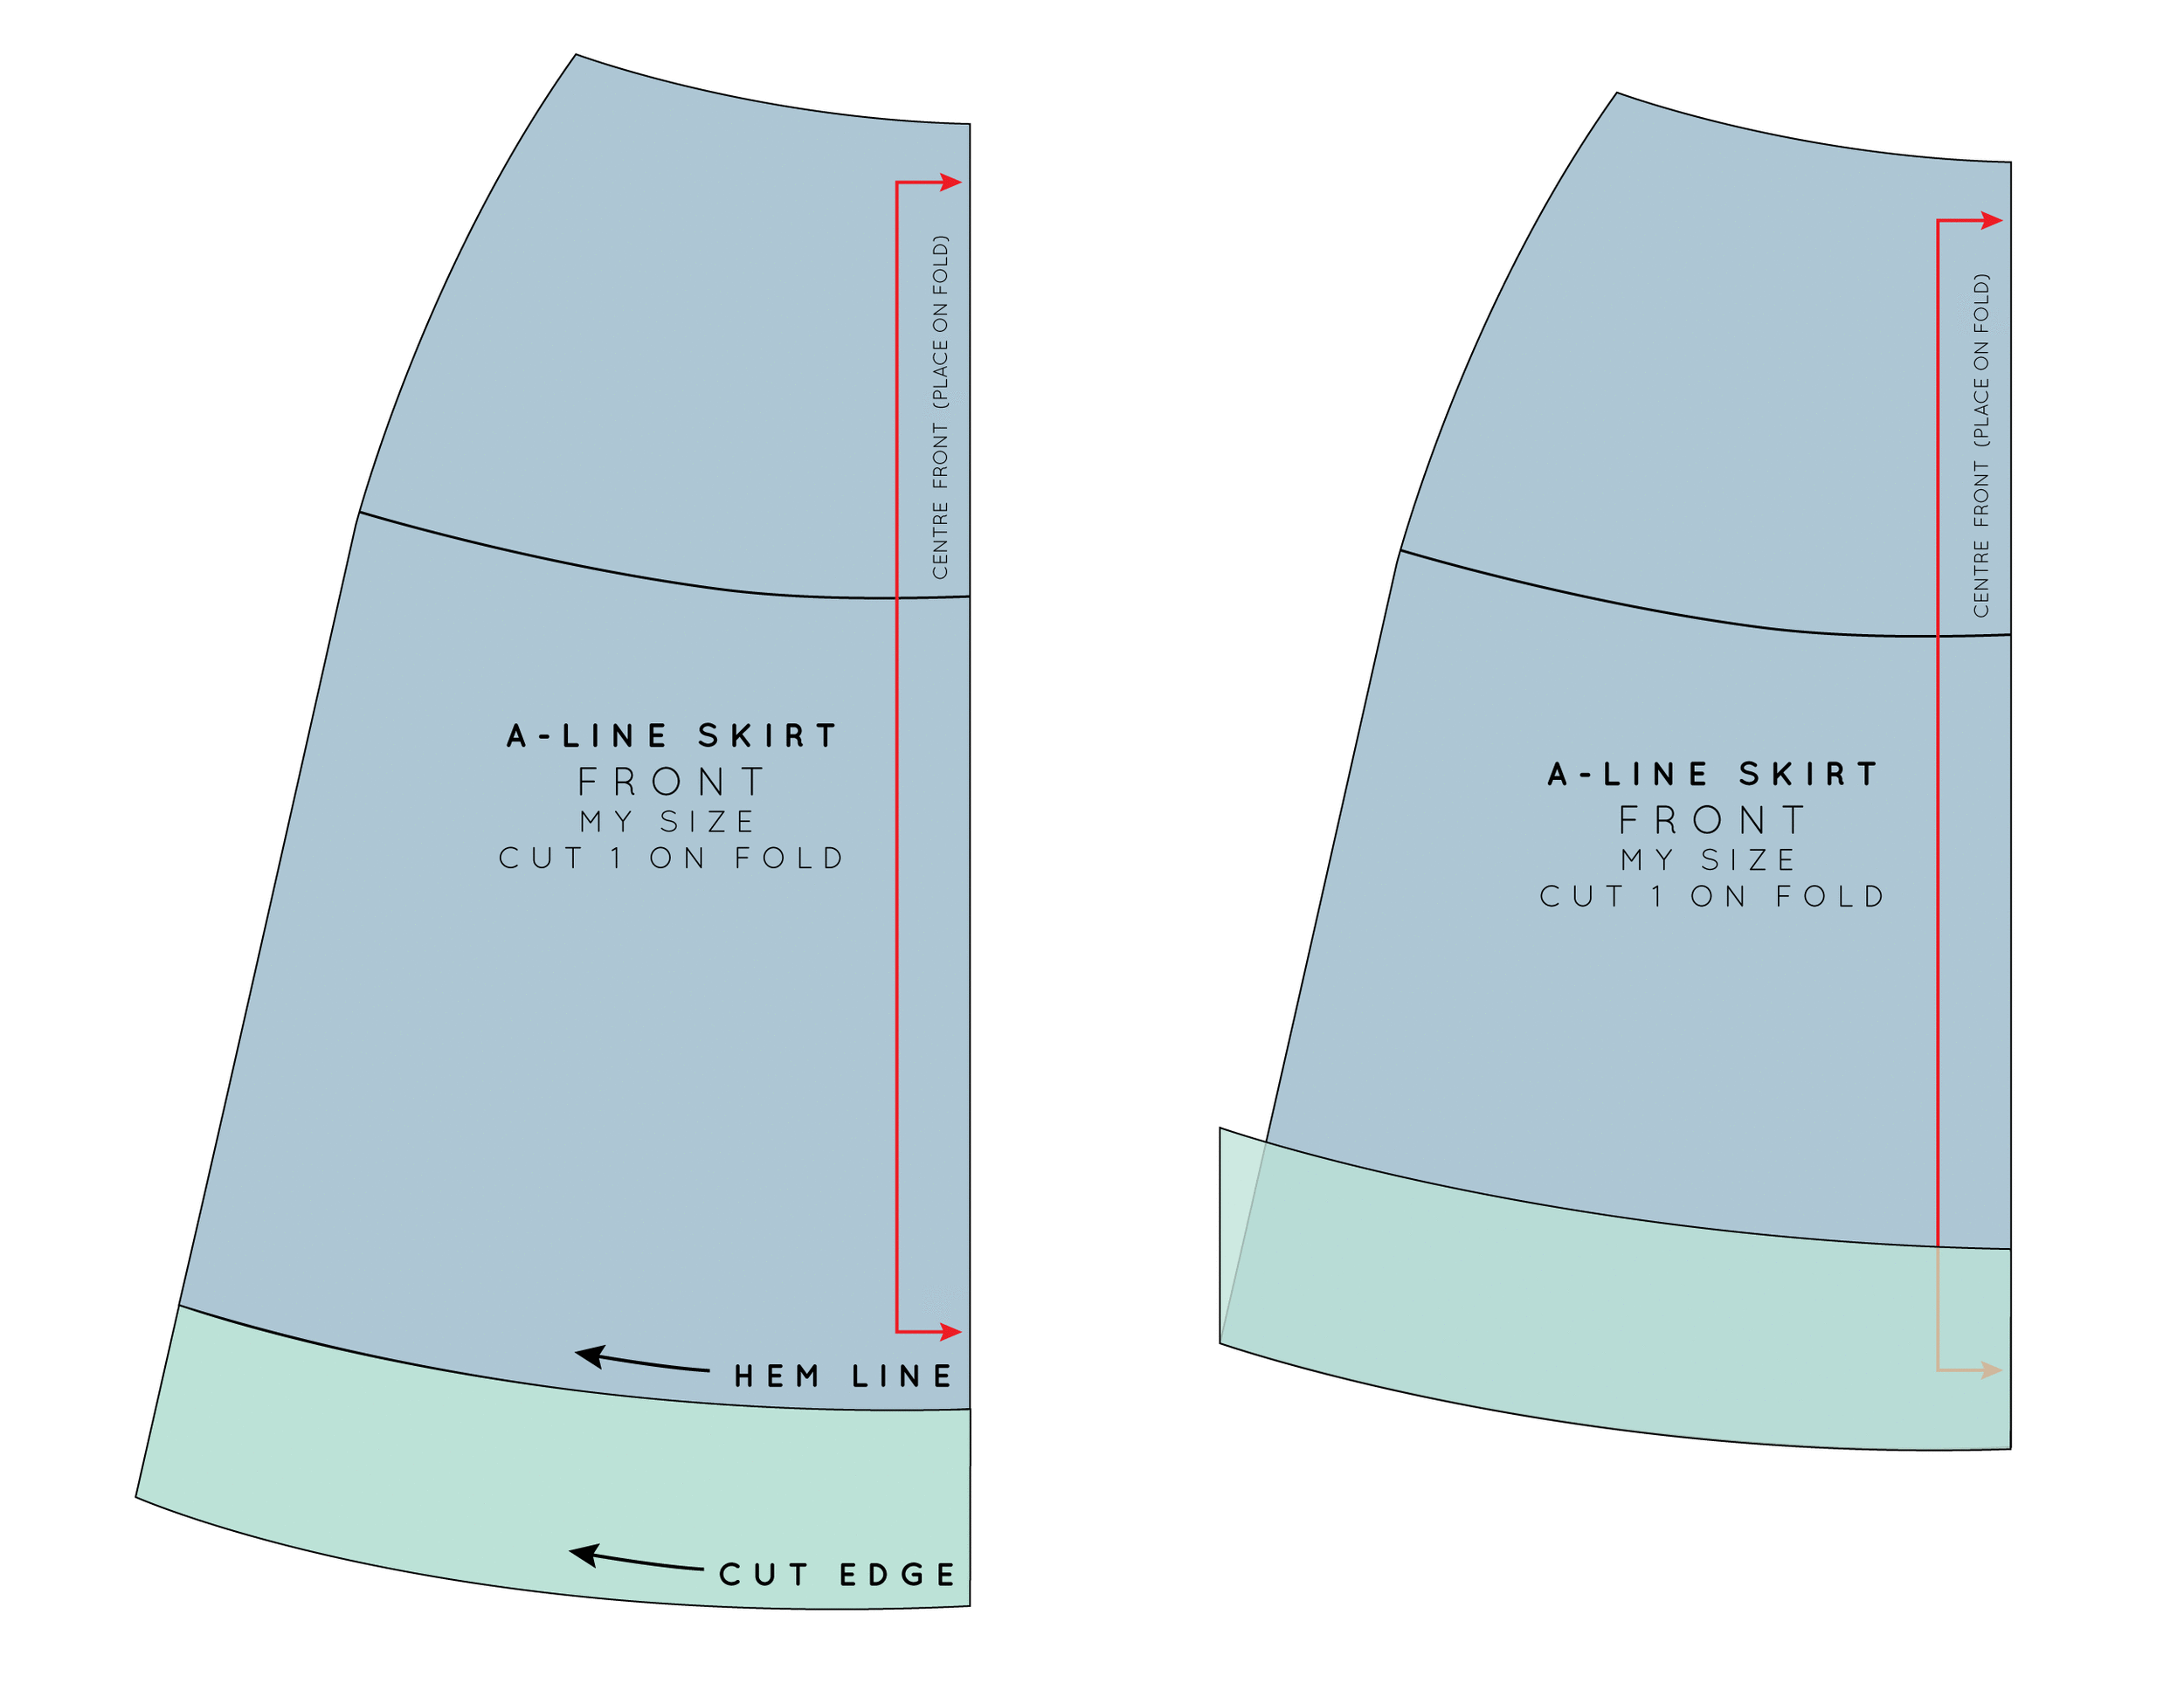
The reason you cannot simply add a hem allowance to a curved hemline (left hand image) by extending the pattern beyond the side seam and centre front, as you often would to create a hem, is that when you have a curved line, the circumference of the cut edge will become larger than the hemline. When you fold up the hem (right hand image), there will be too much fabric and the hem will be unable to sit flat.

To avoid this, you will need to create a separate pattern piece - a hem facing.

How to draft a hem facing

how_to_draft_a_hem_facing_4

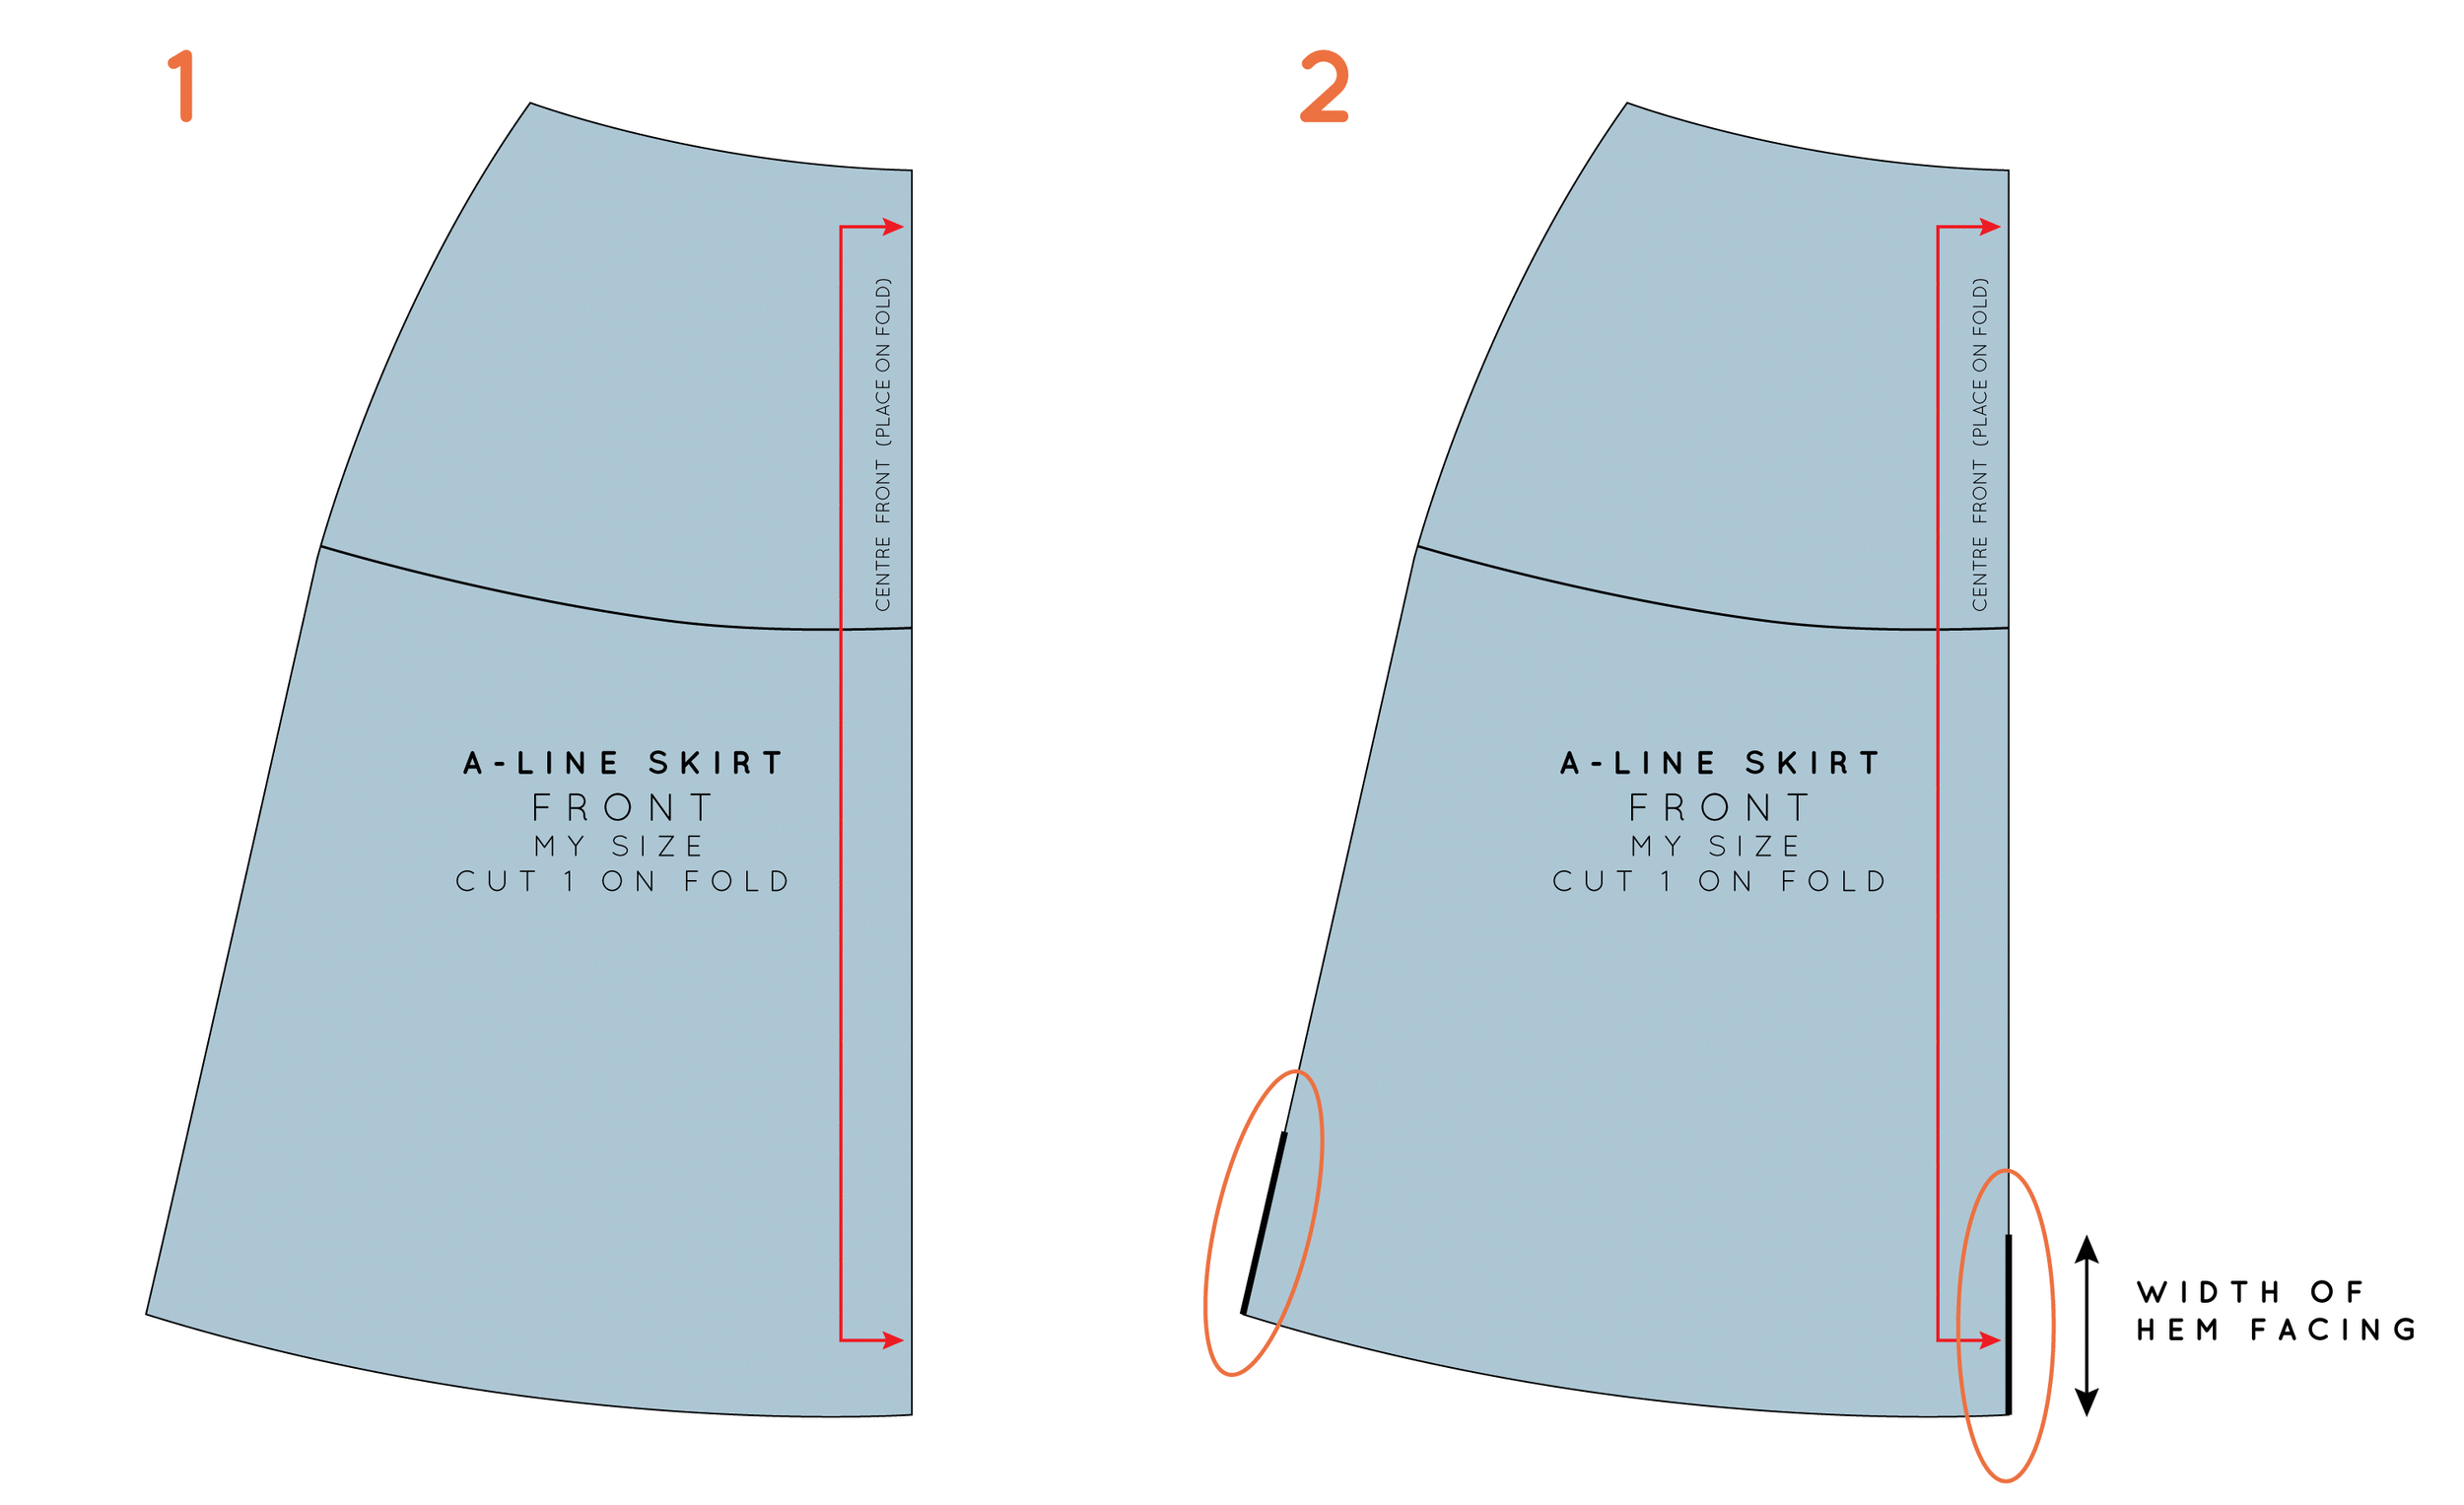
1. To get started, take the pattern you will be making a facing for. I am using the basic skirt block, that has been adapted to an A-line shape. You can find how to do this, by looking at this tutorial

The process is the same for the front and back patterns, so I will just use the front pattern piece for this example.

2. Decide how wide you would like the hem facing to be. Anything from 3 - 15cm (1 1/4in - 6in) is okay (this is obviously a very broad spectrum, which will depend on your design and the fabric you are using). If you want anything less than 3cm (1 1/4in), I would suggest using bias binding instead. If you are not sure of what width to use, have a look at your ready to wear clothes, to get an idea. 

Mark the width you would like your facing to be on the centre front, measuring up from the hemline. Mark this distance on the side seam too. 

how_to_draft_a_hem_facing_4

3. You will then need to mark the width of the facing at regular intervals between the centre front and side seam (every 10-15cm or so). Be sure to draw these lines perpendicular to the hemline.

4. Join the endpoints of all these lines with a smooth, sweeping curve. You have now created the shape of your waist shaping.

how_to_draft_a_hem_facing_5

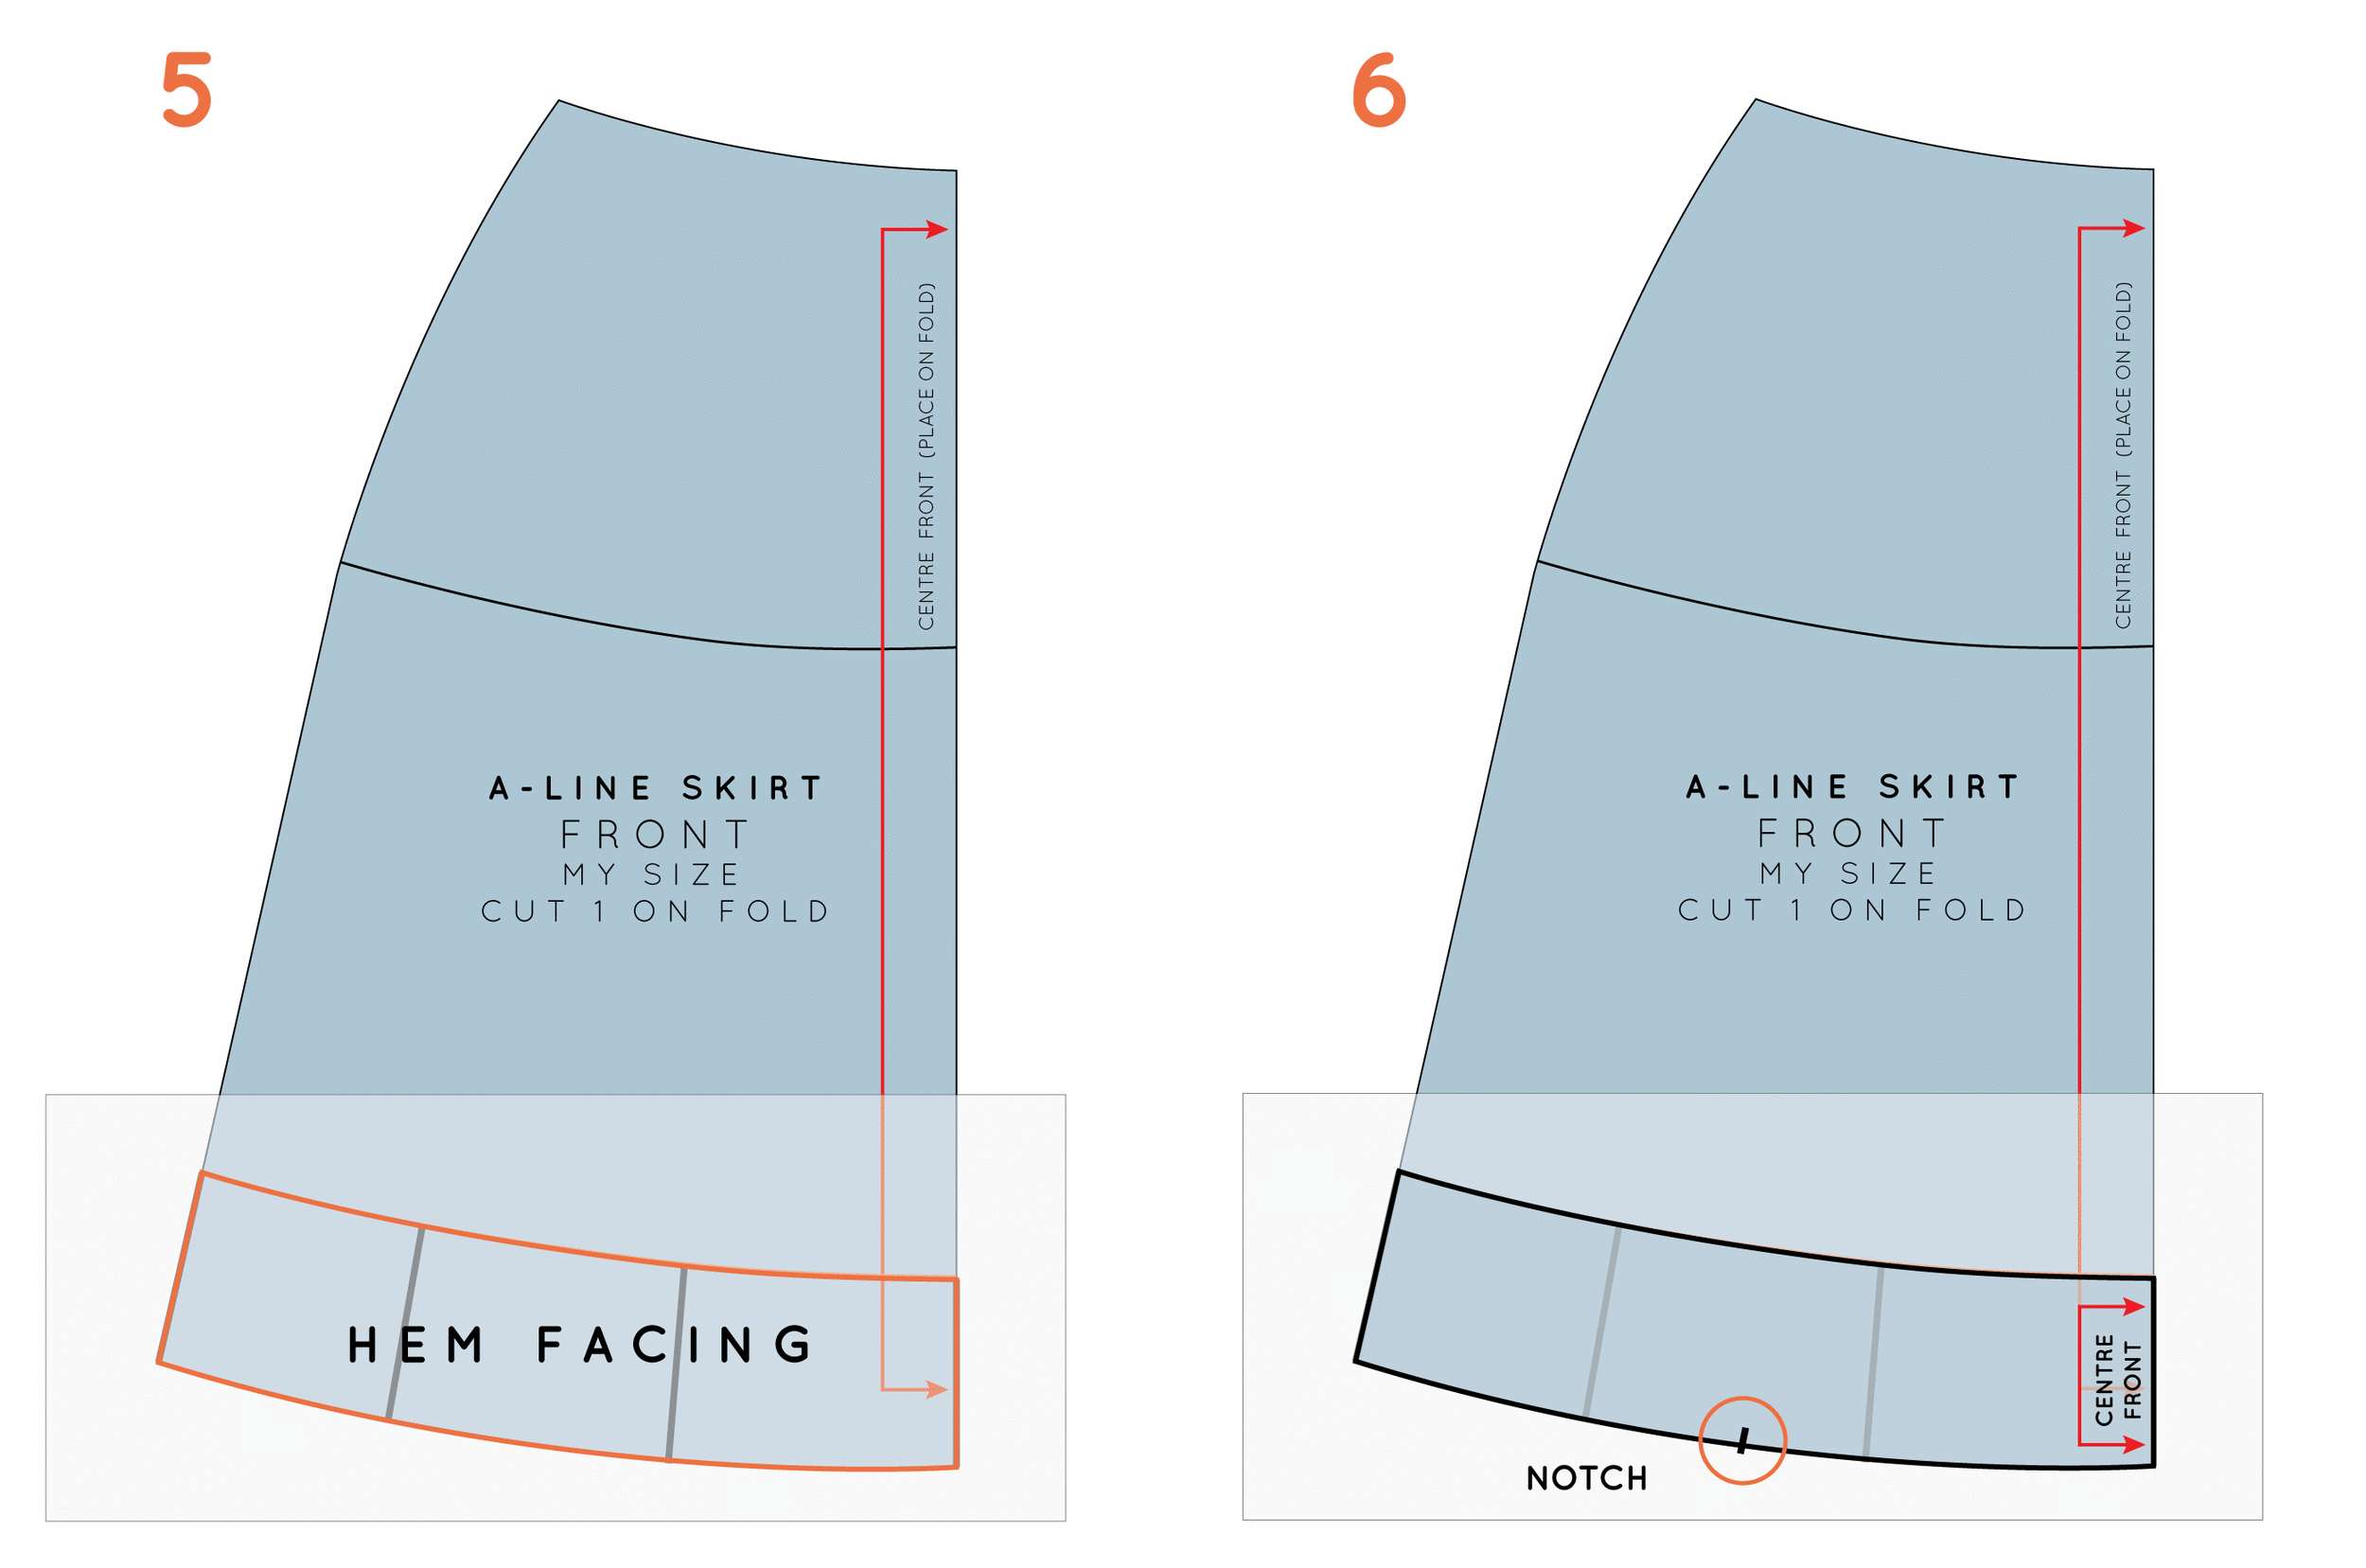
5. Take a seperate piece of pattern paper, and trace off the shape of the hem facing.

6. Before removing the tracing, mark a notch close to the centre of the hem curve (if you have a very wide hem, you may consider adding an extra notch or two), and transfer onto the skirt pattern with a tracing wheel. This will help when you are sewing the pieces together later (it is not crucial if you are making a narrow skirt, but if you are making a full circle skirt, then you will thank your past-self for being so diligent when notching the hemline!)

 Transfer the grainline onto the hem facing (which will be parallel to the centre front).

how_to_draft_a_hem_facing_6

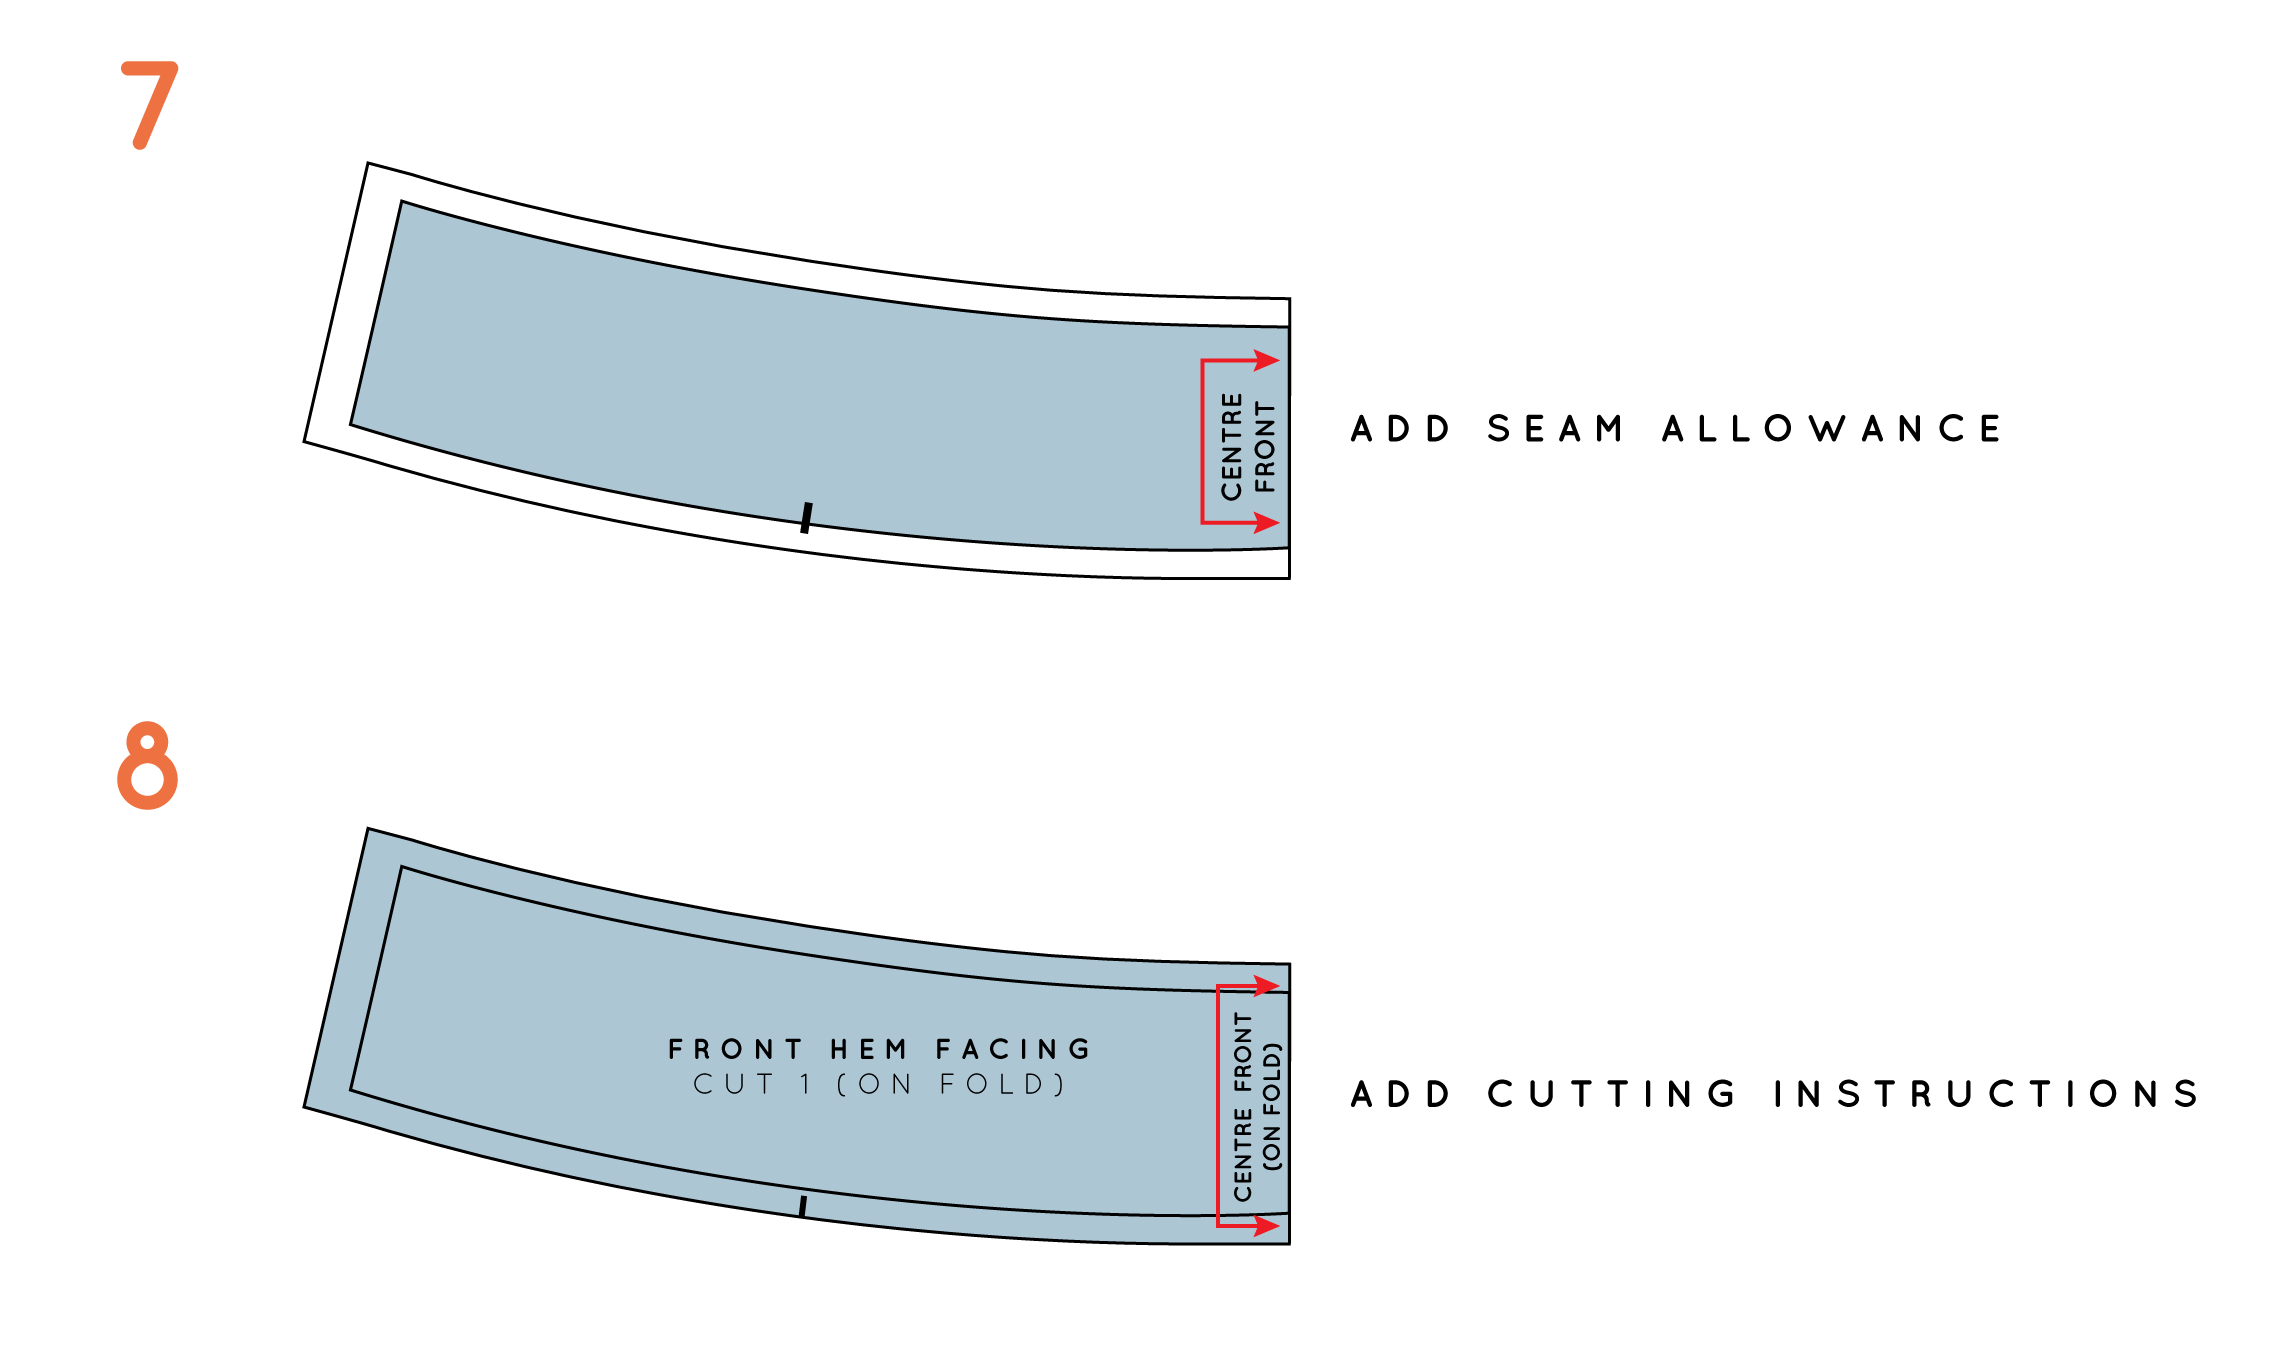
7. Add seam allowance to the body of the pattern (if you have not done so already), as well as the facing. I suggest 1cm (3/8in) along the long edges (the hem edge and the top edge) and 1.5cm (1/2in) on the side seam. You will not need seam allowance at the centre front, as the piece will be cut on the fold. For the back pattern piece, you can also cut on the fold, which will minimise bulk at the centre back seam. 

8. Add cutting instructions

Depending on the fabric, you may want to add interfacing to the pattern when you get to the cutting stage of the project - just keep this in mind.


You may also like:

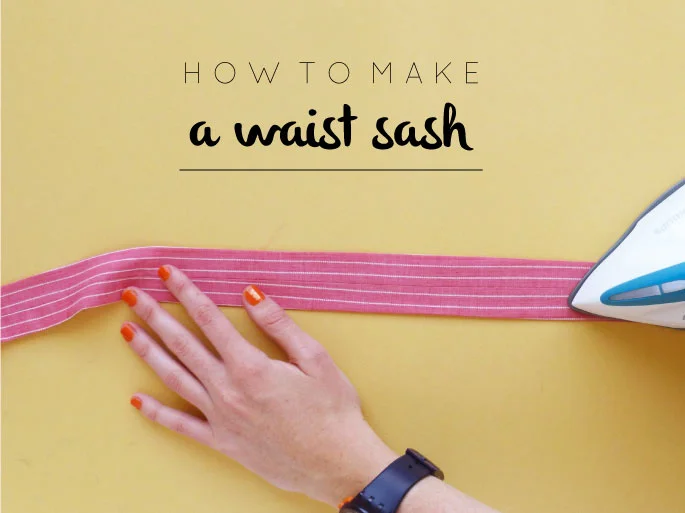
How to make a waist sash

how_to-make_a_waist_sash_1

Last week, we pretty much finished sewing our Rushcutters! All we've got to do now is create a the waist sash (if you want a waist sash for your Rushcutter. It's totally optional!) 

Creating a waist sash is a really simple way to totally transform a silhouette. I decided to include a waist sash in the Rushcutter pattern to give sewers more options for their pattern.

If you haven't got the pattern, don't worry, keep reading, I'll tell you what measurements I used so you can make a waist sash for any pattern you like!

Drafting the pattern

First, you will need to consider how wide you would like your sash to be.  As a guide, the waist sash on the Rushcutter is 3.5cm wide.

Then you need to think about how long you would like your sash to be. Remember, you will need quite a bit of extra length for the bow. Consider tying some string or ribbon around your waist to work out how much extra you will need. For the Rushcutter, I took the waist measurement and added 1.15m for the tie. Sounds like a lot, but you really do need it!

Once you have your measurements, you can draft the pattern (or draw straight onto the fabric with tailor's chalk). Draw a rectangle DOUBLE the width of your finished waist sash and HALF the length of your finished sash. 

Add seam allowance (I went for 1cm, but this is up to you) to all sides. If you would prefer not to have a seam in the centre back, just add seam allowance to three sides (2 long sides and 1 short) and then write 'place on fold' on the side that doesn't have seam allowance.

Draw a line that cuts the pattern piece in half horizontally that will be your grainline and fold line.

Sew the sash

Take the two WAIST SASH pieces (from The Rushcutter pattern or the pieces you drafted) that you have cut and, with right sides together, join them together at the centre back with a 1cm (3/8in) seam allowance. Once stitched, press the seam open. 

how_to-make_a_waist_sash_3

With right sides together, fold the sash in half length ways and press. Pin along the long edge and stitch with a 1cm (3/8in) seam allowance. 

how_to-make_a_waist_sash_4

Use your fingers to roll the seam so that it is in the centre of the tube. Press the seam allowance open.

how_to-make_a_waist_sash_5

Turn back both short ends of the tube by 1cm (3/8in) and press.

TURN THE SASH

how_to-make_a_waist_sash_6

Take a safety pin or bodkin and attach it to one side of one of the short ends of the tube.

how_to-make_a_waist_sash_7

Feed the safety pin through the tube to turn the right side out. Press flat. 

how_to-make_a_waist_sash_8

Enclose the short ends of the sash, by stitching nice and close to the edge. Alternative, you could consider sewing by hand (with a slip stitch) to finish the ends invisibly.

Give the dress one final press and you are done!

The Rushcutter sew-along: The finishing touches

finishing-touches_the_rushcutter_1.jpg

So we are almost there! By now your Rushcutter should be really be looking like a dress. All we have got left to do is to finish the neckline and do the hems.

Finishing the neckline

Now that the zip is done, you can finish the neckline.

finishing-touches_the_rushcutter_2

With the dress inside out, fold the binding to the inside of the dress, rolling the seam line slightly towards the inside too. Make sure the raw edge is folded under, and press in place.

finishing-touches_the_rushcutter_3

Pin the binding around the neckline, using your fingers to smooth out the binding.

finishing-touches_the_rushcutter_4

When you reach the zip, make sure that the short edge of the binding sits a few milimetres away from the zip teeth. 

finishing-touches_the_rushcutter_5

Stitch along the edge of the binding. Press to remove any wrinkles.

Hem the sleeves

finishing-touches_the_rushcutter_7

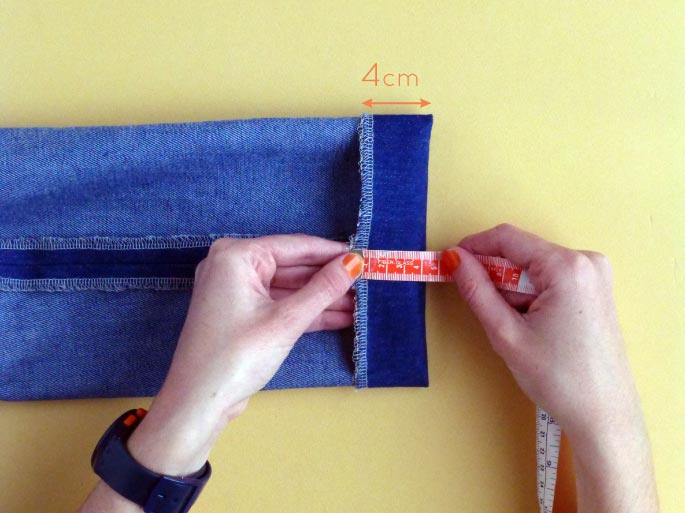
With the neck done, move onto the sleeve hem. With the dress still inside out, fold back each sleeve hem by 4cm (1 1/2in). Press and pin in place. 

finishing-touches_the_rushcutter_8

Stitch the hem in place, by stitching close to the edge. 

Prepare the hem facing

finishing-touches_the_rushcutter_9

Take the FRONT and BACK HEM FACING and, with right sides together, pin them together at the side seams. Stitch with a 15mm (5/8in) seam allowance. These seams will be enclosed in the hem, so do not need to be finished.

finishing-touches_the_rushcutter_10

Press both seams open.

finishing-touches_the_rushcutter_11

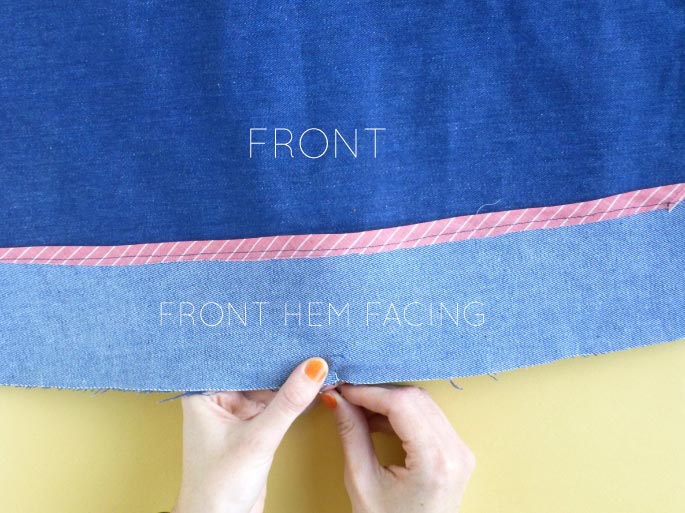
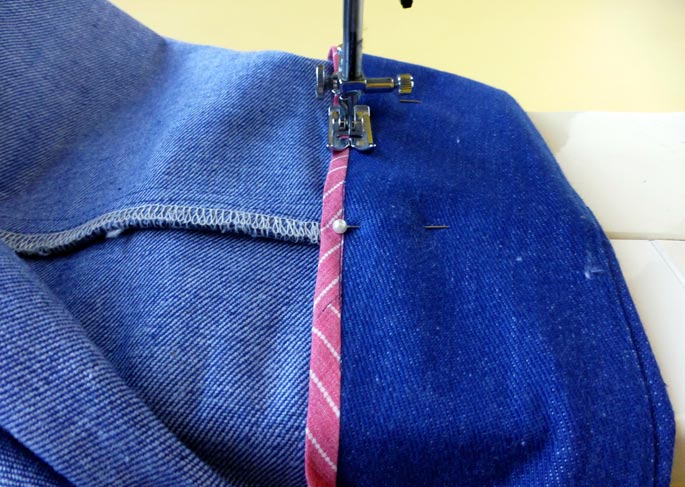
Finish the top edge of the facing (the edge that will not be attached to the hem of the dress). Consider using a contrasting binding for an interesting inner detail. 

Attach the hem facing

finishing-touches_the_rushcutter_12

Pin the hem facing to the dress, with right sides together. Start at the centre front notch and work way around the facing, matching each seam line with the corresponding notch. Stitch with a 1cm (3/8in) seam allowance.

finishing-touches_the_rushcutter_13

Trim back the seam allowance of your hem facing, to minimise bulk in the hemline.

finishing-touches_the_rushcutter_14

Lay the seam flat and, with the seam allowances pushed towards the hem facing, understitch the seam allowances to the facing.

finishing-touches_the_rushcutter_15

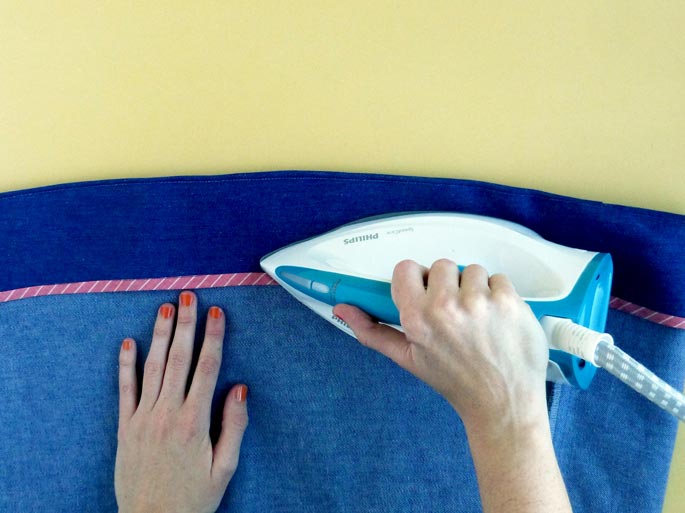
Turn the hem facing to the inside of the dress, being sure to roll the seam line slightly to the inside, and press.

finishing-touches_the_rushcutter_16

Stitch the hem in place, by hand or machine, close to the end of the facing.

Give the dress one final press and you're done! Wooohooo! 


You may also like: