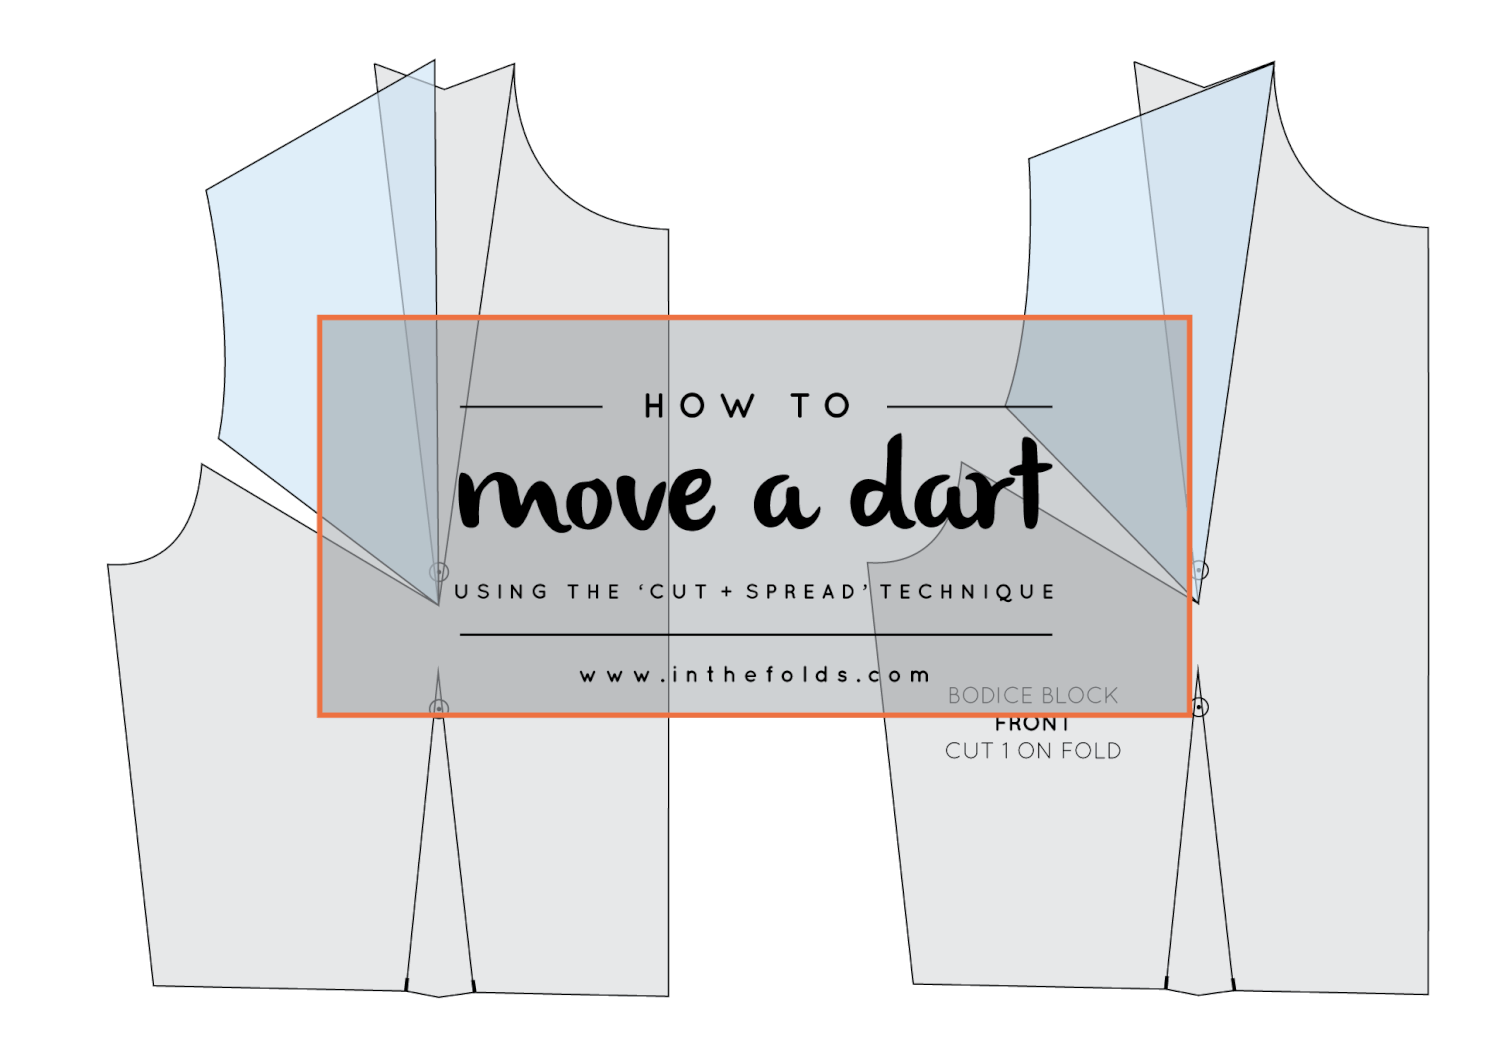
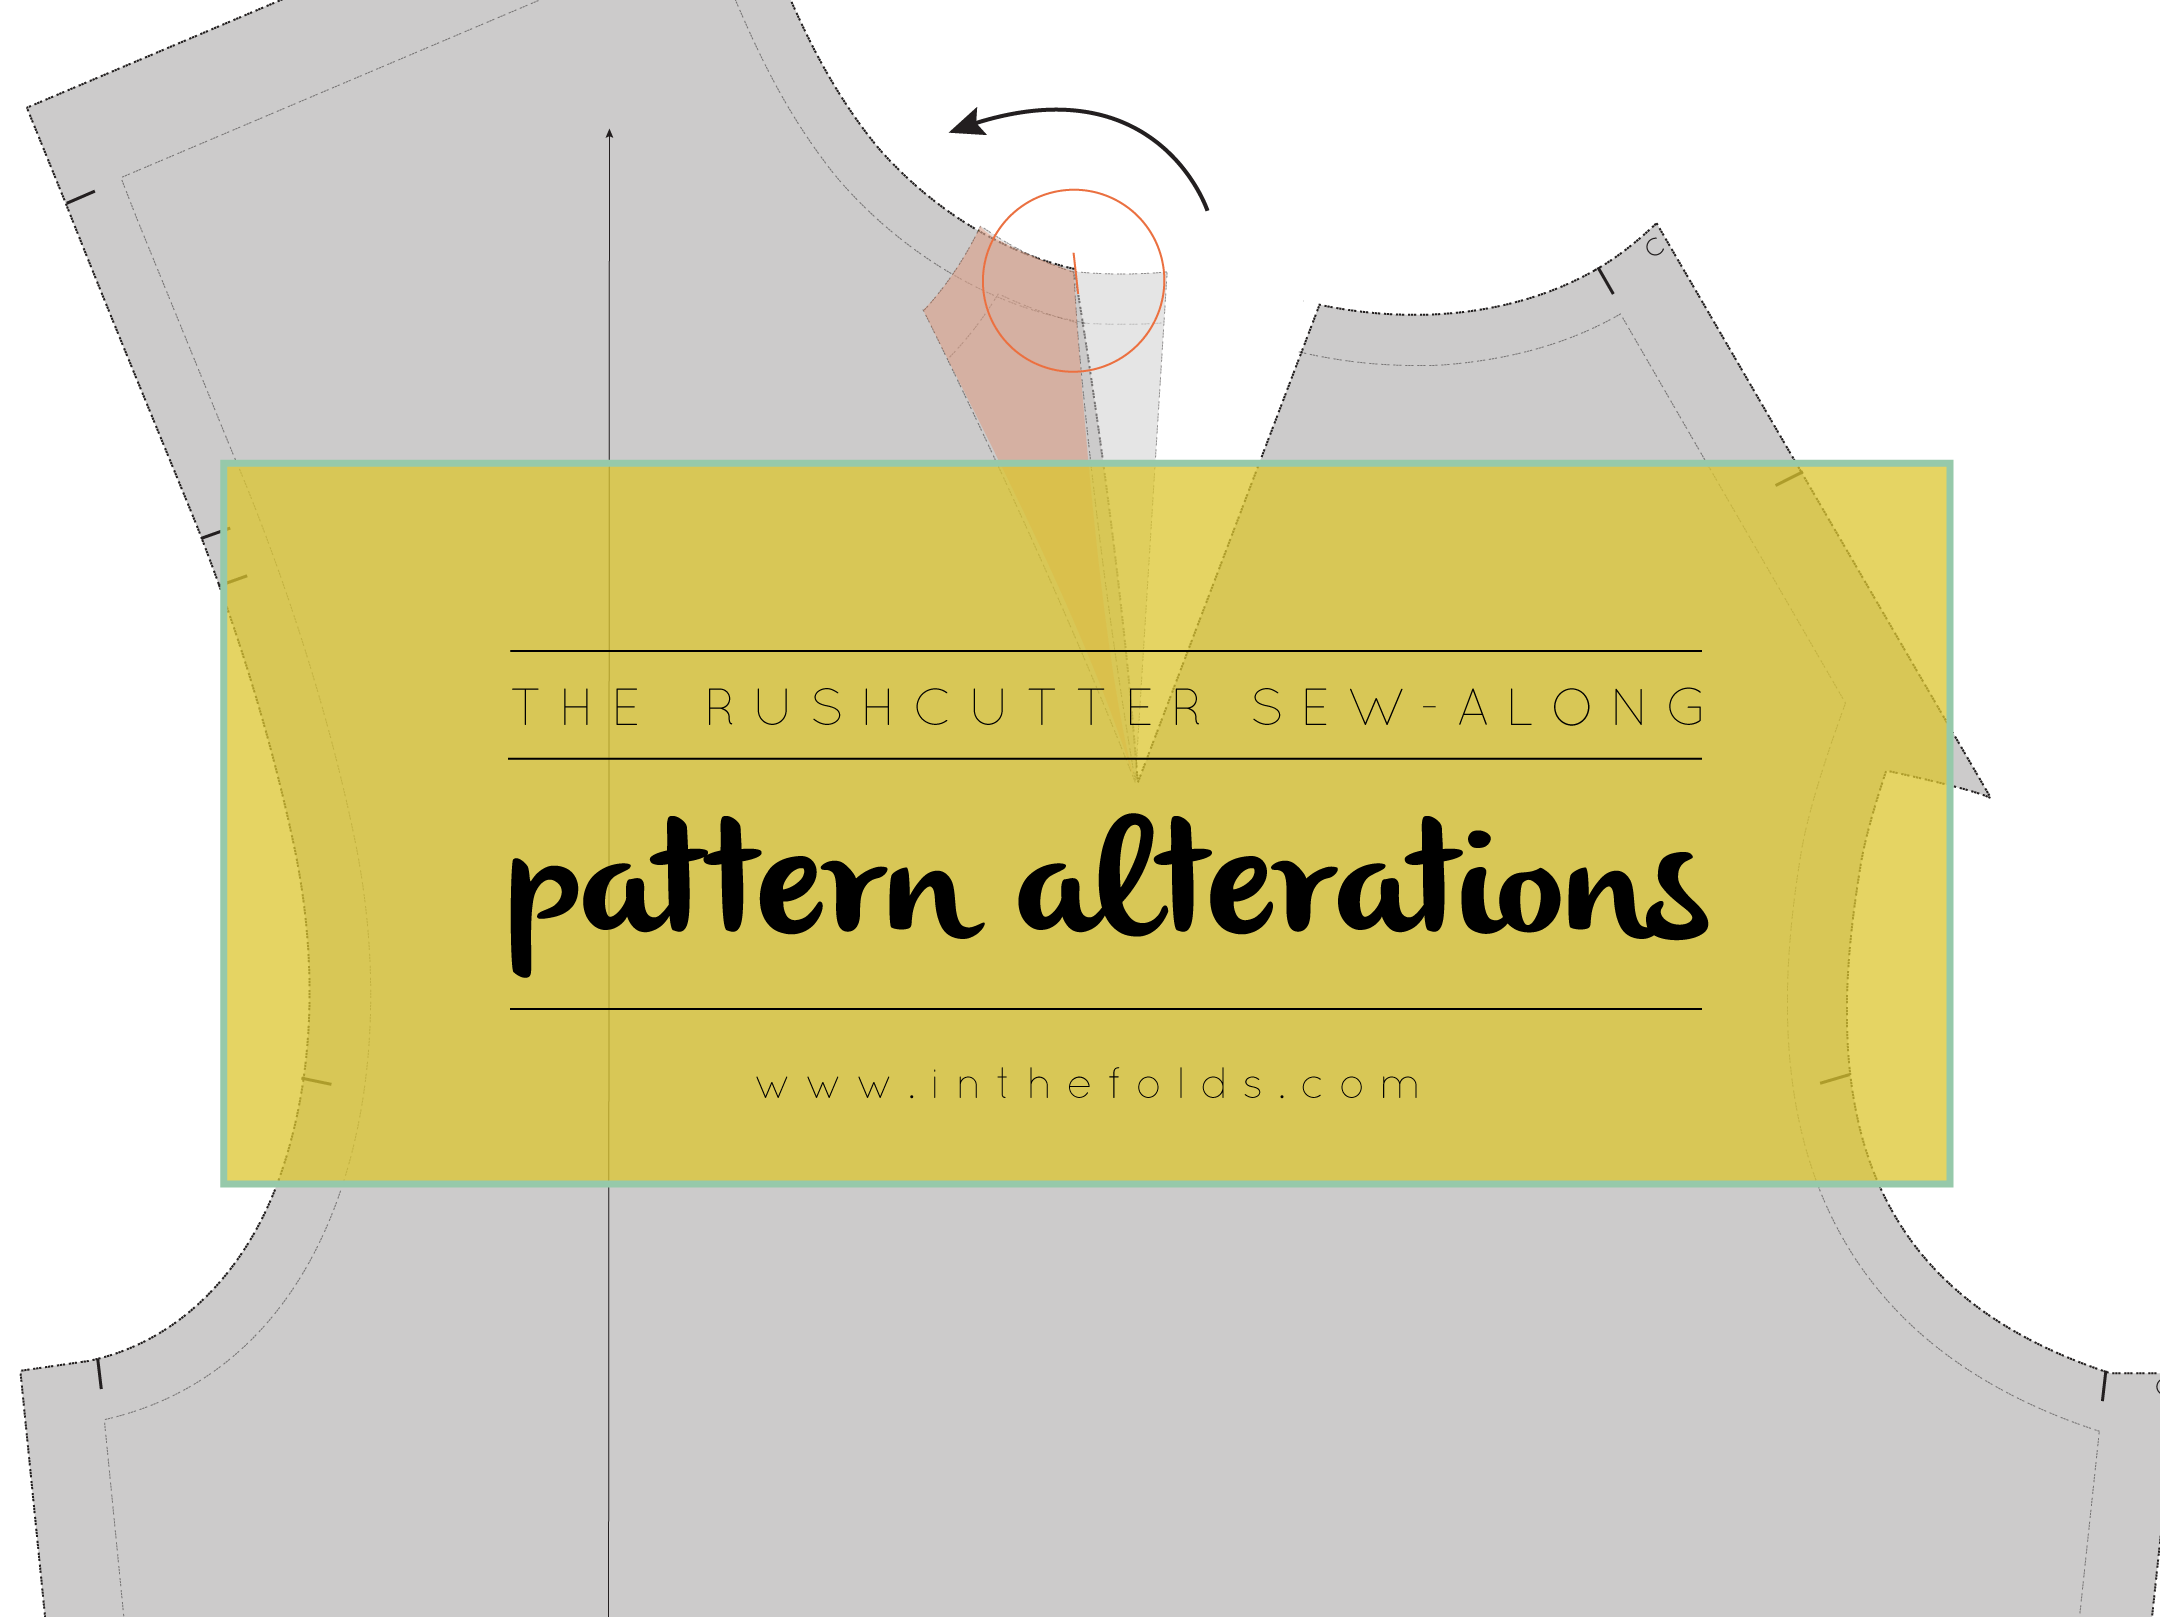
Last week I showed you how to relocate a dart using the 'Cut and Spread Technique.' As the title suggests, this technique involves cutting your pattern piece to move the dart (and can also be used to add fullness to a pattern).
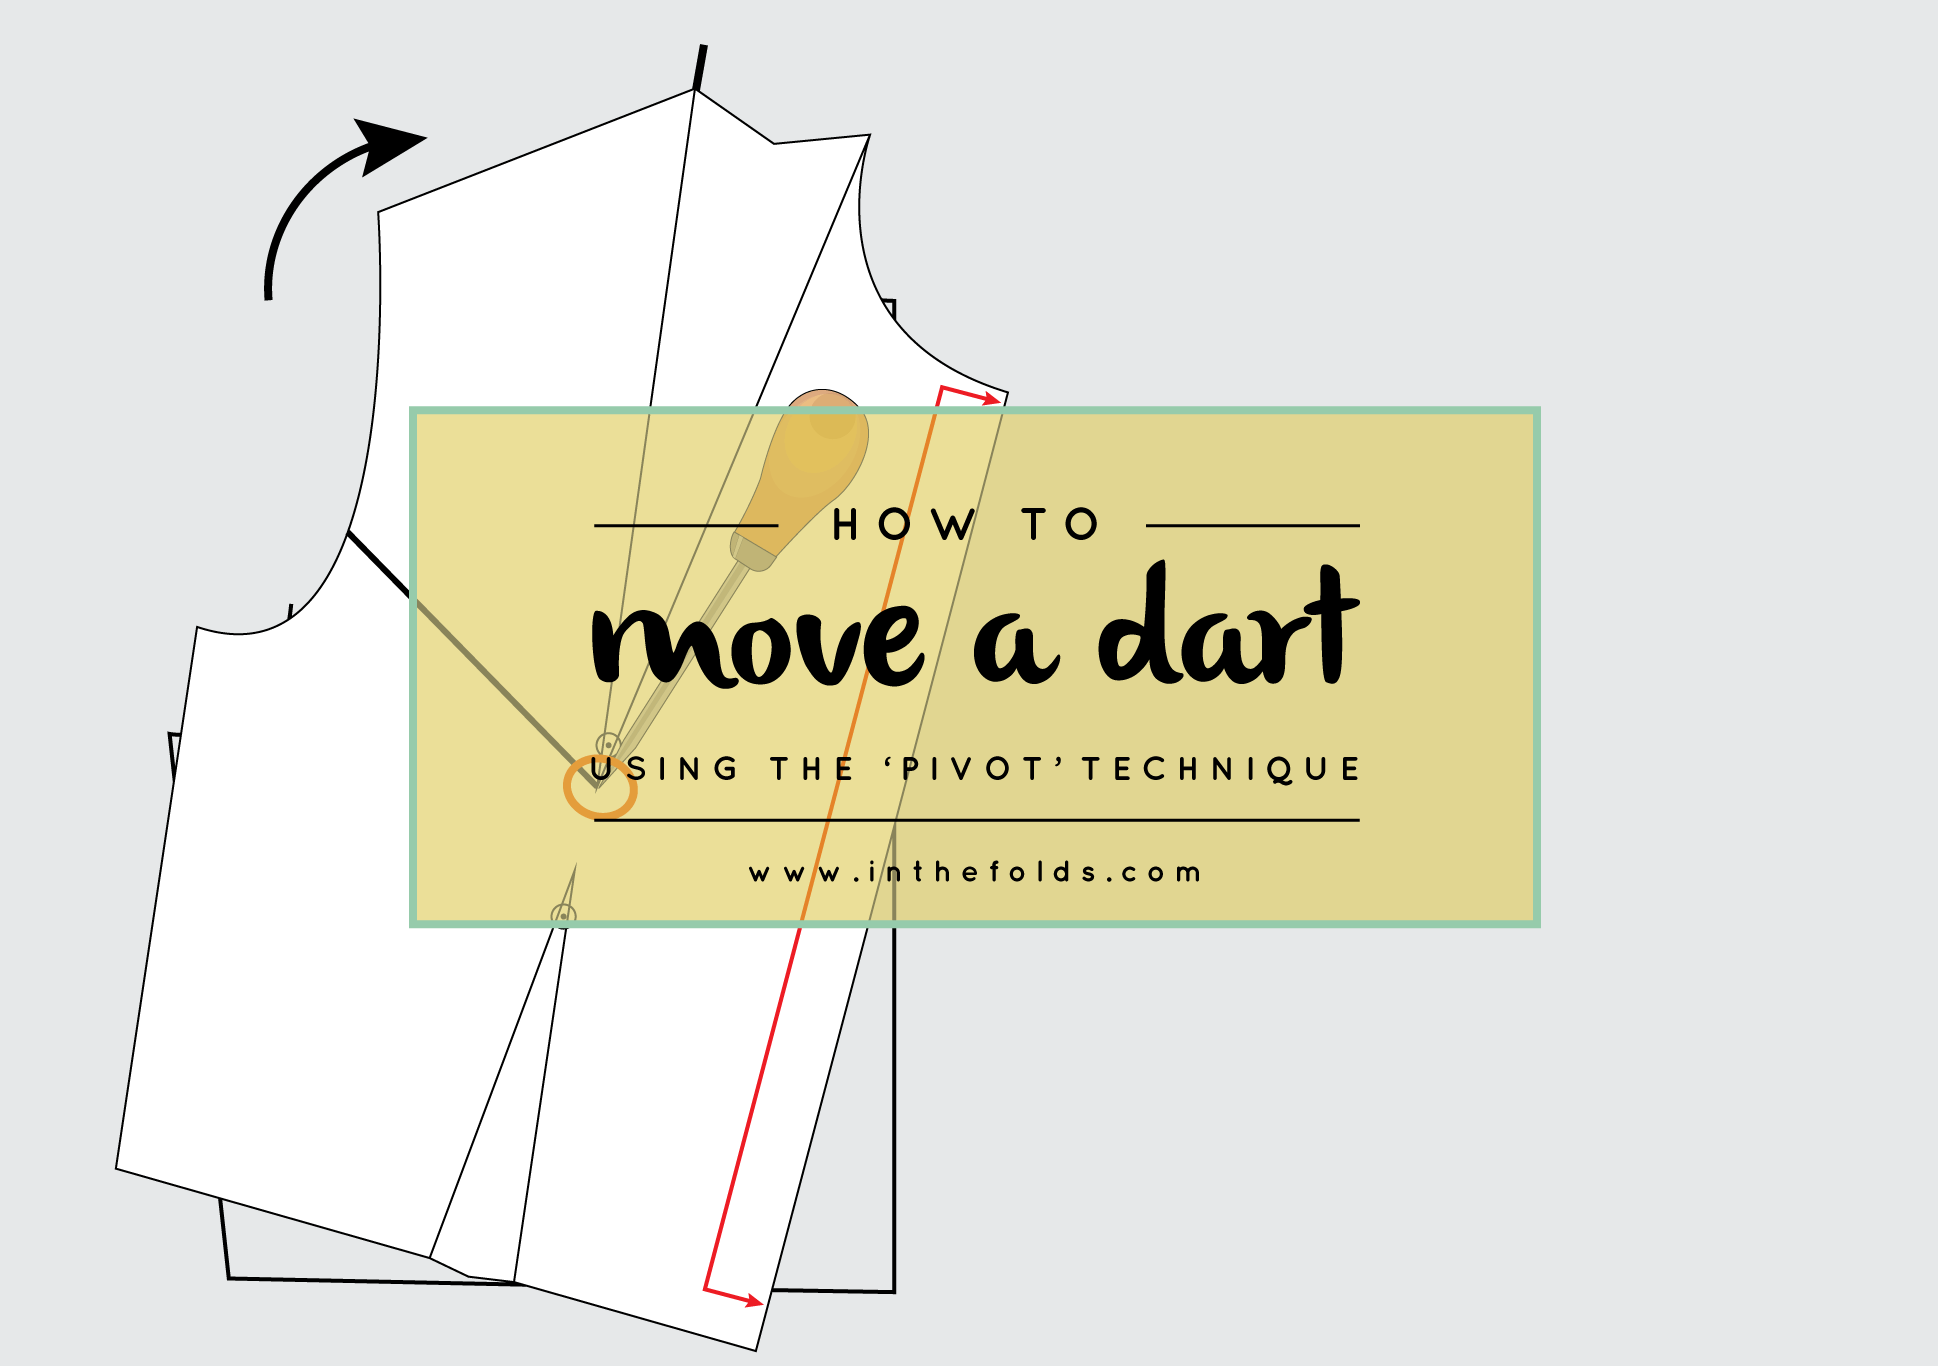
If you would prefer not to cut into your pattern (because it is a master copy, or you want to just experiment before finalising anything) it is a good idea to use the 'pivot' technique to move a dart. The outcome is exactly the same, it's just a different way of achieving it. I use both techniques in practice and it totally depends on what I am doing as to which one I choose to use.
Tools
To perform this techniques you will need your original pattern (the basic bodice, for example), a seperate piece of pattern paper, a stiletto (also known as an awl) and a pencil.
Choose the new dart position
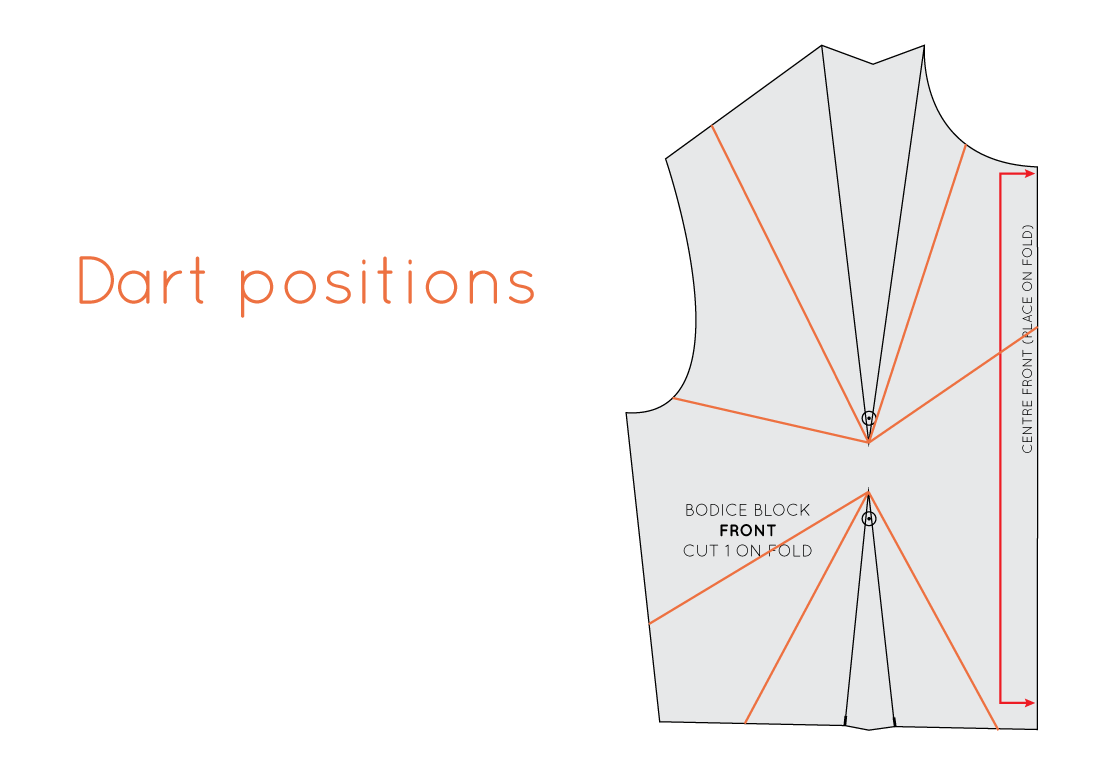
Have a think about where you would like to move your dart/s to. In the image above you can see some suggestions about where you could move the darts to on the front basic bodice.
For the point of the exercise I have chosen to move the shoulder dart to the armhole but you can use this process to move either dart anywhere.
Mark the new dart position
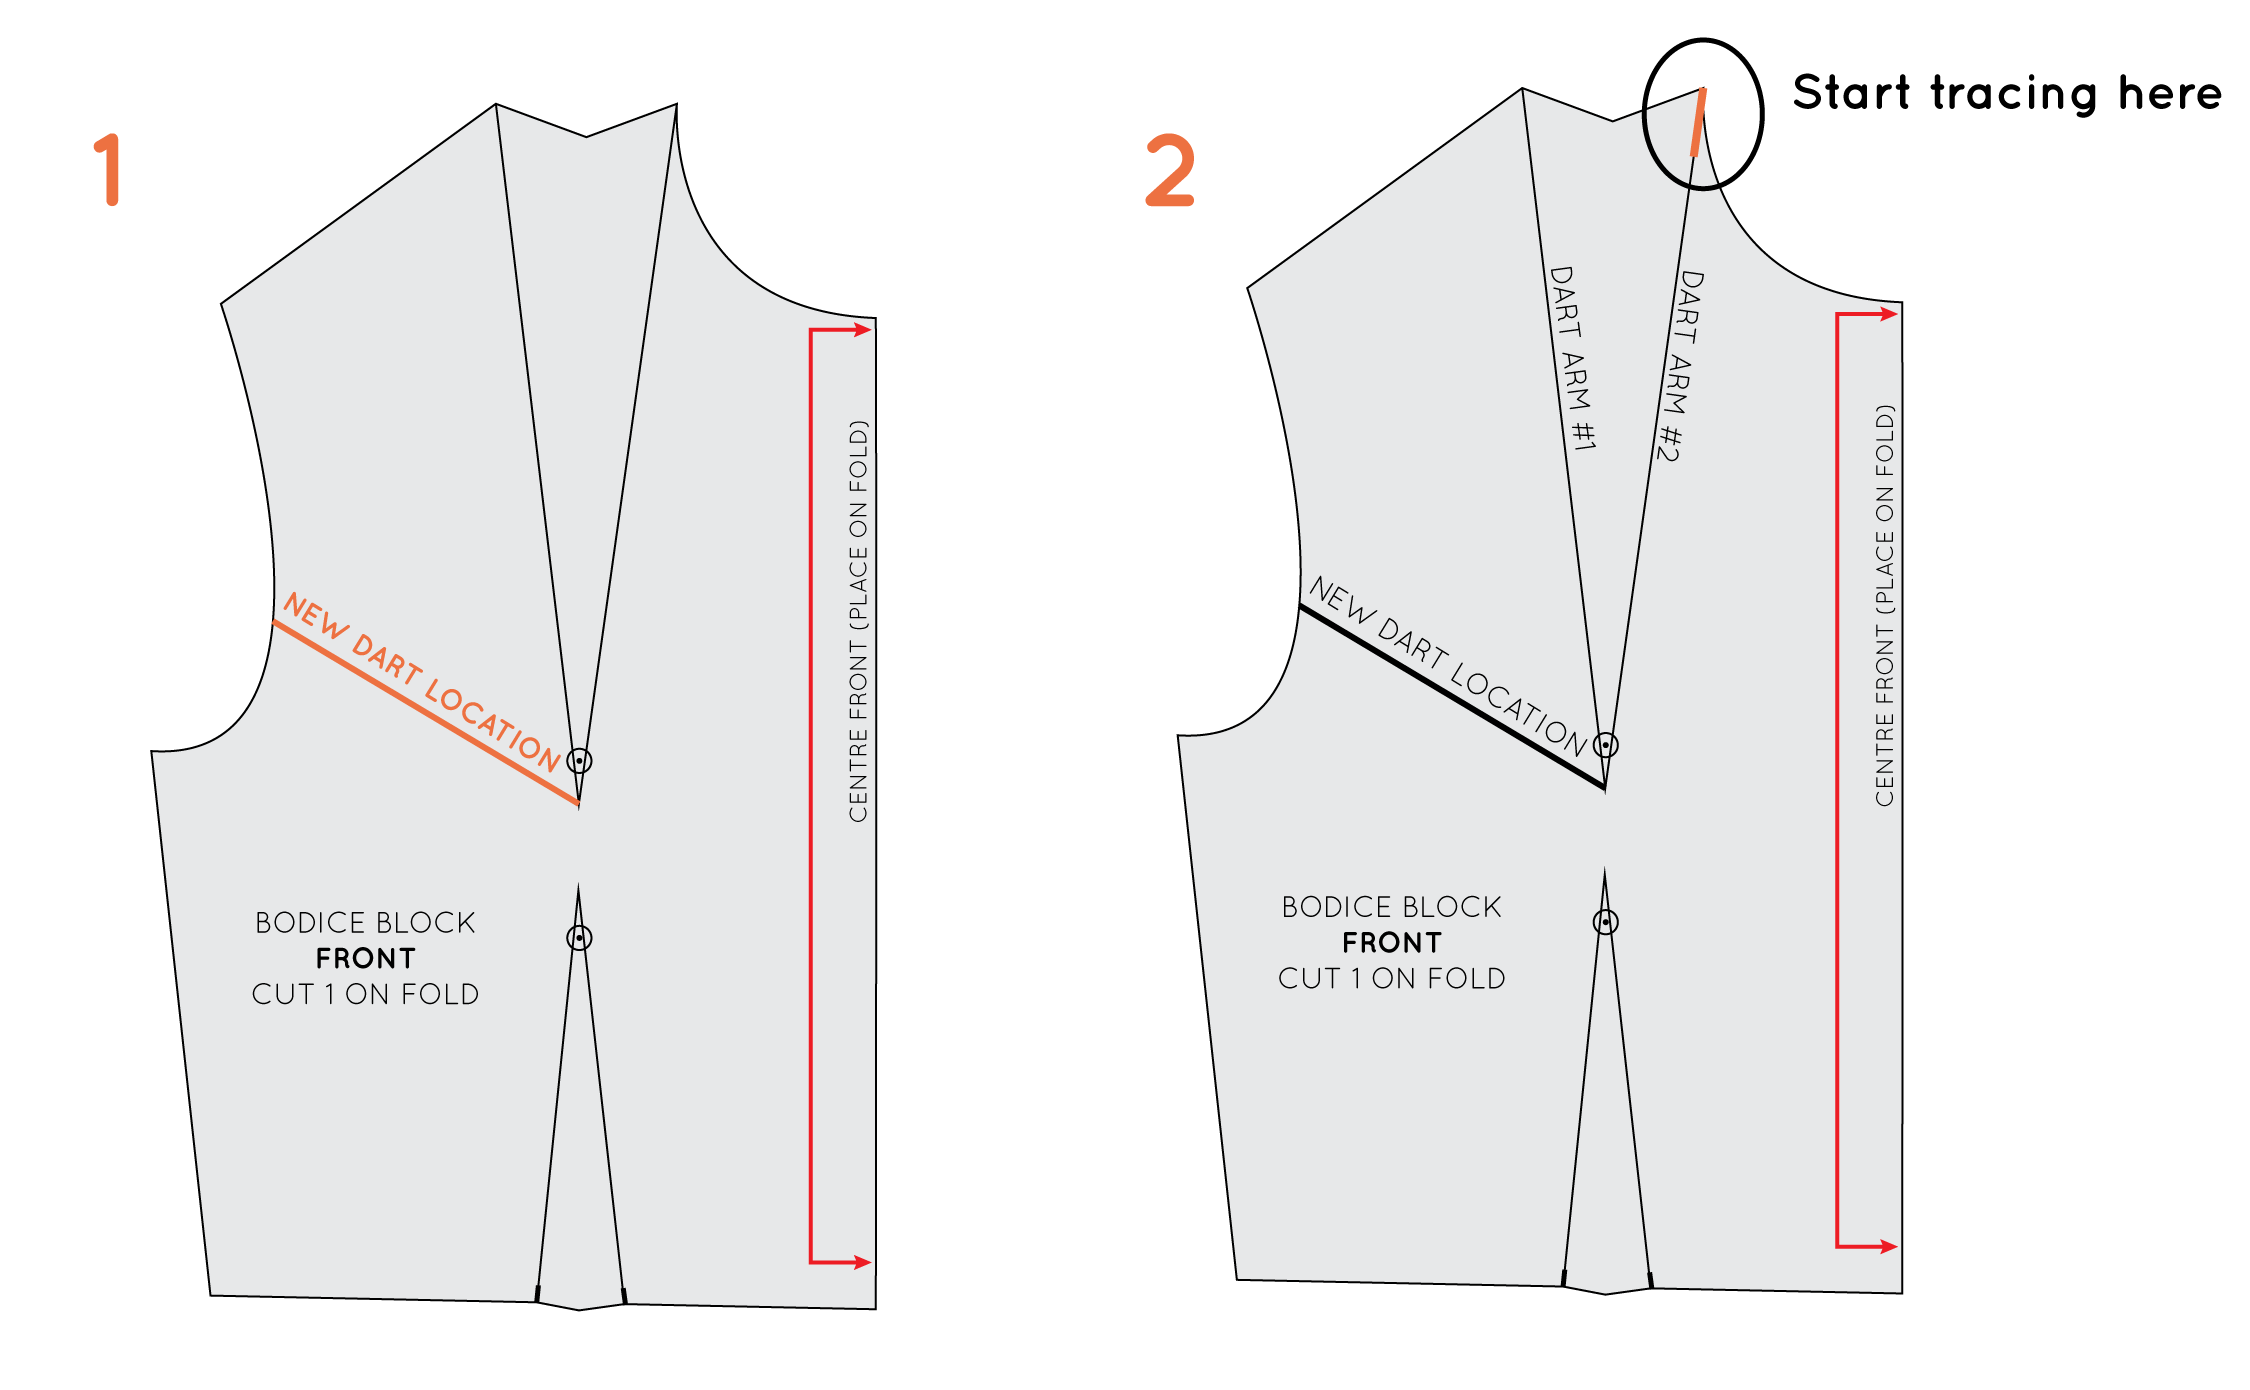
1. Draw a line where you would like your new dart to be placed. The dart point will need to be at the same point as the original dart.
2. Place the pattern onto a piece of pattern paper and hold in place with a pattern weight. Focus on the dart you are moving (which in this case is the shoulder dart) and the dart arm closest to the centre front - this is the point where you will start tracing around the pattern. I have labeled the dart arms 'Dart Arm #1' and 'Dart Arm #2' to help with the explanation.
Trace the original pattern
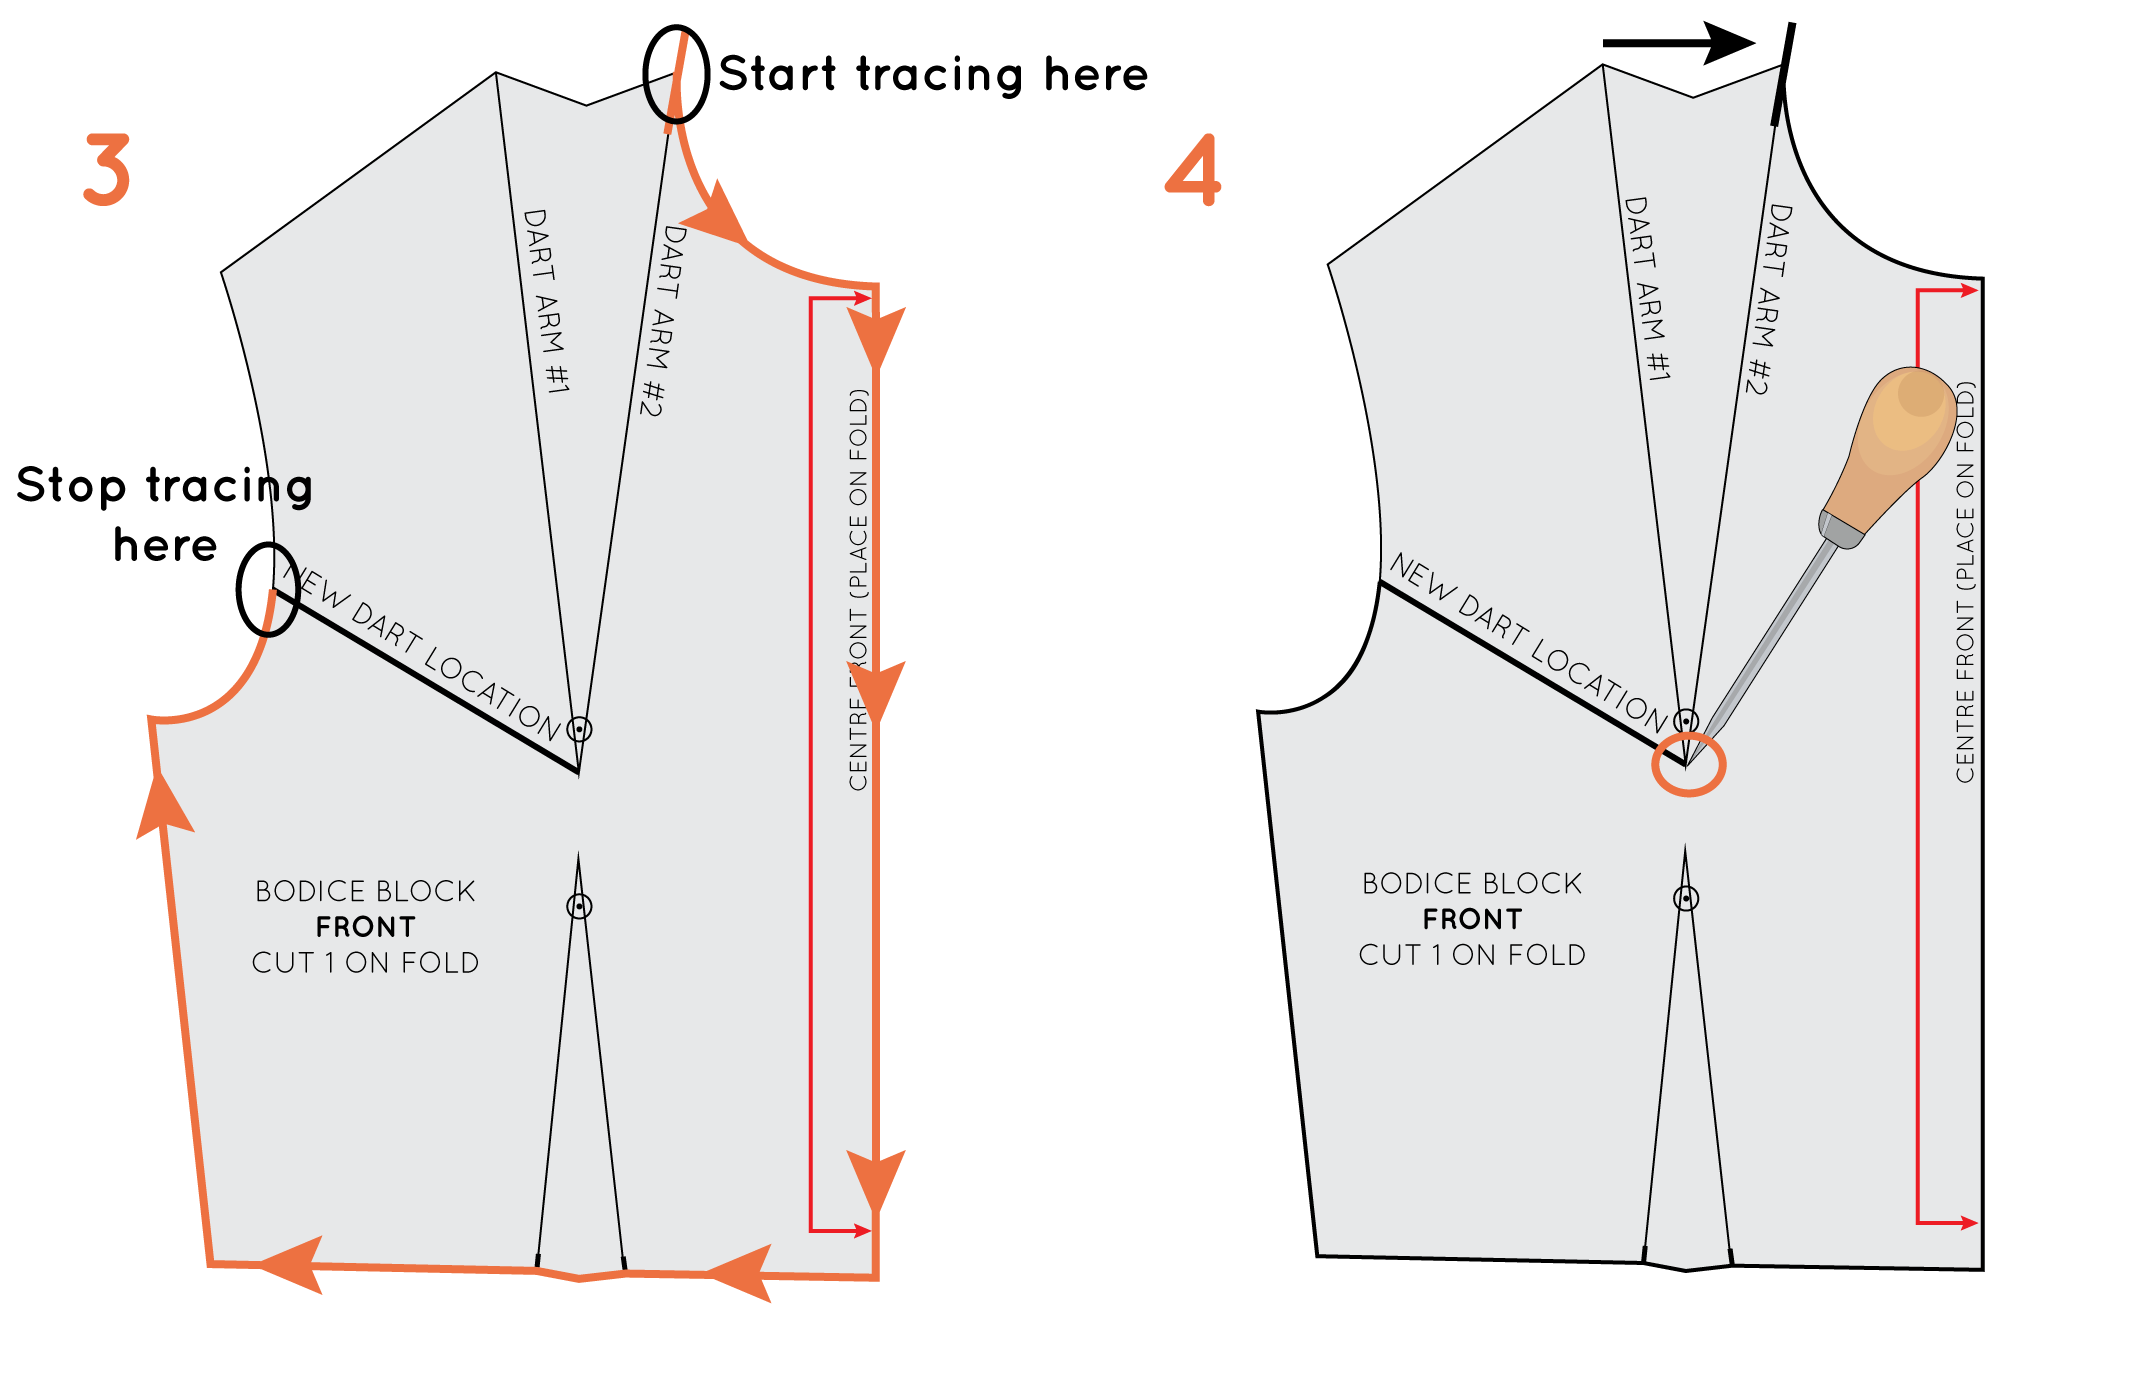
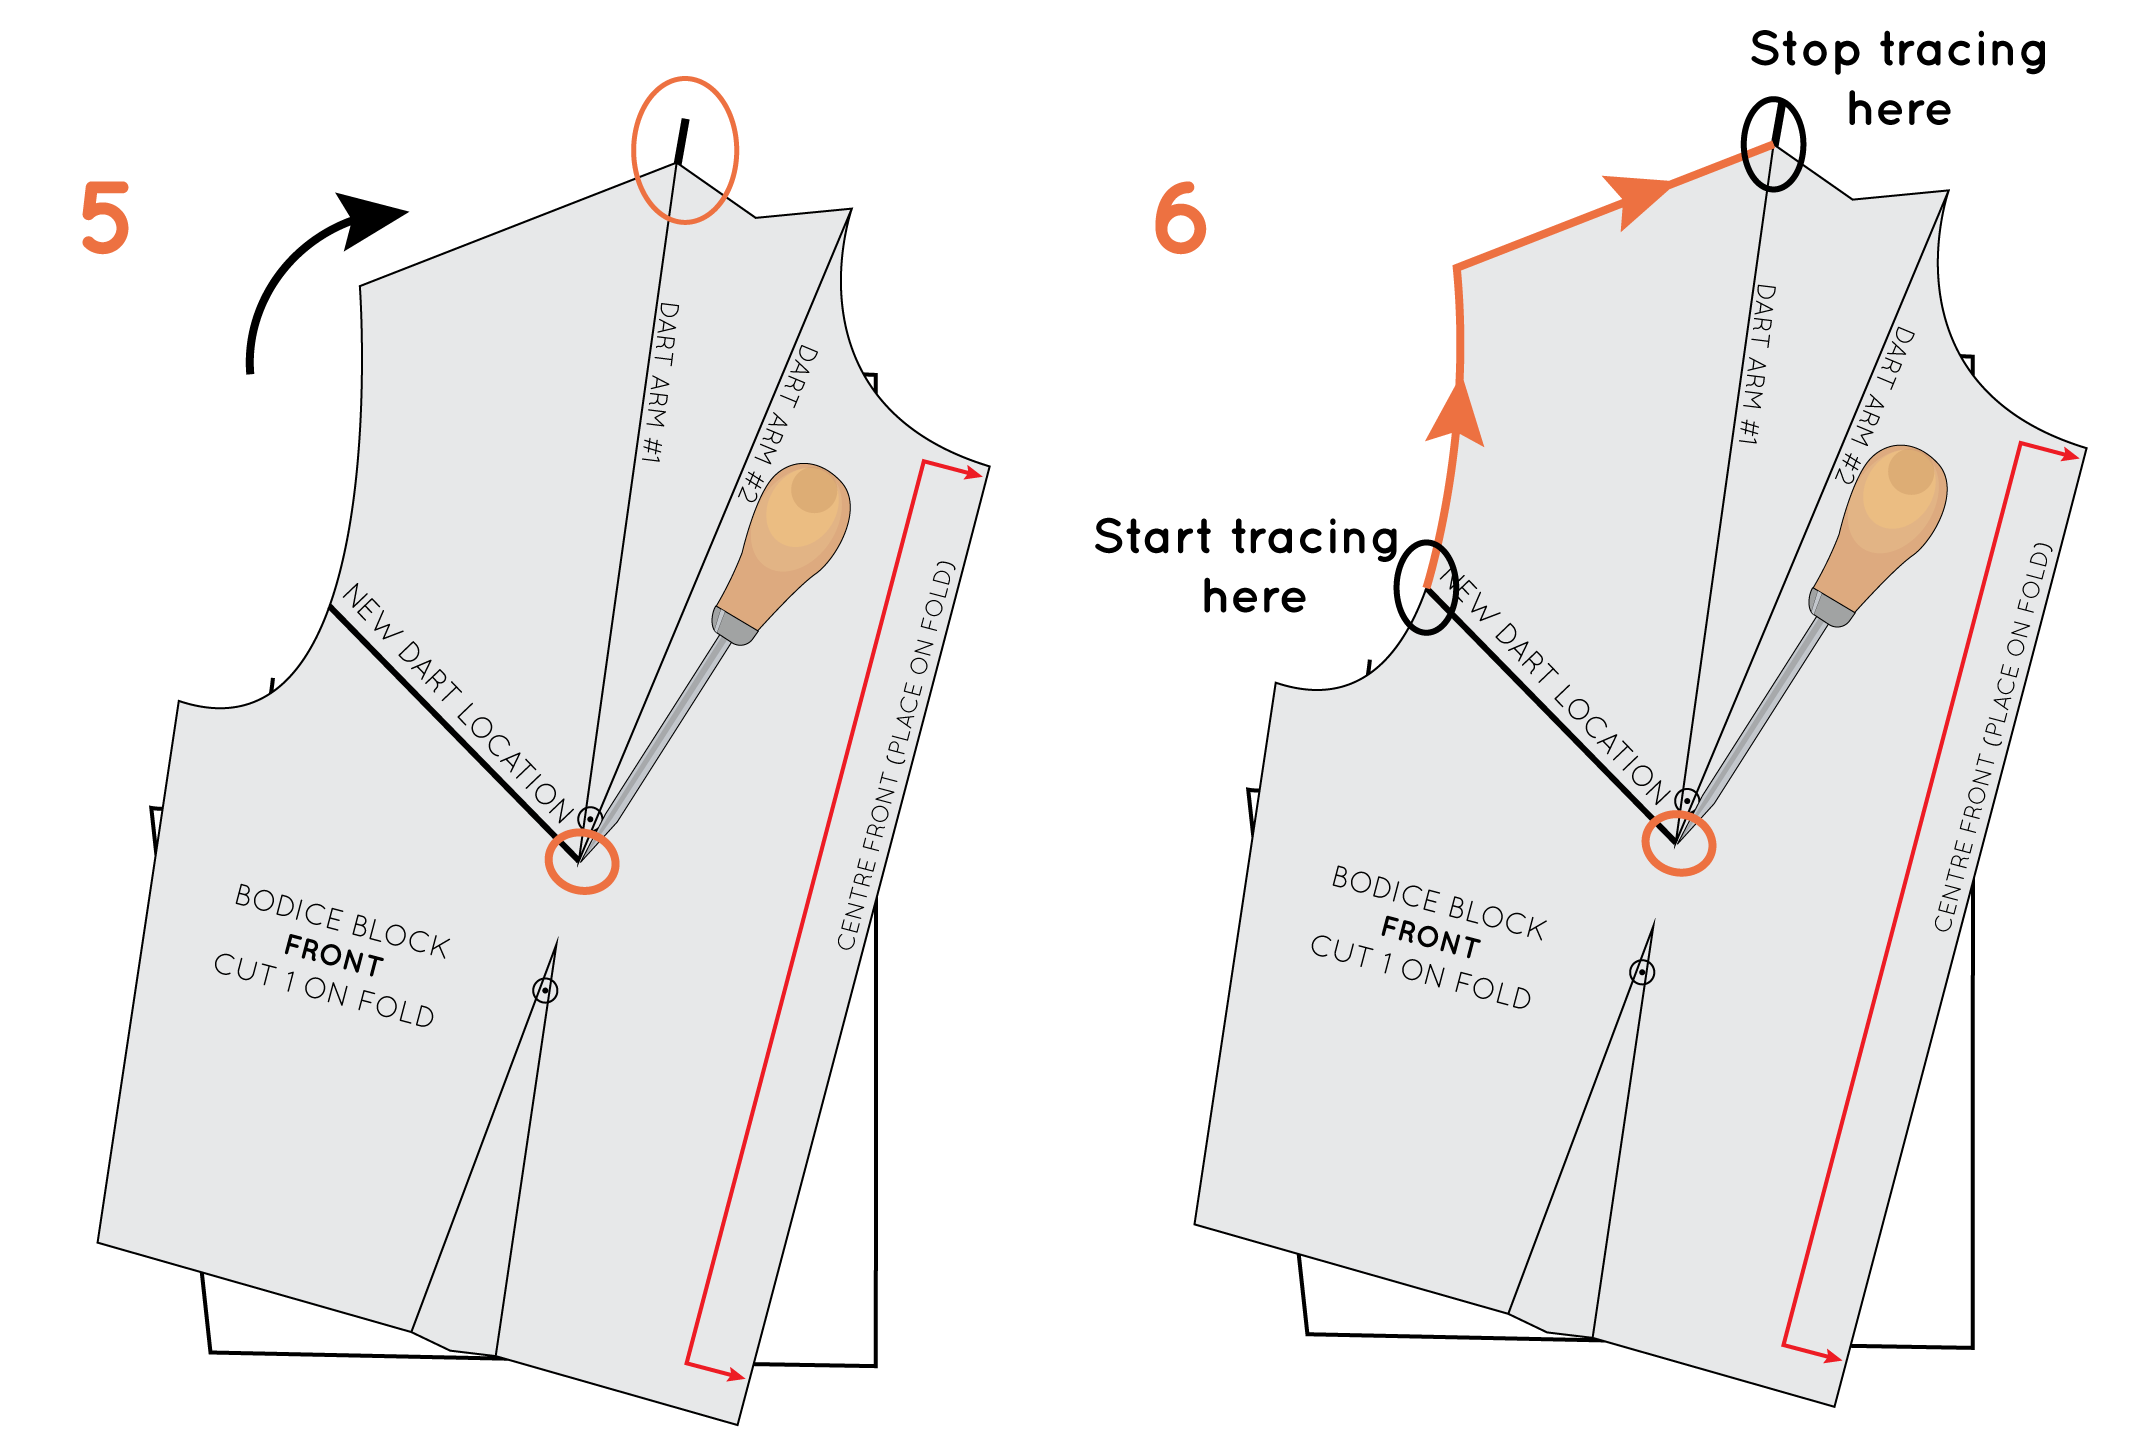
3. Start tracing around the pattern piece from 'Dart Arm # 2' - going down the neckline, centre front, along the waistline, up the side seam and then around the armhole until you reach the new dart location. Stop tracing here.
As the waist dart is staying where it is, remember to mark the dart point and notches so that when you remove the pattern you are tracing, you can redraw the waist dart in its original position.
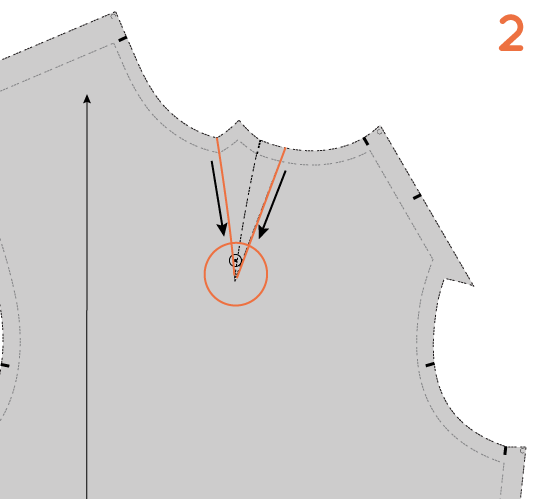
4. Now it is time to pivot the pattern to remove the shoulder dart and create a dart at the armhole. Take your stiletto (or a pin or sharp pencil if you don't have one) and insert the point into the point of the shoulder dart. Remember this is not the drill hole (as the drill hole is marked 1-1.5cm from the dart point), but the point itself. In the next step you will be closing out the shoulder dart by rotating 'Dart Arm #1' towards 'Dart Arm #2.'
Pivot the pattern
5. Remove the weight from the pattern. With the point of the stiletto securely in the drill hole, rotate (or pivot) the pattern so that 'Dart Arm #1' now lines up with the point where you started tracing the pattern in Step 3 (where 'Dart Arm #2' was originally), being careful to hold the piece of pattern paper that you are tracing onto securely in place.
6. Place the weight back on the pattern and trace the remainder of the pattern, starting at the point where your new dart is marked and continuing to 'Dart Arm #1.'
Complete your new dart
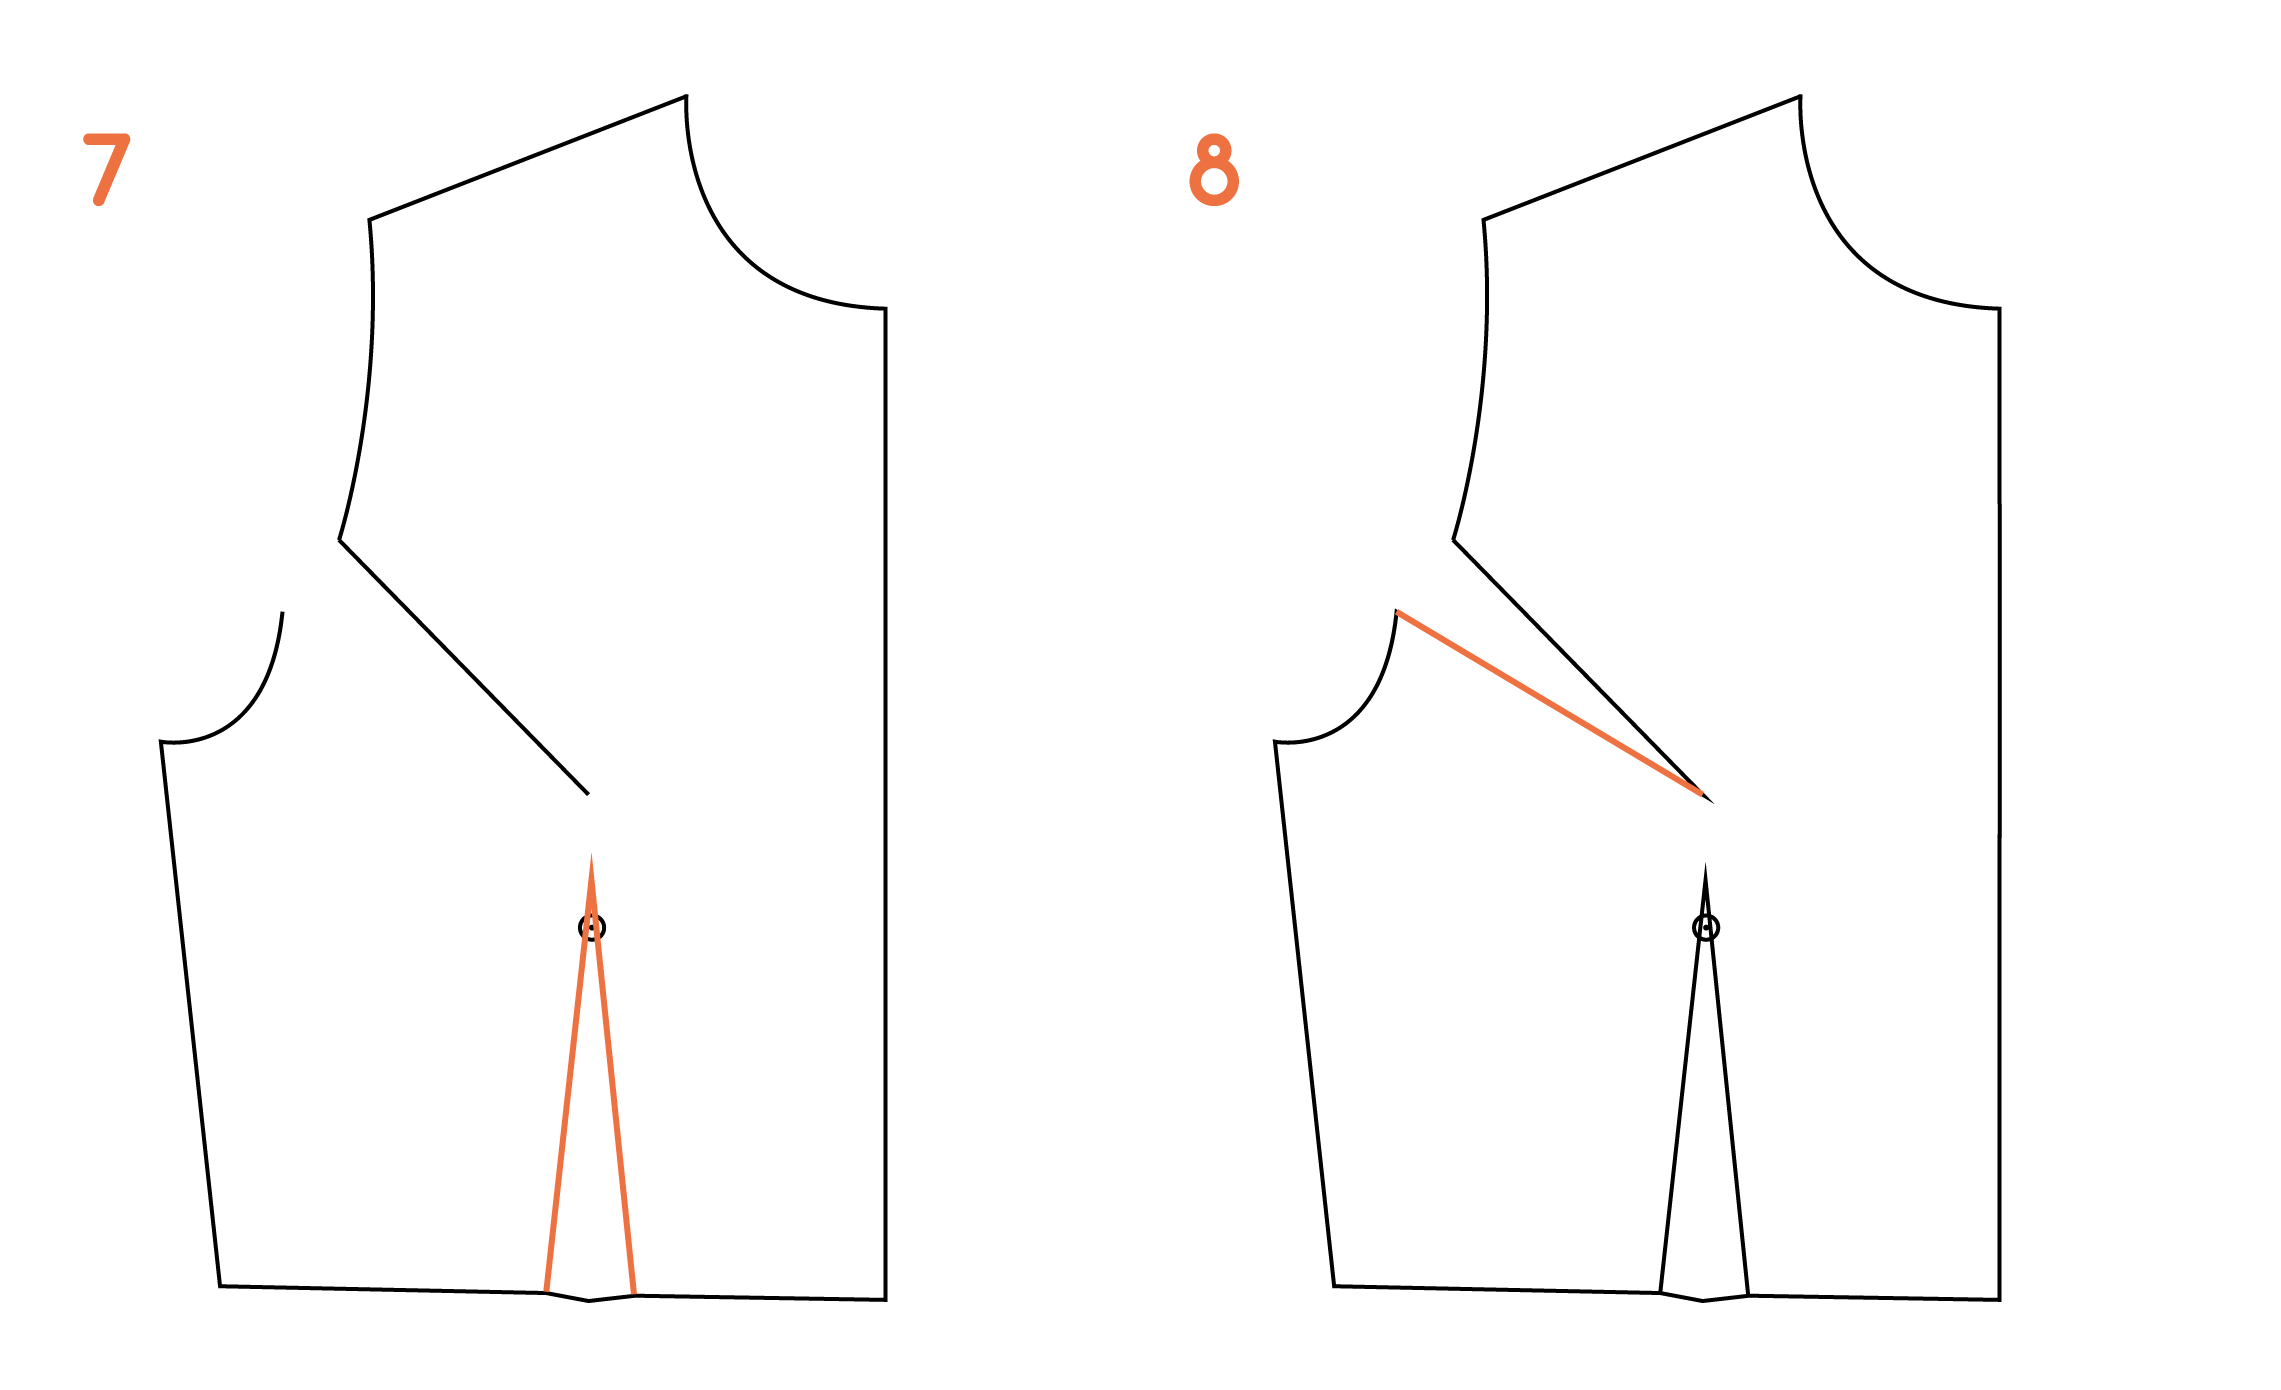
7. Remove the pattern piece you were tracing and re-draw the waist dart (or any design features that you have transferred from the original pattern).
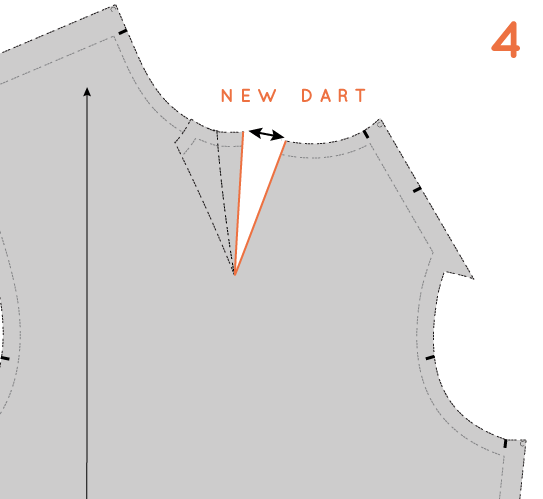
8. Complete the new dart by joining the opening in the armhole to the dart point with a straight line.
Add markings + cutting instructions
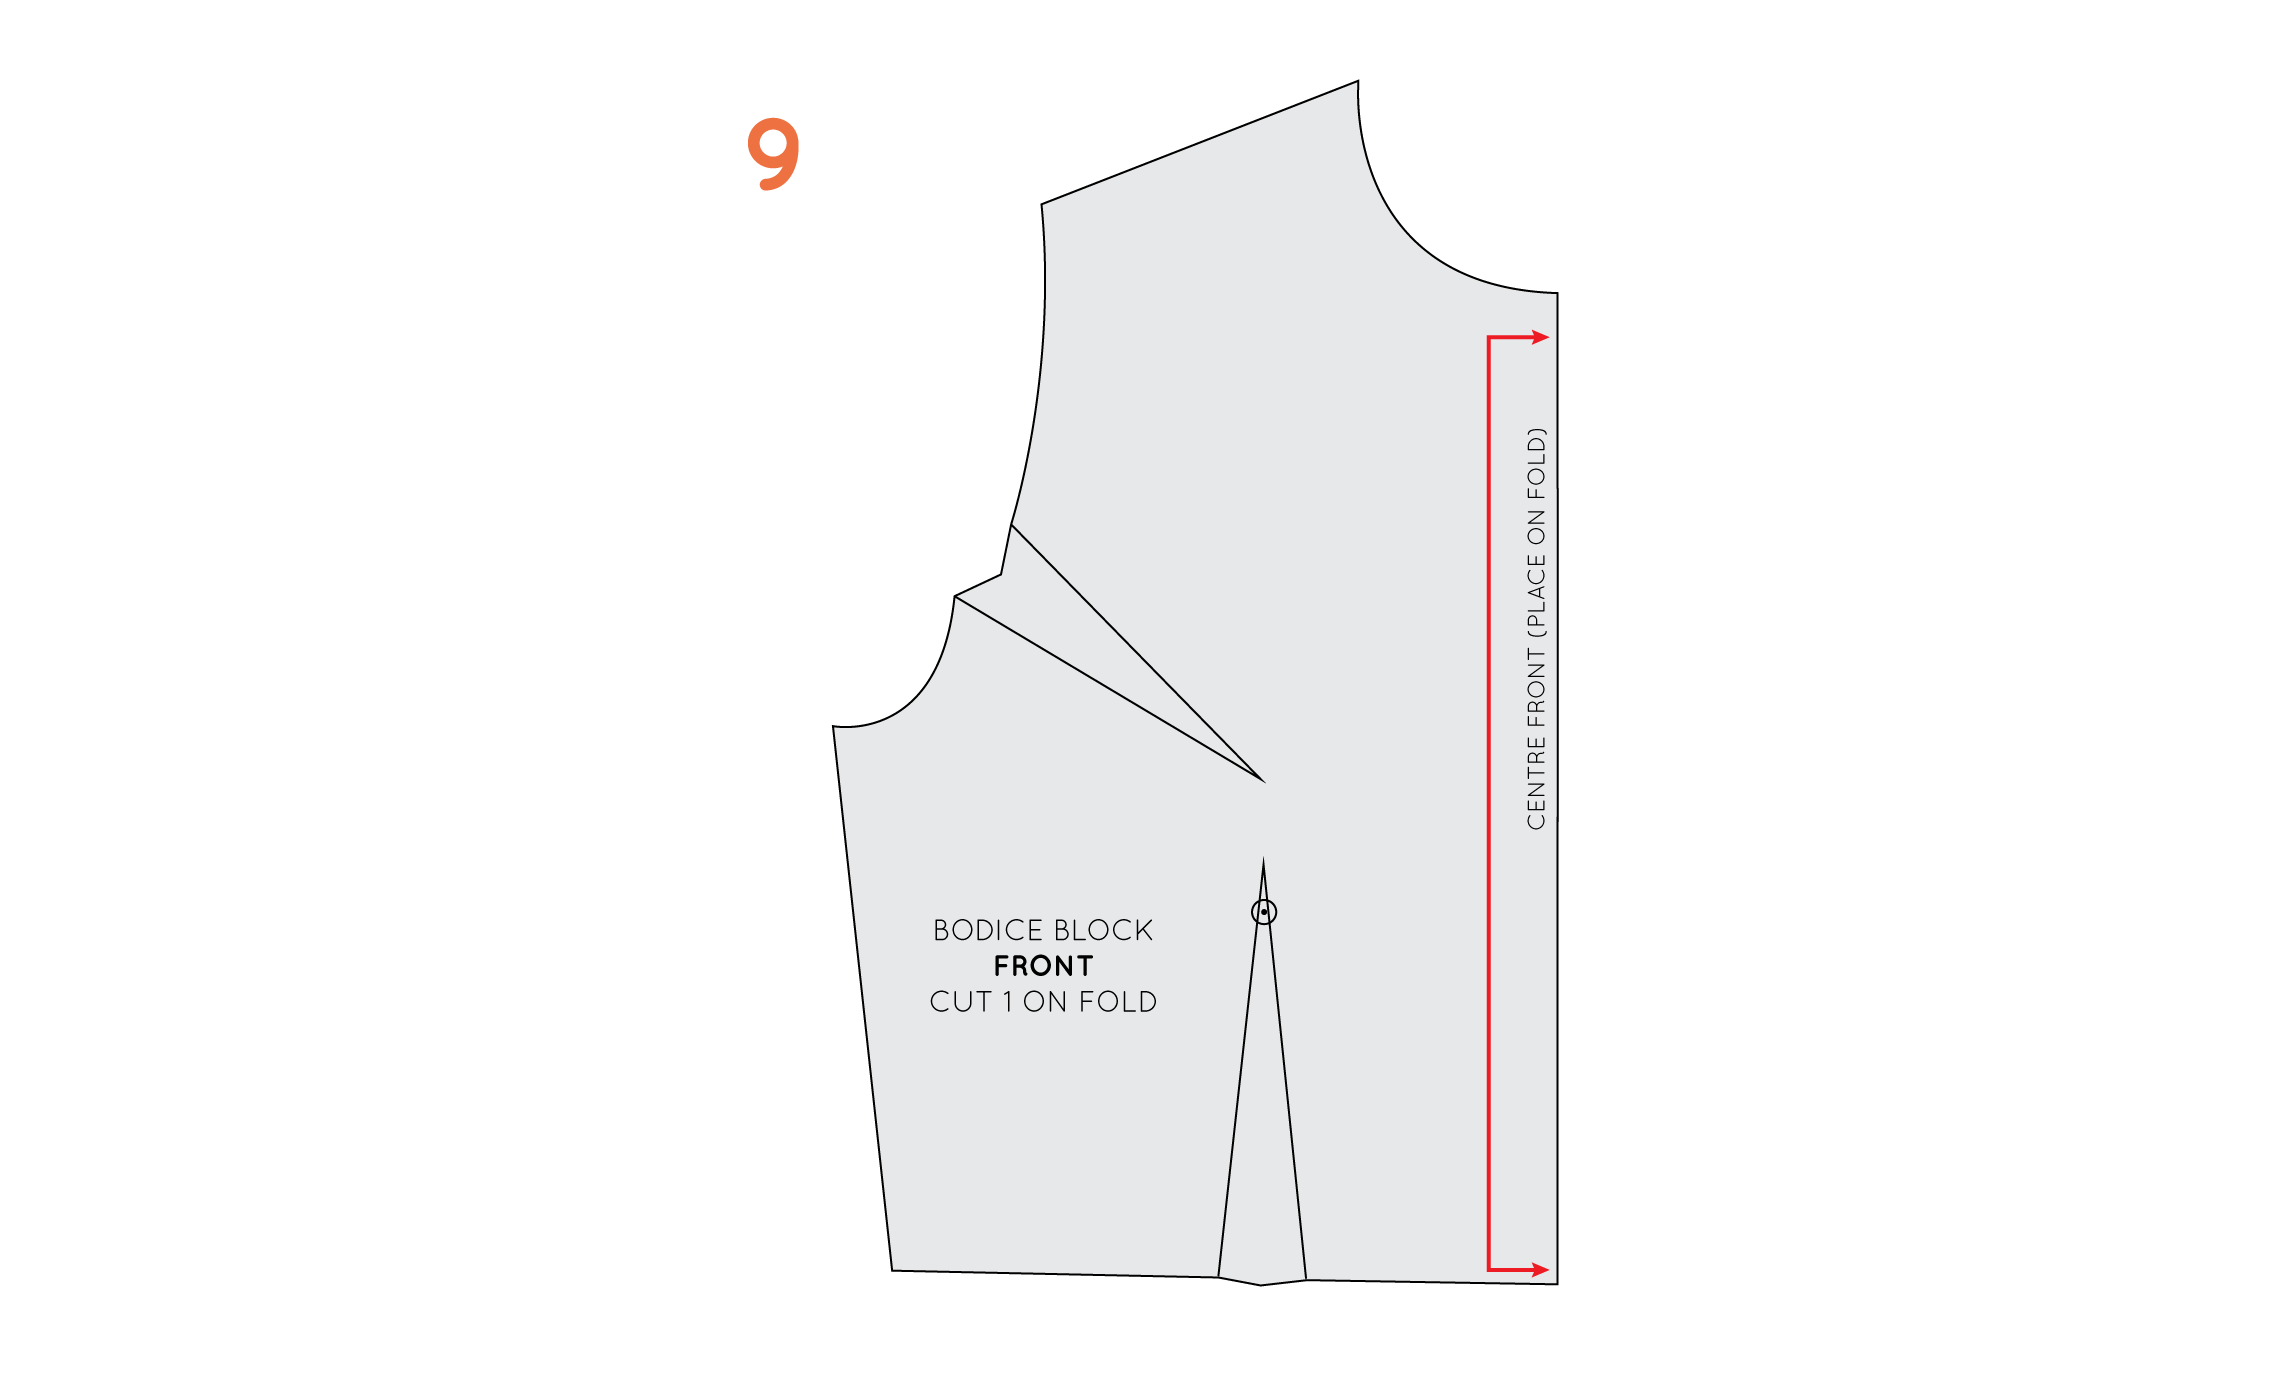
9. Complete the pattern by adding shaping to the new dart, adding pattern markings (in this case notches and the grainline) and cutting instructions as well as seam allowance.
And that's it. Now you have two techniques for moving darts in your repertoire!

