THE Q & A SERIES
Removing dress volume for a slimmer fit
Hi Emily,
I just finished sewing the everyday dress as a toile (old doona) hacked into a tunic with a French seam. I’ve made other patterns of yours (Darlow pants, Collins top and Rushcutter dress), which I’ve really enjoyed.
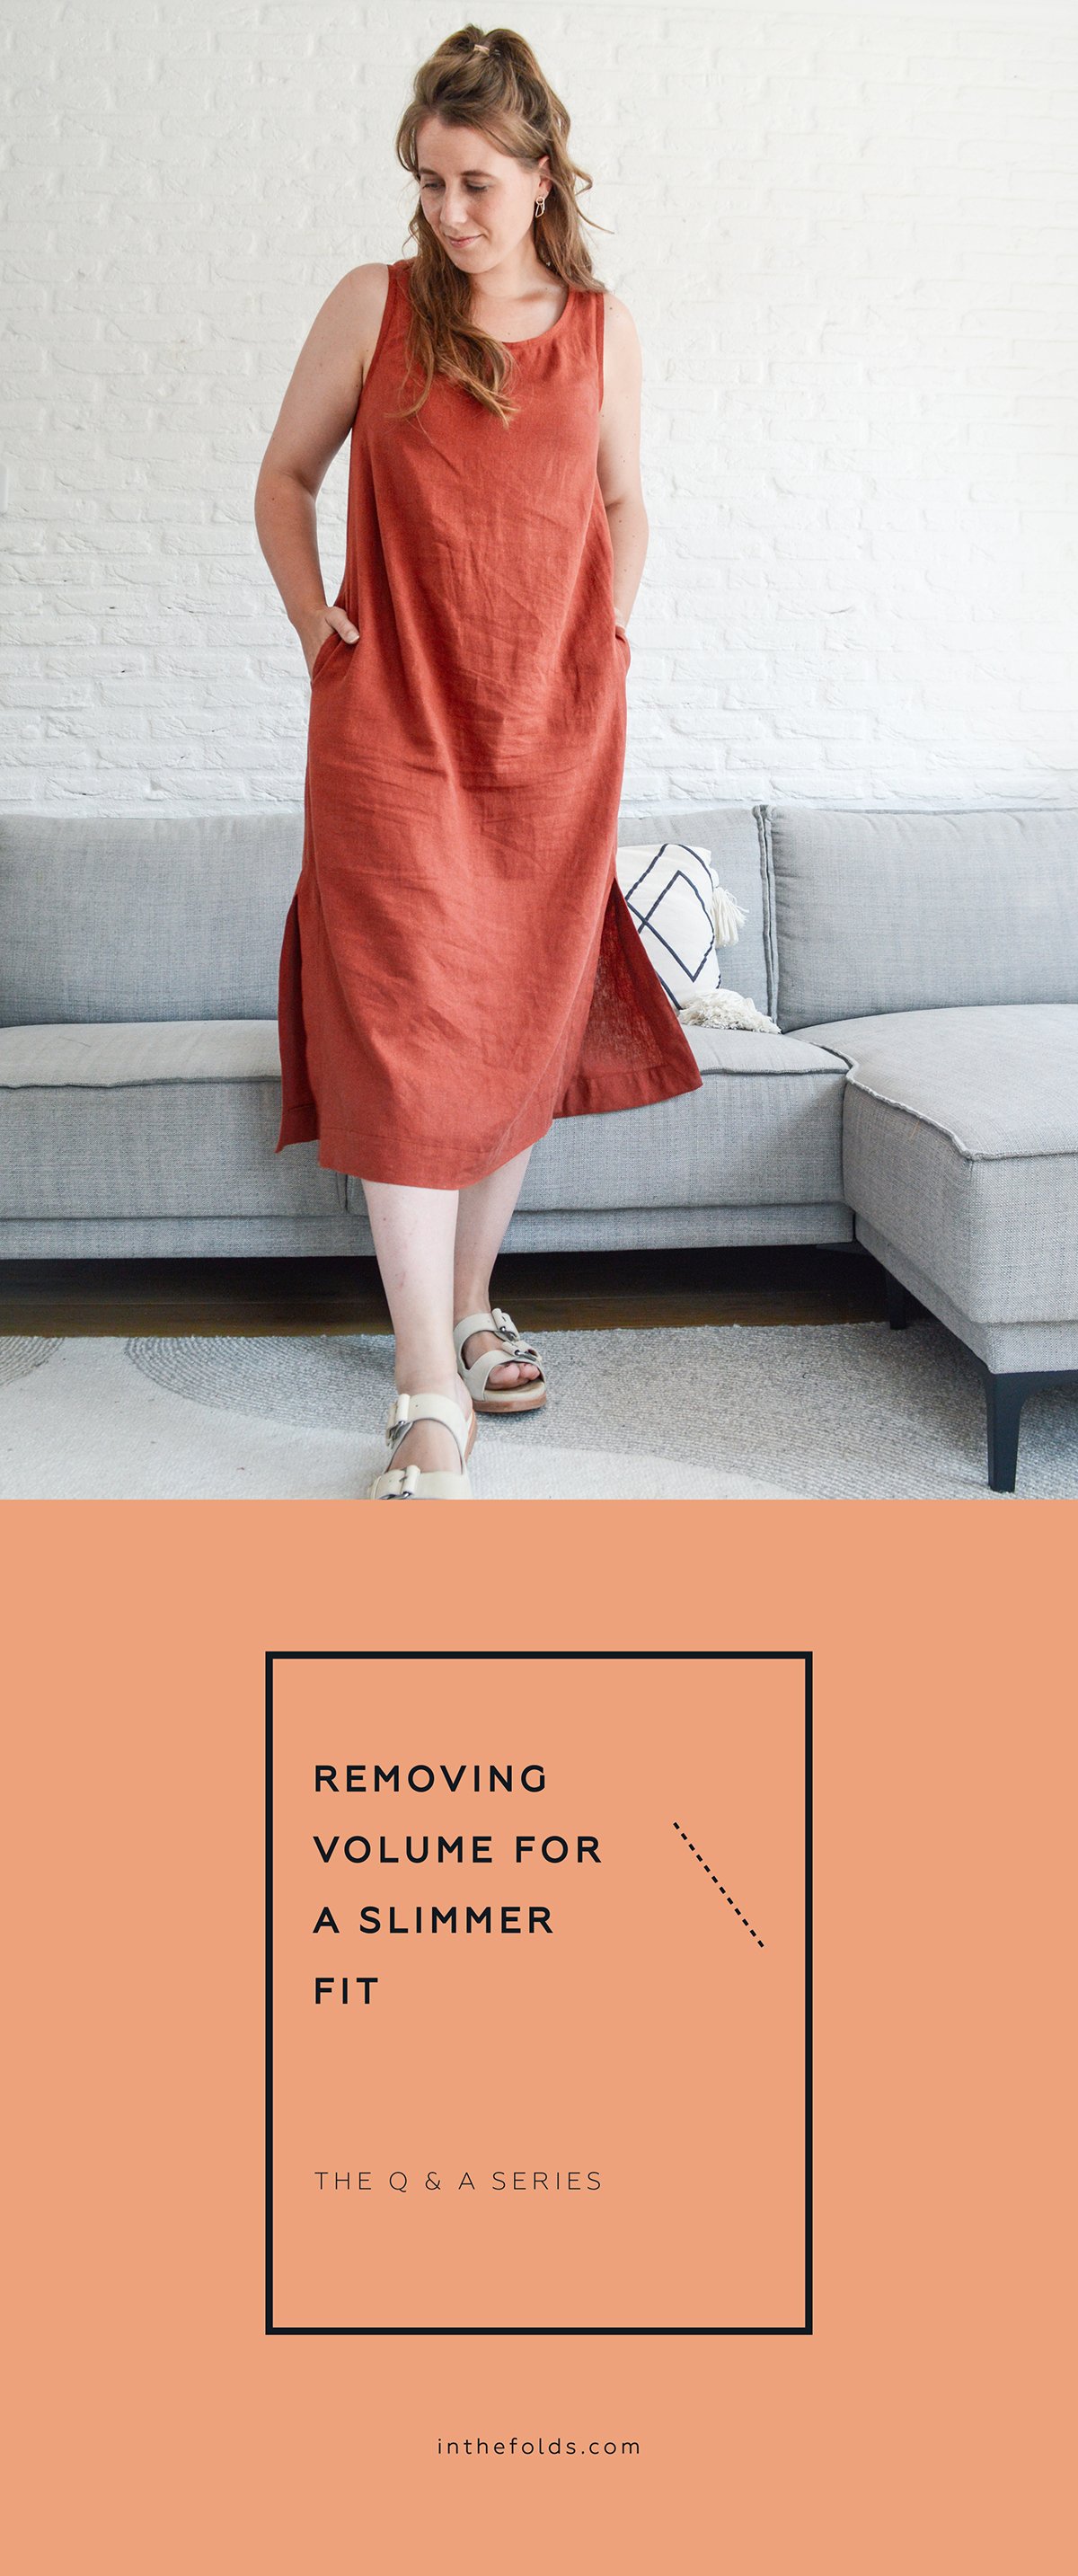
I have some beautiful hand printed linen with a large scale print and am searching for a pattern. I like the look of the Rennie dress but I need a slimmer fit (no belt), can you comment on fit?
Margaret
Hi Margaret,
I’m so happy to hear you have been enjoying using our patterns.
You can definitely slim down the shape of the Rennie dress so that you don’t need to wear a belt. The fit of the dress is slightly A-line, so it sounds like a straighter fit is more what you’re looking for.
What you can do is use the slash and spread technique to reduce volume in the pattern. This technique is often used to add volume to a pattern, but you can also use the same approach to reduce volume from a pattern!
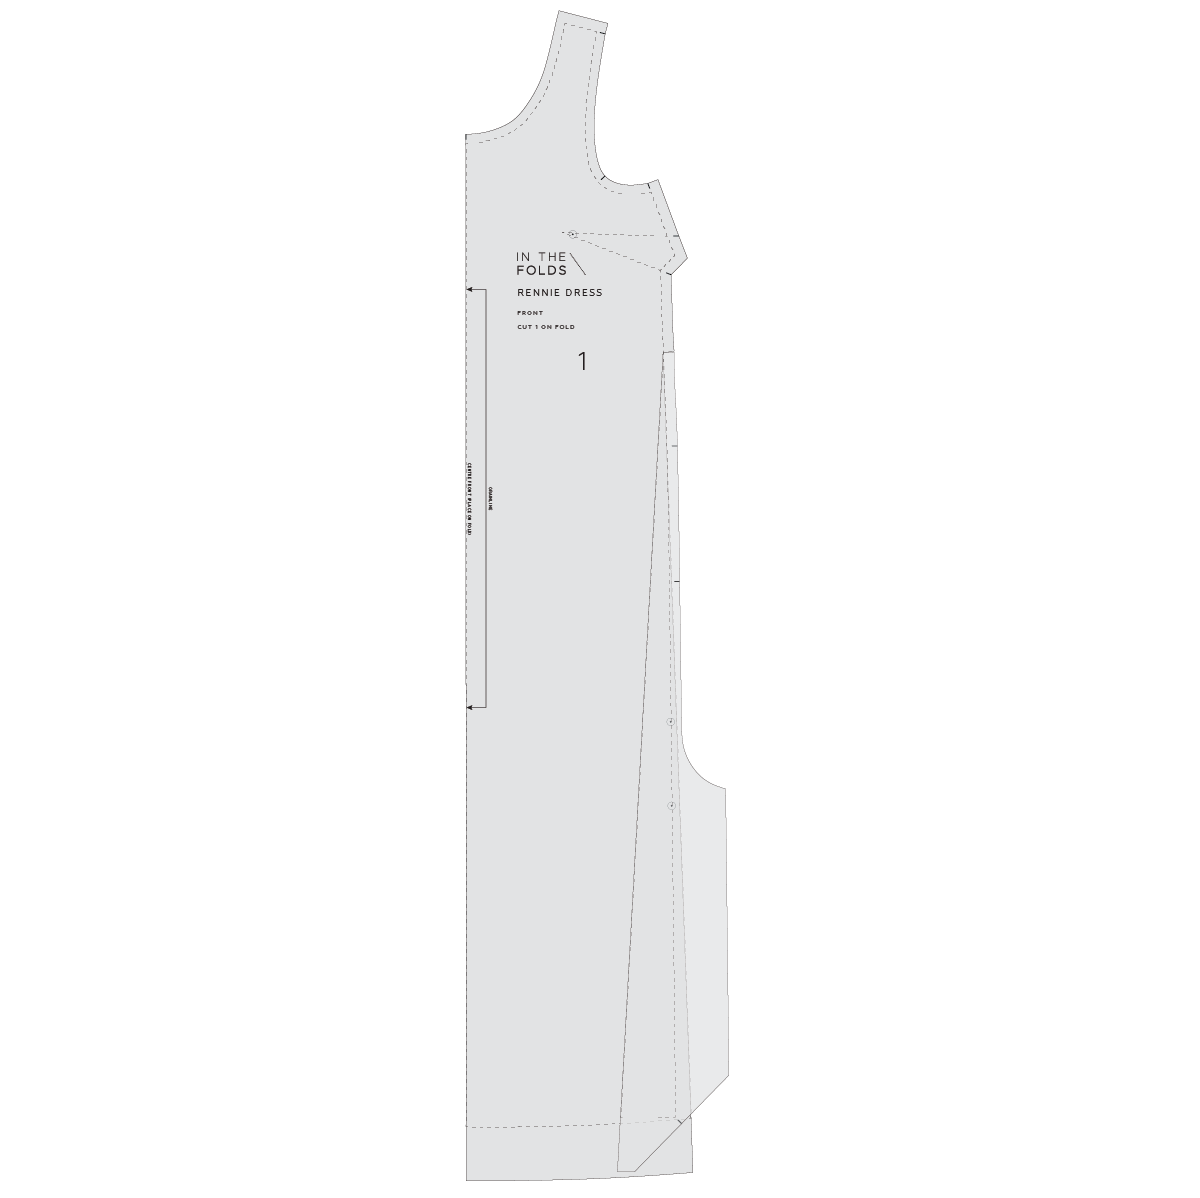
How to use the slash & spread technique on the rennie dress

Step 1
First, you need to think about where you would like to reduce the volume. Looking at the FRONT pattern piece you can see that the pattern becomes A line in shape from around the waist down. We don’t want to change the fit of the bust, so will draw our slash line from the hem up to the waist on the side seam.

Step 2
Cut along the slash line from the hem up to the stitch line at the waist. Cut into the seam allowance on the side towards the point you stopped cutting, stopping 1-2mm from the slash line. This will create a small hinge of paper.
Step 3
Gently slide the cut section across the pattern, removing the desired amount of volume. This is up to you. Remember, this alteration will reduce the finished garment measurement at the hip, so it’s a good idea to work out how much volume you can afford to lose.
Remember, you don’t want the pattern being tight at the hips. You also need ease so you can get the dress on and off, move around and sit. Once you are happy with the amount removed, tape or glue in place.
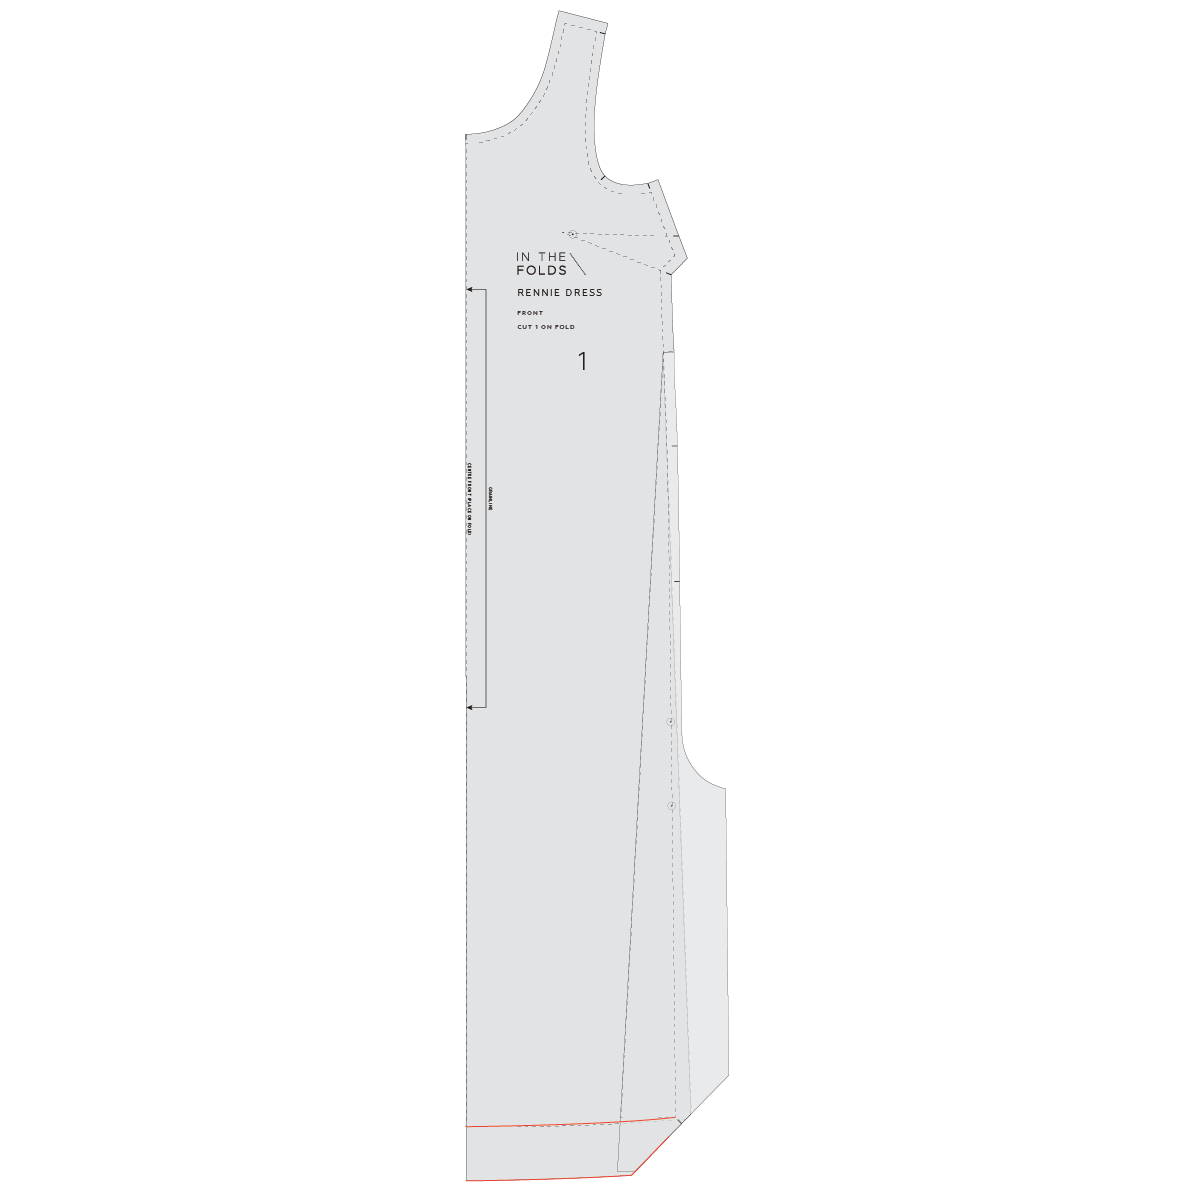
Step 4
Re-draw the hem with a smooth line over the alteration. Cut off any excess paper. Repeat process on the back, removing the same amount of volume.
I hope this gives you the confidence to try out the Rennie dress!
Happy sewing,
Emily
For more issues of the Q & A series, you can check out the archive here.
WHAT YOU’VE BEEN MAKING

Rennie dress made by @mamasuesews

Peppermint peplum top made by @lily_and_lynx


