cut and spread

Throwback Thursday: Adding volume to a pattern

ADD-VOLUME_cut_and_spread_1.gif

Over the past weeks I have been showing you how to draft a skirt block, as part of The Skirt Series.

Now that it is complete, it is time to start making the pattern your own. 

ADD-VOLUME_cut_and_spread_2

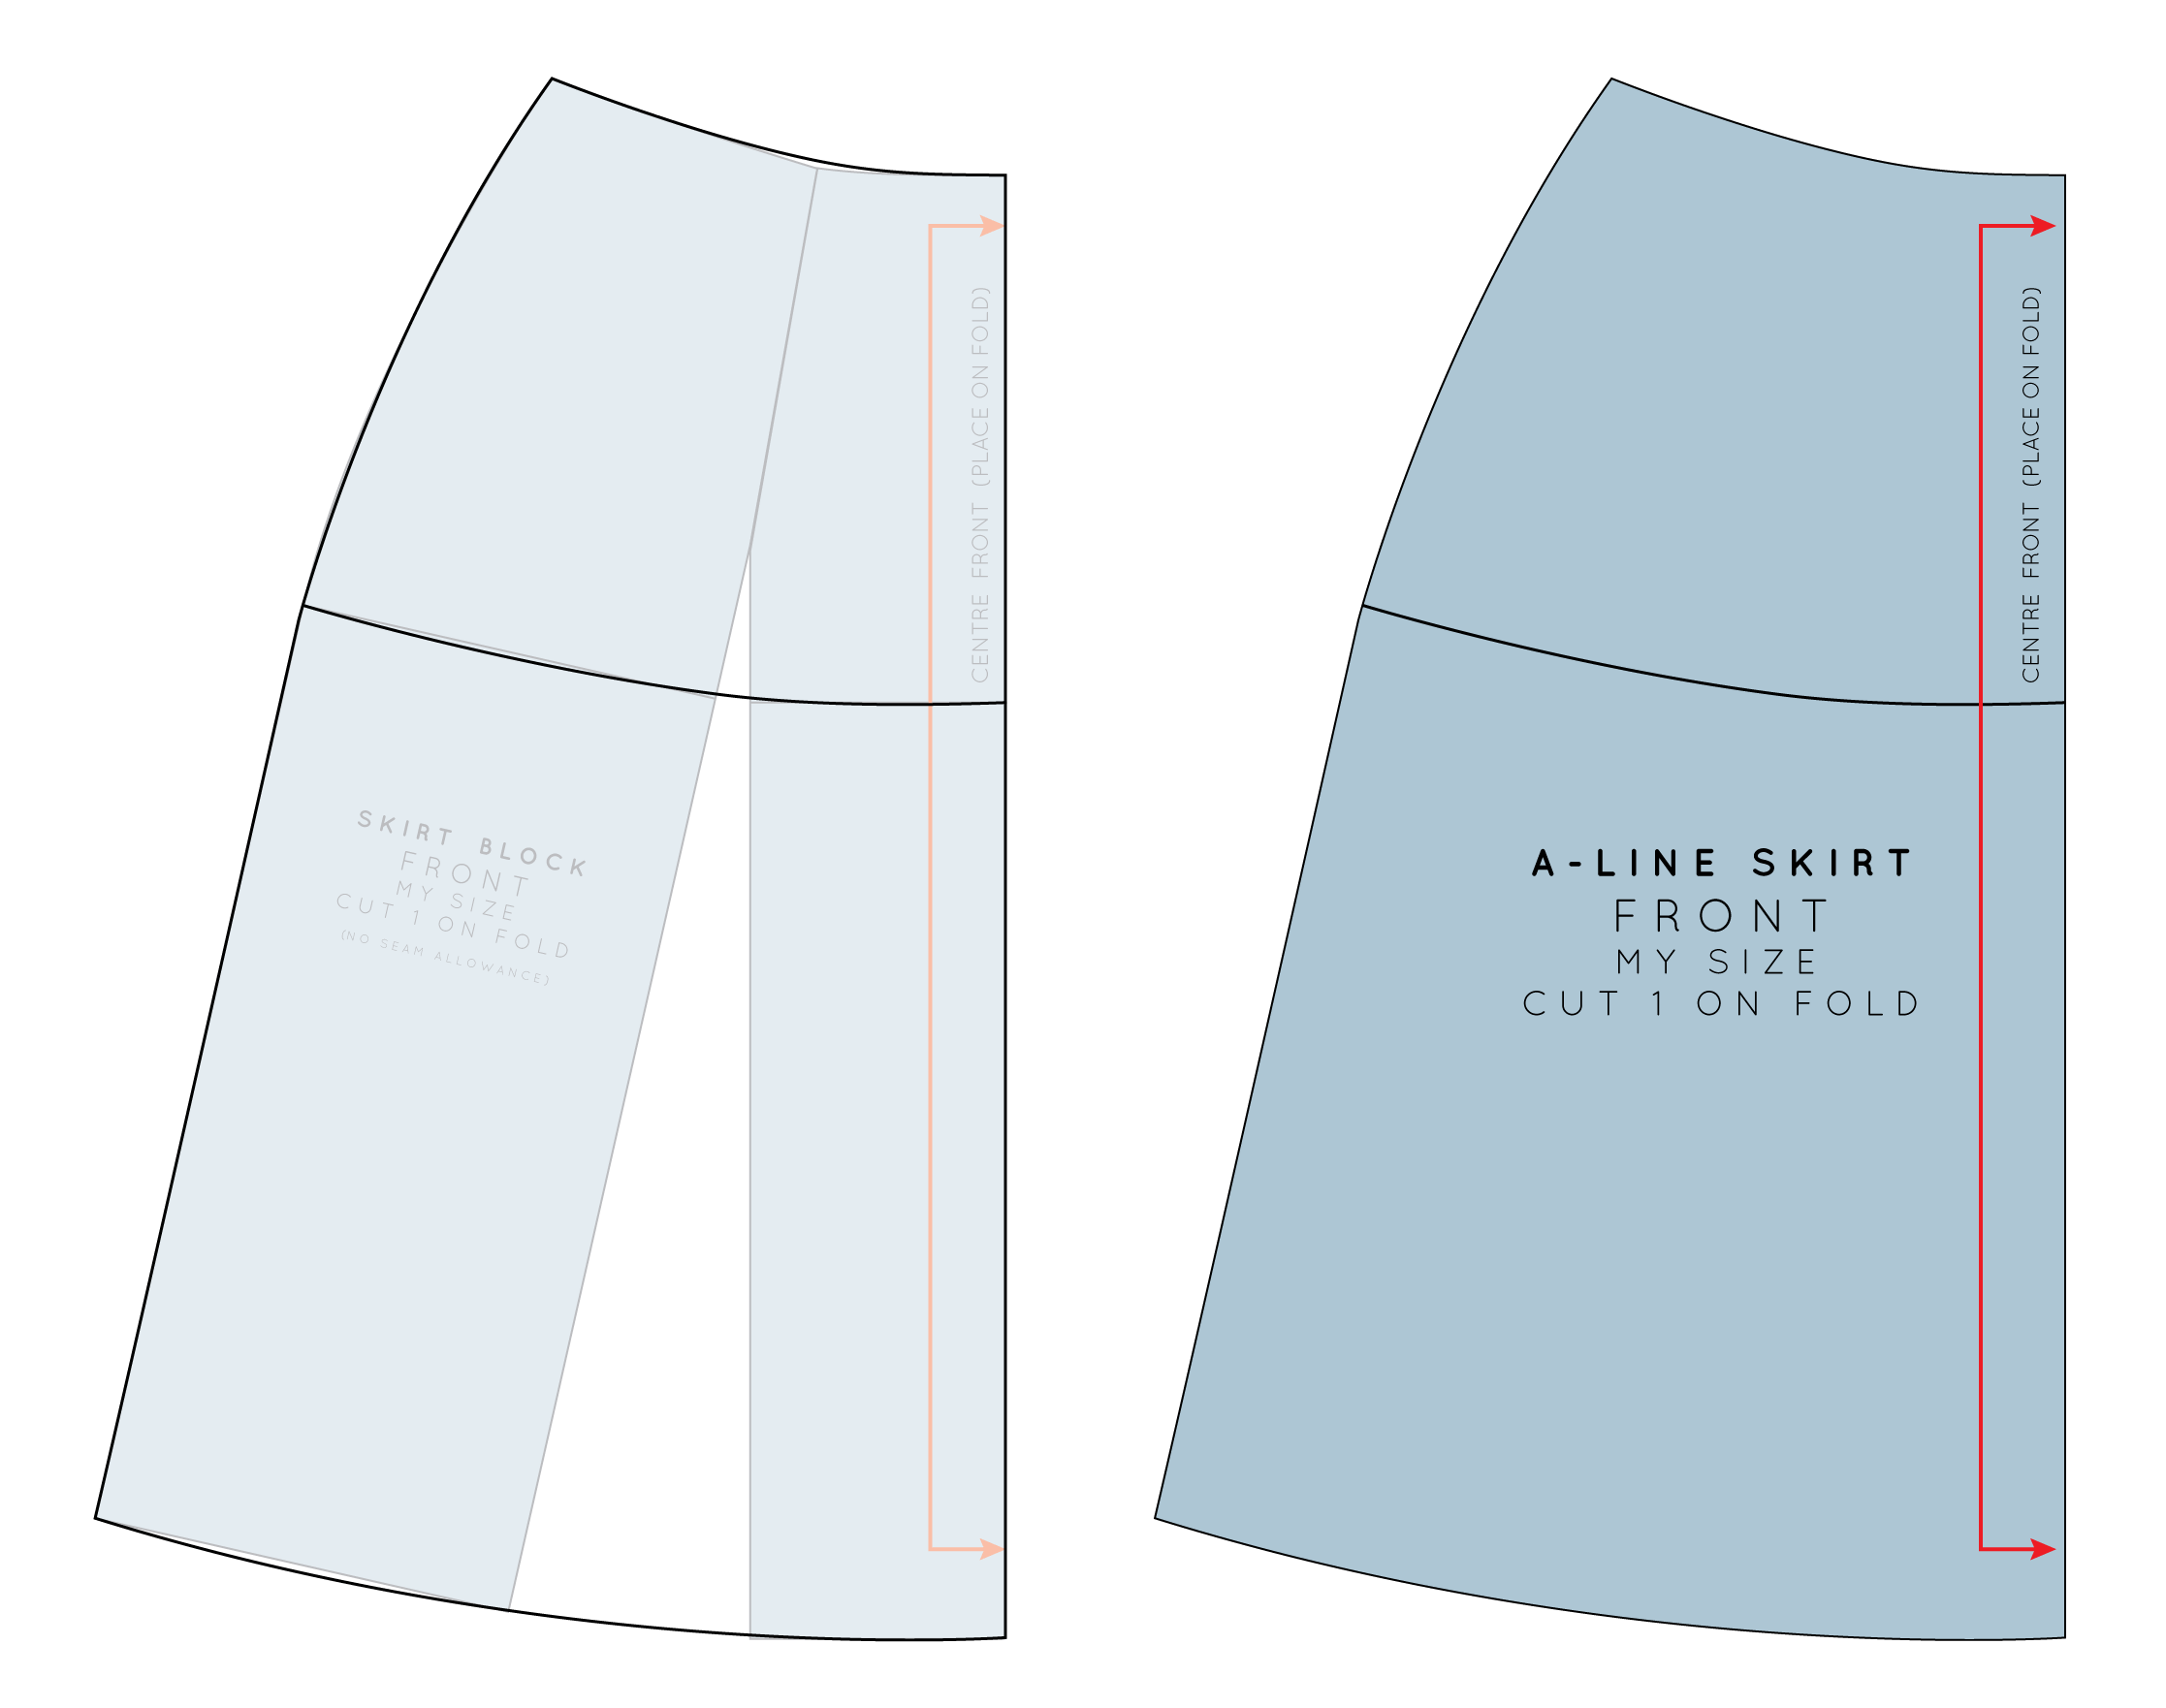
Last week I showed you how to draft an A-line skirt, by relocating the fullness of the dart to the hemline, using the cut and spread technique.

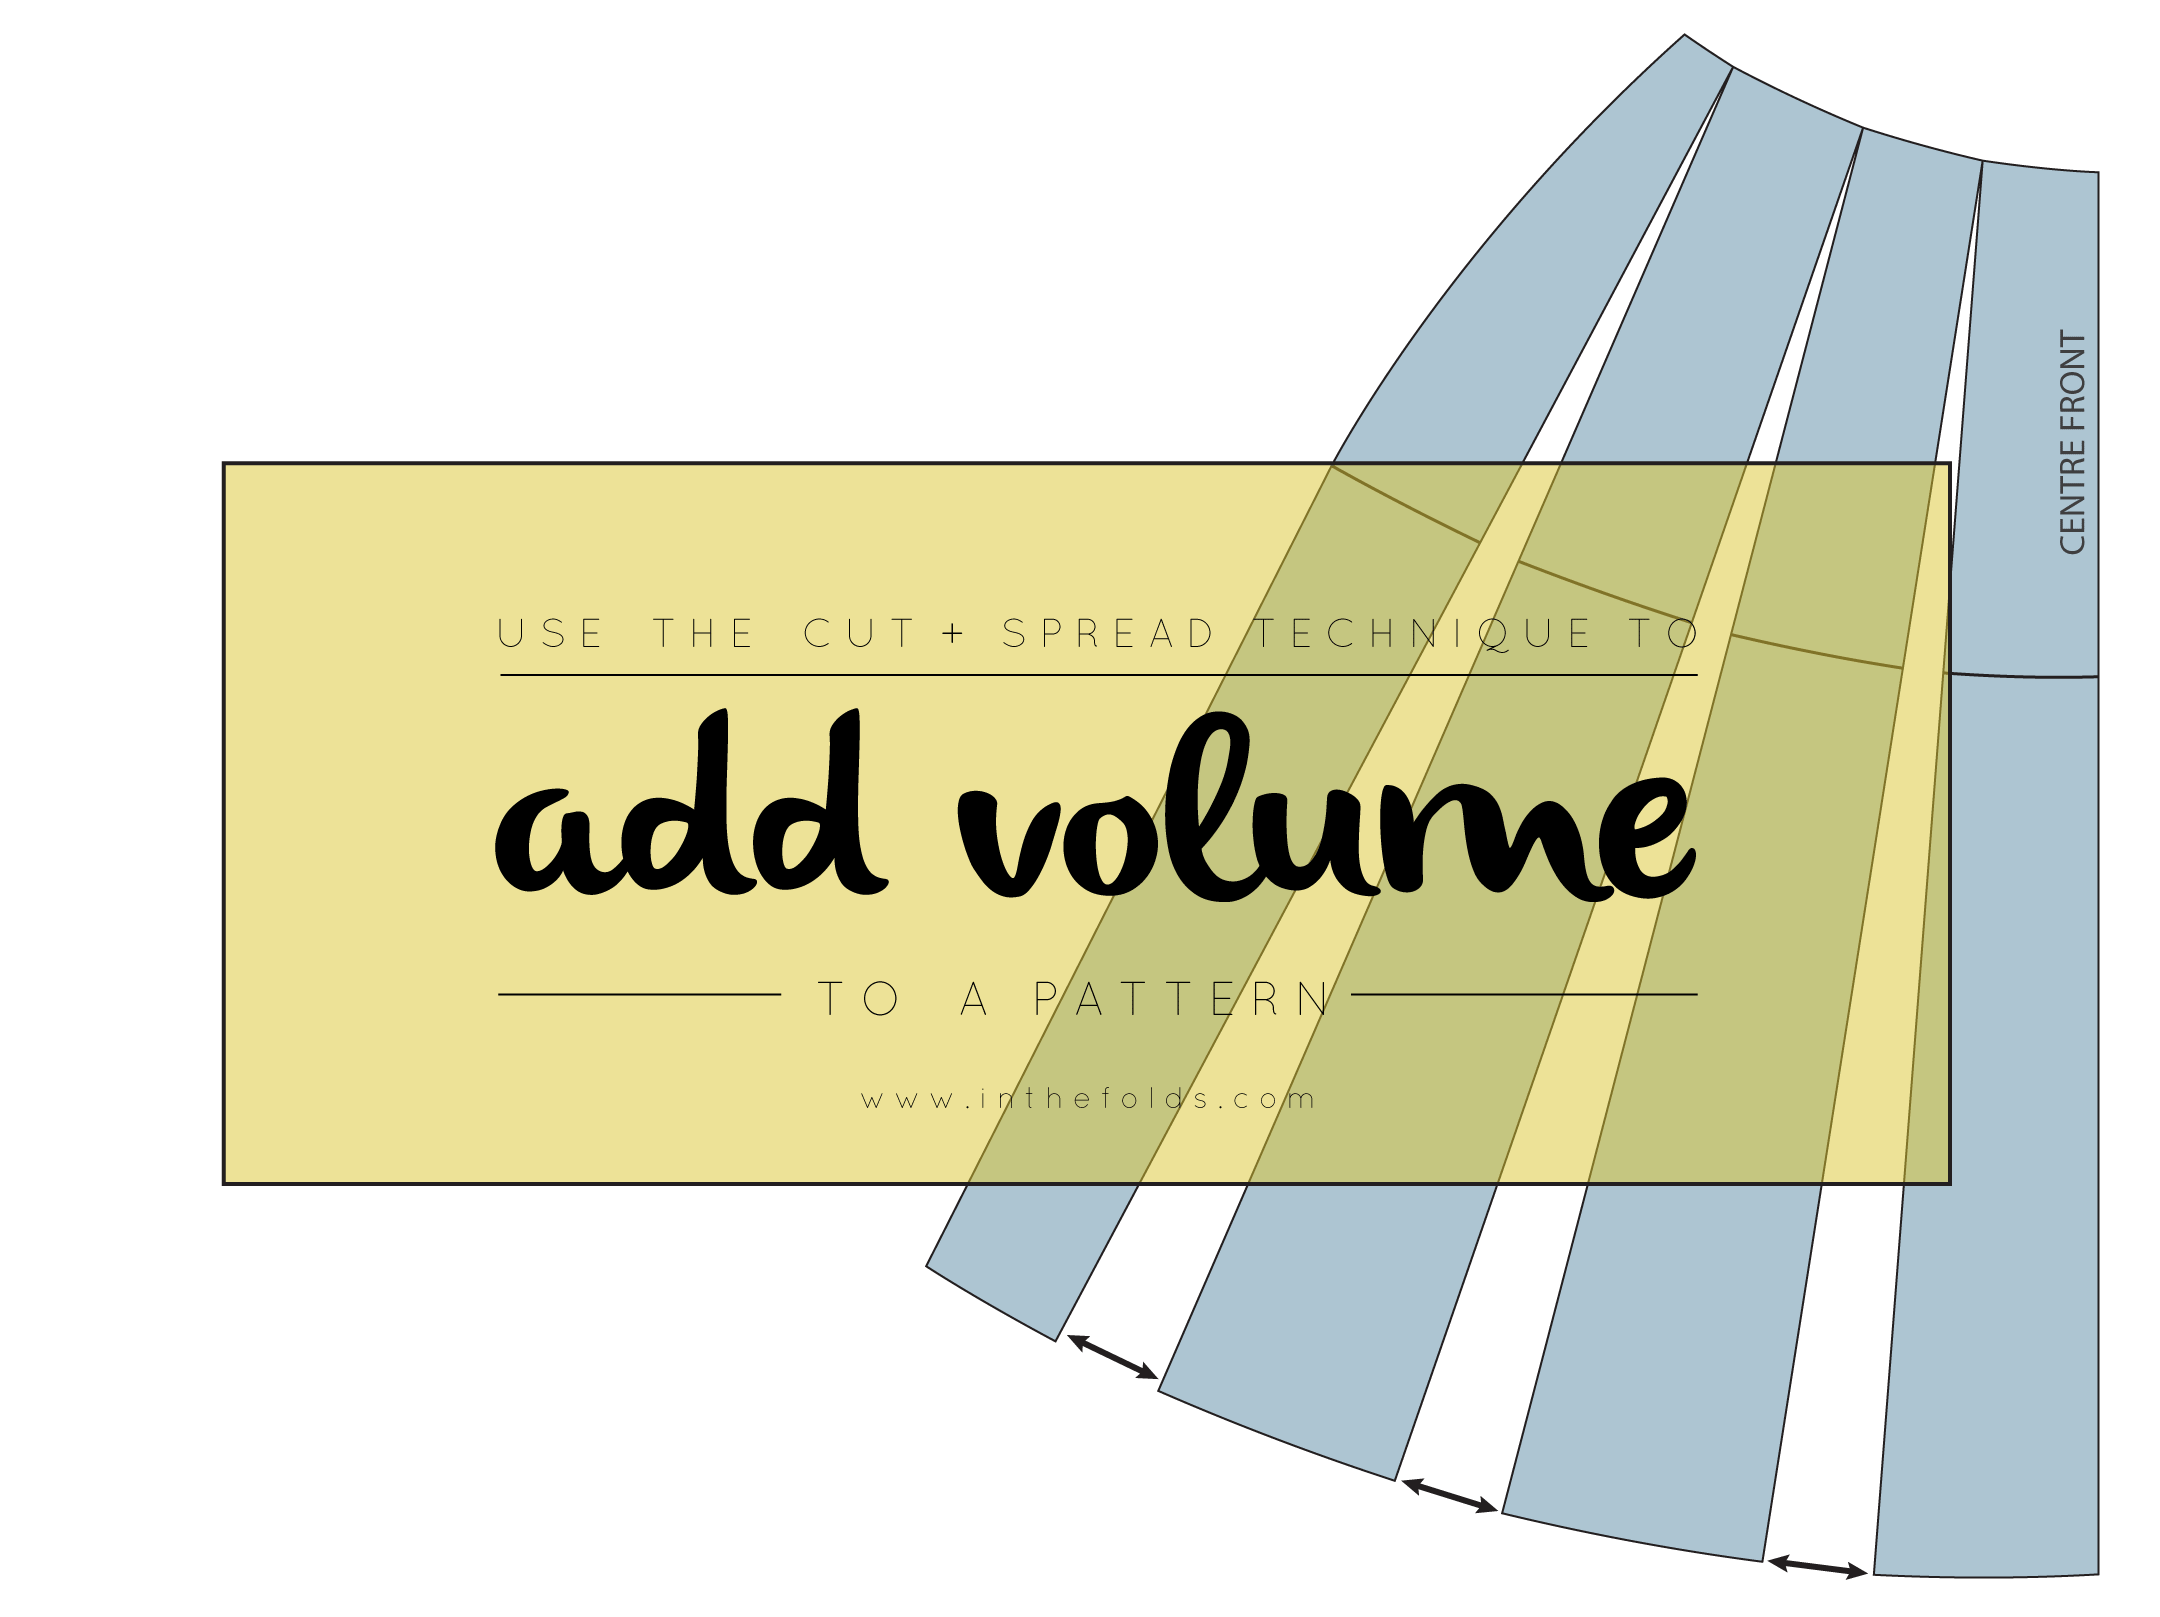
Today I will show you how to add more volume to the skirt block, using this same technique. You can use this same method to add fullness to just about any pattern piece: sleeves, trousers, blouses and jackets, and many more. 

Mark the cut and spread lines

ADD-VOLUME_cut_and_spread_3

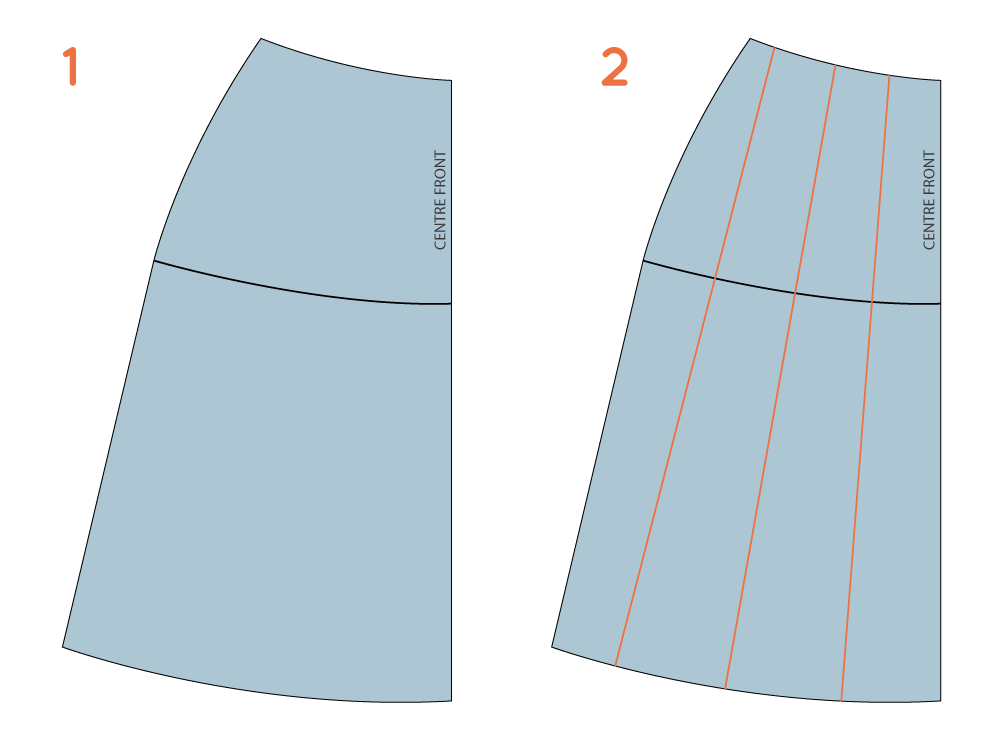
1. I am using my skirt block to demonstrate this tutorial. The darts have already been moved, as shown in this tutorial. As always, it is best to have a copy of your pattern, without seam allowance. It is much easier to make adjustments with seam allowance removed.

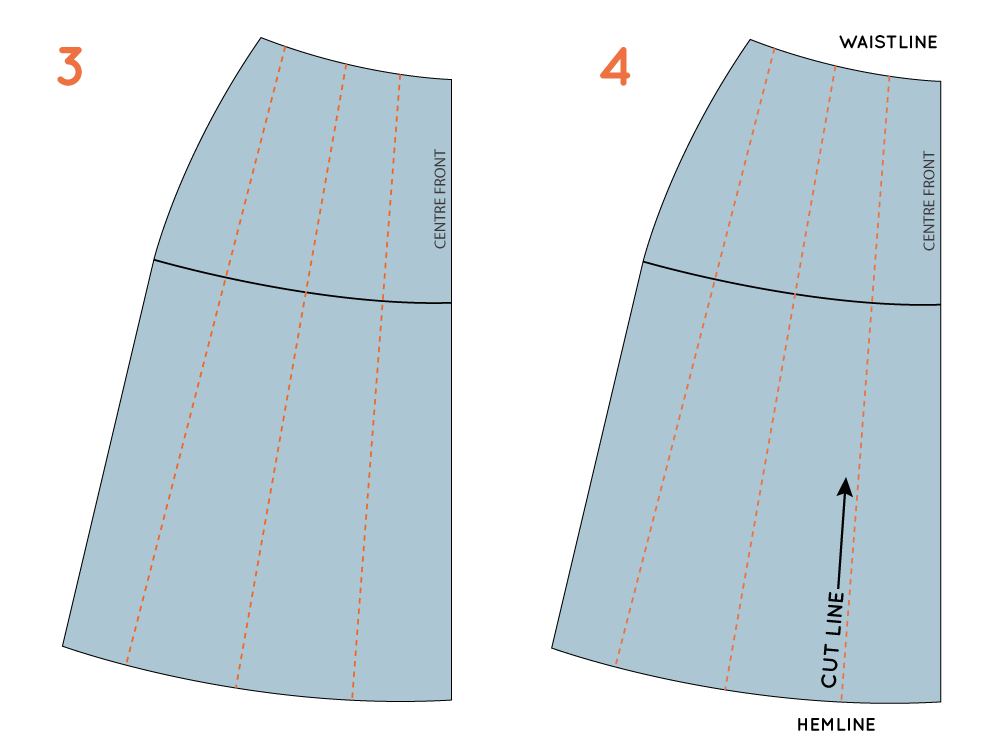
2. Draw three lines (this is only a suggestion, you could use more or less) down the length of your pattern, roughly parallel to the centre front. Space them out, with roughly even gaps between them.

ADD-VOLUME_cut_and_spread_4

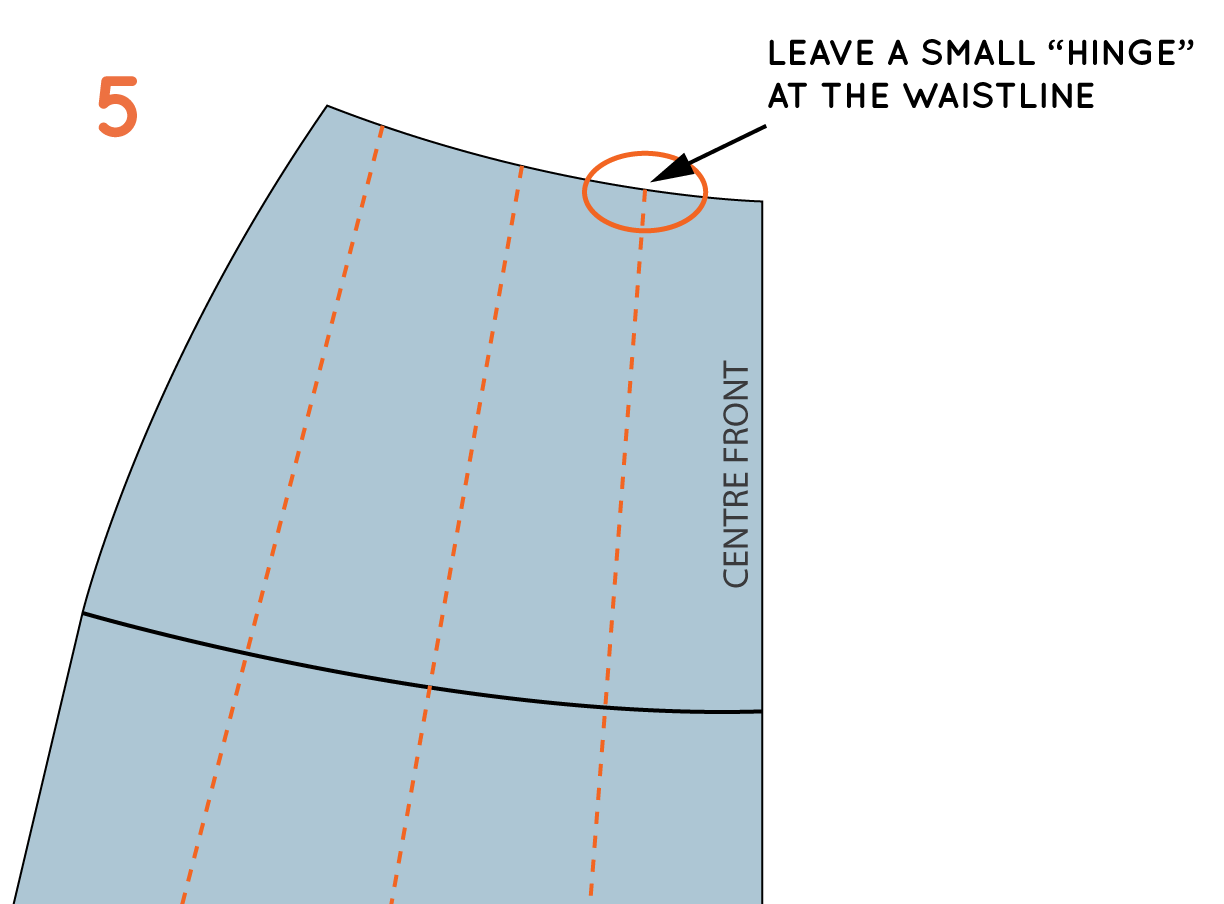
3. You will be cutting these lines, to add volume to the pattern. Wherever there is a line, this is where more fabric will be added - that's why it is best that they are evenly spaced.

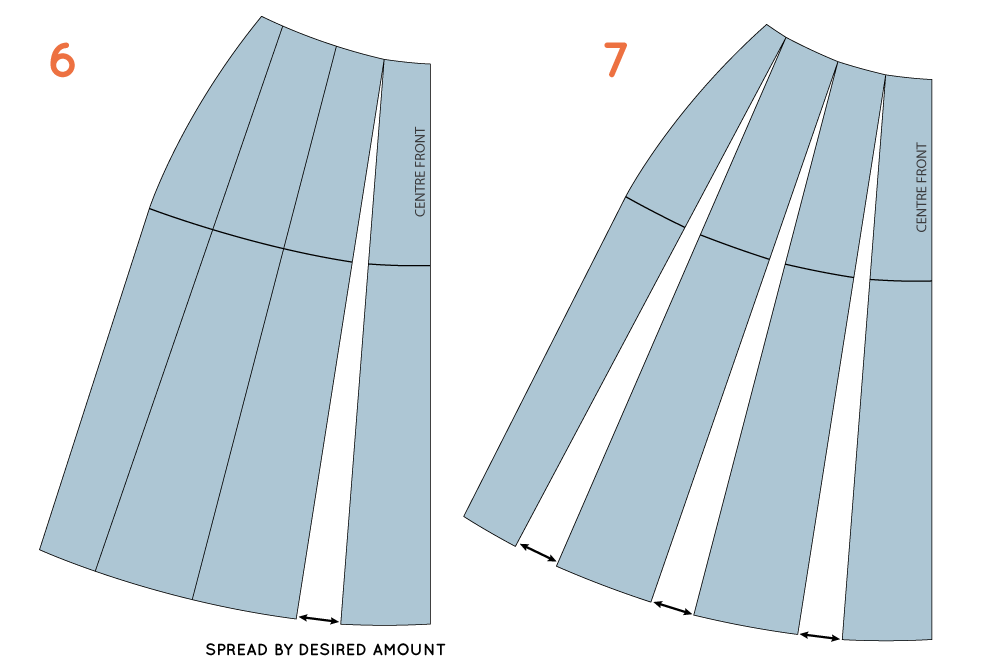
4. Take your scissors and cut along the first guideline, from the hemline up towards the waistline.

ADD-VOLUME_cut_and_spread_5

5. Do not cut all the way through the pattern. Stop a few millimeters (1/16 in) from the waistline, leaving a 1-2mm "hinge" to keep the two pieces together.


How much volume to add?

Think about how much volume you are wanting to add to the pattern overall. You may want to do this by eye (just cut along the line and then spread until it looks as though enough volume has been added), or by an exact amount. If you are just opening up a hemline, I would say that doing it by eye is fine. But if, for example, the hip-line of a pattern is too tight and you are spreading the pattern to accommodate this, then I would suggest finding an exact amount so that you don't get any surprises.

If you have found an exact amount, you will need to divide this figure by four, as the volume will need to be distributed between the four pieces that make up the skirt pattern (front right, front left, back left and back right). Then divide the number again, by the number of guidelines you have on your pattern piece.

For example, if you would like to add an overall 30cm to the hemline, you will be adding 7.5cm to each pattern piece. If I was to add this to my pattern used as an example, I would divide this 7.5cm by my three guidelines, meaning I would open up each guideline by 2.5cm.

Cut and spread 

ADD-VOLUME_cut_and_spread_6

6. Slide a separate piece of pattern paper under your pattern, so that you will have something to stick the pattern to once you make the adjustments. Spread the hemline by the amount worked out in the previous step. Use tape or glue to secure in place.

7. Repeat process for the other lines, spreading each opening by the same amount as the first.

Check pattern

ADD-VOLUME_cut_and_spread_7

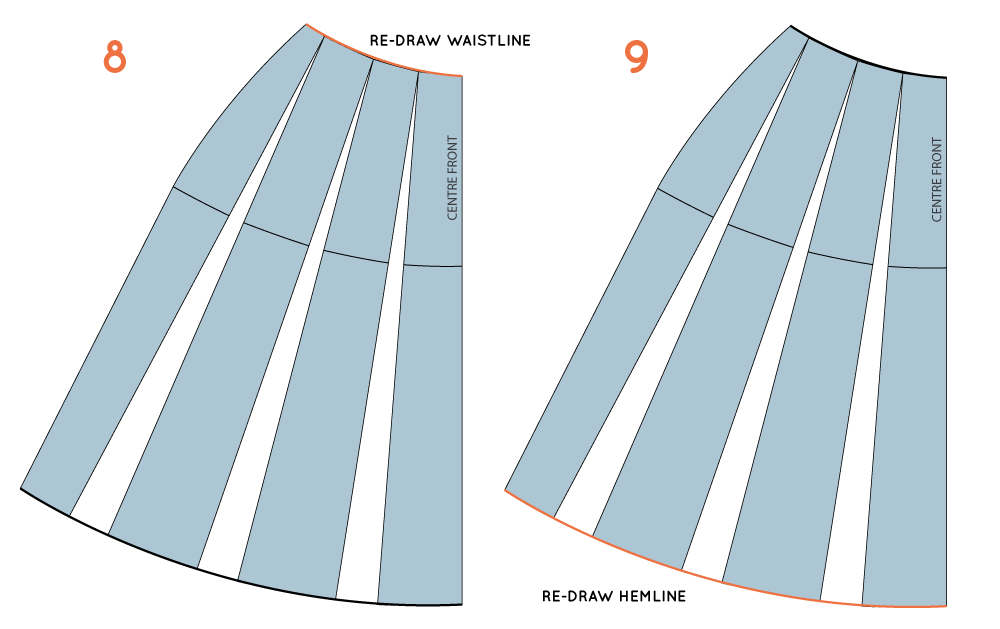
8. Redraw the waistline with a smooth curve.

9. Redraw the hemline with a smooth curve.

ADD-VOLUME_cut_and_spread_8

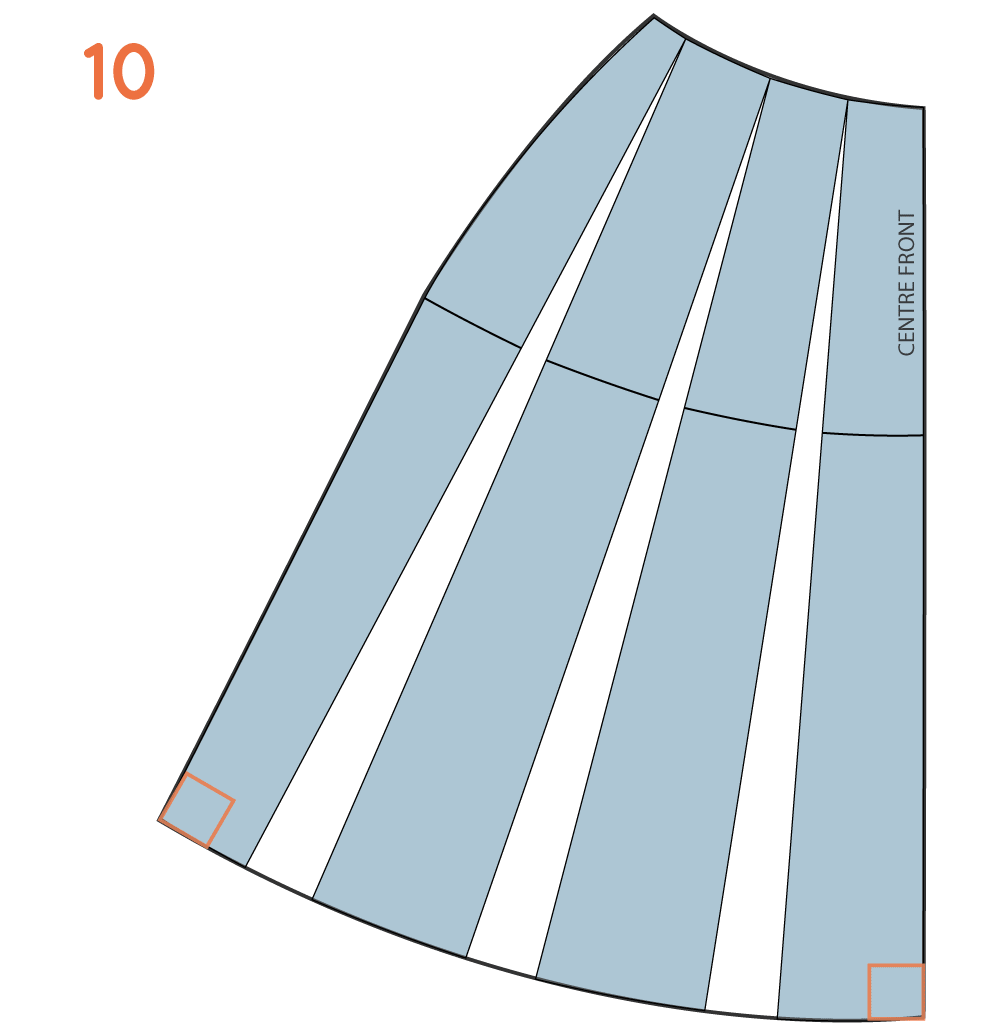
10. Check the the hemline meets the side seam and the centre front with a right angle. This will help you get a nice smooth hemline between front and back pattern pieces.

Complete the pattern

The pattern is done and you can now add seam allowance. If the pattern is a bit of a mess, with all that tape and extra paper, then simply trace a copy onto a seperate piece of paper.

You may also like:

Transferring pattern changes from toile to pattern

transferring_pattern_changes_toile_to_pattern

Last week I showed you how to make a toile, and what you should be looking for when fitting. In today's post, I will show you how to transfer changes from toile to pattern.

Lowering the neckline

The first change that I will show you is how to lower the neckline of The Rushcutter. I am all about the high neck on this dress, but I understand that it's not for everyone. If you'd prefer it to be slightly lower (or even drastically lower) it's not a difficult alteration to make. 

To start, take the sleeve pattern and the centre front panel pattern piece, and put them together. Place one sewing line over the other, so you can see how the pieces fit together when they are sewn. You will notice that on The Rushcutter sewing pattern, both the stitching line and the cutting line are marked, so that making pattern alterations is a little simpler. 

Work out how much you would like to lower the neckline by, by taking the measurement from your toile (measuring down the centre front) and mark it on your pattern piece. Make sure you measure it from the stitch line rather than the edge of the pattern. For the example, I only lowered the neckline at the front, but if you would also like to lower the neckline at the back, place a mark on your centre back too.

Before redrawing the neckline, you will need to fold the dart (so you can get the neckline all in one piece). The easiest way to do this is by placing the dart point on the corner of the table like this. The dart fullness should be folded towards the back.

Starting at the point you marked on the centre front, re-draw the neckline with a smooth curve, gradually easing back into the original neckline (unless you are also lowering the neckline at the back, in which case you will want your new neckline to meet with the point you marked on the centre back).

Before unfolding the dart, take a tracing wheel and trace over the new neck curve at the dart. This will transfer the correct neck shaping onto your dart. If you need some extra help with this, check out this tutorial. You will now just need to add seam allowance to the neckline and you are good to go!

Add or remove volume

The next thing I'm going to show you is how to use the cut and spread technique to add or remove volume from The Rushcutter. You may want to use this technique on the body of the dress, or maybe even the sleeve. 

If you have never used the method of cutting and spreading before, this example will basically show you how to do it. If you want to see it in more detail, check back on the blog later this week, as I am planning to do a post on this technique.

Pattern alterations are much easier to manage if your pattern does not have seam allowance. Remove the seam allowance from the pattern you are altering, or trace a copy of the pattern piece without seam allowance. This is really easy to do with The Rushcutter pattern as the stitch line is marked for you.

1. Draw two vertical lines through the pattern, which will cut the pattern into three equal-ish parts (this does not have to be exact).

2. Starting with one of the lines, cut up from the hemline towards the top of the pattern. Do not cut all the way through the pattern, leave a 1-2mm "hinge." The hinge will give you the freedom to move the parts of the pattern easily, but will still keep the pieces together. Repeat for the second line. 

3. Place the pattern on top of a piece of pattern paper, slightly larger than the pattern piece. Spread the pieces apart, by the desired amount, being careful to distribute the width evenly. When you are happy, tape (or glue) the pieces down carefully.

4. Redraw the hemline with a smooth curve. If the opposite edge has changed shape too drastically you should also re-draw the line.

cut_and_spread_therushcutter_2.gif

The method is the same for reducing volume, you just need to close the cut and spread line, rather than open it.

Shortening pattern

There are two ways of shortening a pattern - the first is to simply remove some length from the hem of the pattern. This method is often used when a garment has been made up and then once it can be tried on and fitted, the length is determined.

The other method is to shorten the pattern piece by removing the length from inside the pattern piece. By using this method, the overall shape of the pattern piece will not be lost.

For this method, you first need to find the 'length and shorten line,' on the pattern piece you would like to shorten. I am using the sleeve from The Rushcutter as an example, but this method can be used on any of the pattern pieces.

Cut along the line to create two separate pieces.

Think about how much length you would like to remove from your pattern piece. Mark this distance on one side of the pattern, measuring from the cut line. Marking this point on the grainline will help ensure the mark remains perpendicular to the cut line. 

Draw a perpendicular line through this point, extending to either side of the pattern piece. 

Move the unmarked pattern piece (in this case, the lower part of the sleeve) to line up with the perpendicular line just drawn, and tape (or glue) in place. 


You can now redraw the seam lines on each side of your pattern with a straight line (or a curve, if your pattern piece has curved seams).

Lengthening a pattern

For lengthening a pattern piece, the concept is exactly the same. Cut up through the 'lengthen and shorten line' and separate the pattern into two pieces.

Open the pattern pieces by the amount you want to lengthen your pattern piece by. Tape a piece of pattern paper onto the back ofthe pieces to fill the gap.

Redraw the side seams with a straight line, and you are done!

I think that's enough pattern altering for today's post, in the next post I'll show you how to slim down the dress by removing some width from the side panel, move the dart on the raglan sleeve (View A), move the shoulder seam (View B) and adjust the pocket.


You may also like: