THE Q & A SERIES
How to make the Acton dress bra friendly
Love the look of the Acton dress but don’t love wearing a strapless bra.
How could it be modified to be more of a “racer tank” style. I still want to keep the high neckline and not broad across the shoulders. Just be able to wear a racer/convertible/ cross back bra? Does that all make sense?
- Donna, Tingalpa QLD
Hi Donna,
I'm thrilled to hear you are thinking about making the Acton dress! This is a concern for quite a few people when making this dress, so I think many people will be interested in reading this week's email.
I'll show you two options - the first is to alter the pattern to make it more bra friendly, while the other option is to sew bra cups into the bodice so that you can avoid wearing a bra all-together. I know this isn't a suitable option for many people, but thought I'd include it for those of you would like to give this option a go.
Option 1 - Alter bodice armhole shape for more bra coverage

STEP 1
Take the CENTRE FRONT BODICE [1] and SIDE FRONT BODICE [2] pieces. Trace a copy of the pieces if you think you'd like to go back to the original. You could also re-print these pieces if you are working from the PDF version of the pattern.
Place STITCH LINE on STITCH LINE (grey line on the pattern), as if the two pieces have been sewn together. As you can see, you can only line up the top section of the princess seam, due to the shaping in the panel. Hold in place with a small piece of tape (I like to use magic tape as it is easy to remove when you need to) or a pin.

STEP 2
We will be extending the section where the strap attaches to the bodice to accommodate the width of a bra strap and to create some more coverage for a bra in the top section / upper armhole of the bodice.
If you have made a toile of the Acton bodice, put on the bra you plan to wear with your Acton, and try on your toile. You can then measure how far you need to extend this section of the bodice to cover the bra. You may also like to check how far the princess seam needs to be extended by to cover your bra.
Slide a piece of pattern paper under your bodice - you will only need the extra paper in the top section. Tape in place.
Extend the top of the bodice (the section that will join to the strap), to the width you would like for your new strap. The original strap width is 1cm (3/8in) and for the example we are extending for a 3cm (1 1/4in) strap, which means we are extending the line by 2cm (3/4in). Extend on the armhole side of the FRONT BODICE [1] as that is the area where more coverage is required.

If you don't want to increase your strap width by too much, the other option is to change the neckline slightly. This way, you can have a narrower strap (I'd suggest still making it wider than 1cm to cover a regular bra strap), but have the top of the bodice in the correct position to cover the top of your bra. Again, this is a great time to look at your toile to work out the exact positioning.

STEP 3
Re-draw the armhole, starting at the new outer point on the top of the bodice. Draw a gradual curve that reconnects with the original armhole STITCH LINE before you get to the side seam. It might take a couple of tries to get an armhole curve you are happy with.
If you would like to raise the armhole at the side seam, before marking the new line, extend the side seam up and join the new armhole line to the new side seam.

STEP 4
Take a tracing wheel and trace over the new armhole line in the section that is overlapping. This means that when you take the pieces apart, you will have the correct shaping on both pieces.

STEP 5
Seperate the pieces and use a pencil to trace over the tracing wheel markings. Add the seam allowance back onto the new stitch line. The seam allowance on this seam is 1cm (3/8in). For a tutorial on how to add seam allowance, see here. You may need to add paper to the SIDE FRONT BODICE [2] as we have done in the example.
You will see that the seam allowance on the CENTRE FRONT BODICE [1] kicks up at an angle, we will show you how to recreate that shape for the new line in the following step.

STEP 6
The reason the seam allowance kicks out like this on the CENTRE FRONT BODICE [1] is because when the princess seam is pressed open, this will allow the seam allowance to sit flush with the armhole. To do this:
a Extend the STITCH LINE on the princess panel side of the piece, up onto the paper - following the angle of the line.
b Fold along the line marked in part a. Trace the section of the new seam allowance line that is close to the fold - transferring it onto the paper underneath.
c Unfold the paper and mark in the lines created by the tracing wheel - joining it back to the original CUT LINE (edge of pattern) of the princess seam.
For more information on this technique, you can see this tutorial.

STEP 8
Cut along new CUT LINE to remove excess paper.
Repeat for the back pieces.
Alter your strap width to match the altered bodice.
Option 2 - Alter bodice armhole shape for more bra coverage
The other option is to sew bra cups directly into your bodice and avoid the need to wear a bra. I know this isn't an option for everyone, but for those of you interested, I have added some details below.
This is a great example of how to do it by Miranda from Stitching in Space.
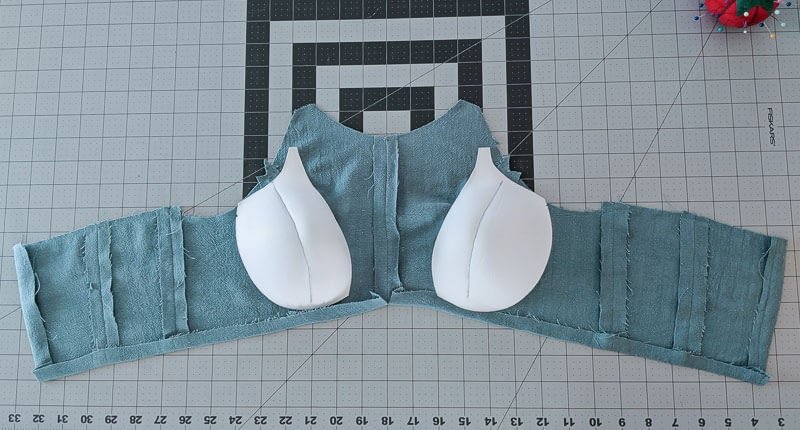
Miranda attached the cups to the inner layer of the bodice (the bodice is fully lined) by stitching through the princess panels. You could also hand stitch to the seam allowance if you would prefer this over stitching in the ditch.
As you can see, this avoids the need for a bra and gives a really beautiful finish from the outside of the bodice, as the cups have been attached to the inner lining only.
I hope that helped you and makes you feel more confident to tackle the Acton dress.
If you have any more questions about this pattern, we have a sew-along that you can find here.
Happy sewing,
Emily
resources mentioned in this issue
For more issues of the Q & A series, you can check out the archive here.
What you’ve been making

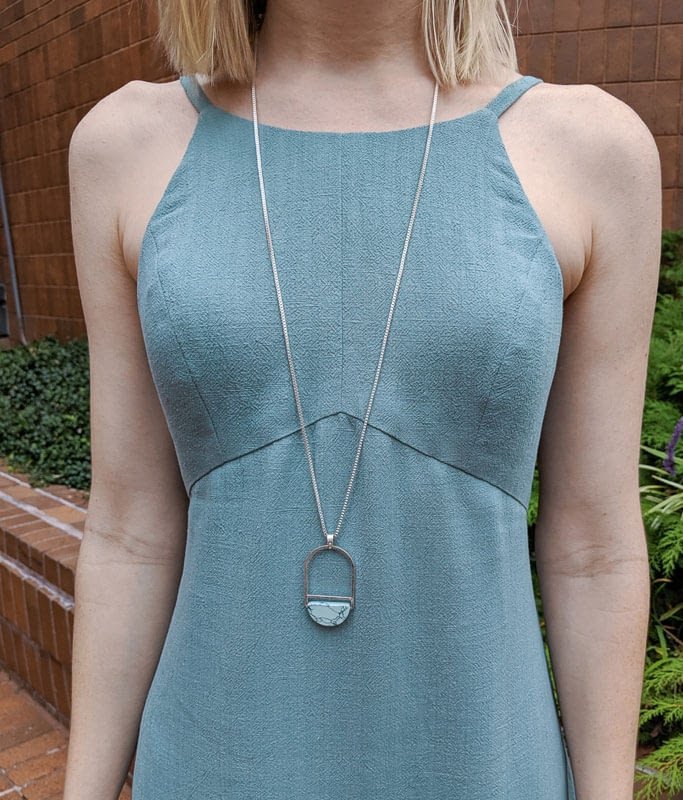
Acton dress made by @yotsuba_blythes

Acton dress made by @yotsuba_blythes

Acton dress made by @fabric_scraps


