Acton dress

ISSUE 168 - REMOVING PANEL LINES FROM A PATTERN

THE Q & A SERIES

HOW TO REMOVE PANEL LINES FROM A PATTERN

On the Acton dress the centre front bodice is not cut on the fold, although the seam is straight and so it could be. I'm wondering if there is any structural purpose to having a seam down the centre front, or whether I could cut on the fold so I don't have to pattern match my tricky fabric.

A

Sydney, Australia


Hi there!

I’ll answer your question specifically, as well as give you some pointers about removing seams in general for anyone else reading along that may have this question in relation to another pattern.

In general, if a seam line is straight, it’s normally fine to remove it.

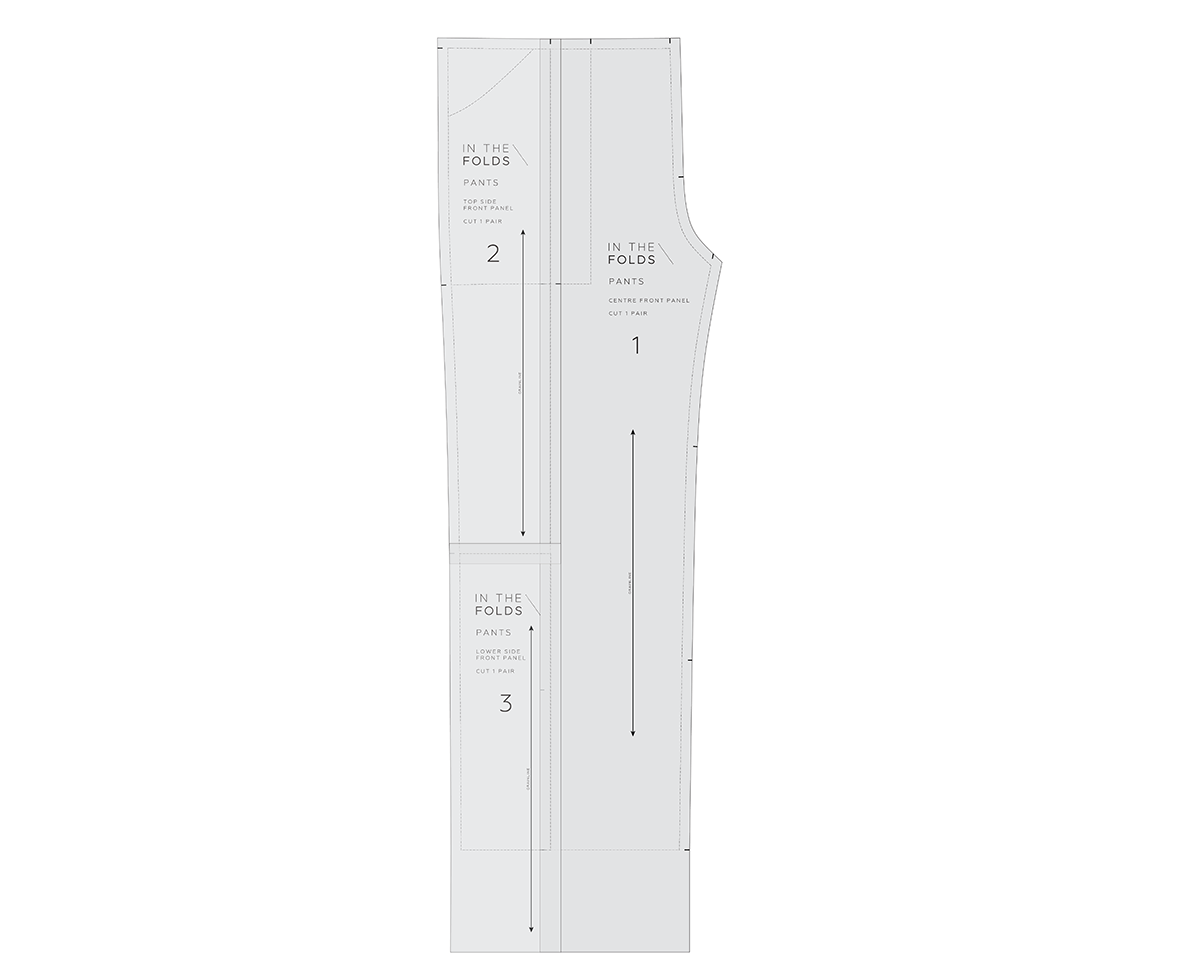
For example, in our Attwood pants we used a lot of panel lines to create a design feature. The design intention of the different panels allows makers to play with the pattern and use fabric in different ways (like colour blocking or directional prints) to create different looks. When made in a solid colour, the panel lines add a point of difference so that the pants are more than ‘just’ a plain pair of pants. But, the panel lines aren’t a necessary part of the Attwood pants’ ‘constructability’ and can be removed if you want a basic pair of pants with the same fit as the Attwoods.

If you look at the centre seam lines on the Atwood pants you can see they are straight.

HOW TO REMOVE PANEL LINES FROM THE ATTWOOD PANTS PATTERN

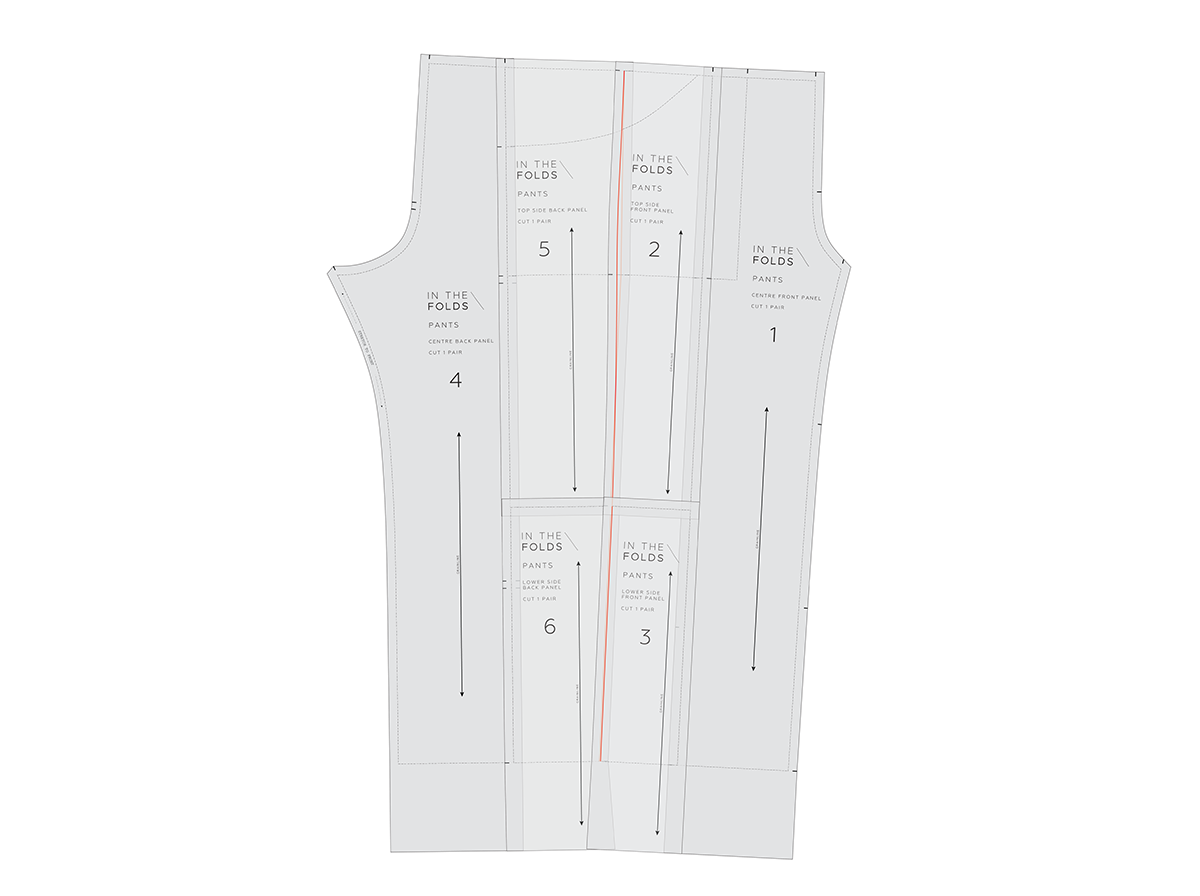
Removing the panel lines from the Attwood pants pattern is very straightforward.

Line up the corresponding panel pieces with STITCH LINE (grey line on our patterns) on STITCH LINE. Tape or glue in place. 

Done!

In the case of the Attwood pants, you could even do this to remove the side seams!

In most cases there will be shaping in the side seam, but due to the wide leg and elastic waist of the Attwoods pants pattern, the side seam is almost straight. 

Shown above is the CENTRE FRONT BODICE panel and the SIDE FRONT BODICE panel of the Acton dress pattern.

Shaping is created for the bust through a princess panel. (If you’d like to learn more about princess panels, read this blog post.)

As you can see, although the seam lines on the CENTRE FRONT BODICE (piece 1) are straight, the curve on the SIDE FRONT BODICE (piece 2) is what creates the shaping. We can’t remove this panel line as a result.

However, the CENTRE FRONT SEAM LINE on piece 1 is straight, so it can be removed.

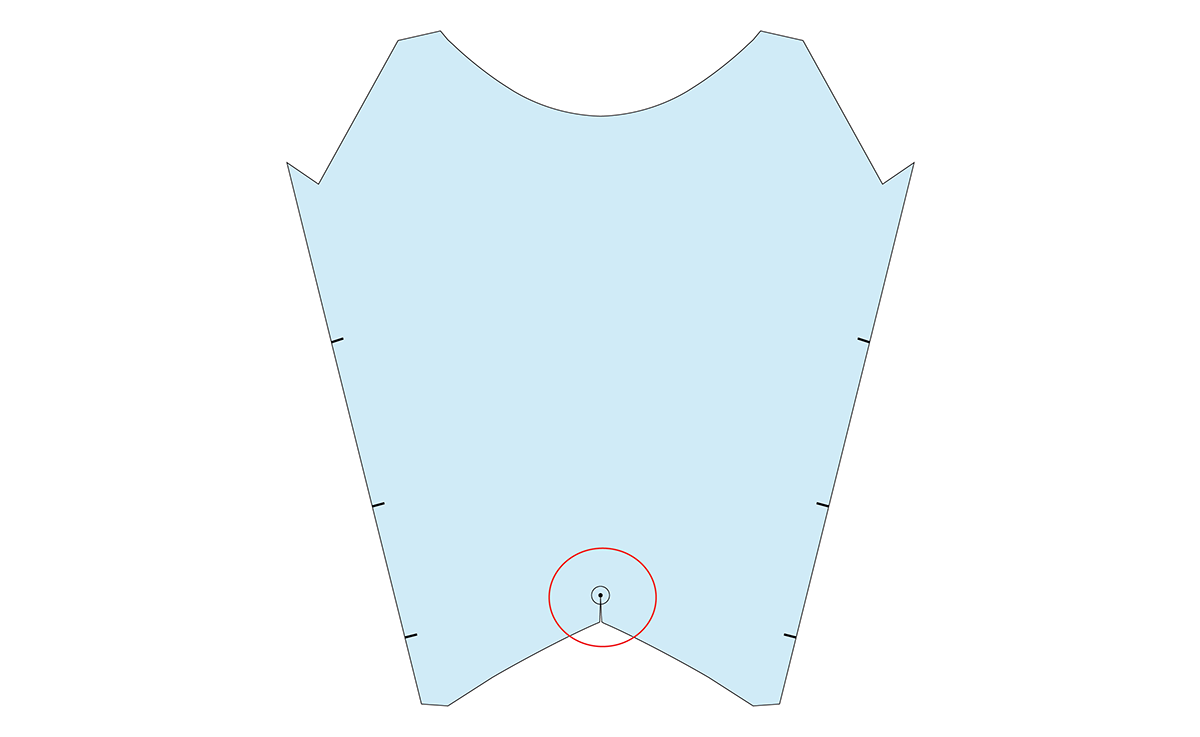
When determining if a seam can be removed, the other things to check for are design details or markings. In this case you can see there is a drill hole on the CENTRE FRONT STITCH LINE.

What is a drill hole?

Drill holes are small holes marked on a pattern. They are used to indicate a dart point or other design feature, such as the location of patch pockets, belt loops or pivot point - any feature that is located in an area where you are unable to notch a seam. They are marked on fabric with chalk or a tailor's tack. You can read more about drill holes here.

In this case the drill hole indicates where you need to stop stitching when joining the CENTRE FRONT BODICE pieces together.

An opening is required to join the bodice to the skirt due to the V shape of this seam line.

The opening in the seam allows flexibility so that both sides of the bodice can be pinned accurately to the skirt. So you can see that this drill hole marking is important to the pattern and needs to be included in any design changes made.

HOW TO REMOVE PANEL LINES FROM THE ACTON DRESS PATTERN

Step 1

To remove the panel line from the CENTRE FRONT BODICE, remove the seam allowance from the centre front seam by cutting along the STITCH LINE. Remember that you still need the drill hole marking.

Alter the cutting instructions so this piece is cut on the fold rather than as a pair.

Step 2

When you cut the piece, mark the drill hole and cut along the fold from the bottom of the piece to the drill hole to create the required opening in the centre front.

And that’s it!

Happy Acton and Attwood sewing!

Emily


RESOURCES MENTIONED IN THIS ISSUE

  • The Attwood pants pattern can be found here.

  • The Acton dress pattern can be found here.

  • How to create princess panels - blog post here.

  • Adding pattern markings to your patterns - blog post here.


For more issues of the Q & A series, you can check out the archive here.


WHAT YOU’VE BEEN MAKING


MORE POSTS IN THE SERIES

ISSUE 104 - THE COMBINED METHOD FOR SEWING IN SLEEVES

THE Q & A SERIES

How to use the sewing flat and "in the round" techniques together when sewing sleeves

Hi Emily,

I really enjoy your newsletter. Thank you for answering our questions :)

I was wondering about sewing sleeves. There are 2 methods to set the sleeves in, right? Sewing them in when the side seams are already sewn up and when they are not sewn up yet.

When would you choose one over the other? What are the benefits for one or the other in a finished garment? I guess there is a sewing pun for this one as well - what are bene-fits in fitting the sleeves :)

I am looking forward to your answer.

Greetings,
Spela

The Hague | The Netherlands


Hi Spela,

As you may have seen, I answered your question about sewing sleeves in flat or in the round in our last issue of the Q&A series. In this week's issue I want to show you the combined method - sewing part of the sleeve in flat and the rest of it in the round.

The problem with the usual methods of setting in sleeves

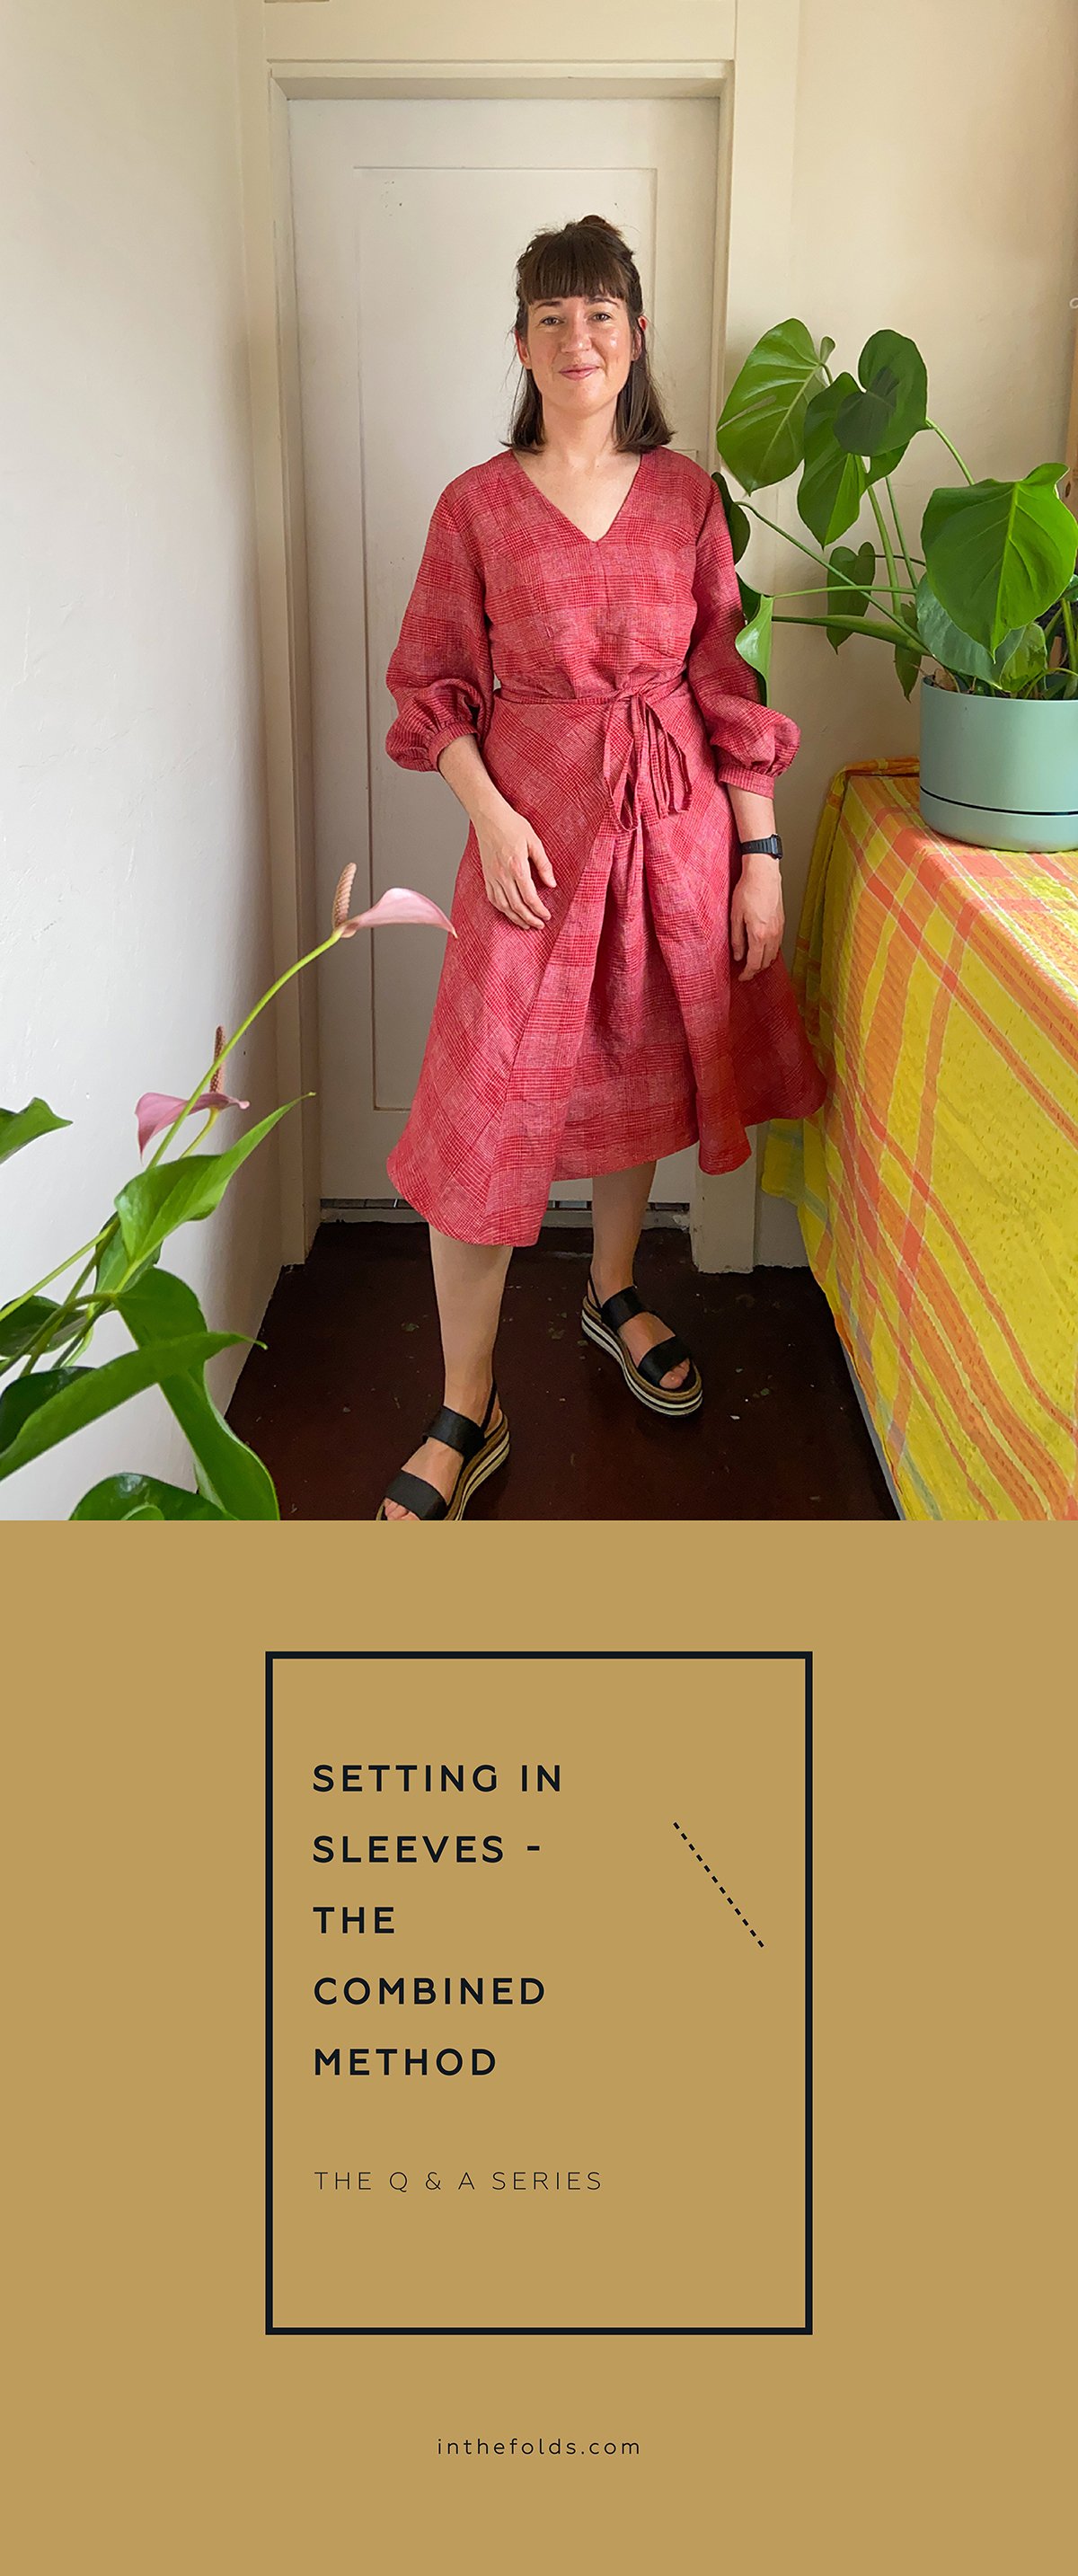
When designing the sleeve expansion for the Acton dress pattern I decided I wanted the bodice to be fully lined, just like the original Acton dress pattern. The problem was that it's not as simple to line a bodice with sleeves as it is to line a sleeveless bodice.

When doing research to work out the best way to approach this, I realised that a lot of sewing resources guided makers to use hand-sewing to enclose the lined bodice. Although I am a fan of all things slow sewing, I don't love the idea of falling back on hand sewing just because it's the simplest way to finish something off.

Drafting patterns and creating the order of construction for our patterns has always been one of my favourite parts of the process as it's like trying to solve a puzzle! So I got to work with the goal of finding the best way to fully line a bodice with sleeves and to do it all on the sewing machine.

The solution: a combined method for setting in sleeves

I figured out a way to do it and it became the basis for the instructions of the Acton dress sleeve expansion pattern.

I also realised that this method would work for garments without linings too. Although I think everyone should give sewing sleeves in the round a go a couple of times as it gets easier with practice. But, for those of you who would like to stick to sewing flat, this might be just the method you’ve been looking for!

Prepare sleeves

Step 1

Finish both sides of the sleeve piece with your chosen method. 

With your machine on its longest stitch length, make two lines of stitching along the sleeve cap between the front and back armhole notches. The first row should be 5mm (¼in) from the edge and the next 5mm (¼in) from the first row of stitching. The stitches will be hidden inside the seam allowance when the sleeve is attached to the bodice. Leave the threads long at each end and don't backstitch to start or finish.

Carefully pull on one set of threads to slightly pull in the sleeve cap, allowing it to curve in nicely, but not making gathers.

Step 2

The bodice needs to have the shoulder seams stitched and the seams pressed open. In the case of the Acton, as the bodice is fully lined, these seams haven't been finished.

Pin one SLEEVE to armhole with right sides together, using the notches to guide you and easing in the sleeve cap to fit the armhole. Pin sleeve in place, stopping when you get approximately 4cm (1½in) from the underarm on each side. Leave these sections free. 

Machine baste the sleeve in place with a 6mm (¼in) seam allowance. This row of stitching will just hold the sleeve in place before we stitch the seam properly in the next step. Repeat with the other sleeve.

Flip bodice to the right side and check for puckering in the sleeve cap. If there is puckering, don't worry! Just unpick a small section around the puckering and steam well. Ease the section back into the bodice, pin and re-stitch.

Once you're happy with how its looking, sew the sleeve in (still leaving the gap on each end) with a 1.2cm (½in) seam allowance. 

Tip: If you're working with a sleeve that has a very high sleeve cap, you may need to leave more than a 4cm gap open at each end. You'll know if you need to do this if you have a really hard time pinning the sleeve into the armhole.

Step 3

Pin the SLEEVE underseams together with right sides together. Stitch with a 1.2cm (½in) seam allowance. Press seam allowances open and turn bodice and sleeves right side out.

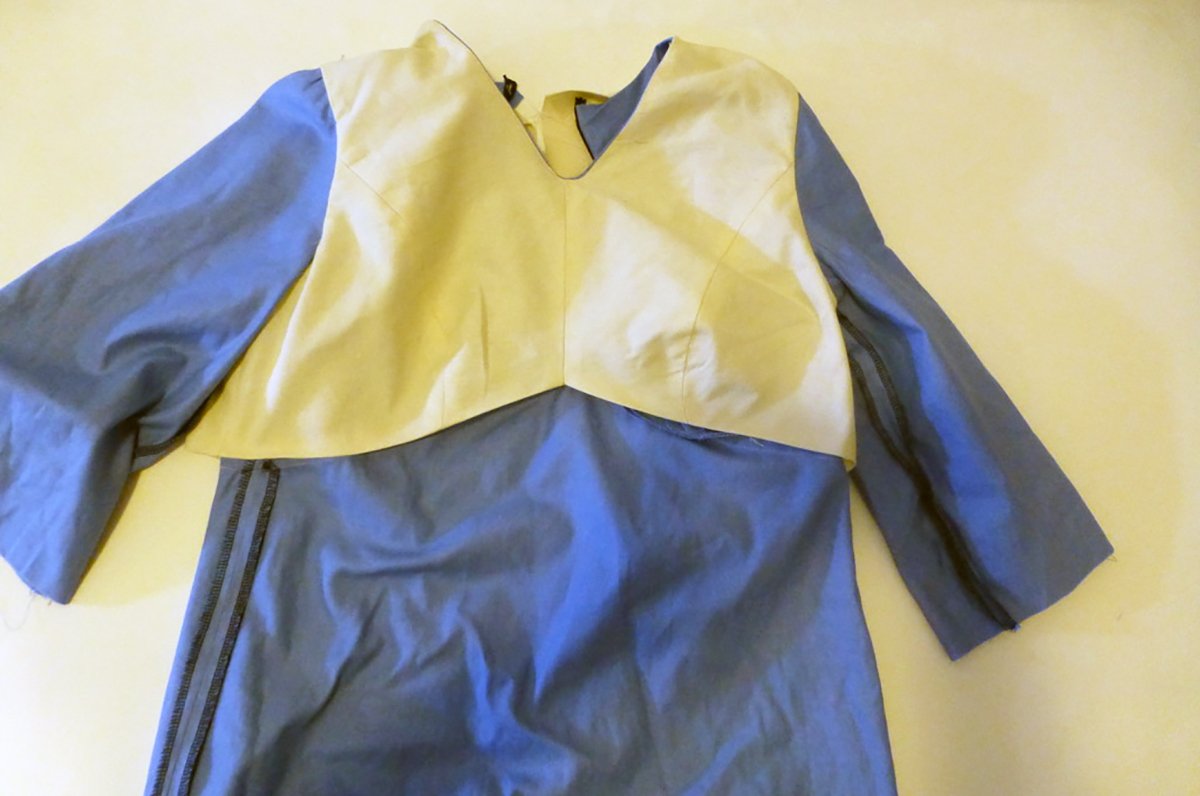
As you can see in the illustration, at this point the bodice is lined. I don’t go into the details of the lining in this email, as we're just focusing on the method for attaching the sleeves. If you're interested to try the method of the lined bodice with sleeves, grab a copy of the pattern.

Step 4

Pin the side seams of the bodice together with right sides together.

In this case, due to the bodice lining, you will need to flip up the bodice, so you can access the seams on both the bodice lining and outer bodice. Pin the front and back bodice together at the side seams with right sides together.

Repeat on the lining.

Stitch each side seam with a 1.2cm (½in) seam allowance before pressing seam allowances open.

Step 5

Pin the bottom of the sleeve into the bottom of the armhole with right sides together. This is how you will finish the sleeve "in the round."

If the bodice has a lining like ours: From the wrong side of the lining and bodice, sandwich the underarm section of one sleeve between the bodice and lining. Pin the remainder of the sleeve into the armhole. Stitch with a 1.2cm (½in) seam allowance.

Press armholes well.

And that's it! 

Happy sewing,

Emily


RESOURCES MENTIONED IN THIS ISSUE

  • The Acton dress pattern can be found here.

  • The Acton dress sleeve expansion pattern can be found here.

  • The difference between setting in sleeves and sewing flat - tutorial can be found here.


For more issues of the Q & A series, you can check out the archive here.

MORE POSTS IN THE SERIES

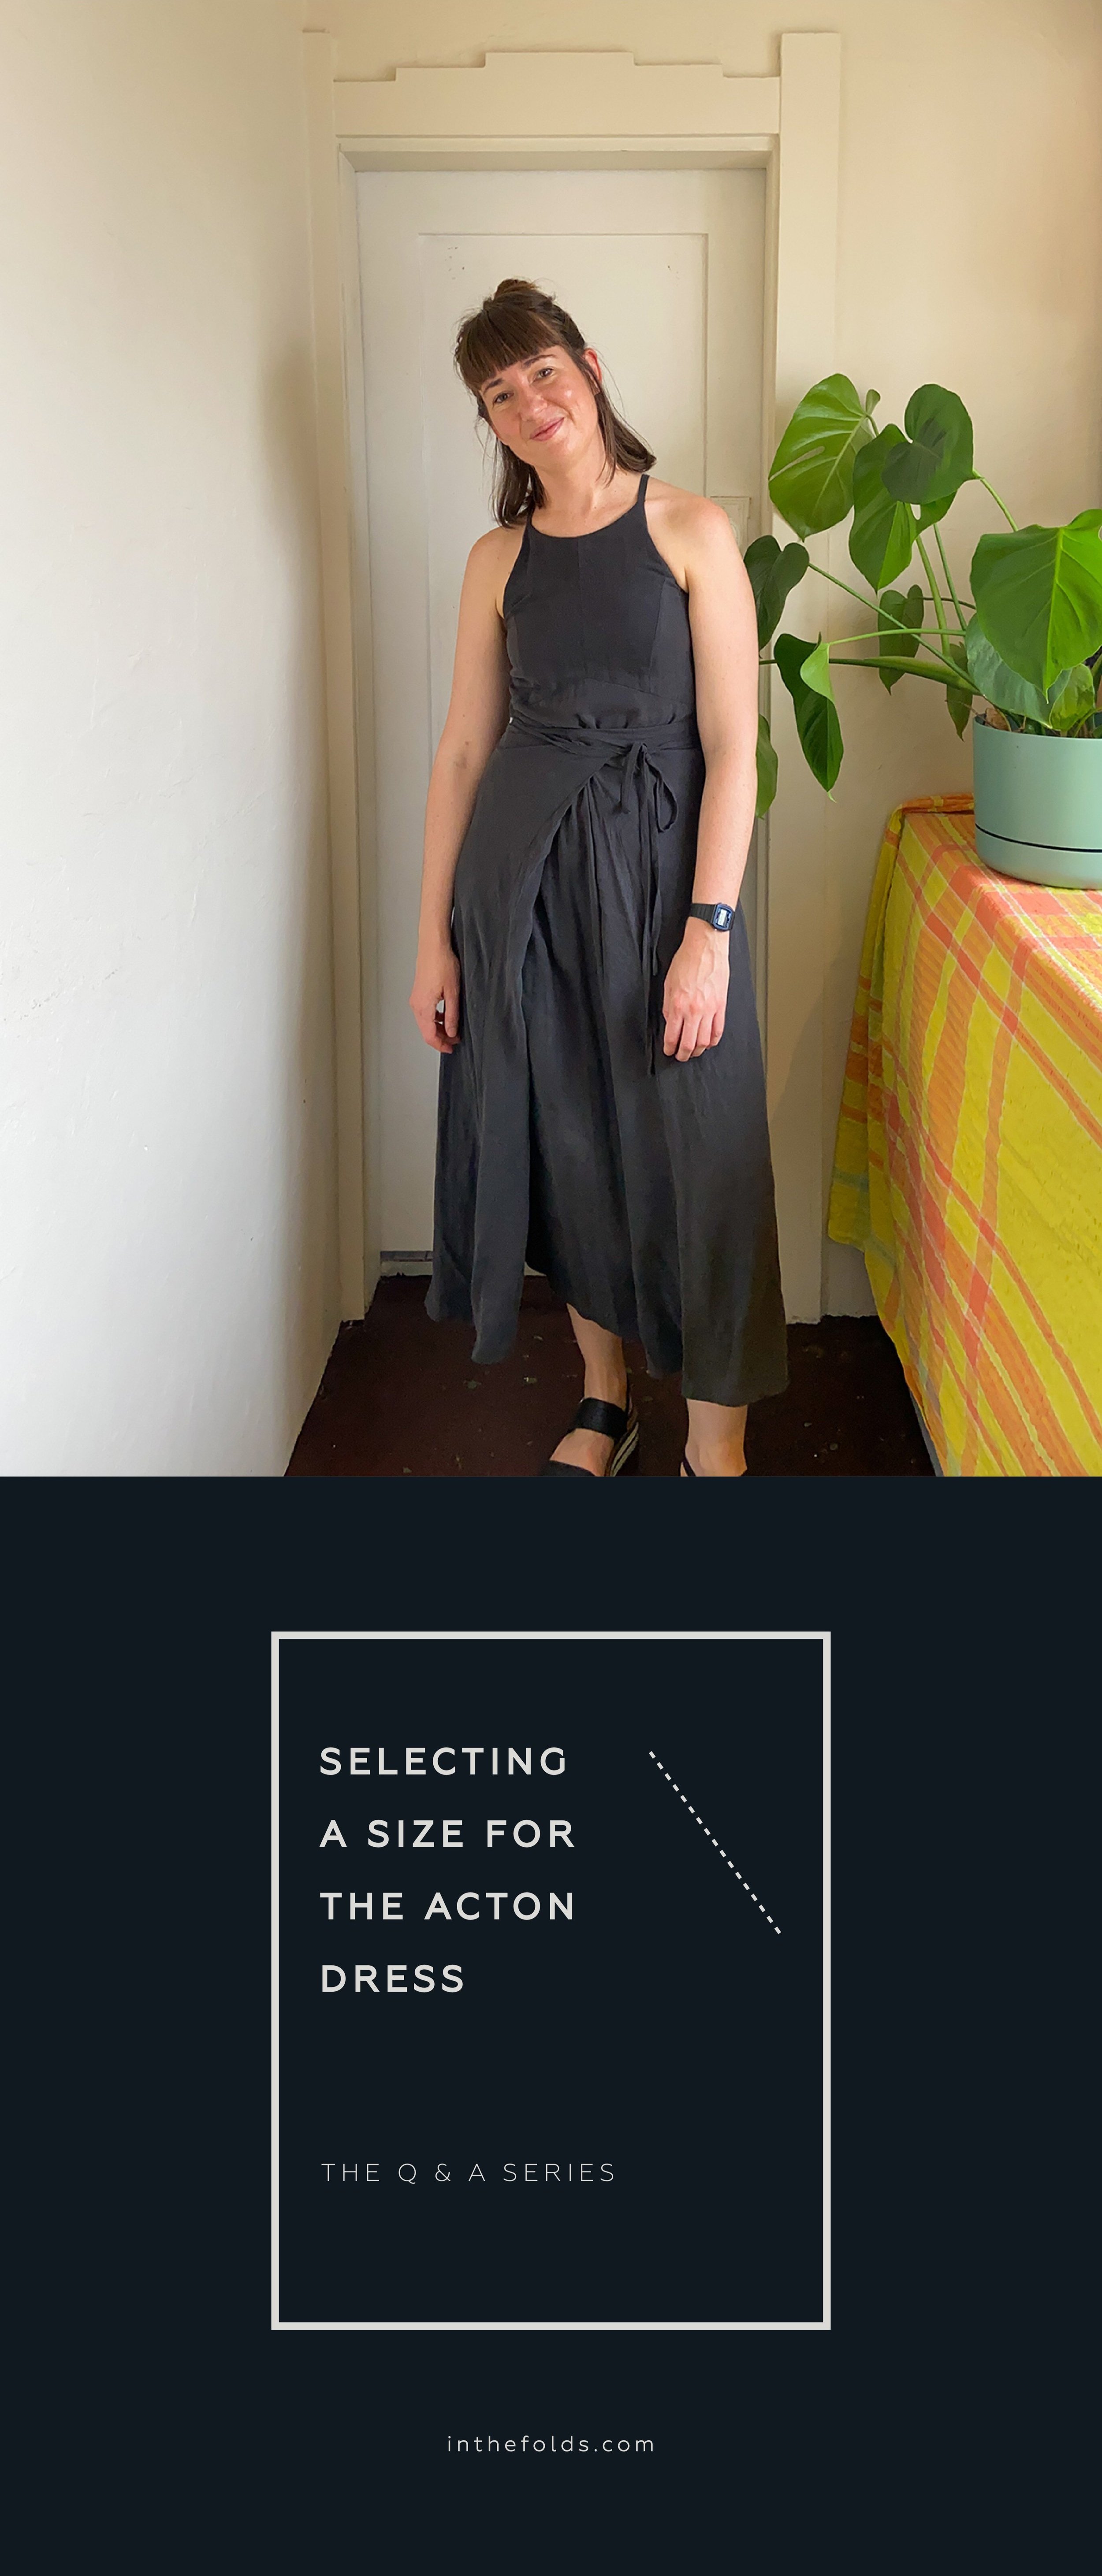
ISSUE 91 - Selecting a size for the Acton dress

THE Q & A SERIES

Selecting a size for the Acton dress

Hello,

I am about to get started on the Acton dress, but am feeling a little bit confused.

My measurements are as follows:

Bust 84cm
High Bust 80.5cm
Waist 72cm
Hips 89cm

I have no idea how to select the right size based on my measurements.

I'm hoping that you can help.

Thank you


Hi there,

I am excited to hear you will be working on an Acton dress! This is a timely question as I have Actons on my mind, as we just released a new sleeve expansion for this pattern!

Getting started

It might be helpful to print the size chart so you can circle / highlight the size according to your measurements, as you work through this process. Alternatively, jot down your measurements and write the corresponding size / sizes next to each one as you work down the list.

1. Start with your high bust measurement

When selecting your size based on your measurements it will depend on the style of the garment. For the Acton dress, you need to select your size based on your high bust measurement. This is due to the fitted nature of the bodice. Generally, when selecting your size for fitted styles that involve the upper half of your body, you are best off selecting a size based on your high bust measurement

With a high bust measurement of 80.5cm, this puts your measurements in a size C.

You then work your way down the column for that size and check if your other measurements sit within the same size bracket. For most of us, they won't, and that's not a problem! This is the joy of making your own clothes. You can make them to fit your body!

2. Work out if you need to do a bust adjustment

Your bust measurement is 84cm, but the pattern is drafted for an 86cm bust for size C. This means that your bust is 2cm smaller than the pattern. Due to this, you may choose to do a 2cm Small Bust Adjustment. We have tutorials about how to do both a Small Bust Adjustment (SBA) and a Full Bust Adjustment (FBA) on our website, if you'd like to take a look.

3. Look at waist measurements

We then continue to work our way down the column. Your waist measurement, at 72cm, is 1cm larger than the size C, but with the amount of ease in the waist of the Acton dress, this will not be a problem.

Ease is the difference between the body measurements a pattern is designed for and the finished garment measurements. To work out the ease in a pattern, you need to take the body measurements and subtract them from the finished garment measurements.

For woven garments, ease is required to make a garment comfortable to move in. More ease is added to change the silhouette of a design. For example, in the Acton dress, the amount of ease in the hip area is more than you need to sit, stand, move etc. but it is this amount of ease that gives the pattern its A-line shape.

In the case of the waist for a size C, we subtract 71cm from 81.5cm. The result is 9.5cm. This means there is 9.5cm extra fabric at the waist.

4. Look at hip measurements

The last measurement to check is your hips. Your hip measurement is 89cm. This is smaller than the size C and would you put you in a size B. If you were making View A (the A-line skirt), you could grade down a size if you wanted. If it was me, I wouldn't worry about grading to a smaller size due to the design of the pattern. For a larger hip size, I would grade up a size

5. Bring it all together

You can now look at your circled / highlighted size chart and see that you should be selecting a size C and doing a small bust adjustment of 2cm. Please keep in mind that this process has not considered length, and sometimes to achieve a great fit, you will need to add or remove length in different parts of a pattern. For how to do this on the Acton dress, you can see this post.

This will give you a really good start when it comes to printing the correct size. We would still suggest making a toile though so that you can check you are happy with the fit before cutting into your real fabric.

Although I have linked to a number of tutorials in this email, we have a whole lot more available in the Acton dress sew-along. You can check it out here.

If you're making another one of our patterns and not sure where to start when taking tour measurements, you might find this post from the Q&A series archive helpful. You may also like this post, which also talks about fit and things to consider when adding and removing length.

I hope this helps and you now feel confident to get started!

Happy sewing,

Emily


resources mentioned in this issue

  • Acton dress pattern can be found here.

  • Acton dress sleeve expansion can be found here.

  • Small Bust Adjustment (SBA) on princess panels. Tutorial can be found here.

  • Full Bust Adjustment (FBA) on princess panels. Tutorial can be found here.

  • How to grade between sizes on the Acton dress. Tutorial can be found here.

  • How to add length to the Acton bodice. Tutorial can be found here.

  • How to make a toile of the Acton dress. Tutorial can be found here.

  • The Acton dress sew-along can be found here.

  • Selecting the correct size. Tutorial can be found here.

  • Getting a good fit. Tutorial can be found here.


For more issues of the Q & A series, you can check out the archive here.

More posts in the series

ISSUE 76 - How to make the Acton dress bra friendly

THE Q & A SERIES

How to make the Acton dress bra friendly

Love the look of the Acton dress but don’t love wearing a strapless bra.

How could it be modified to be more of a “racer tank” style. I still want to keep the high neckline and not broad across the shoulders. Just be able to wear a racer/convertible/ cross back bra? Does that all make sense?

- Donna, Tingalpa QLD


Hi Donna,

I'm thrilled to hear you are thinking about making the Acton dress! This is a concern for quite a few people when making this dress, so I think many people will be interested in reading this week's email. 

I'll show you two options - the first is to alter the pattern to make it more bra friendly, while the other option is to sew bra cups into the bodice so that you can avoid wearing a bra all-together. I know this isn't a suitable option for many people, but thought I'd include it for those of you would like to give this option a go.


Option 1 - Alter bodice armhole shape for more bra coverage

STEP 1
Take the CENTRE FRONT BODICE [1] and SIDE FRONT BODICE [2] pieces. Trace a copy of the pieces if you think you'd like to go back to the original. You could also re-print these pieces if you are working from the PDF version of the pattern.

Place STITCH LINE on STITCH LINE (grey line on the pattern), as if the two pieces have been sewn together. As you can see, you can only line up the top section of the princess seam, due to the shaping in the panel. Hold in place with a small piece of tape (I like to use magic tape as it is easy to remove when you need to) or a pin.

STEP 2
We will be extending the section where the strap attaches to the bodice to accommodate the width of a bra strap and to create some more coverage for a bra in the top section / upper armhole of the bodice.

If you have made a toile of the Acton bodice, put on the bra you plan to wear with your Acton, and try on your toile. You can then measure how far you need to extend this section of the bodice to cover the bra. You may also like to check how far the princess seam needs to be extended by to cover your bra.

Slide a piece of pattern paper under your bodice - you will only need the extra paper in the top section. Tape in place.

Extend the top of the bodice (the section that will join to the strap), to the width you  would like for your new strap. The original strap width is 1cm (3/8in) and for the example we are extending for a 3cm (1 1/4in) strap, which means we are extending the line by 2cm (3/4in). Extend on the armhole side of the FRONT BODICE [1] as that is the area where more coverage is required.

If you don't want to increase your strap width by too much, the other option is to change the neckline slightly. This way, you can have a narrower strap (I'd suggest still making it wider than 1cm to cover a regular bra strap), but have the top of the bodice in the correct position to cover the top of your bra. Again, this is a great time to look at your toile to work out the exact positioning.

STEP 3
Re-draw the armhole, starting at the new outer point on the top of the bodice. Draw a gradual curve that reconnects with the original armhole STITCH LINE before you get to the side seam. It might take a couple of tries to get an armhole curve you are happy with.

If you would like to raise the armhole at the side seam, before marking the new line, extend the side seam up and join the new armhole line to the new side seam.

STEP 4
Take a tracing wheel and trace over the new armhole line in the section that is overlapping. This means that when you take the pieces apart, you will have the correct shaping on both pieces.

STEP 5
Seperate the pieces and use a pencil to trace over the tracing wheel markings. Add the seam allowance back onto the new stitch line. The seam allowance on this seam is 1cm (3/8in). For a tutorial on how to add seam allowance, see here. You may need to add paper to the SIDE FRONT BODICE [2] as we have done in the example.

You will see that the seam allowance on the CENTRE FRONT BODICE [1] kicks up at an angle, we will show you how to recreate that shape for the new line in the following step.

STEP 6
The reason the seam allowance kicks out like this on the CENTRE FRONT BODICE [1] is because when the princess seam is pressed open, this will allow the seam allowance to sit flush with the armhole. To do this:

Extend the STITCH LINE on the princess panel side of the piece, up onto the paper - following the angle of the line.

Fold along the line marked in part a. Trace the section of the new seam allowance line that is close to the fold - transferring it onto the paper underneath.

Unfold the paper and mark in the lines created by the tracing wheel - joining it back to the original CUT LINE (edge of pattern) of the princess seam.

For more information on this technique, you can see this tutorial.

STEP 8
Cut along new CUT LINE to remove excess paper. 

Repeat for the back pieces.

Alter your strap width to match the altered bodice.


Option 2 - Alter bodice armhole shape for more bra coverage

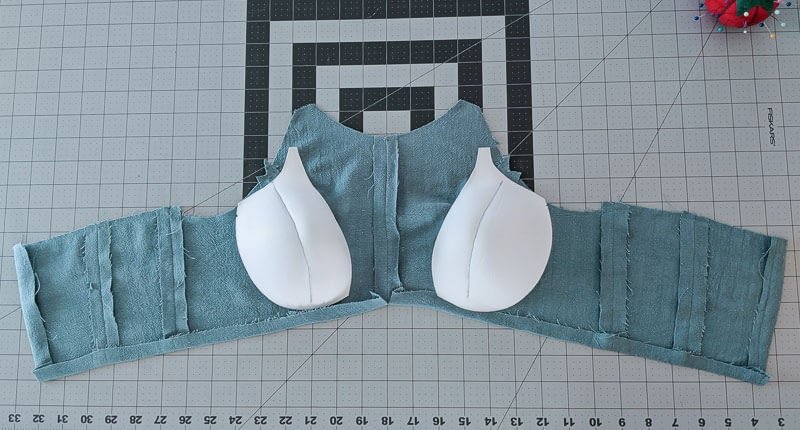
The other option is to sew bra cups directly into your bodice and avoid the need to wear a bra. I know this isn't an option for everyone, but for those of you interested, I have added some details below.

This is a great example of how to do it by Miranda from Stitching in Space.

Miranda attached the cups to the inner layer of the bodice (the bodice is fully lined) by stitching through the princess panels. You could also hand stitch to the seam allowance if you would prefer this over stitching in the ditch.

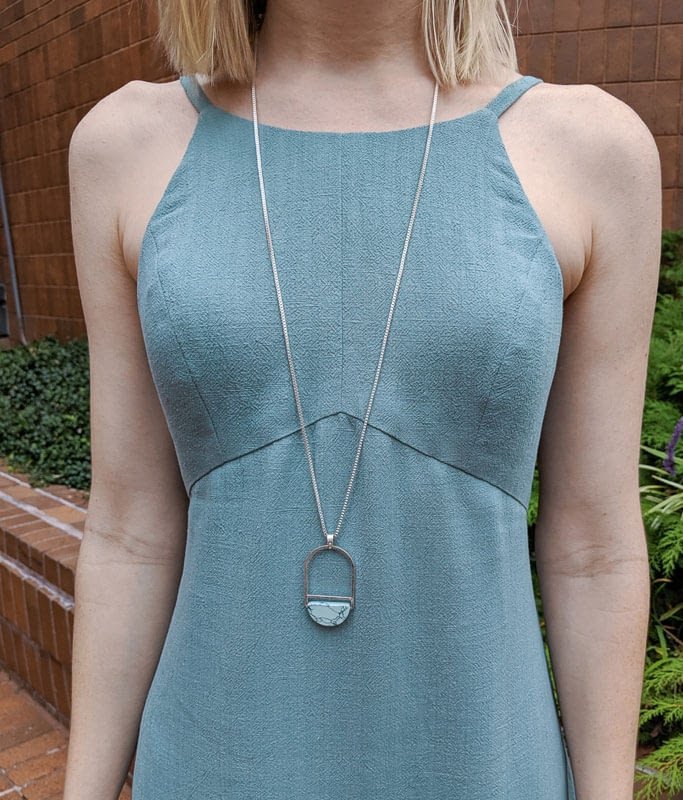
As you can see, this avoids the need for a bra and gives a really beautiful finish from the outside of the bodice, as the cups have been attached to the inner lining only.

I hope that helped you and makes you feel more confident to tackle the Acton dress.

If you have any more questions about this pattern, we have a sew-along that you can find here.

Happy sewing,

Emily


resources mentioned in this issue

  • The Acton dress pattern can be found here.

  • The Acton dress: How to make a toile. Tutorial can be found here.

  • How to add seam allowance to a sewing pattern. Tutorial can be found here.

  • Notes on adding seam allowance. Tutorial can be found here.

  • The Acton sew-along can be found here.


For more issues of the Q & A series, you can check out the archive here.

What you’ve been making


More posts in the series

ISSUE 50 - Using a border print on the Acton dress

HEADER_ISSUE_49.jpg
HEADING - V1.jpg

Hi Emily! 

I really love your Q&A series—it has become a highlight of my weekend to receive it!

My question is about using border prints. I recently scored some vintage cotton meterage with a gorgeous border print that I’d love to turn into a dress—perhaps View B of the Acton dress. However I am not sure how to approach the curved hem of the Acton dress with a border print. Any tips? Or is it best to choose a different pattern with a straighter hem? Many thanks!

Meg

Sydney, Australia


Hi Meg,

I am thrilled to hear that you are enjoying the Q&A series and it has become a highlight of your weekend. I love creating it and when I hear from happy readers it makes my heart sing.

This is a great question! I think you could make a border print on the Acton dress work.

I have come up with a couple of options for you: 

add seam lines

You could add some seams into the skirt, so that you could then cut all pieces on the straight grain. This option might not work with all prints and it probably depends on how you feel about cutting the print.

To do this:

SUB-HEADING 6.jpg

Step 1

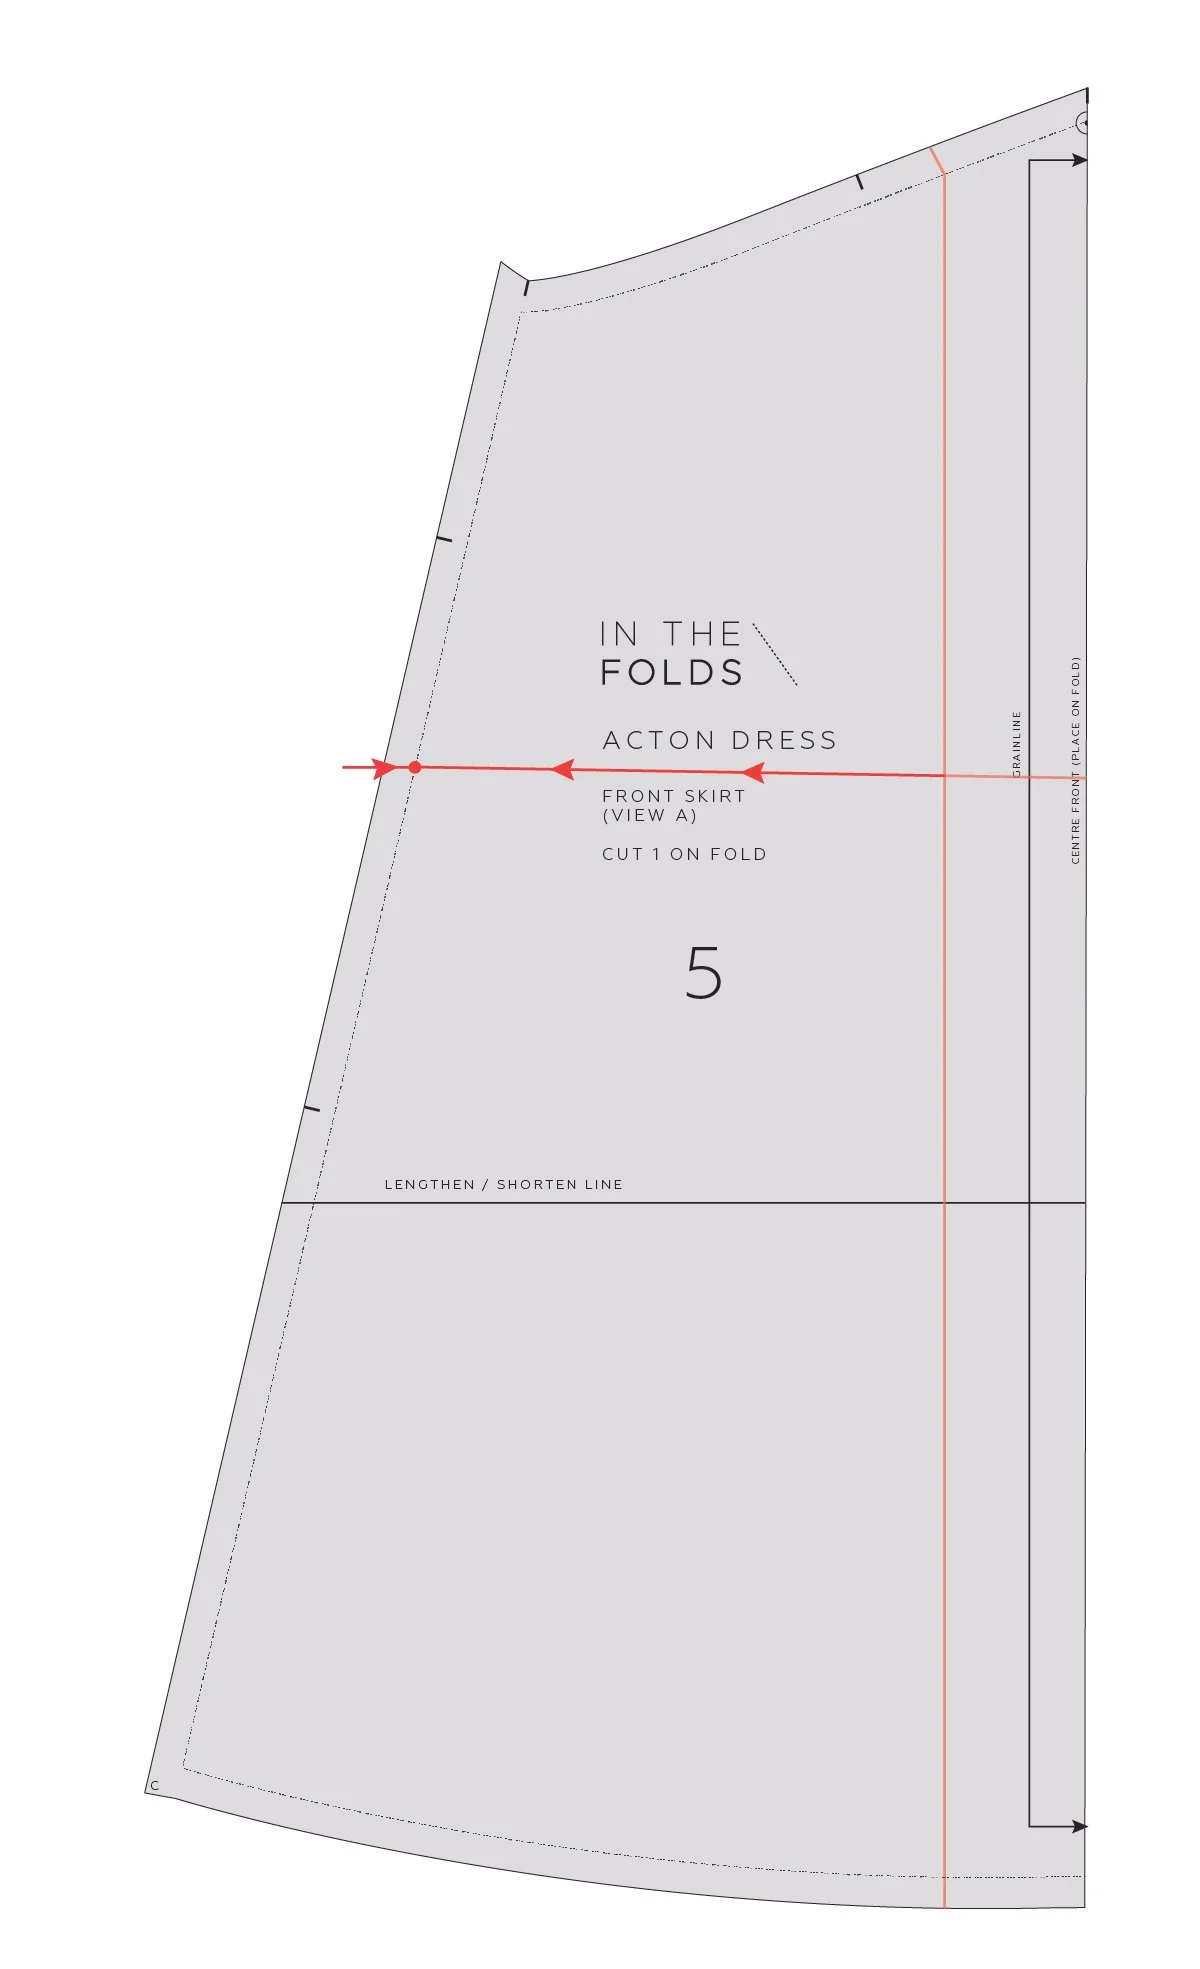
Draw a line through the pattern as illustrated.

Acton dress - border print - 2.jpg

Step 2
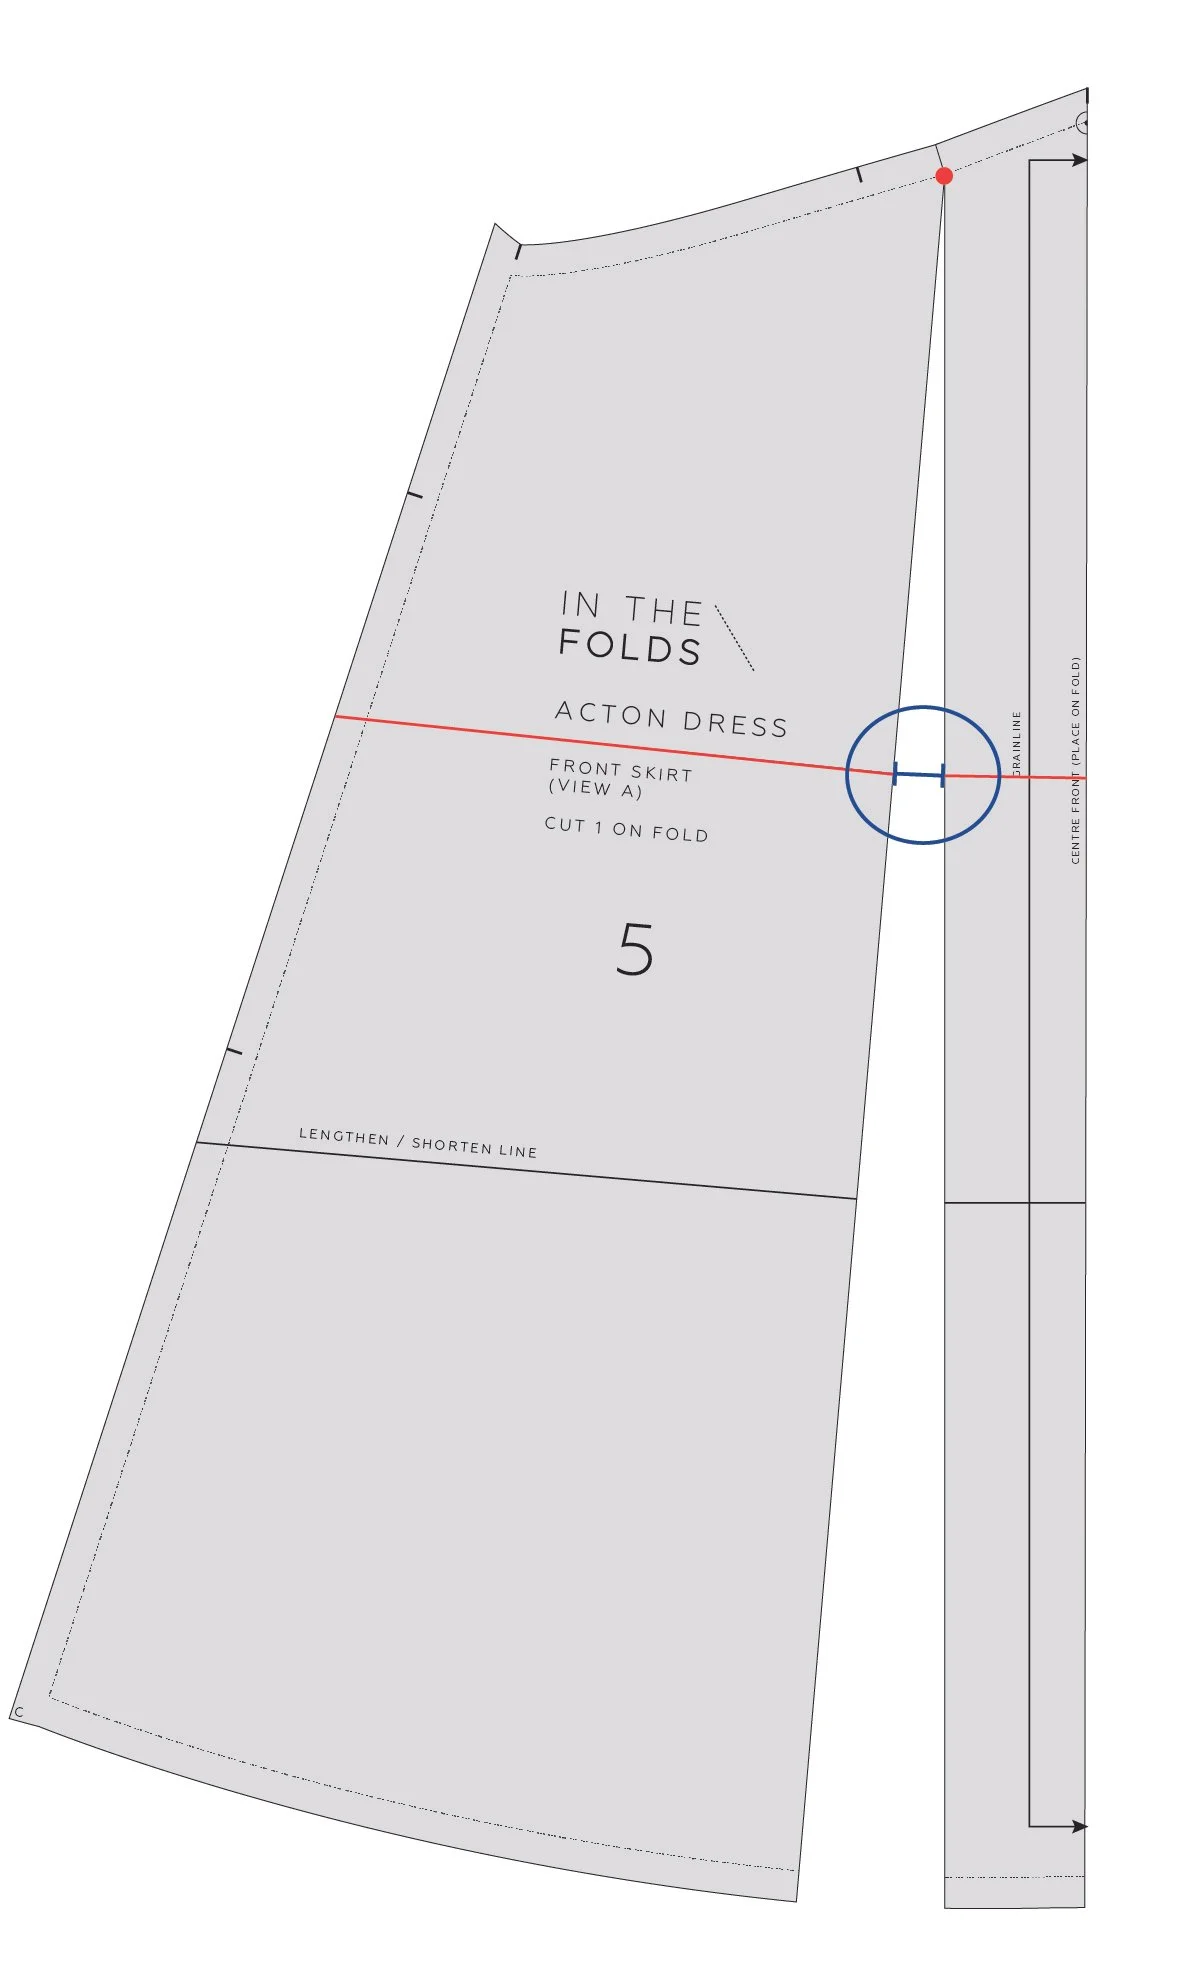
Cut along the line to separate the pattern into two pieces. As you can see. By splitting the piece in two, you can now get the hemline much straighter on both sections of the piece.

Acton dress - border print - 3.jpg

Step 3

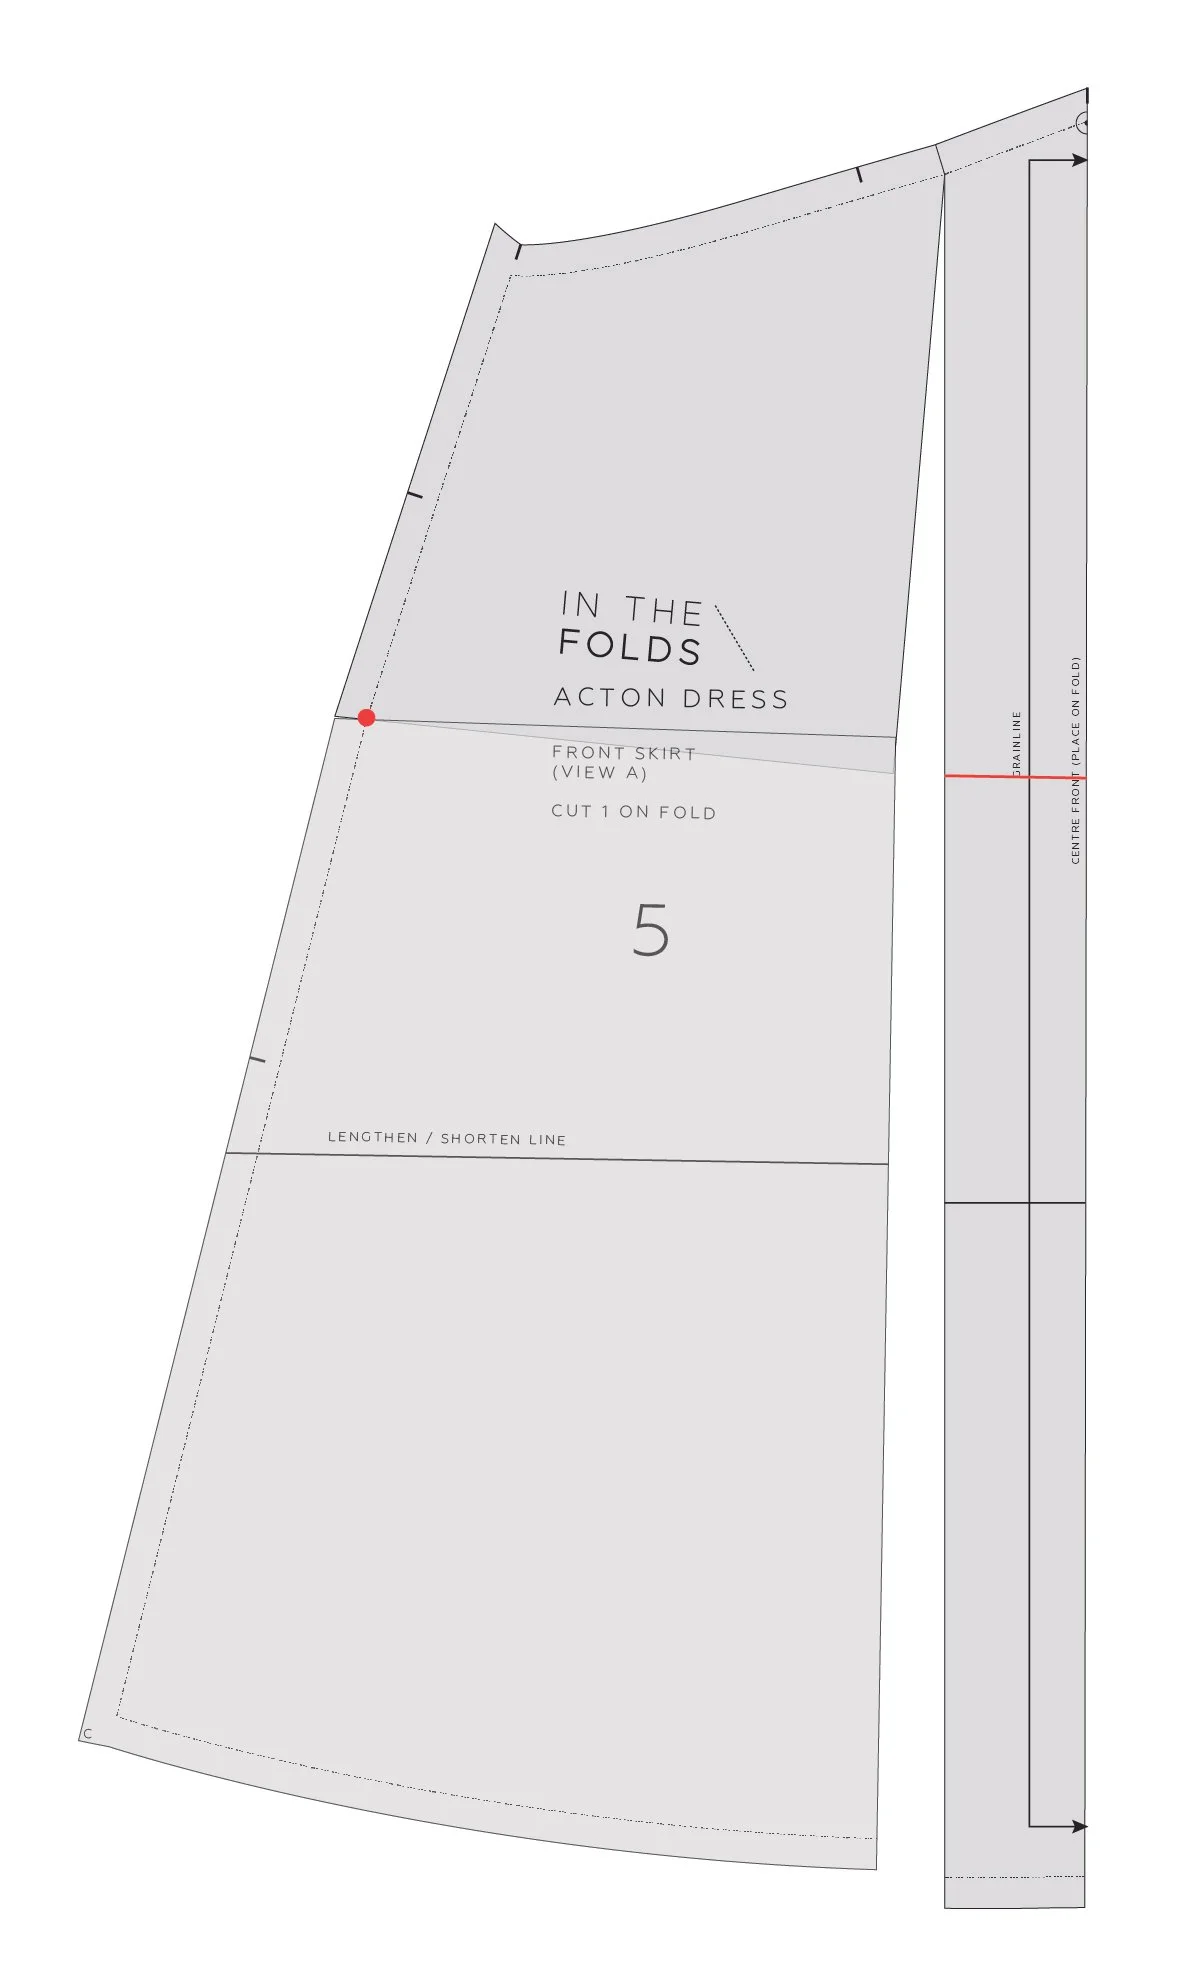
Mark a new grainline on the side section of the skirt (you will want it to be perpendicular to the hemline) and label the pattern pieceAdd seam allowance to each side of the cut line (I would suggest the same amount that is on the side seam for consistency). You can also add some notches to the seam so that you know which side connects to the centre panel and which side is the side seam.

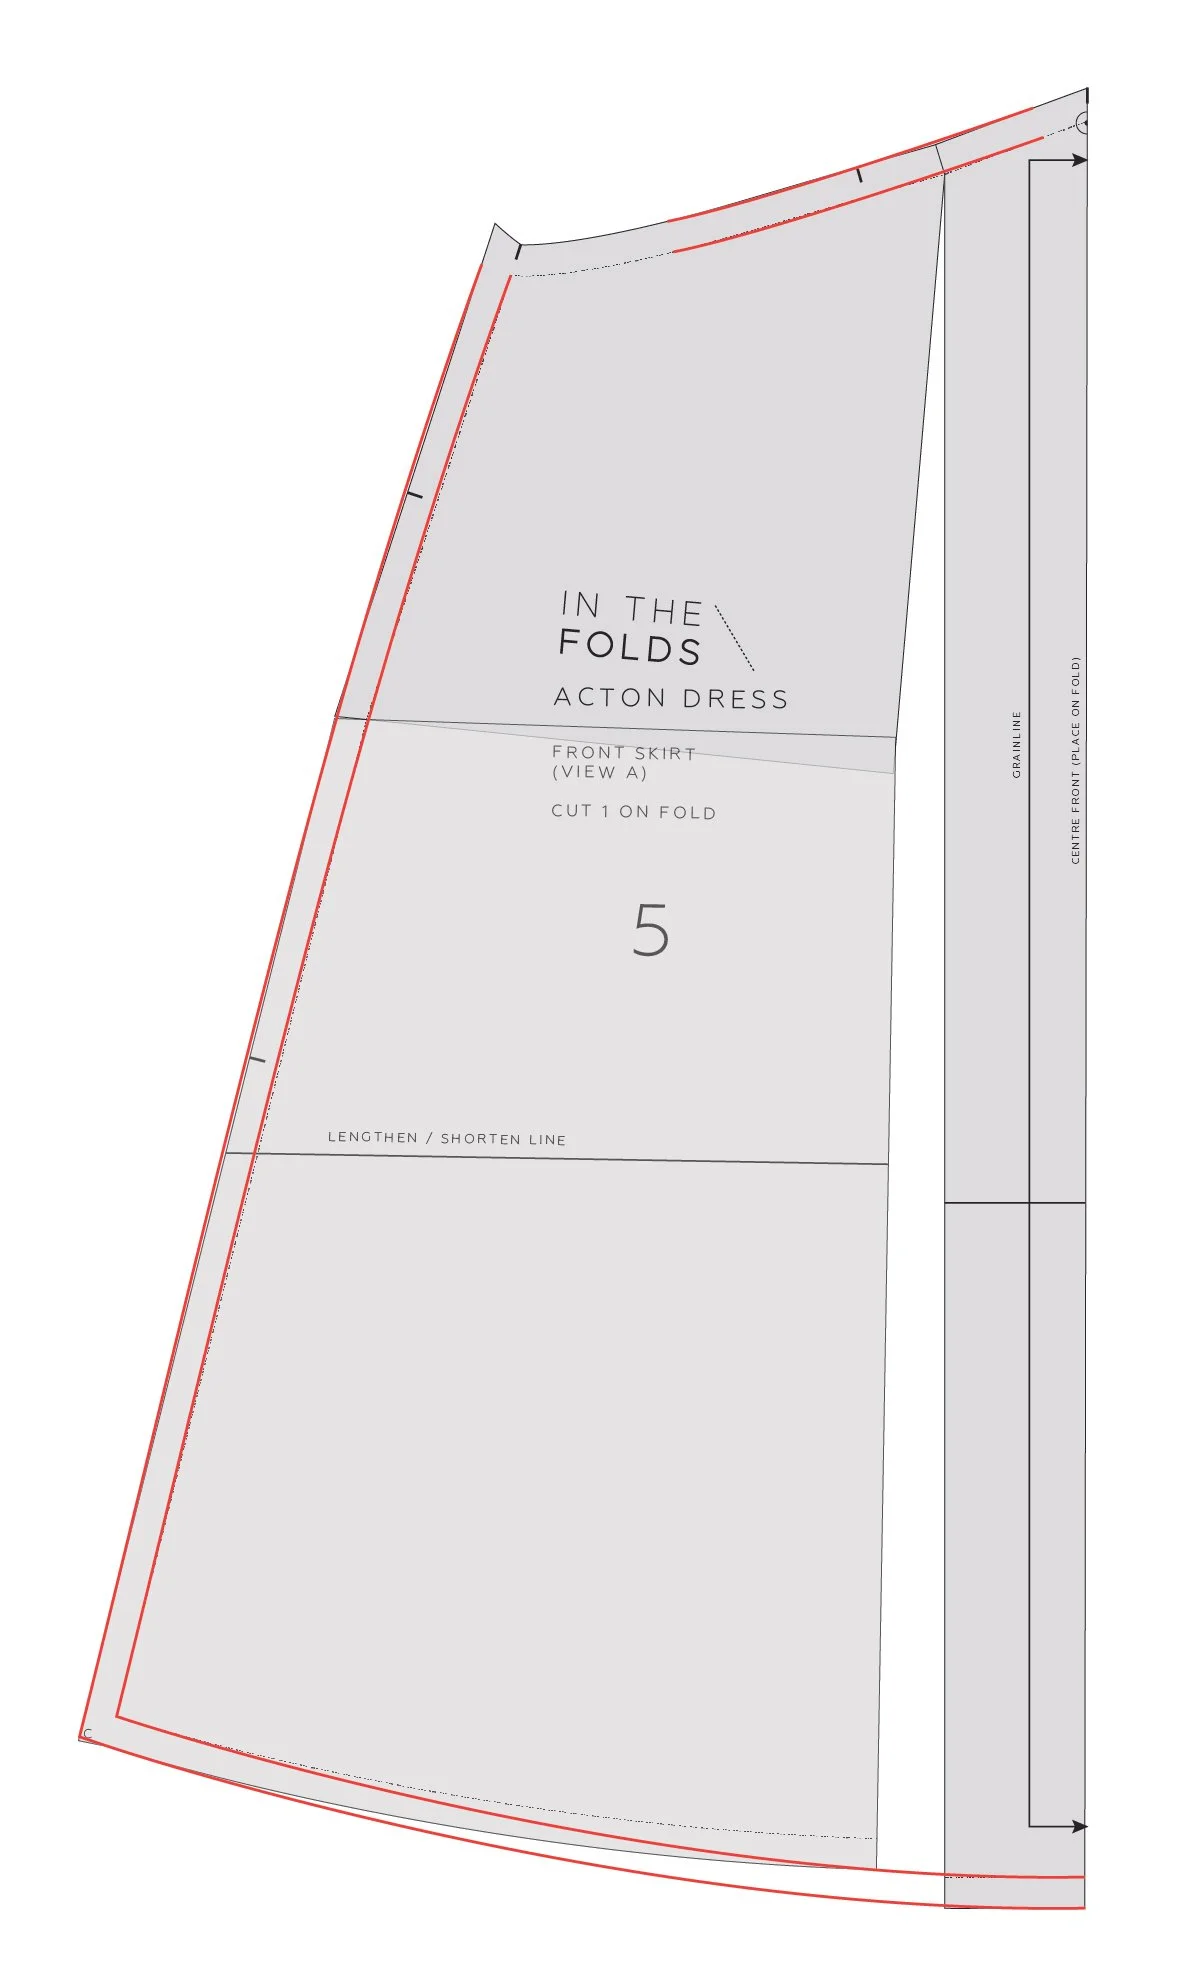
You will need to repeat this for the FRONT SKIRT pattern piece too.

change the shape of the pattern piece

Acton dress - border print - 4.jpg

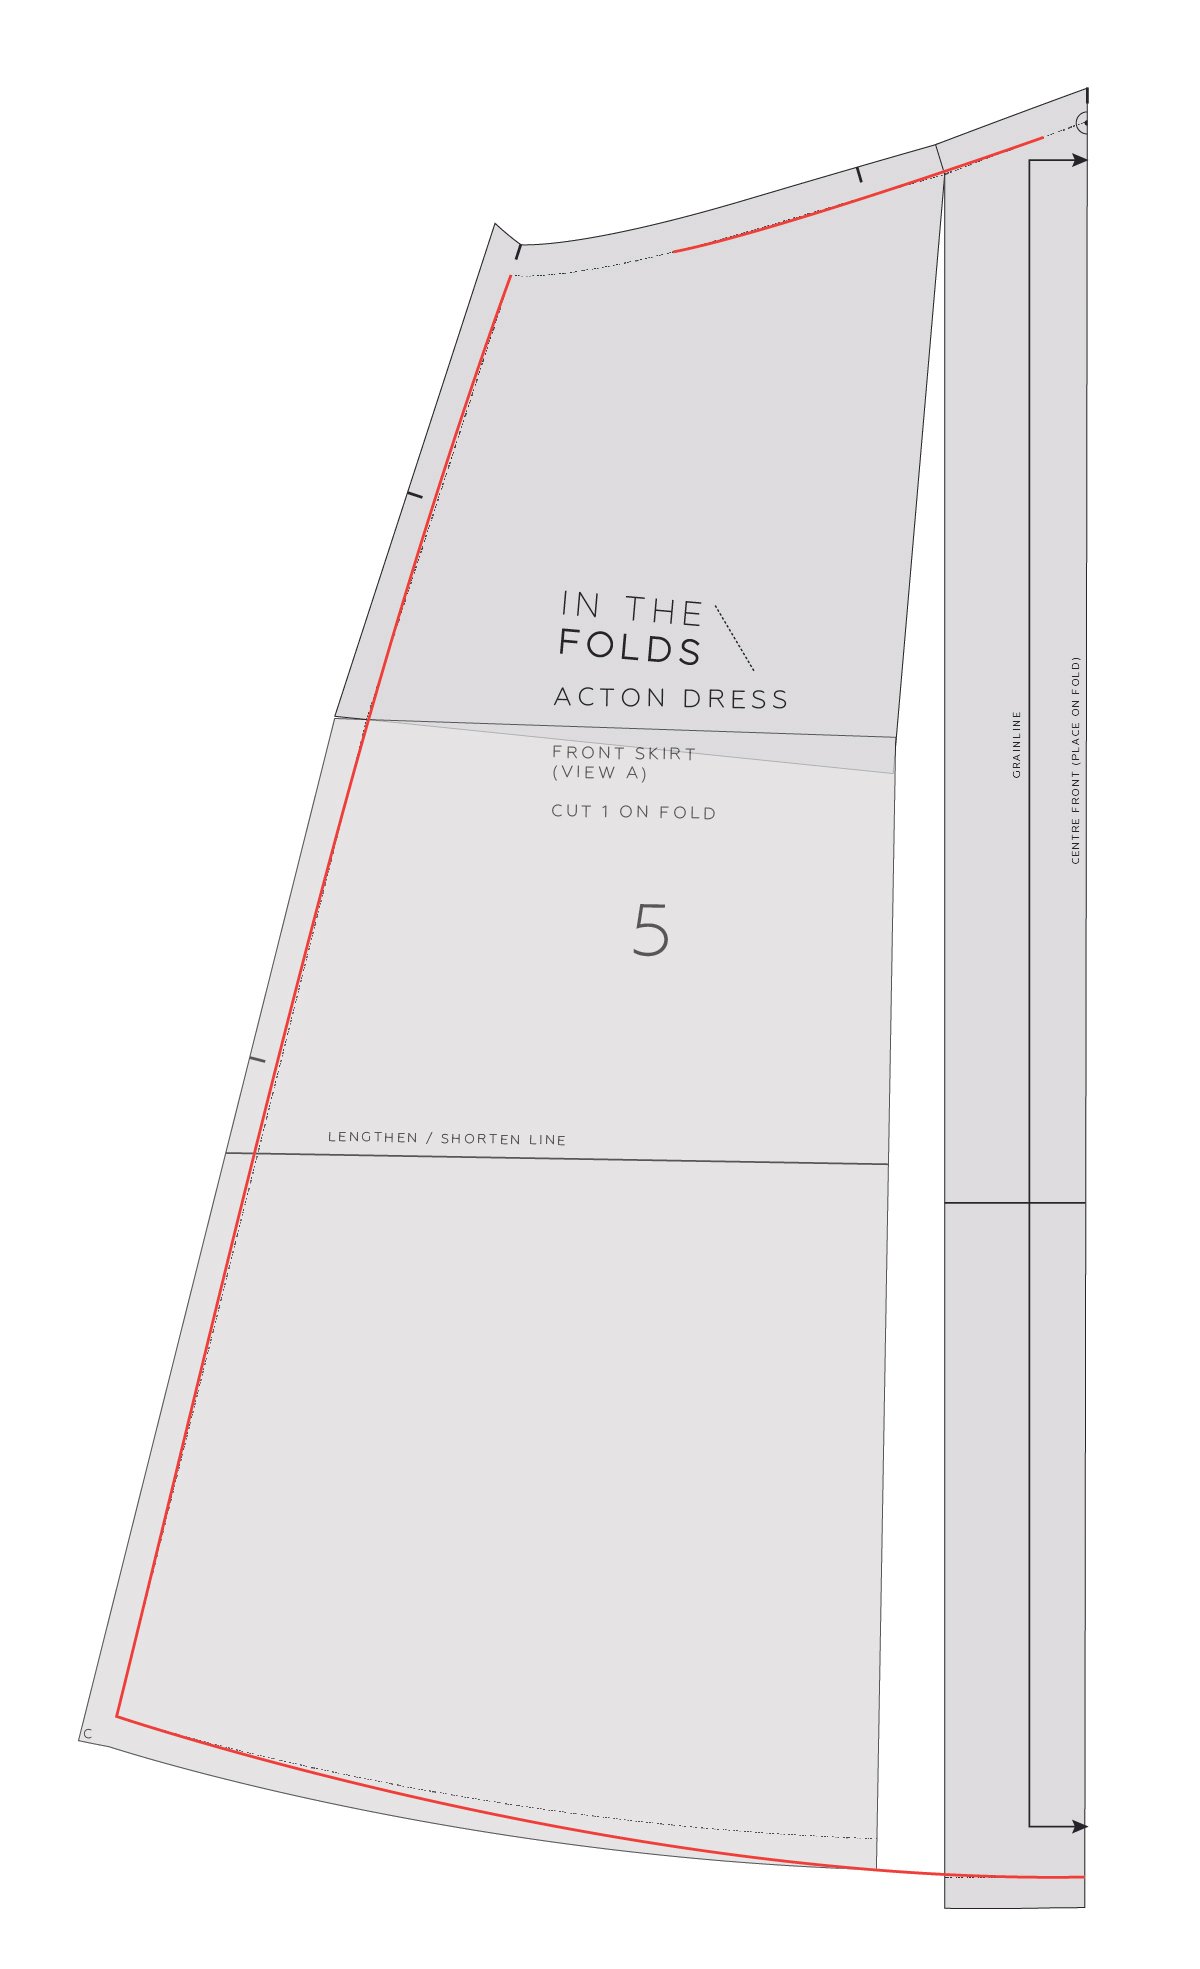
The other option would be to redraft the pattern piece with straighter lines. I haven't done this, so I'd suggest making a toile first to check the wrap still works in the way you want it to, before cutting into your special vintage fabric. I think it would need to look something like the above illustration so that you get a nice straight hemline as well as a fairly straight side seam.

I did a bit of Googling to see if I had missed something with my answer and came across this forum on the topic. One of the ideas that popped up that I hadn't thought of was that you could cut off the border and then add it to the hem line (after you have cut the pattern piece so it is shorter (to allow for the border print to be added back on). It might require some small darts in the border print to get it back on. I think this method would only work with particular types of border prints, but it might be worth considering.

I’d love to see a photo of your Acton dress if you do choose to go ahead with this!

Happy sewing,

Emily


resources mentioned in this issue

  • The Acton dress pattern can be found here.
  • Adding pattern markings to your patterns. Tutorial can be found here.
  • How to add seam allowance to a sewing pattern. Tutorial can be found here.

  • How to add panel lines to a skirt pattern. Tutorial can be found here.
  • How to (and why) make a toile. Tutorial can be found here.

  • Border print on a curved hem. Discussion forum can be found here.

  • The Q&A series archive can be found here.

  • Making a plan for the year / quarter. Issue can be found here.


P.S. Would you like to know what the Q & A series is all about? This page tells you a little bit more about the motive behind the series. Past issues from the Q & A series can be found here.

Don't have a question, but found this newsletter helpful? I'd love to hear from you! Get in touch and say hi. 


What you’ve been making


More posts in the series