THE Q & A SERIES
HOW TO AVOID HUNGRY BUM IN PANTS
Hi Emily,
How can I avoid the “hungry bum” on trousers ?
Sandie
Hi Sandie,
Thanks for asking this question. It’s something that nobody likes to think happens to them, but I’m sure we’ve all fallen foul of it at some point in our lives!
WHAT IS HUNGRY BUM WHEN REFERRING TO PANTS?
For those who’ve never heard the term ‘hungry bum’ you might be more familiar with the term ‘wedgie’. Basically, both terms refer to when your pants creep up in between the thighs and buttocks, and stay there.
SIGNS OF HUNGRY BUM
When we think of ‘hungry bum’ we immediately conjure up worst case scenario images in our head. In reality, the affect of a ‘hungry bum’ can be measured on a scale. For a bit of laugh, let’s say the scale goes from the lower end of ‘feeling peckish’ to ‘absolutely famished’ at the higher end ;)
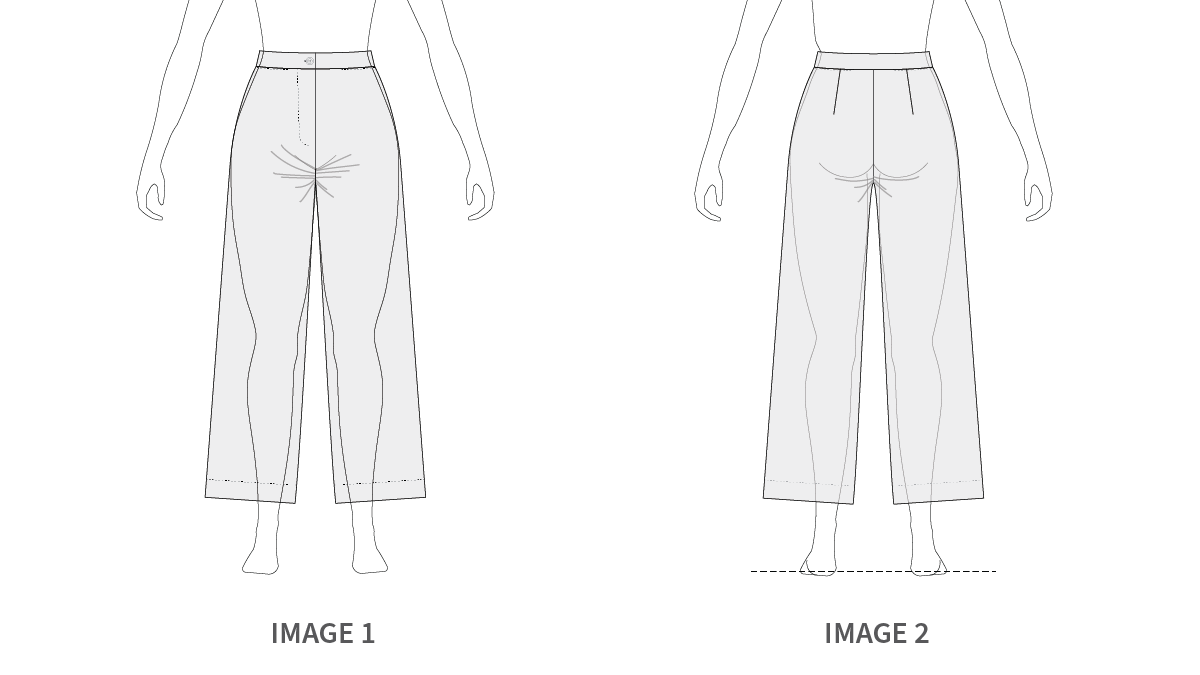
In all seriousness, if you’ve noticed that you’ve got fabric pulling towards the front or back crotch of your pants, or the fabric is bunching up between your legs, then you’ve probably got a ‘hungry bum’. The fabric around the thighs may also feel tight.
But what causes it, specifically?
the causes of hungry bum
Although it is difficult to say what is causing the ‘hungry bum’ without seeing photos of a toile being worn, it’s commonly a result of a garment not fitting the wearer’s thighs properly. If this is the case, the alteration that needs to be made is a Full Thigh Adjustment. This is just one of the pants fitting adjustments we cover in our Pants Fitting issue of Curated by ITF.
when to do a full thigh adjustment
You’ll know you need to make this adjustment if your toile is too tight in the thigh area or you struggle to pull your toile up beyond your thighs. You may also notice that your range of movement is limited in the thigh area. If you cannot pull your toile up over your thighs you definitely need to include a Full Thigh Adjustment in your pants fitting process.
If a Full Thigh Adjustment is common for you, we suggest measuring the thigh on the FRONT [1] and BACK [2] pieces and comparing that to your body measurements before making a toile.
Keep in mind that you require ease in the thigh of the pattern so that you can comfortably sit and stand.
PREPARATIONS FOR A FULL THIGH ADJUSTMENT
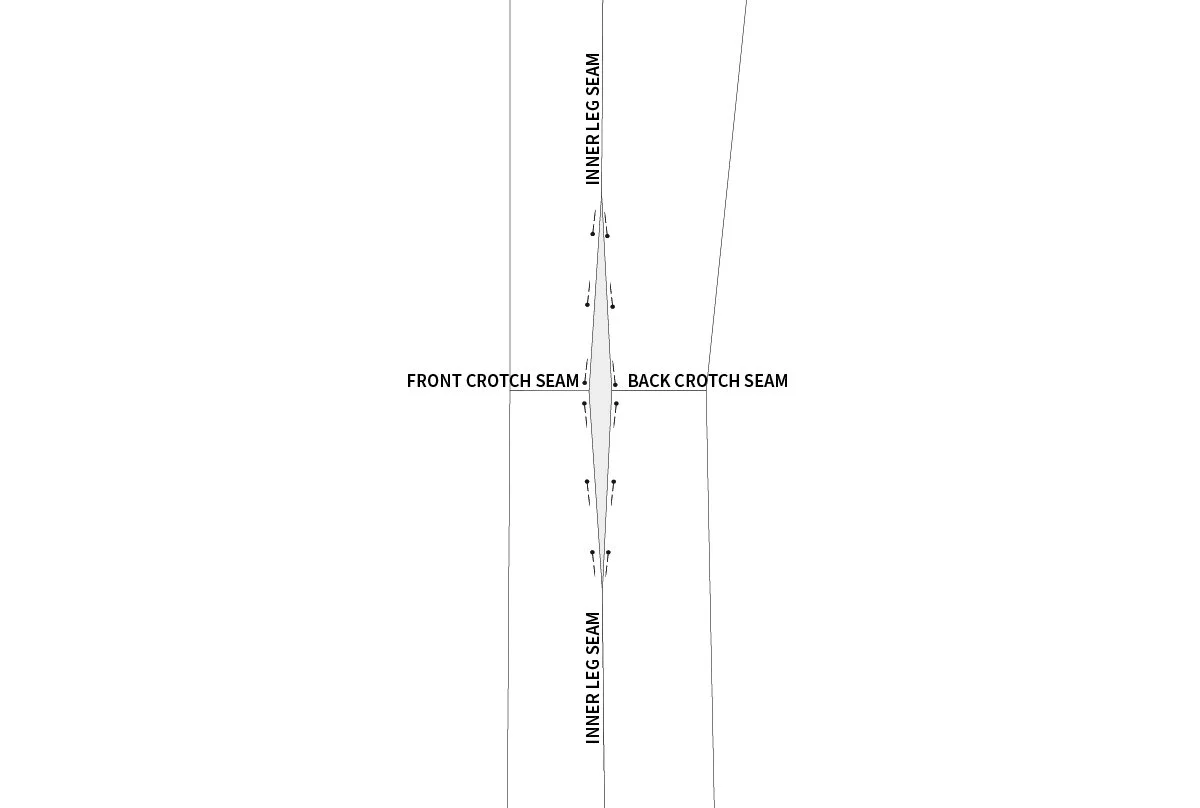
Unpick the inner leg seams of your toile from the crotch to a point approximately 25-30cm (10-12in) down the seam. Open up the seam and pin a strip of fabric in the opening at the width you think you need to add.
Try on the toile. Add or remove width in the opening depending on the result.
Continue the process until you are happy with the amount of width added to the toile.
HOW TO DO A FULL THIGH ADJUSTMENT ON PANTS
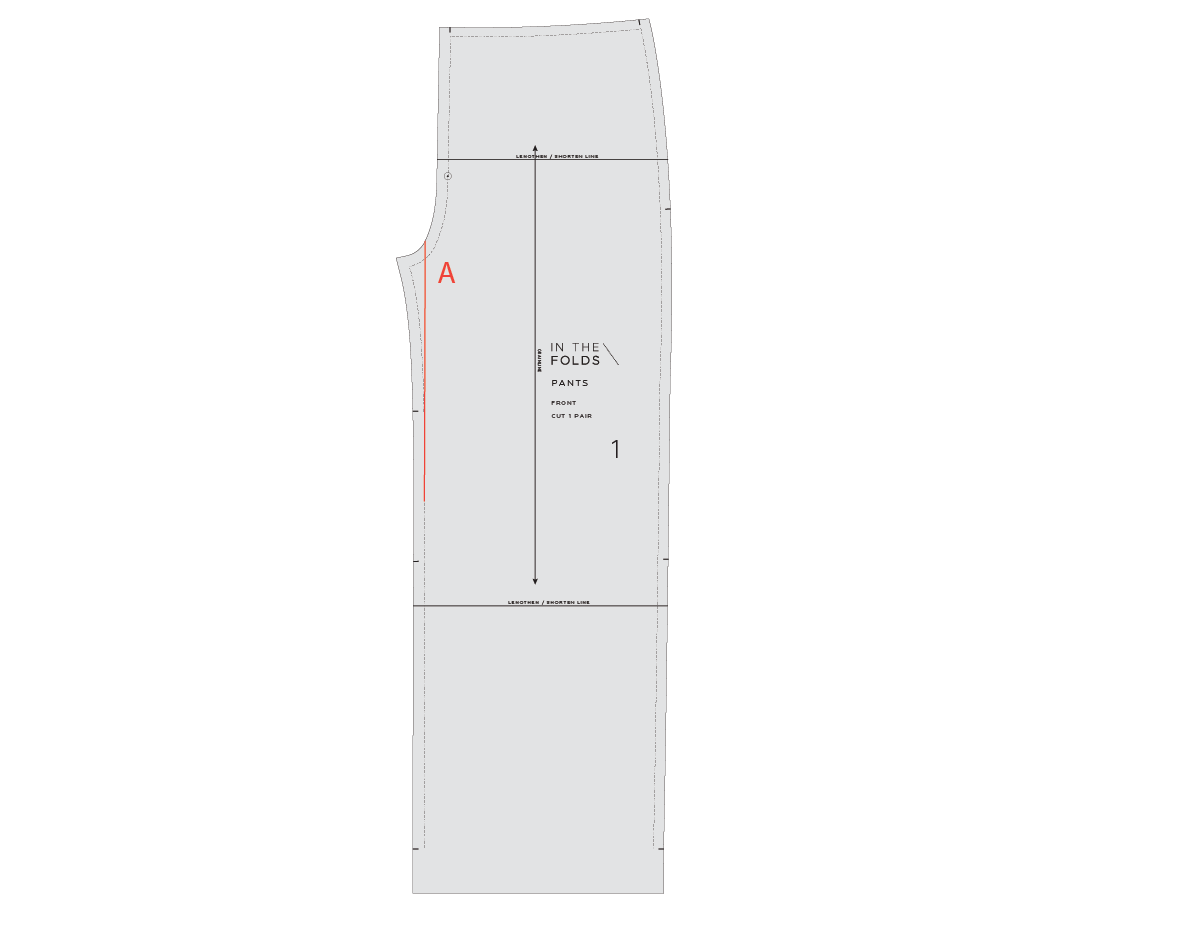
Step 1
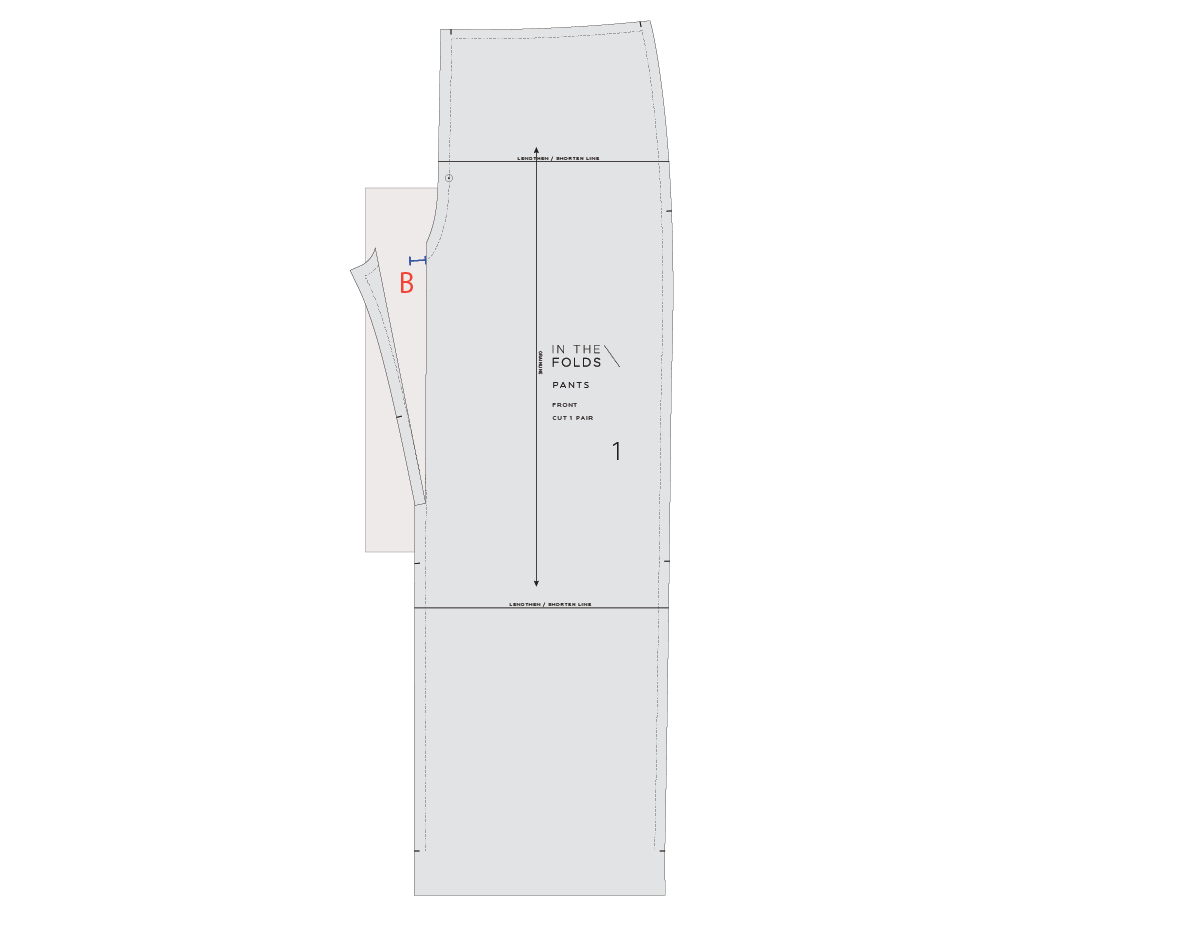
On the FRONT [1], extend the inner leg seam from a point midway between the notches up through the crotch seam. The line needs to be parallel to the grainline. We will call this line A.
At the bottom of line A, draw a perpendicular line through the seam allowance to the CUT LINE.

Step 2
Cut down line A from the crotch seam. Stop 1-2mm from the end of the line at the STITCH LINE. Cut into the seam allowance towards the end of the line, creating a small hinge of paper at the end of line A.
Step 3
Refer to your toile to work out how much width needs to be added to the thigh of the pattern. We will add half the amount to the FRONT [1] and the other half to the BACK [1].
Slide a piece of pattern paper under the cut section. Swing out the inner leg seam. Mark a point out from the STITCH LINE of the crotch at the width you would like to add. We will call this point B.

Step 4
Swing the inner leg section so that the STITCH LINE meets point B. Tape in place. Redraw crotch seam STITCH LINE and CUT LINE, joining the two sections with a smooth curve that merges into the original crotch seam.

Step 5
Straighten out the top section of the inner leg seam. This will help you retain the nice smooth scoop of the crotch seam when this seam is sewn. Smooth out the inner leg seam where the alteration was made, if required.

Step 6
Repeat STEPS 1 - 5 for the BACK [2]. Add the same amount to the BACK [2] as you did to the FRONT [1].
If you notice on your toile that the fabric is only pulling at the front or back then you can choose to make this adjustment to only one section.

Step 7
Check that the crotch seam is a nice smooth curve by lining up the STITCH LINES of the inner leg seams. For more details on checking curved seams, see this tutorial.
There’s a lot to consider when you’re sewing pants and if you’re just starting out on your pants sewing journey we highly recommend our Pants Sewing series, which is part of our Curated by ITF subscription.
Across three Issues we cover everything you need to know to be able to sew, fit and design yourself a pair of pants you love to wear! As well as the resources we provide in each Issue, you also have access to our online sewing community, where you can ask all your sewing questions and get the support you need to help you on your way!
Happy sewing,
Emily
RESOURCES MENTIONED IN THIS ISSUE
The Pants Sewing Skills Kit, Pants Fitting pattern & Fit Kit and the Pants Design Kit are the first, second and third parts of our Pants Sewing project series, which is available through our Curated by ITF subscription. Past issues are also now available for purchase by subscribers. More information can be found here.
Checking patterns: curved seams - read the tutorial here.
For more issues of the Q & A series, you can check out the archive here.
WHAT YOU’VE BEEN MAKING

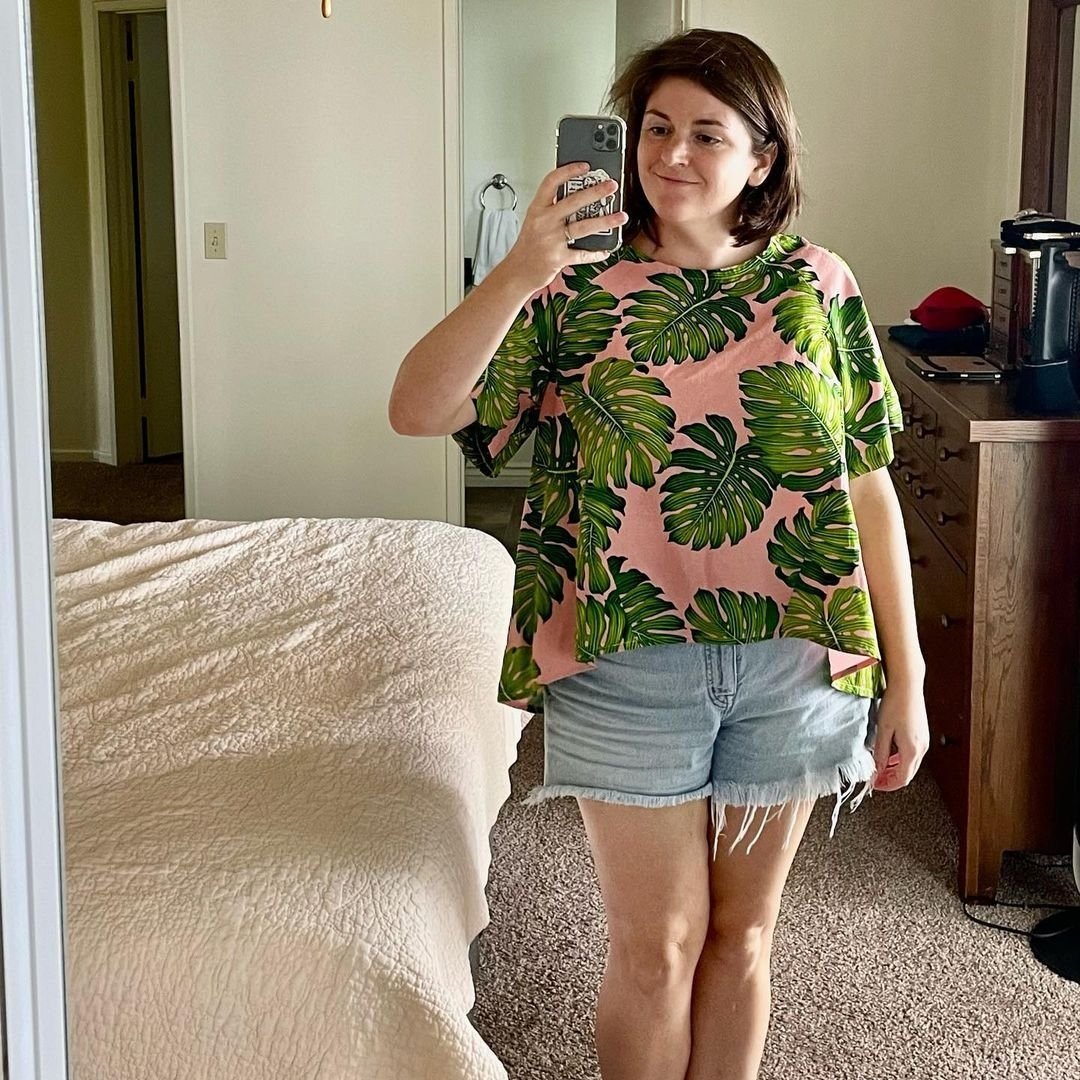
Collins top made by @megantheezbornak


