THE Q & A SERIES
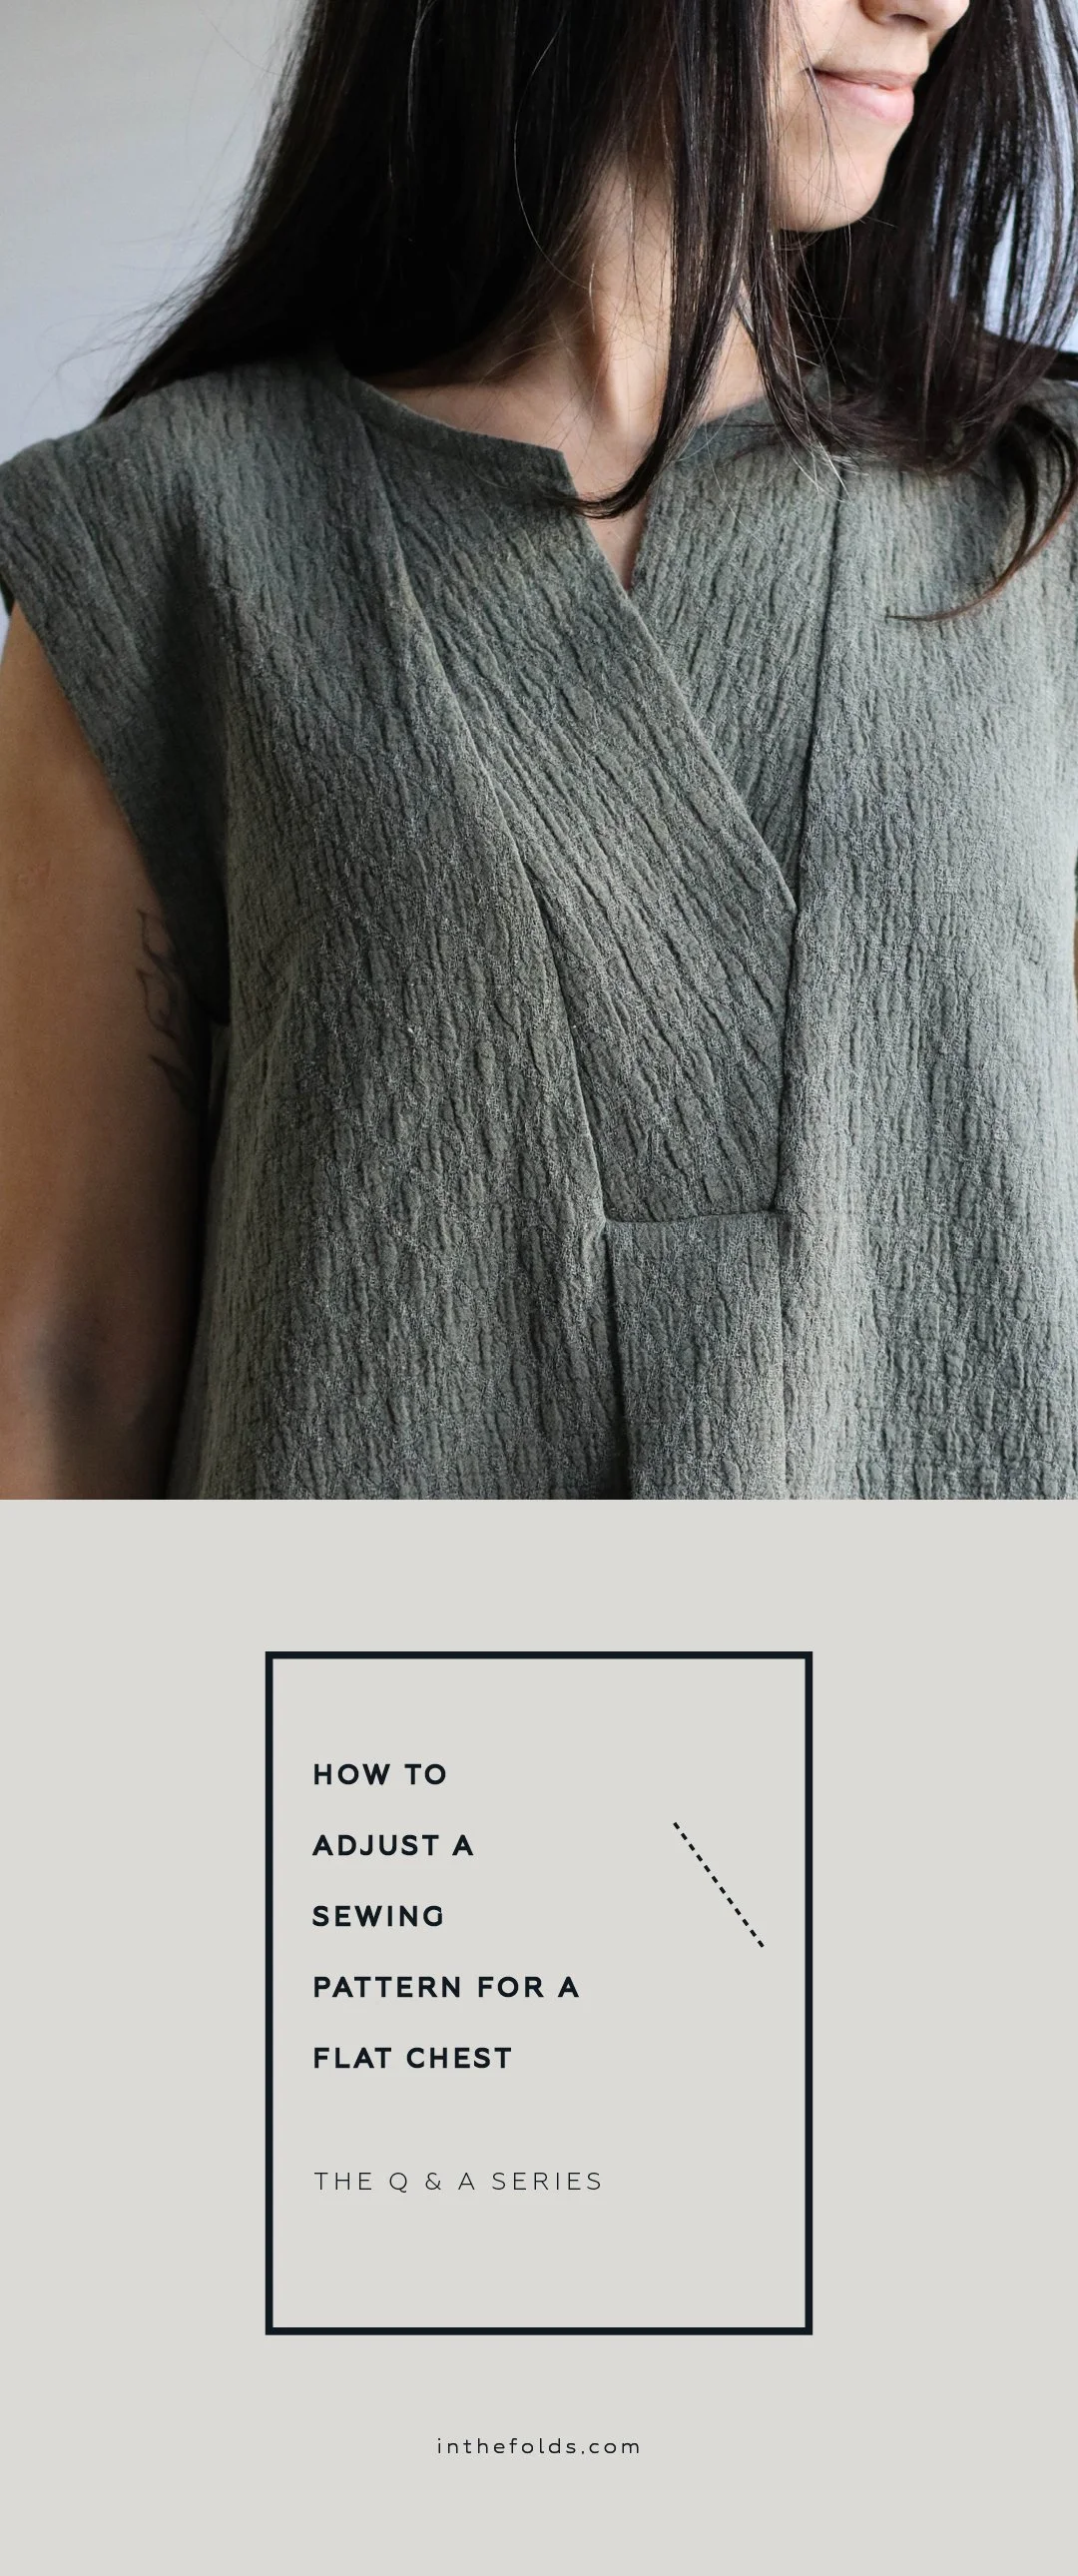
How to adjust a sewing pattern for a flat chest
One of the things I love about sewing our own clothes is that we have the opportunity to make garments that fit our bodies, rather than trying to make our bodies fit the clothes.
Of course, that doesn't mean it's always straightforward! Sometimes we need to make a few adjustments to a pattern to get the fit we're looking for, and one alteration can lead to another.
This week we're answering a question from a customer, who wanted to adapt the Sawtell dress pattern for her flat chest following a double mastectomy.
Her questions led to an interesting conversation about removing bust darts, matching side seams and making adjustments to the upper body of a garment.
The question
Hello Emily,
You might remember me from your first Darlow Pants testing group, seems forever ago! At that time I was just setting out on my clothes sewing journey and so much of that course was completely new to me.
Anyhow some years later, I am still sewing and occasionally checking in on your blog which is always interesting!
I have just bought your Sawtell bundle and I have a question. I have had a double mastectomy and I am now completely flat chested. Given this, how do I manage the darts on the patterns? I will of course make a toile as I am also concerned about the armhole sizing.
Ultimately, I would like to make the dress with mid-length sleeves, just below the elbow.
Best wishes to you.
M
THE ANSWER
Hi M,
Lovely to hear from you! Of course I remember you. Gosh, time flies by, doesn't it? I'm glad you're still sewing away and finding the blog interesting.
This is a great question, and one that I think will be useful for other makers too.
When a sewing pattern includes a bust dart, it has been drafted to accommodate some fullness through the bust. If you have a flat chest, whether following a mastectomy or simply because of your natural shape, you may find that this extra fullness isn't needed.
The good news is that you can alter the pattern to remove it.
1. Removing bust fullness with a small bust adjustment
The alteration I'd suggest is a Small Bust Adjustment (SBA). A Small Bust Adjustment removes volume from the bust area of a sewing pattern, allowing the fabric to sit closer to the body without excess fabric or unwanted shaping.
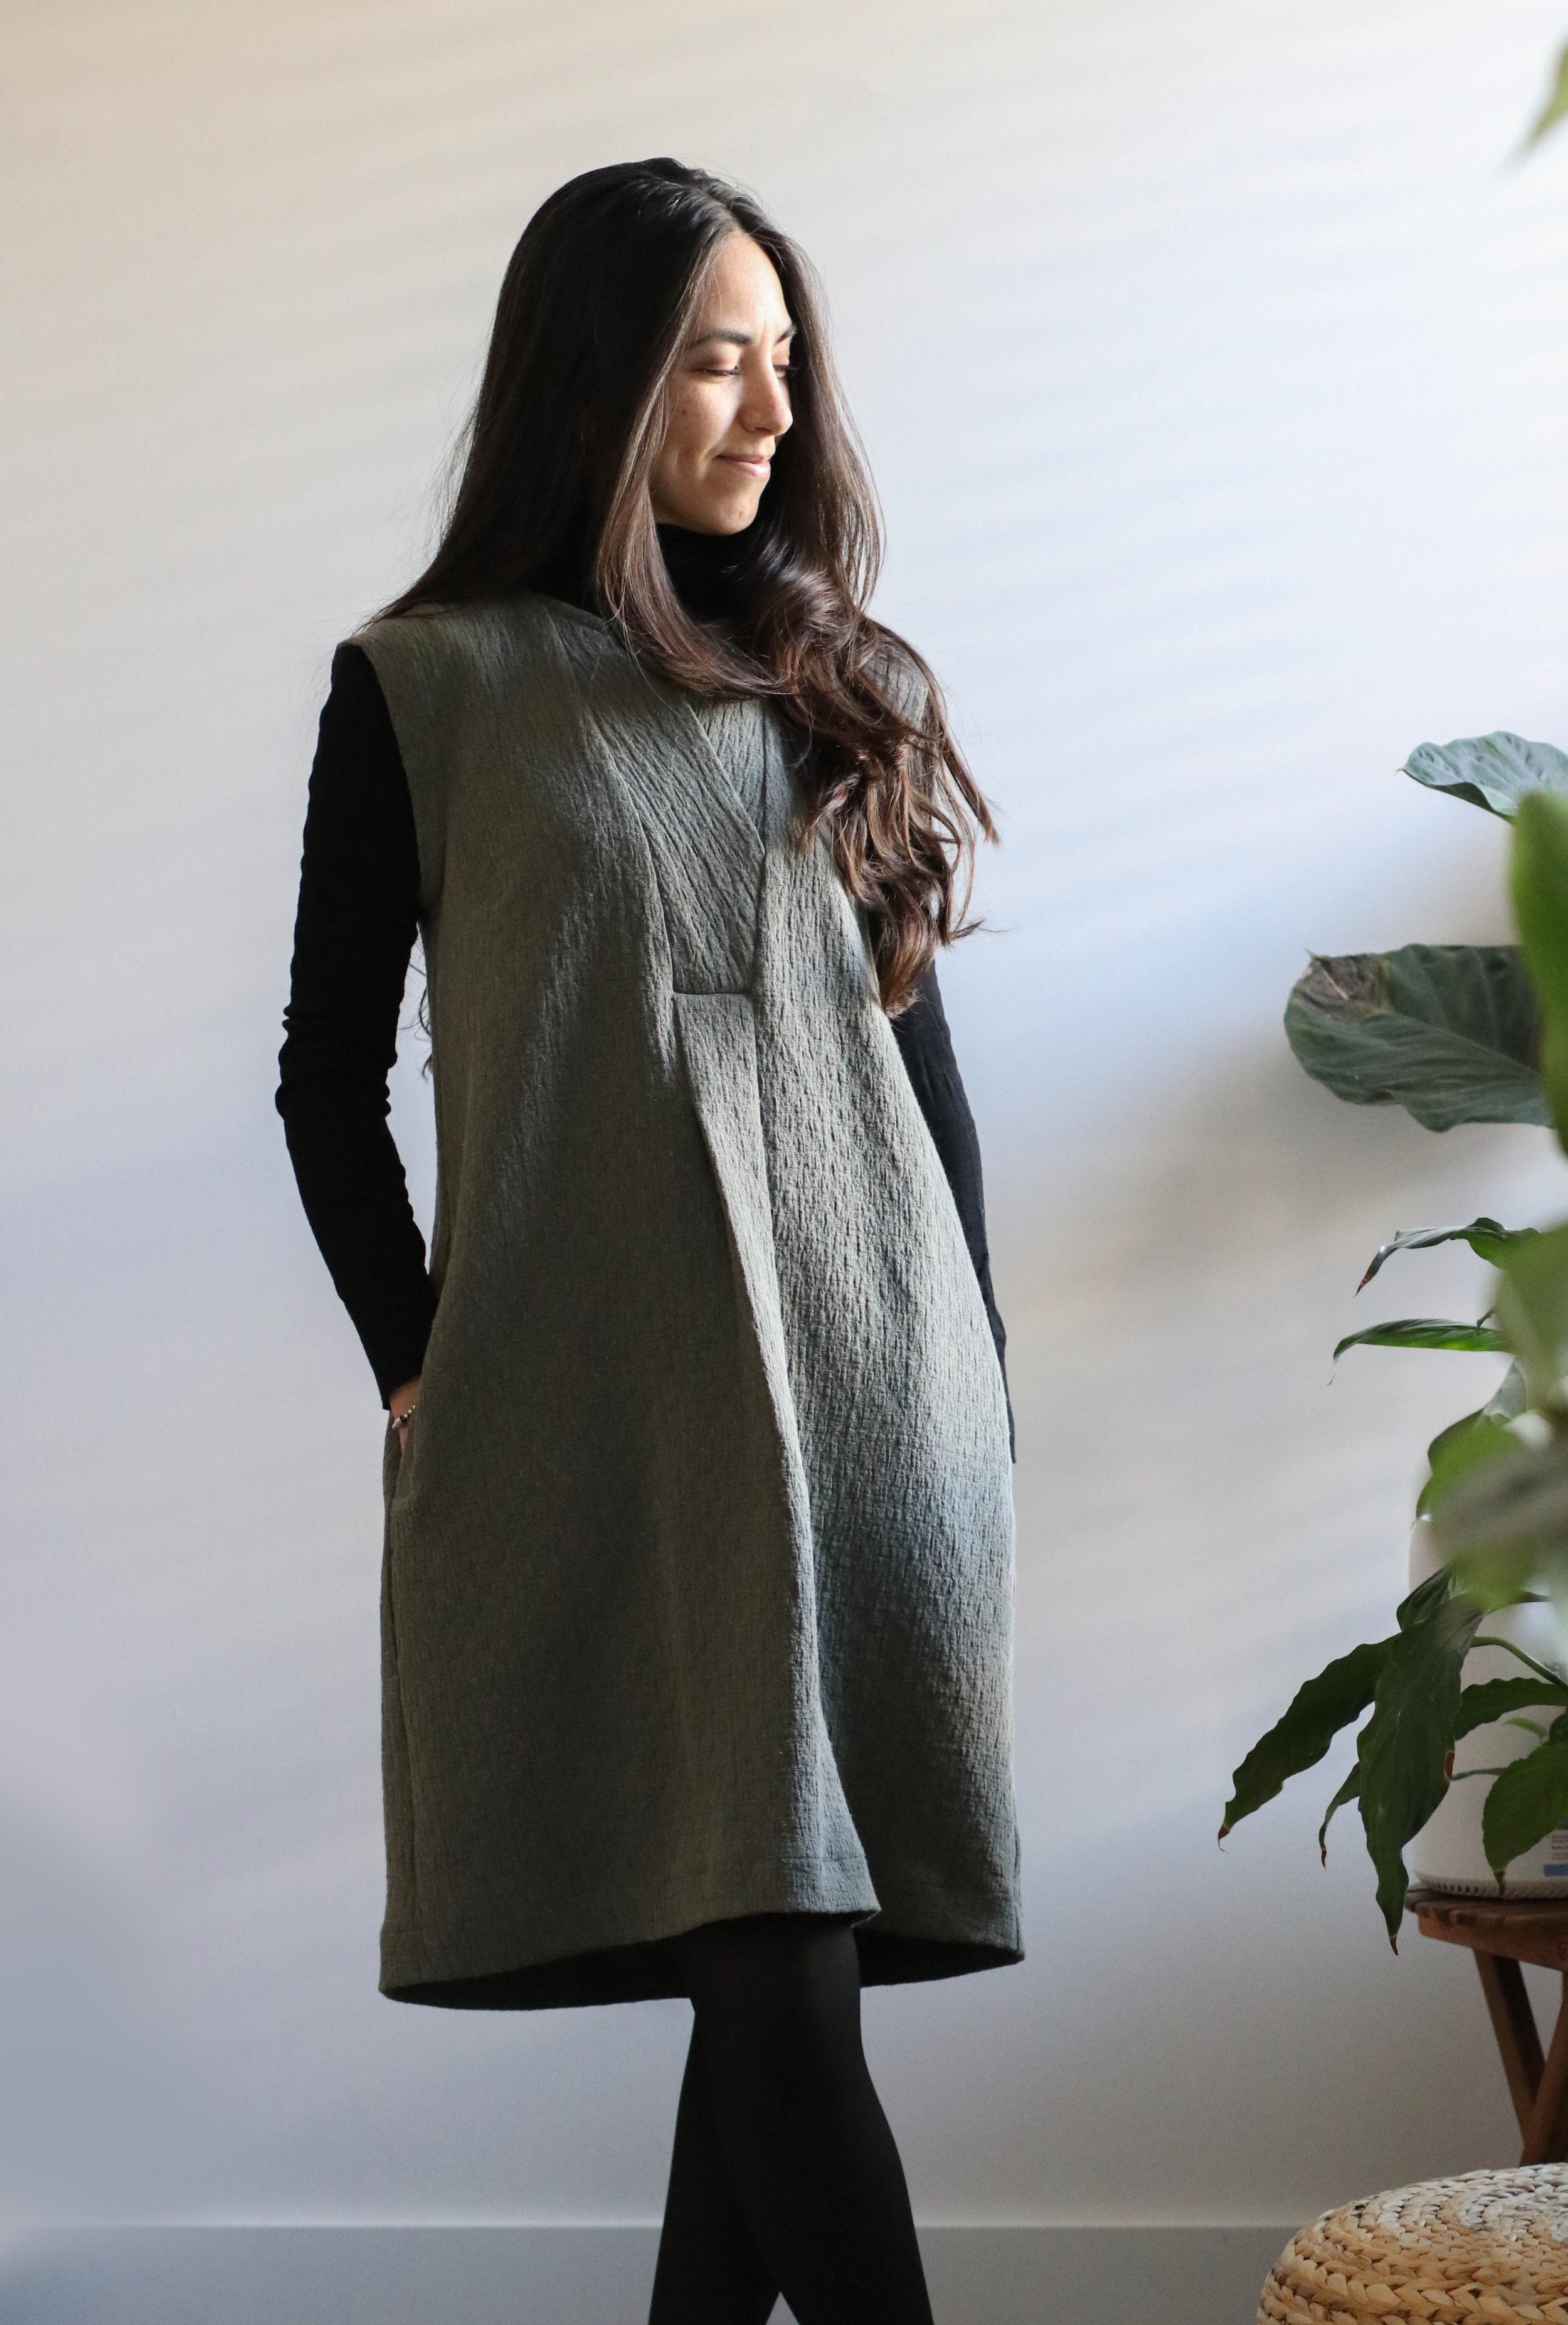
For the Sawtell dress, I'd suggest removing the bust dart all together to remove as much bust shaping as possible.
We have a step-by-step tutorial that walks you through the process: How to do a small bust adjustment on the Ruffle Sleeve Top
A note on sizing: A flat chest doesn't necessarily mean you need a smaller size overall. Your shoulder width, upper chest, back and armhole measurements are all important when choosing a starting size. The small bust adjustment is intended to change the bust shaping without unnecessarily reducing the fit elsewhere.
Although the tutorial I linked to aboveuses a different pattern, the same principles can be applied to the Sawtell dress, so I won’t go into all the nitty gritty again here. The aim is to remove the fullness created for the bust while retaining the other shaping needed for the garment.
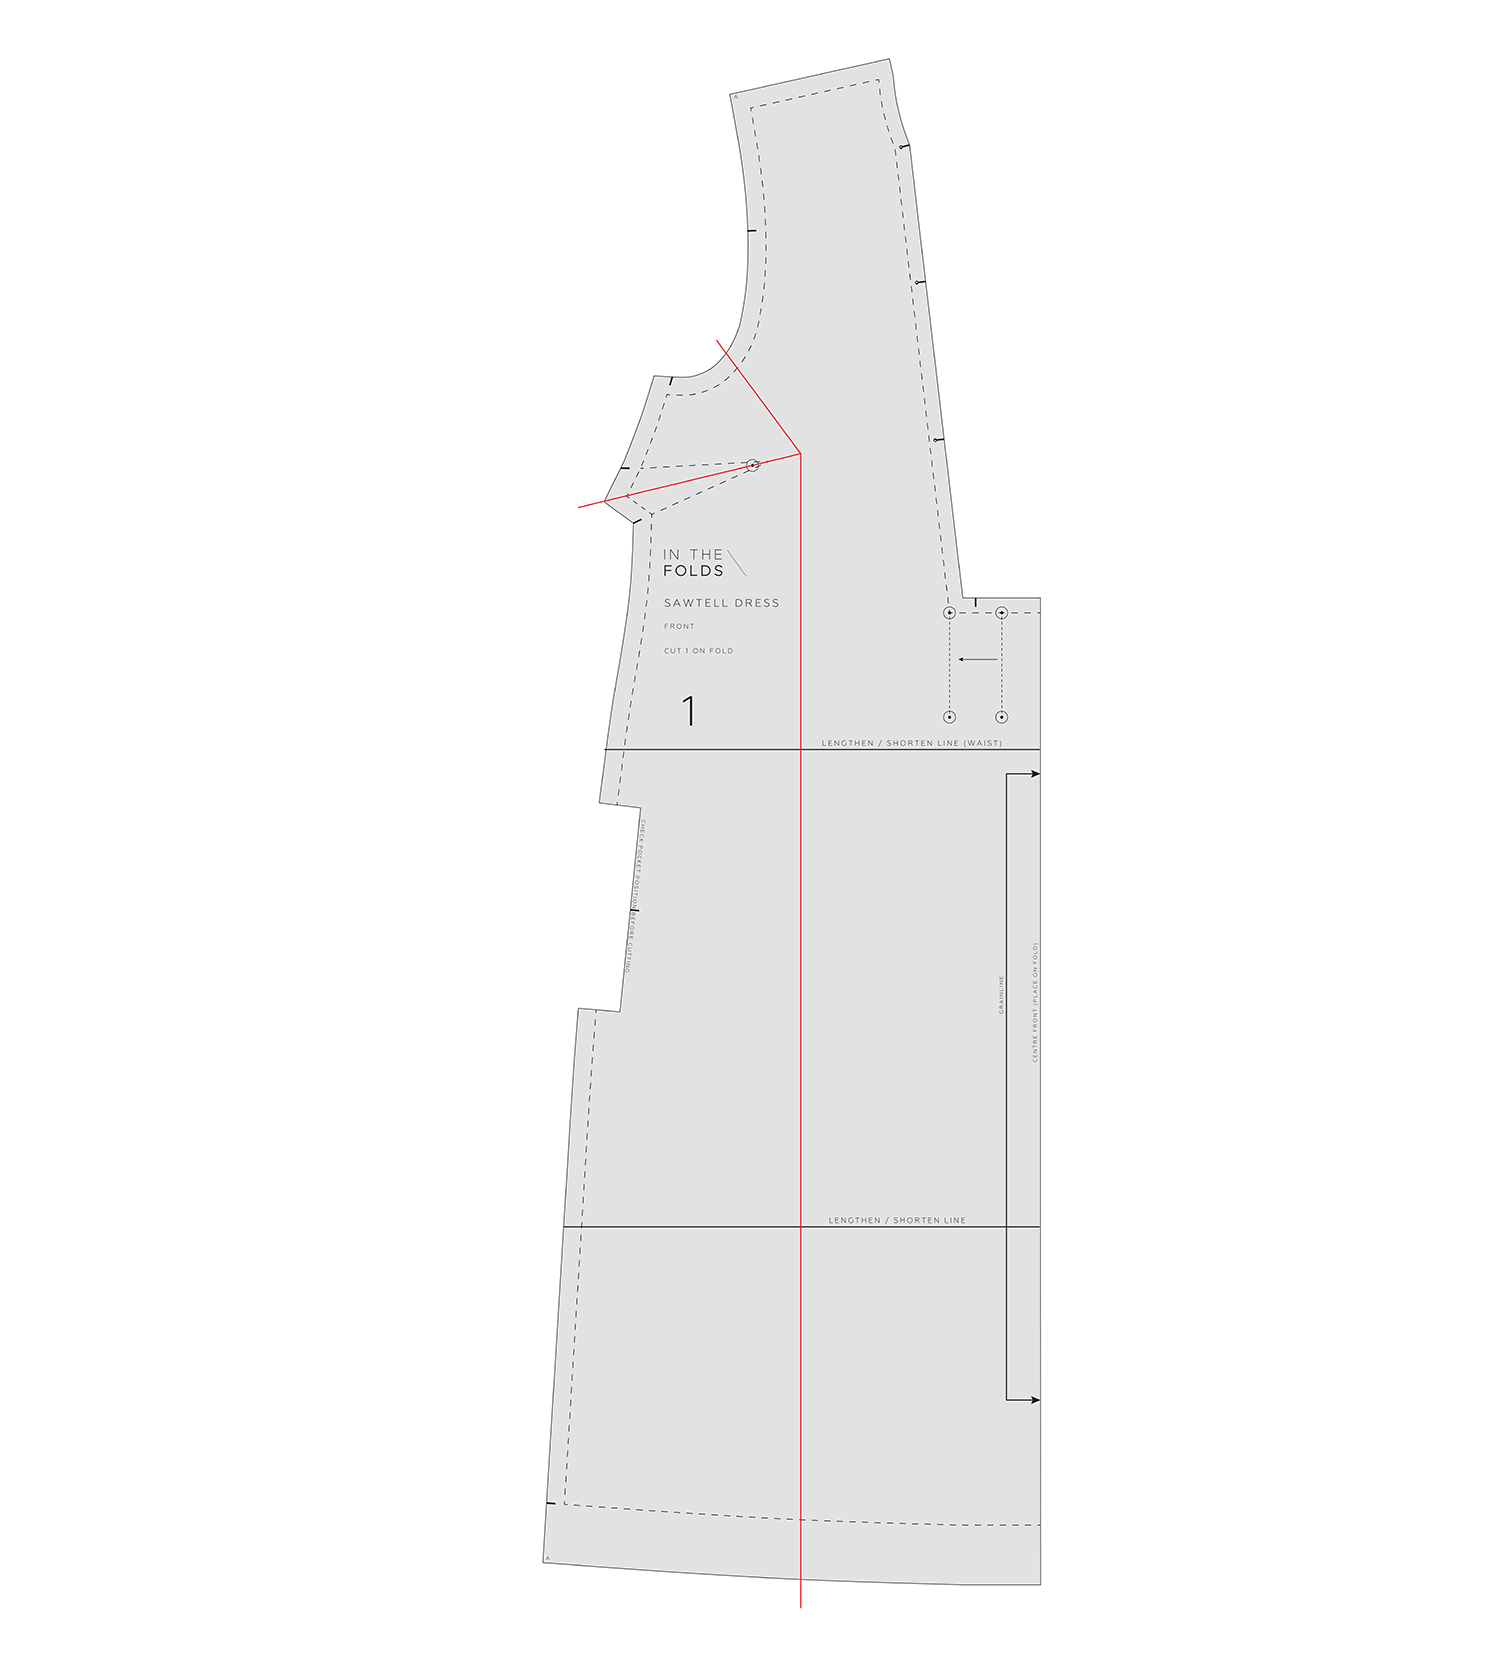
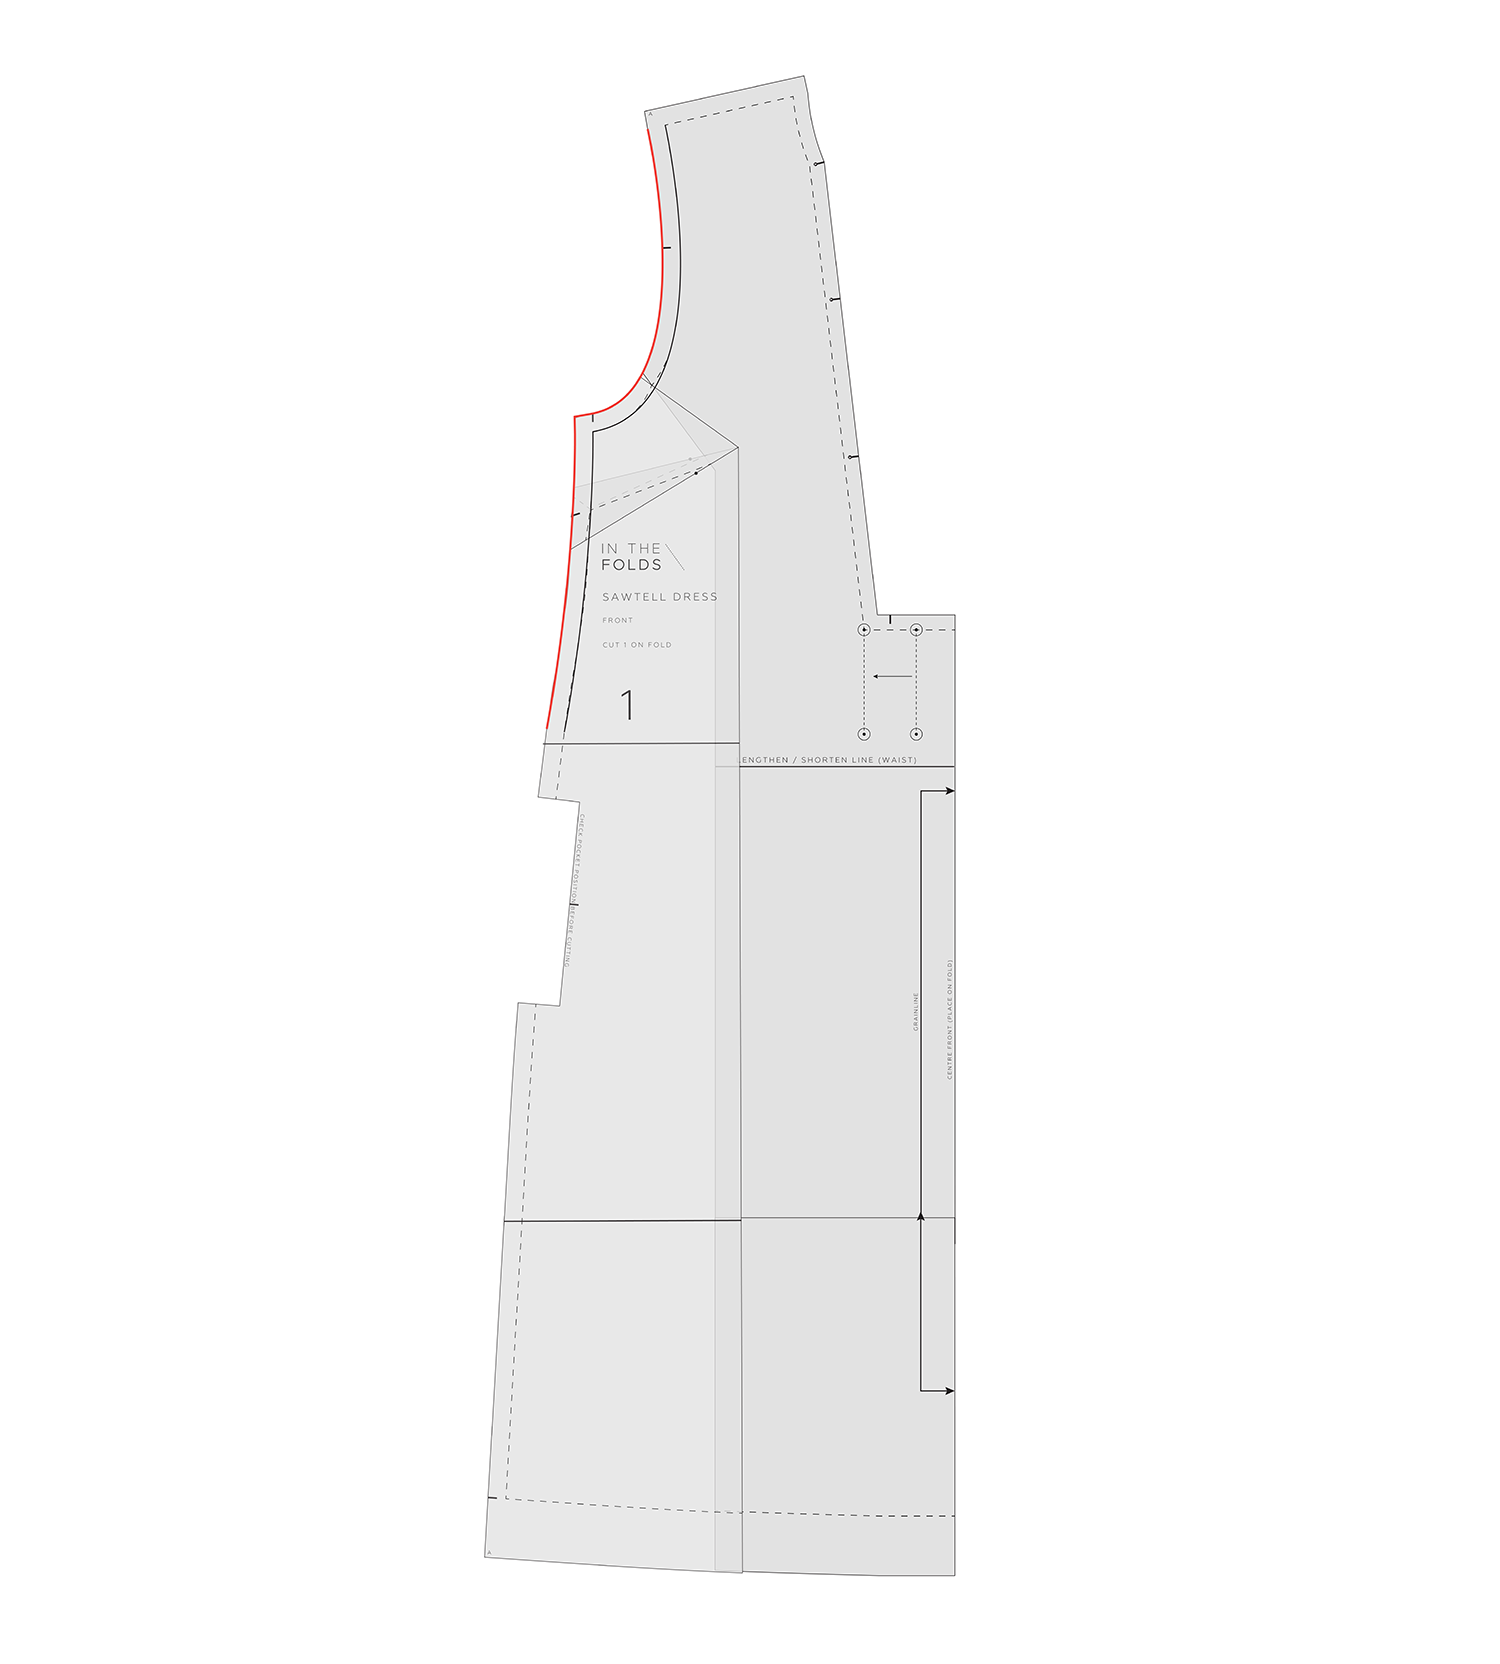
Below you can see what happens when you do a Small Bust Adjustment to the Sawtell dress.
Step 1
Mark the alteration lines onto the pattern - as explained in the tutorial I mentioned above.
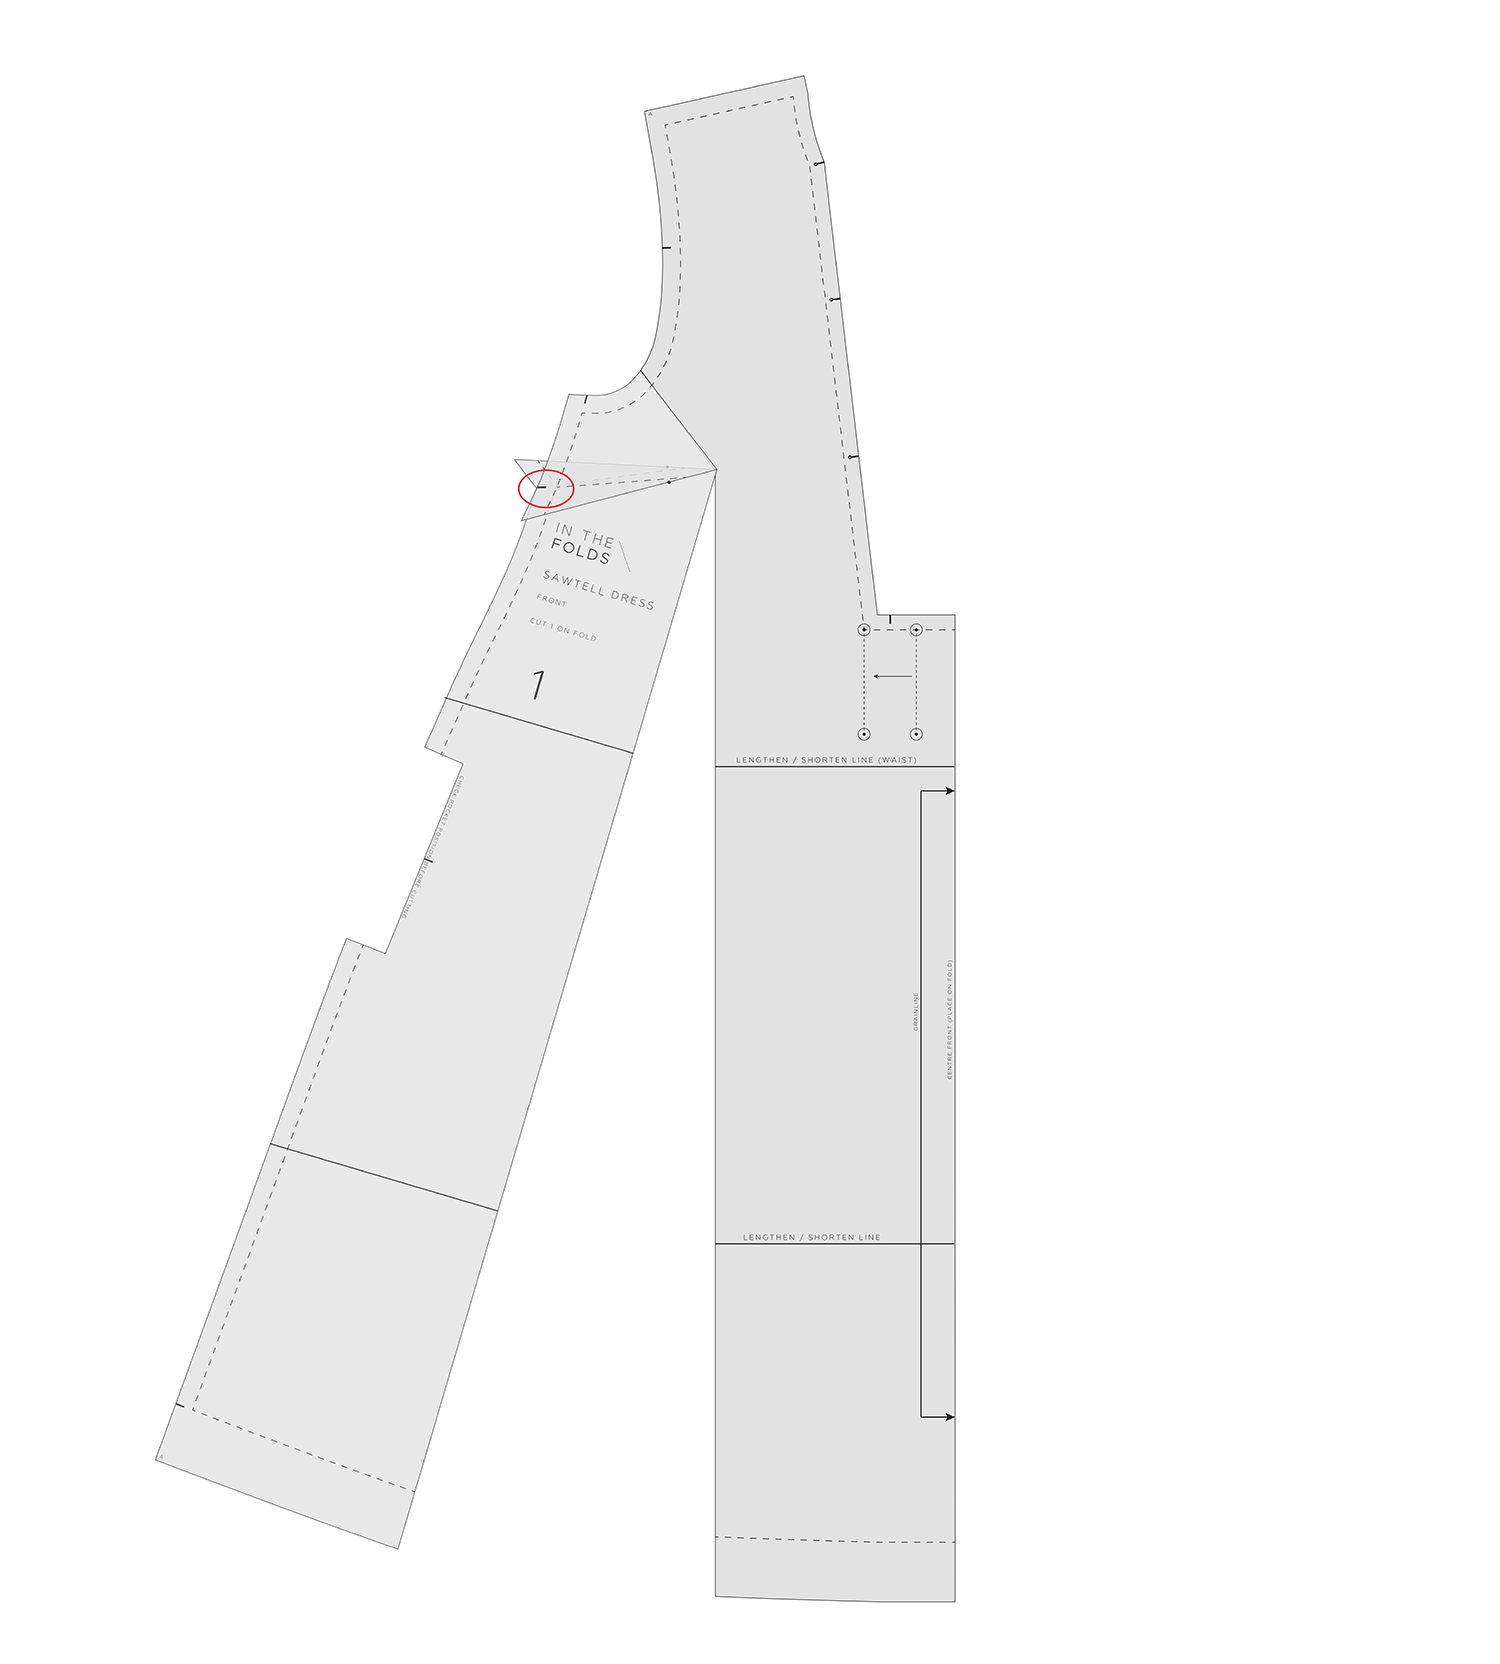
Step 2
Use the guidance in the tutorial to cut through the alteration lines.
Rotate the lower section of the side seam to “close out” the bust dart, lining up the notches on both sides of the dart. Tape or glue the pieces together along the dart only.
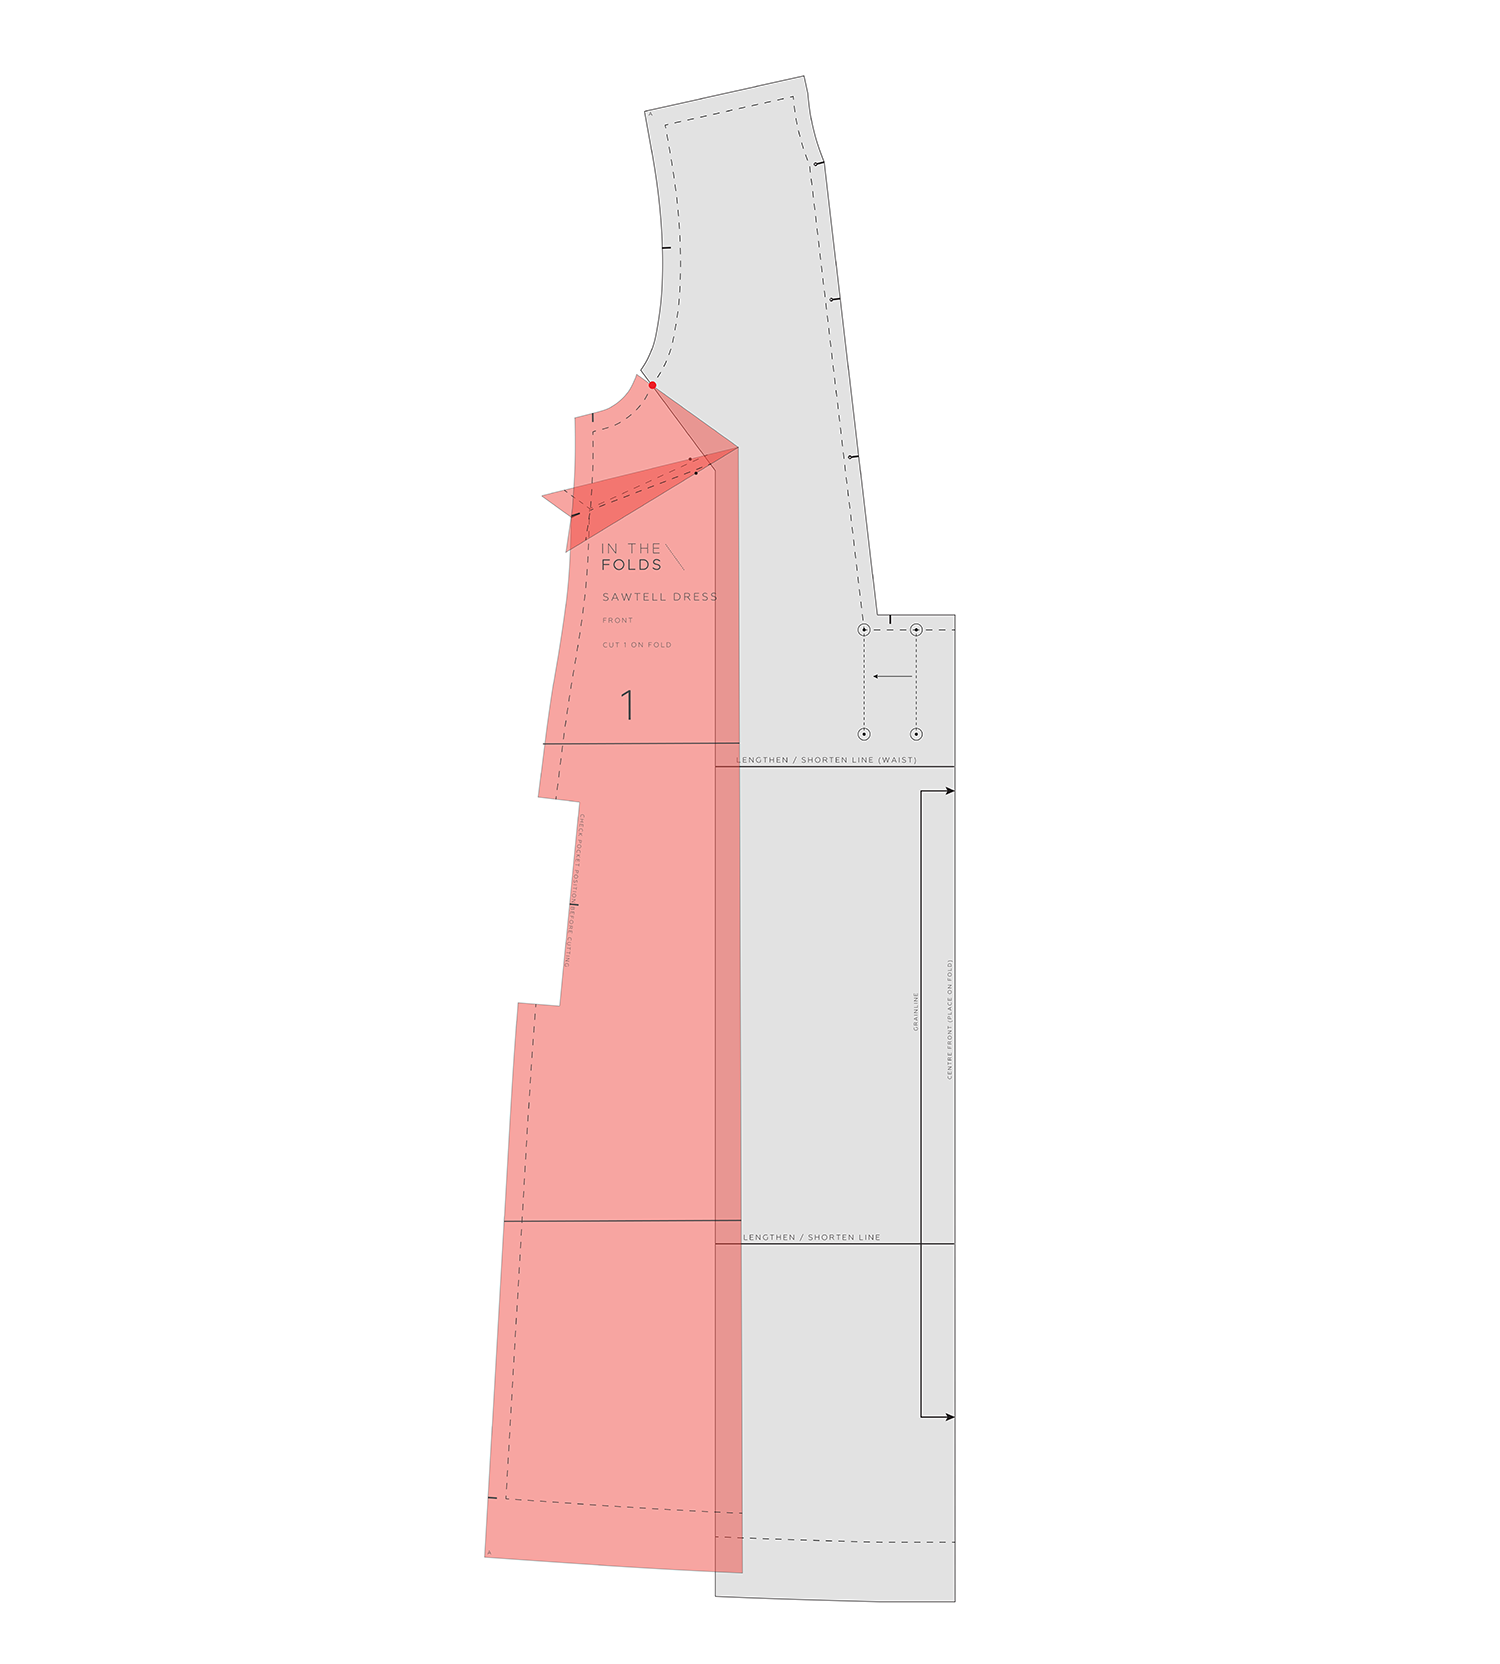
Step 3
Using the hinge on the armscye, rotate the side of the FRONT (pink in the illustration) so that the two sides of the cut line are sitting parallel to each other down the length of the pattern. You will notice that this has removed width from the pattern.
Tape or glue in place.
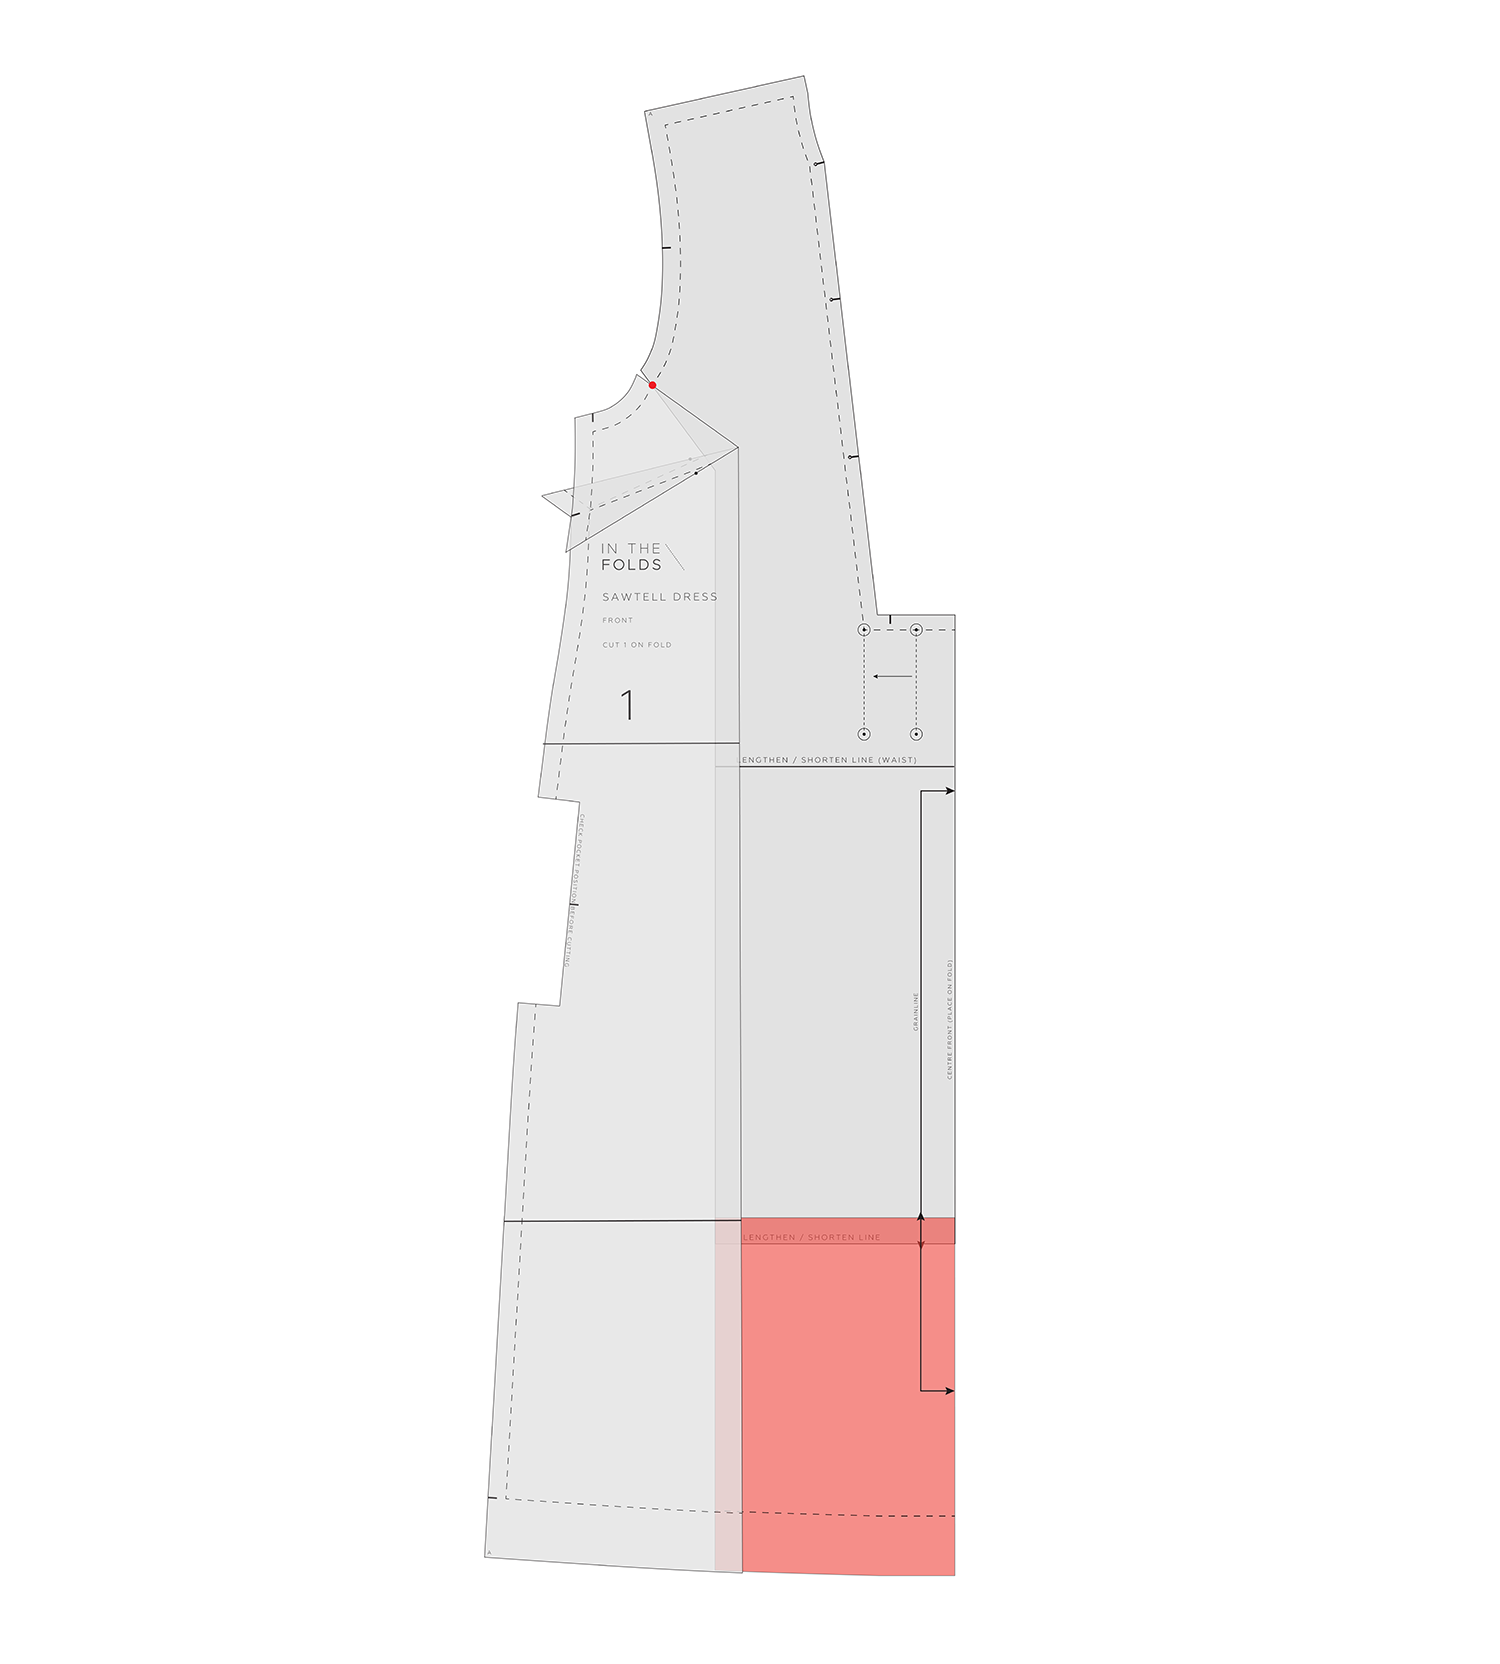
Step 4
On the section of the pattern closer to the CENTRE FRONT, cut through the lower LENGTHEN / SHORTEN LINE and move up to keep the hem length consistent (more about this in the post linked above). Tape or glue in place.
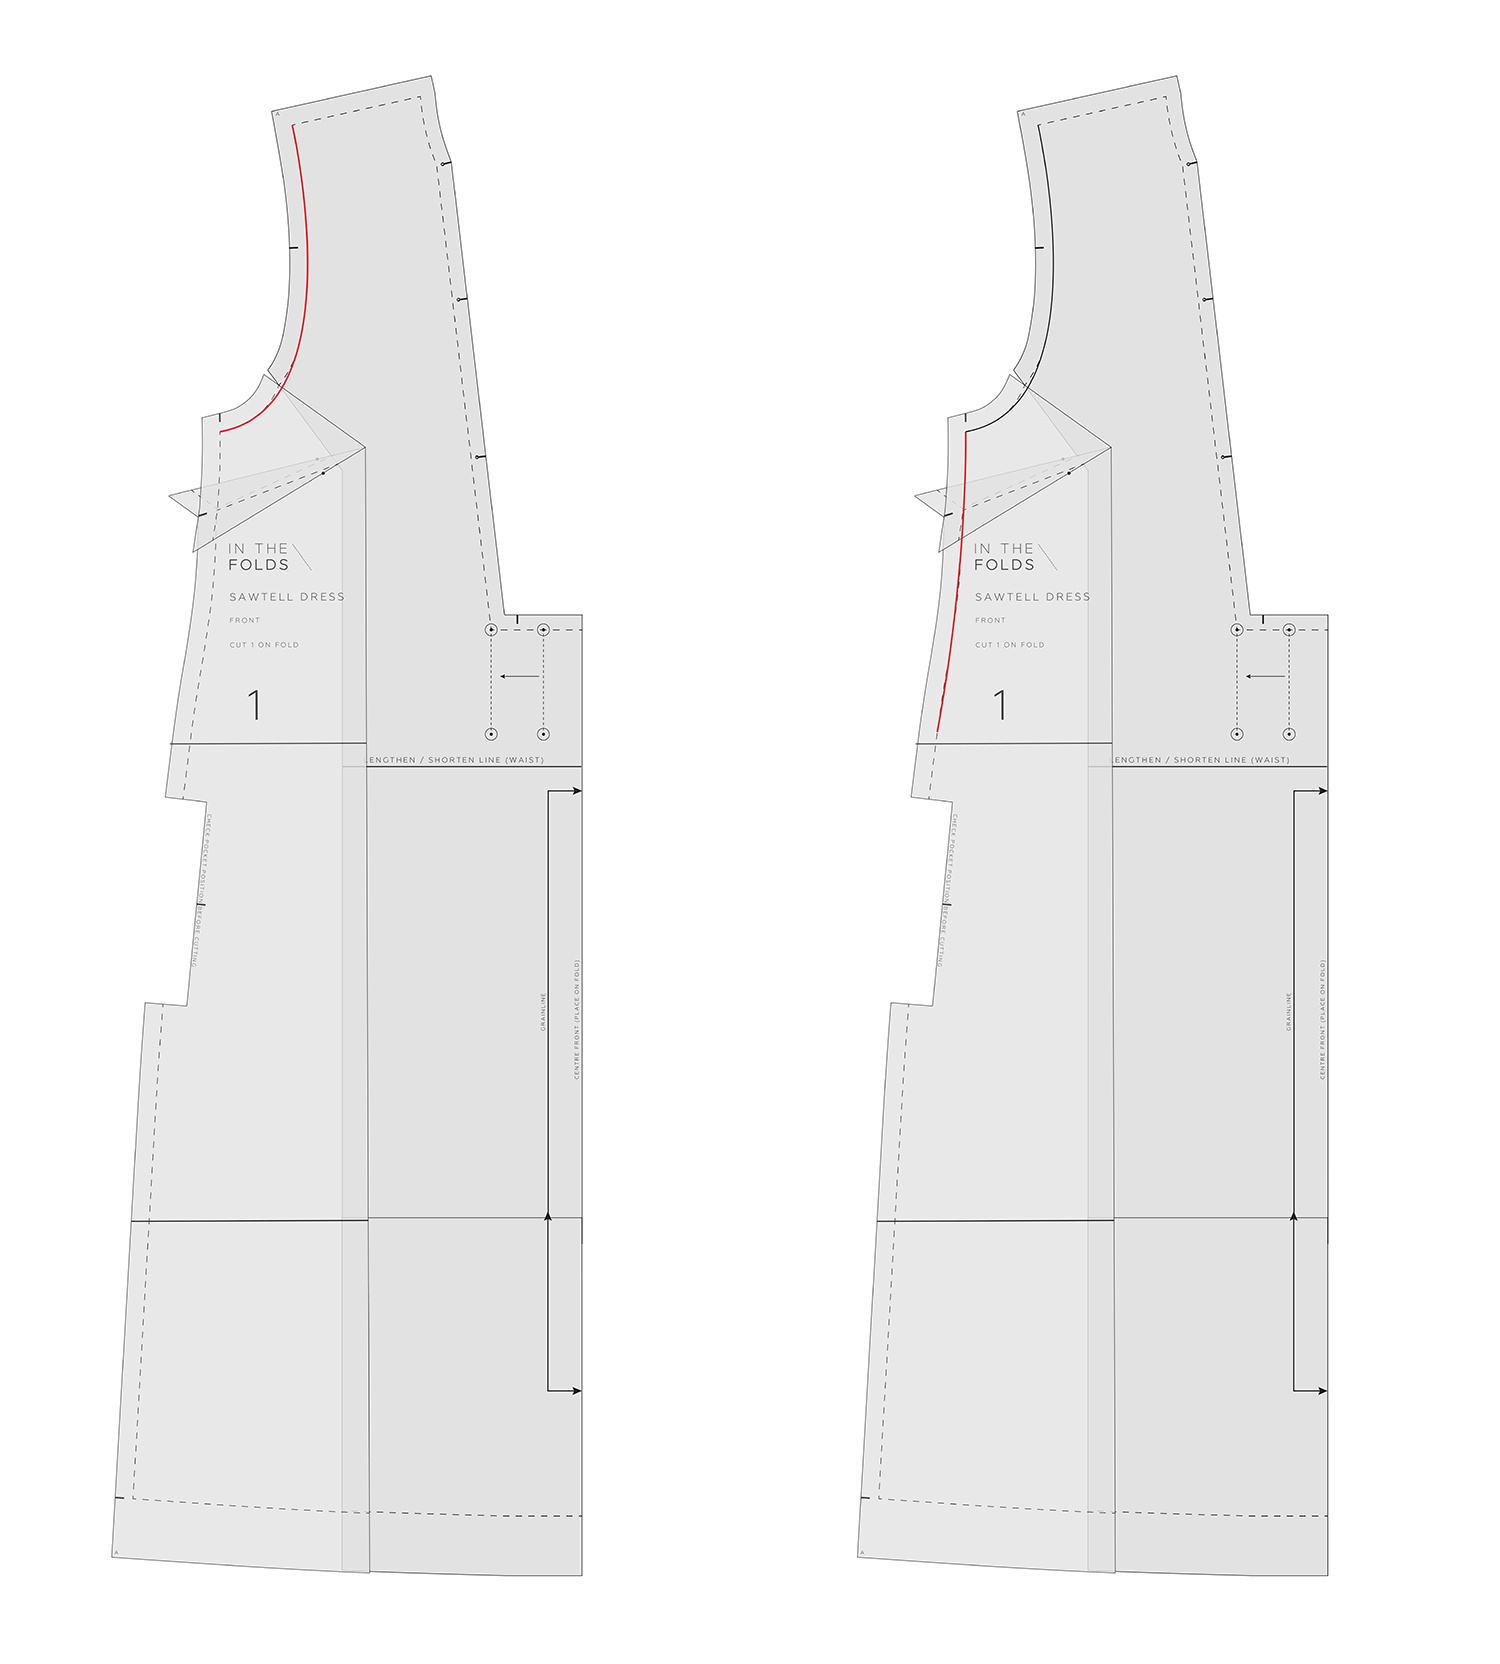
Step 5
(Left) Re-draw the amscye with a smooth curve over the alteration. Use a French curve if you have one. IF you don’t have a French curve, try this technique.
(Right) Re-draw the side seam with a smooth curve over the alteration.
Step 6
Check and true the side seams to ensure everything will sew back together cleanly.
Step 7
Add seam allowance to the new lines and cut off any excess paper. I have a video of the process here.
Now what?
As always, I'd recommend making a toile before cutting into your final fabric. This gives you the opportunity to check the fit and make further adjustments if needed.
2. What if the garment feels tight across the upper chest and back?
After making her adjustments, M discovered that the dress was feeling a little tight across the upper body, around the level of the bottom of the armhole. This is a good example of why fitting is often a process of making one adjustment, checking the result and then deciding what to do next.
Removing bust fullness addresses one part of the fit, but it doesn't necessarily solve everything. If you're experiencing tightness through the upper chest or back, the first step is to work out where you need more room.
Option 1: Add a little width through the side seams
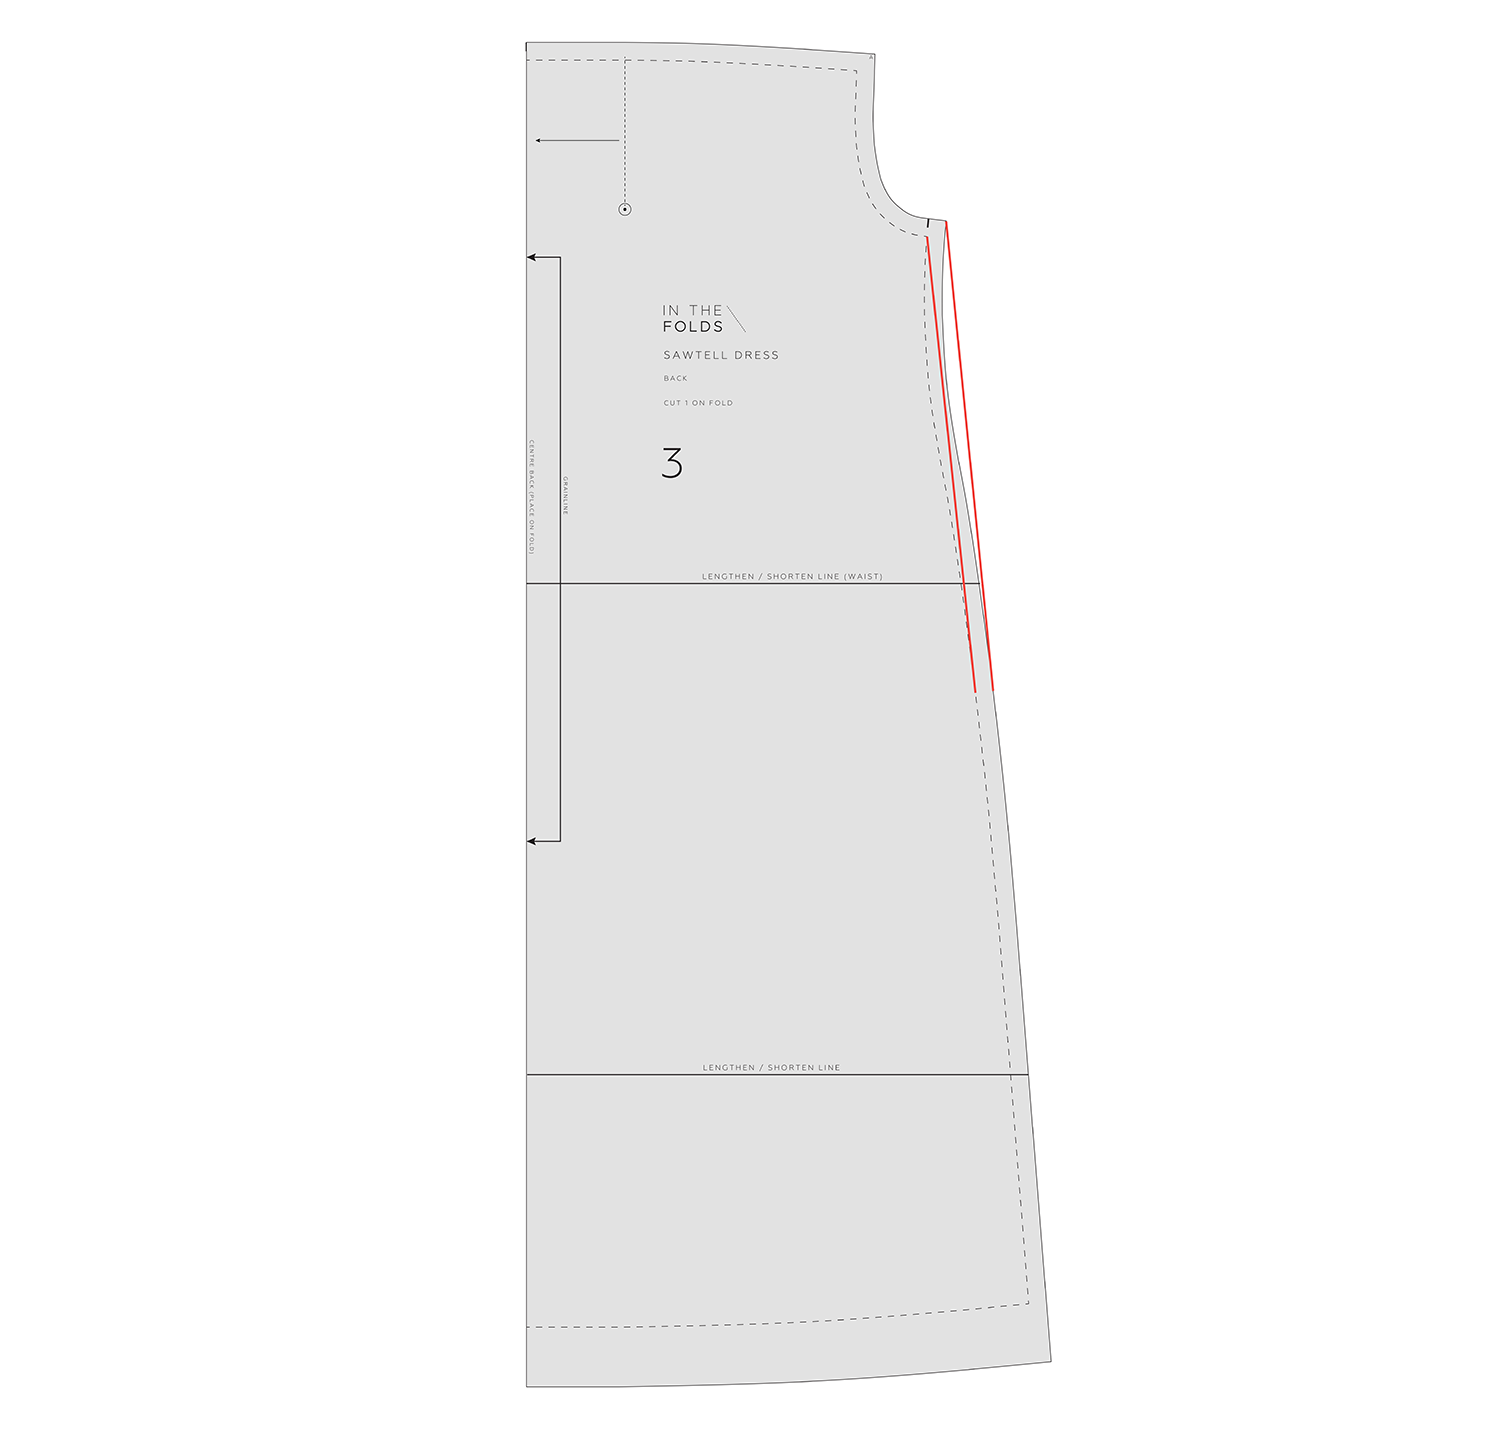
If the garment feels generally snug around the upper body, you may be able to add a little more room by adjusting the side seams.
In M's case, I suggested straightening out some of the shaping through the back side seam. This would add a little extra width in that area without needing to make a more involved alteration. It's worth making small adjustments at a time and checking the fit before committing to a larger change.
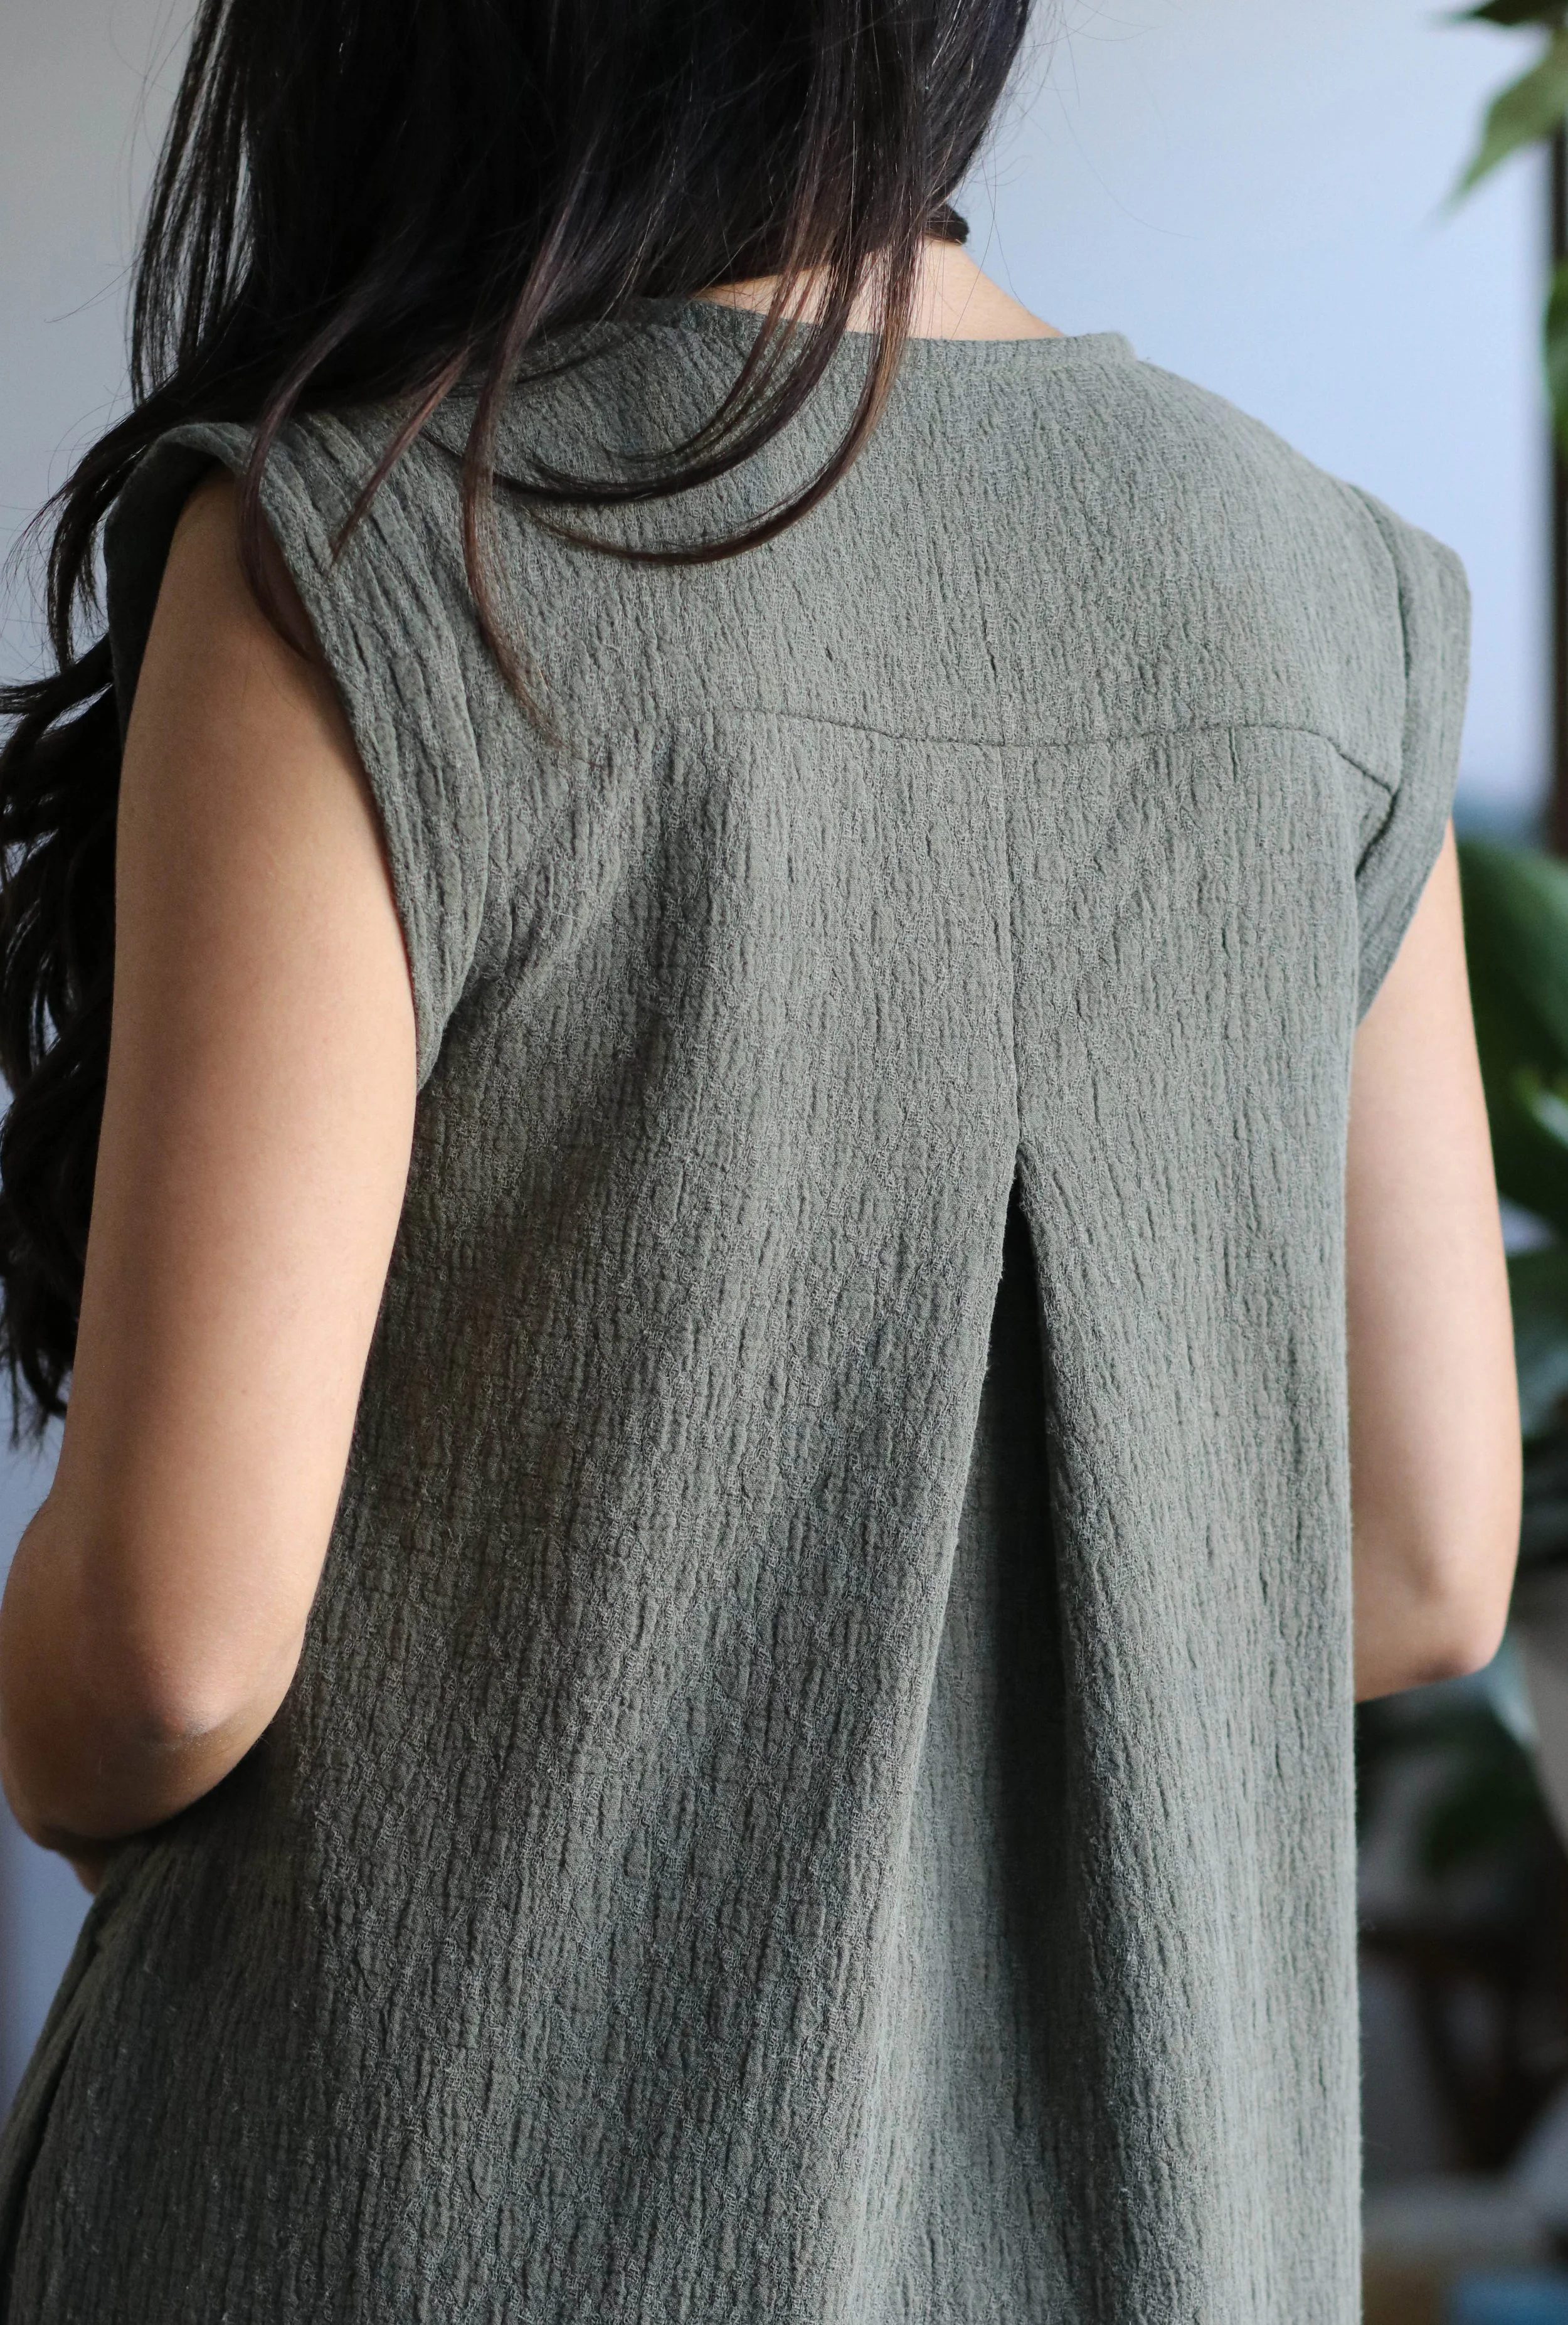
Option 2: Consider a broad back adjustment
If the tightness is mainly across the back, particularly when moving your arms forward, a Broad Back Adjustment may be more appropriate. This alteration adds width through the back of the garment without necessarily changing the fit through the front.
A toile is particularly helpful here because you can pin, mark and experiment with the fit before transferring your changes back to the paper pattern.
3. Remember that fitting is a process
One of the things M mentioned during our conversation was that she was enjoying spending time with the pattern and beginning to understand more about fitting and pattern drafting.
I loved hearing this because it's something I really encourage makers to do. It's easy to think of pattern alterations as problems to solve so that we can get on with the actual sewing. But there's so much to learn in the process.
When you make an adjustment, sew a toile and look at how the garment fits, you're learning about the relationship between a two-dimensional pattern and a three-dimensional body. You're also learning that there isn't always one correct answer. Sometimes two different alterations can achieve a similar result. Sometimes an adjustment solves one fitting issue but reveals another.
The more you experiment, the easier it becomes to understand what your pattern is doing and why. And once you're happy with the fit, you can start thinking about the design details!
M mentioned that she was considering inverting the front pleat on the Sawtell dress. This was actually something I played around with during the design process too. I struggled to decide which direction I preferred because I liked both versions! It's a lovely reminder that once you've made a pattern work for your body, you can continue making it your own.
A final thought
If you're adapting a sewing pattern for a flat chest, my biggest piece of advice is to approach it one adjustment at a time. Start by choosing a size that works for your shoulders and upper body, then remove the bust fullness you don't need. Make a toile, check the fit and see what else might need adjusting.
And remember that the aim isn't to make your body fit a particular pattern. It's to understand how the pattern can be adjusted to work for you.
Happy sewing,
Emily
For more issues of the Q & A series, you can check out the archive here.