
THE Q & A SERIES
HOW TO SEW ACCURATE CURVES
Lately I have been doing a bit of a deep dive into thinking about what In the Folds patterns are all about. What we are known for, what makes our patterns stand out, and what elements of our patterns make them specifically “In the Folds.” Something that comes to mind are curves. I love an interesting curved seam line, and in today’s post I thought I’d chat to you about sewing accurate curved seams.
Get your bearings
First you need to get clear about what pieces are being joined. Sometimes this will be more obvious than others.
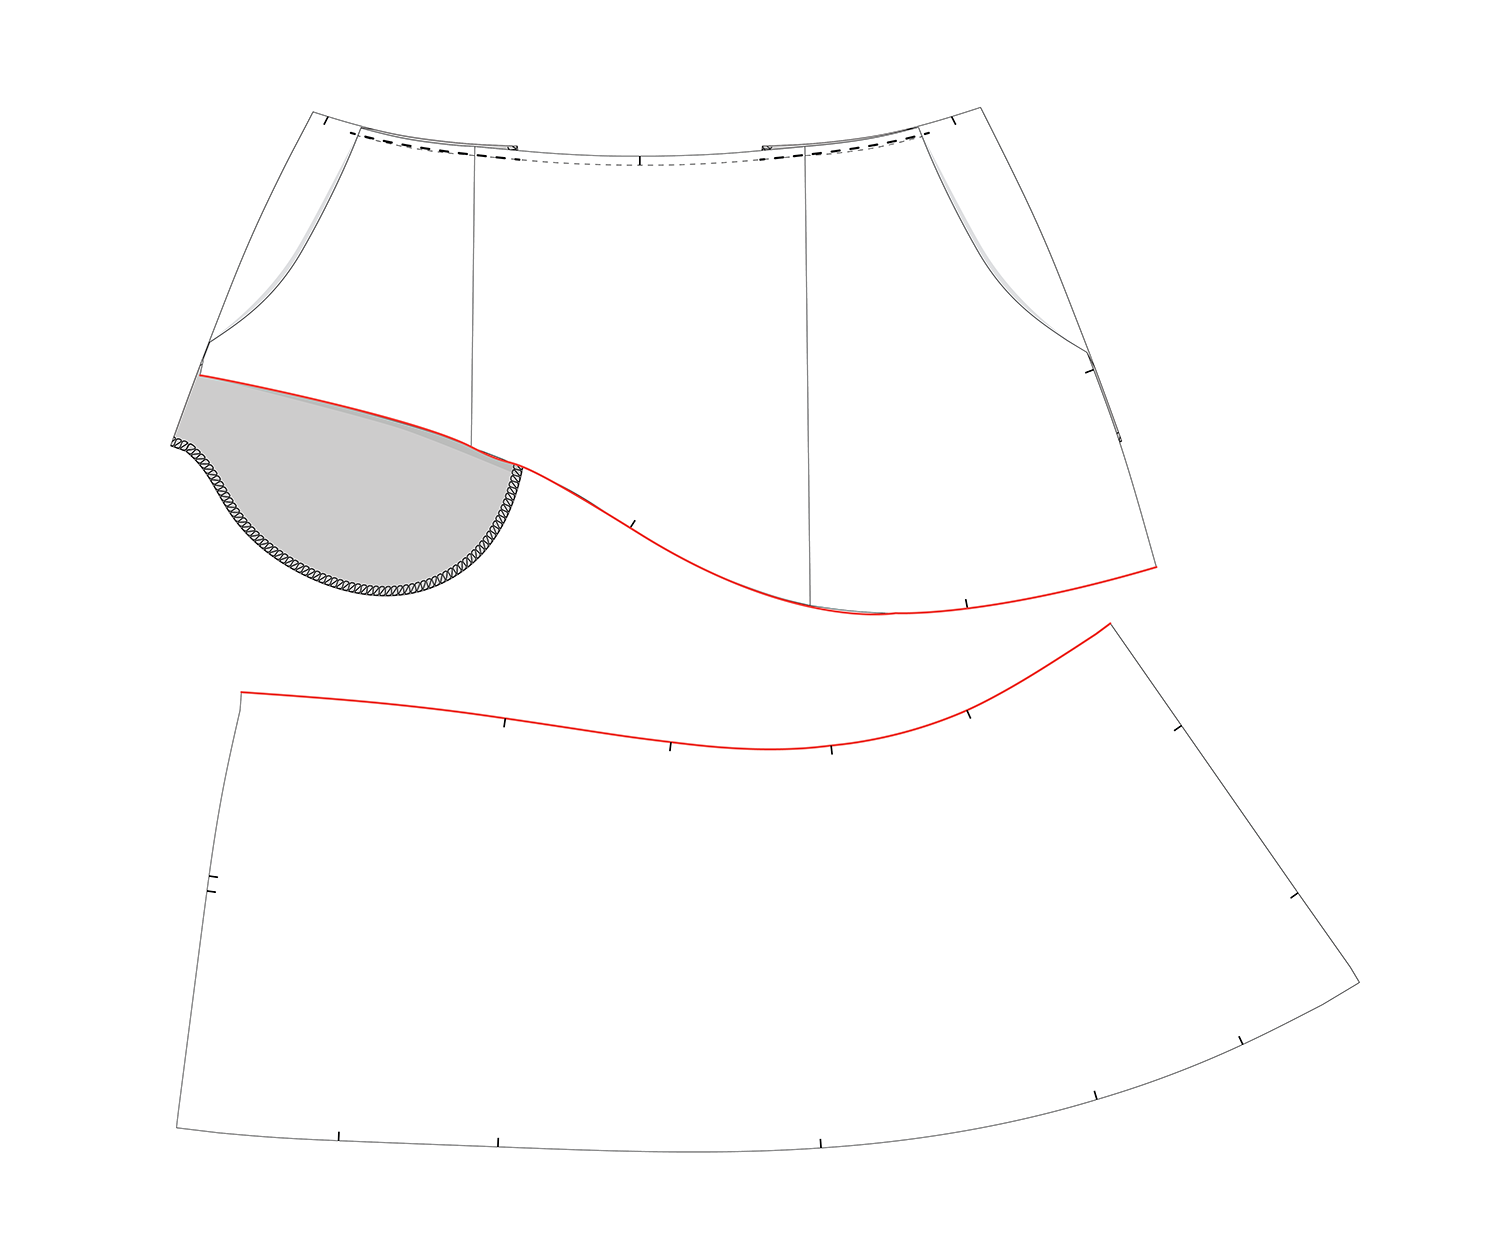
In this example you can see the curve of the pocket opening on the Mornington skirt. It’s the same shape between the POCKET FACING and POCKET BAG, meaning that it’s easy to match up and no extra notches are required.
Sometimes you will be left wondering “Am I pinning the correct pieces together?” This is when checking your notches line up is very important.
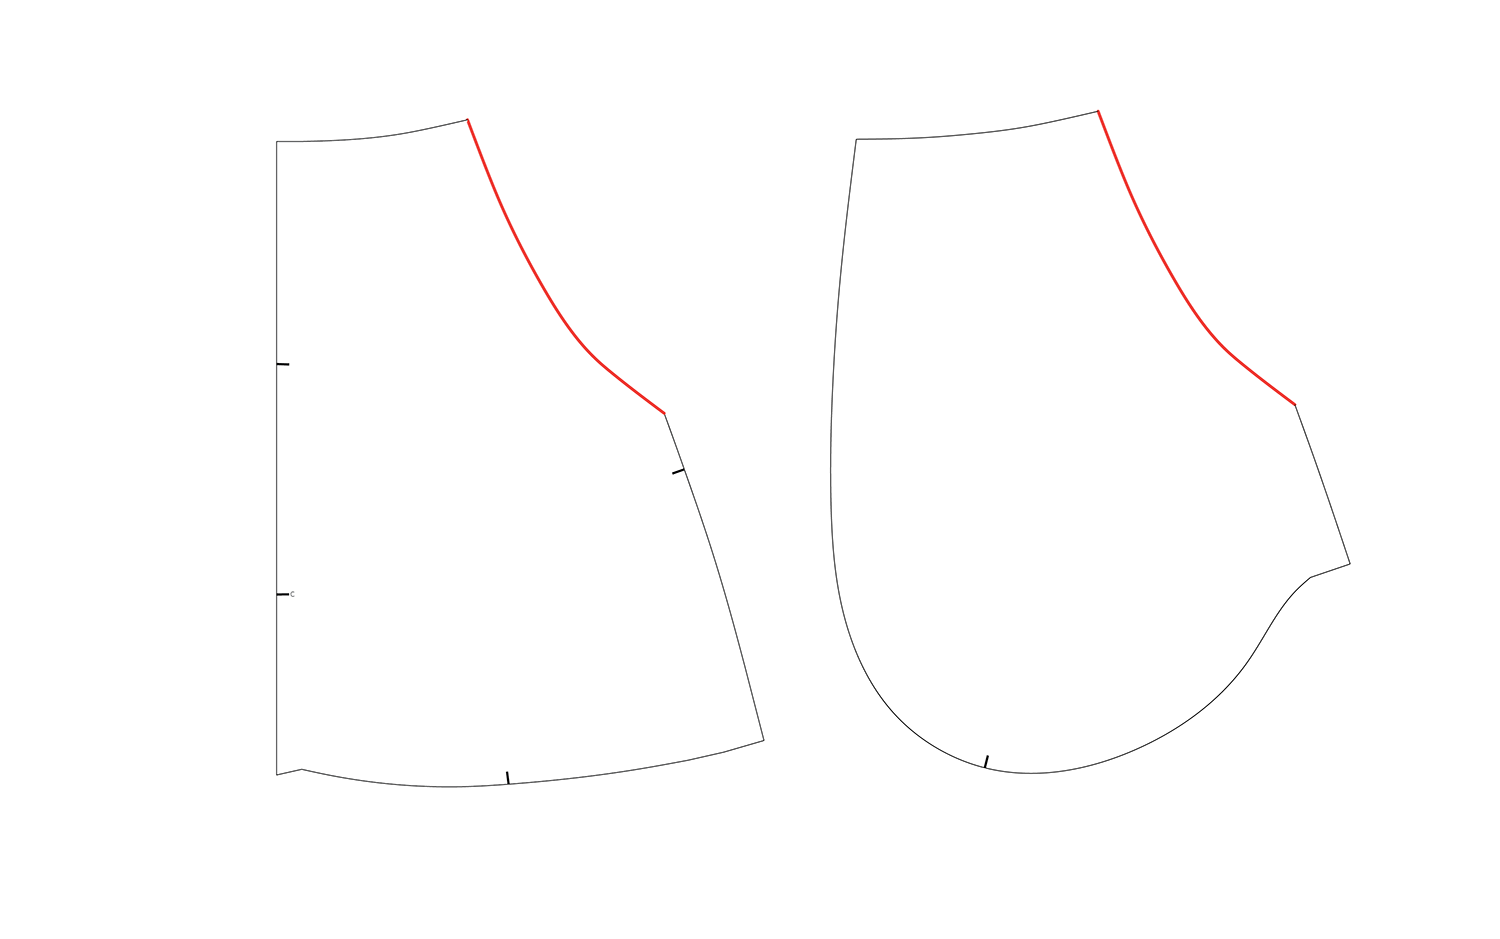
In the second example, it’s not obvious how these pieces come together, or even if it’s the correct piece. This is because there is some shaping being created in the seam.

This is when notches will do the heavy lifting for you.
2. The importance of pinning
Accurate pinning is your best friend when it comes to sewing curves.

Line up the notches first and pin in place. Place the pins perpendicular to the seam edges - this will prevent the fabric from moving, but is also the safest way to pin as pins come out easily as you sew, but also means if you accidentally sew over a pin, the needle should slide to one side of the pin, rather than through it.

Pin between the notches and to the edges of the pieces. For extreme curves, use more pins than you usually would - every 2-3cm (1in) is a good guide.
3. Go nice and slow
Once you get on the sewing machine, go nice and slow. Curves often take a bit of tweaking when you start sewing, even if you have done a great job of pinning.

As you sew, you might see small puckers forming, especially if you are sewing quite an extreme curve. For small puckers, use a pin to press the puckers flat.
For larger puckers, put the needle down into the fabric using the hand wheel and lift the foot to release the puckers. Gently smooth out using your fingers.
4. Keep your eye on the edges.

For some curves, one layer of fabric is going to try to pull away from the other at the edge. Keep your eye on this - it could be the layer on top or the underneath layer.

Gently move the edge of the fabric back over to where it should be as you sew.
5. Check for puckers

When you finish sewing the seam, check for puckering on both the front and back of the seam. If you have puckering, unpick a few centimetres (1in) either side before carefully re-sewing. Ensure all puckering is removed before finishing the seam allowance.
6. Pressing curves
When pressing curves, consider where the curve is positioned on the body.

If it’s in an area that should be sitting flat, press flat on the ironing board.

If it’s an area of the body that is contoured (such as panel lines over the bust, waist or hips) use a pressing ham to shape the seam.
And that’s it! With these tips up your sleeve you should be sewing beautiful and accurate curves in no time!
Happy sewing,
Emily
RESOURCES MENTIONED IN THIS ISSUE
The Mornington skirt pattern can be found here.
For more issues of the Q & A series, you can check out the archive here.
WHAT YOU’VE BEEN MAKING
Ormond Coat made by @helensewsmemadeclothes

Ormond Coat made by @pippa2633


