Tips for topstitching when sewing.
Q&A 201: GENTLE GUIDE TO DELICATE FABRICS

THE Q & A SERIES
GETTING STARTED WITH DELICATE FABRICS
If you’ve ever dreamt of sewing with silk, chiffon or organza but hesitated at the thought of slippery seams and fraying edges, you’re not alone. Delicate fabrics can feel intimidating at first, but with the right preparation and a little patience, they can be incredibly rewarding to sew.
The key is to slow down, set yourself up for success, and let the fabric guide you.
This guide brings together our favourite tips from the Delicate Fabrics Hack Kit and Skills Kit to help you begin your journey with confidence.
1. Know Your Fabric
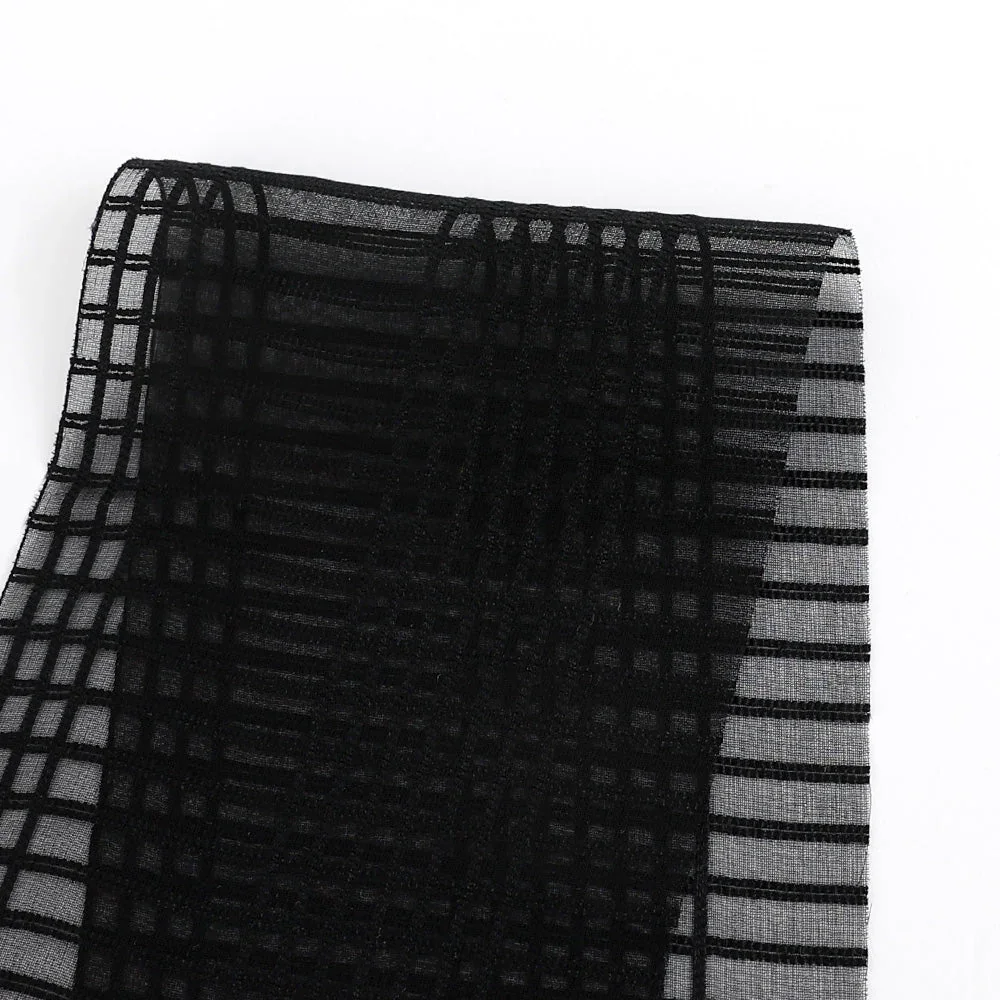
Each delicate fabric has its own personality. Silk charmeuse drapes like liquid and catches the light. Crepe de chine has a soft, matte texture and gentle crinkle. Organza is crisp and sheer, while georgette feels airy and slightly springy.
Before you cut, spend some time getting to know how your fabric moves. Hold it up to the light, notice its weight and transparency, and press a small test corner to see how it reacts to heat. Understanding these qualities will help you choose the right techniques and finishes later on.
2. Prepare Your Tools and Space
When working with fine fabrics, your tools can make all the difference.
Needles: Use a fine, sharp needle such as size 60/8 or 70/10 to avoid snags or visible holes.
Thread: Choose a high-quality polyester thread. For extra softness, try silk thread.
Pins: Fine silk pins or glass-head pins are best. Pattern weights help avoid marks.
Pressing cloth: Use a silk organza cloth to protect the fabric and see your work clearly.
Before you begin, clear your workspace and check that your cutting surface is smooth. Even a small nick or rough patch can catch on delicate fabric.

Clover Glass Head Silk Pins
3. Set Up Your Machine
Delicate fabrics prefer gentle machine settings. Always test on scraps first.
Stitch length: 1.5 to 2.5 mm.
Tension: Adjust to prevent puckering. If stitches look uneven, reduce presser foot pressure.
Machine feet: A Teflon foot helps fabric glide smoothly. A walking foot keeps layers even.
And when in doubt, hand baste. Slower, yes, but it gives you control and precision.
4. Prepare and Cut Carefully
Pre-wash your fabric gently, then give it a light press before cutting. Because delicate fabrics shift easily, stabilising is key.
Try these methods:
Cut in a single layer to prevent slippage.
Place tissue or pattern paper underneath and pin through both layers.
Use a rotary cutter with a sharp blade and pattern weights for clean edges.
Accuracy at this stage will make sewing far easier later.

5. Try Spray Starch
A light mist of spray starch can help keep slippery fabrics stable while cutting and sewing. Use sparingly and always test first, as too much can leave residue or stiffness.

6. Choose the Right Techniques
Delicate fabrics shine when finished lightly and cleanly.
French seams enclose raw edges for a neat, refined finish.
Rolled hems add an airy drape to sleeves and edges.
Bias or French binding works beautifully for necklines or sheer edges.
Each finish should support the fabric, never overwhelm it.

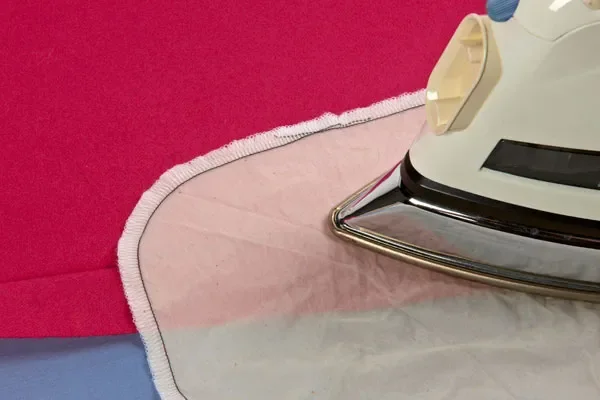
7. Press Thoughtfully
Pressing sets stitches and shapes your garment. With delicate fabrics, gentle is best.
Use steam carefully, always with a pressing cloth, and let each section cool before moving it. Think of pressing as sculpting the fabric into its final form.
8. Embrace the Process
Sewing with delicate fabrics invites you to slow down. It’s an exercise in patience and precision, but the results are worth it—the soft sheen, the fluid drape, the seams that melt into the fabric.
Start small with a sleeveless top or scarf and build your confidence. Each project teaches you something new about the balance between control and flow.
Ready to Try It?
Explore our Delicate Fabric Series in Curated for step-by-step tutorials on French seams, rolled hems and more. Each project is designed to help you learn at your own pace, one technique, one stitch, one beautiful fabric at a time.

RESOURCES MENTIONED IN THIS ISSUE
For more issues of the Q & A series, you can check out the archive here.
MORE POSTS IN THE SERIES


Q&A 200 - HOW TO SEW ACCURATE CURVES

THE Q & A SERIES
HOW TO SEW ACCURATE CURVES
Lately I have been doing a bit of a deep dive into thinking about what In the Folds patterns are all about. What we are known for, what makes our patterns stand out, and what elements of our patterns make them specifically “In the Folds.” Something that comes to mind are curves. I love an interesting curved seam line, and in today’s post I thought I’d chat to you about sewing accurate curved seams.
Get your bearings
First you need to get clear about what pieces are being joined. Sometimes this will be more obvious than others.
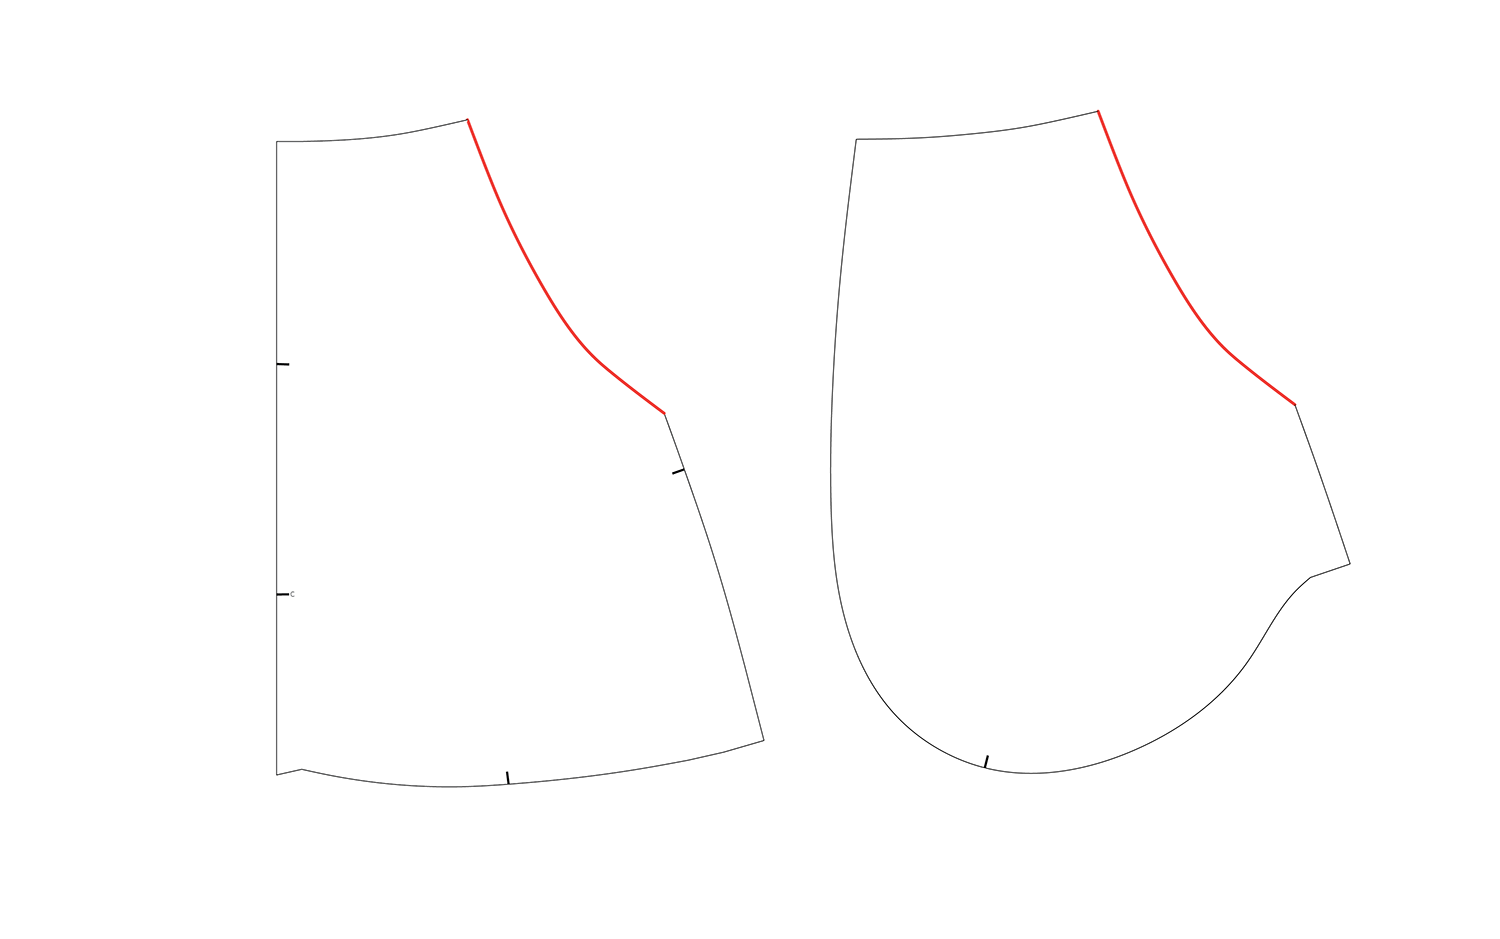
In this example you can see the curve of the pocket opening on the Mornington skirt. It’s the same shape between the POCKET FACING and POCKET BAG, meaning that it’s easy to match up and no extra notches are required.
Sometimes you will be left wondering “Am I pinning the correct pieces together?” This is when checking your notches line up is very important.
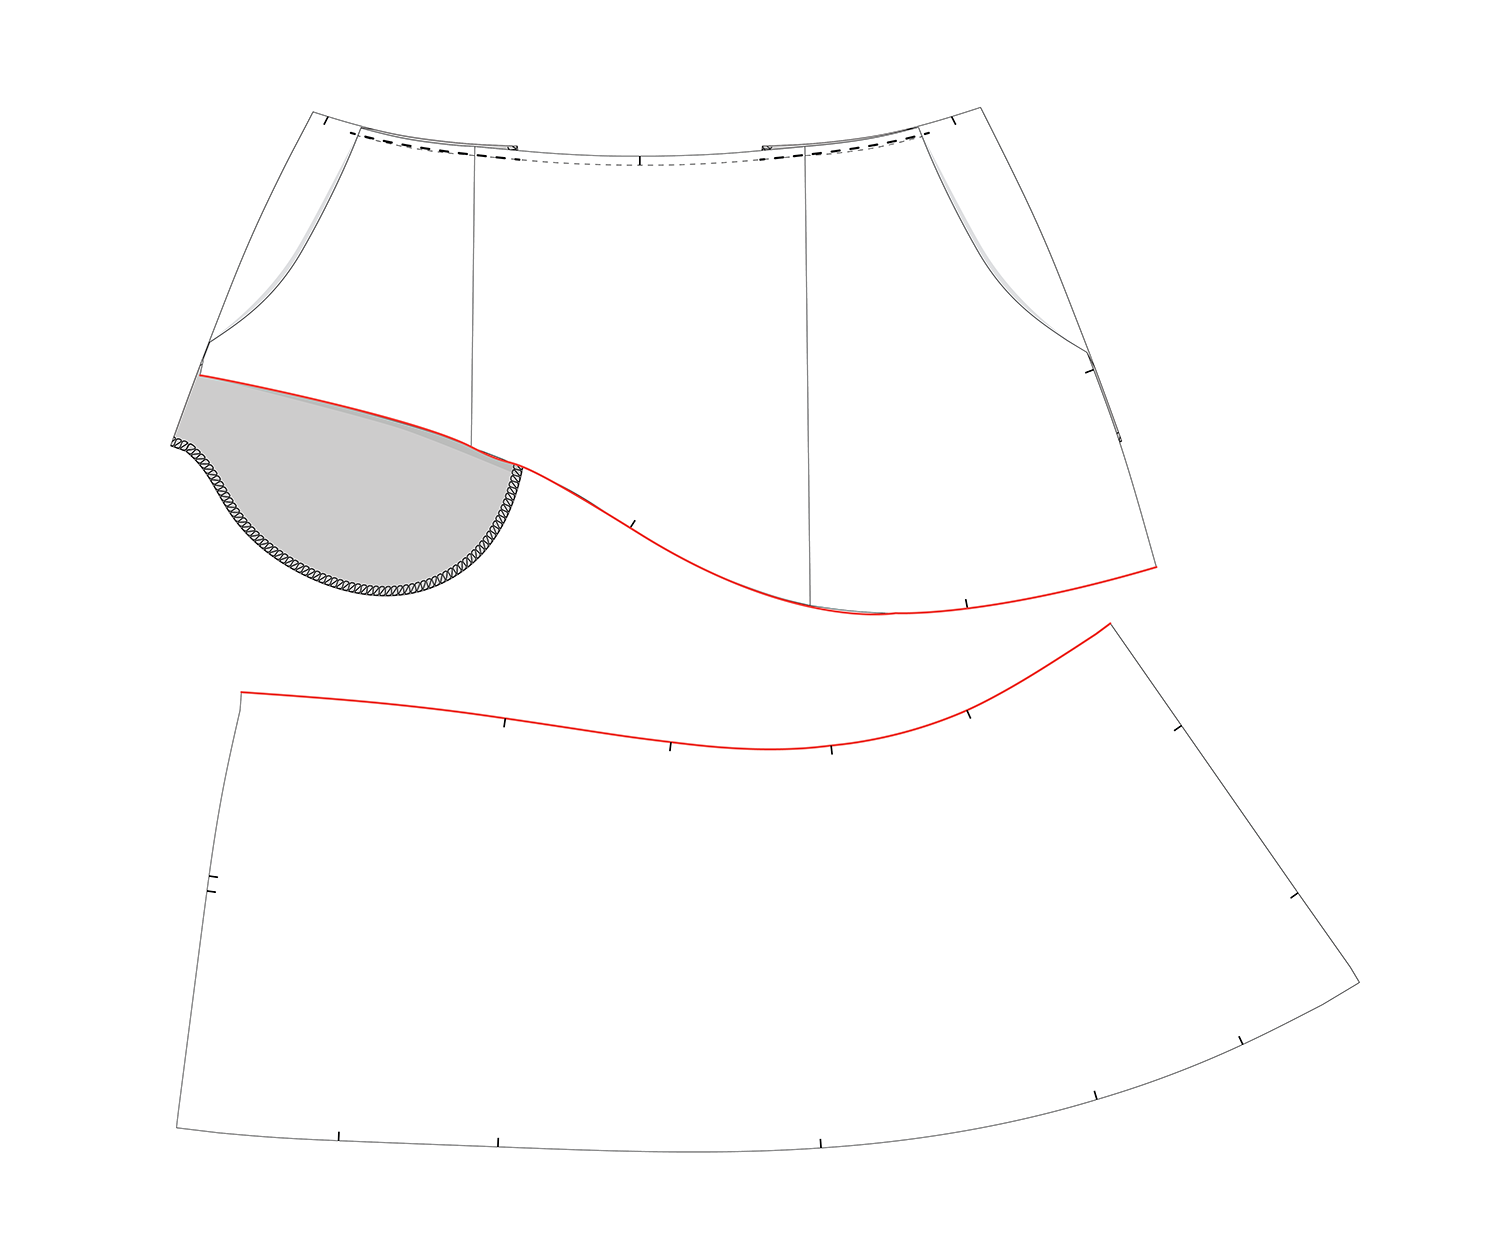
In the second example, it’s not obvious how these pieces come together, or even if it’s the correct piece. This is because there is some shaping being created in the seam.

This is when notches will do the heavy lifting for you.
2. The importance of pinning
Accurate pinning is your best friend when it comes to sewing curves.

Line up the notches first and pin in place. Place the pins perpendicular to the seam edges - this will prevent the fabric from moving, but is also the safest way to pin as pins come out easily as you sew, but also means if you accidentally sew over a pin, the needle should slide to one side of the pin, rather than through it.

Pin between the notches and to the edges of the pieces. For extreme curves, use more pins than you usually would - every 2-3cm (1in) is a good guide.
3. Go nice and slow
Once you get on the sewing machine, go nice and slow. Curves often take a bit of tweaking when you start sewing, even if you have done a great job of pinning.

As you sew, you might see small puckers forming, especially if you are sewing quite an extreme curve. For small puckers, use a pin to press the puckers flat.
For larger puckers, put the needle down into the fabric using the hand wheel and lift the foot to release the puckers. Gently smooth out using your fingers.
4. Keep your eye on the edges.

For some curves, one layer of fabric is going to try to pull away from the other at the edge. Keep your eye on this - it could be the layer on top or the underneath layer.

Gently move the edge of the fabric back over to where it should be as you sew.
5. Check for puckers

When you finish sewing the seam, check for puckering on both the front and back of the seam. If you have puckering, unpick a few centimetres (1in) either side before carefully re-sewing. Ensure all puckering is removed before finishing the seam allowance.
6. Pressing curves
When pressing curves, consider where the curve is positioned on the body.

If it’s in an area that should be sitting flat, press flat on the ironing board.

If it’s an area of the body that is contoured (such as panel lines over the bust, waist or hips) use a pressing ham to shape the seam.
And that’s it! With these tips up your sleeve you should be sewing beautiful and accurate curves in no time!
Happy sewing,
Emily
RESOURCES MENTIONED IN THIS ISSUE
The Mornington skirt pattern can be found here.
For more issues of the Q & A series, you can check out the archive here.
WHAT YOU’VE BEEN MAKING

Ormond Coat made by @helensewsmemadeclothes

Ormond Coat made by @pippa2633