new pattern

New pattern in collaboration with Peppermint Magazine : the Everyday Dress

BLOG HEADER EVERYDAY DRESS.jpg

I am very excited to be popping onto the blog today to let you know that we have just added a new pattern to the In the Folds in collaboration with Peppermint Magazine pattern family!

While we’re all going crazy for easy-wearing sack dresses, we thought it was about time we created one for you!

Peppermint-everyday-dress-1.jpg

What is really fun about this design, is that you can wear it two different ways - depending on how you’re feeling / your style! The Everyday dress is a knee-length oversized reversible dress. One side of the dress has a soft v-neck, while the other has a round neck. The dress features relaxed boxy sleeves, inseam pockets, hem splits and an optional waist tie. A neck facing is used to finish the neckline, which gives a beautiful and clean finish, as well as a lovely detail on the neckline.

The pattern is available in 10 sizes (approximately AU size 6 - 24) and comes as a layered PDF so you can just download the size that you need. More information about In the Folds sizing can be found here.

PeppermintSewingSchool42-outside2.jpg

Through the creation of this garment you will gain confidence in:

  • sewing with woven fabrics

  • sewing in-seam pockets

  • sewing facings

  • sewing a hem split

As always, the instructions are very detailed, so I’ll be there to hold your hand every step of the way!

Peppermint-everyday-dress-6.jpg

The Everyday dress is compatible with light to mid-weight fabrics. Consider using: cotton, linen, viscose / rayon, chambray or silk. We used smoke chambray linen from The Fabric Store for ours.

Please note: due to the width of the pattern pieces, you will need to use 150cm (60in) wide fabric (or wider).

Peppermint-everyday-dress-4.jpg

The pattern can be downloaded in both A4 and A0 format. This is a great pattern for advanced beginners and beyond. 

I’d love to hear what you think!

Happy sewing lovely people.

New pattern in collaboration with Peppermint Magazine : Wrap skirt

Free Wrap skirt pattern - Peppermint mag collab

In all the excitement of releasing the Darlow pants, I forgot to let you know that I just released a new pattern in collaboration with Peppermint Magazine. So I am popping in today to introduce you to the Wrap skirt! I have a feeling that this one is going to be really popular, as it’s a quick and easy sew for makers of all levels. And, as always, it’s available for free downloaded.

The pattern is available in 10 sizes (approximately AU size 6 - 24) and comes as a layered PDF so you can just download the size that you need.

PeppermintSewingSchool41c.jpg

The Wrap skirt is a three-quarter length skirt with a waist tie, that sits on the natural waist. The skirt features front and back waist darts, french seams and a buttonhole to feed the waist tie through.

Free Wrap skirt pattern - Peppermint mag collab 2

Through the creation of this garment you will gain confidence in:

  • sewing with woven fabrics

  • sewing darts

  • sewing french seams

As always, the instructions are very detailed, so I’ll be there to hold your hand every step of the way!

Peppermint wrap skirt - free pattern

The Wrap skirt is compatible with a wide range of fabrics. For a soft silhouette, consider using: lightweight cotton, linen, viscose / rayon or silk. For a more structured silhouette, consider using mid to heavy-weight fabrics such as: cotton drill, linen, denim or wool. For the sample, I used a beautiful mid-weight linen from The Fabric Store.

The pattern can be downloaded in both A4 and A0 format. This is a great pattern for beginners and beyond. 

New pattern in collaboration with Peppermint Magazine : The Playsuit

Free Romper pattern - Peppermint mag collab

Yay! A new pattern is here and I am really excited to share it with you! This pattern is another one to add to the collection that I have released in collaboration with Peppermint Magazine. As always, the pattern can be downloaded for free! I really loved designing this pattern. It’s cute, fun and quite a simple sew (and getting the fit right isn’t too tricky due to the loose nature of the design and the tie-up straps).

The pattern is available in 10 sizes (approximately AU size 6 - 24) and comes as a layered PDF so you can just download the size that you need.

Free Romper pattern - Peppermint mag collab 2

The Playsuit is a comfortable and easy to wear summer staple with bib front and tie straps. The bust area has a close fit and then relaxes into the waist and hip area, for ease and comfort on warm summer days. The Playsuit features patch pockets, invisible zip (in the side for easy access) and an all-in-one facing for a clean and high end finish.

Peppermint playsuit 3

As you can see, the Playsuit looks super cute on its own, but also works really well with a t-shirt underneath. As mentioned, the pattern isn’t too tricky and I’d say it’s a good confidence builder for beginner makers who would like to up their skills a little bit.

Peppermint playsuit free pattern

Through the creation of this garment you will gain confidence in:

  • sewing with woven fabrics

  • sewing an invisible zip

  • making straps

  • sewing a facing

  • sewing pockets

As always, the instructions are very detailed, so I’ll be there to hold your hand every step of the way!

Peppermint playsuit detail

The Playsuit is compatible with a range of different fabrics. Consider using light to mid-weight fabrics such as: linen, linen blends, cotton, gauze or chambray. You could also consider sateen, silk (crepe de chine or habotai), tencel or viscose (rayon) for a dressier look. For a boxier silhouette, consider light-weight denims or heavy-weight cottons. For the sample, I used a beautiful heavy-weight linen from The Fabric Store. The pattern can be downloaded in both A4 and A0 format. This is a great pattern for brave beginners and beyond. 

New pattern in collaboration with Peppermint Magazine : The Ruffle Sleeve Top

RUFFLE-SLEEVE-TOP-BLOG-HEADER_SQUARE2.jpg

It's that time again! Time to release another pattern in collaboration with Peppermint Magazine! As you probably know by now, each quarter I release a pattern with Peppermint that you can download from their website for free.

SewingSchool37.jpg

What I love about this collaboration is that it gives me an opportunity to design something that is a little simpler than my usual patterns, and it also allows you to try out my patterns for free. Win, win! To see the past patterns from the collaboration, look here (issues  30 - 37). 

SewingSchool37-DETAIL1.jpg

For this issue, we decided to make a simple top with a ruffle sleeve. I wanted it to be a piece that was both comfortable, yet still looks put together and chic. To do this, I went for a loose boxy shape, no closure (it just slips over the head) and a facing, to give the neckline a really clean finish. 

I thought it would be nice to encourage a few new techniques in this pattern, so the instructions guide you through making the top with french seams for a clean and professional finish. Although french seams do take a bit of time, they really will make your heart sing each time you look at the insides of your new top! If you would like to see a tutorial on sewing french seams, you can have a look here.

Through the creation of this garment you will gain confidence in:

  • sewing with woven fabrics
  • sewing darts
  • sewing french seams
  • sewing a facing
  • sewing gathers
SewingSchool37-DETAIL2.jpg

The Ruffle Sleeve Top is compatible with a range of different fabrics. Consider using light to
mid-weight fabrics such as: linen, linen blends, cotton, gauze or chambray. For a softer silhouette,
consider sateen, silk or viscose (rayon). Be careful if you are a beginner though, as these fabrics are a little trickier to sew. Softer fabrics will drape over the bust, while stiffer fabrics will create a more voluminous and structured silhouette. If using a sheer fabric, consider binding the neckline rather than using the facing. For the sample I used a beautiful cotton voile from our lovely sponsor for this partnership, The Fabric Store.

The pattern can be downloaded in both A4 and A0 format and comes with detailed instructions, so you will feel supported the whole way through. This is a great pattern for brave beginners and beyond. 

The Collins Top Sew-along : Tester Round-up

Yay! It's time to start the Sew-along for the Collins Top! This has been a long time coming. I had high hopes for this sew-along being ready as soon as the pattern was released, but unfortunately it didn't work out that way. I decided to release the Collins Top the week before #makersforfashrev and two weeks before an overseas trip and so that is what caused the delay (sometimes my planning skills leave a bit to be desired!). 

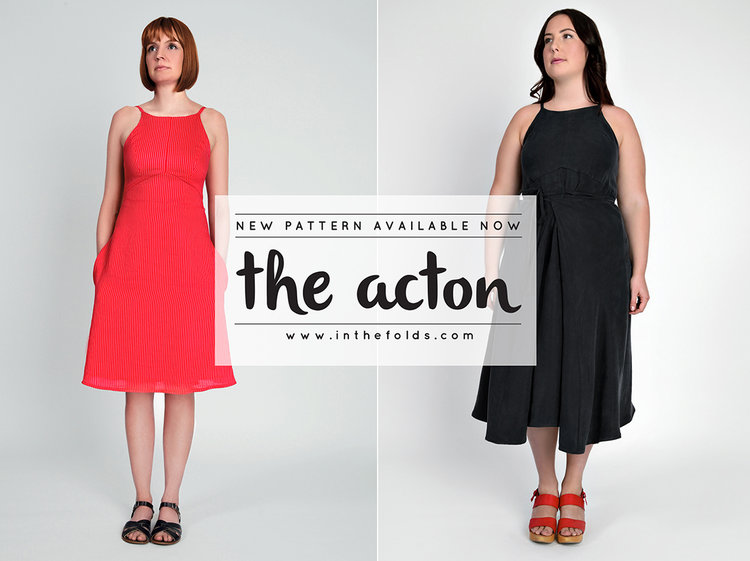
If you have been following my blog for a little while, you'll proabbly know that a sew-along for me is a pretty big deal. I really like to jam pack in as many posts as possible, to ensure that if you are following along, all your questions get answered and I can help you make a garment that you really love and fits you well. You may remember that the Acton sew-along had a whopping 24 posts in it! It is a lot of work to do, but as a lot of the content can be applied to many other different patterns, I feel it is a worthy mission. I want to help makers be the best makers they can be and I feel this is a great way to help!

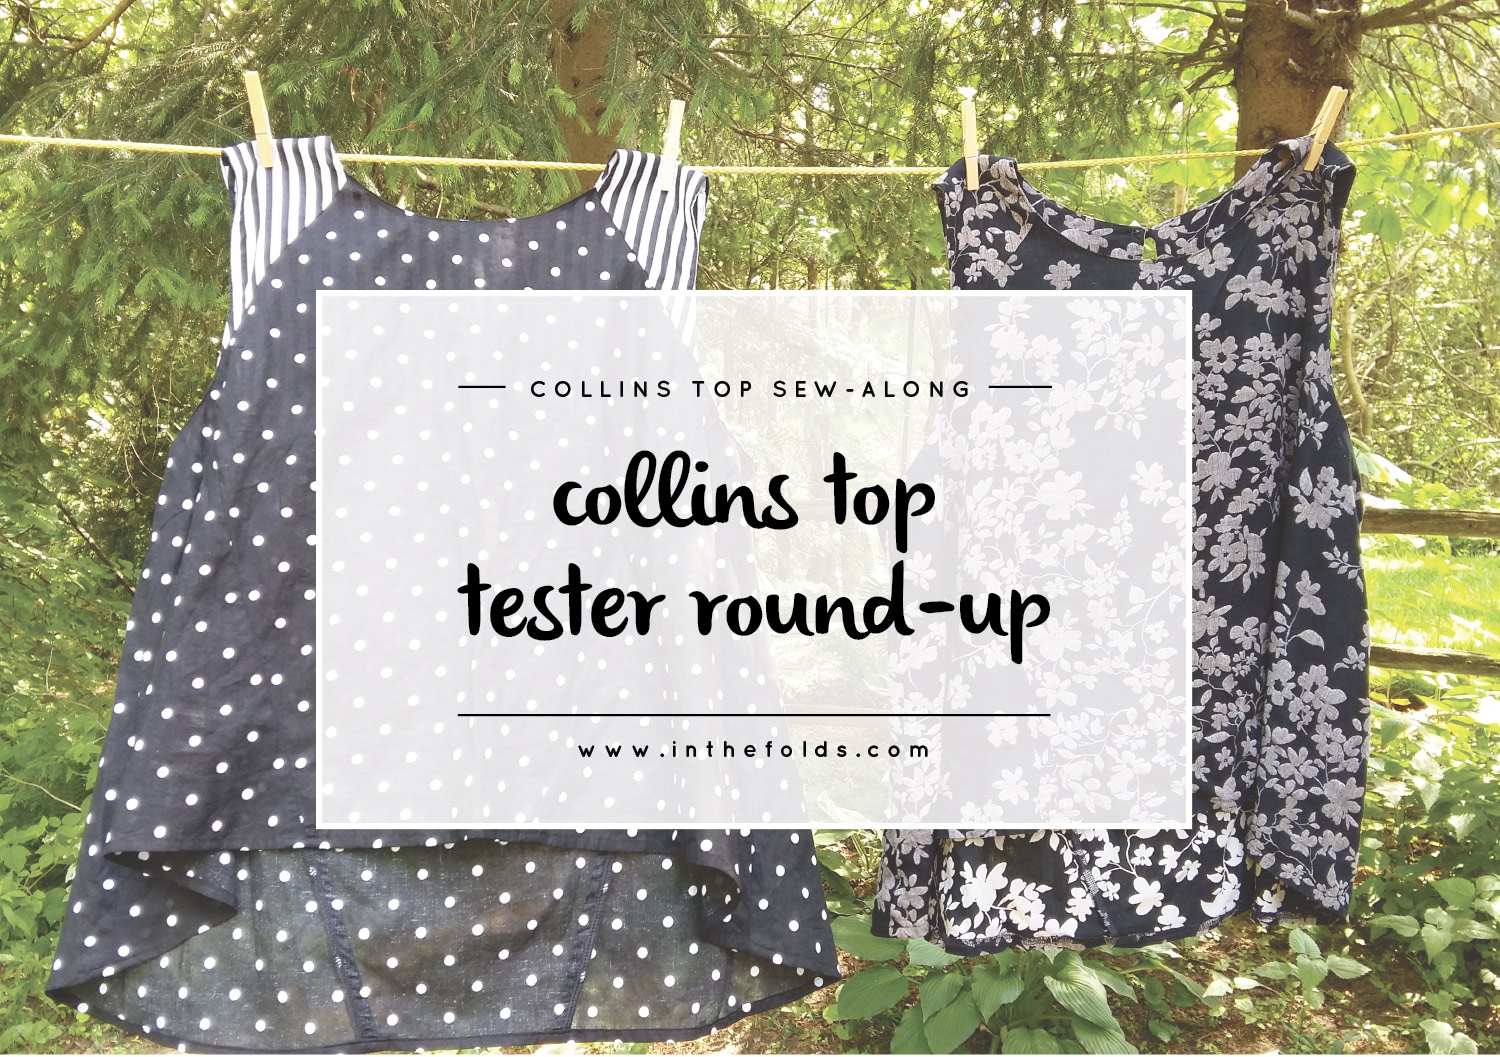
I'll be starting with the tester round-up, as I think it's always the best place to start. It gives you a chance to see how the pattern looks on a variety of body shapes, as well as in a range of different fabrics.

I'm not going to lie, testing this pattern was tough. I made a bit of a drafting blunder in the original pattern, which I somehow overlooked before sending it out for testing. I corrected the problem and overall am much happier with the final product, but this did mean that I had to test the pattern twice - which meant a huge testing group!! Thankfully I had so many amazing people put their hands up to get the job done (some of them even tested in both rounds of testing) and we made it in the end!

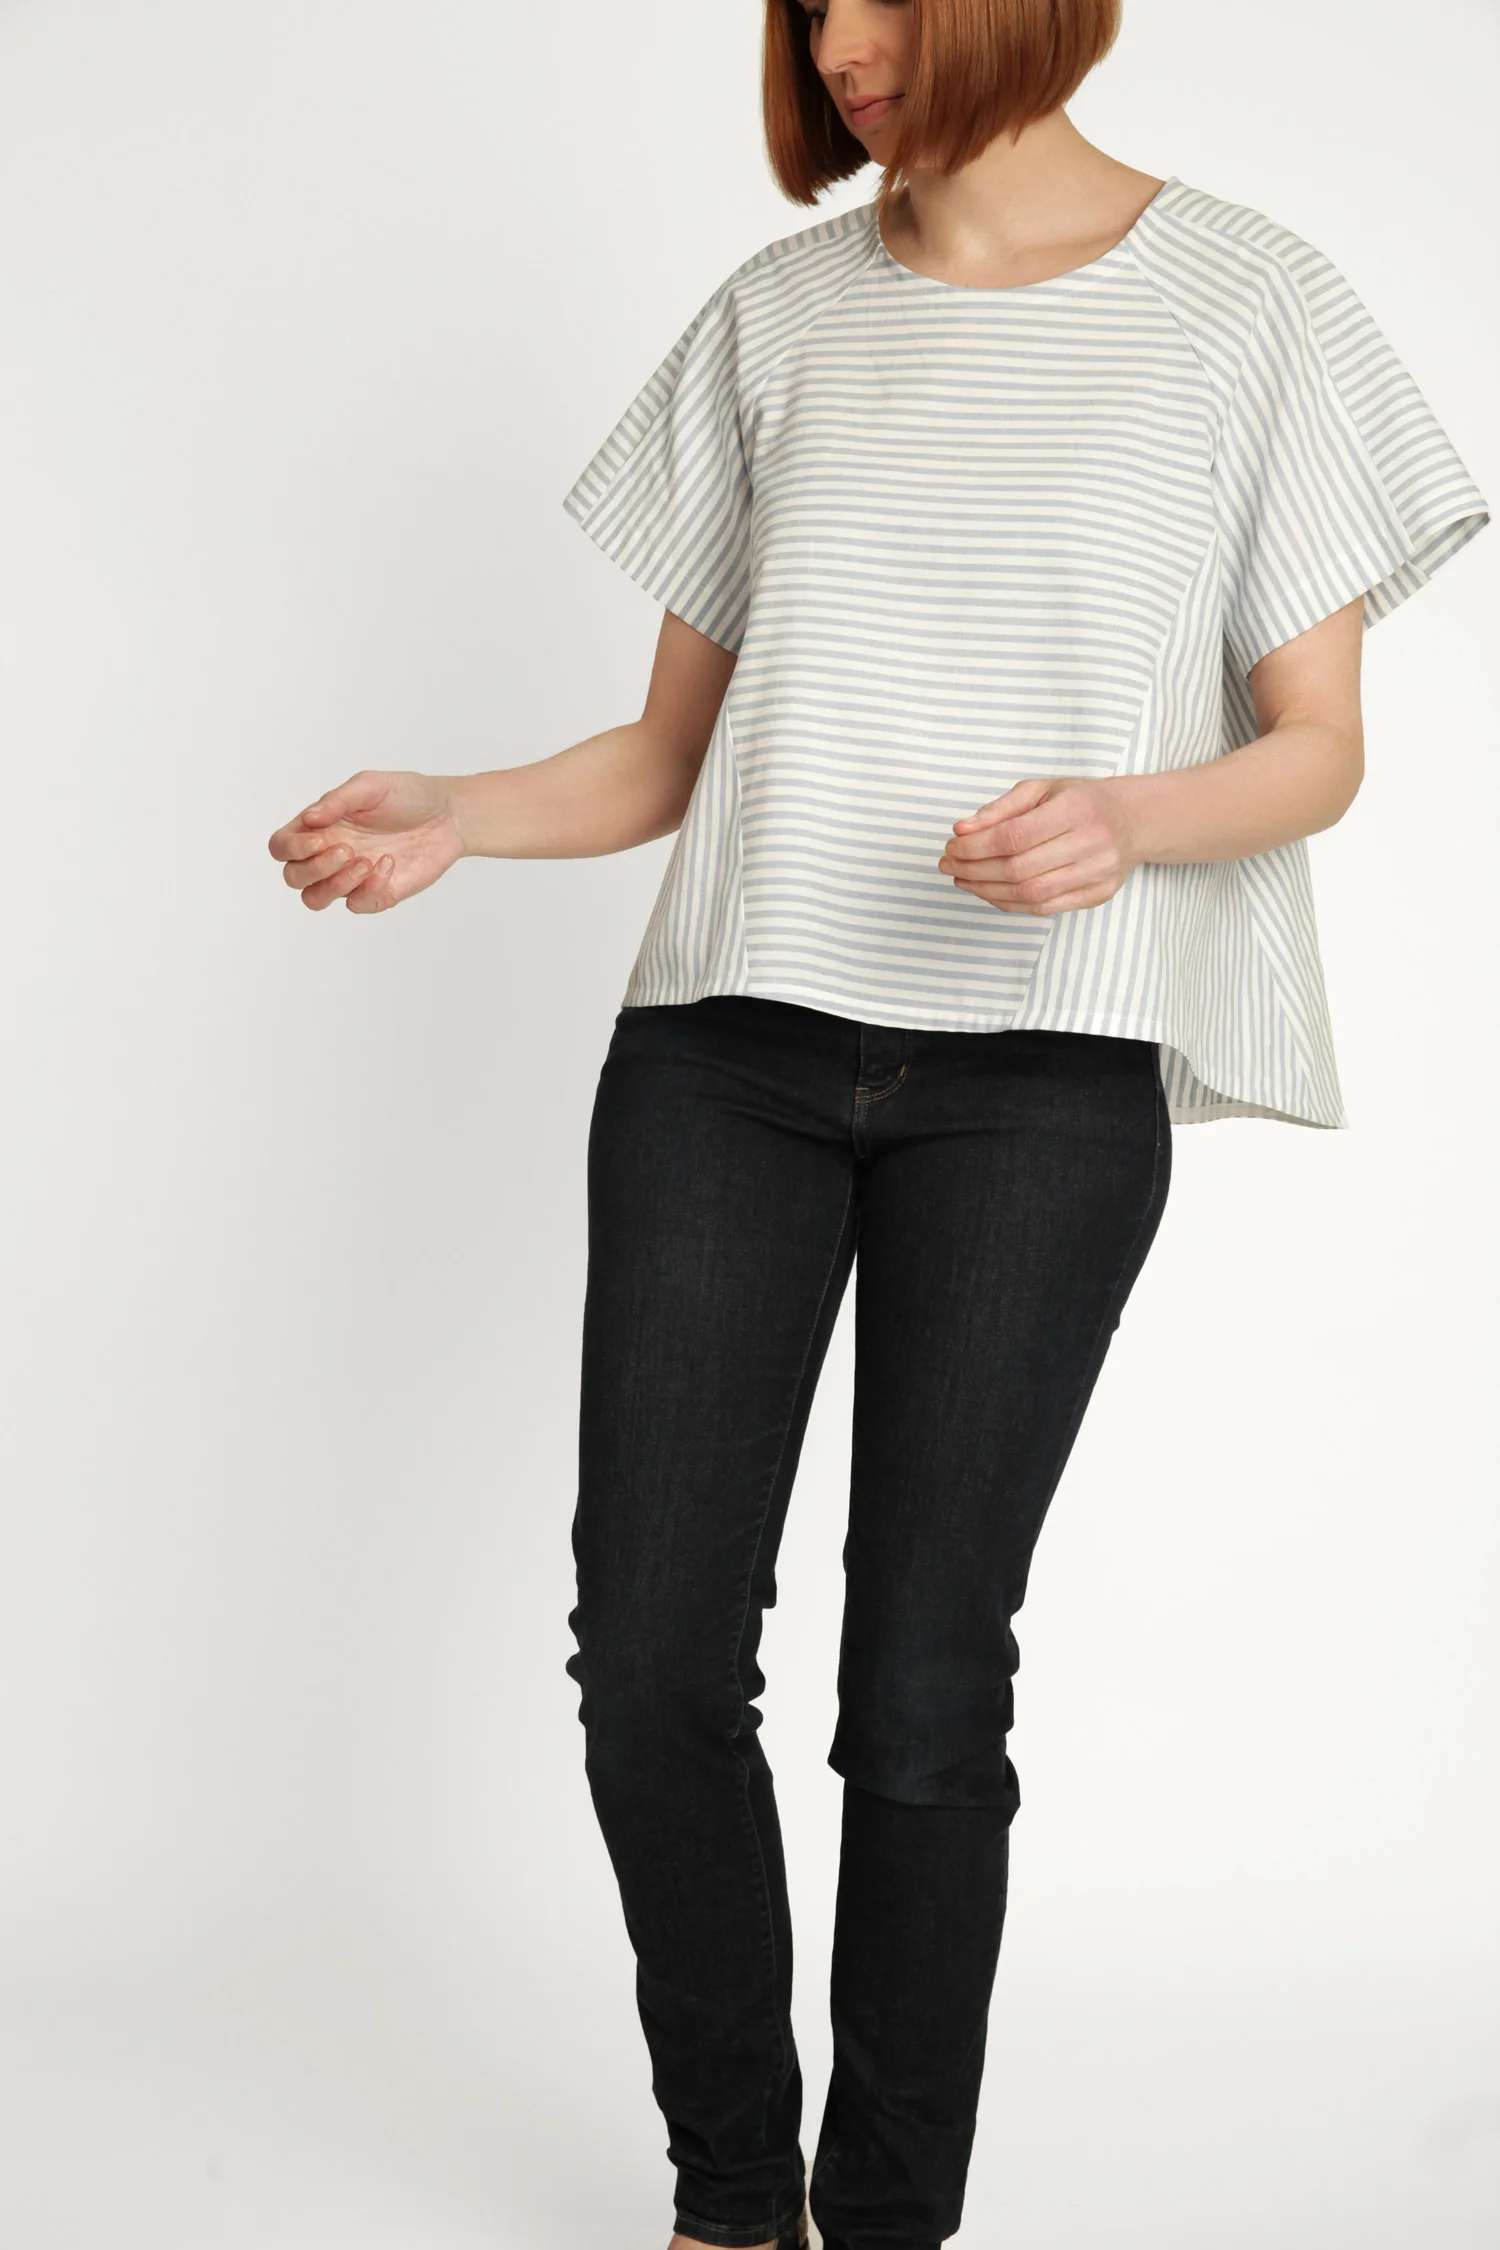
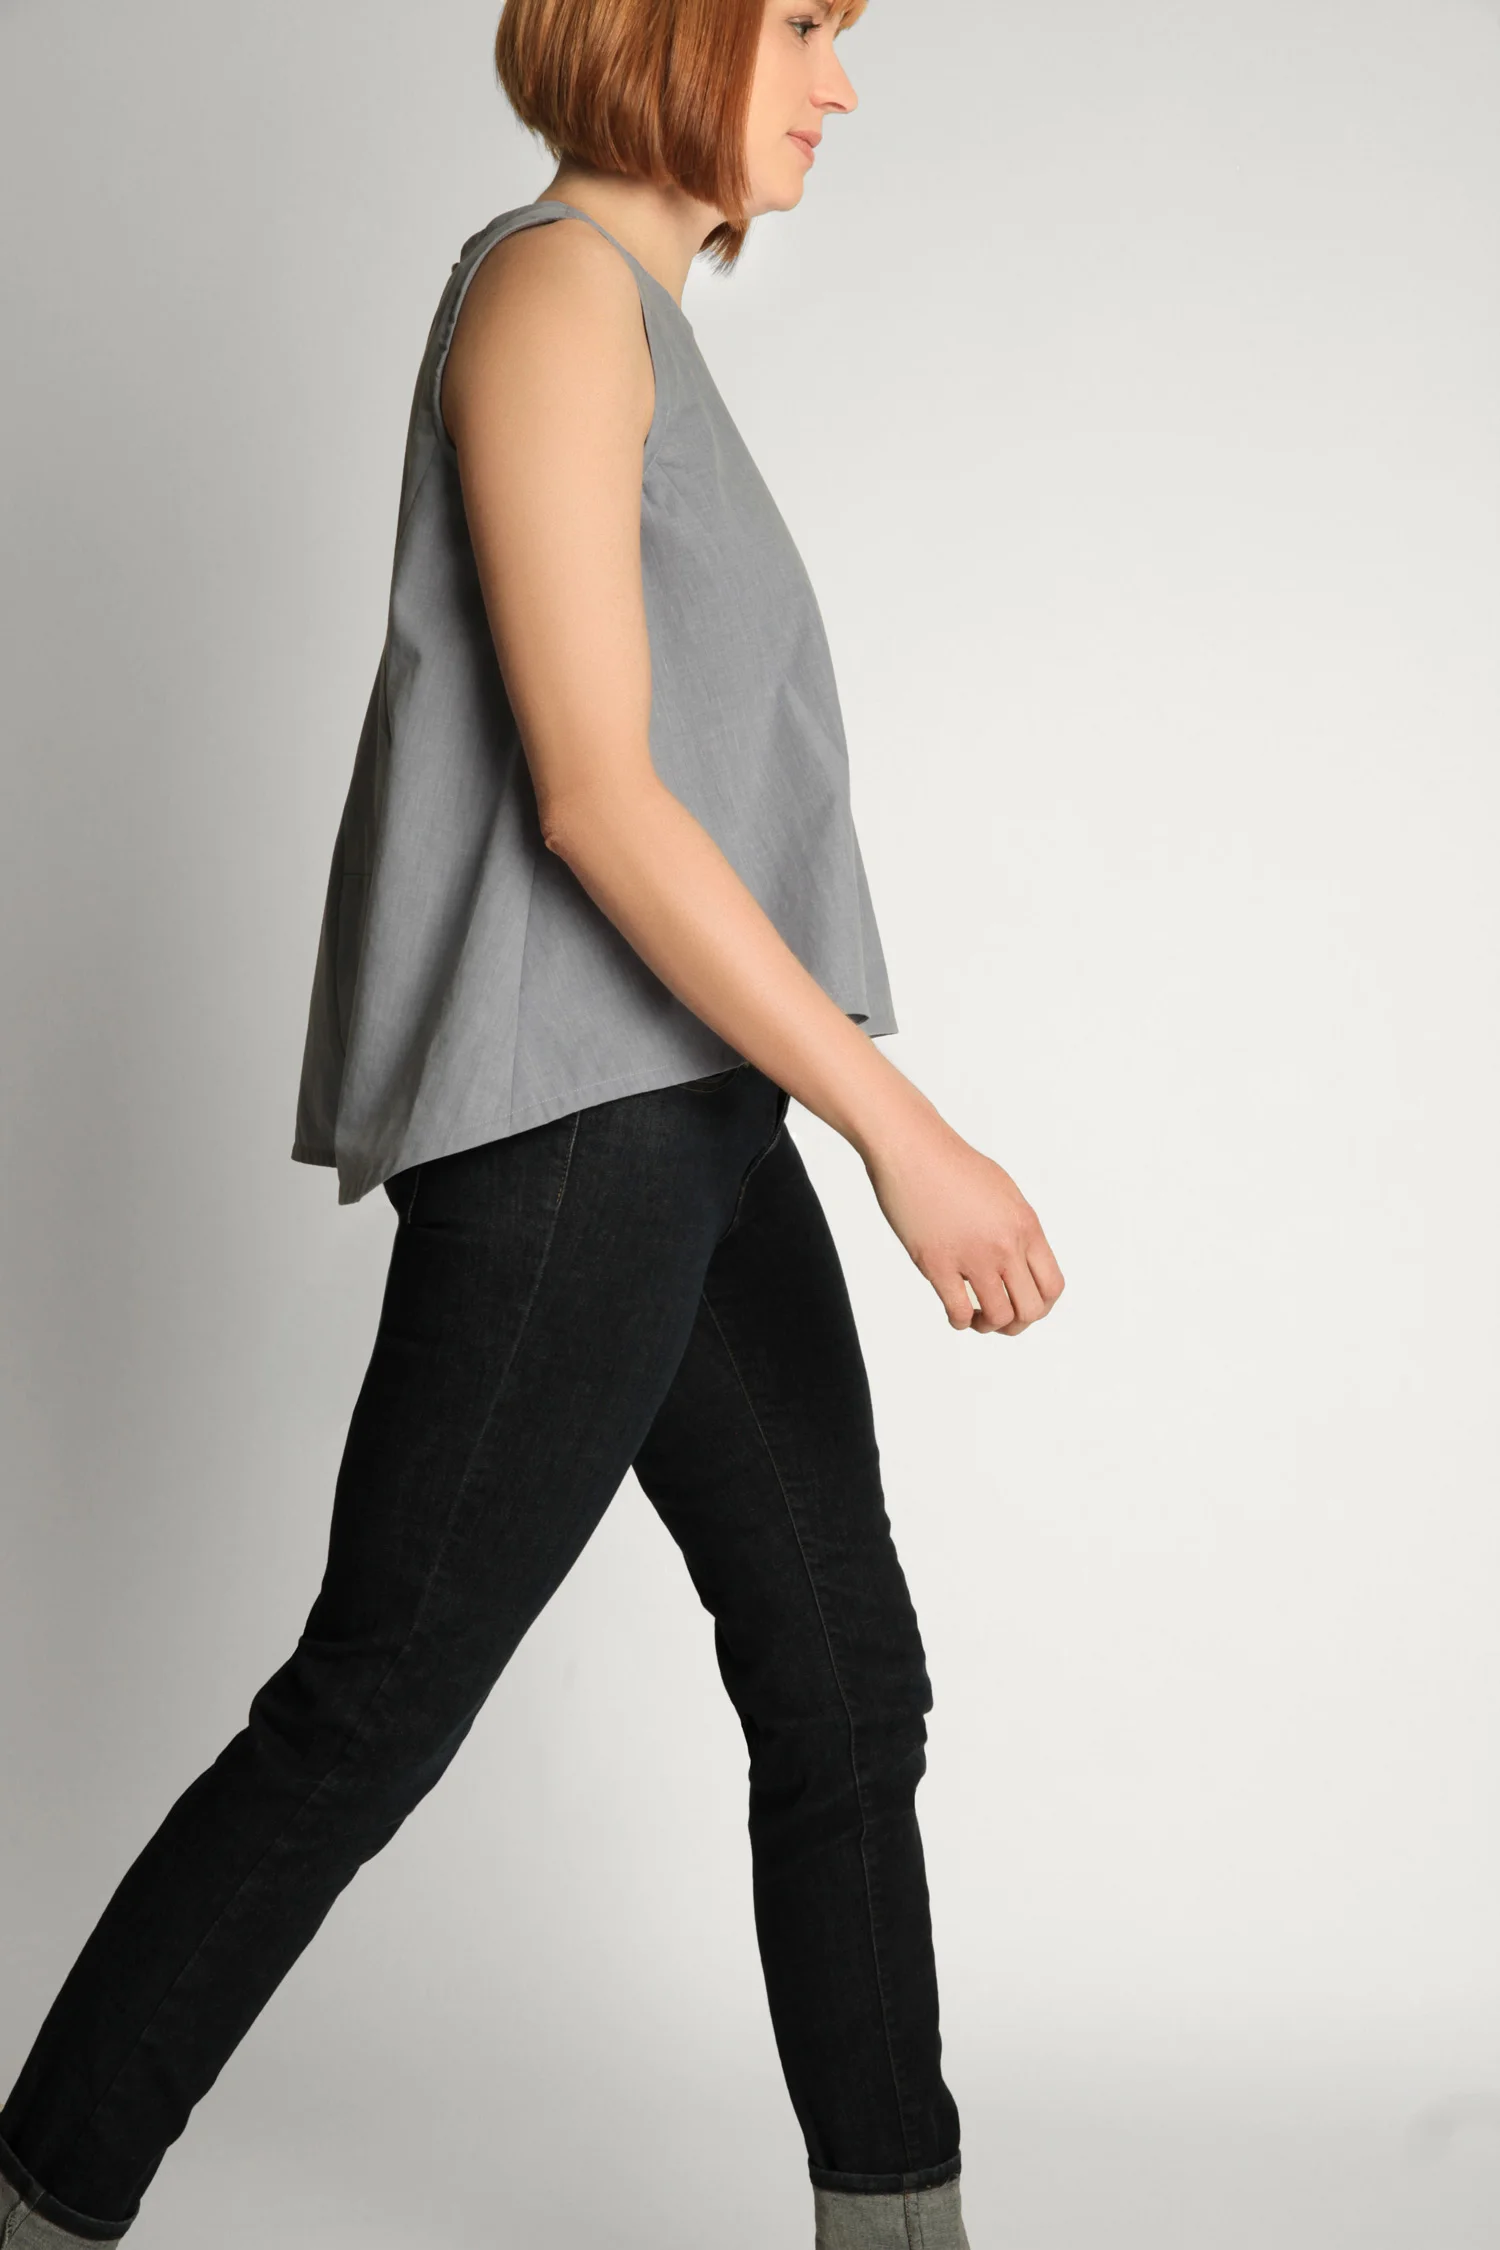
So without further adieu, here is a round-up of the tester versions of the Collins Top. I have included everyone who wanted their photos shared and have put them in alphabetical order for no reason except that it will help me know that I haven't forgotten anyone!
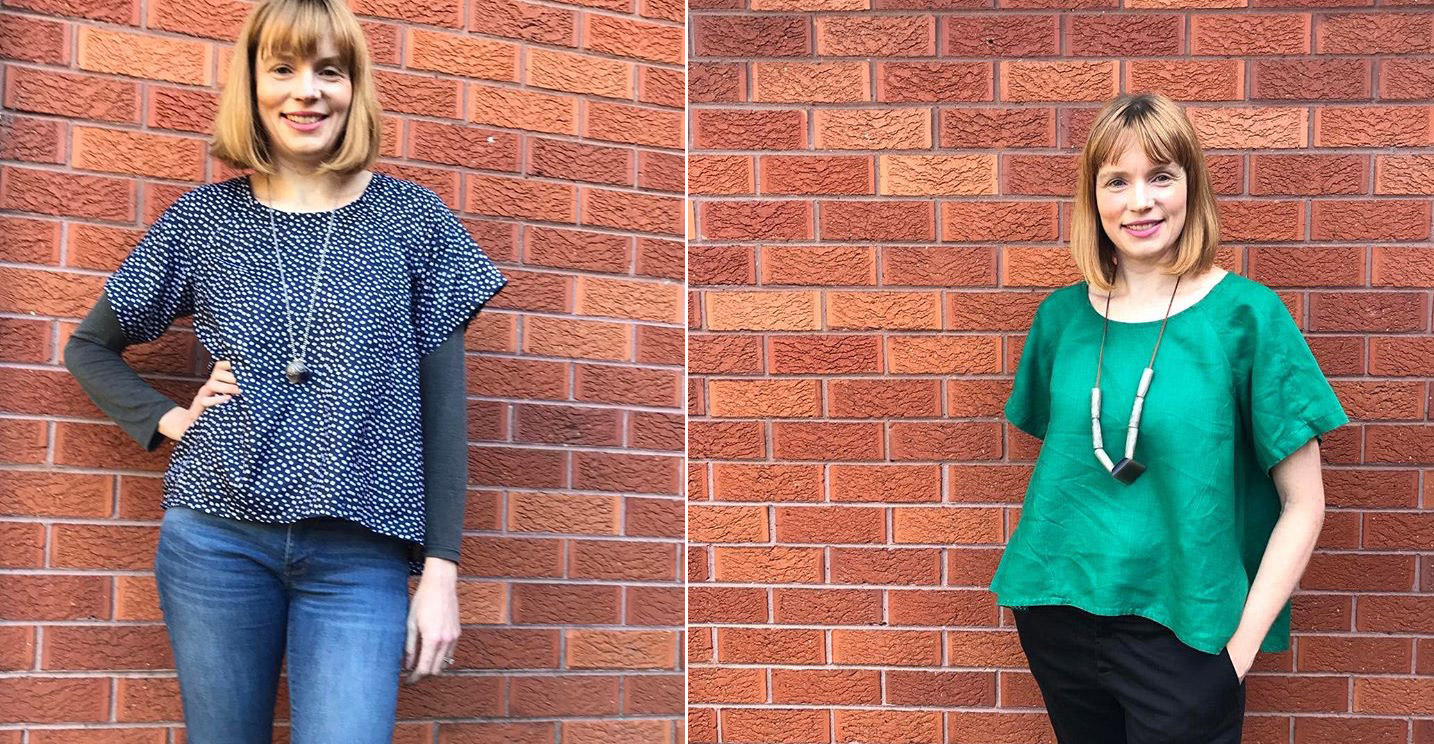

Adrienne

Alice

"This was a wonderful pattern and produced a lovely garment. This top has already become my favourite item of clothing, not just that I have made but in my whole wardrobe." 

Asheley

"I actually love the inside of my garment. I am a stay at home mom who runs around with my 2 year old and 5 year old, mostly wearing jeans and t-shirts. This top is one of the nicest finished garments in my wardrobe and I made it. Also, I love modern but timeless silhouette. I don't own anything else like this, but would like to make more garments like this."

Becky

"I can sense the work and love in this pattern, everything is so detailed and helpful."

Caz

"Oh my! I love how your patterns fit together! All those angles at the edges and seam allowances, so neat and tidy!"

Emma

"I have always enjoyed making In the Folds patterns. Comfort , thoughtful , generous ; sizing,instructions,sharing of knowledge, design ....artistic .... I learn new techniques every time and there is a simplicity to the design element I adore."

Erin

"I feel very fortunate to be a regular pattern tester for In the Folds. Her unique design style and thoughtful perspective always produce the most interesting and fun garments to maker and wear."
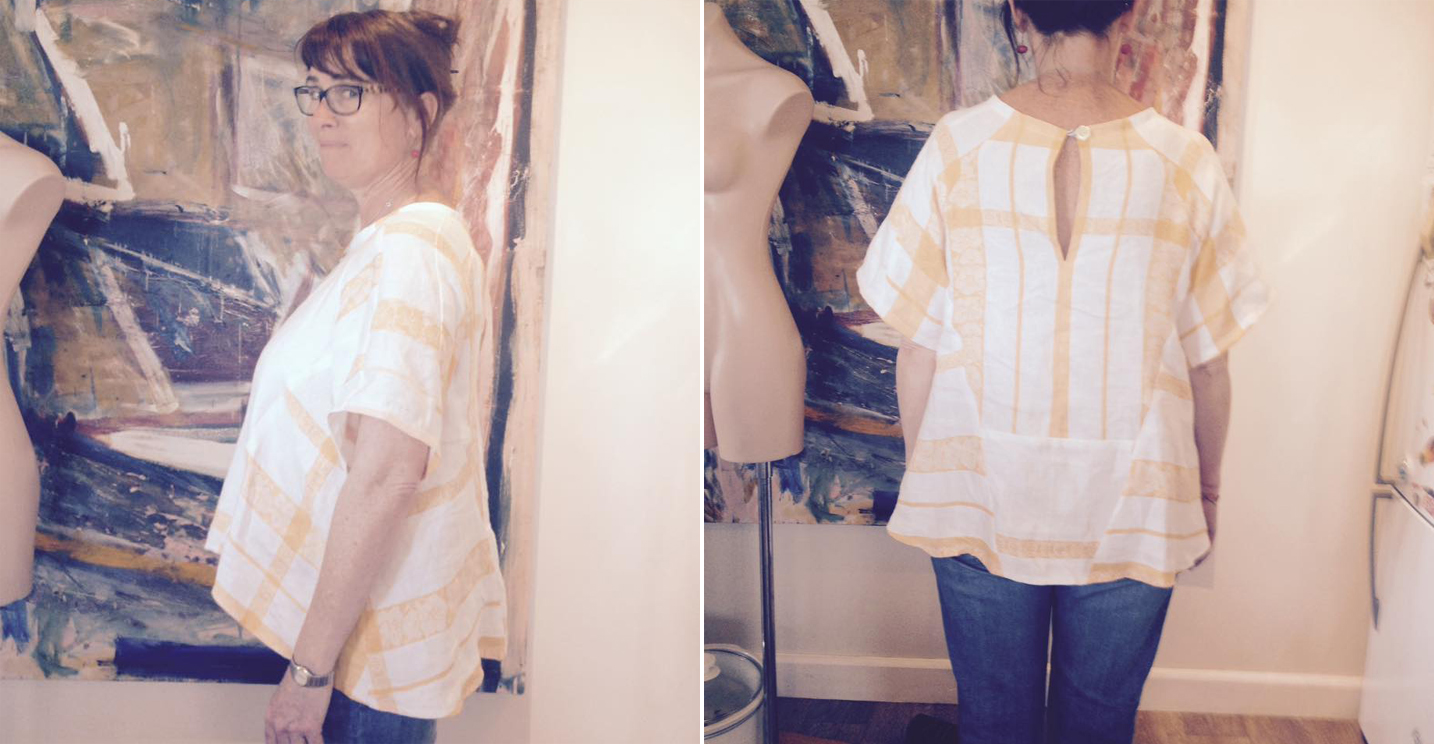
Genevieve

"I really like the amount of ease around the waist and hips to allow for flowy fabric and comfort. I also really like the fit around the bust and the shoulder so that I have a bit of shape without being tight. I like the way it hangs off the shoulder to the back. I think that's panelling. It's lovely and gives subtle help to bring the eye in at the wide points."

Jackie

"I liked that the diagrams in the instructions had the pieces numbered - I mostly just follow diagrams and skim the words so this made it super easy to follow."

Jennifer

"I love that it feels like I am not wearing anything. It is so light and breezy and doesn't hug anything!! I also like the hem design. It adds interest to my wardrobe. I also like the button detail. It adds a nicely tailored aspect to the shirt."

Jessica

"I'm so thankful for have been chosen to test this pattern! I didn't think garment sewing could be so fun! I'm so used to sewing straight seams on quilts that I thought this was going to be really hard to do, but it wasn't. It was really enjoyable. I looked forward to sewing on it each time I did and telling my husband about what I had learned while I was working on the pattern that day."
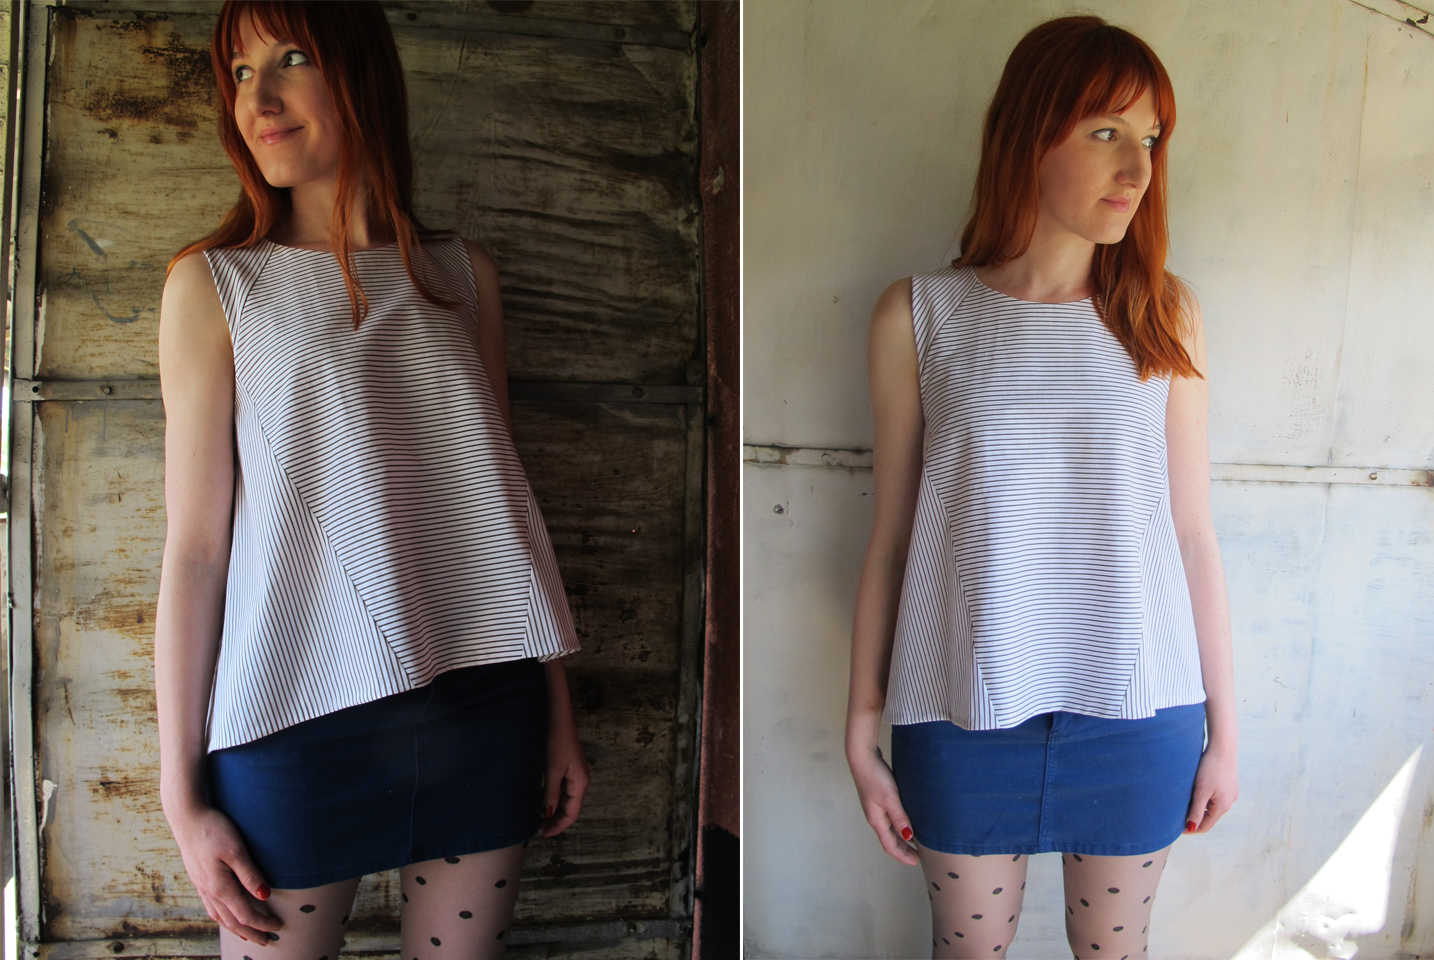
 

Jurgie

"It feels so comfortable! Easy to wear, easy to style with pants or a skirt. I love the construction of it and how smarty-pants I feel when looking at the panels that make up the top. The dropped hem flatters."

Kate

"A great pattern for woven fabric with loads of panels to mix and match fabric. This top looks great in a fabric that has structure but I decided to use a silk/poly mix which gives it a lovely drape."

Kate

"I love the panelling in this pattern. For me, as a slim flat chested girl, I find fitting a challenge and also that the majority of clothes and commercial patterns are aimed at women with fuller figures or have necklines that only flatter a bigger bust. The panels on the front of the Collins are great because they imitate the effect of princess seams but are much less daunting (for me!). Also the sleeve attachment was so easy - it's all about the raglan sleeves for me these days! I don't know why I didn't start off with patterns which featured raglan sleeves, they're so much easier!" 

Renee

"I especially love the top part (neckline and sleeves) of the Collins top in my chosen fabric. It fits perfectly and is flattering."

Vesna

"I thought that the look is really unique and interesting - I love panel lines of the pattern as well as both versions - with and without the sleeves. While loose and boxy this design is still very flattering, which is not an easy thing to achieve in my opinion. I loved that about Collins. Also, I'm certain that this design would work in pretty much all lengths - which is awesome! I see Collins as a starting point for lots of different looks: depending on the choice of fabric, sleeves or no sleeves and crop/blouse/tunic or dress length - you can end up with a number of cool looking silhouettes, each significantly different than the next one!"


That's it! What do you think? Has this inspired you to make a Collins Top for yourself?

See all the posts in the Collins Top Sew-along.


You may also like:

New pattern : Introducing the Collins Top

I am so excited to be here telling you all that my new pattern is here! Meet the Collins Top -  a loose-fitting trapeze-shaped top designed for woven fabrics. 

The Collins top is It is A-line in shape, perfect for hot summer days. It features a round neck, panel lines, a high-low hem and a centre-back opening, with a button and loop closure.

Due to its length, the Collins Top is the perfect top to pair with skirts or trousers that sit on or above the natural waist.

As always, this pattern is available in 10 sizes, from bust 76cm (30in) - 131cm (51.5in).

What I am most excited about when it comes to the Collins Top is that I designed this pattern specifically for beginners. Okay, I know, I know, there are a lot of pattern pieces and panel lines (I really can't help myself, can I?), but I believe that if you have mastered sewing a straight seam and a curved seam, you can make the Collins. Also, due to the loose nature of the top, there are not too many fitting issues to worry about (possibly just a full bust adjustment), which makes it even more beginner friendly! And, although I designed it specifically for beginners, it does not mean that you more seasoned stitchers won't enjoy it too. It is a really fun pattern to sew up, and lots of room to play! 

View A

The Collins top (view A) has a three-piece raglan sleeve with some extra volume, which creates a fun and interesting shape. Due to the nature of a raglan sleeve, there is no sleeve setting in required (it is all done flat), so it comes together really quickly and easily. 

The neckline is finished with bias binding.

As you can see in this sample, this pattern leaves a lot of room for playing with stripes (or colour blocking), which really highlights the panel lines in the design. As I knew this was something a lot of you would get excited about, I created a little template that you can download for free and experiment with your ideas of colour blocking and stripe direction, before cutting into your fabric. Download it now. 

View B

The Collins top (view B) is sleeveless and the neckline and armholes are finished with an all-in-one facing for a really clean and professional finish. 

The Collins top is compatible with a range of different fabrics. Your choice of fabric will dictate the silhouette you achieve. Consider using light to mid-weight fabrics such as: linen, linen blends, cotton, gauze or chambray. For a softer silhouette, consider sateen, silk (crepe de chine or habotai) or viscose (rayon). These two versions were made from cotton, so I can't wait to share all the tester versions next week, so you can see the range of silhouettes you can achieve with this pattern!

Learn more about the pattern and grab your copy here. 

What do you think? I'd love to hear your thoughts about the new member of the In the Folds pattern family


You may also like:

New pattern in collaboration with Peppermint Magazine : The pleated skirt

I am excited to let you all know that I have just released another pattern in collaboration with Peppermint Magazine! It's a pleated skirt, which features stitched down knife pleats, slanted pockets (that are deep enough to keep your hands nice and snug and your belongings nice and safe), shaped waistband, invisible zip and a hem facing.

I must say, this is my favourite of all the patterns so far. I didn't think I was one to wear this kind of style / silhouette, but once the sample was made up, I really didn't want to give it away! The fabric I used was a beautiful linen / cotton blend from The Drapery (a lovely little fabric retailer based in South Australia, with a great online store), which made it even harder to part with.

It's a little hard to see all the details with the busy print, so here is the technical drawing, to give you a better idea of what's involved. I have rated it as an advanced beginner pattern, as it's quite a straight-forward sew, with only your waist to fit!

You can download the pattern for free from the Peppermint Magazine website. As a bonus, for the first time I have also made the pattern available in A0 format for copy shop printing, as I know how much you all like that feature!

While you're on the Peppermint Magazine website, you may also want to check out the other patterns I have made for the magazine over the past 12 months. I made the Beach Cover-up pattern for summer, the Peplum Top pattern in spring (which has been a favourite for many) and the Sweater Dress pattern last winter. All patterns are available for free!

Get the Pleated Skirt pattern now


You may also like:

New Pattern : The Beach Coverup - in collaboration with Peppermint Magazine

BEACH_COVERUP_cover.jpg

It just ticked over into Summer here in the Southern Hemisphere and I'm celebrating the turn of season with the release of a new pattern in collaboration with Peppermint Magazine!

If you have been following my blog this year, you would have seen the Sweater Dress we released together in Winter and then the Peplum Top that followed in Spring. And the best bit is, you can download them all for free! 

The Beach Cover-up is a simple summer kaftan with a comfortable and relaxed fit, perfect for hot summer days on the beach.

It features a scooped neck, high-low hem and an optional waist tie (that can give you a range of different silhouettes).

Through the creation of this garment you will gain confidence in:
- sewing with light-weight woven fabrics
- sewing straight seams
- sewing curved seams
- attaching bias binding
- attaching trims

Download the pattern now for free from the Peppermint Magazine website (along with heaps more free sewing patterns). 


You may also like:

New pattern : The Jersey Dress - in collaboration with Peppermint Magazine

I made a pattern for Peppermint Magazine! I am very excited about this as it is such a great magazine. I was planning to tell you what it's all about, but then I realised they probably do it much better themselves!

"Peppermint is an Australian eco fashion and lifestyle quarterly focused on style, sustainability and substance. Covering food, fashion, natural living, health and beauty, DIY, diversity, social entrepreneurs and more, it was created for the rapidly growing number of consumers who appreciate good design and creativity, but also care about social and environmental issues, positive media and things that matter."

They have a section on their website called 'Sewing School' where you can access a whole lot of great patterns, and now I have a pattern amongst them!

The pattern is a lovely snugly raglan sleeve jumper dress, with in-seam pockets, which is a really quick sew. It can be sewn with an overlocker or standard sewing machine (and the instructions include both methods) and could be tackled by a confident beginner. Best of all, it's free! You can download it directly from the Peppermint Magazine website. While you're there, you should also check out all the other great patterns that are available. 

Download the pattern now

The Rushcutter Sew-Along : Gathering supplies

therushcutter_sewingpattern_gathering-supplies_2.jpg

I hope that yesterday's post in the Rushcutter sew-along inspired you! I know it sure did inspire me. Now that you (hopefully) know what fabric you would like to use, let's talk supplies.

Below is a list of ideal supplies, but before I go on, I must say that I  am an advocate of using whatever you've got at home (within reason, of course) for your sewing projects. So if you've got a zip that's a little too long or a little too short, then use it! Buttons a little bigger or small than required? Use them! If you don't have an invisible zip around, then consider using a standard zip. As well as this, consider cutting your fabric flat, rather than on the fold, you'll be able to squeeze your pieces on way less fabric (I will talk about that more when we get to cutting fabric). 

For View A, you will need:

therushcutter_Lay-plan_viewA.gif
  • Fabric: 2.9m x 150cm wide (3 yards x 60in) OR 4.2m x 115cm wide (4 5/8 x 45in)
  • 40cm (16in) invisible zip
  • Coordinating thread
  • 35mm bias tape (store bought or made at home) - I will do a tutorial about making your own binding, so stay tuned, if you think you'd like to go down that route

For View B, you will need:

therushutter_Lay-plan_viewB.gif
  • Fabric: 2.2m x 150cm wide (2 1/2 yards x 60in) OR  3.3m x 115cm wide (3 5/8 yards x 45in)
  • 3 x 10mm (3/8in) buttons 
  • Coordinating thread
  • 35mm bias tape (store bought or made at home)
  • A small piece of iron-on interfacing (not required for all fabrics, but if your fabric is quite delicate or flimsy, this is a good way to stabilise your buttons and buttonholes)

When you have chosen the fabric you will be using, you will need to wash it, dry it and press it. Use the same method you plan to use when laundering your actual dress, to avoid it shrinking after the first wash!

And that's all for today. Tomorrow we'll be talking about sizing!


You may also like:

The Rushcutter Sew-Along : Finding inspiration

inspiration.jpg

Yay! It's the first day of my very first sew-along, and I couldn't be more excited to get started.

For those of you who are just joining us, in the last post I introduced you to my brand new sewing pattern, the Rushcutter! If you missed the memo, you can check out all the details here.

I thought the best place to start the Rushcutter sew-along would be with some inspiration.

I had the most amazing group of women volunteer to test the pattern for me (thanks again ladies!) and they really did an incredible job of showing how different this dress can look, depending on your fabric choice. They each really made the dress their own.

As I mentioned in the last post, she is quite a versatile pattern and will make up well in a variety of different fabrics. Your fabric choice will really govern the end result, so before running off to the fabric shop, have a think about the kind of silhouette you would like to achieve and then go from there. I hope this images help!

therushcutter_sewingpattern_1

If you think you would like a dress that is quite structured or boxy, consider using a mid-weight cotton, sateen or twill or or brocade. Jennifer used a beautiful jacquard weave to make hers, and achieved a really beautiful silhouette, which works both belted and un-belted. 

If you prefer something a little softer or more relaxed, I suggest light to mid-weight cotton shirting, poplin, sateen, viscose (rayon) or silk. Cindy achieved quite a soft silhouette using mid-weight cotton, and created a nice detail by using exposed binding on the armholes and neckline.

Claire also achieved a relaxed look, perfect for a casual summer dress, using this striped light-weight cotton shirting. 

For something in between the soft look and the structured look, consider using chambray or linen. Kimberly used a bottom weight denim wash cotton to achieve this silhouette. 

As the Rushcutter is made up of a few different panels, there is a lot of room to play with the pattern, with piping or colour blocking... or both, like Marie-Paule. She also attached some elastic at the waist to achieve a more fitted silhouette.

I really love the dress Corey made. She cut the bodice panels in the same fabric to make it look like a standard yoke, and then used a solid colour for the remaining panels, to create a lovely contrast between the two sections. 

This lovely relaxed Rushcutter by Indu is just the perfect summer dress. She shows how beautiful it can look with, or without, the waist sash. 

There is a lot of room for playing with stripes or contrasting fabrics in this dress, and Sneha really showed what is possible. Didn't she do an incredible job of this dress? 

Megan made this lovely light-weight cotton Rushcutter, which she shortened considerably to tunic length. I will show you how to do this during the sew-along, so keep your eyes peeled, if this is something that interests you! I think it goes perfectly with those black tights and shoes, although I think this dress will work just as well in spring.

Sarah also made a couple of changes to the pattern. She shortened the dress, as well as the sleeves, and also widened the neckline. I really love the changes she made and I think this fabric (wool boucle) just works perfectly.

Ann made this lovely blue Rushcutter, with a fabric that has a slightly quilted texture. It goes wonderfully with her red hair, don't you think?

And last, but not least, is Andreia. I am a huge fan of this dress. She really thought outside the box when it came to selecting fabric, and went for a Ponte di Roma. It has a lovely modern aesthetic, and I just love how the sleeves sit when the fabric has a bit more body to it.


These wonderful ladies have provided me with a lot of inspiration (and I hope they have provided you with some too) - now I just have to work out which one to make first! I'd love to know what you are planning to make your Rushcutter in?


You may also like:

Introducing the Rushcutter

theruhcutter_sewingpattern_inthefolds

Yipee!!! I am so pleased to introduce you to my very first sewing pattern! Her name is The Rushcutter and I think she's a bit of a beauty.

She is a relaxed knee length A-line dress, which is flattering to pretty much all figure shapes. My main mission when designing the Rushcutter was to create a dress that is comfortable, wearable, effortlessly cool, and would fit comfortable into many different women's existing wardrobes. She can easily be dressed up and down, and is perfect for all seasons.

She comes in two variations, which means she is perfect for all you people in the northern hemisphere too!

therushcutter_viewA_technicalsketch

View A has three-quarter raglan sleeves, large pockets on the side (optional), an invisible zip, bound neckline and a large hem facing.

therushcutter_viewb_technicalsketch

View B is a sleeveless dress with back button closure. It has in-seam pockets and the neckline and armholes are finished with bias binding.

Included in the pattern is an optional waist sash, that is suitable for both styles.

theruhcutter_sewingpattern_inthefolds

The Rushcutter was designed with woven fabrics in mind and is quite a versatile pattern. She makes up beautifully in a wide range of fabrics (and I would know, as I have made at least eight versions over the last two months!). My lovely testers also showed how different this dress can look depending on the fabric - and I will include some of their incredible dresses in the next post

As well as these two variations, I will also be showing you as many hacks as I can possibly come up with (and am open to suggestions, if you want to send an idea through to me), in the coming weeks, so we can get all you sewers pattern making too (and hopefully seeing how un-scary it is - yes, I made up a word)!

theruhcutter_sewingpattern_inthefolds

The pattern is suitable for brave advanced beginners and beyond. I have placed it a 'Level 4' on my skill scale, as I think a sewer with a few projects under their belts, along with some pins and patience (and probably a few cups of tea) would be able to handle this project.

You can make the project as simple or as challenging as you like. Add piping for an interesting detail or play with stripes on the various panels to make it a more challenging sew.

theruhcutter_sewingpattern_inthefolds

The pattern also comes with instructions alongside full colour photographs that hold your hand every step of the way (there is also a 'cheat sheet' available for those of you who don't want your hand held) which can be printed at home, or simply viewed on a computer, tablet or smartphone. 

Would you like to sew your Rushcutter along with me? I will be doing a sew-along over the next few weeks (starting on Monday October 19th) and will be giving you some fitting tips, showing you how to get a lovely clean finish with bias binding, and my method for sewing invisible zips! So stay tuned...

And even if you are not planning on buying the pattern, I'm sure you will find some great tips in the sew-along that can help you with other projects that find their way to your sewing table.


What do you think? I'd love to know what you think. Is there room for the Rushcutter in your wardrobe? 


You may also like: