Throwback Thursday : Drafting a skirt block

inthefolds_draftaskirtblock_tutorial

As I mentioned last week, I will be diving into the Em Makes Patterns archives every Thursday to bring you some juicy pattern making goodness. 

For this weeks Throwback Thursday post, I thought it was worth starting right at the very beginning. If you are thinking about learning to your own patterns, then the best place to start is by drafting a skirt block. 

The skirt series

This is the first post of the skirt series, and each week I will be adding more posts, so that by the end of it, you will have a skirt block made to your measurements, and also have some pattern making techniques under your belt, so that you can make the skirt of your dreams!

What is a pattern block?

A pattern block is a basic pattern drafted to specific (or custom) measurements.

It is the starting point for most patterns (when flat pattern cutting), and can be manipulated and adjusted to meet individual design preferences.

It is a good idea to transfer your blocks onto cardboard, to keep them strong, as once you have a set of these, you will be using them a lot!

The skirt block

A skirt block is a fitted skirt that sits on the waist. Generally skirt blocks have two darts in the front and two in the back, although it is common to see a variation on this (for example, four darts in the back). By drafting a skirt block, you will get to know some basic techniques, and also get a sense of flat pattern making.

Tools + supplies

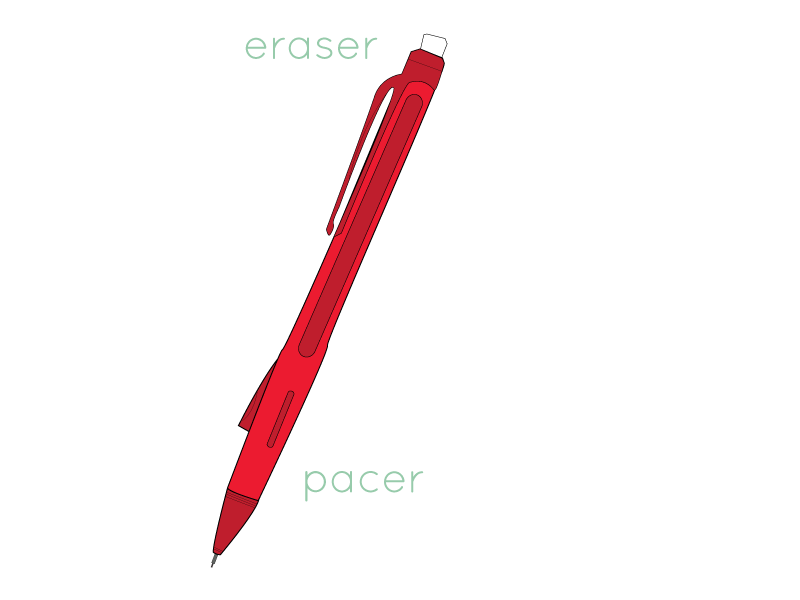
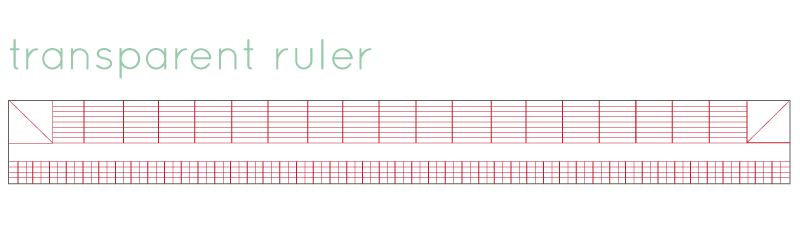
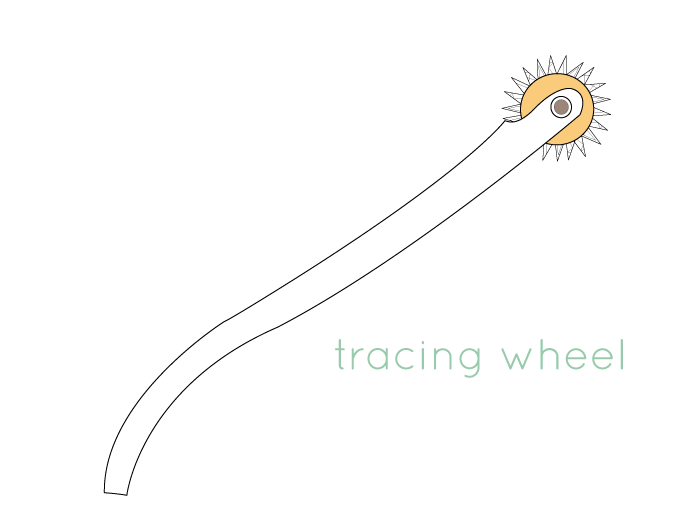
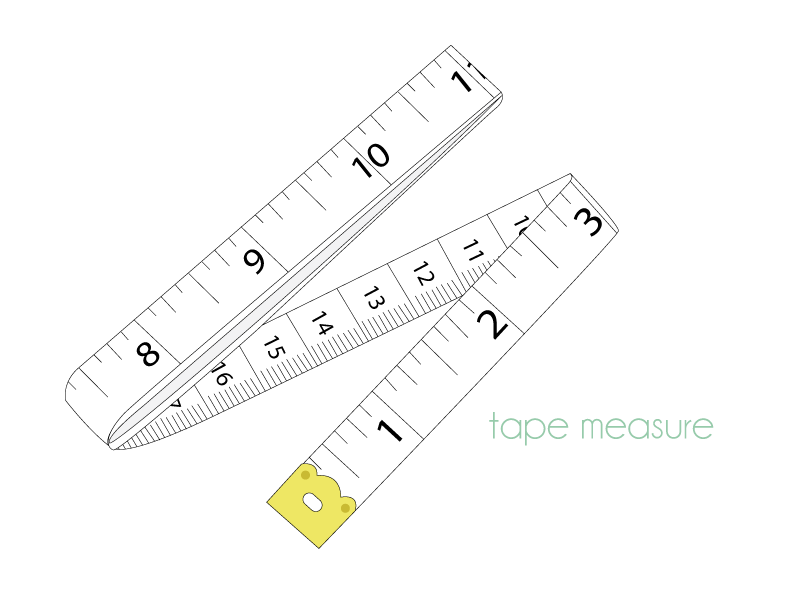
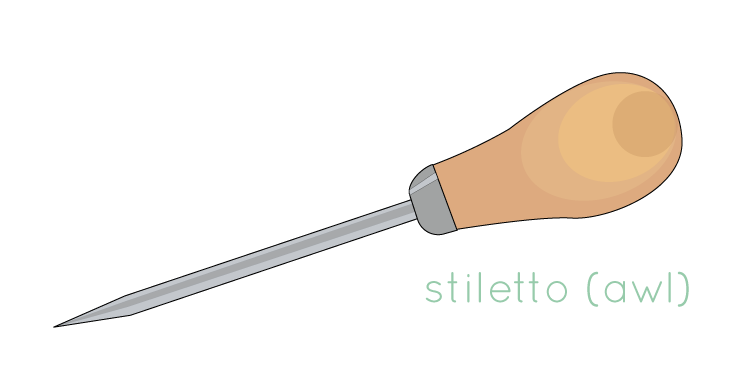
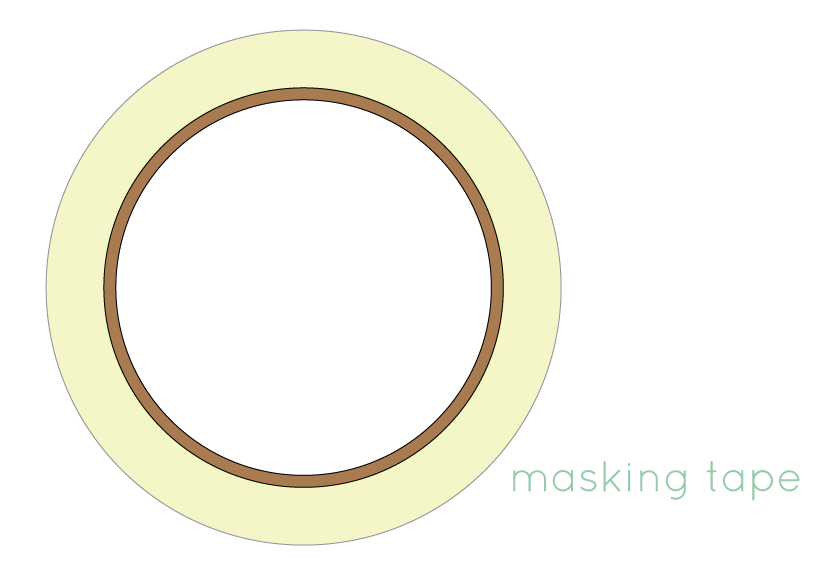
To draft a skirt block, you will need:

  • a piece of pattern paper

  • a ruler

  • a pencil

  • a tape measure

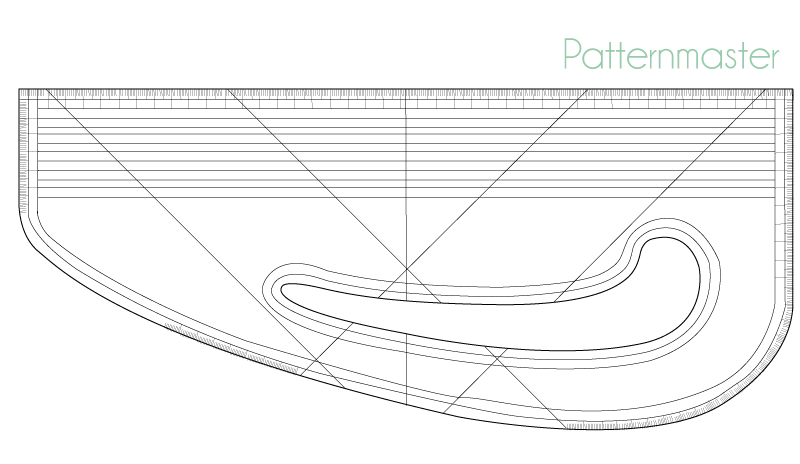
  • You may also want a french curve (or plate) for drawing the hip curve. To be honest, I don't use a curved ruler very often, and would rather use a standard ruler to draw my curves. But I will leave that tutorial for another day!

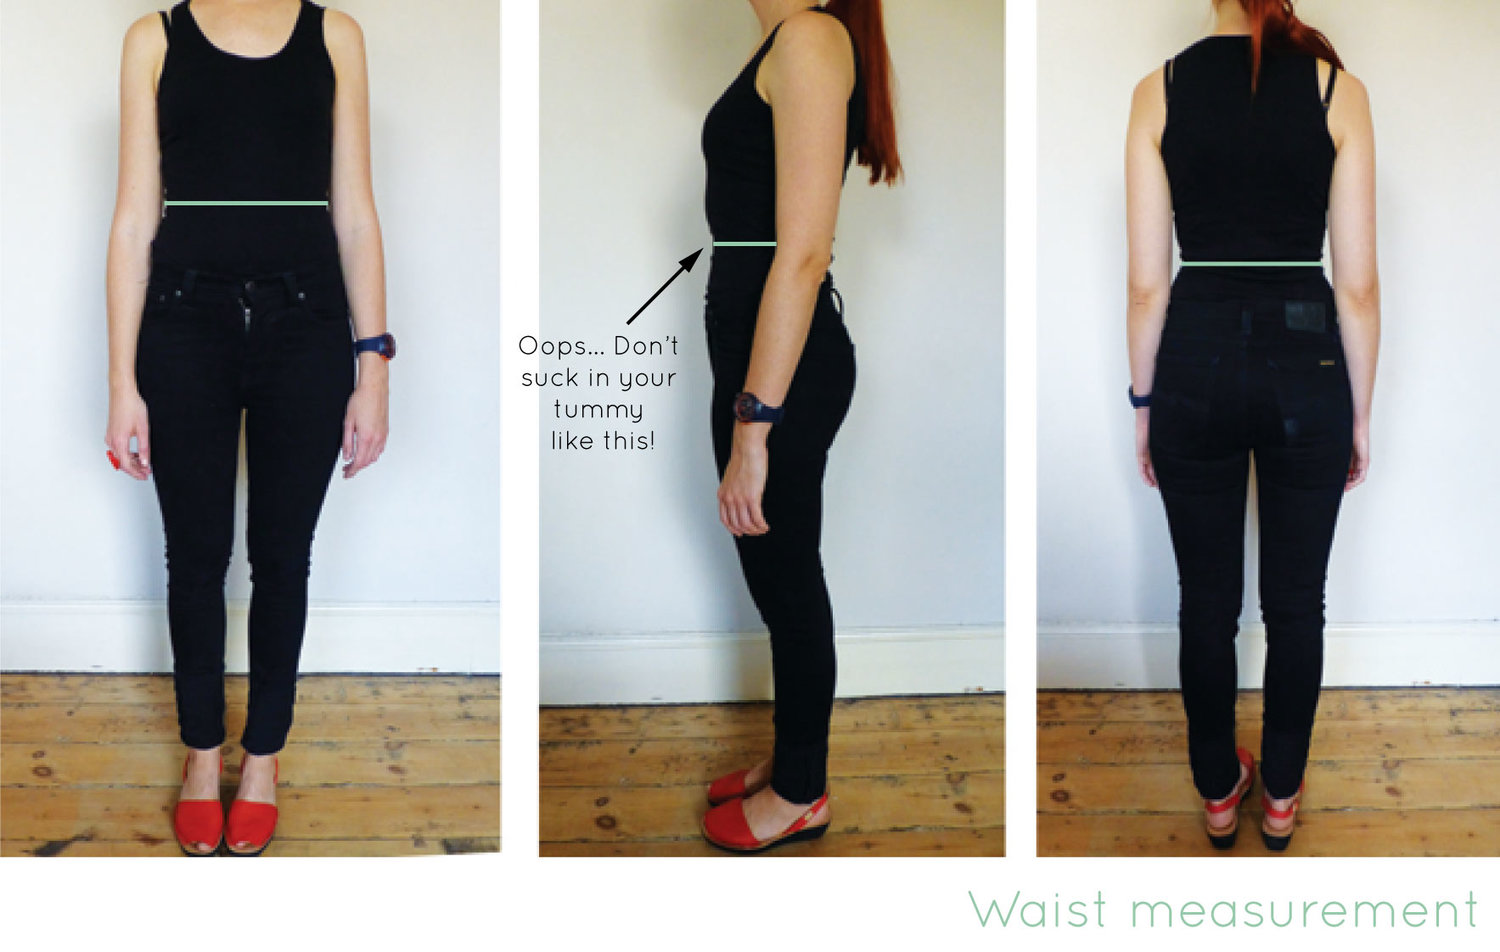
Measurements required

For this tutorial, you will need the following measurements: 

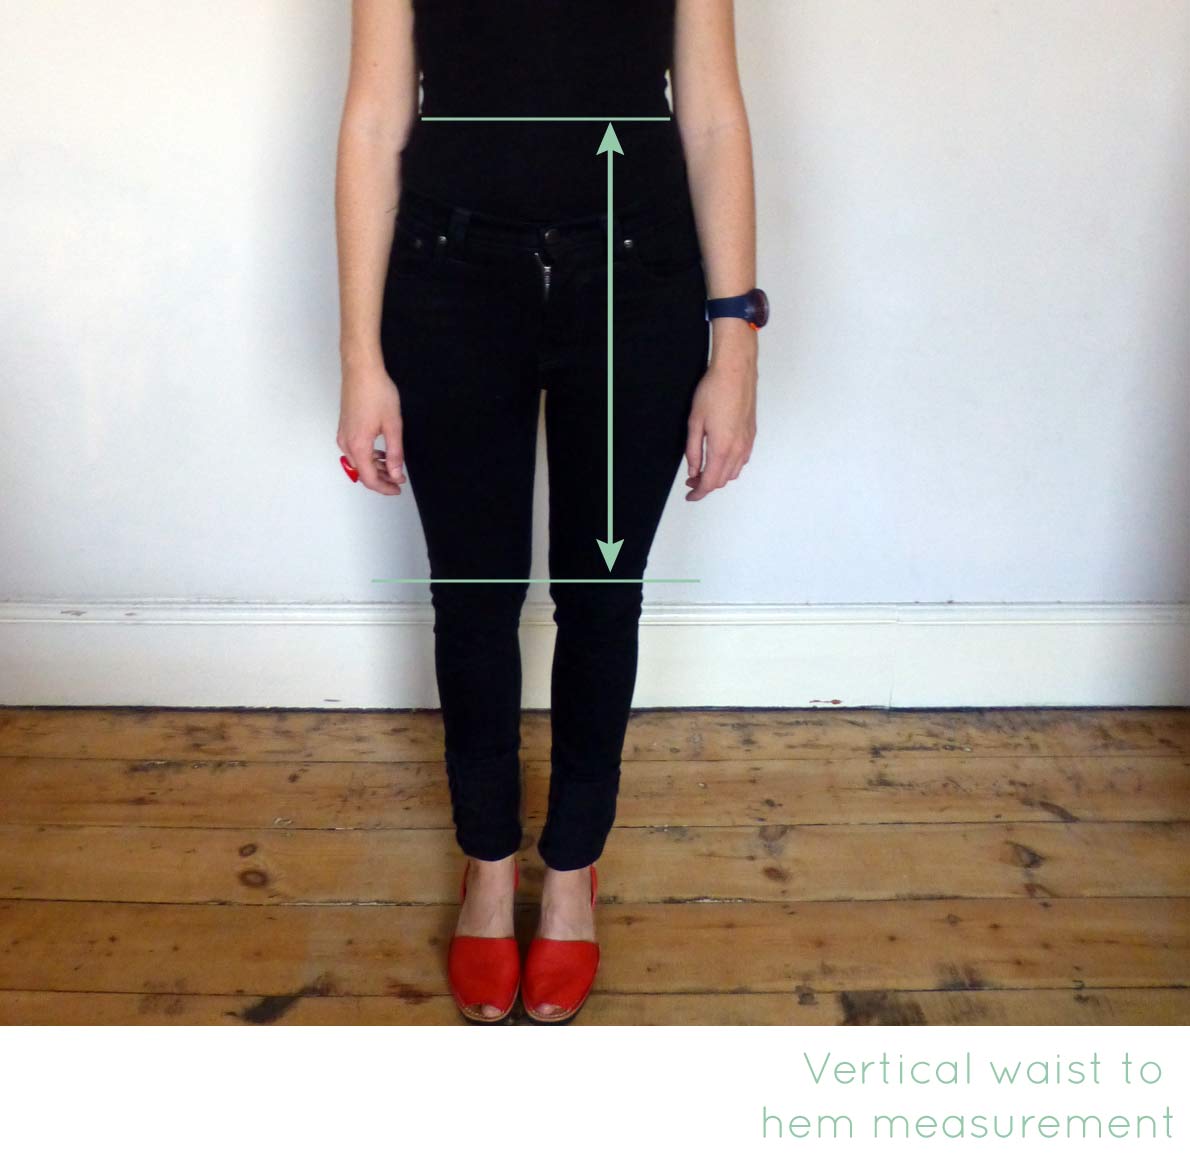
This distance will depend on how long/short you would like to make your skirt block - I made mine to finish just above my knee. 

Let's get drafting!

Mark the centre back

inthefolds_draftaskirtblock_1

To start, draw a straight line down the left hand side of your pattern paper, the length of your WAIST TO HEM measurement.

Label the ends as A and B. 

This will become the CENTRE BACK seam in your skirt.

Mark the waistline

inthefolds_draftaskirtblock_2

You will need to add a small amount of ease to the pattern (which will allow you to walk/sit/dance in your skirt). It is up to you how much ease you add - but as it is a block it should be quite close fitting, I suggest adding about 5cm to the HIP measurement and 3cm to the WAIST measurement.

Take your HIP measurement and add ease to this measurement, then divide result by two. As for all symmetrical patterns, you will be making half the skirt pattern (as the front pattern will be cut on the fold, and a pair of backs will be cut, to create a full skirt).

Draw a line from A (perpendicular to the CENTRE BACK seam ie. AB) the length of the measurement you found above. Label the end point as C.

This line (AC) will become the waistline of the skirt.

Mark the hemline

inthefolds_draftaskirtblock_3

Move down to point B and draw a line, perpendicular to the CENTRE BACK, the same length as the waistline. Label the endpoint as D.

This line (BD) will become the HEMLINE of the skirt.

Mark the centre front

inthefolds_draftaskirtblock_4

Join points C and D. This will be the Centre Front of the skirt.

Mark the hip line

inthefolds_draftaskirtblock_5

Take your WAIST TO HIP measurement and mark a point this distance from A, down the CENTRE BACK line. Mark point as E.

inthefolds_draftaskirtblock_6

Draw a perpendicular line from E that intersects with the CENTRE FRONT (CD).

You can mark this line as the HIP LINE.

Mark the side seam

inthefolds_draftaskirtblock_7

It is now time to mark the side seam. 

Take your full HIP MEASUREMENT and divide by four (once agin because we will be cutting on the fold). Add 1.5cm to the result. This extra 1.5cm will move the side seam slightly beyond the halfway point - to allow room for your derriere in the back of the skirt.  

Mark this measurement on your HIP LINE, measuring from point E. 

Mark point as F.

inthefolds_draftaskirtblock_8

Draw a perpendicular line from F, that extends up to the WAISTLINE (mark intersection point as G) and down to the HEMLINE. 

inthefolds_draftaskirtblock_9

At this stage, your waistline is the same length as your hip line. This is not the case in most women's bodies, so you will need to remove some width from the waistline. This will be done by creating four darts (two in the front and two in the back) and curving the hip line at the side seam.

To do this, take you WAIST measurement and subtract it from your HIP measurement. 

With your result, subtract the width of your four darts (4 darts measuring 3cm each = 12cm). The result is how much you need to remove from the side seams. 

Take the result and divide by two (as we are making half the pattern) and distribute either side of point G, on the waistline (half the measurement on the front pattern and half on the back). Mark points as H and I.

inthefolds_draftaskirtblock_10

Join H to F with a smooth curve. 

If you have quite a big difference between your waist and hip measurements and are worried that the hip curve is too extreme, you may choose to increase the width of your darts to compensate. 

inthefolds_draftaskirtblock_11

Repeat for the front by joining I to F with a smooth curve. 

inthefolds_draftaskirtblock_12

You will need to extend your side seams slightly beyond the WAISTLINE to accommodate the curve of your hips. Extend lines from H and I by 1.5cm, at the same angle as the curved hip line so that each becomes one continuous line.

Waistline

inthefolds_draftaskirtblock_13

Join the new point (extension from H) to A with a smooth curved line. You have now created the back waistline of the skirt.

inthefolds_draftaskirtblock_14

Repeat for front pattern. Join the new point (extension from I) to C with a smooth curved line. This is now the front waistline.


DOWNLOAD THE LITTLE BOOK OF SEAM FINISHES

Would you like to make clothes that are as beautiful on the inside as they are on the outside?

Sign-up to the newsletter to stay in the loop to receive inspiring content that will help you become a more confident maker. And get started with a free e-book!


Darts

inthefolds_draftaskirtblock_15

Now it is time to draw in the darts.

Mark the midpoints of both front and back waistlines. Label the midpoint of the back waistline as J and front waistline as K.

inthefolds_draftaskirtblock_16

From point J, mark a point 1.5cm towards the CENTRE BACK. From this new point, mark another point 1.5cm towards the CENTRE BACK.

If you have decided to increase your dart width, then make sure you remember to add in this width now. For example, if you plan to make the darts 3.5cm wide, then mark your points 1.75cm apart. If your dart value goes beyond 4cm, I would suggest creating two smaller darts instead - you will get a more flattering shape that way.

inthefolds_draftaskirtblock_17

These points mark the centre of the back dart, and the dart arms 1.5cm either side (to create a dart that is 3cm wide).

Draw a line that is 14cm long (this will be the length of your back dart) from the middle point. The line should be perpendicular to the waistline.

inthefolds_draftaskirtblock_18

Join the points either side to the endpoint of the line you just drew. You have now created the two dart arms.

inthefolds_draftaskirtblock_20

Move to your front waistline.

From point K, mark a point 1.5cm towards the CENTRE FRONT. From this new point, mark another point 1.5cm towards the CENTRE FRONT. These points mark the centre of your front dart, and the dart arms 1.5cm either side (to create a dart that is 3cm wide).

inthefolds_draftaskirtblock_21

Draw a line that is 13cm long (this will be the length of your front dart) from the middle point. This line should be perpendicular to the waistline. This will be the centre line of your front dart.

inthefolds_draftaskirtblock_22

Join the points either side to the endpoint of the dart centre line. This will complete your front dart.

inthefolds_draftaskirtblock_23

By this point, it should really be starting to look like a skirt pattern!

Finishing up

inthefolds_draftaskirtblock_24

Take a seperate piece of pattern paper and trace a copy of the front pattern. Remember to include all markings (hip line, dart, centre front). 

inthefolds_draftaskirtblock_25

Leaving some space between the pattern pieces (you still haven't added seam allowance), trace around the back pattern piece - once again, marking all important points. 

inthefolds_draftaskirtblock_26

And now you have a front and back skirt pattern! Add grainlines (parallel to the centre front and centre back) and label each piece.

For labelling I always use the format:

  • pattern name

  • name of pattern piece

  • sizing information (if required)

  • cutting instructions

  • You can also add the date and whether or not there is seam allowance added

Some of these things may seem very obvious, but I'm telling you, it makes it much easier if you pick the pattern up in a few months time!

Before cutting out the pattern, you will need to add shaping to the dart at the waistline, and seam allowance. You can go right ahead and do this, or you can wait for me to show you on the blog (very soon)!


profile pic.jpg

DID YOU ENJOY THIS TUTORIAL?

It is our vision to empower you to make a wardrobe that you will wear, love and cherish - long into the future.

If this tutorial has helped you, it would be greatly appreciated if you could give thanks with a small donation. This will help us to continue to create content like this tutorial and continue offering it for free - so it can be accessed by all.

We greatly appreciate your support!


How did you go? Would love to know if you have any questions related to drafting a skirt block?


You may also like:

The Rushcutter Sew-along: Selecting your size

So now that we are all feeling inspired (hopefully) and have chosen our fabric, it is time to think about sizing. The Rushcutter sewing pattern is available in sizes A - K (approximately equivalent to AU size 6-24).

Take your measurments

To select the appropriate size, first take your measurements.

It is best to take your measurements while wearing only underwear, or otherwise very tight clothing, so that you can get true measurements. Get someone to help you, if you can. Otherwise take your measurements in front of the mirror, so that you can check that your tape measure remains parallel to the floor, and is not twisted. 

First, measure your bust and take note of the measurement. 

Measure your waist... and don't suck in your tummy like me!

And then measure your hips.


Body measurements

Now look at the size chart and circle where your measurements lie. Your measurements may lie across several sizes or between sizes. 


Rushcutter finished measurements 

You should also look at the finished measurements of the Rushcutter. This dress is designed to be oversized, so there is A LOT of ease included (14cm at the bust, 43cm at the waist, and 28cm at the hip). If your bust measurements  fit one size and then your waist and hips are another, it is likely that you can go with the size of your bust, but do check the finished measurements and make a decision based on them. It is no problem if your size ranges between  multiple sizes. It is very easy to grade between sizes, as the pattern is nested, and I will show you how to do this next week in the sew-along. 

Take note of which size/s you need to print, as the pattern has been made with embedded layers so that you can just print the size/s you want! Layers make it much less confusing to cut the right size, and also saves on ink (and paper, in some sizes).

In the next post in the sew-along, I will show you how to print and assemble your PDF pattern


You may also like:

The Rushcutter Sew-Along : Gathering supplies

therushcutter_sewingpattern_gathering-supplies_2.jpg

I hope that yesterday's post in the Rushcutter sew-along inspired you! I know it sure did inspire me. Now that you (hopefully) know what fabric you would like to use, let's talk supplies.

Below is a list of ideal supplies, but before I go on, I must say that I  am an advocate of using whatever you've got at home (within reason, of course) for your sewing projects. So if you've got a zip that's a little too long or a little too short, then use it! Buttons a little bigger or small than required? Use them! If you don't have an invisible zip around, then consider using a standard zip. As well as this, consider cutting your fabric flat, rather than on the fold, you'll be able to squeeze your pieces on way less fabric (I will talk about that more when we get to cutting fabric). 

For View A, you will need:

therushcutter_Lay-plan_viewA.gif
  • Fabric: 2.9m x 150cm wide (3 yards x 60in) OR 4.2m x 115cm wide (4 5/8 x 45in)
  • 40cm (16in) invisible zip
  • Coordinating thread
  • 35mm bias tape (store bought or made at home) - I will do a tutorial about making your own binding, so stay tuned, if you think you'd like to go down that route

For View B, you will need:

therushutter_Lay-plan_viewB.gif
  • Fabric: 2.2m x 150cm wide (2 1/2 yards x 60in) OR  3.3m x 115cm wide (3 5/8 yards x 45in)
  • 3 x 10mm (3/8in) buttons 
  • Coordinating thread
  • 35mm bias tape (store bought or made at home)
  • A small piece of iron-on interfacing (not required for all fabrics, but if your fabric is quite delicate or flimsy, this is a good way to stabilise your buttons and buttonholes)

When you have chosen the fabric you will be using, you will need to wash it, dry it and press it. Use the same method you plan to use when laundering your actual dress, to avoid it shrinking after the first wash!

And that's all for today. Tomorrow we'll be talking about sizing!


You may also like:

The Rushcutter Sew-Along : Finding inspiration

inspiration.jpg

Yay! It's the first day of my very first sew-along, and I couldn't be more excited to get started.

For those of you who are just joining us, in the last post I introduced you to my brand new sewing pattern, the Rushcutter! If you missed the memo, you can check out all the details here.

I thought the best place to start the Rushcutter sew-along would be with some inspiration.

I had the most amazing group of women volunteer to test the pattern for me (thanks again ladies!) and they really did an incredible job of showing how different this dress can look, depending on your fabric choice. They each really made the dress their own.

As I mentioned in the last post, she is quite a versatile pattern and will make up well in a variety of different fabrics. Your fabric choice will really govern the end result, so before running off to the fabric shop, have a think about the kind of silhouette you would like to achieve and then go from there. I hope this images help!

therushcutter_sewingpattern_1

If you think you would like a dress that is quite structured or boxy, consider using a mid-weight cotton, sateen or twill or or brocade. Jennifer used a beautiful jacquard weave to make hers, and achieved a really beautiful silhouette, which works both belted and un-belted. 

If you prefer something a little softer or more relaxed, I suggest light to mid-weight cotton shirting, poplin, sateen, viscose (rayon) or silk. Cindy achieved quite a soft silhouette using mid-weight cotton, and created a nice detail by using exposed binding on the armholes and neckline.

Claire also achieved a relaxed look, perfect for a casual summer dress, using this striped light-weight cotton shirting. 

For something in between the soft look and the structured look, consider using chambray or linen. Kimberly used a bottom weight denim wash cotton to achieve this silhouette. 

As the Rushcutter is made up of a few different panels, there is a lot of room to play with the pattern, with piping or colour blocking... or both, like Marie-Paule. She also attached some elastic at the waist to achieve a more fitted silhouette.

I really love the dress Corey made. She cut the bodice panels in the same fabric to make it look like a standard yoke, and then used a solid colour for the remaining panels, to create a lovely contrast between the two sections. 

This lovely relaxed Rushcutter by Indu is just the perfect summer dress. She shows how beautiful it can look with, or without, the waist sash. 

There is a lot of room for playing with stripes or contrasting fabrics in this dress, and Sneha really showed what is possible. Didn't she do an incredible job of this dress? 

Megan made this lovely light-weight cotton Rushcutter, which she shortened considerably to tunic length. I will show you how to do this during the sew-along, so keep your eyes peeled, if this is something that interests you! I think it goes perfectly with those black tights and shoes, although I think this dress will work just as well in spring.

Sarah also made a couple of changes to the pattern. She shortened the dress, as well as the sleeves, and also widened the neckline. I really love the changes she made and I think this fabric (wool boucle) just works perfectly.

Ann made this lovely blue Rushcutter, with a fabric that has a slightly quilted texture. It goes wonderfully with her red hair, don't you think?

And last, but not least, is Andreia. I am a huge fan of this dress. She really thought outside the box when it came to selecting fabric, and went for a Ponte di Roma. It has a lovely modern aesthetic, and I just love how the sleeves sit when the fabric has a bit more body to it.


These wonderful ladies have provided me with a lot of inspiration (and I hope they have provided you with some too) - now I just have to work out which one to make first! I'd love to know what you are planning to make your Rushcutter in?


You may also like:

Introducing the Rushcutter

theruhcutter_sewingpattern_inthefolds

Yipee!!! I am so pleased to introduce you to my very first sewing pattern! Her name is The Rushcutter and I think she's a bit of a beauty.

She is a relaxed knee length A-line dress, which is flattering to pretty much all figure shapes. My main mission when designing the Rushcutter was to create a dress that is comfortable, wearable, effortlessly cool, and would fit comfortable into many different women's existing wardrobes. She can easily be dressed up and down, and is perfect for all seasons.

She comes in two variations, which means she is perfect for all you people in the northern hemisphere too!

therushcutter_viewA_technicalsketch

View A has three-quarter raglan sleeves, large pockets on the side (optional), an invisible zip, bound neckline and a large hem facing.

therushcutter_viewb_technicalsketch

View B is a sleeveless dress with back button closure. It has in-seam pockets and the neckline and armholes are finished with bias binding.

Included in the pattern is an optional waist sash, that is suitable for both styles.

theruhcutter_sewingpattern_inthefolds

The Rushcutter was designed with woven fabrics in mind and is quite a versatile pattern. She makes up beautifully in a wide range of fabrics (and I would know, as I have made at least eight versions over the last two months!). My lovely testers also showed how different this dress can look depending on the fabric - and I will include some of their incredible dresses in the next post

As well as these two variations, I will also be showing you as many hacks as I can possibly come up with (and am open to suggestions, if you want to send an idea through to me), in the coming weeks, so we can get all you sewers pattern making too (and hopefully seeing how un-scary it is - yes, I made up a word)!

theruhcutter_sewingpattern_inthefolds

The pattern is suitable for brave advanced beginners and beyond. I have placed it a 'Level 4' on my skill scale, as I think a sewer with a few projects under their belts, along with some pins and patience (and probably a few cups of tea) would be able to handle this project.

You can make the project as simple or as challenging as you like. Add piping for an interesting detail or play with stripes on the various panels to make it a more challenging sew.

theruhcutter_sewingpattern_inthefolds

The pattern also comes with instructions alongside full colour photographs that hold your hand every step of the way (there is also a 'cheat sheet' available for those of you who don't want your hand held) which can be printed at home, or simply viewed on a computer, tablet or smartphone. 

Would you like to sew your Rushcutter along with me? I will be doing a sew-along over the next few weeks (starting on Monday October 19th) and will be giving you some fitting tips, showing you how to get a lovely clean finish with bias binding, and my method for sewing invisible zips! So stay tuned...

And even if you are not planning on buying the pattern, I'm sure you will find some great tips in the sew-along that can help you with other projects that find their way to your sewing table.


What do you think? I'd love to know what you think. Is there room for the Rushcutter in your wardrobe? 


You may also like:

Throwback Thursday: Tools for patternmaking

in-the-folds-patternmaking-tools-1

Welcome to the very first post in my 'Throwback Thursday' blog series. In this series I will go back to some of my most popular blog posts from my previous blog, Em Makes Patterns. 

For today's post, I thought it would be good to start with a post about pattern making tools. If you are keen to start making adjustments to your store bought patterns, or want to start drafting from scratch, there are a few things you are going to need!

There are probably a million different gizmos and gadgets that you could buy to help you with your patterns, but I like to keep things simple, so this post will guide you through just the most useful tools. I learned this from experience... When I moved to London a few years ago, I arrived with very little (a 15kg backpack to be specific), and that very little did not include pattern making tools. Being in that situation, meant that I needed to work out what I really needed and learn to live without the abundance of things I had accumulated over the years in my home sewing room. Now I am back at home, I still try to stick to the basics.

So here goes... The pattern making tools I cannot live without are:

in-the-folds-patternmaking-tools-patternpaper

The first necessity is pattern paper. Without it there is no chance! 

While at university I fell in love with ‘dot and cross’ pattern cutting paper. It makes drawing parallel and perpendicular lines a piece of cake, and is transparent enough that you can easily trace off patterns when you are making changes. It is also nice and wide, so you don’t end up sticking twenty pieces of paper together to make a dress. I can't even remember where I bought mine from, because it seems it's a never ending roll! But there are lots of supplies around, or you can even check eBay.

But, all that said, you can live without it if need be. Some good old fashioned butcher’s paper or brown wrapping paper will also do the trick!

Next in my “pattern cutting tools I cannot live without” round-up is a pacer pencil. 

in-the-folds-patternmaking-tools-pacer

Okay, a good old lead pencil will do just fine, but a pacer gives you the kind of accuracy you need when making patterns. Think about it, if you use a thick lead pencil it may add 2 millimetres to your patterns. This may not seem like much, but if you continue to trace your patterns in this way, over and over, eventually that 2 millimetres will lead to a lot! And an added bonus... A pacer normally comes with an eraser on the end, so it crosses one piece of equipment off the list! An eraser in absolute pattern making staple. We would all like to think that we are perfect and won’t make a mistake. But we will. So always have an eraser in arm’s reach.

Another pattern cutting necessity is a ruler. Any ruler will do, but if you would like to make your life easier, invest in a grading ruler. 

in-the-folds-patternmaking-tools-ruler

Another pattern cutting necessity is a ruler. Any ruler will do, but if you would like to make your life easier, invest in a grading ruler. A grading ruler is long (so you can draw nice long lines in one go), transparent (great for adding seam allowance) and flexible (perfect for measuring curves).

in-the-folds-patternmaking-tools-tracingwheel

 Some pattern cutting tools look like weapons. The tracing wheel is one of them. This is one tool you really do want a case for! Without it, the tracing wheel has been known to poke through handbags and poke legs. 

Apart from the danger surrounding this tool – it really is a handy tool to have when pattern cutting. It is great for tracing patterns (if your paper isn't transparent) or if you are tracing onto card. It is also good for transferring lines, markings, dart shaping or notches to the pattern.

in-the-folds-patternmaking-tools-tape-measure

A dressmaking tape measure is needed for taking body measurements, whilst also being handy for measuring long or curved seams.

in-the-folds-patternmaking-tools-patternmaster

The Patternmaster is a bit of a luxury when it comes to pattern making. I struggled to decide whether it should actually be on my list of “pattern cutting tools I cannot live without,” but it just managed to scrape in. I know a lot of people swear by them, but I often find it much easier to draw a curved line by pivoting with a straight ruler. The main thing I use my Patternmaster for is drawing right angles – it is very good for that!

in-the-folds-patternmaking-tools-stiletto-awl

The other contender for the most dangerous pattern cutting tool in the round-up is the stiletto (often known as an awl). This is another one to be careful with. It’s sharp point is great for making drill holes, as well as keeping the pattern in the right place when using the pivot technique to eliminate a dart or to add volume.

in-the-folds-patternmaking-tools-scissors

Scissors are a must, for obvious things like cutting out your patterns. You also need scissors for some pattern cutting techniques and tricks, like the ‘cutting’ counterpart of the ‘cut and spread’ technique.

in-the-folds-patternmaking-tools-masking tape

Masking tape is another essential. I could not live without it when pattern making. You will need it when making additions or changes to a pattern (like lengthening or shortening). Masking tape is better than regular sticky tape as you can draw lines over it.


That brings me to the end of my “pattern cutting tools I cannot live without” list.

I'm wondering if there is a tool that I haven't mentioned that you cannot live without?


You may also like:

Welcome to 'In the Folds'

Hello and welcome to my brand spankin' new website and new little corner of the internet!

I'm Emily, and I'd say most of you will know me from my other website / blog Em Makes Patterns. 

As some of you may already know, I recently decided to take the plunge and start my own business. I had somewhat idealistically imagined spending each day working on a new task - one day making a pattern, the next sewing, the day after that working on my website and social media. But I have found out very quickly, that it is not like that at all. Things that I had imagined would take a few days, take weeks (hello grading a pattern into 10 sizes - I'm talking to you!). So a pattern that I had thought I would launch two months ago, is only now, ready to go. But I am learning to enjoy the process, and to respect and appreciate the time that it takes to make something beautiful. As it's all about the journey, right? (yes, year 10 English taught me something!)

I thought that a good way of starting my new blog, would be in a Q & A format - getting a few of the questions out of the way that I am sure some of you may have, before we get onto more exciting things (like the release of my first ever sewing pattern! Yay!)

Why did you start a new website to release you patterns?

Whether or not to start a new website (with new name and branding etc.) has been one of the biggest decisions I have had to make related to my business so far. After all the hard work and long days and nights spent creating tutorials for Em Makes Patterns, (EMP) it seemed at first that it would be crazy to start again somewhere else. But the more I thought about it, the more I realised that this is a new business, and although it will have similarities and common threads in common with EMP, it needs its own home. My goals and mission have somewhat changed since writing my first blog post on EMP, and for me to fulfill these goals, I knew I needed a new website.  EMP gave me an opportunity to learn, and experiment and get to know what this whole blogging thing is about. And I learned A LOT. But now, I feel it is time to take all those lessons and create a space for this new venture. 

What is going to happen with 'Em Makes Patterns?'

That is a good question (she says to herself)! And one I am not entirely sure of. When I first made the decision to create an entirely new website, I also decided that I would continue blogging over at EMP (because we all have so many hours in the day, right?). I have since learned that this may be too difficult to manage . So for the moment I am playing it by ear. Many of the tutorials on EMP are going to be relevant to the patterns I create, so at this stage, I plan to slowly bring the tutorials across to the new site. 

What can we expect from 'In the Folds?'

You can expect many things from In the Folds! To start, I will be releasing my first sewing pattern (of many). Alongside each pattern release, I will be doing a sew-along, as well as showing you as many pattern hacks as I can possibly come up with. One of my main missions for this project, is to get people pattern making, and realising how many things you can create from a single pattern.

Patterns will be drafted with the following things in mind:

·         Always beautifully drafted and available in a broad range of sizes

·         Design will be very thoughtful, and will always include unexpected detailing, to make it an interesting sew for makers of all levels

·         Patterns are designed with room for you to make them your own

·         The pattern will teach you a new technique (or hopefully two)

·         Instructions that will help you get a beautiful store-bought finish and encourage you to push yourself into unknown territory

·         Step by step tutorials and sew-alongs that will give you helpful hints and tips that will not only help you with this particular pattern, but will help you become a better sewer in general

·         There will also always be a lot of pattern hacking inspiration with every pattern release, so that you can transform a single pattern into as many garments as your imagination will allow

As for the future of In the Folds, I also plan to start producing a small collection of garments each season to be sold online and at local markets, but that will be a little later on down the track, as I really have my work cut out for me at the moment!

Who is this website for?

This website is for anyone interested!

Although I do think that if you are interested in learning and developing your pattern making skills, this will be a good resource for you! I really want to show people that pattern making is nowhere near as scary as many people think it is, and that you just need to know a few simple processes to get yourself started. There will be a lot of sewing goodness, as I firmly believe that a good understanding of putting clothes together is critical to being able to draft patterns well.

I would rather spend my precious hours sewing instead of pattern-making, is this site still for me?

Yes! It definitely is still for you. I will be sharing both pattern making and sewing tutorials, so there will be enough sewing inspiration to keep you going! And maybe after a little while, I will sway you to spend some of those hours pattern making too!

Do I have to be good at maths to be good at pattern making?

It helps, but no, you don't have to be good at maths to be good at pattern making. All you need is a little bit of patience and a lot of imagination (and maybe a calculator) and I am sure you will surprise yourself with what you can do! 

I have a specific pattern making question, can you help me?

Yes, of course I can help (well, at least I can give it a go)! Please get in touch and I'll get back to you as soon as I can.

So I think that pretty much sums up In the Folds for the moment! But please, do watch this space, there is a lot of content coming your way very soon!


I am so happy to finally unveil this project that has been a long time in the making. If you like what you read, why don't you follow along with me on Instagram or Bloglovin? I promise, there is a lot more to come! Including the release of my first ever sewing pattern! Yipeee!