Pleated Summer dress

ISSUE 116 - High bust measurement on In the Folds patterns

THE Q & A SERIES

High bust measurement on In the Folds patterns

Hello there!

I am a member of Curated by ITF which I enjoy. I do, however, tend to look at the patterns that you produce for Peppermint Magazine. I have just downloaded the Pleated Summer Dress and I have a couple of questions:

What cup size has been used for the dress block, please? You quote height but not upper bust size. This helps me understand if I need to do an FBA even before making up a toile.

One of the last instructions is around buttonholes and placing them in the placket. Surely it would be easier to do the buttonholes before actually attaching the skirt so that you have less fabric to wrestle???? (fabric wrestling is popular sport for me!)

I look forward to hearing from you.

Thanks

Zoe


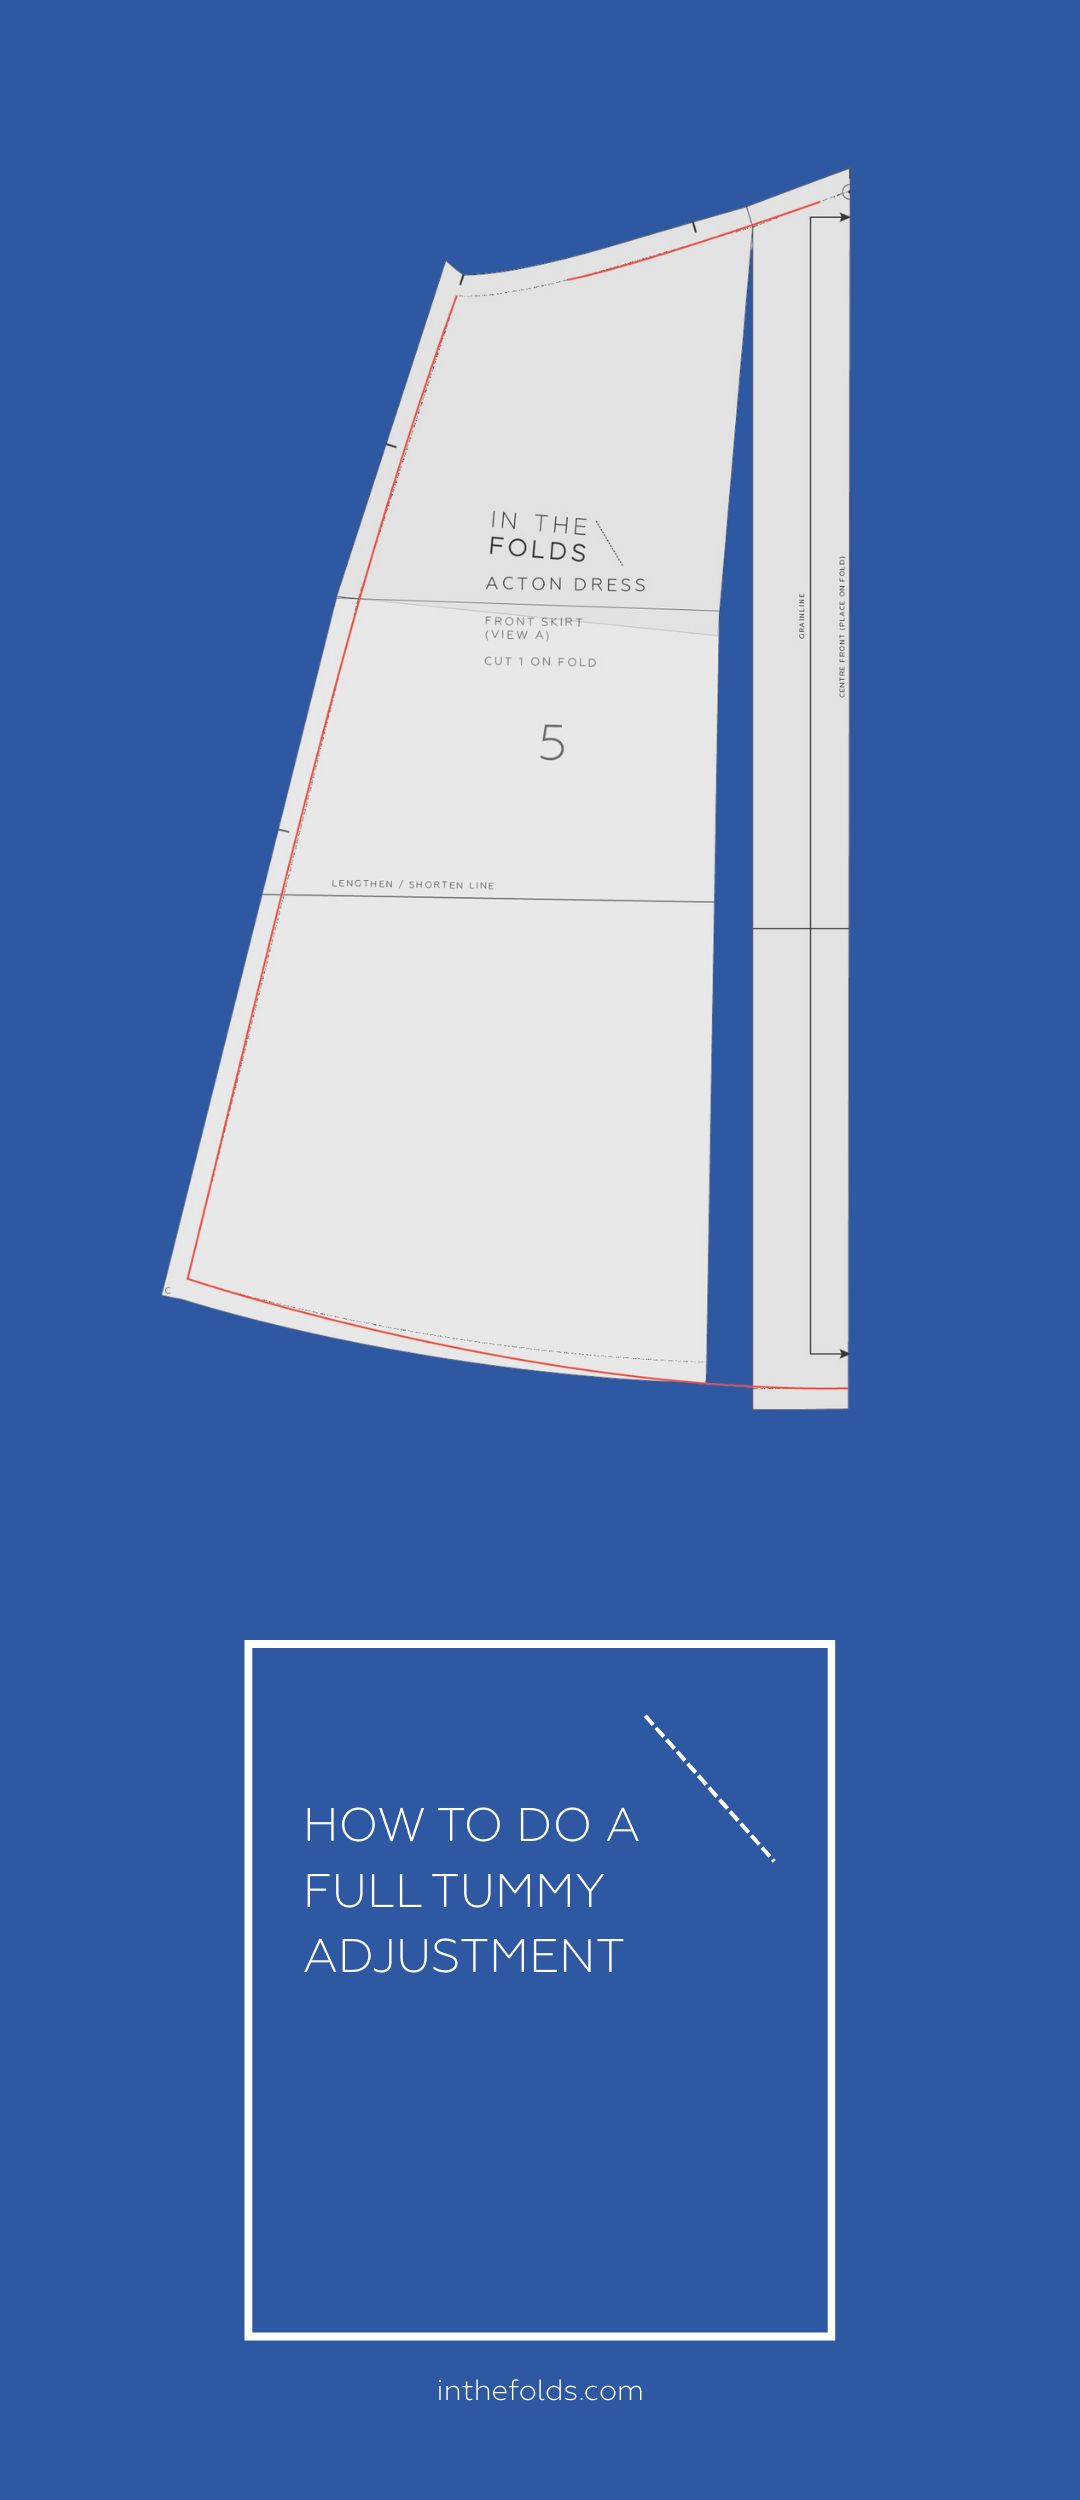
At this stage, all In the Folds patterns are drafted for a B cup bust (except for the Whitlow robe which we recently released in our extended size range). The Pleated summer dress pattern was produced a number of years ago, before we started including high bust measurements in our instruction booklets. The same block was used that we currently use and you can find the high bust measurements here.

Feel free to place your buttons and buttonholes at any point you like. You could even do them as soon as the placket is complete as the neckline is all finished at this point. I just generally do them at the end as it was the way I was taught, but there is no particular reason to do that and it's always a good idea to construct garments in the ways that are comfortable to you (and avoid fabric wrestling if possible).

I think we often can second guess ourselves and assume the instructions know better - but there are often times when you are better off choosing a method or order of construction that suits your preferences. Even I fall into this trap sometimes when I use another company's patterns and then kick myself later for not just doing it the way that I enjoy / that makes me feel comfortable.

Happy sewing,

Emily


RESOURCES MENTIONED IN THIS ISSUE

  • The free Pleated Summer dress pattern can be found here.

  • The Sizing Chart that all In the Folds patterns are based on is available here.


For more issues of the Q & A series, you can check out the archive here.


WHAT YOU’VE BEEN MAKING


MORE POSTS IN THE SERIES

ISSUE 111 - HOW TO SEW A HIDDEN BUTTON PLACKET

THE Q & A SERIES

How to sew a hidden button placket

What a lovely pattern the Peppermint Pleated dress is! I've been practicing the placket on some scraps before destroying some pretty linen, but I keep getting stuck on the last three steps. If ever you have a chance, a tutorial on how to make this button placket would be so appreciated.


Hi there,

It's always a good idea to practice new techniques on a scrap of fabric, so well done for doing that!

It's especially important for techniques such as cut-in plackets (like this one) and welt pockets as, due to needing to cut into the fabric, they are much more difficult to fix if you run into strife.

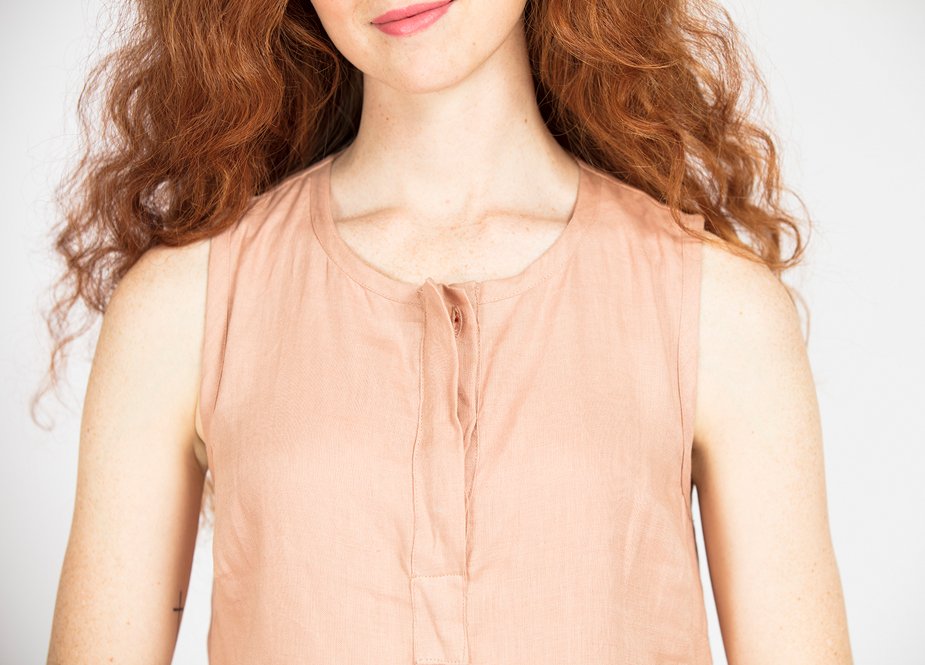
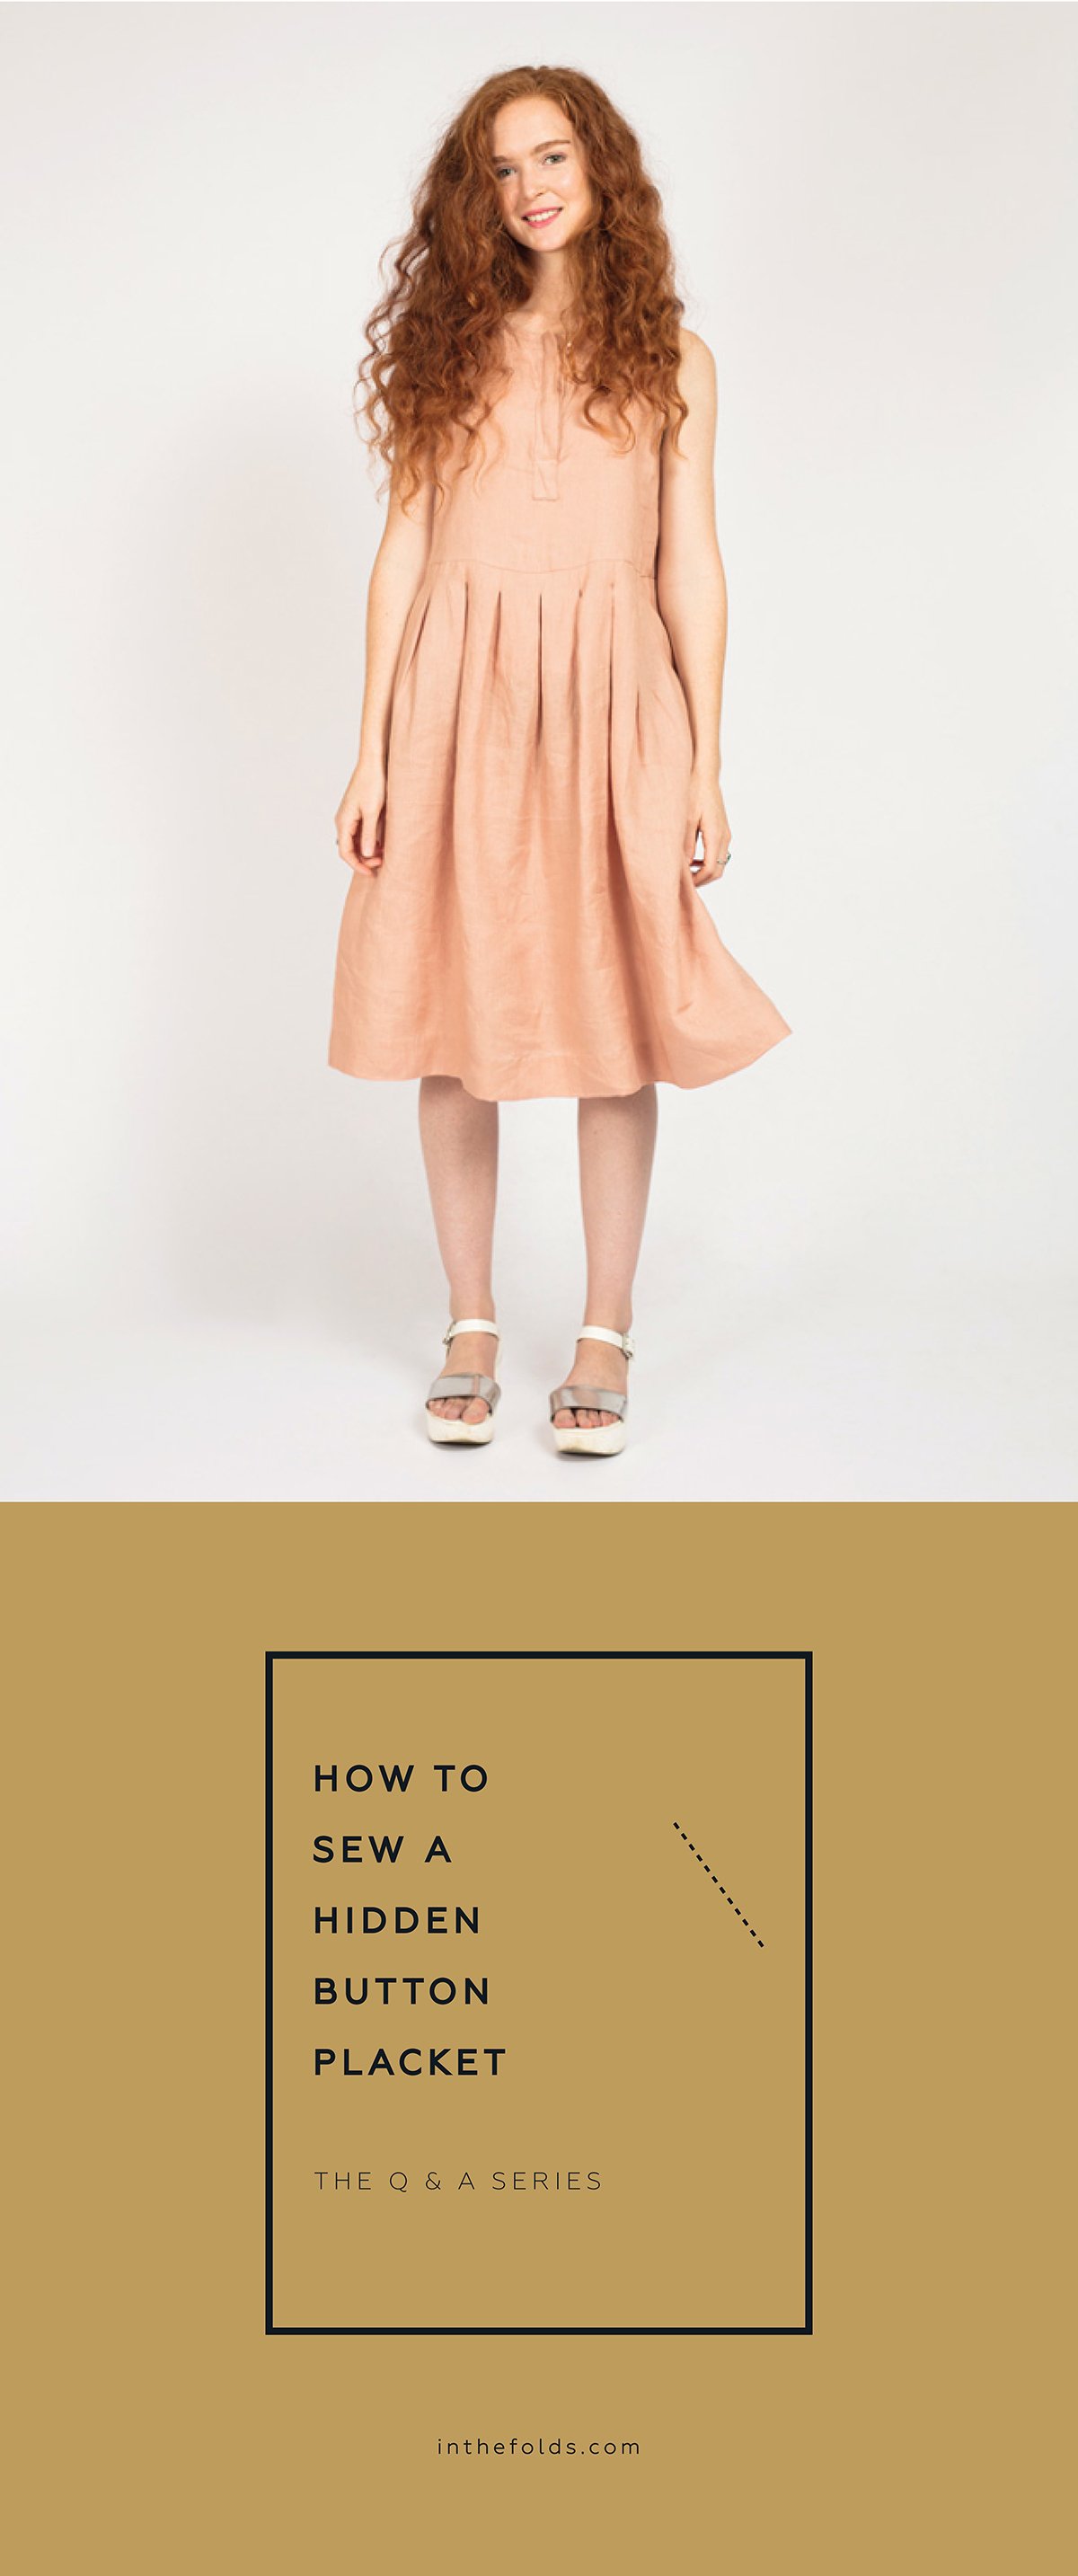
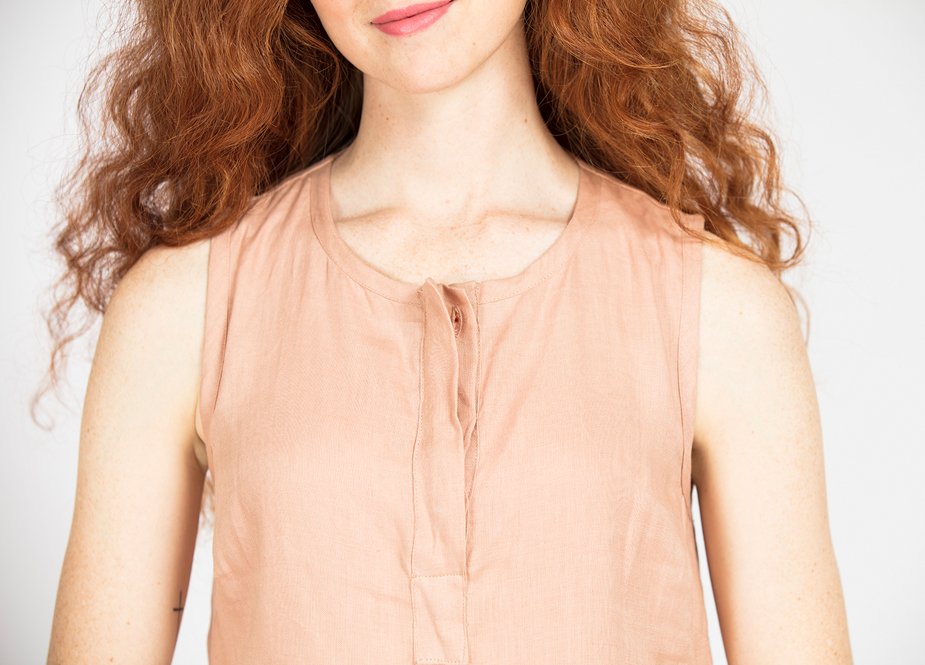
The placket on the Peppermint Pleated dress involves a number of steps and when you're done you will have a really gorgeous placket! Hopefully seeing some photos of the process will help you get your head around it so you can get the dress started!

A note before I get started - we normally only use these type of photos to aid in the instruction illustration process, so we apologise that for a couple of steps we don't have photos. Sometimes as we are photographing the steps we find a better way to do a particular technique, so this sometimes means we don't have a photo of the exact step. This will give you a little behind the scenes of how our instructions come together!

Prepare your placket

To start, prepare your placket according to the instructions (STEPS 7 and 8). Accuracy is very important when it comes to sewing plackets, so by taking these steps at the beginning you will make the sewing process much easier for yourself.

Attach placket

Take your FRONT BODICE [1] and fold the neckline in half. Use a pin to mark the centre front.

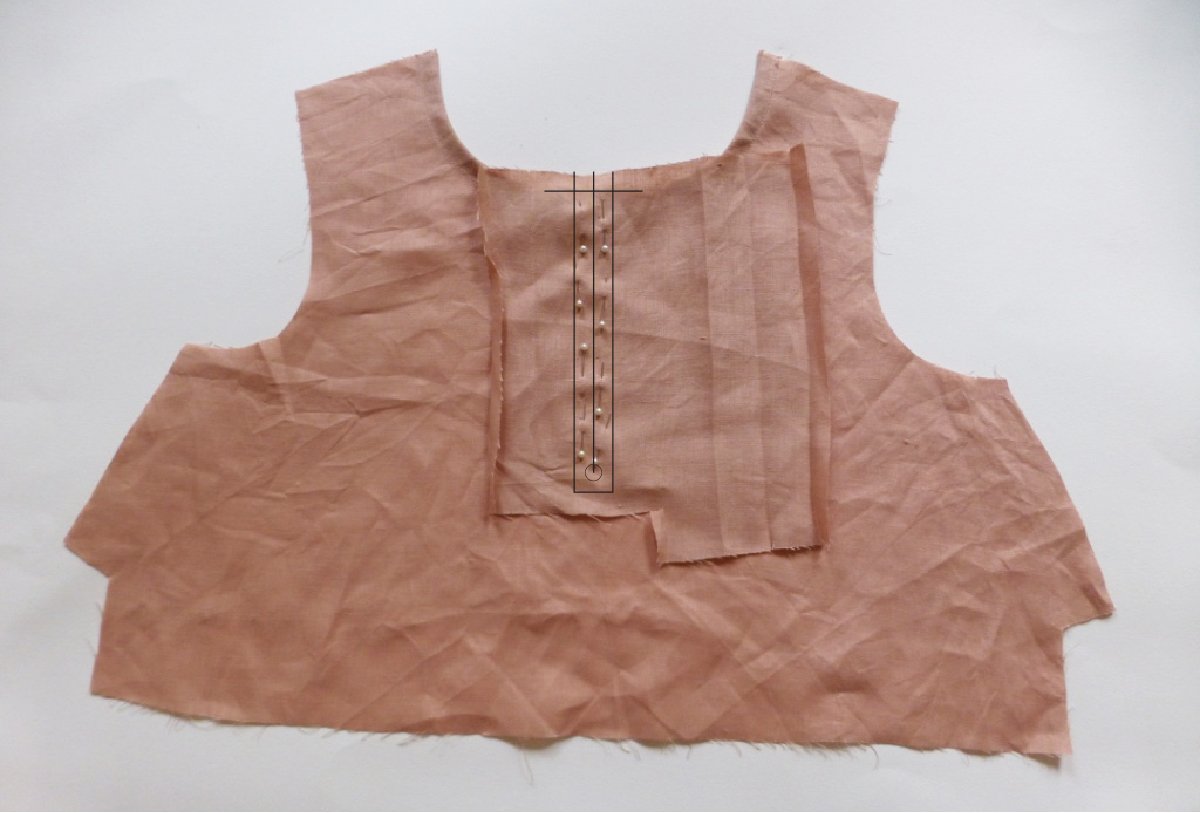
Take the PLACKET [5] piece and place it right side down on the wrong side of the FRONT BODICE [1]. Line up the 1cm (⅜in) guideline on the top of the PLACKET [5] with the neckline of the bodice. Align the cut line marked on the placket with the pin on the bodice and the drill hole underneath. 

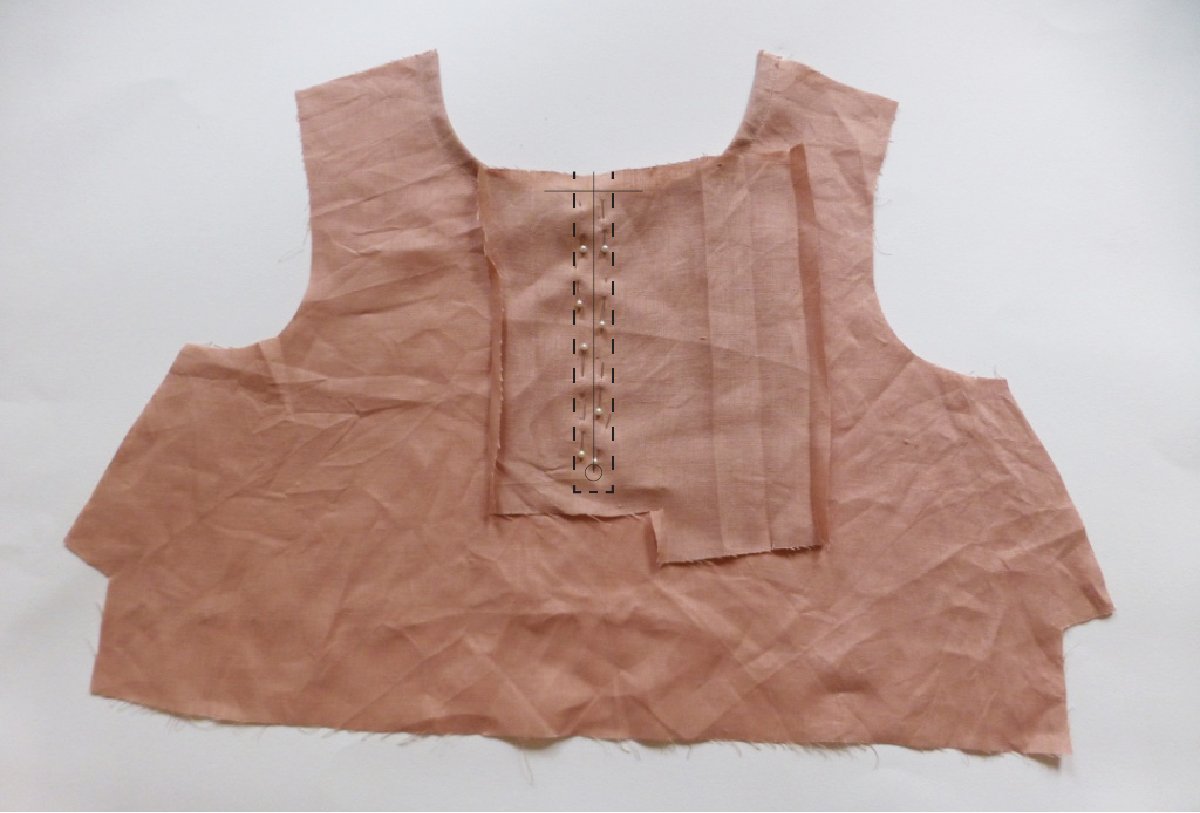
Pin PLACKET [5] in place along the lines of the “box” marked.

Stitch a box around the cut line (following your guide line marked) - walking in the stitches at each corner to ensure it is sewn precisely.

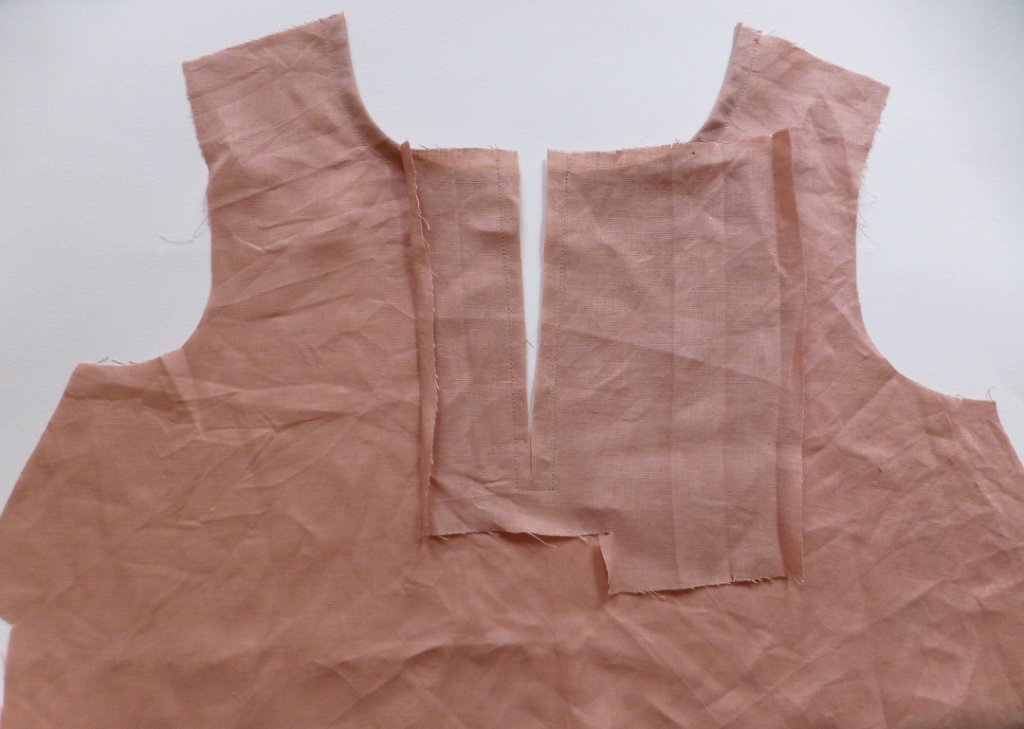
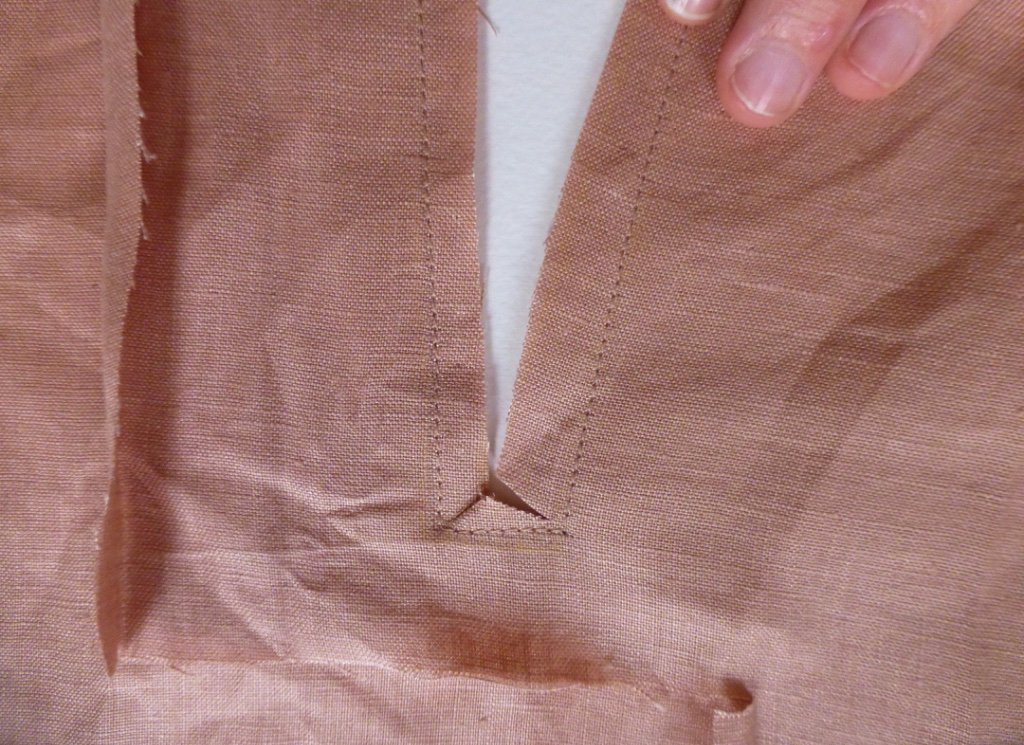
Carefully cut along the cut line, through the PLACKET [5] and the FRONT BODICE [1].

Cut in to each corner of the rectangle, getting nice and close to the stitch line, but not cutting through it.

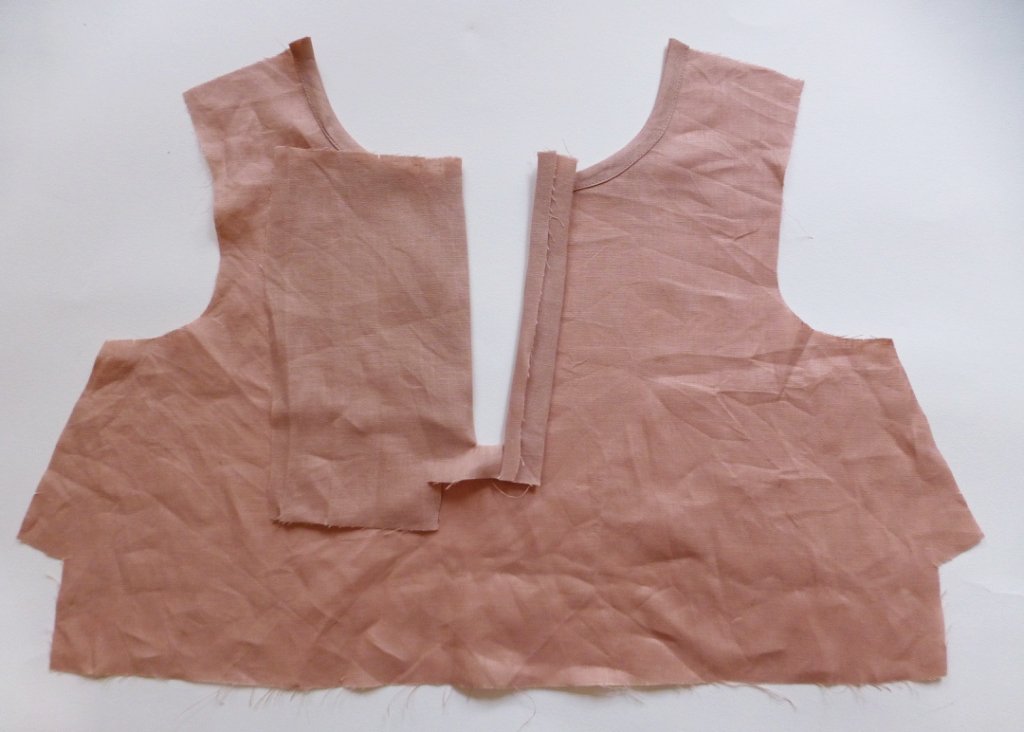
Flip the PLACKET [5] to the right side of the FRONT BODICE [1] and give it a good press along the seams and corners.

We will start by finishing the top edge of the PLACKET [5].

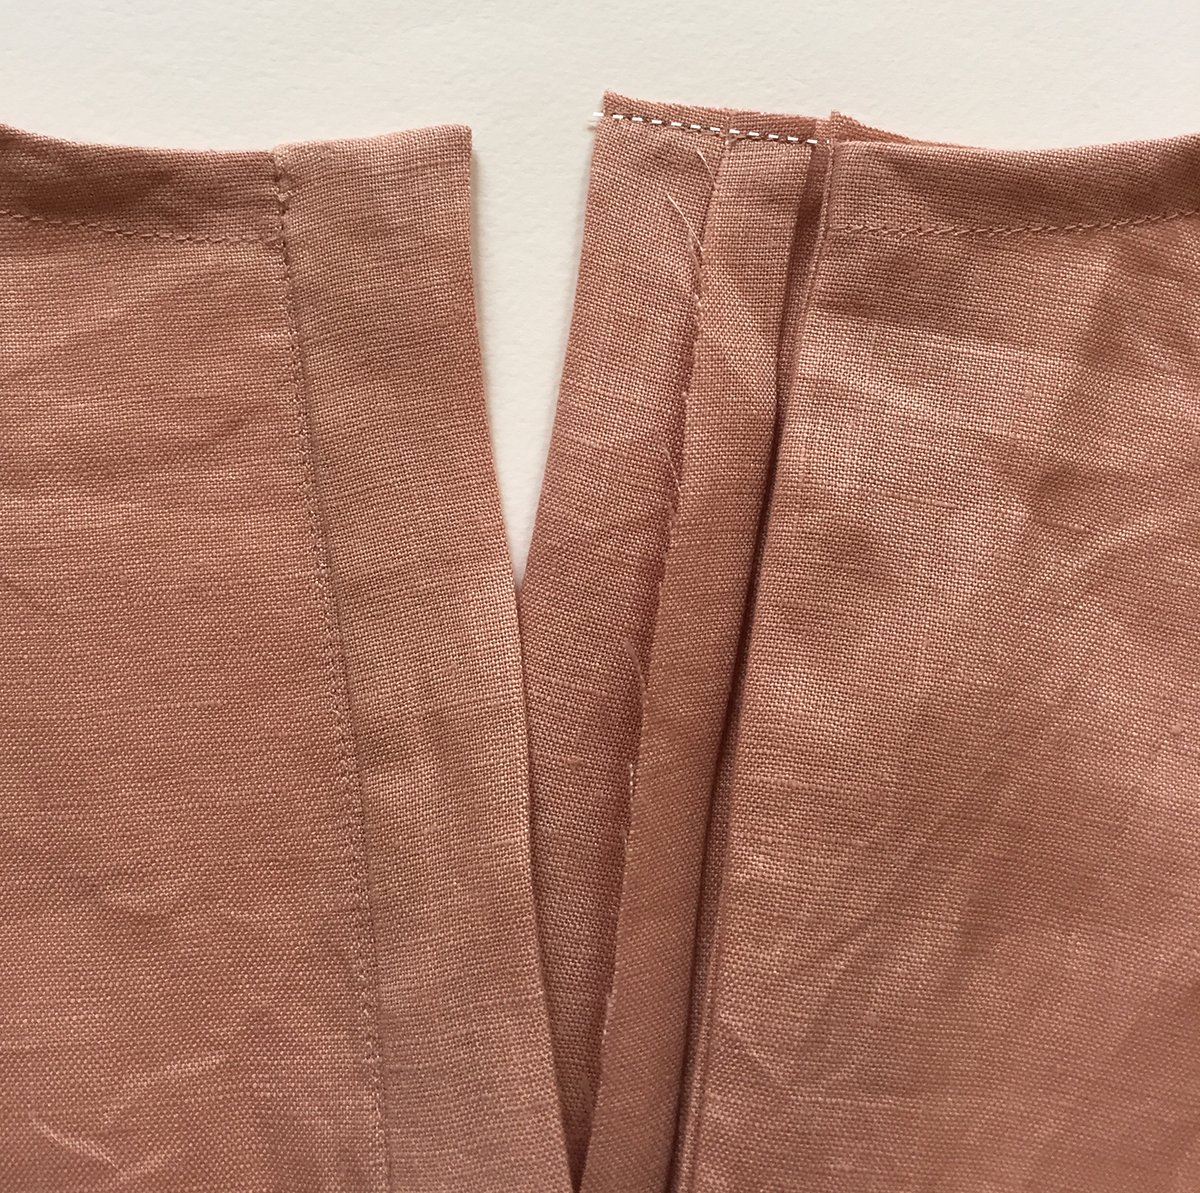
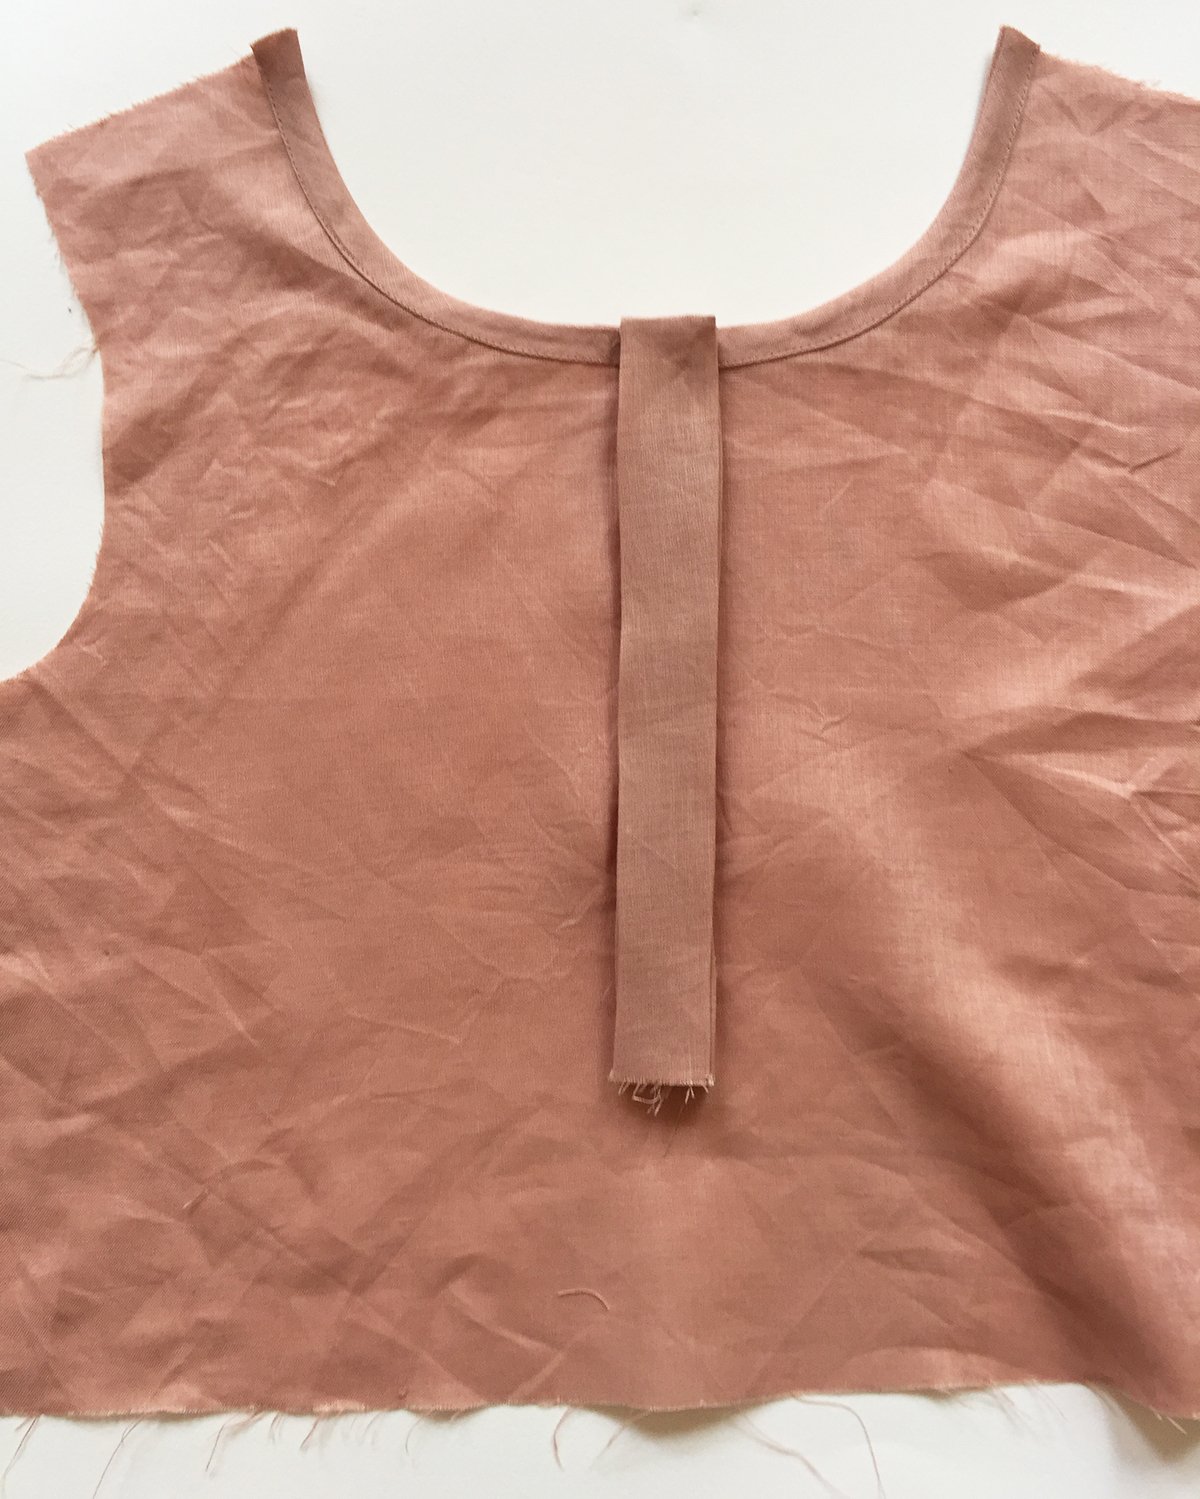
Focussing on the underside of the PLACKET [5], press the folded edge towards the seam of the opening, using the notches to guide you, so that the piece has right sides together.

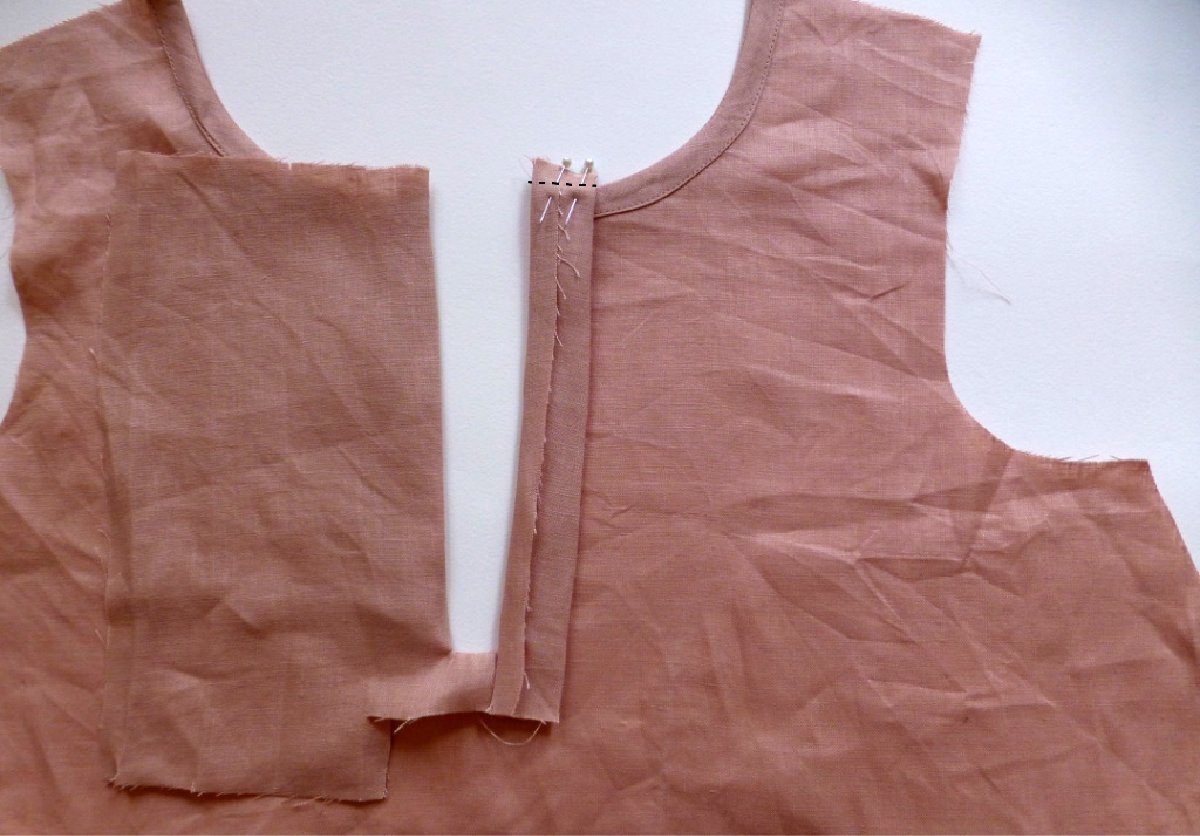
With tailors chalk, mark a straight line along the top of the PLACKET [5], 1cm (⅜in) down from the top edge. Pin in place. 

Stitch along the line, getting as close as possible to the edge of the binding. Trim back the edge to minimise bulk.

Turn the PLACKET [5] right side out, using a corner turner to turn the point of the PLACKET [5]. Press along the fold line (now in the opposite direction) and press PLACKET so that the fold just covers (by about 1mm) the stitch line underneath. 

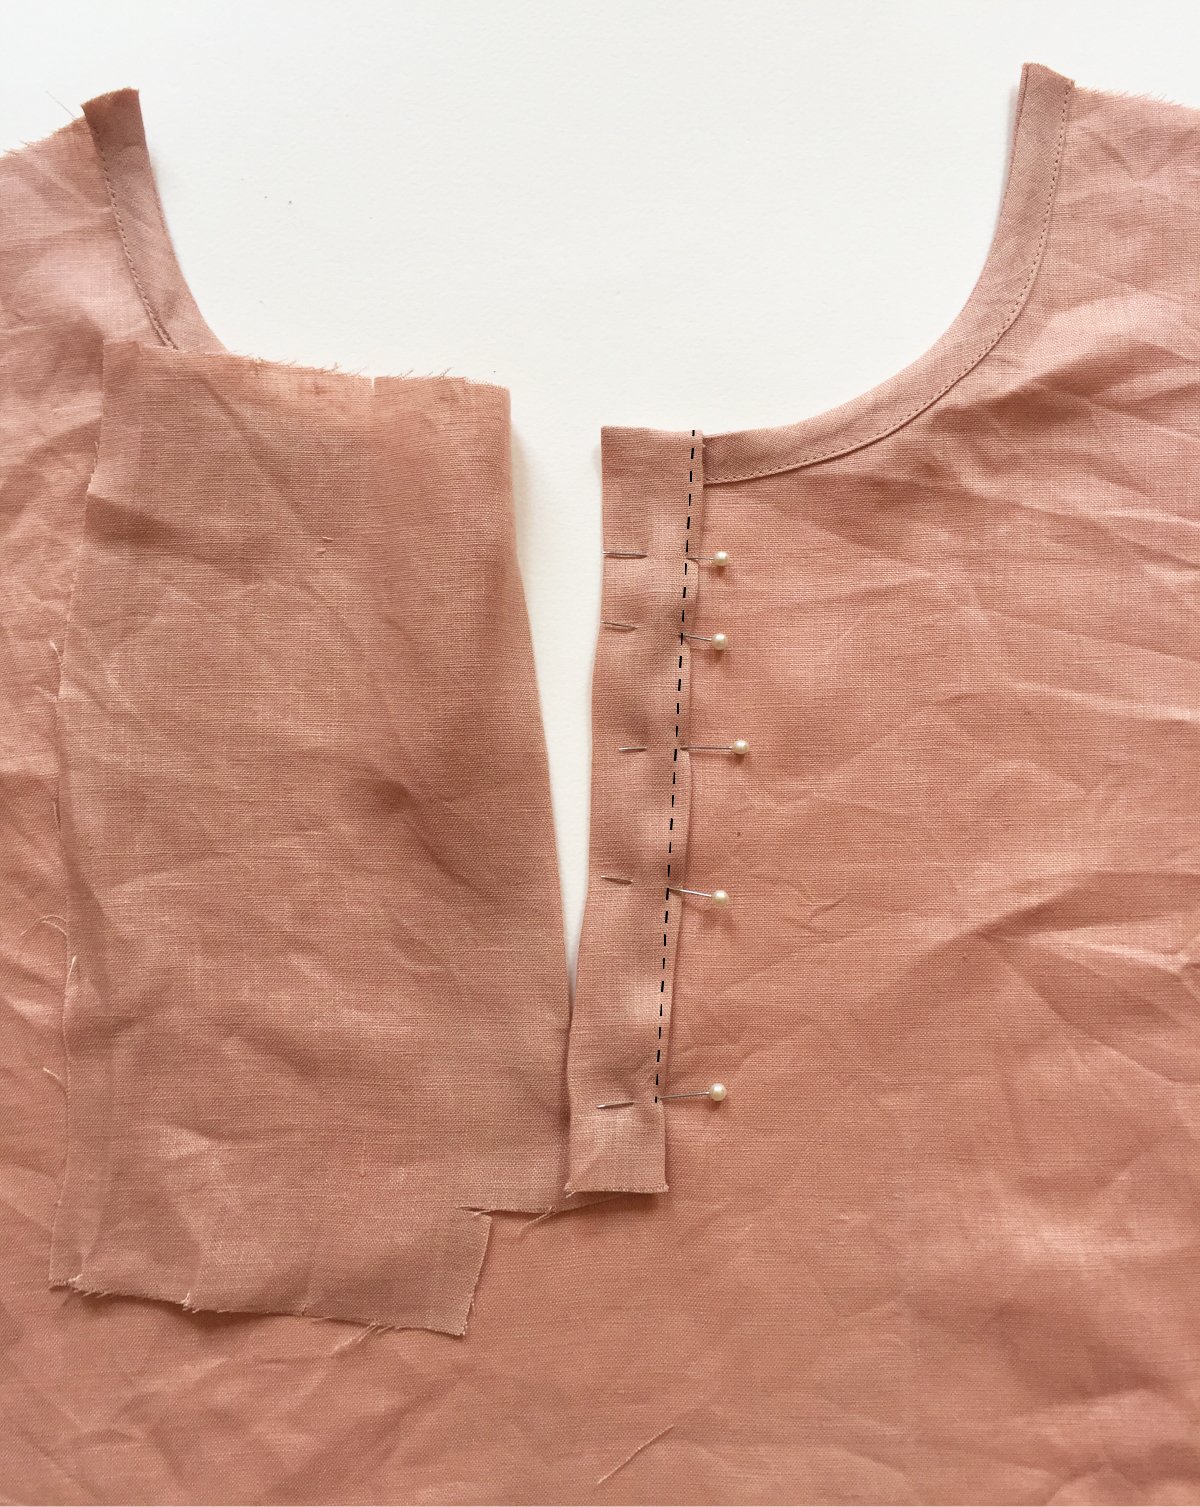
Pin in place from the top, down to the point where the opening ends (2cm / ¾in up from the bottom of the placket). 

Stitch down from the top to the last pin, close to the folded edge.

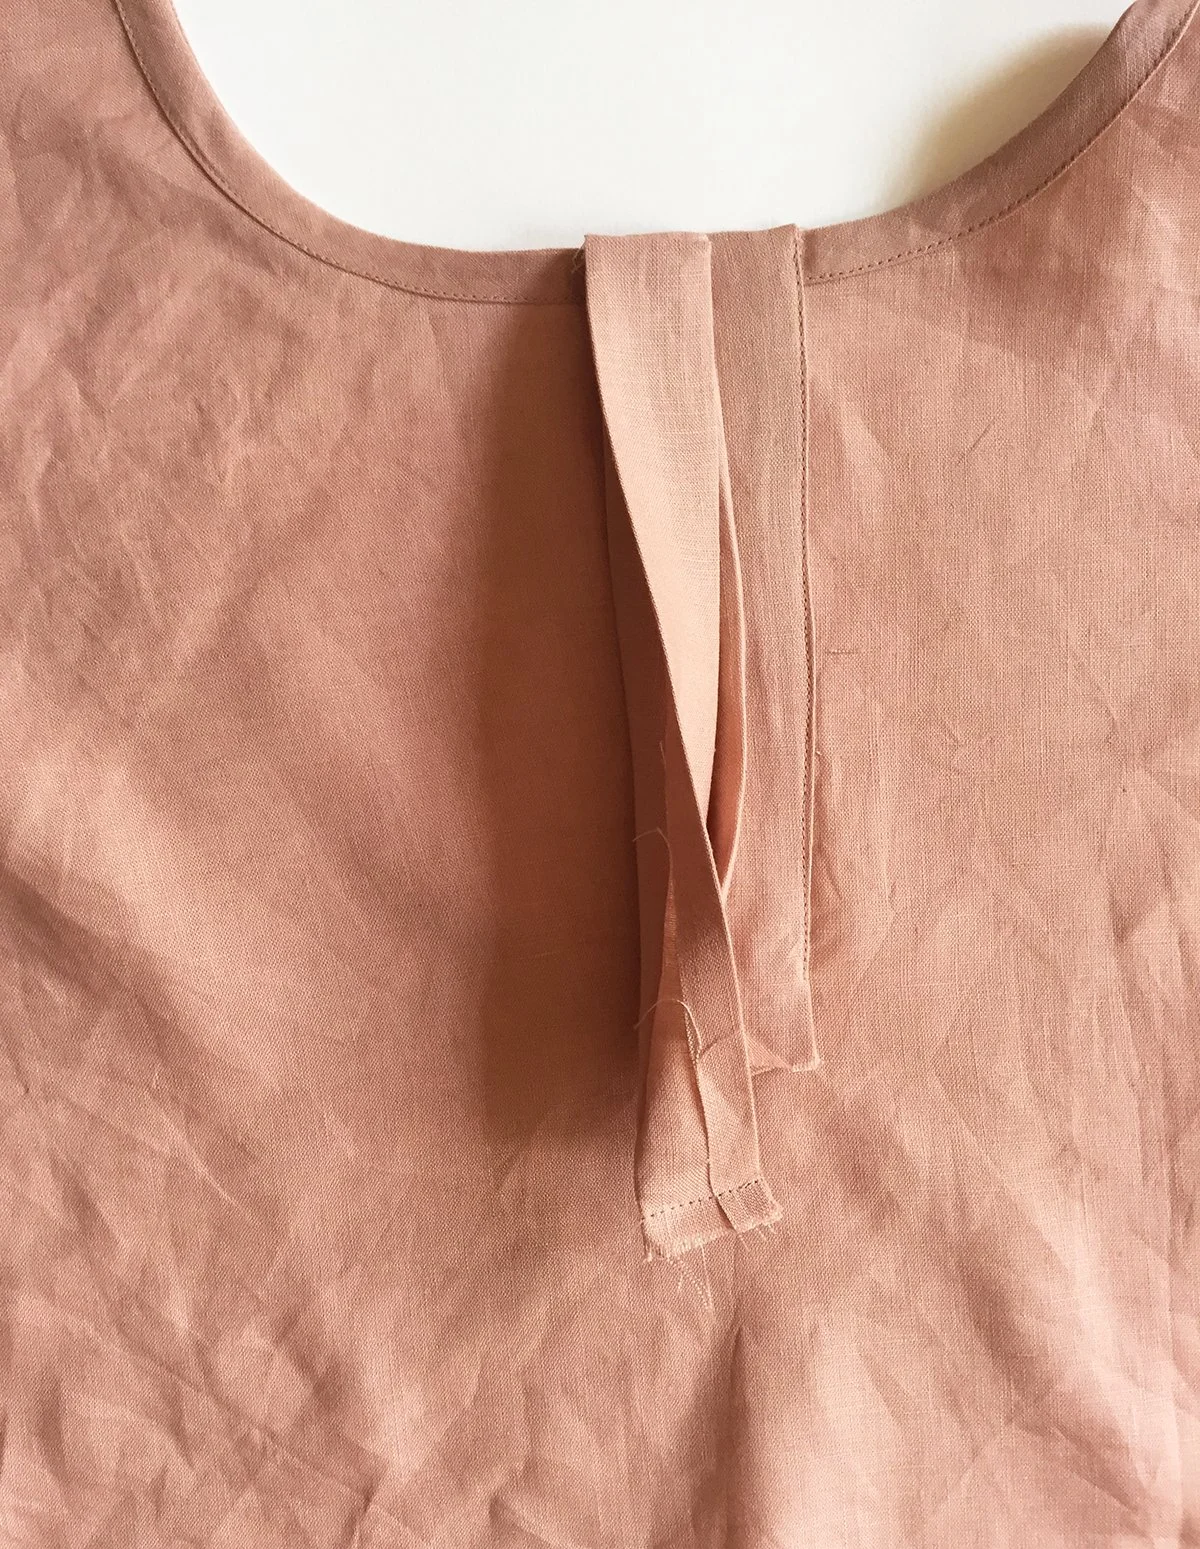
Now it’s time to assemble the other side of the PLACKET [5]. Using the notches closest to the left side, make a crease in the placket. Make sure that the long edge of the PLACKET [5] is still folded under.

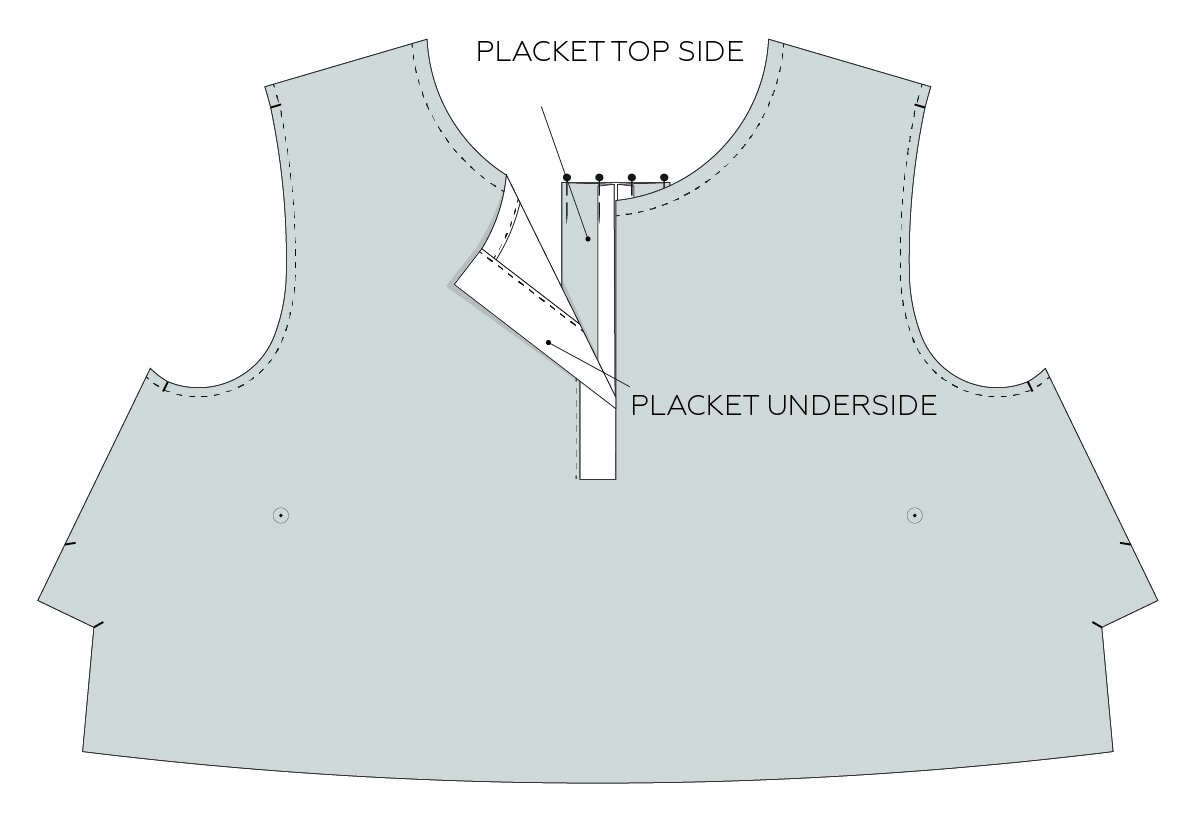
Again we’ll start by finishing the top of the PLACKET [5]. This side is slightly different to the first, as it is made up of two pieces, so that the buttons will be covered by a shield. Flip the FRONT BODICE [1] so that you can access the wrong side. Fold the PLACKET [5] into two sections, using the notches to guide you. Mark a line across the top (1cm / ⅜in from the top) and pin in place.

Stitch along the line. 

Trim back the seam allowance to minimise bulk.

Turn the PLACKET [5] right side out - using a corner turner to help you to get a nice point on each of the corners. Fold the raw edge inside the PLACKET and press flat.

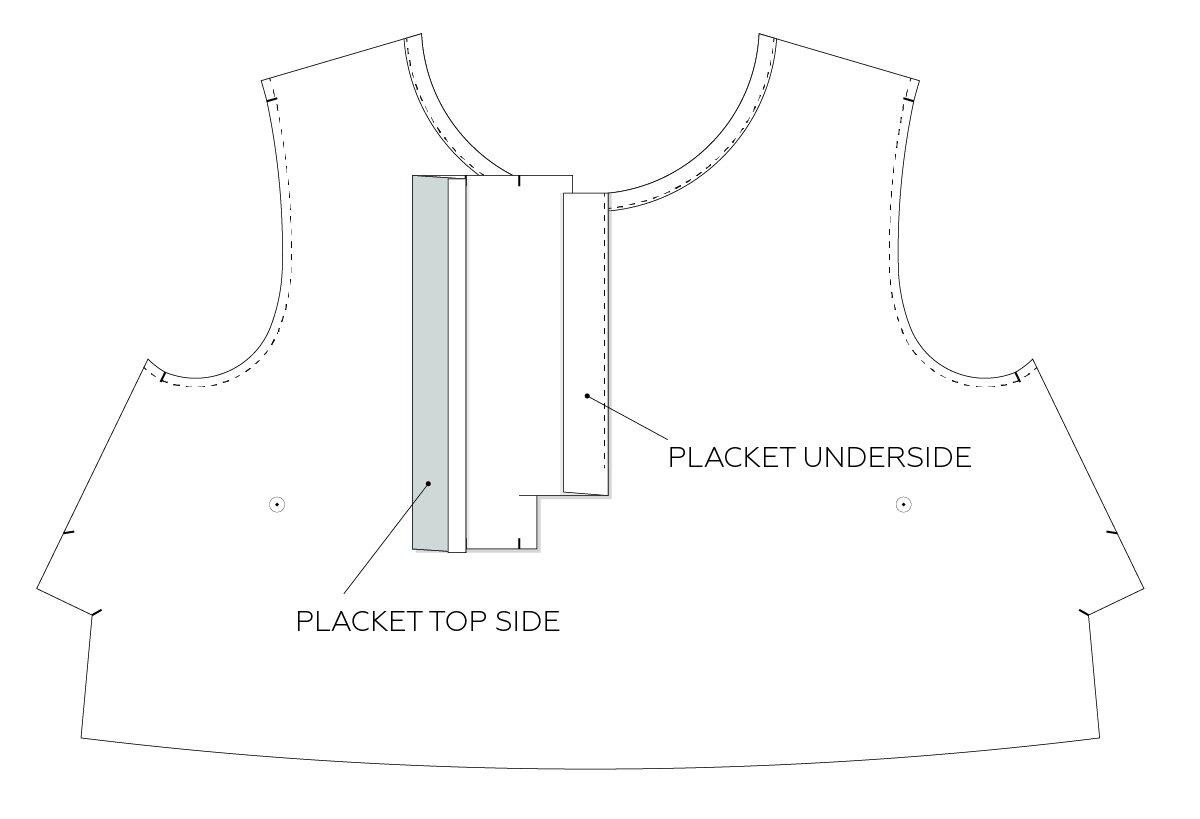
Carefully fold the PLACKET [5] so that each section of the placket is neatly stacked on top of the section underneath (the two sections of the PLACKET TOP SIDE should be sitting on top of the PLACKET UNDERSIDE). The left side of the placket will still be open.

Give it a good press.

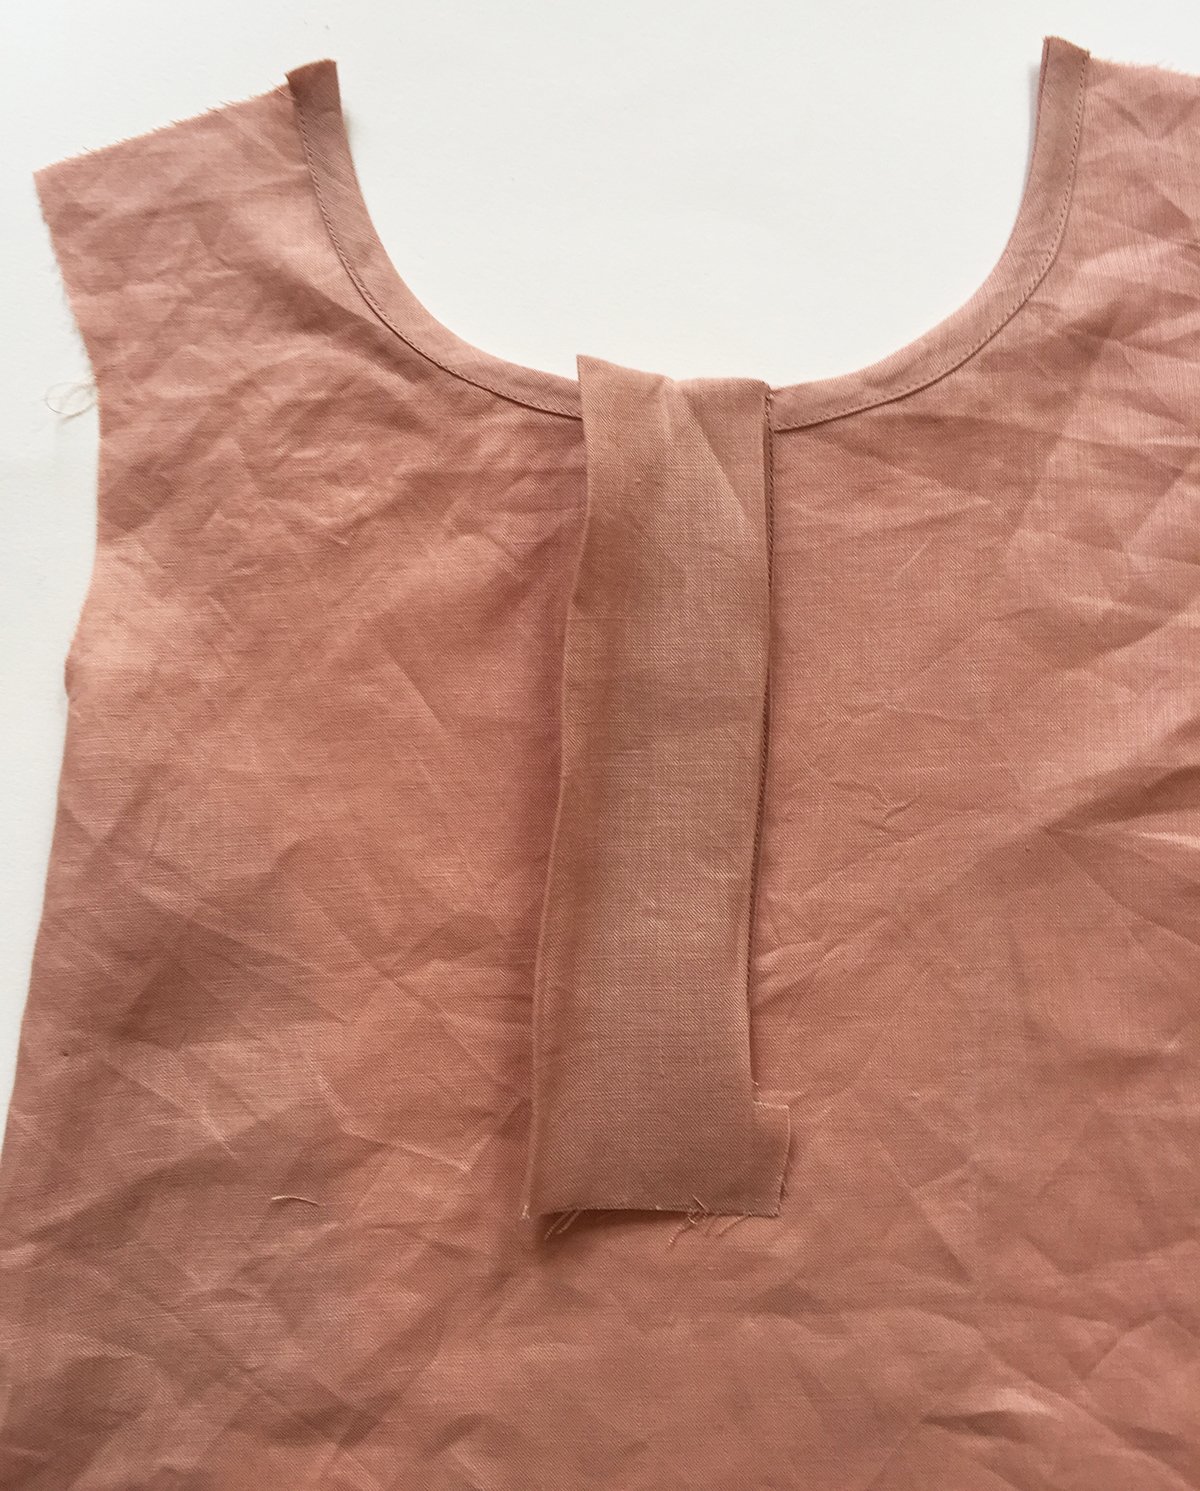
To finish the bottom edge of the PLACKET (top side), with the raw edge still folded back, reverse the direction of the internal fold, so that the right sides come together and you can pin the bottom of the placket together. 

Stitch with a 1cm (⅜in) seam allowance. Draw in the stitch line with tailors chalk before sewing if you feel the need. Trim back the seam allowance and turn corner with a corner turner. 

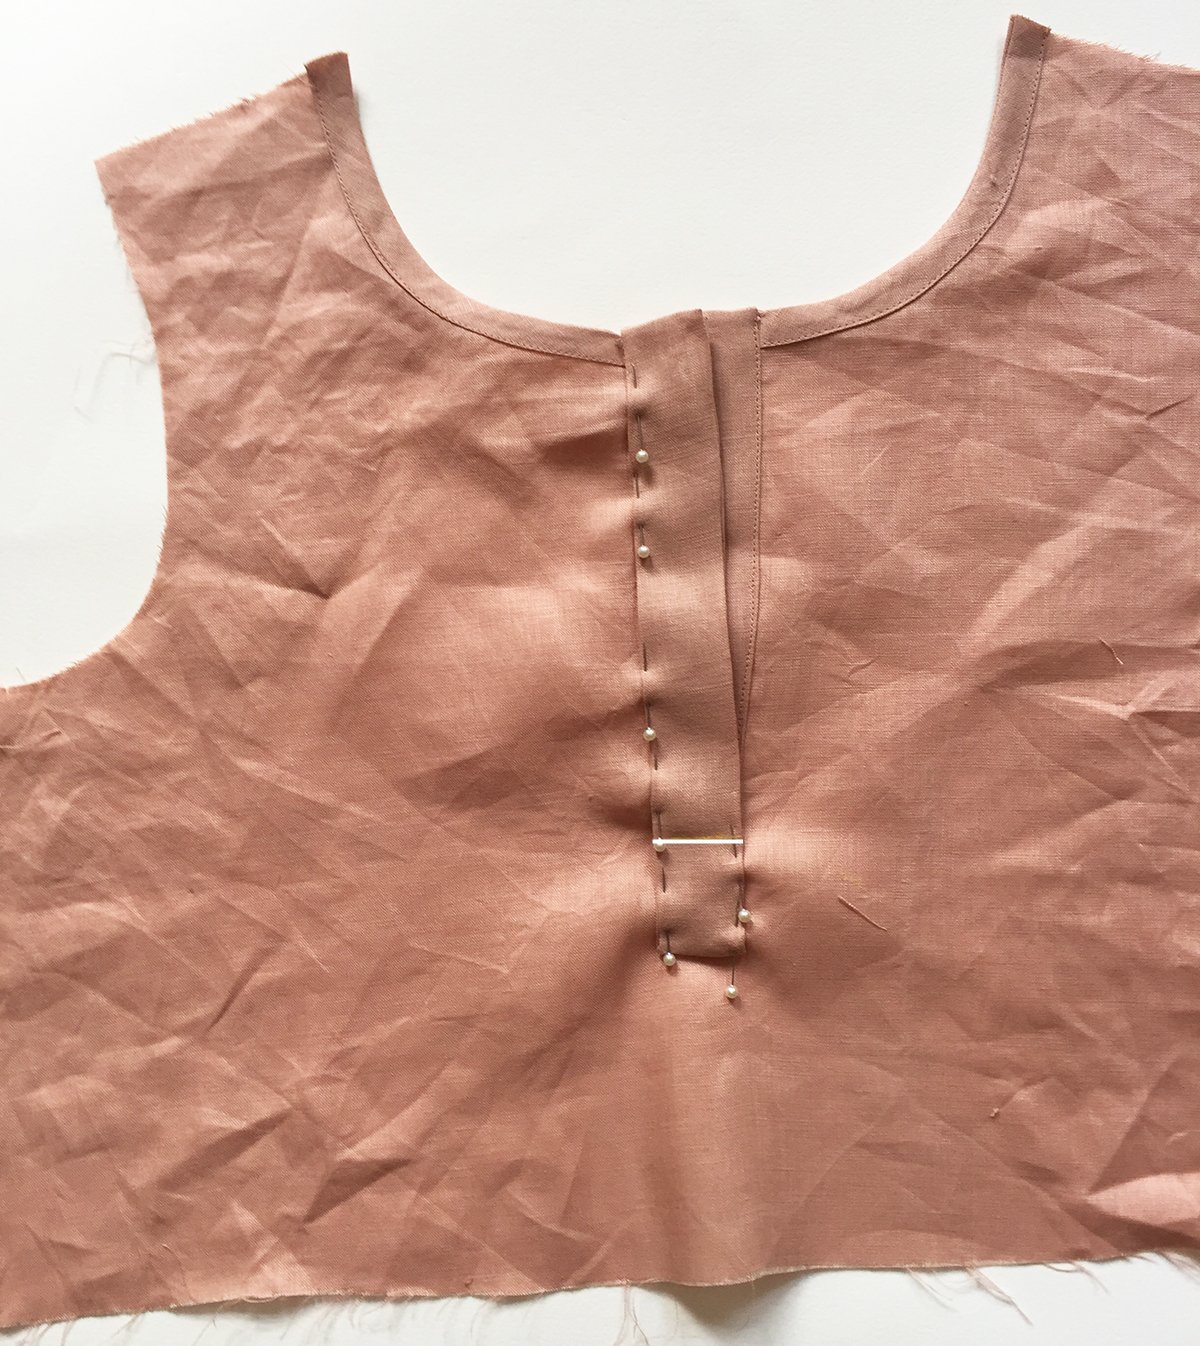
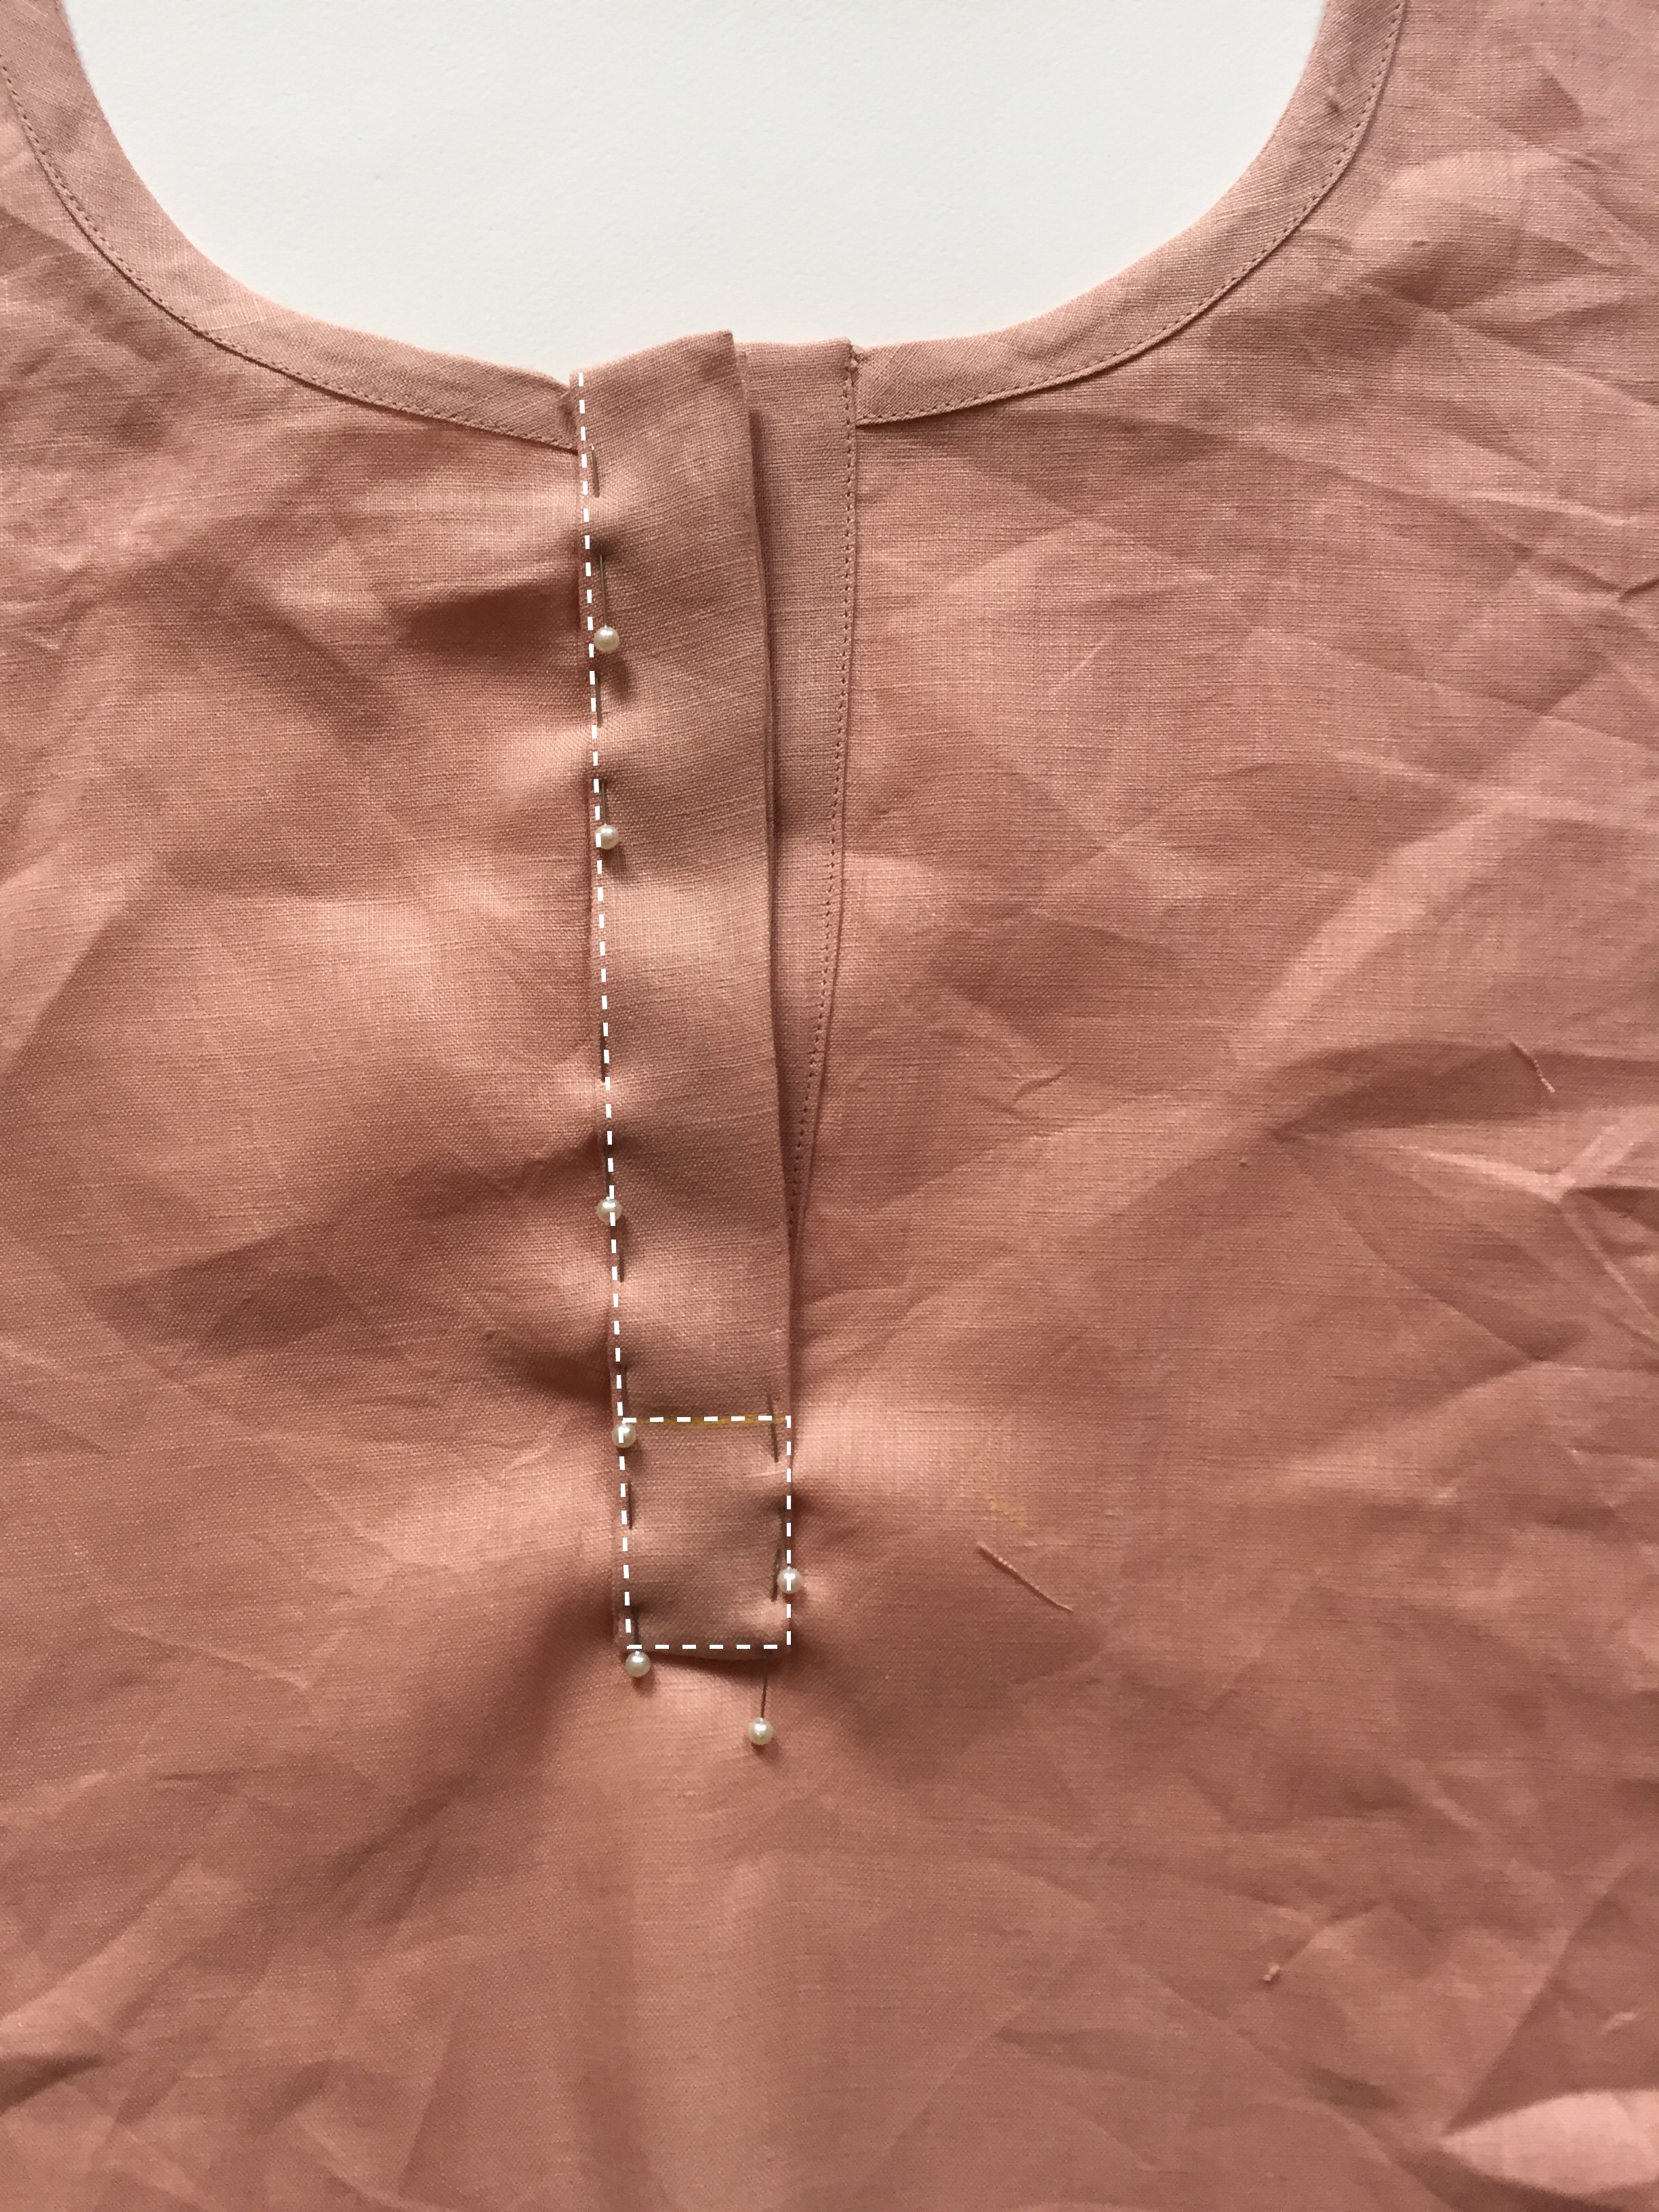
Give the PLACKET [5] a good press and then pin in place. You will want to be pinning through both sections of the top placket and ensuring the fold is covering the stitch line underneath. 

Mark a horizontal line across the PLACKET [5] 5cm (2in) up from the bottom of the PLACKET [5]. 

Carefully stitch the PLACKET [5] in place, through all the layers.

I hope this tutorial gives you the confidence to give it a go!

Happy sewing,

Emily


RESOURCES MENTIONED IN THIS ISSUE

  • Peppermint pleated dress pattern can be found here.


For more issues of the Q & A series, you can check out the archive here.


WHAT YOU’VE BEEN MAKING


MORE POSTS IN THE SERIES