
THE Q & A SERIES
Sway back adjustments
Hello, I just bought a copy of the malvern culottes pattern, and it dawned on me that while I'll probably have to make a full seat or swayback adjustment, I have no clue how to do any alterations when pleats are involved. I didn't see resources for this question in your tutorial section so I was wondering if you could point me towards the answer on this one.
Any info is helpful
Thanks,
Sarah B

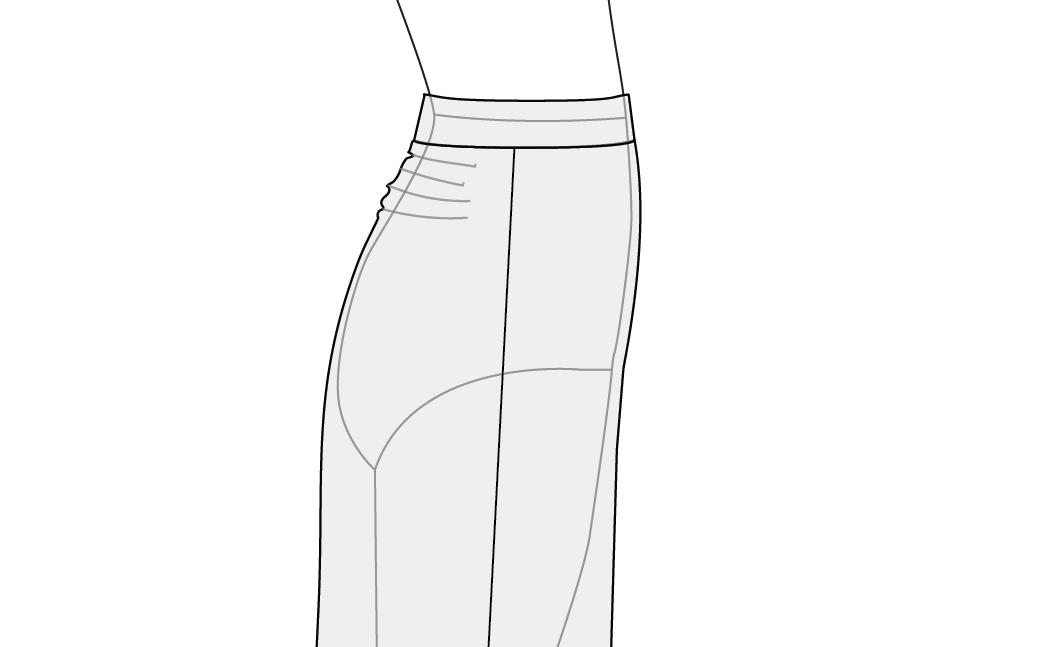
The Malvern culottes are a wide-leg pattern with a relaxed, almost trouser-like silhouette. They sit at the natural waist, feature front pleats, and have a deliberately low crotch, which is a big part of what gives them their easy, effortless drape. Because the crotch sits very low on the body (which is part of the style of culottes), your regular fitting “issues” may not be a problem with this pattern (if you do want to shorten the crotch depth on this pattern, we have a tutorial about how to do that here).
Basically, a low crotch and lots of pleats provide a lot of give that a more fitted pair of pants will not. For example, I almost always have to shorten the front crotch seam when I am making pants for myself. When it comes to the Malverns, I don’t need to do this. If you think you may still need to make one of these adjustments (or both), thats not a problem. In this tutorial, I will show you how to make a swayback adjustment on the Malvern culottes and next week I will show you how to do a full seat adjustment.
SWAYBACK ADJUSTMENT
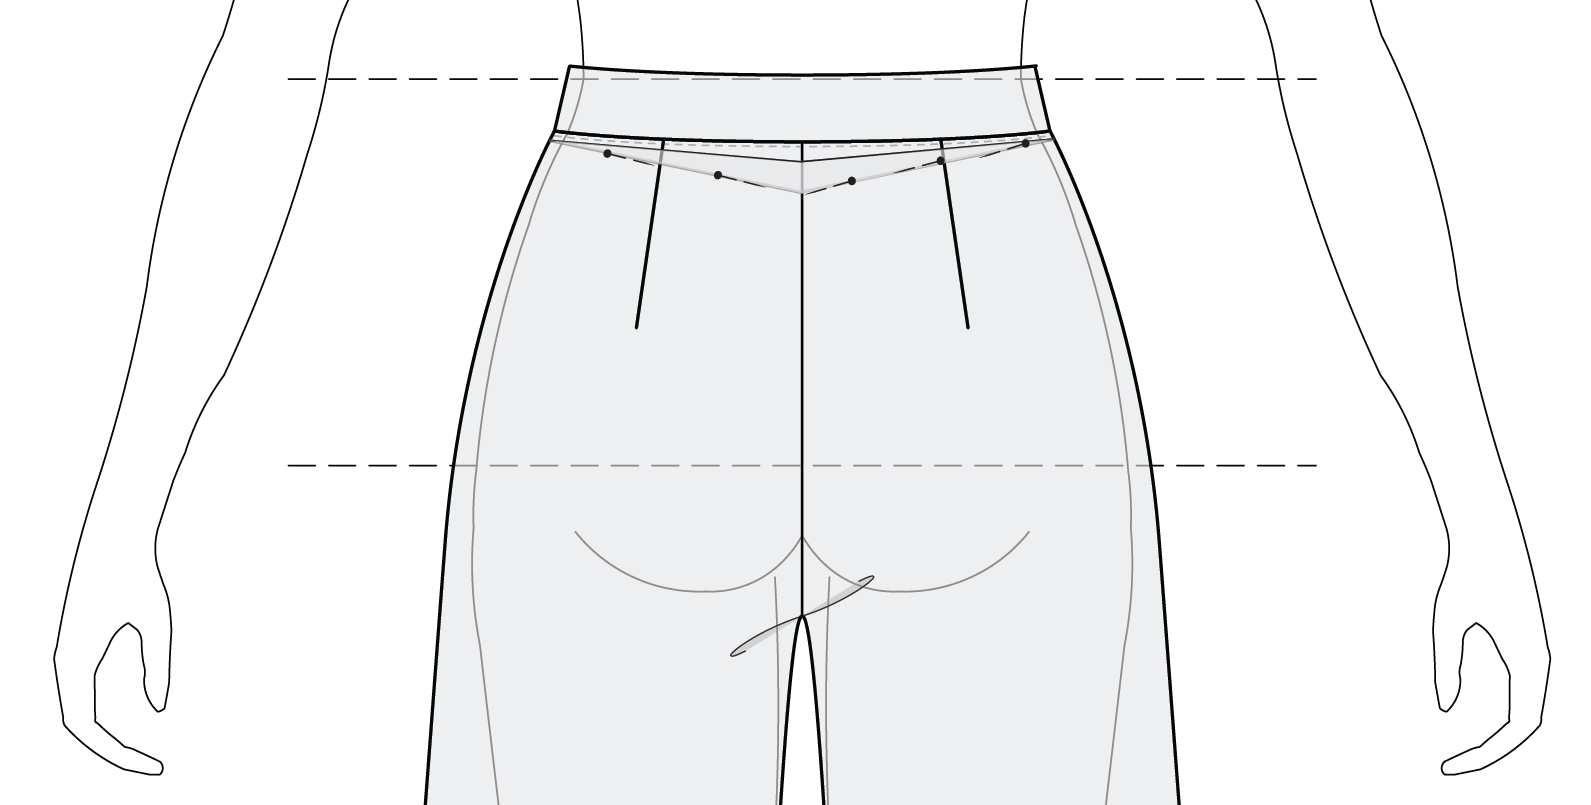
A swayback (sometimes called a hollow back) is a posture characteristic where the lower back curves inward more than average. It's very common, and if you have one, you've likely noticed the same fitting issue appearing across multiple garments: excess fabric bunching or pooling just below the waistband at the centre back of pants, skirts, and sometimes even dresses.
How to know if you need this adjustment
You may need to make this adjustment if you notice excess fabric pooling below the waistband at the centre back of a garment. You may notice this on pants, dresses, or even tops. We’ll talk about how to deal with it on pants so that it applies to the Malvern culottes.
The best way to know if you need to make this adjustment is by making a toile. Although for many, if you have made enough garments, you will start to realise you often have to make the same adjustments across patterns and are happy to go ahead and make the adjustment without making a toile.
If you have a toile you can:
Stand in front of a full length mirror. Using another mirror or a handheld mirror, look at the back of the toile. It's best to avoid using only one mirror and turning around as the garment will twist so you won't get an accurate representation.If there is excess fabric pooling below the waistband, then you may need to remove it for a better fit.
Preparing the adjustment
If you are able to, roughly pinch out vertically at the CENTRE BACK, just below the waistband and measure how much needs to be removed.
This can be difficult to do, just try your best. Then take the toile off, pin out the excess (Take the amount required at the CENTRE BACK to nothing at the side seams).
If you are unable to pinch out at the back, guesstimate how much you need to remove, take the toile off, pin out that amount and then try on and repeat the process.
Making the adjustment on the pattern
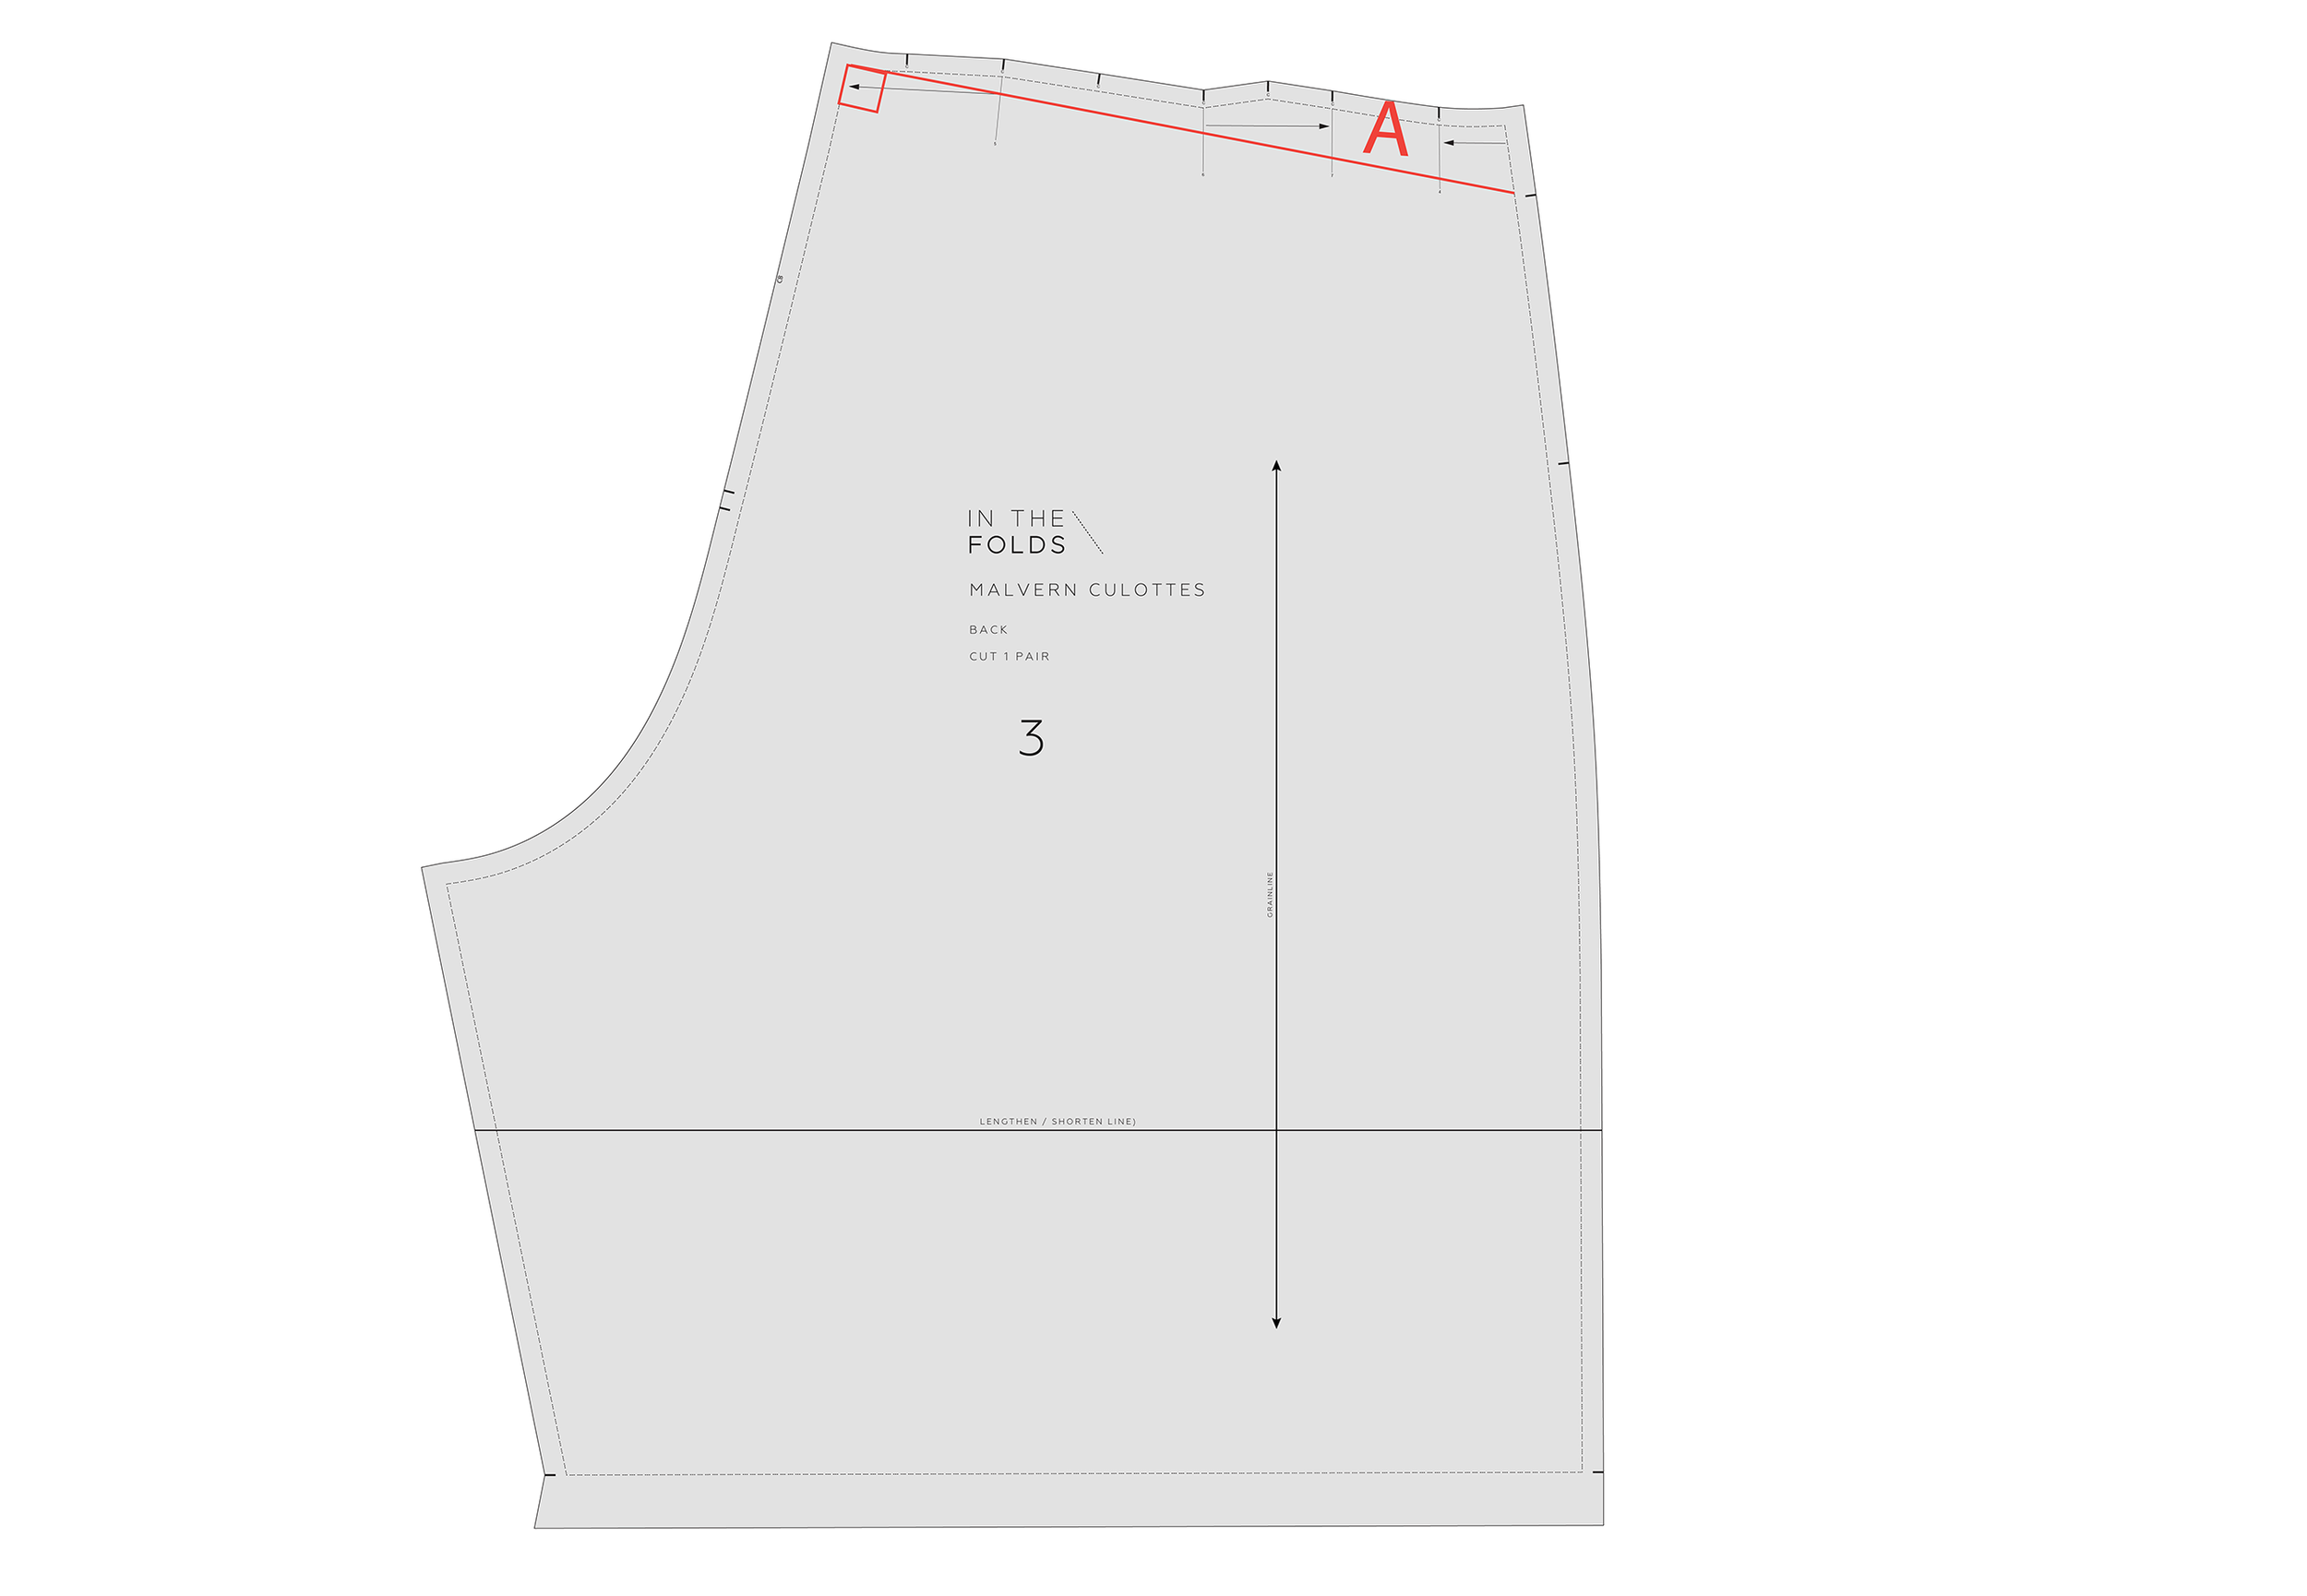
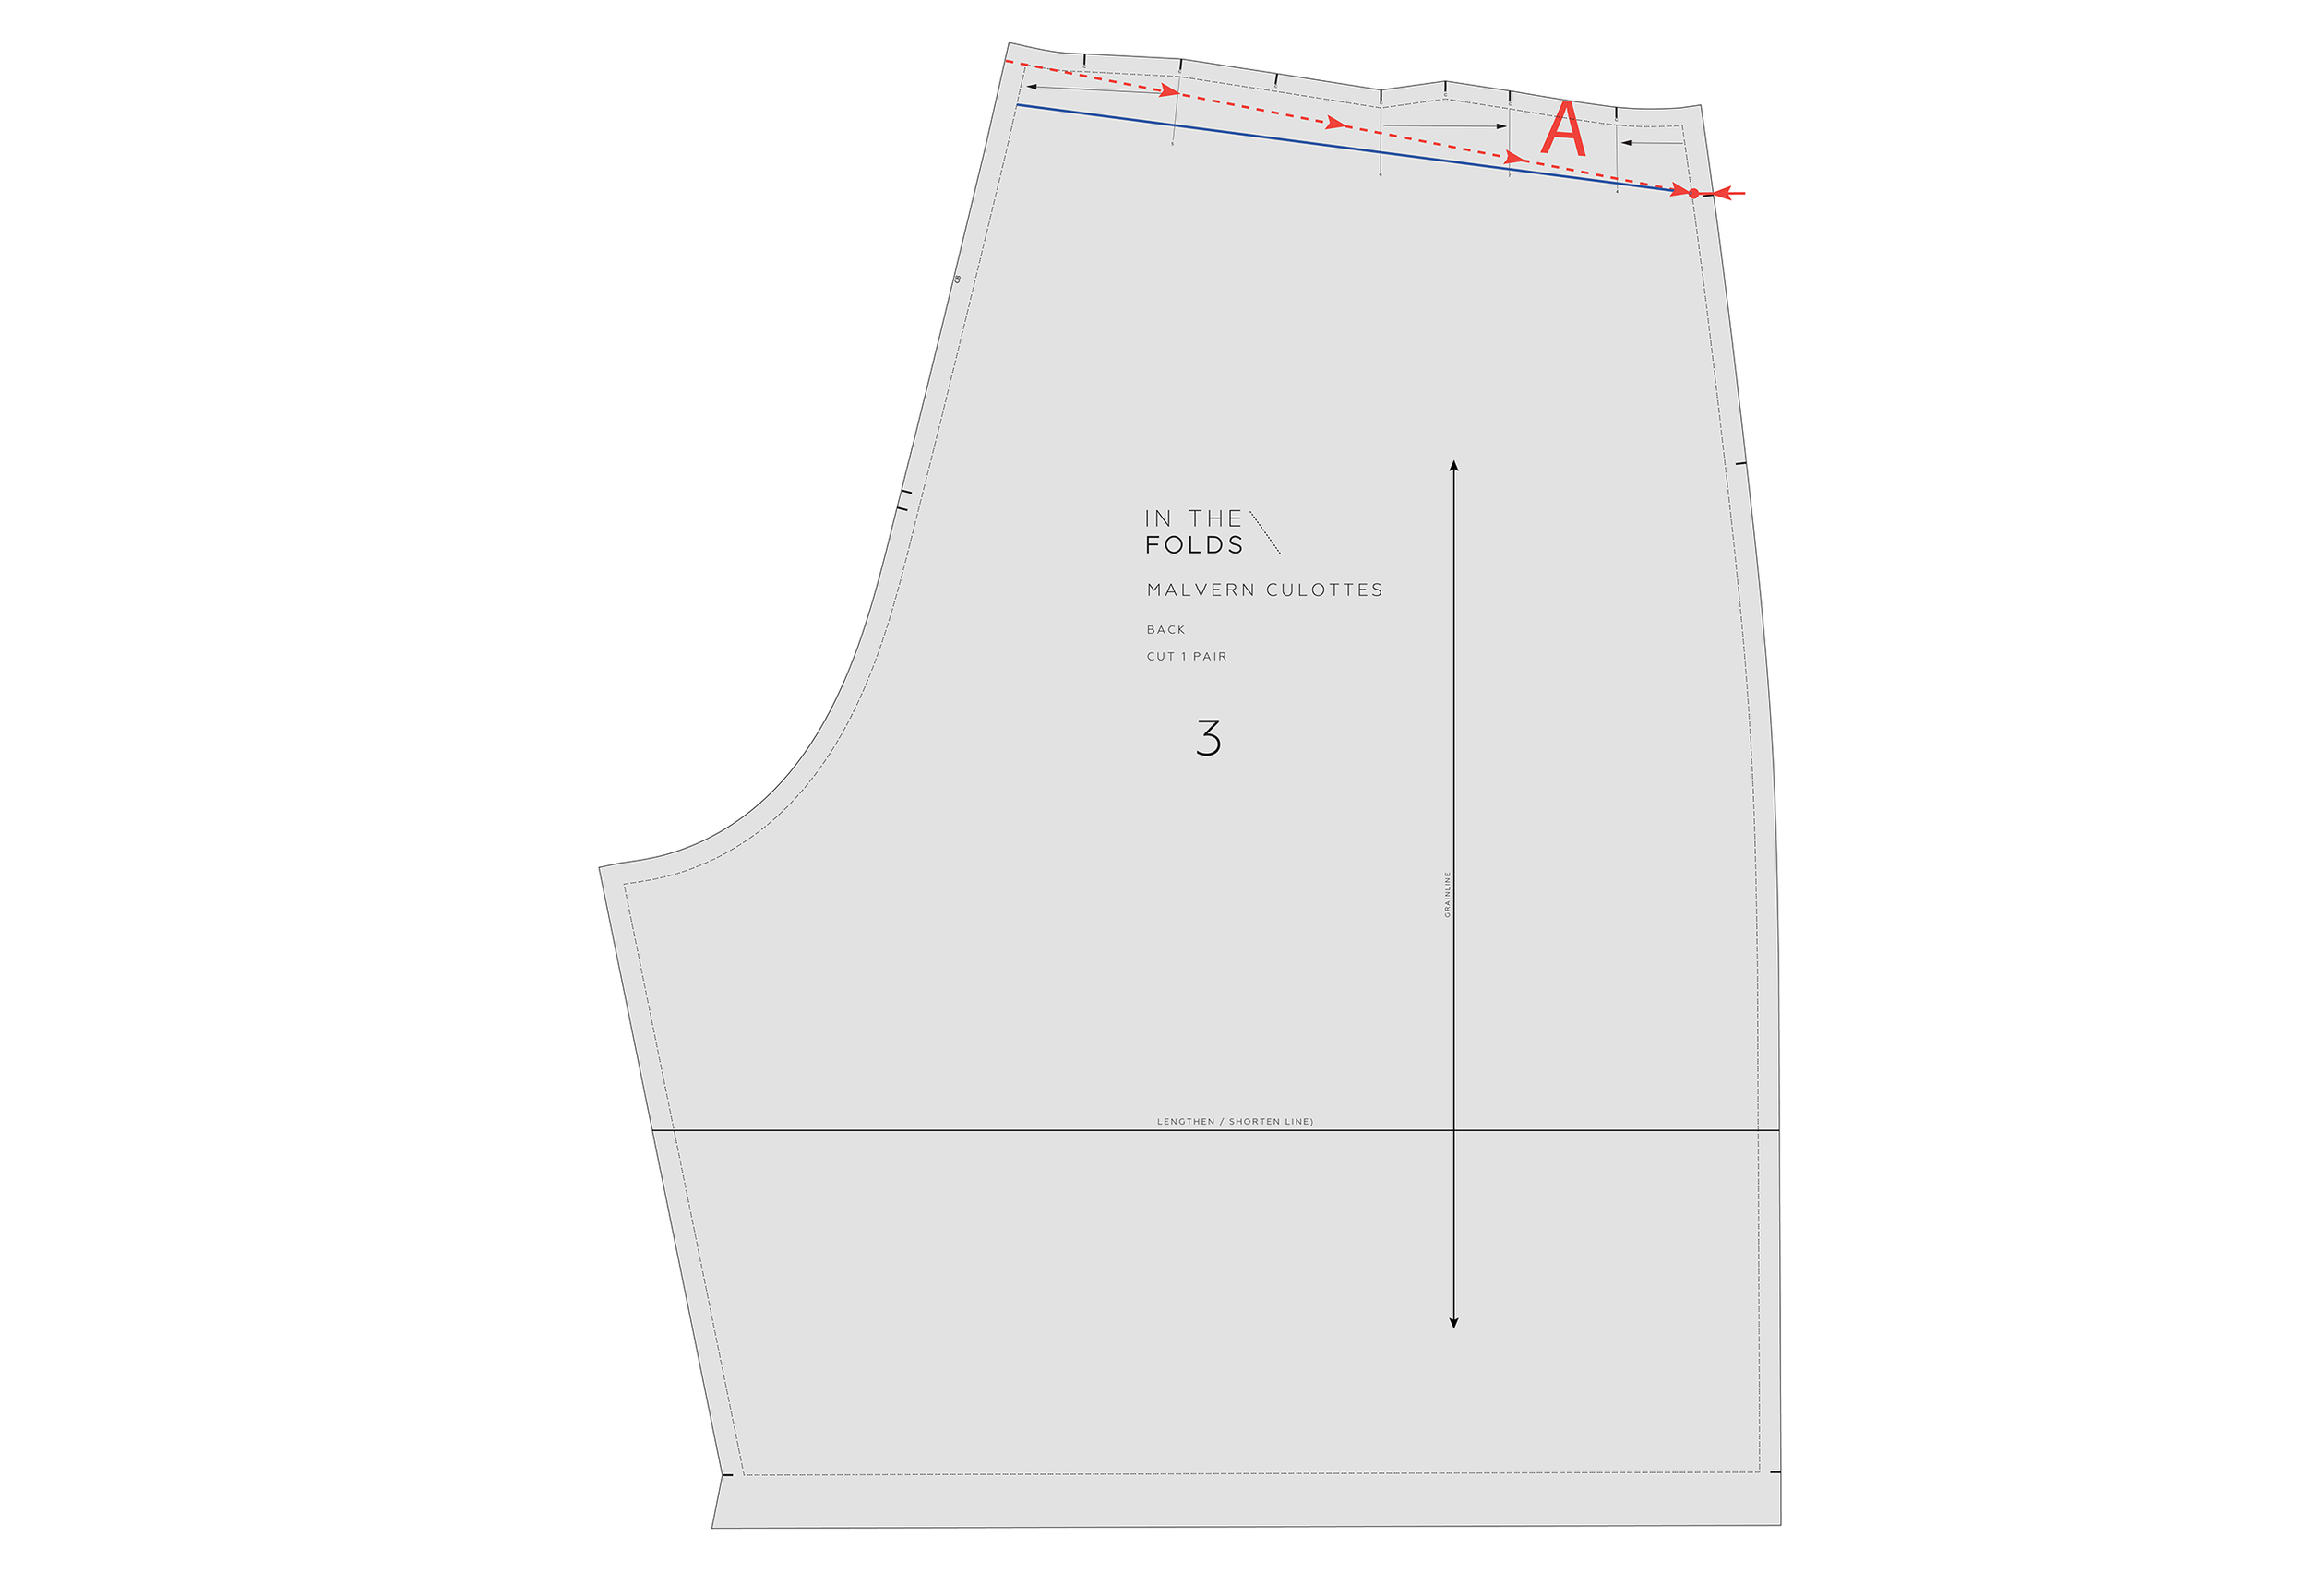
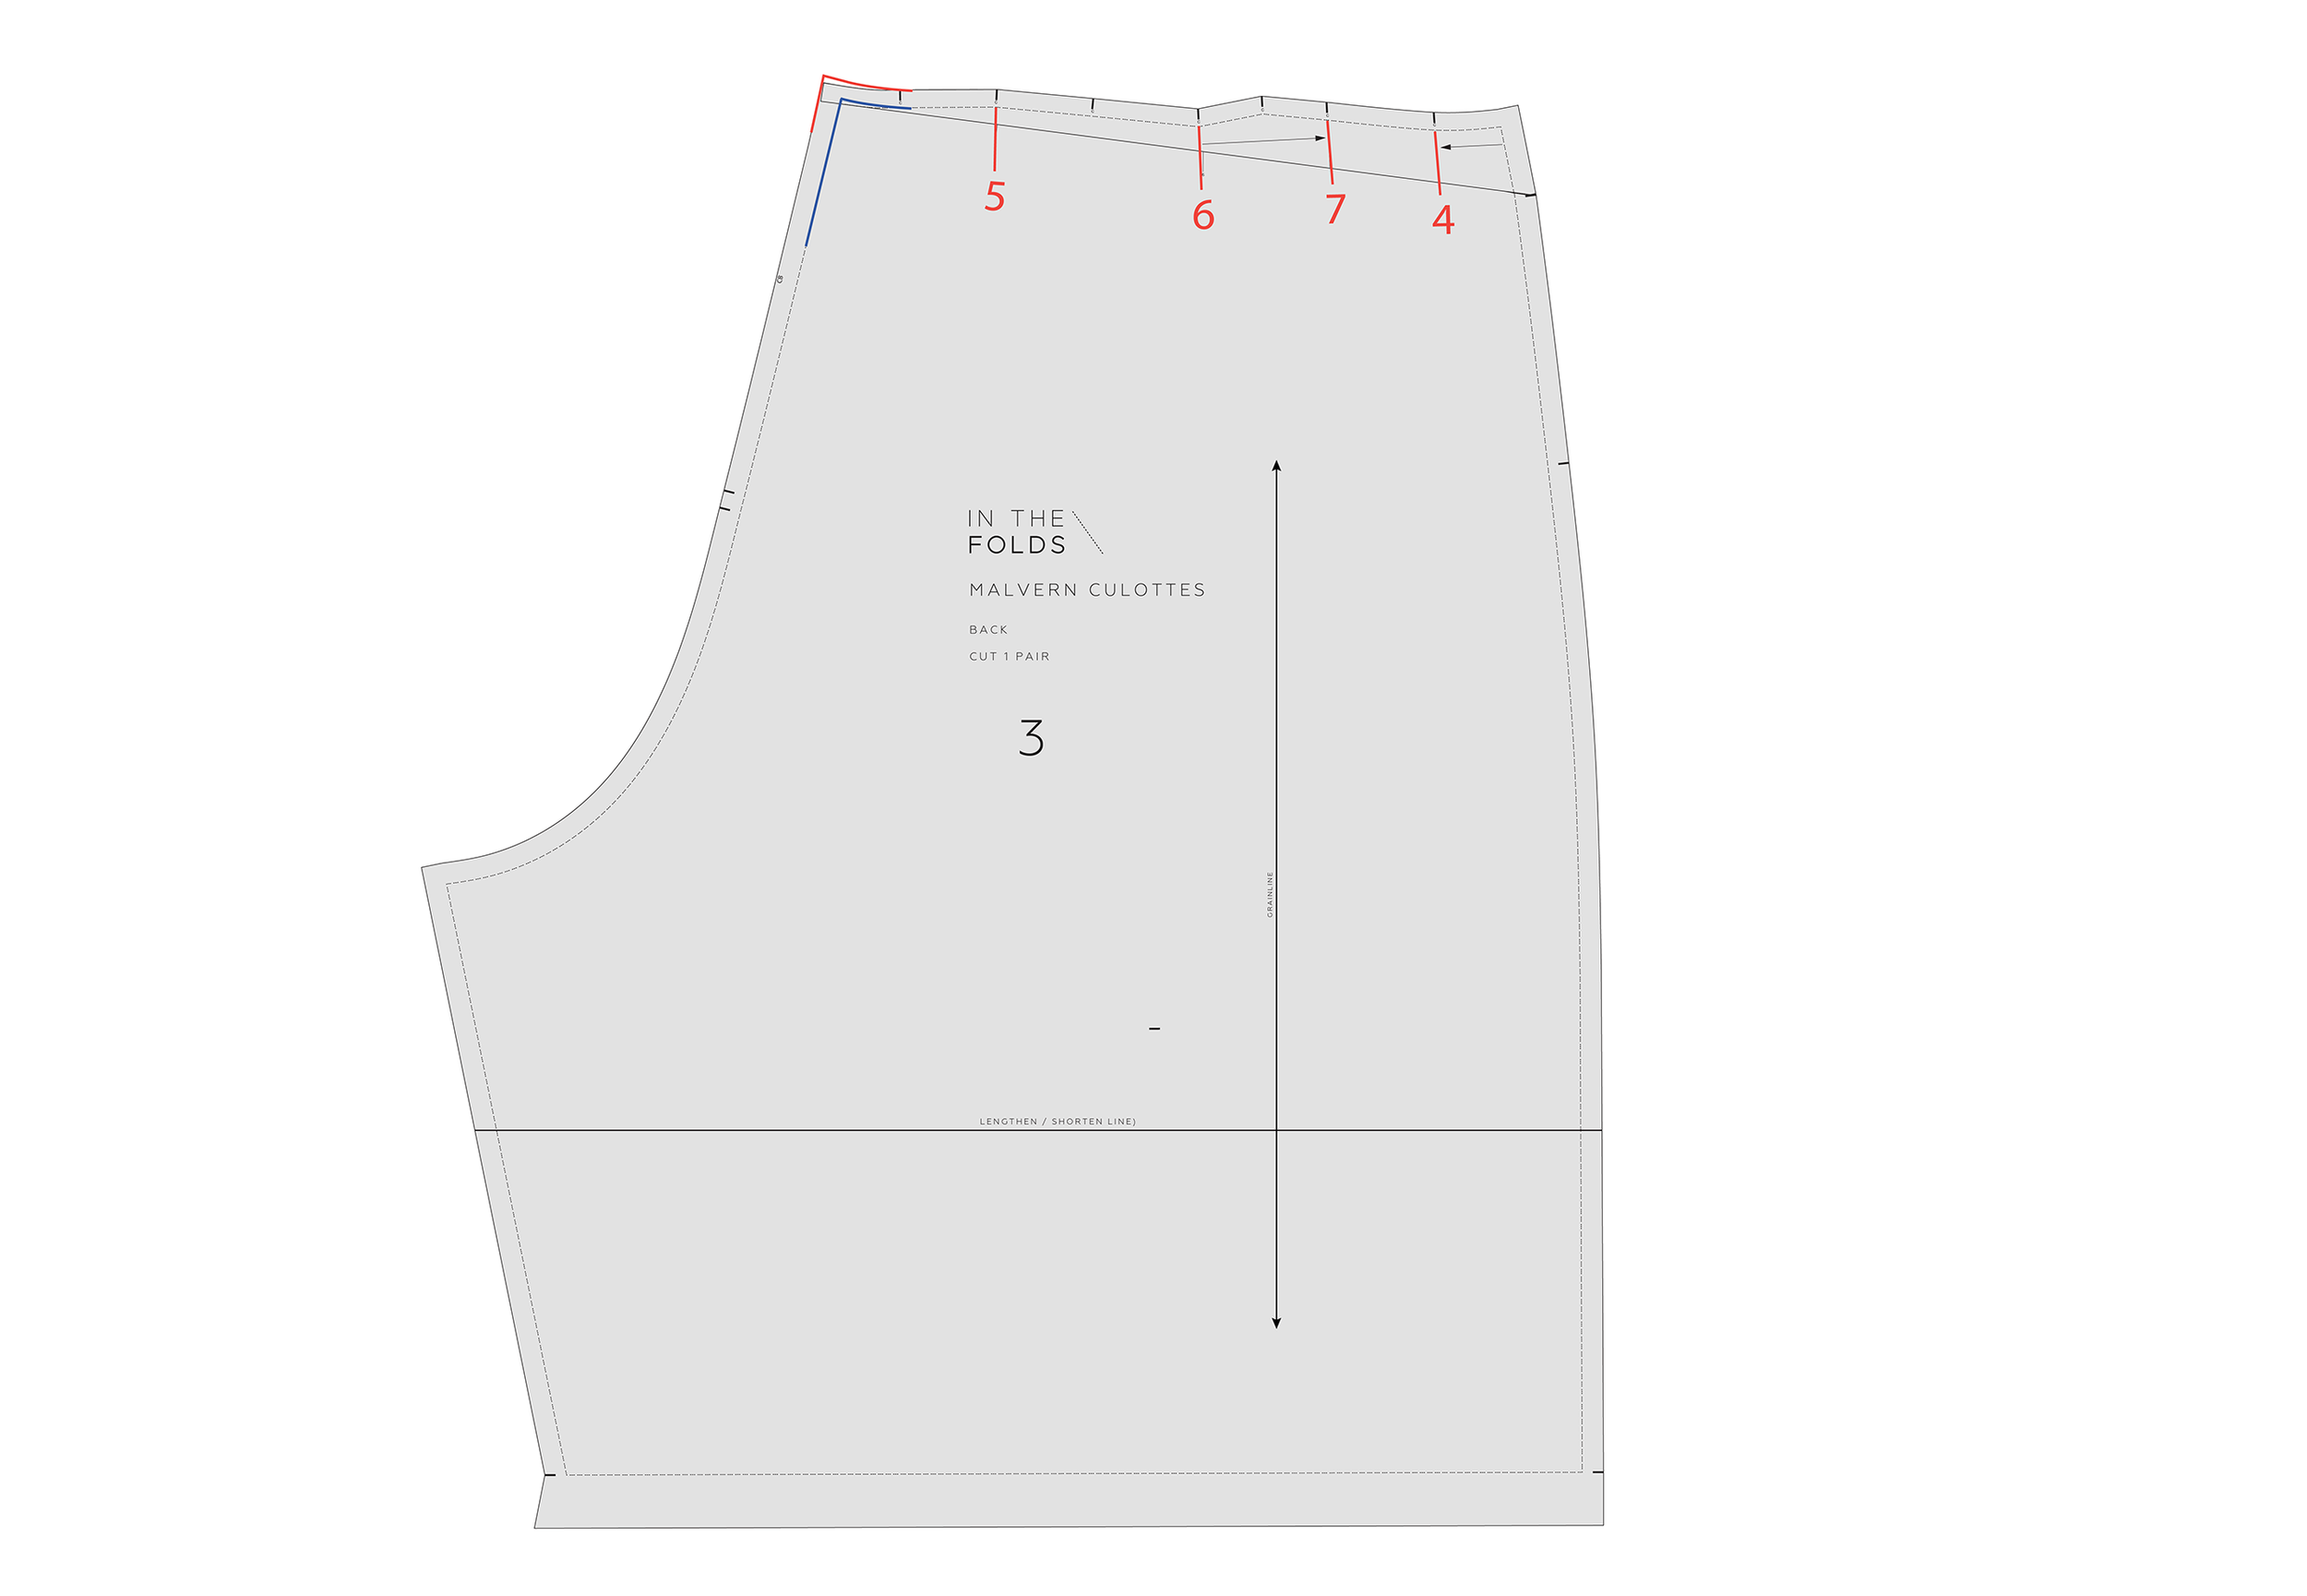
STEP 1
Starting at the top of the CENTRE BACK STITCH LINE, draw a line to the side seam STITCH LINE perpendicular to CENTRE BACK. We'll call this line A.
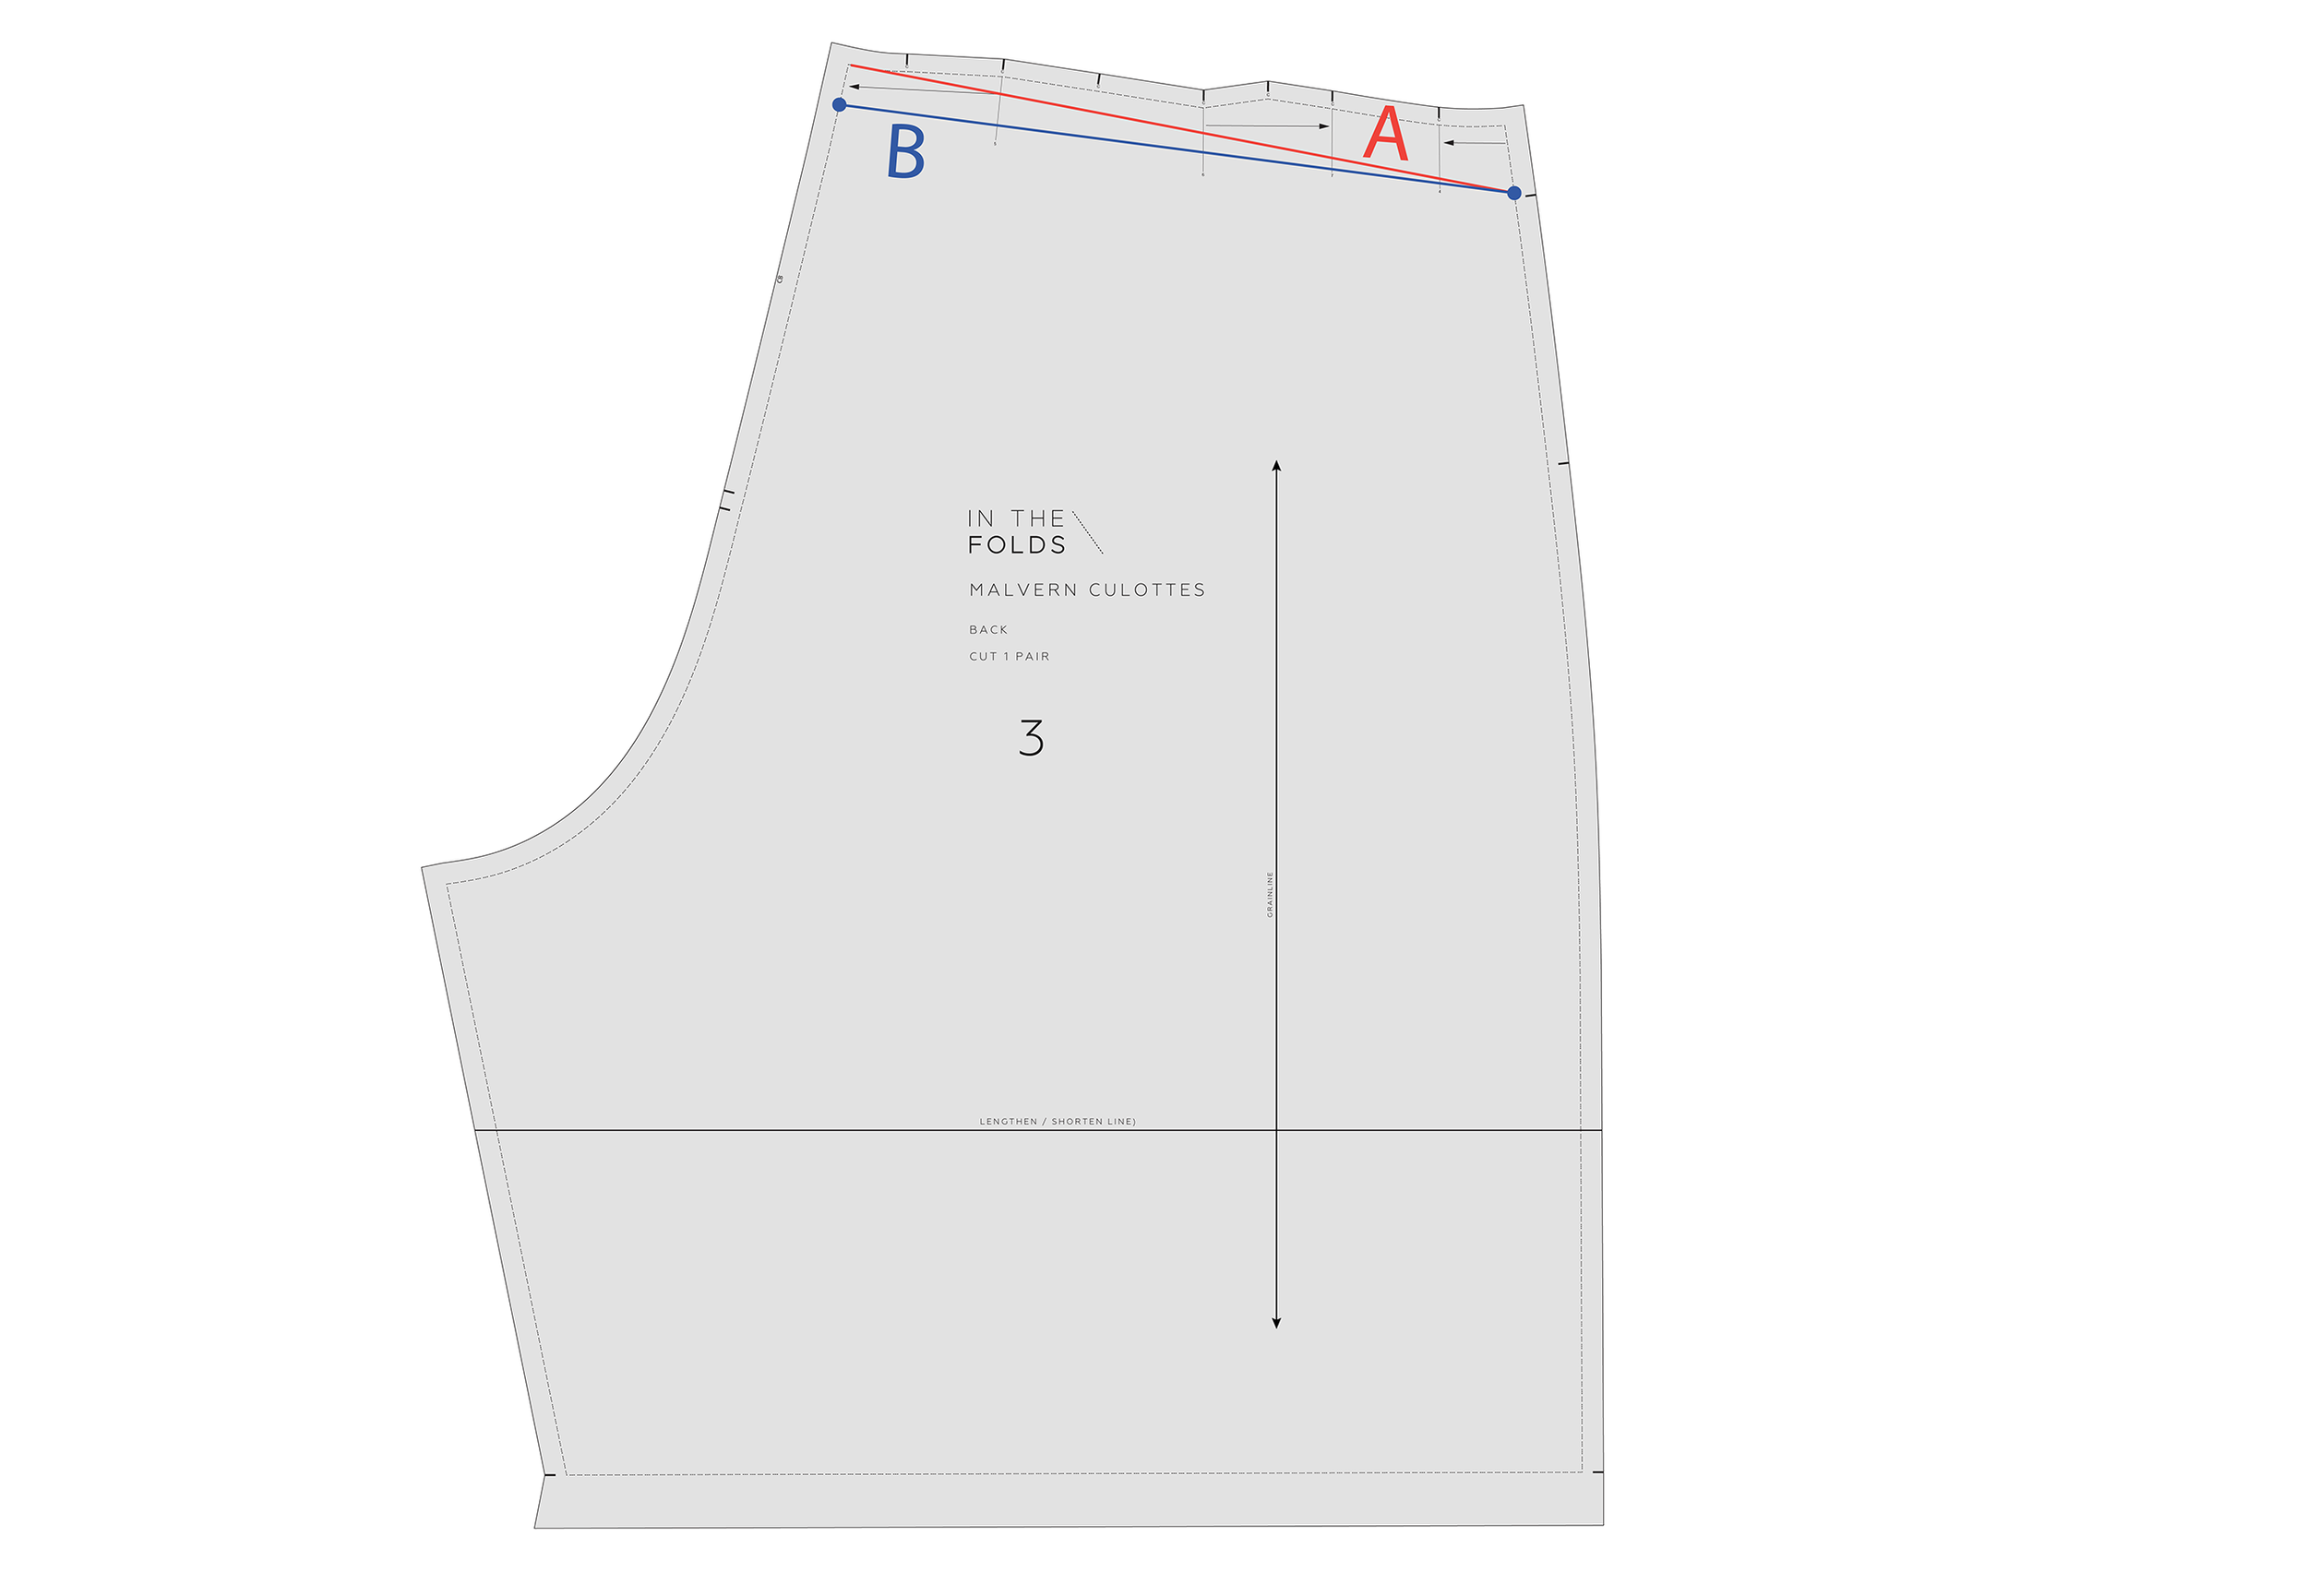
STEP 2
Measure down from the top of the CENTRE BACK STITCH LINE and mark a point at the amount you would like to remove. Draw a straight line to join this point with line A at the side seam. We'll call this line B.
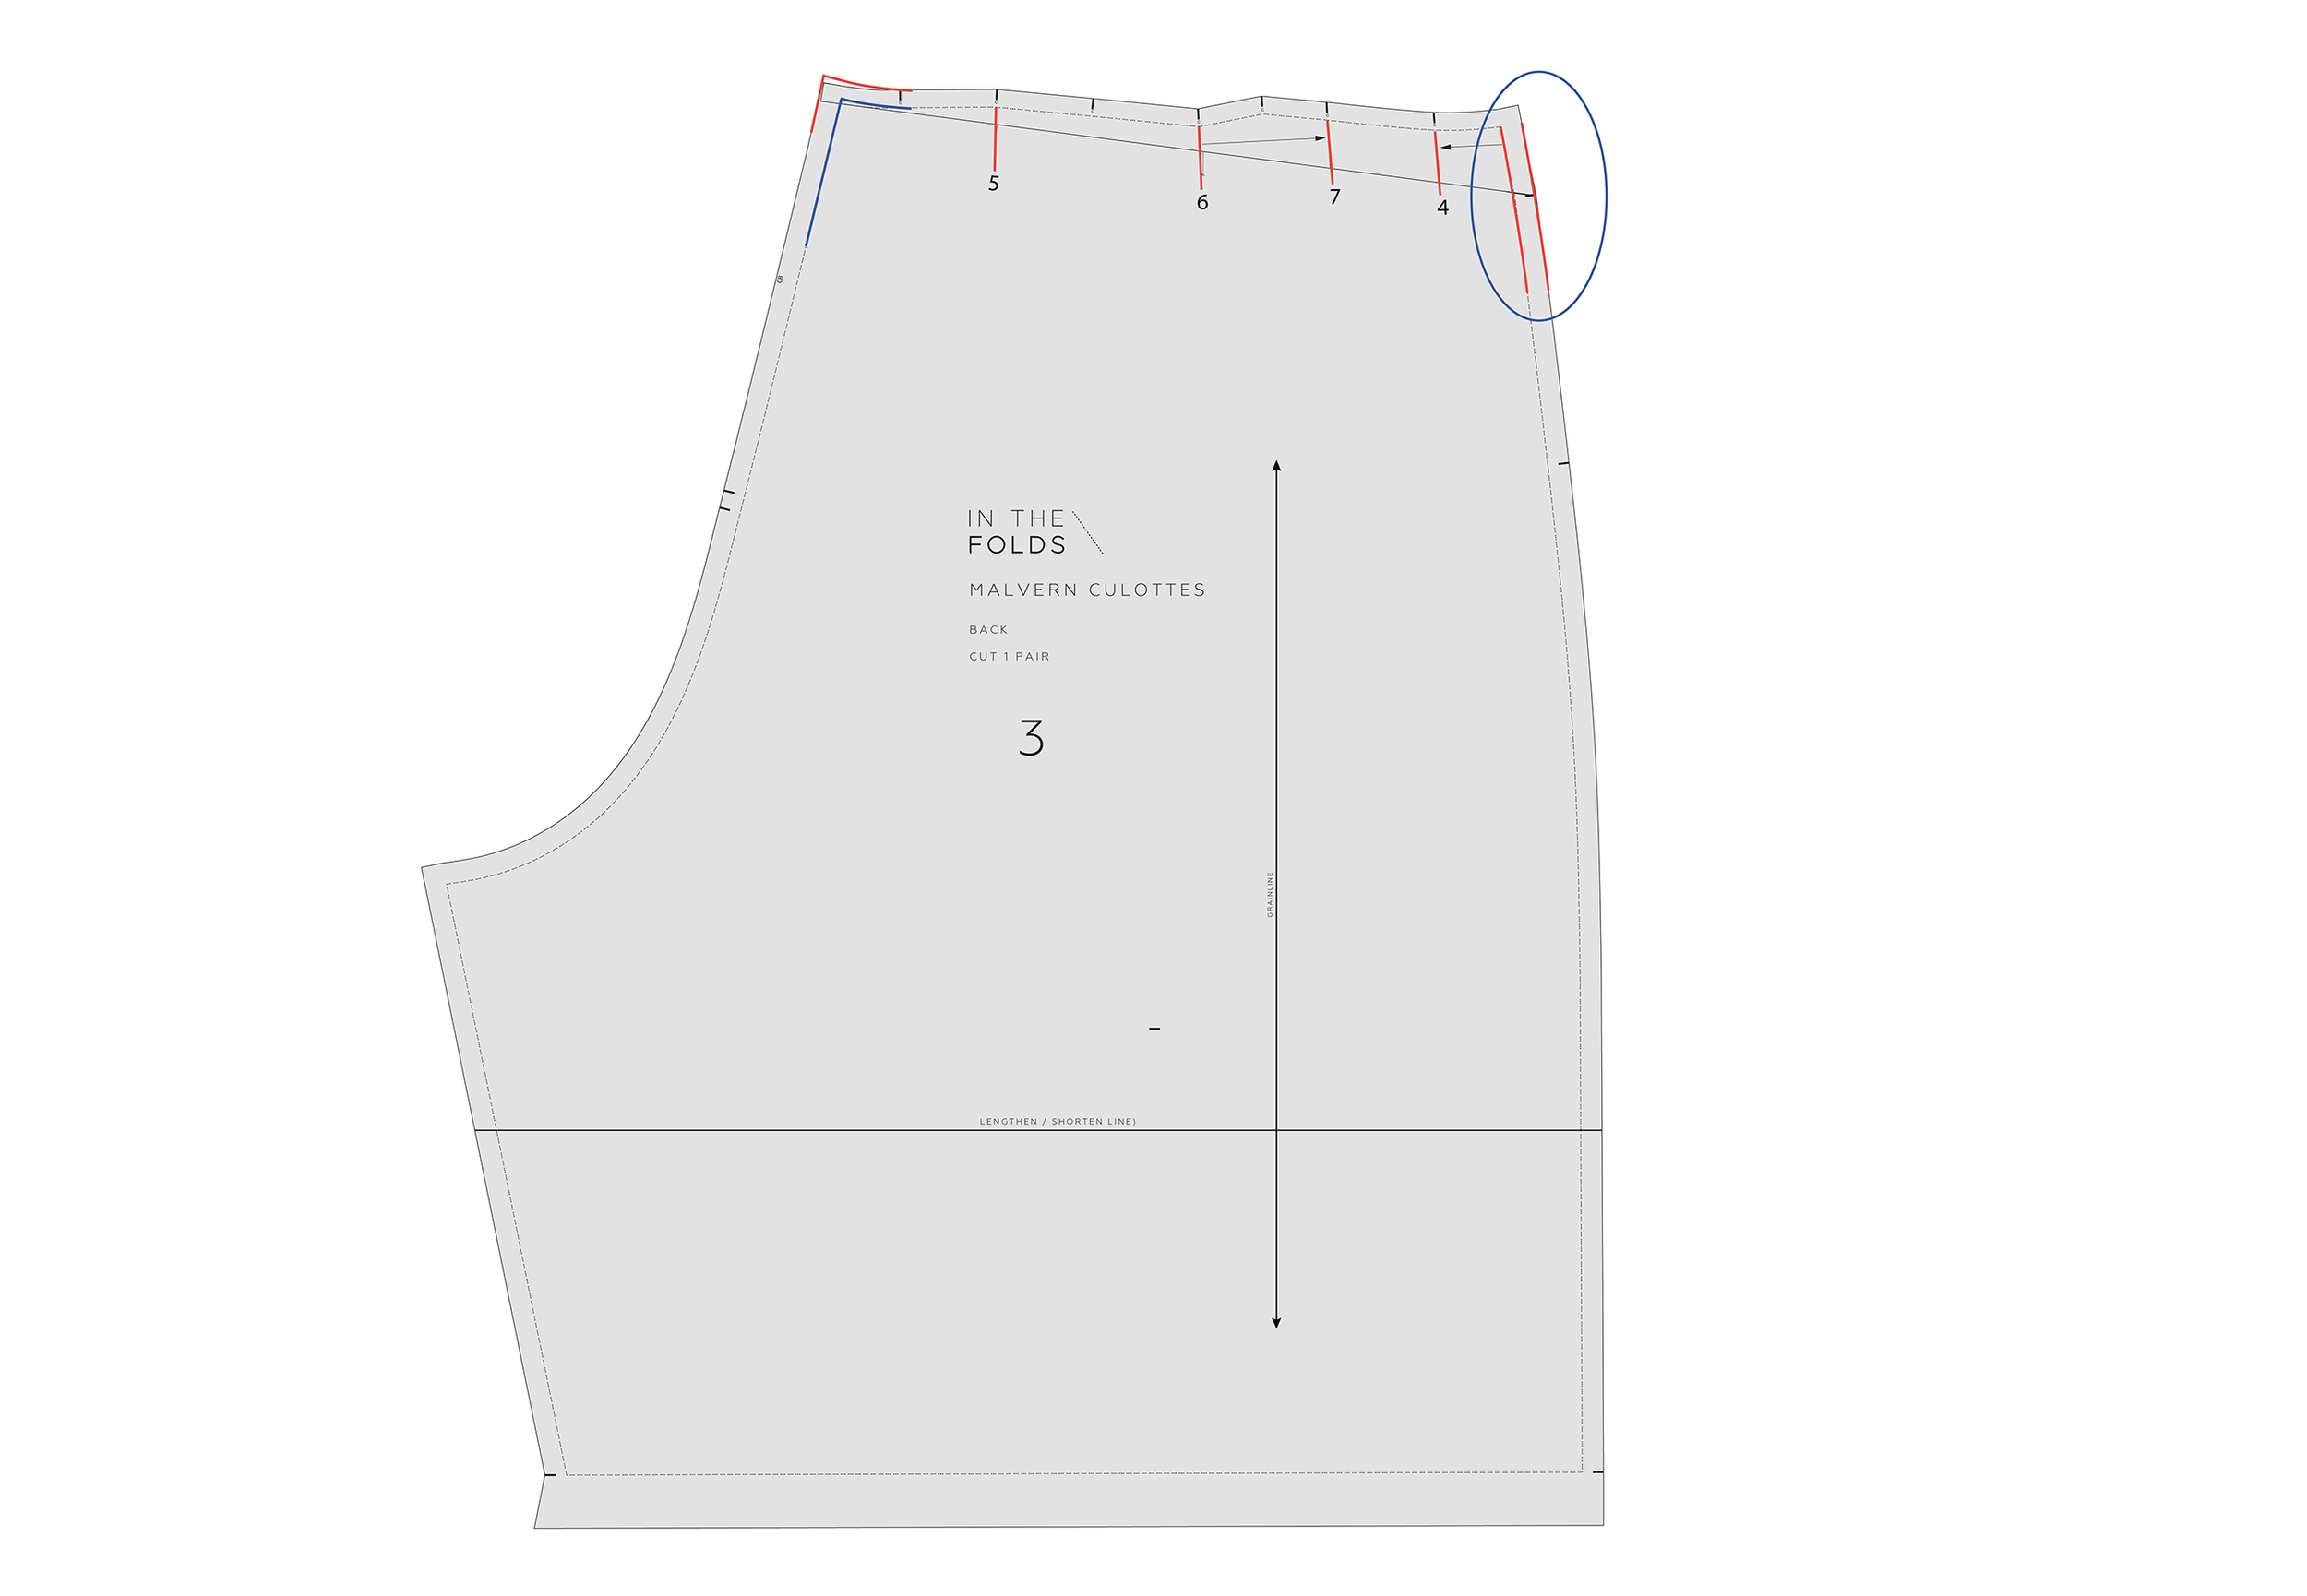
STEP 3
Starting at CENTRE BACK, cut through line A and stop when you reach the side seam stitch line. Cut from the other side of the seam allowance to create a hinge.
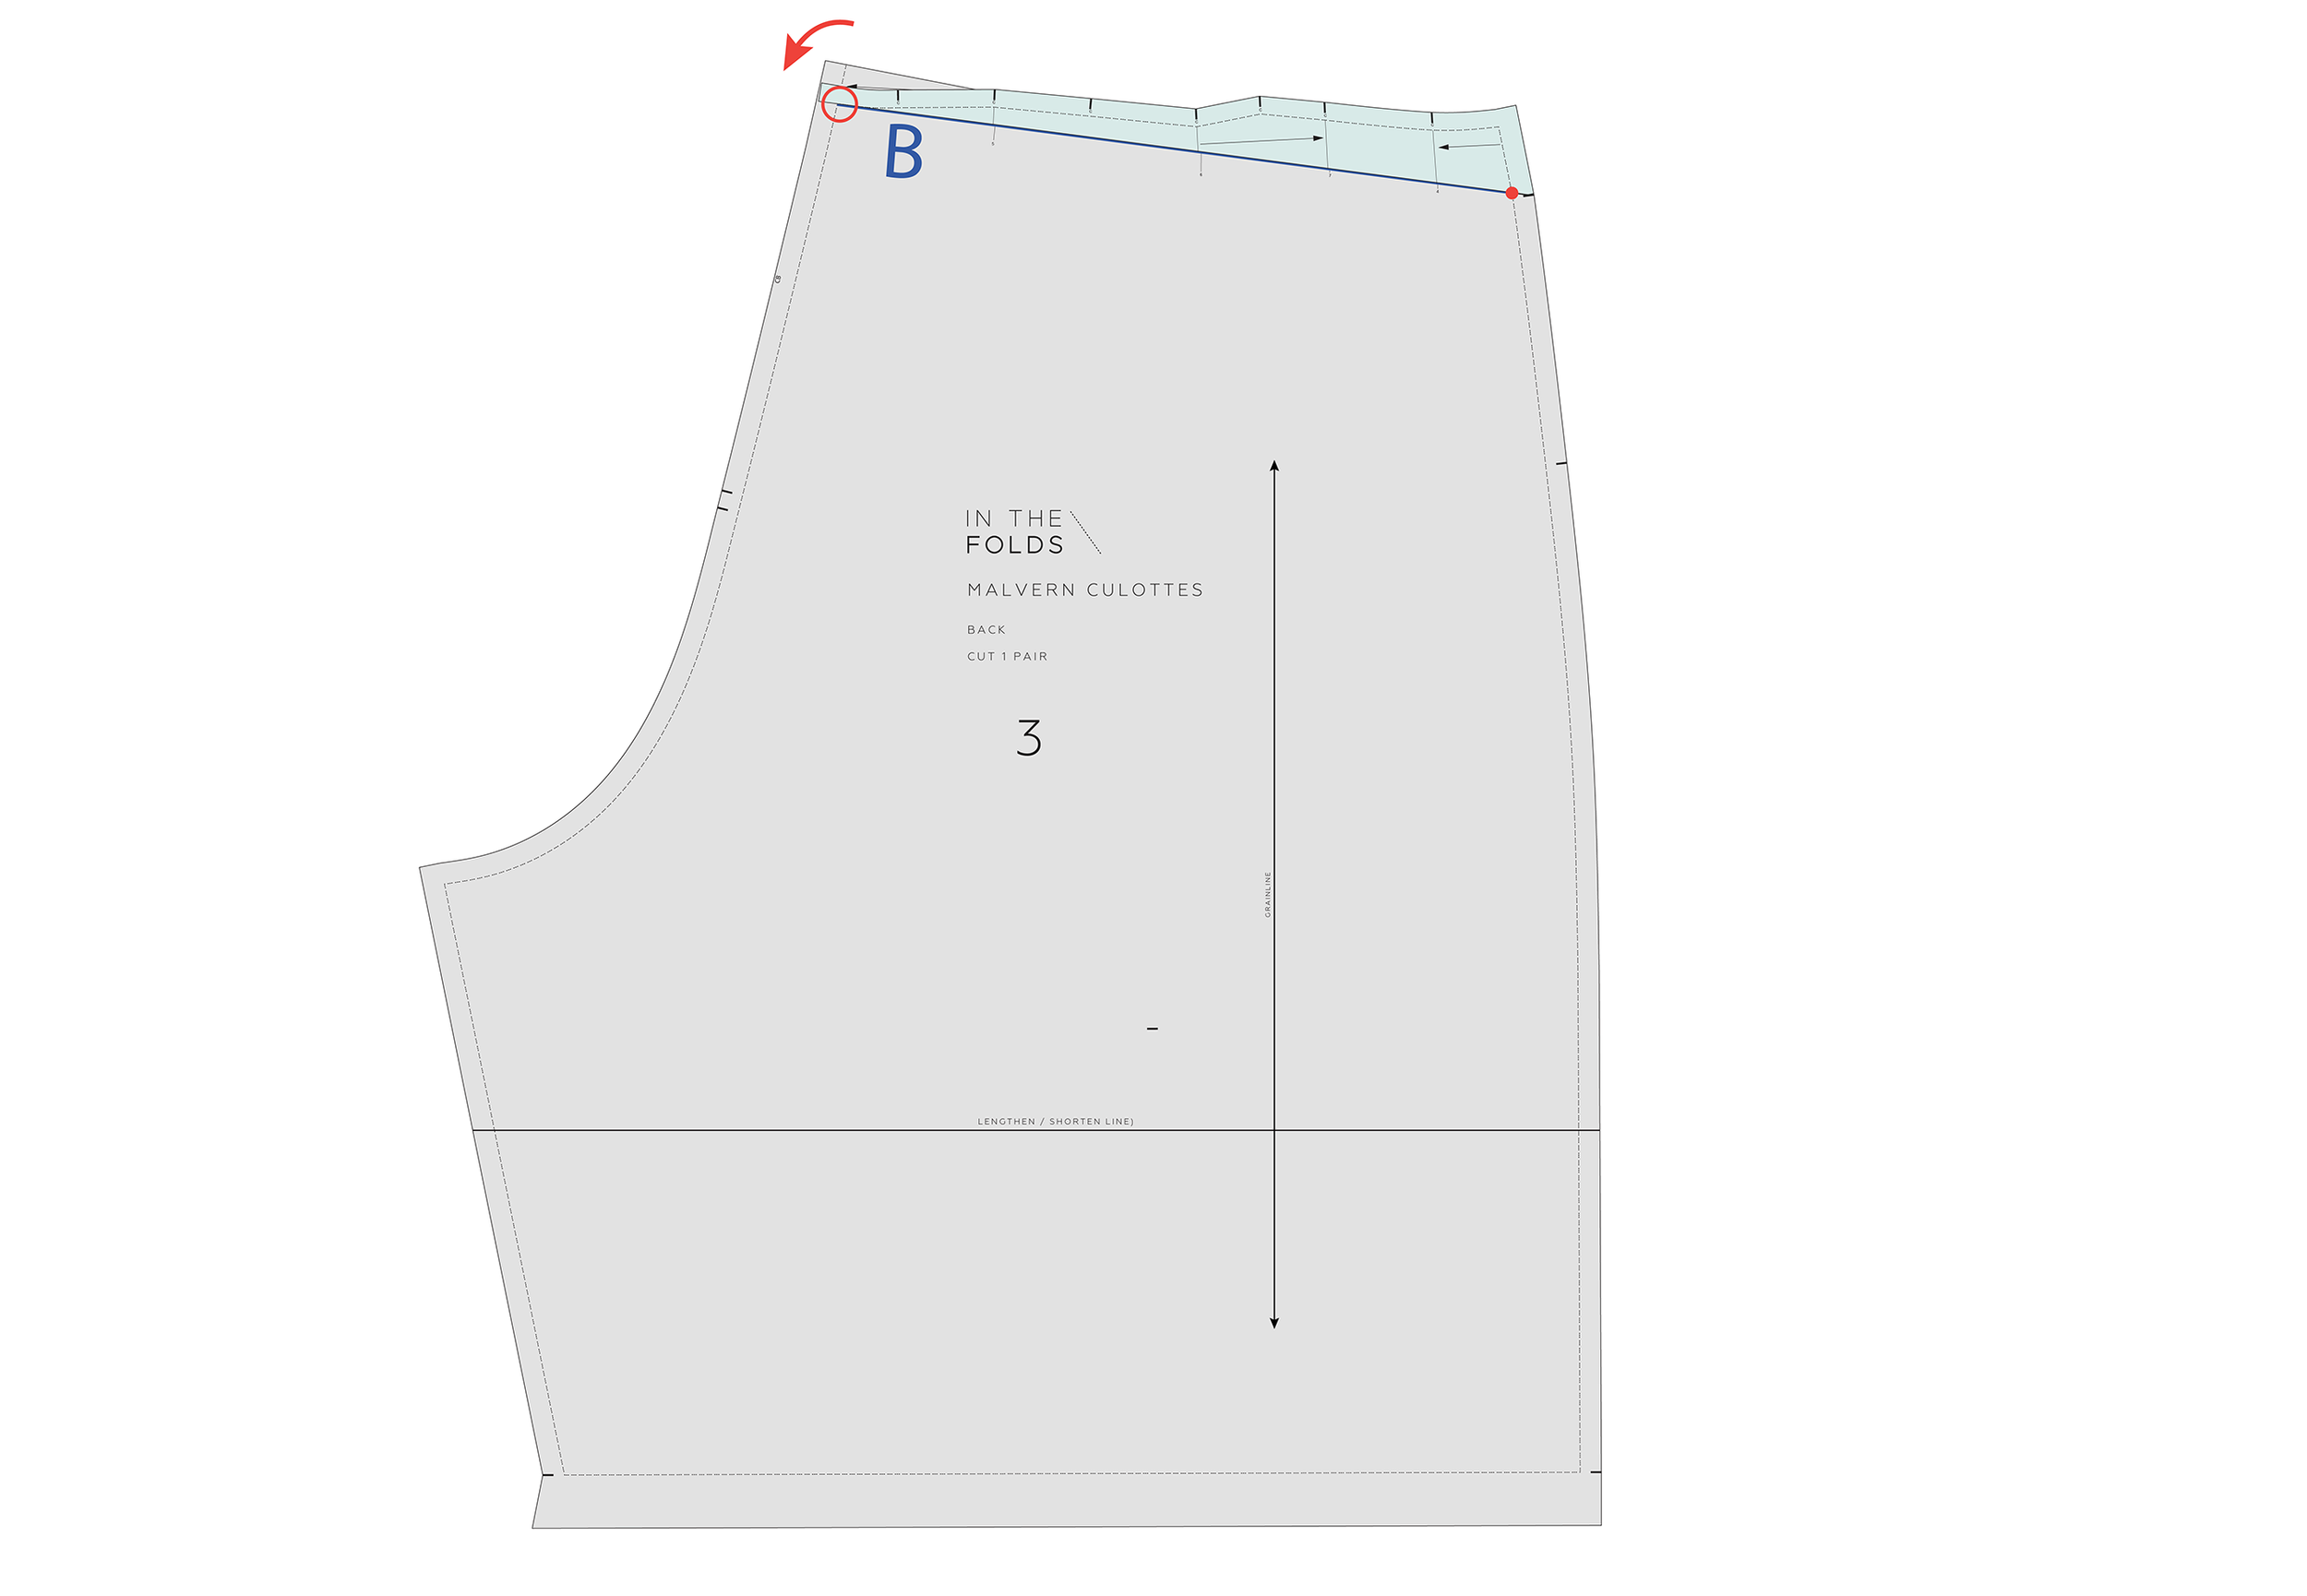
STEP 4
Swing the top section down so that it meets line B at the CENTRE BACK STITCH LINE, using the hinge created in the previous step. Tape or glue in place.
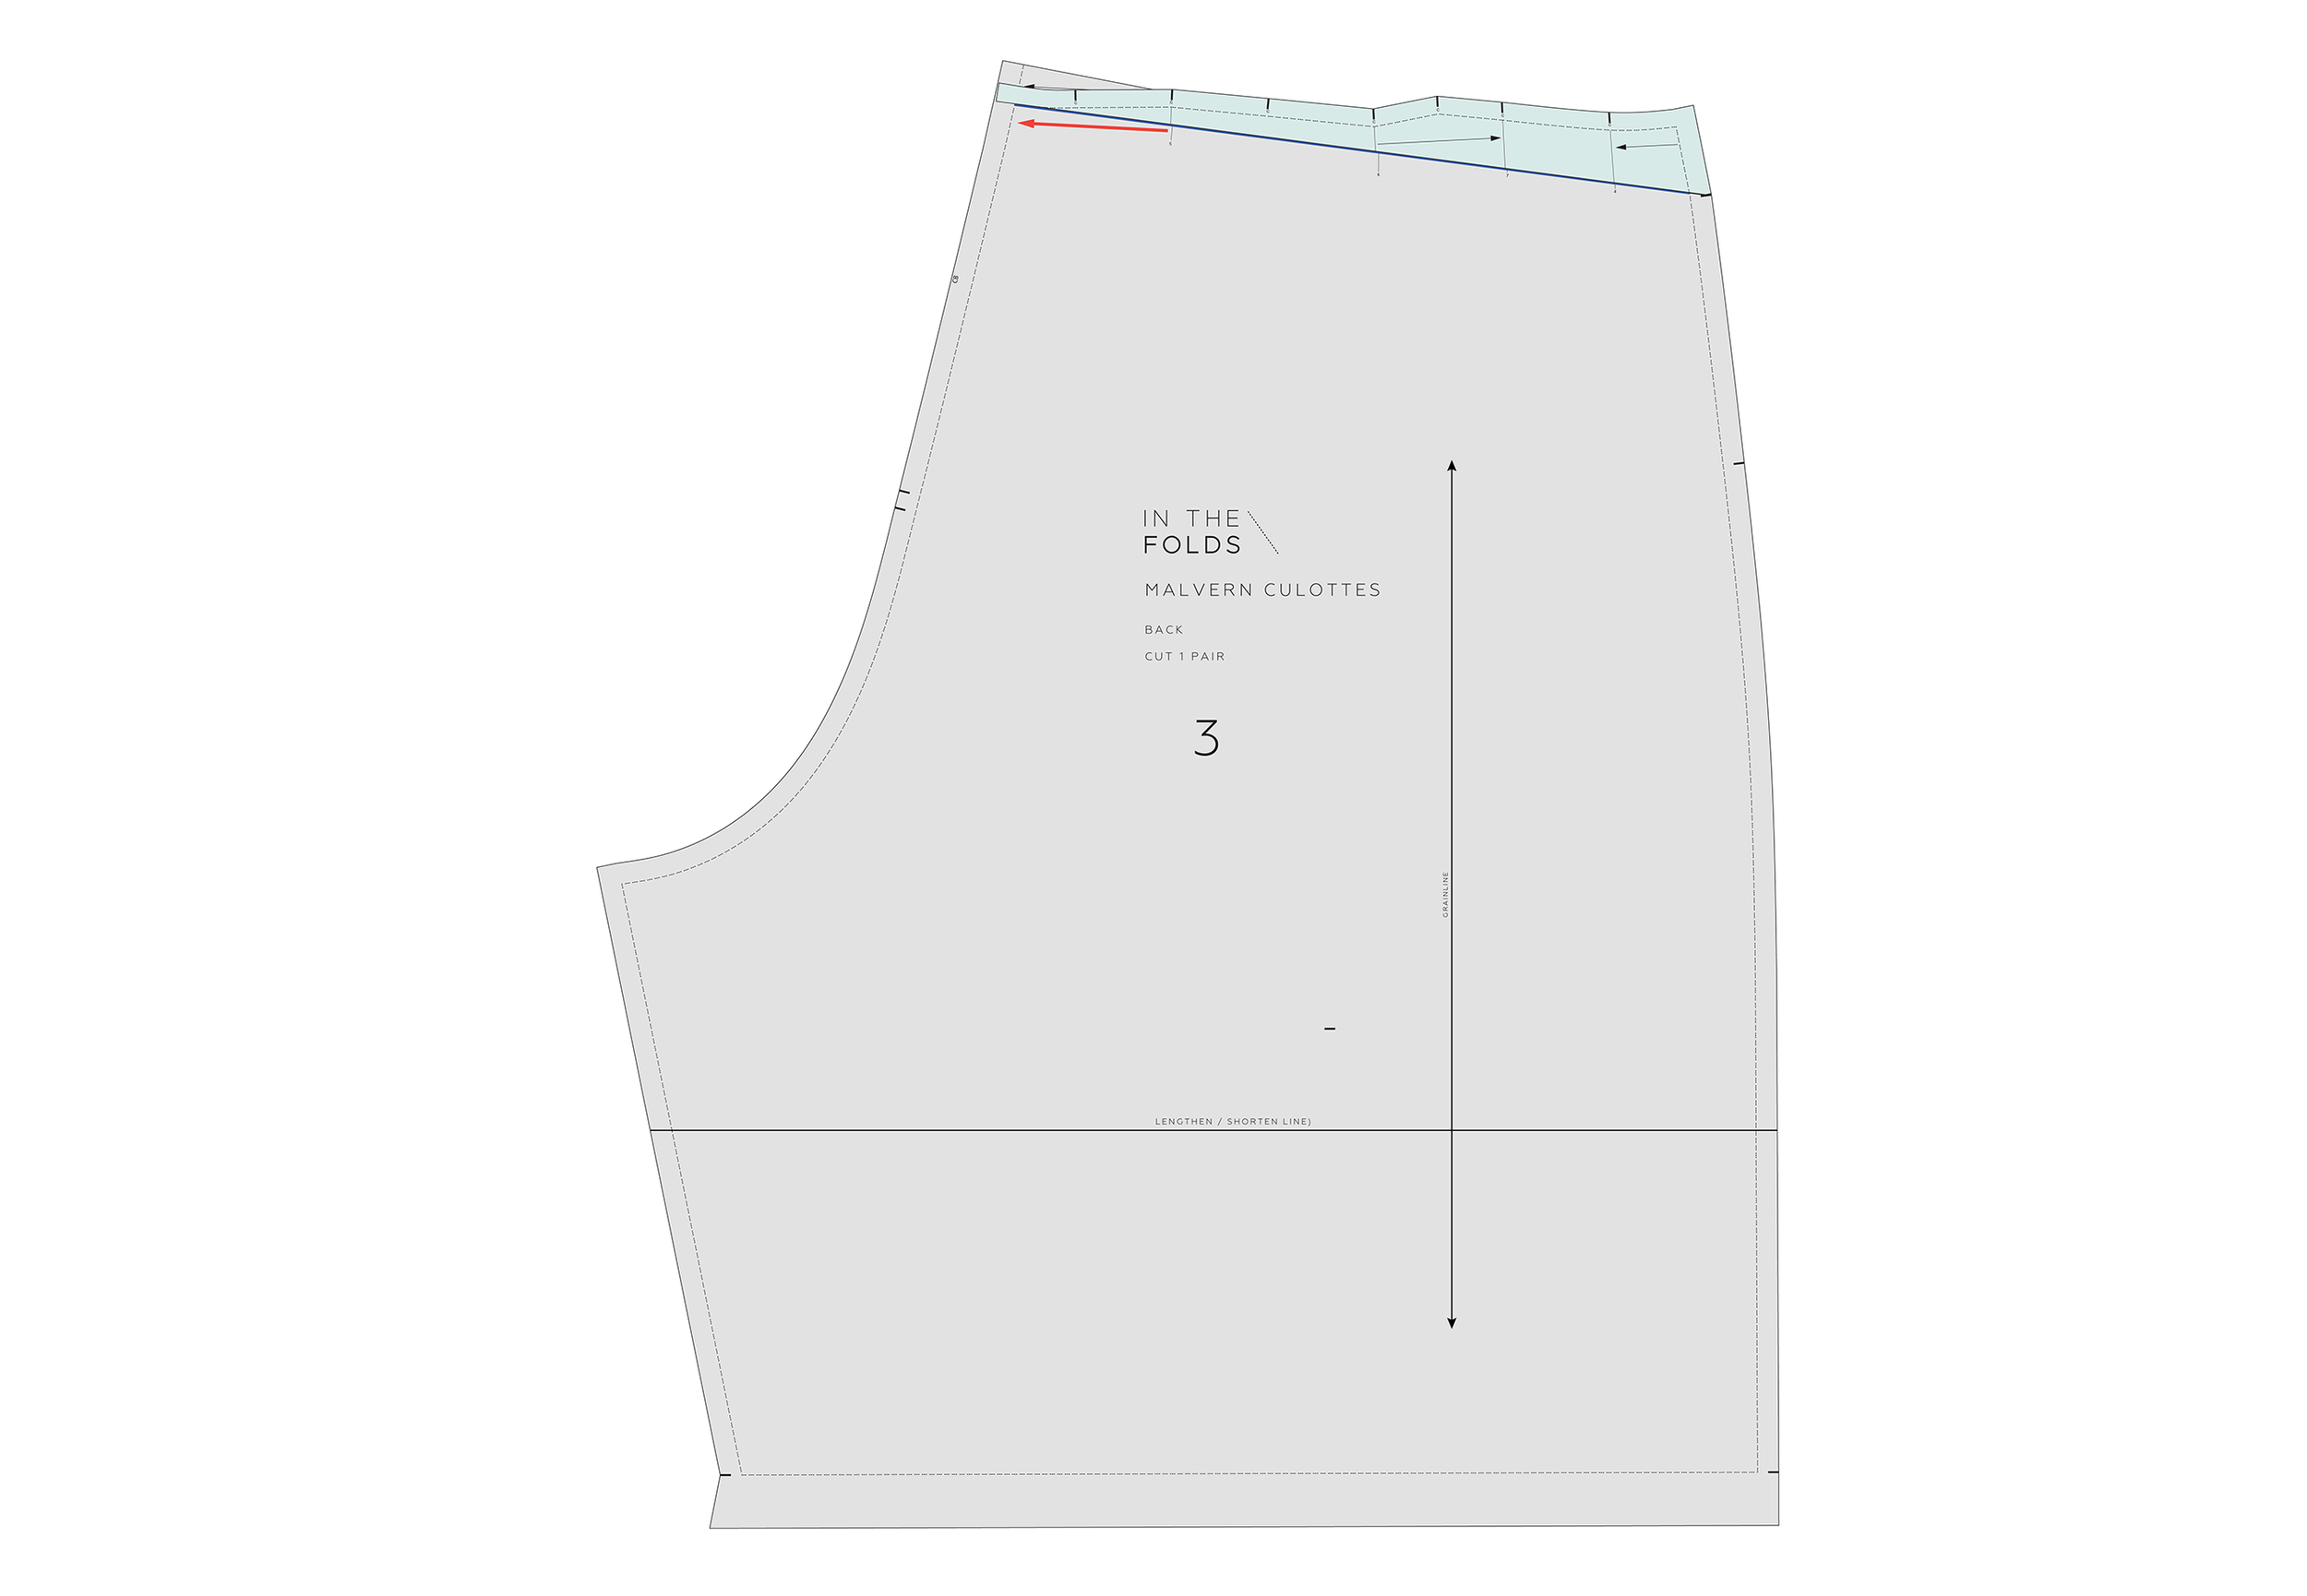
STEP 5
If you have lost any of your markings, re-mark them. For example, the arrows indicating the direction of the pleats.
STEP 6
You may need to remove some paper from above the waistline (the red shaded area in the illustration).

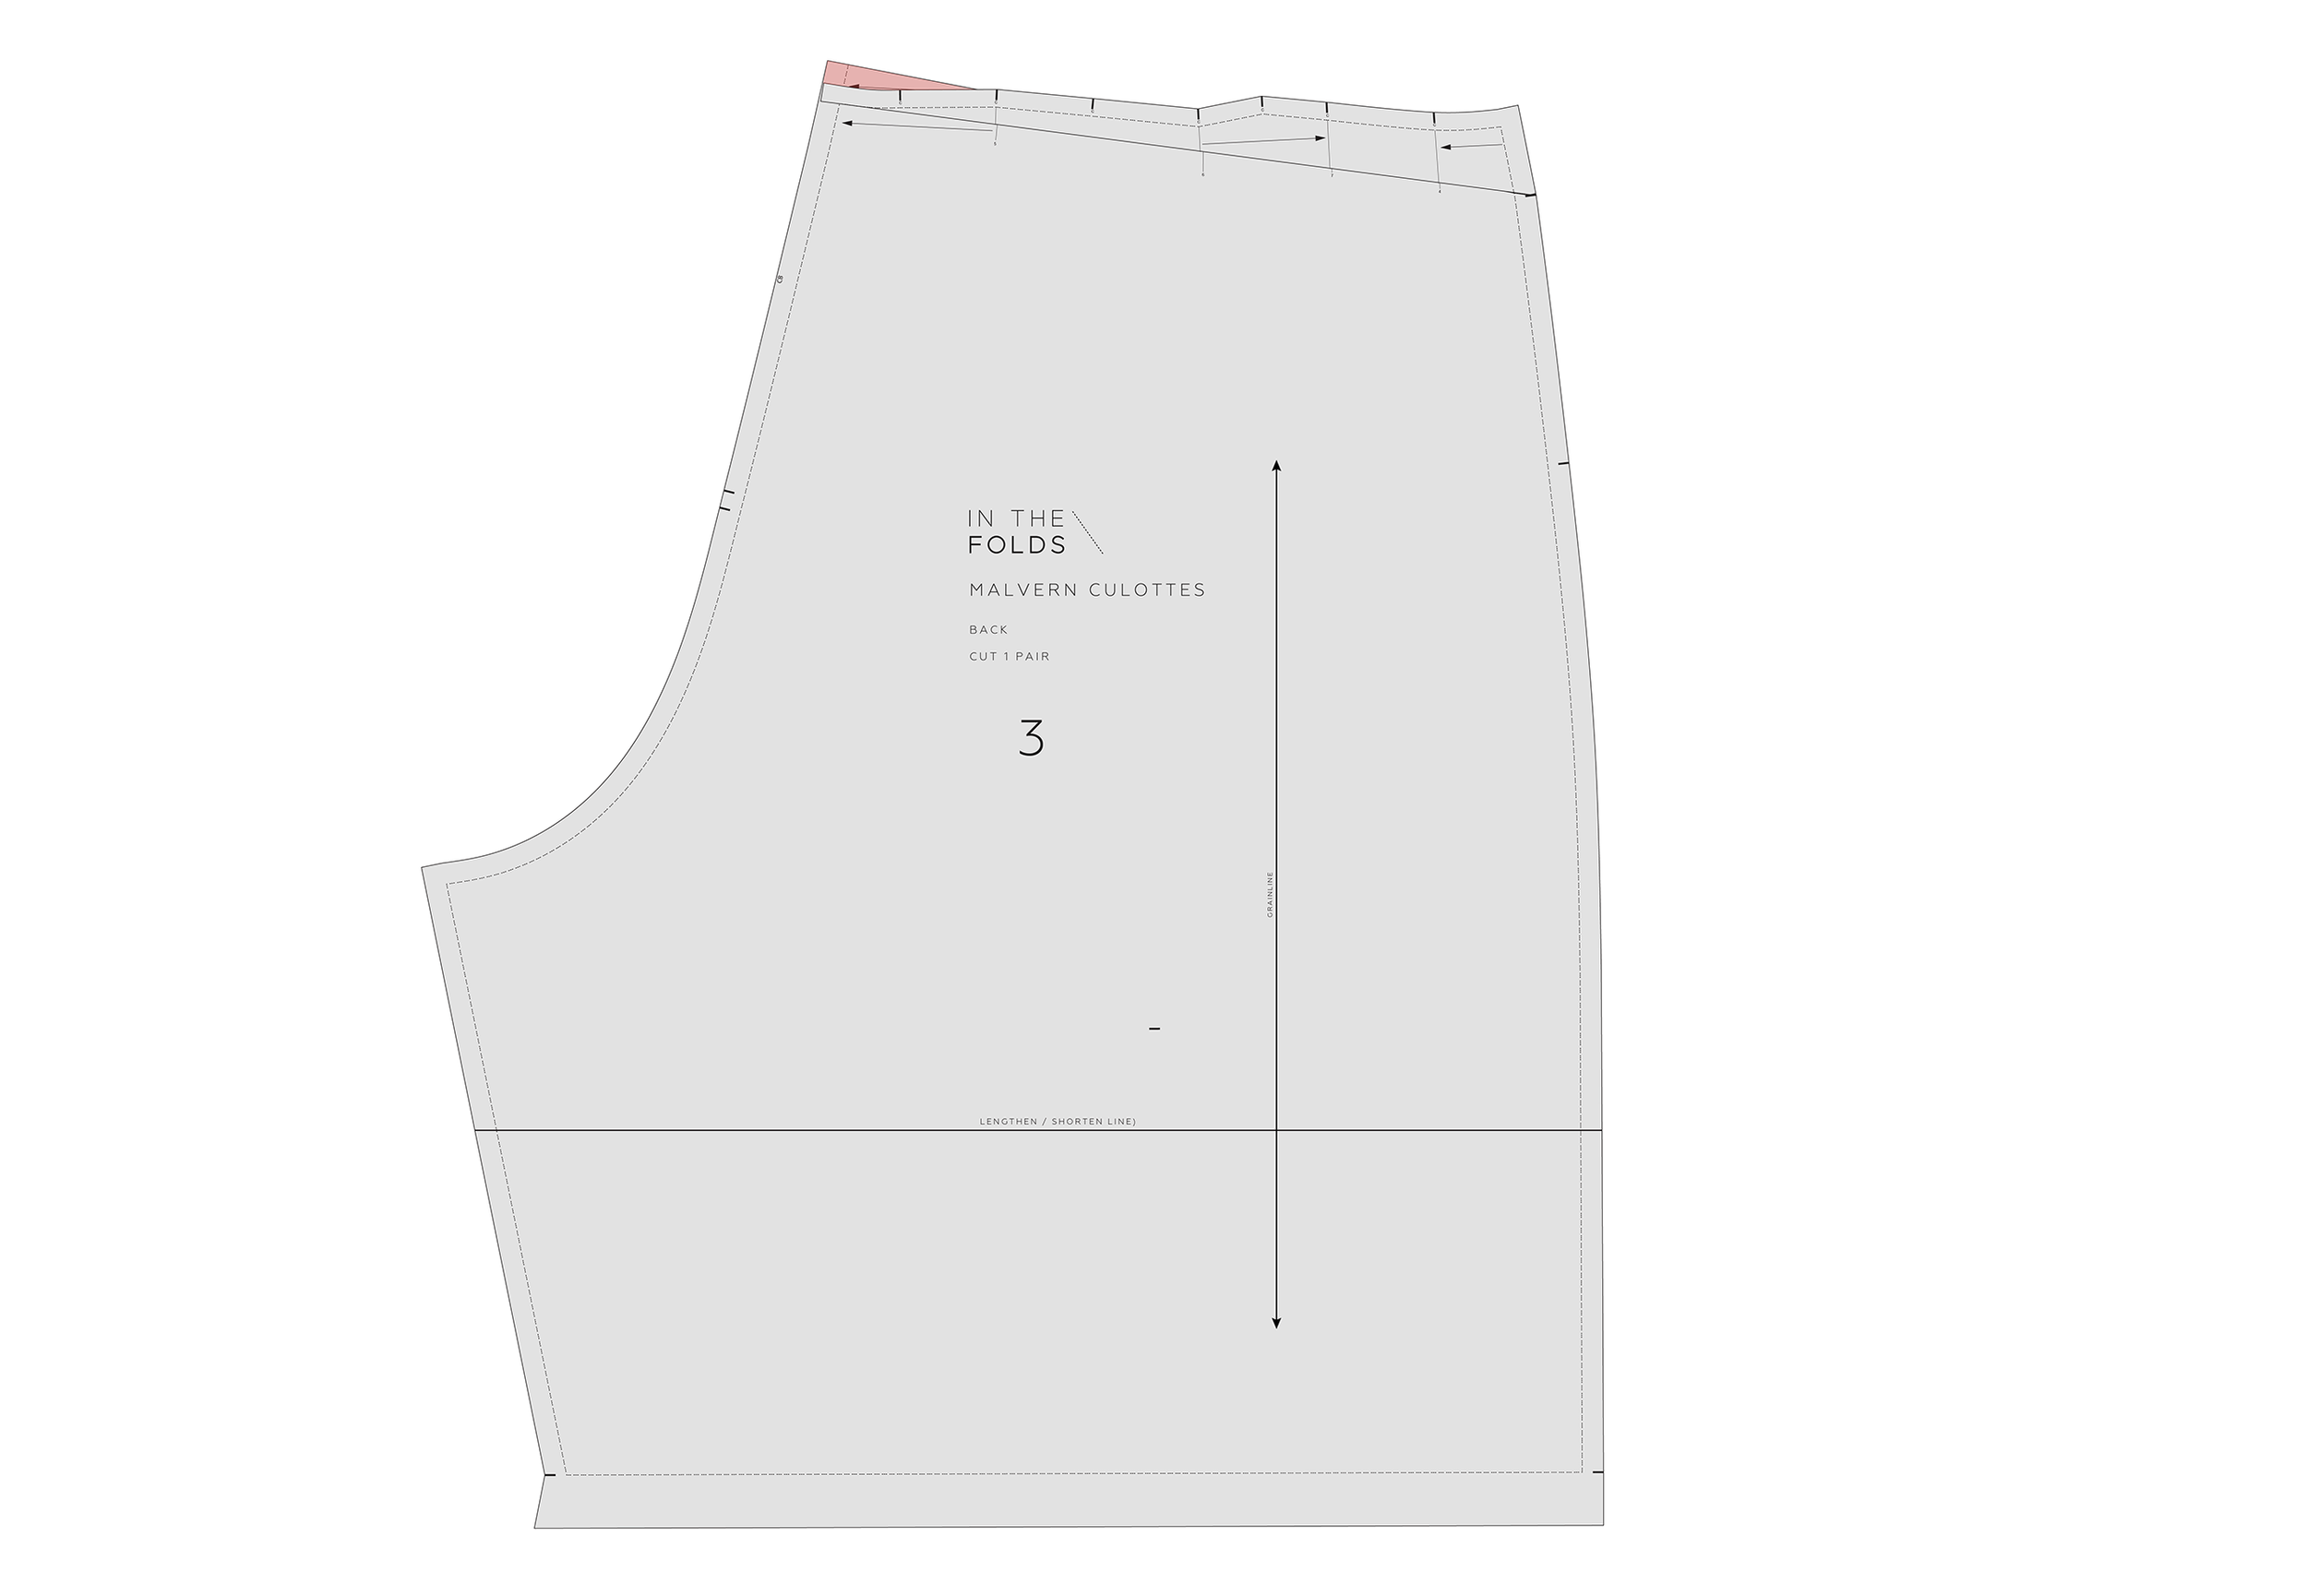
STEP 7
Re-draw the waistline if you need to, making sure it meets the CENTRE BACK at a right angle. You will notice in the illustration that in the case of the example this means extending the back crotch slightly, to achieve a nice smooth transition back into the waist CUT LINE.
STEP 8
Re-draw the pleat lines by drawing a straight line from the waist STITCH LINE, down 3-4cm. Re-mark the numbers if they have been lost in the process.
STEP 9
Smooth out the side seam STITCH LINE and CUT LINE over the alteration.
And that’s it! Excess fabric has been removed.
If you enjoyed learning this alteration, you may like to check out our Pants Fitting Kit as we cover a whole heap more pants alterations that you can apply to a range of pants patterns.
Happy sewing,
Emily
For more issues of the Q & A series, you can check out the archive here.