
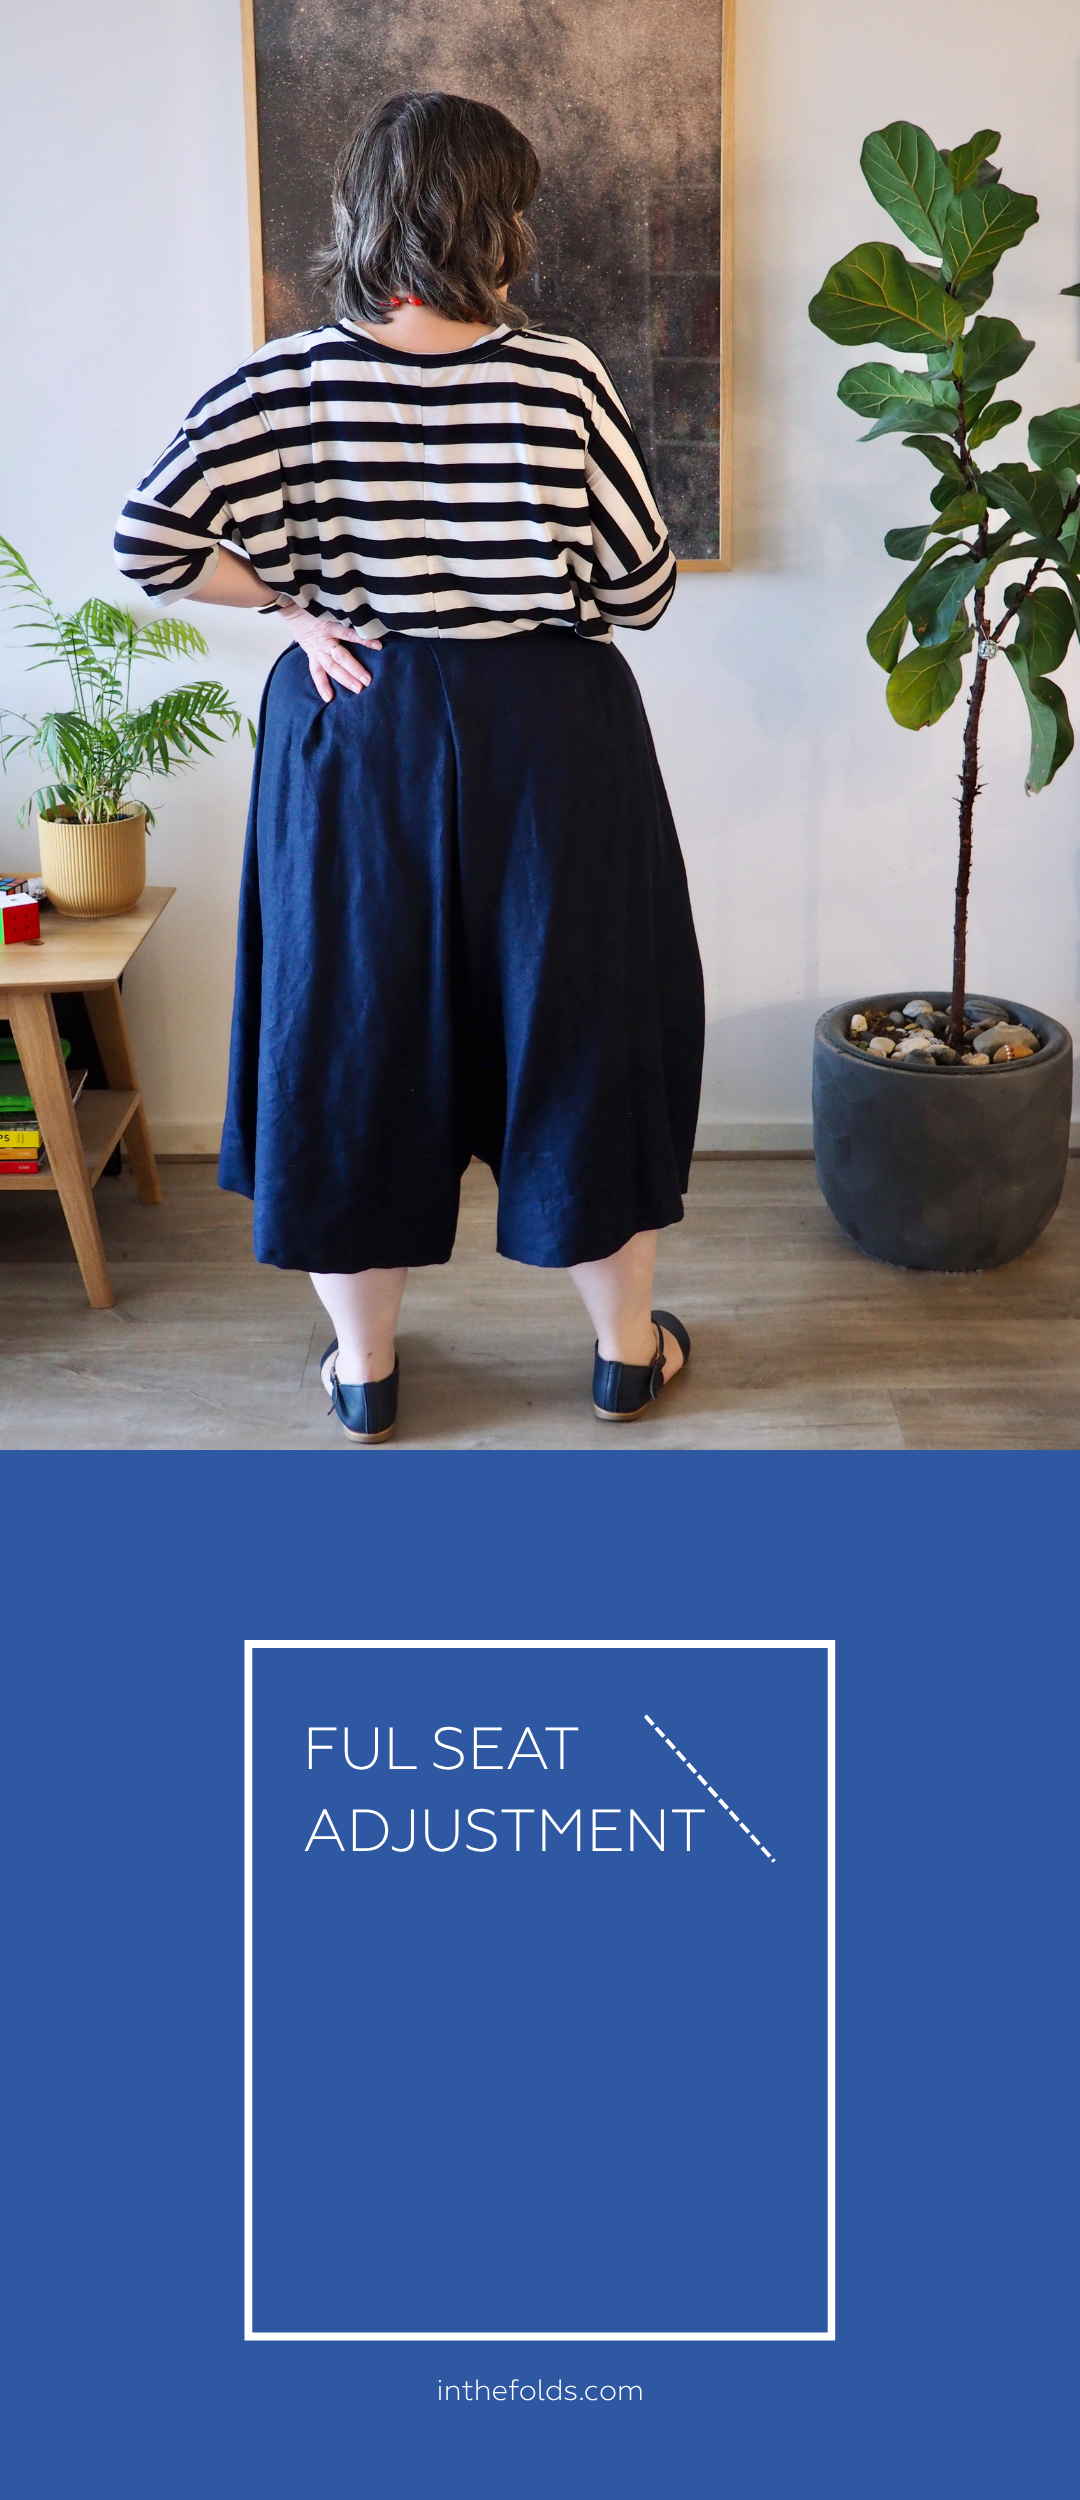
THE Q & A SERIES
Sway back adjustments
Hello, I just bought a copy of the malvern culottes pattern, and it dawned on me that while I'll probably have to make a full seat or swayback adjustment, I have no clue how to do any alterations when pleats are involved. I didn't see resources for this question in your tutorial section so I was wondering if you could point me towards the answer on this one.
Any info is helpful
Thanks,
Sarah B
Last week I answered the first part of this question: how to do a swayback adjustment on the Malvern culottes. As I said in that tutorial, the Malverns are a very forgiving pattern. They have a dropped crotch, pleats and lots of volume, so anyone reading along at home who hoped they wouldn’t need to make alterations to this pattern, you will probably be fine to make them as they are. But if fit is something you would like to work on and you enjoy getting a perfect fit, no matter the pattern, then this tutorial is for you.
Today I will show you how to do a Full Seat / Full Butt adjustment. This process is very straight forward and is the same process you would use on any pants pattern - so for those of you wanting to make this adjustment on a more “regular” pants style, follow along as you can apply this same technique.
FULL SEAT/BUTT ADJUSTMENT
A full seat/butt adjustment adds extra room to the back of a pants pattern, right through the seat, without changing the fit anywhere else. Most pants blocks are drafted for an average amount of curve through the back, and plenty of bodies simply have more fullness there than that. Rather than sizing up all over, this adjustment pivots extra fabric into the back crotch curve, so you get the room you need in the seat while everything else, the waist, the hips, the leg, keeps its original shape.
How to know if you need this adjustment
You may need to make this adjustment if you notice your toile is tight across the butt.
If you have a toile, stand in front of a full length mirror. Using another mirror or a handheld mirror, look at the back of the toile. It's best to avoid using only one mirror and turning around as the garment will twist so you won't get an accurate representation.
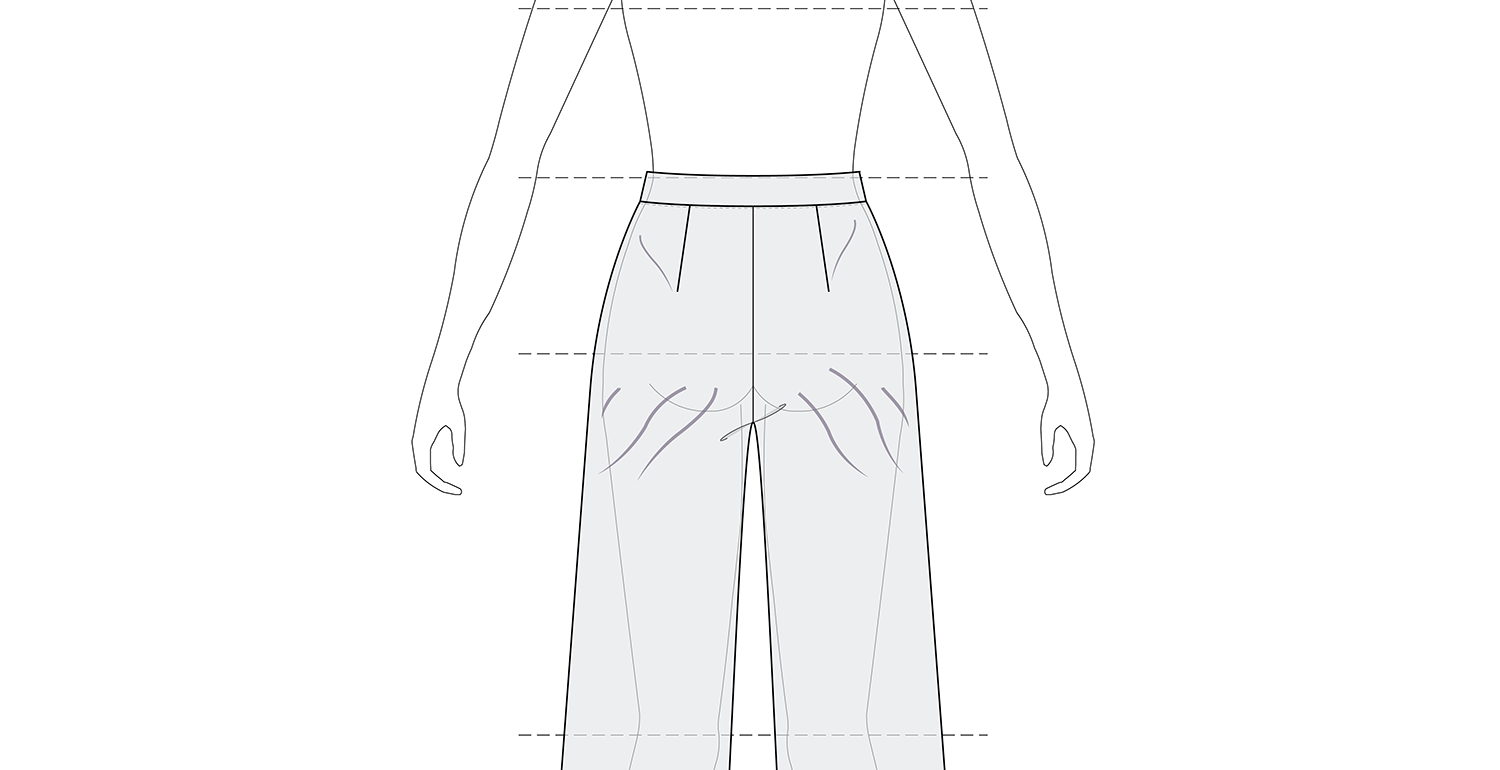
There may be tight diagonal lines coming from the fullest part of your butt pointing to the back crotch seam.
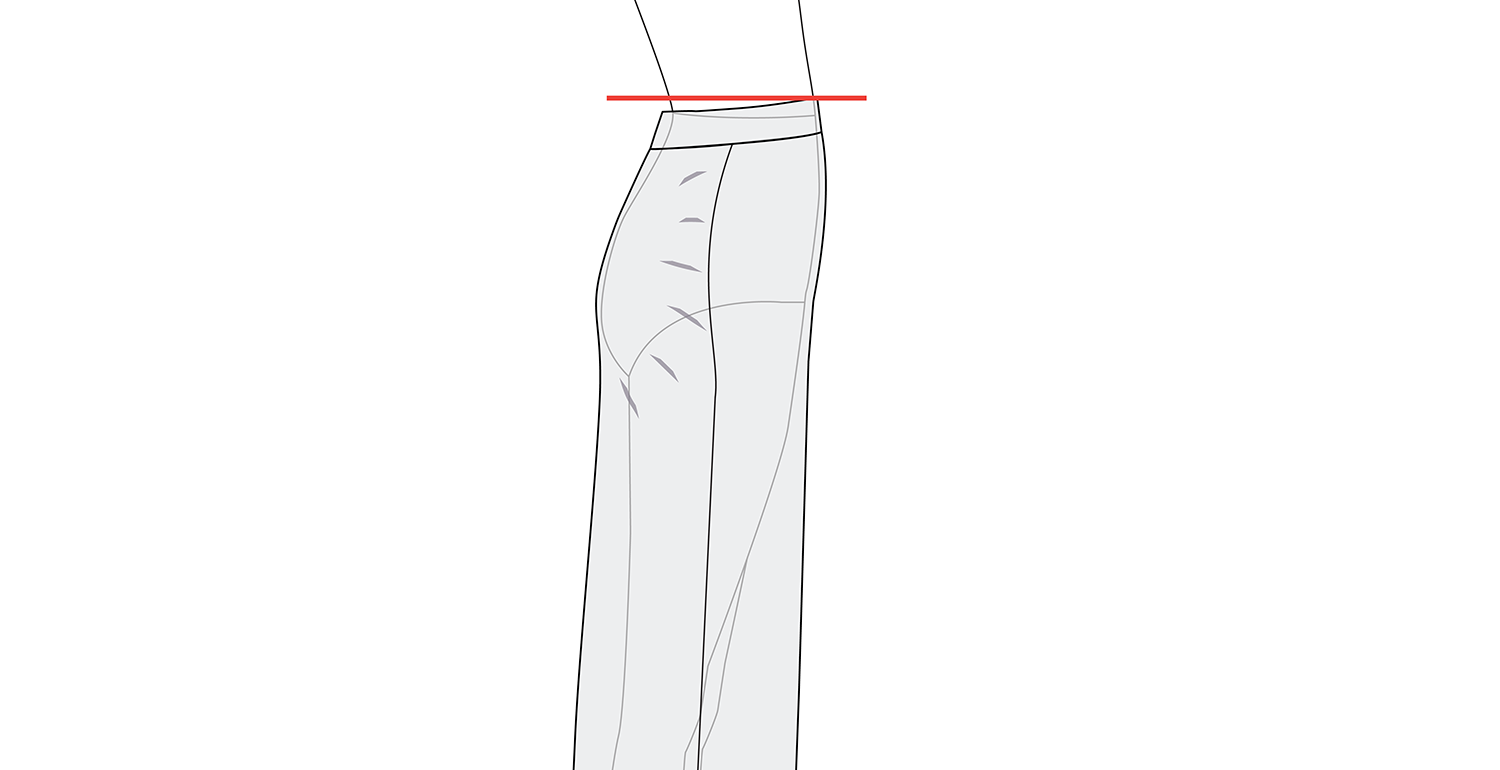
Another sign that you may need this adjustment is if the side seams around your hip area pull towards the back, or if the waistband pulls down at the back. This shows that you require more fabric in the butt of the pattern.
Prepare to make the adjustment
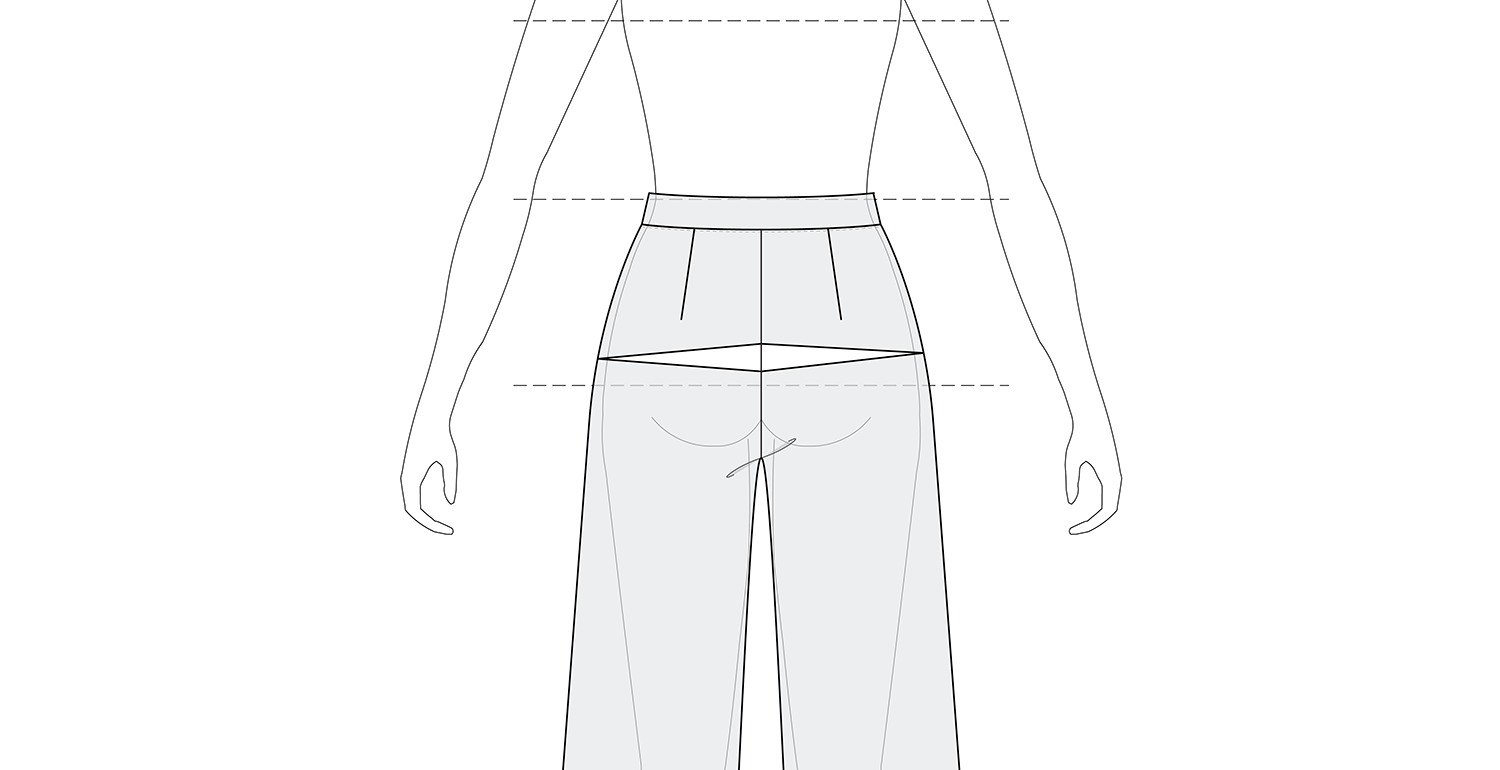
On the toile, mark a line across the fullest part of your butt. Take the toile off and cut along the line through the back crotch seam. Stop before you reach the STITCH LINE at each side seam.
Try on the pants with the cut line and see how much it opens up by. Lay fabric underneath the opening and pin in place. There should be an opening that is widest at the back crotch and eases to nothing at the side seams. You will need to take the toile off to do this, unless you have a friend to help. Try on the pants again and check if it now fits better in this area. Repeat if necessary until you have worked out how much you need to add.
How to make the adjustment
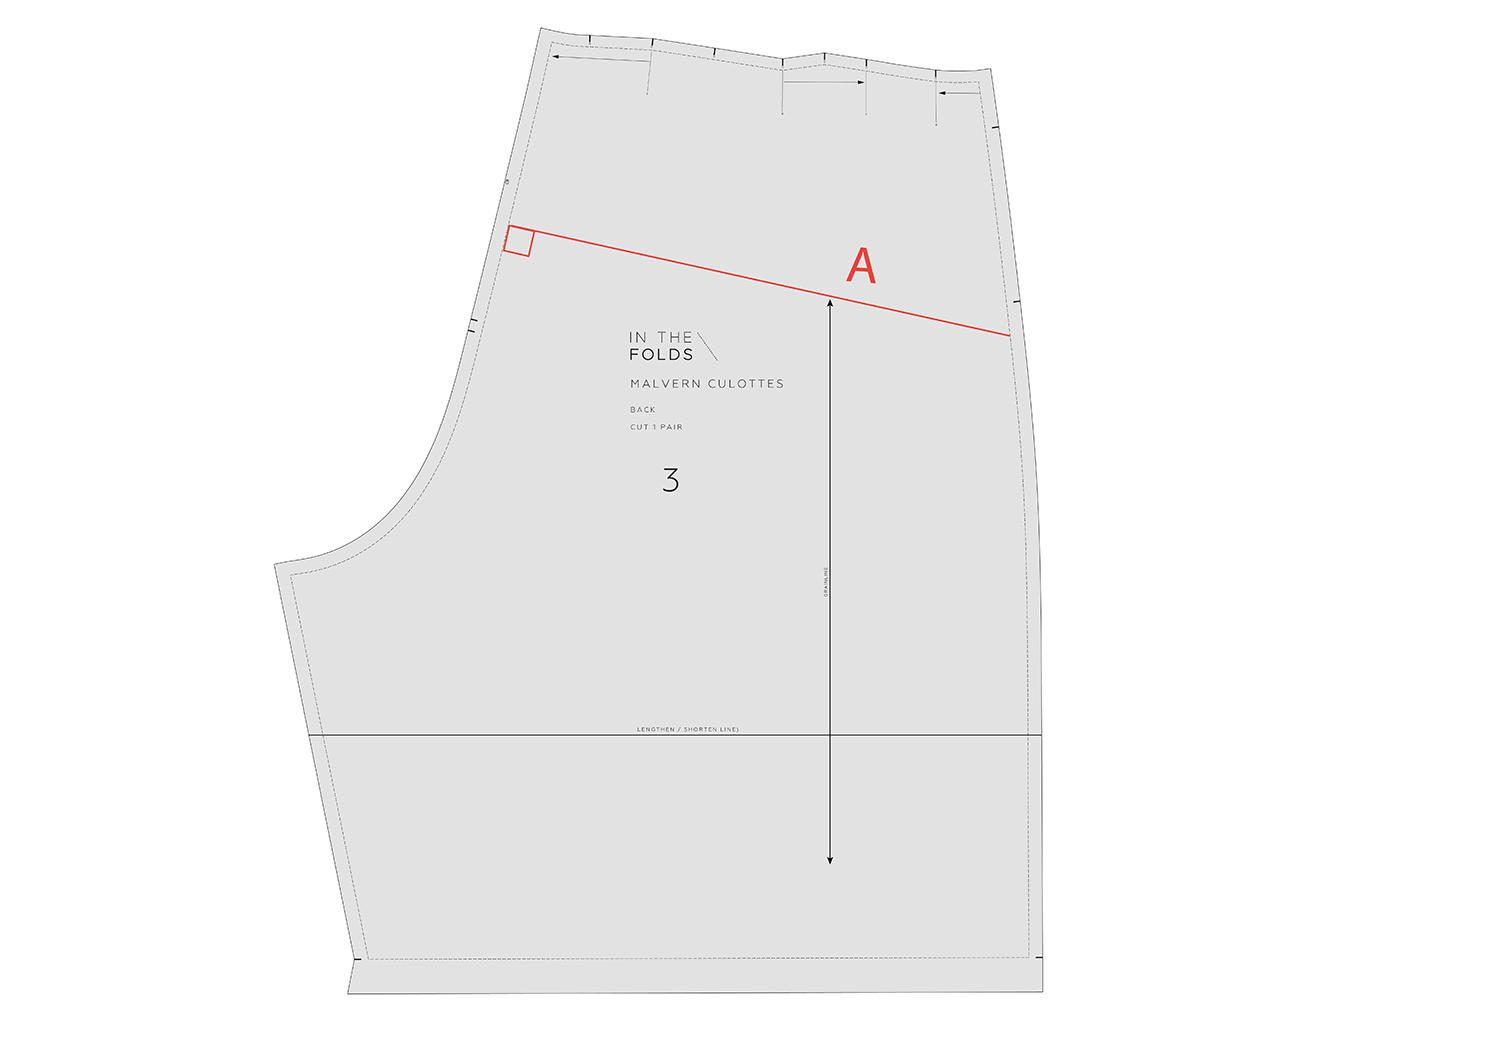
STEP 1
On the BACK, mark a line from the back crotch to the side seam. The line should be perpendicular to the CENTRE BACK STITCH LINE. Mark the line in the straight section of the pattern (or the section you noticed the drag lines on the toile were pointing to).
We will call this line A.
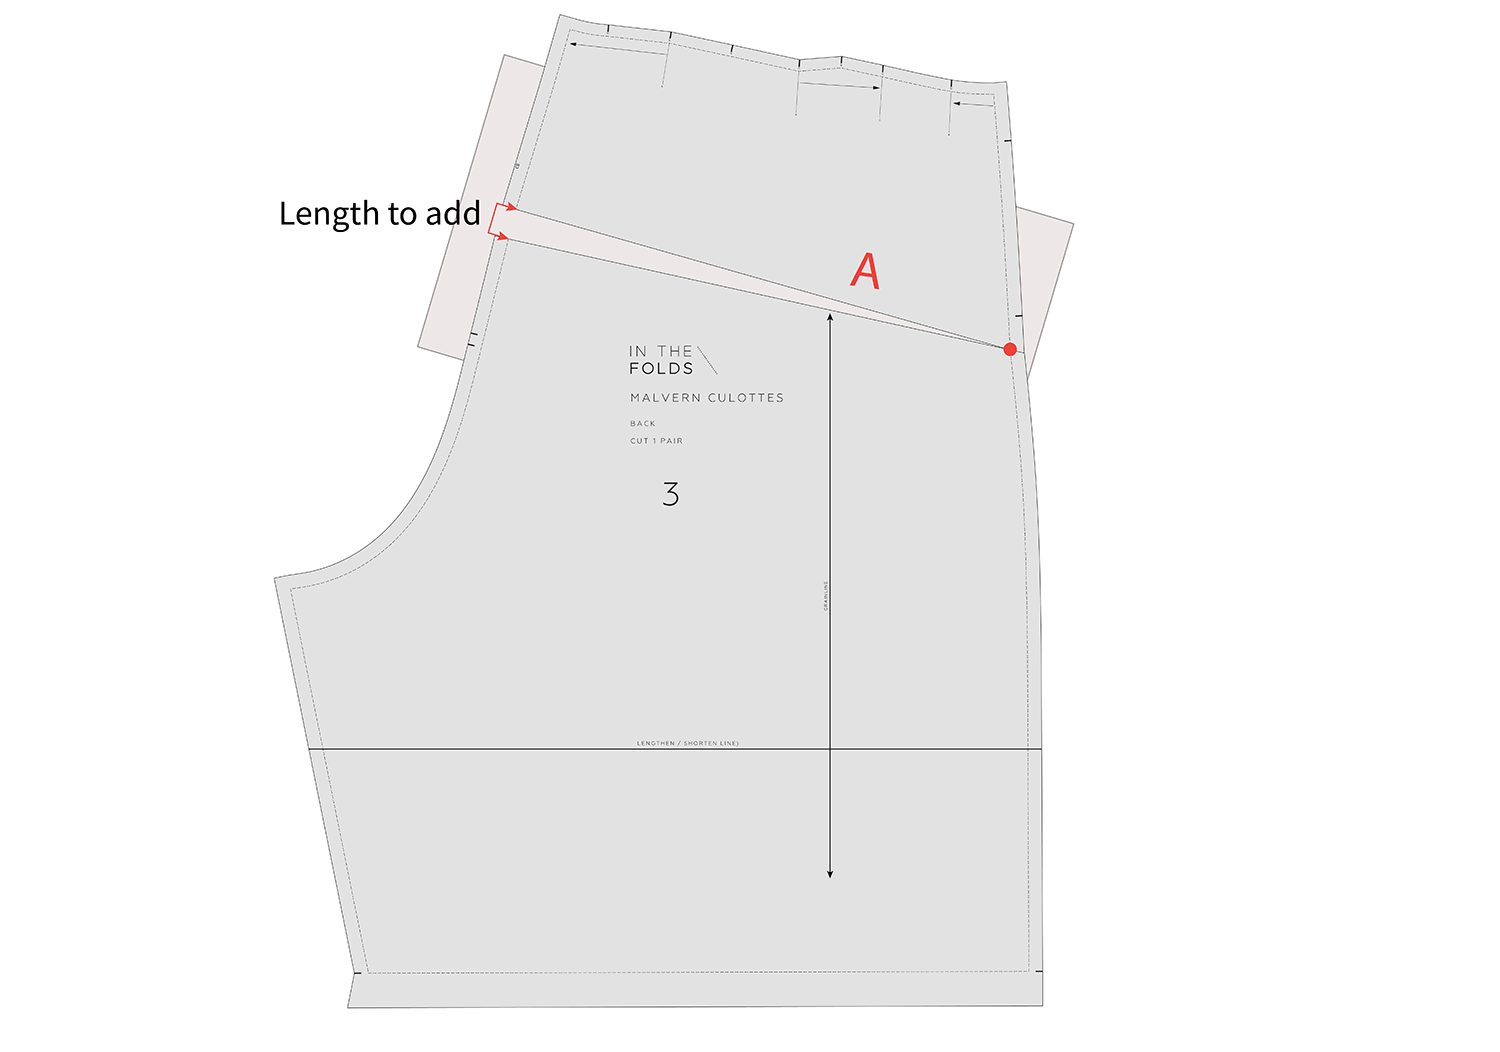
STEP 2
Cut along line A from the CENTRE BACK. Stop 1-2mm from the STITCH LINE at the side seam. Cut into the seam allowance from the side seam towards the point you stopped cutting. Stop 1-2mm from the STITCH LINE to create a hinge.
Slide some paper underneath and open the pattern at the CENTRE BACK STITCH LINE by the amount you would like to add. Use your toile as a guide. Tape or glue in place.
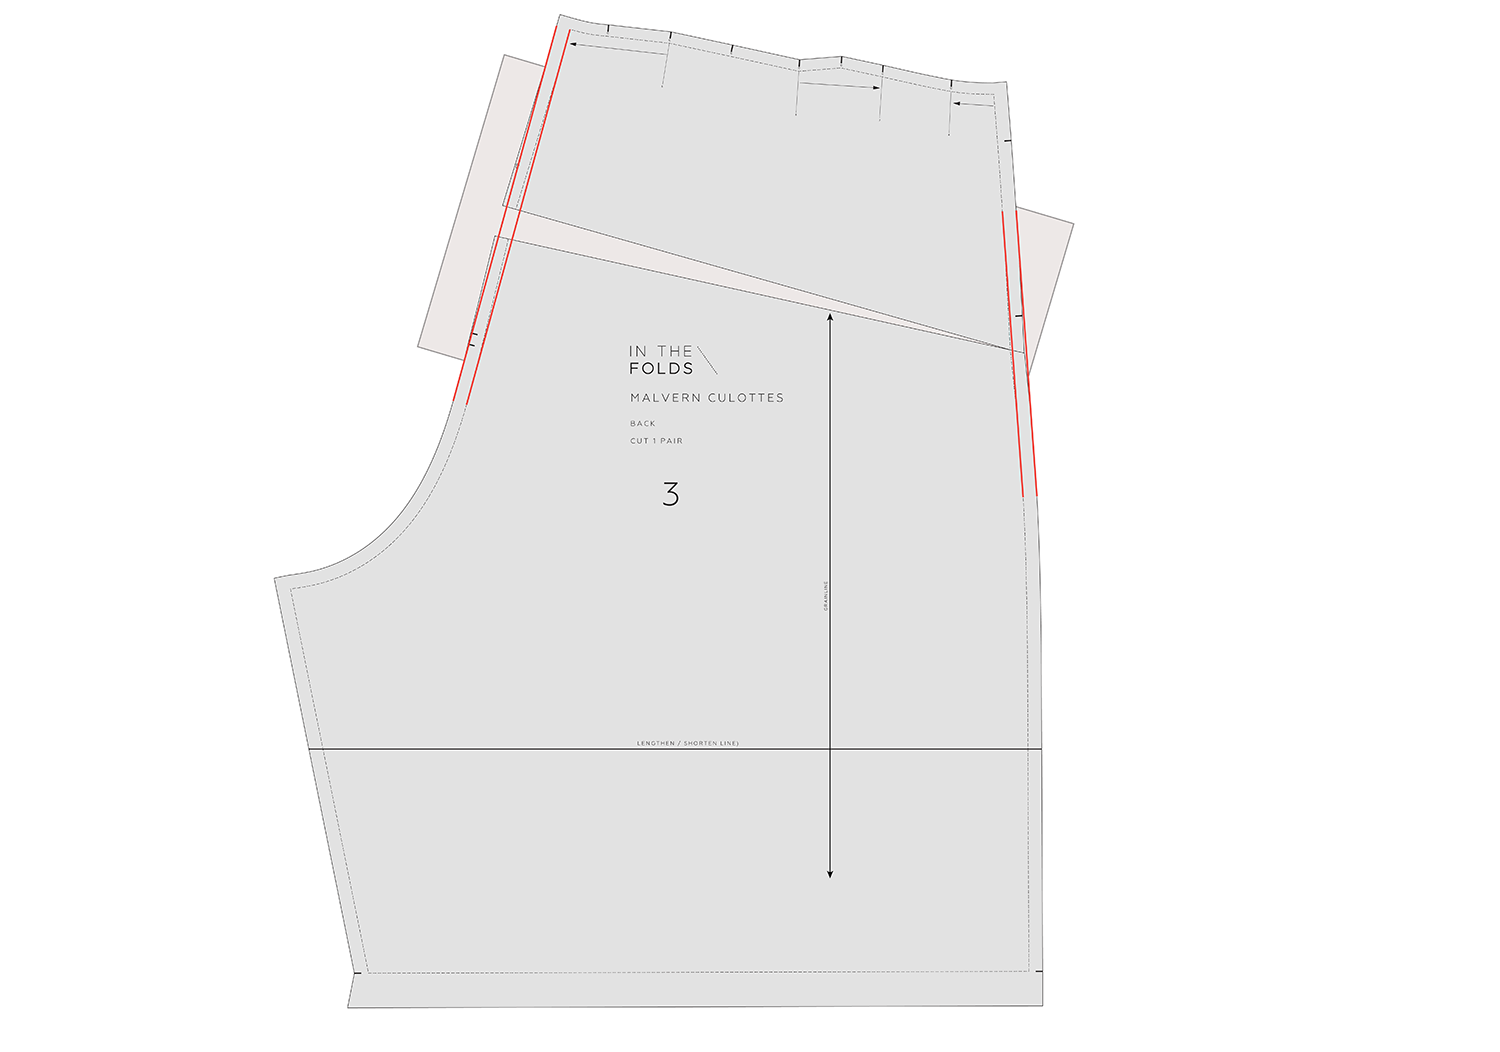
STEP 3
Re-draw the back crotch seam with a smooth line over the adjustment on both the CUT LINE and STITCH LINE. Do the same on the side seam.
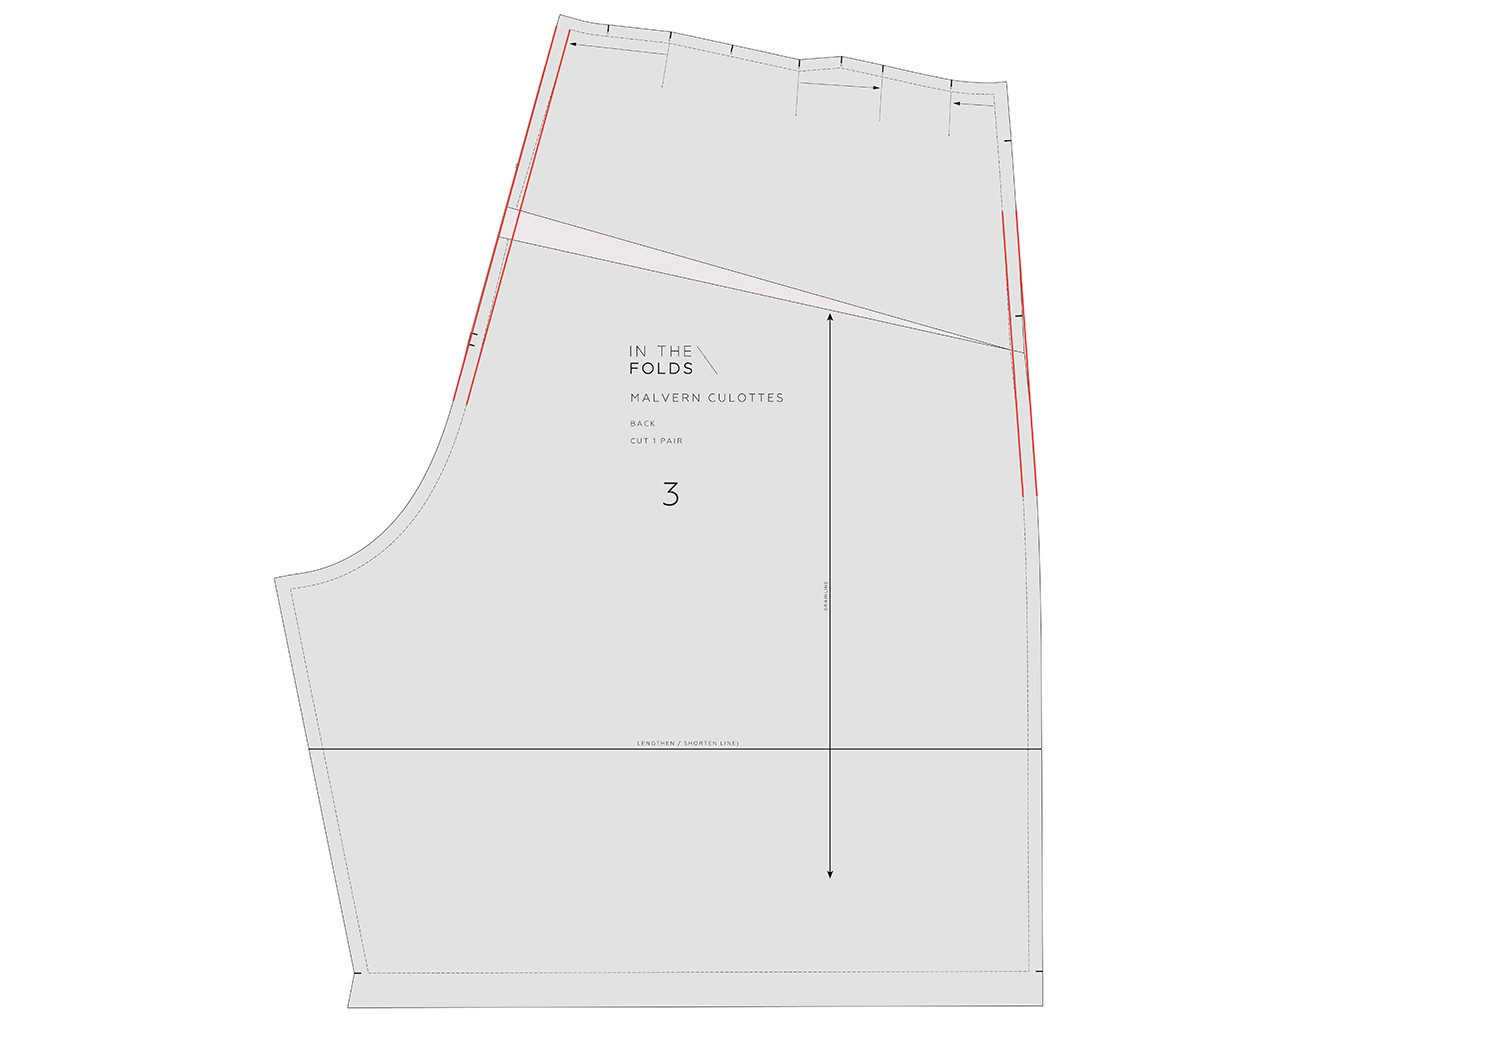
STEP 4
Cut off any excess paper by cutting along the new CUT LINE on the back crotch and side seam.
In this example, the grainline isn't affected. If it is, then re-draw the grainline by extending the original grainline from the bottom section toward the top of the pants.
I hope you now feel confident to give the Malvern culottes a go!
If you enjoyed learning this alteration, you may like to check out our Pants Fitting Kit as we cover a whole heap more pants alterations that you can apply to a range of pants patterns.
Happy sewing,
Emily
For more issues of the Q & A series, you can check out the archive here.