sewing tutorial

The Collins Top Sew-along : Finishing up (sewing button and tacking the facing)

collins_sewing_button_1

Today we have made it to the final post in the Collins Top Sew-along! For a full round-up of all the posts in the series, you can have a look here. I must say it is a huge relief to be done. Although this time I received a lot of help with it, by having someone take the photos for me (fin out more about that here), it is still a huge amount of work to put a sew-along together.

In today's post, we'll be finishing of View B (the sleeveless version) by sewing the button in place and hand tacking the all-in-one facing in place (in my opinion, when it comes to clothing there is nothing more annoying than a facing that keeps flipping up from the inside of the garment).


Position button

collins_sewing_button_2

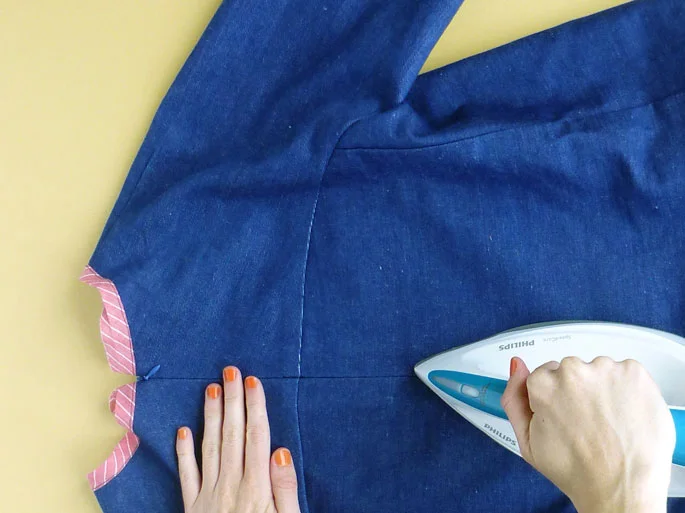
After giving the back of your top a really good press, lay the top flat with the back facing up. Close the centre back opening and position your button so that the button loop will go around it comfortably without pulling, being sure to check the top corners of the opening are in line. 

collins_sewing_button_3

Use a pin to mark the position of the button on the top.

collins_sewing_button_4

Use tailor's chalk or an erasable fabric marker to mark the position so that you can remove the pin. 

Sew button

collins_sewing_button_5

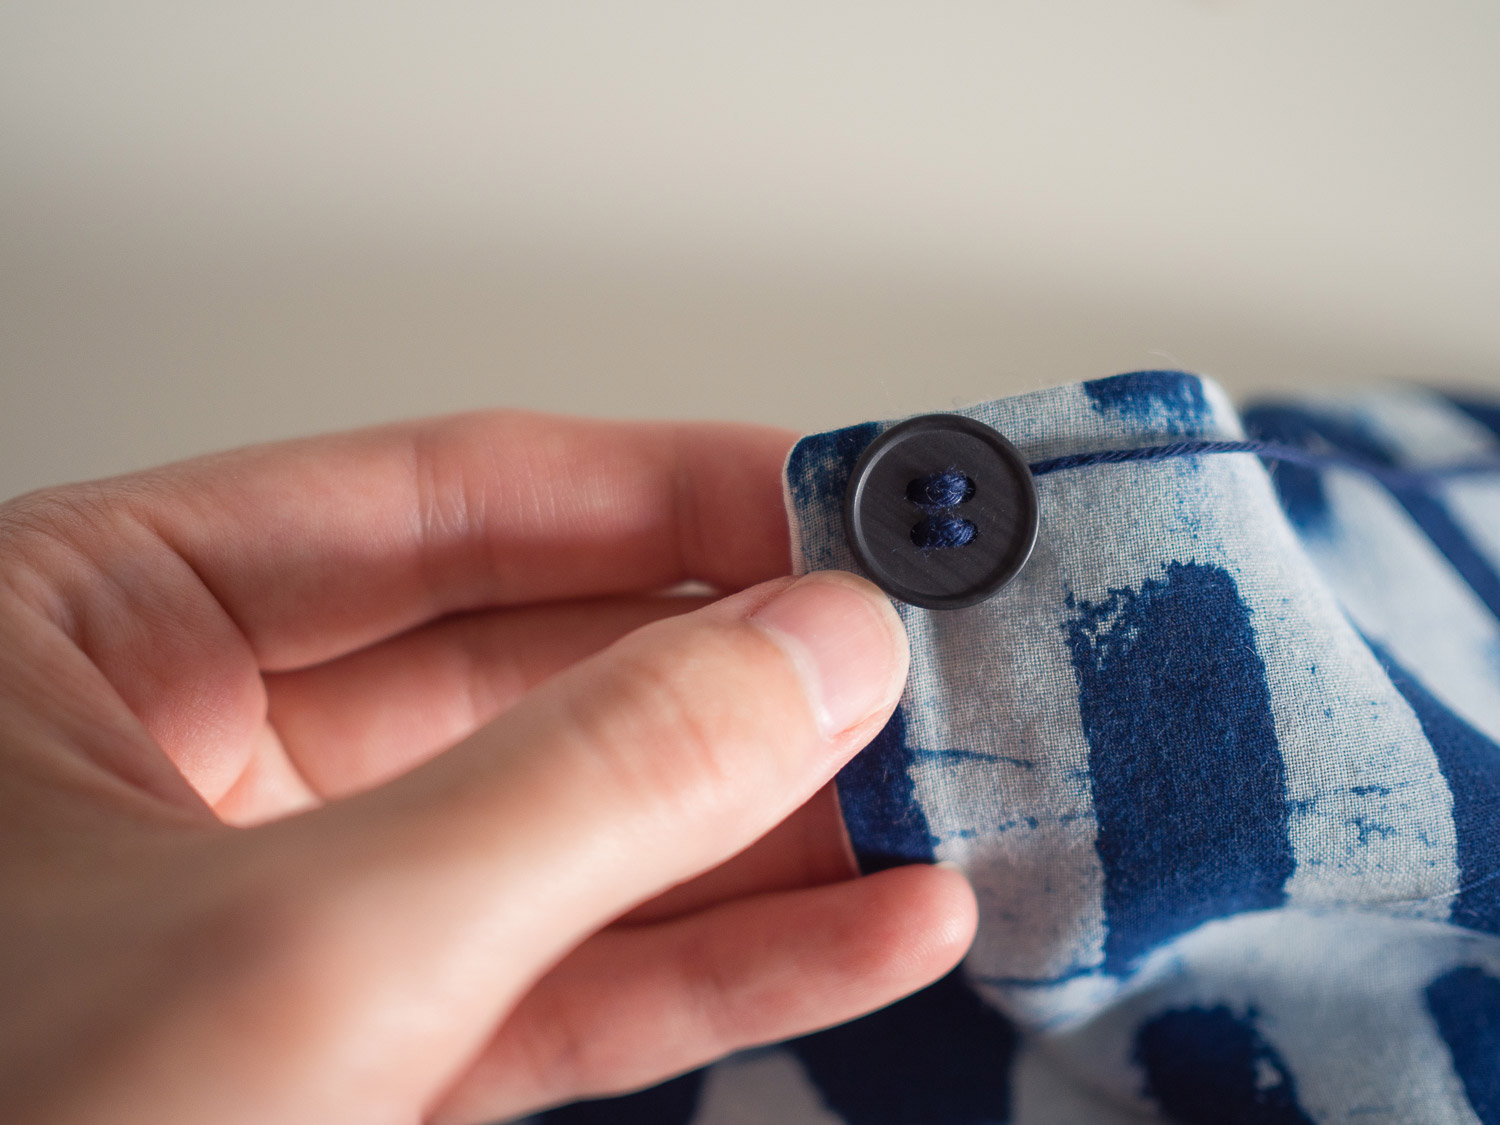
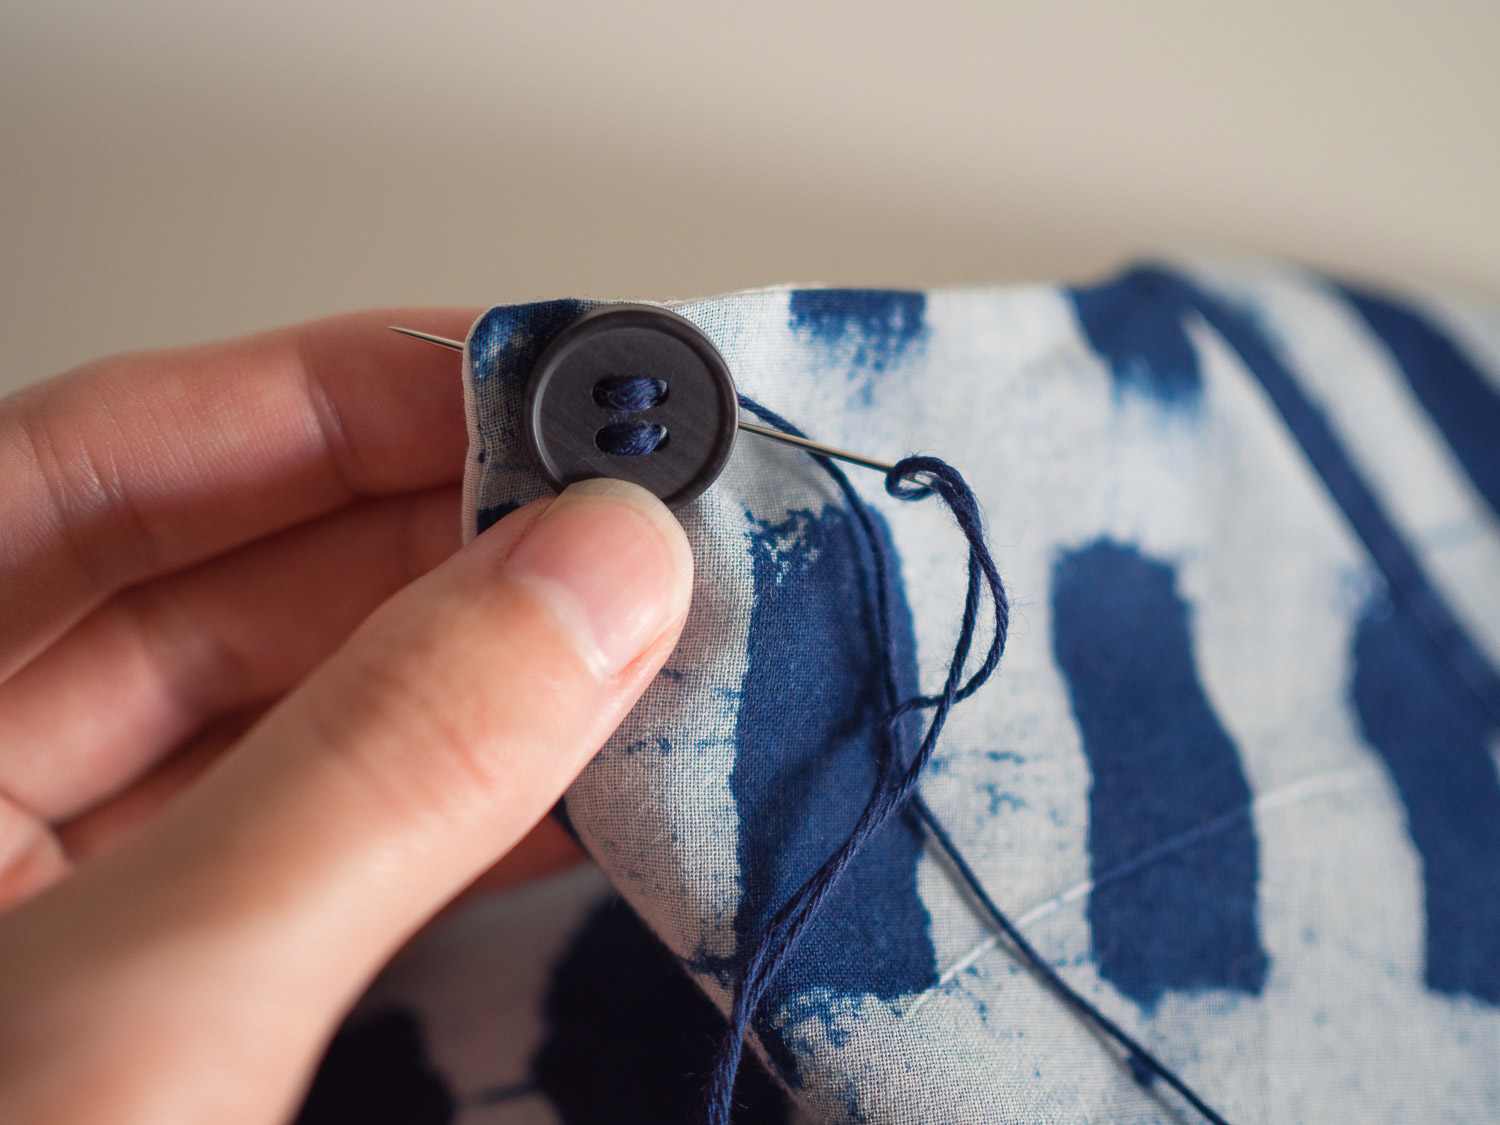
Take some thread and tie a knot in the end. I like to use a thick thread (like the one in the photo) or a normal thread doubled. Place your chosen button onto a tooth pick (or similar) and sew the first stitch to secure it. We are using a toothpick under the button so that the button will be slightly raised off the fabric, which will mean it is easier to secure the button loop around it, and the loop won't slip off the button.

collins_sewing_button_6

Making sure the button is straight, secure the bottom of the button with another stitch.

collins_sewing_button_7

Continue stitching the button in place, keeping your stitches nice and close together on the back so that it remains neat on the inside as well as the outside. 

collins_sewing_button_8

Once your button is secure, remove the toothpick from underneath the button.

collins_sewing_button_9

Take the needle to the inside of the top, by putting the needle through the fabric underneath the button. 

collins_sewing_button_10

Bring the thread up through the wrong side of the top, underneath the button. 

Make a small knot in the thread by making a few small stitches and putting the needle and thread through the stitches. 

collins_sewing_button_11

To secure the end, put the needle into the fabric under the button and bring it up about 2-3cm (1in) under the button on the centre back of the top.  

collins_sewing_button_12

Pull the thread through. 

collins_sewing_button_13

Cut the thread so that it drops back inside the top (between the top and the facing) so that you cannot see the end. 

collins_sewing_button_14

And admire your work! Your button is in position.


Secure all-in-one facing

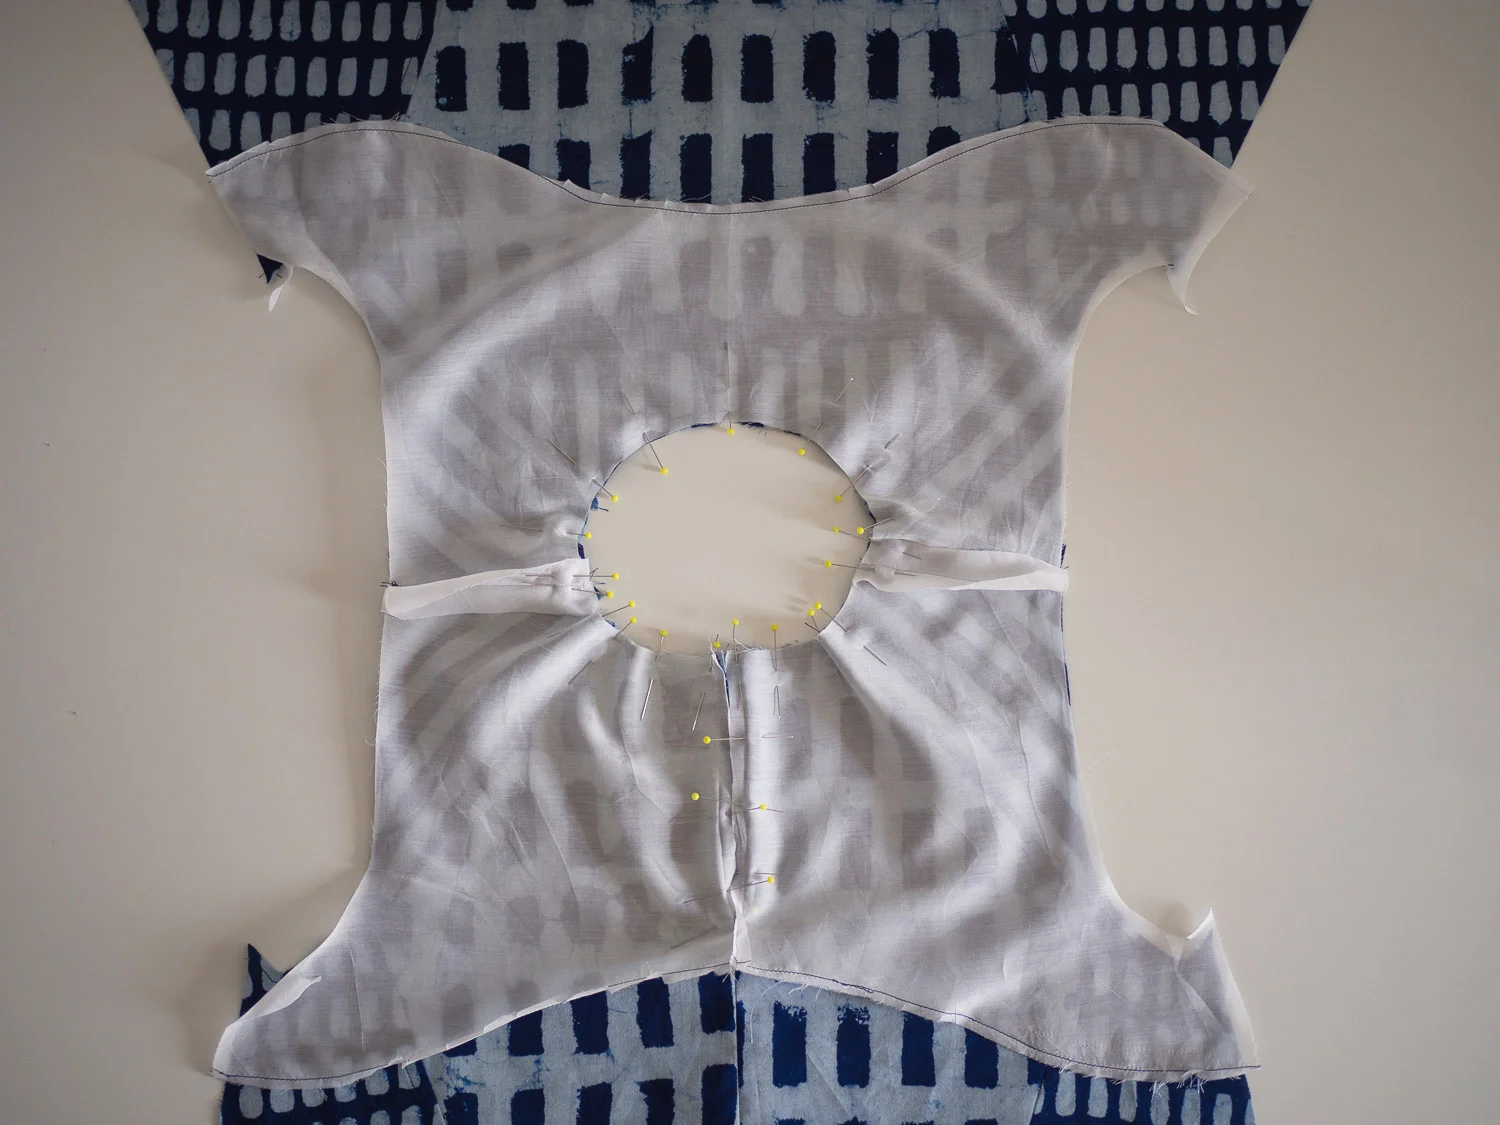
The final step you need to do to complete your Collins Top, is to stitch down the all-in-one facing. I showed you in this tutorial how to attach the facing, but at this point it can still be flipped up from the neckline and armholes. 

collins_sewing_button_15

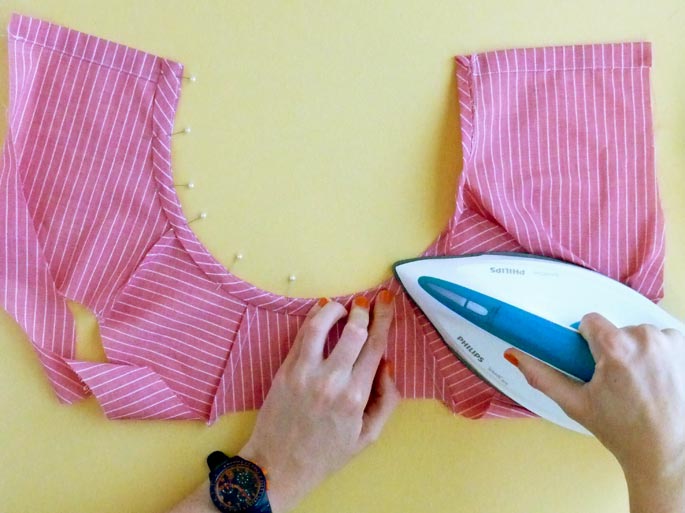
With the top inside out, give the facing a good press. You want to slightly roll the neckline and armhole seams in, so that are on the inside of the top (the understitching will help with this).

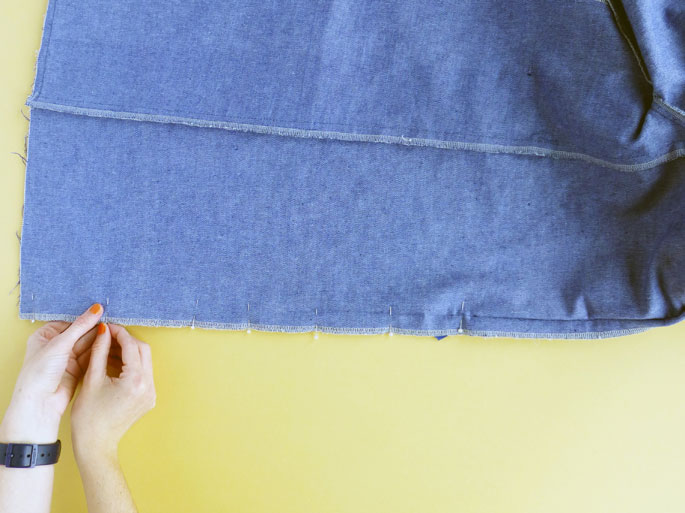
Pin the front facing in place on the two panel seams. 

collins_sewing_button_16

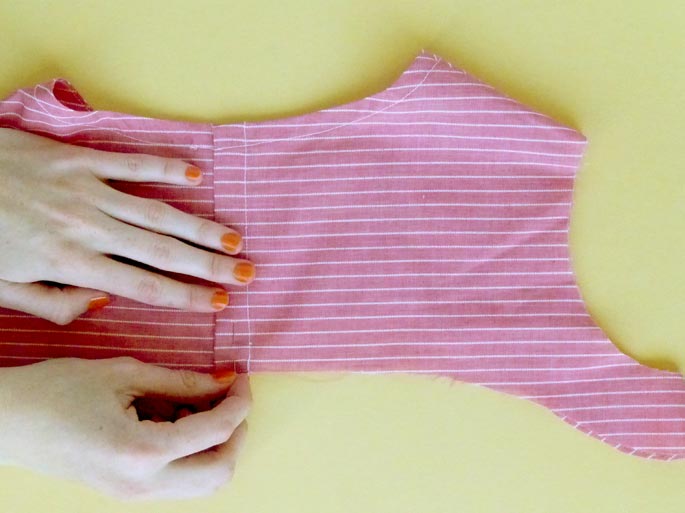
Do the same on the back, as well as at the side seams. 

collins_sewing_button_17

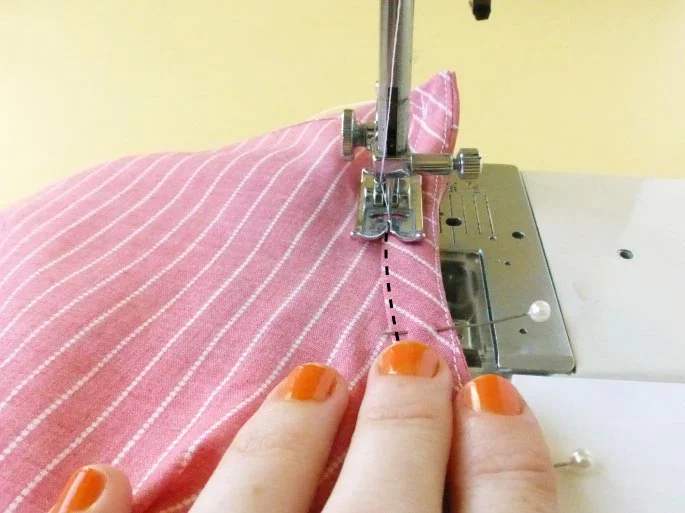
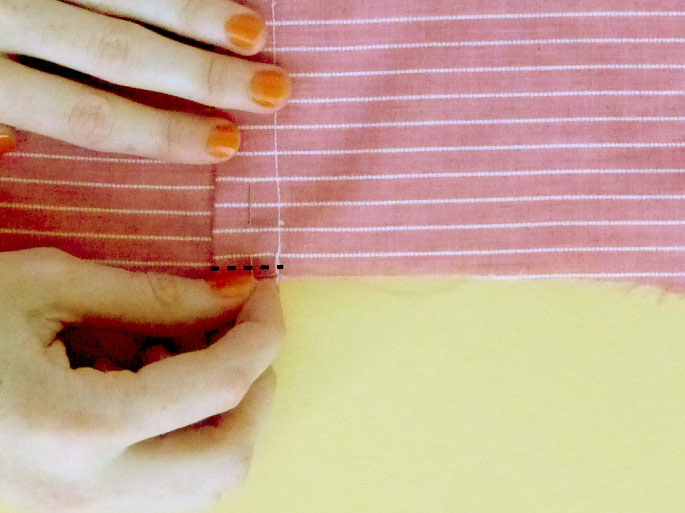
Working your way around the top, stitch the facing to the seam allowance at each point pinned. 

collins_sewing_button_18

Make your stitches slightly above the bottom of the facing, so that when the facing is turned down, the stitches are hidden underneath it. 

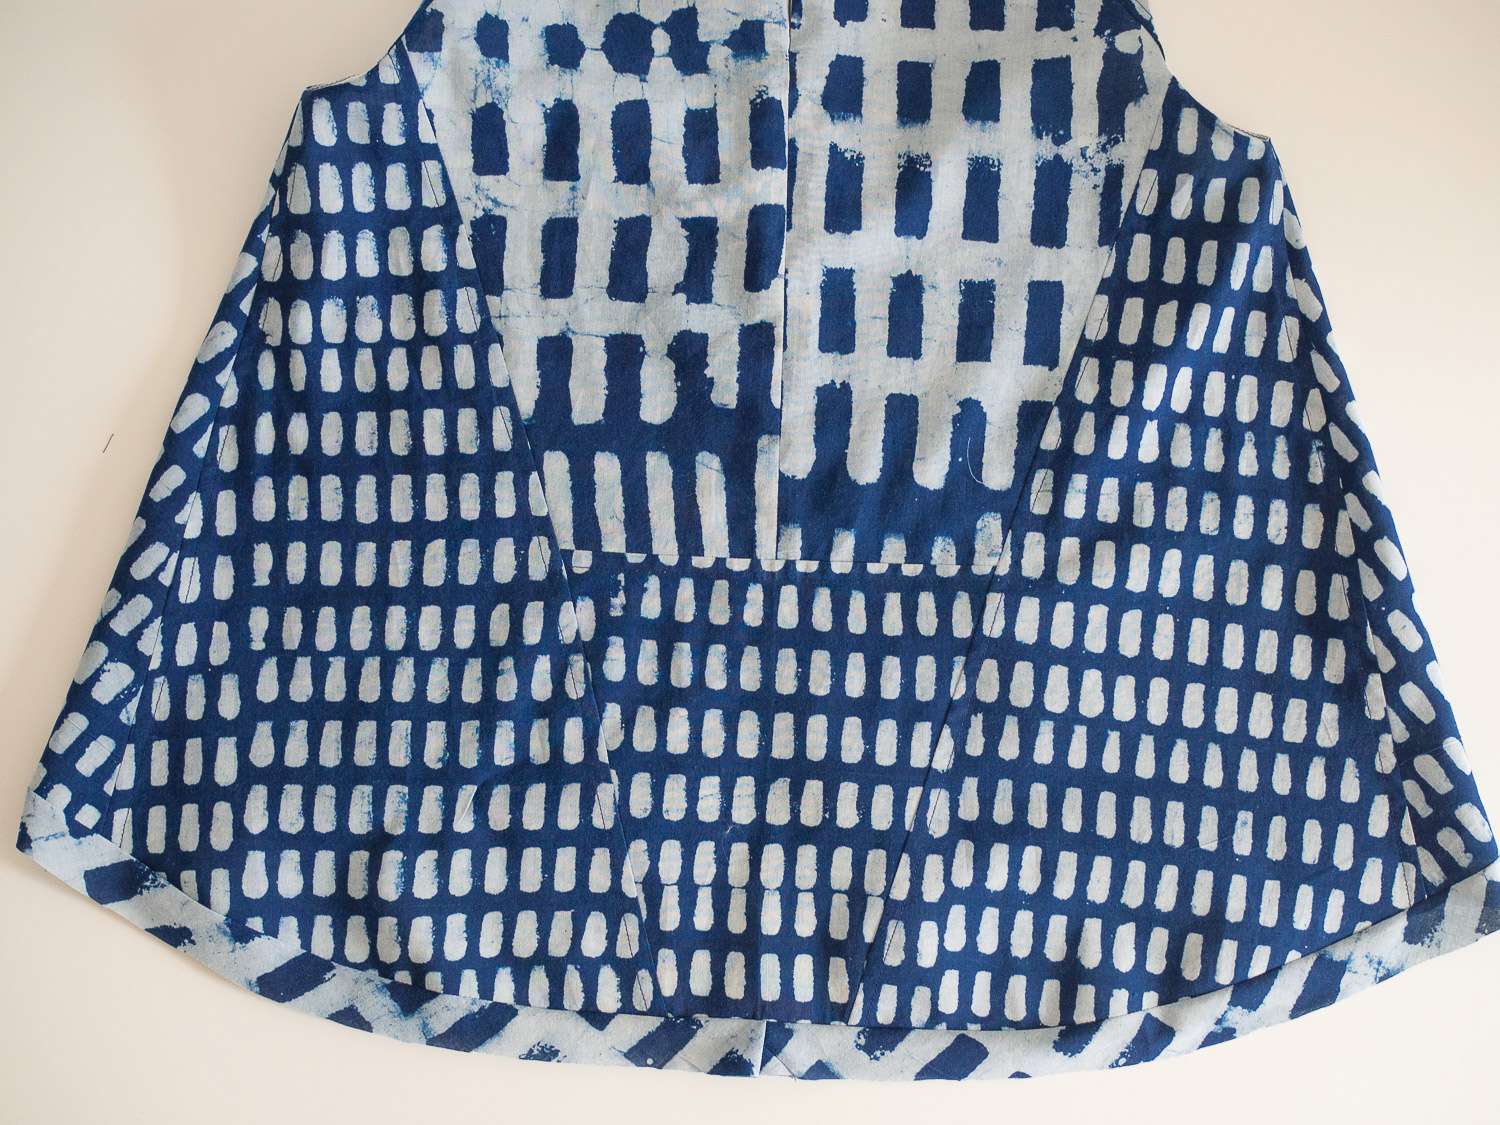
And that's it. Your Collins Top is finished! I hope you have enjoyed following along with these posts and have learned a new skill or two!

See all the posts in the Collins Top Sew-along.


CREDITS: 

Fabric : The Drapers Daughter

Photography : Saki Jane Marsh


You may also like:

The Collins Top Sew-along : Finishing the hem with bias binding

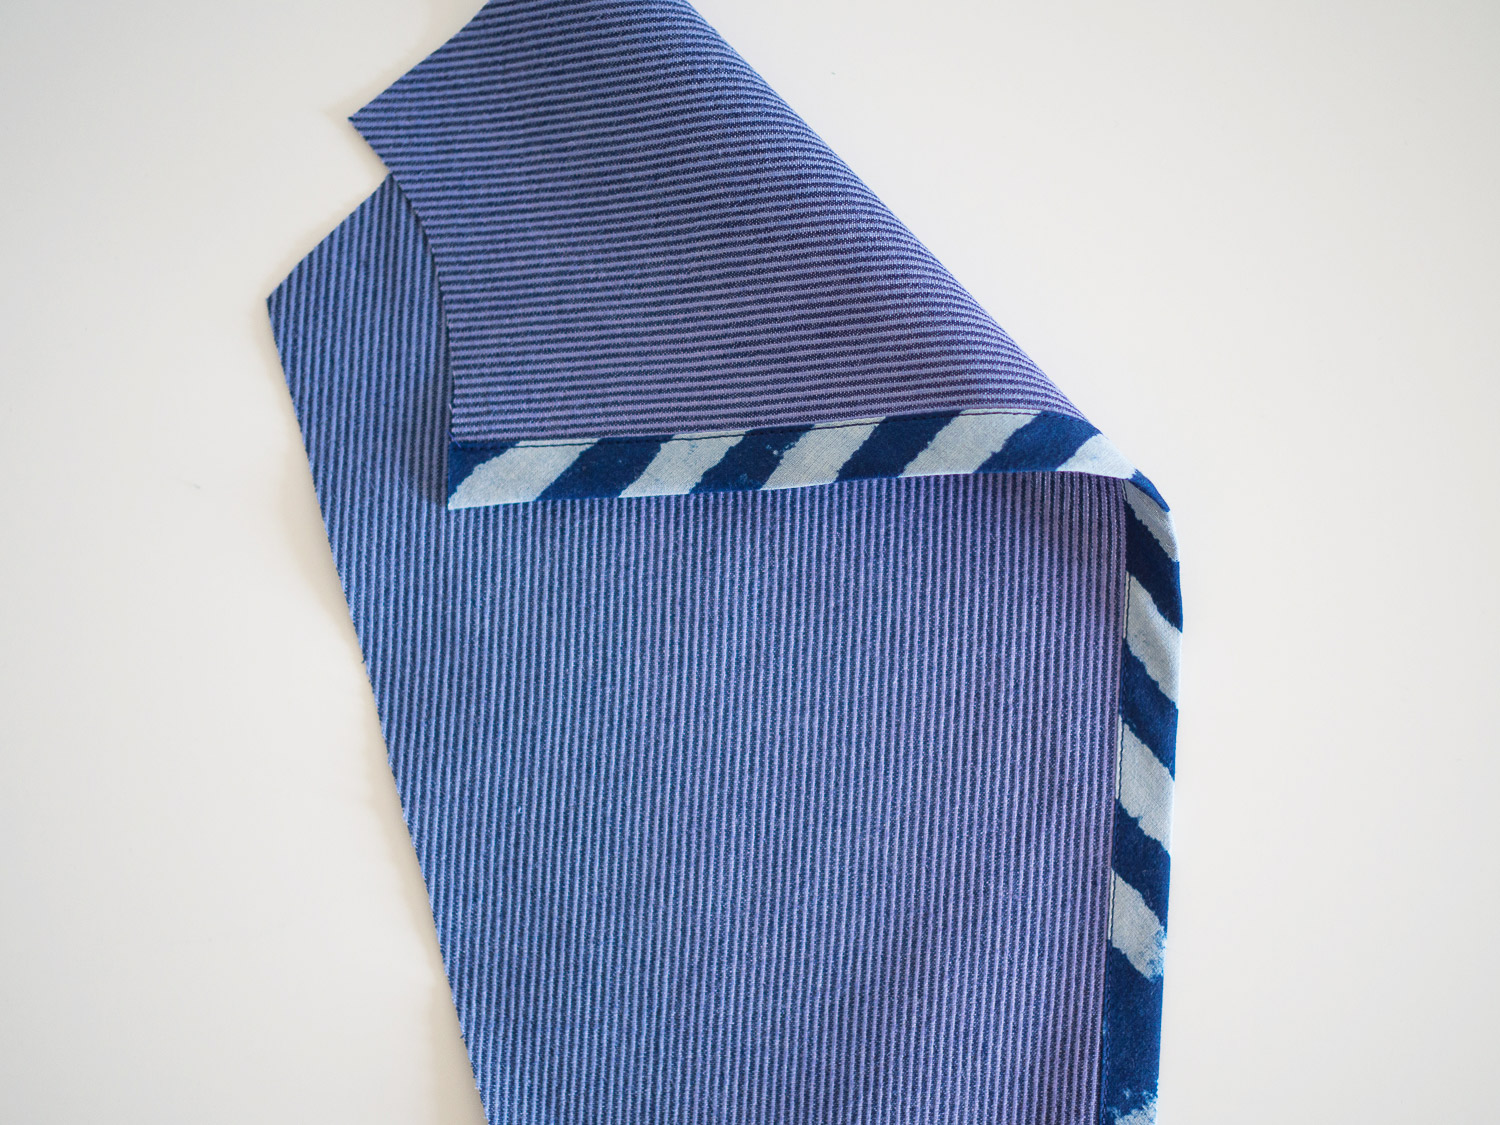
Hem time! Yay! If you would like to bind the hem on your Collins Top, then keep following this tutorial. If you would prefer a simple double folded hem, then head over to this tutorial for more guidance. 

Getting started

Take a length of binding at least 5cm (2in) longer than the circumference of your hem (this can be store-bought or self-made bias tape).

Fold one short end under by about 2cm (¾in) and begin pinning the binding to the hemline with right sides together. 

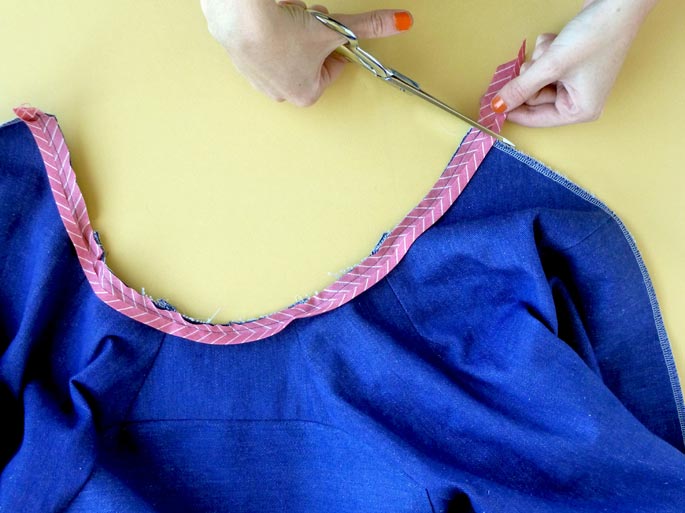
Continue pinning the binding until the end of the bias strip overlaps the beginning of the bias strip. Trim off any excess.

Stitch in place with a 1cm (⅜in) seam allowance.

Trim down the seam allowance down by about 5mm (¼in).

bias_binding_hem_5.jpg

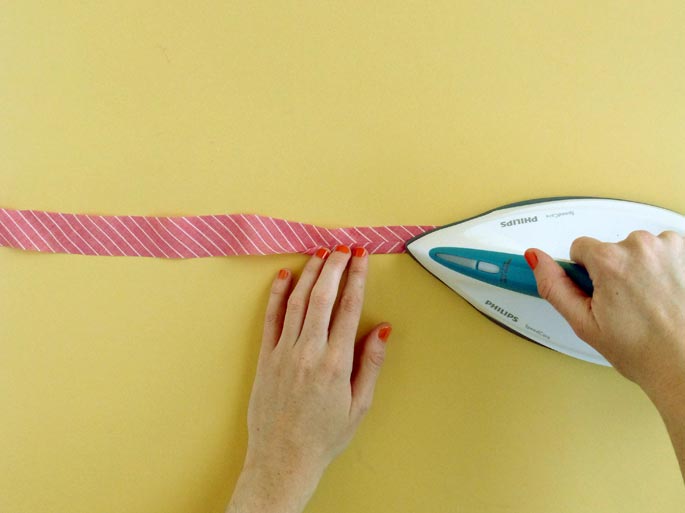
Flip the binding to the right side, and with your fingers, press the seam allowance towards the binding.

Understitch the seam allowance to the binding.

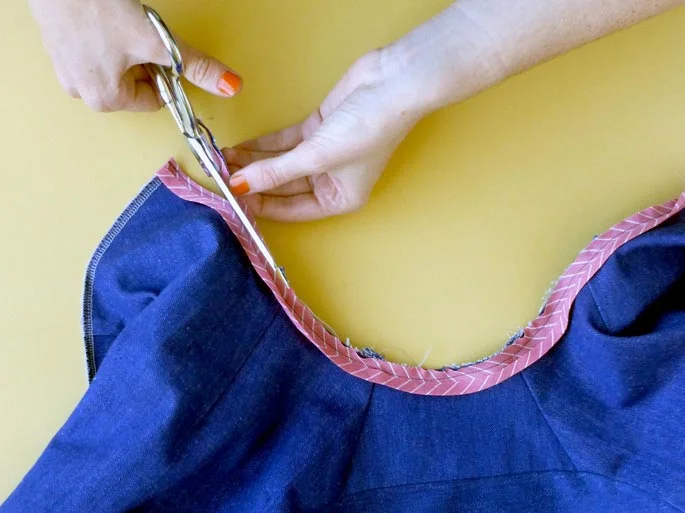
Turn the top inside out and flip the bias binding to the inside of the top. Fold the raw edge of the binding under before pressing and pinning in place.

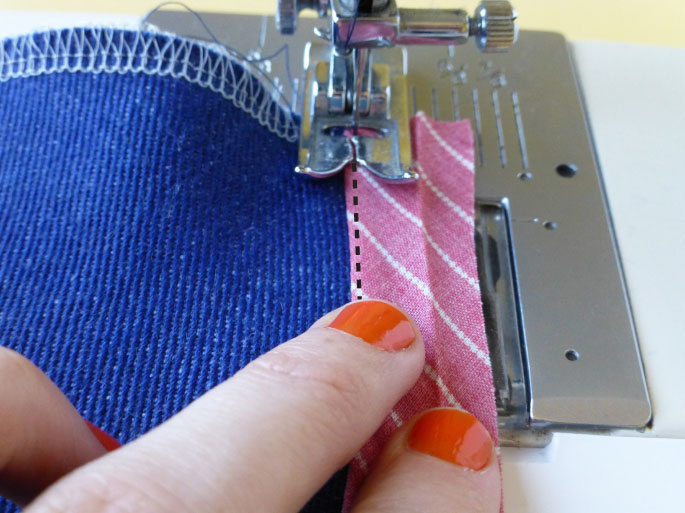
Sew hem by stitching binding in place, close to the folded edge of the binding.

Give the binding a good press from the right and wrong side. 

See all the posts in the Collins Top Sew-along.


You may also like:

The Collins Top Sew-along : Sewing an all-in-one facing

Welcome back to the Collins Top Sew-along, today we're working on my favourite element of the sleeveless version of the Collins Top - the all-in-one facing. It is sure to give you a really beautiful and clean finish, as well as leave you feeling pretty chuffed with your skills!

Finish raw edges of the facing pieces

To start, take the FRONT and BACK FACING pieces and finish the bottom edges with your chosen method. For a really beautiful finish, consider using bias binding (do this Hong Kong style to reduce bulk).

Join back facing pieces

With right sides together, pin the BACK FACING pieces together, from the notch down only. The upper part of the seam will be left open, as this will be attached to the centre back opening later on.

Stitch the seam with a 2cm (¾in) seam allowance, being sure to backstitch at the notch.

Press seam allowance open.

Join shoulder seams

With right sides together, pin FRONT and BACK FACING together at the shoulder seams.

Stitch with a 1.5cm (⅝in) seam allowance.

Press seam allowances open.

Attach button loop

Create the button loop and attach to the top using this tutorial. If you would prefer to make a hand-stitched button loop (pictured above), check out this tutorial

With the top right side up and the shoulder seams flat, turn back the centre back seam allowances on both sides of the opening, so that they are sitting flat (not folded inside the top).

Attach facing at neck line

sewing_facing_11.jpg

With the centre back seam allowances still pressed open, place the facing right side down on to the top (FRONT FACING on the front of the top and BACK FACING on the back of the top), matching the neckline and shoulder seams (the centre back seam allowance on the facing also needs to be flat and not folded). Pin the necklines of the facing and the top together.

When you reach the centre back opening, check that the seam allowance is still pressed open on both the top and the facing. Pin the facing to the top, down each side of the opening until you reach the point where the centre back seams are joined on both the top and the facing.

Sew the facing in place by stitching up the centre back seam on one side - with a 2cm (¾in) seam allowance (you should be able to follow the crease created earlier), starting at the point where the centre back seam stops.

Continue up one side of the opening until you reach the point where the centre back seam allowance meets the neckline. Pivot your machine foot using the needle, so that you can turn the corner and stitch around the neckline. 

Reduce to a 1cm (⅜in) seam allowance around the neck, before going back down the other side of the centre back seam (again with a 2cm / 3/4in seam allowance).

Before continuing, check that the button loop has been secured correctly by lifting the back facing.

Trim, clip + grade the seam allowance

Trim, clip and grade the seam allowance by 5-6mm (¼in). You can also clip back the corners at the centre back.

Turn the facing to the inside of the top and use a corner turner (or pencil) to turn out the corners at the centre back.

Understitch

Understitch the seam allowance to the facing. To do this, lift the facing and press the seam allowance towards the facing with your fingers. You can then understitch the seam allowance to the facing (this will help the facing remain on the inside of the top), before giving it a good press.

You won't be able to stitch all the way to the centre back. Just get as close as possible.

Sew the armholes

To sew the facing and the top together at the armholes, take the top and lay it out flat with the right side facing down. 

Take one side and carefully roll up the top, towards the opposite side.

Continue rolling the top until you reach the start of the shoulder seam on the other side (the end closest to the neckline).

With the top still rolled up, flip the facing back towards you, so that it lies on top of the rolled fabric.

Lift the roll and flipped facing, and turn the remaining side of the top right side up, so that the armhole of the top can now meet the armhole of the facing (with the rolled up fabric in between). Line up the shoulder seams and pin in place.

Pin the top and facing together at the armhole, using the shoulder seams and notches as a guide.

sewing_facing_28.jpg

Stitch the armhole with a 1.2cm (½in) seam allowance (being careful not to stitch through the rolled up fabric).

Grade the seam allowance before clipping into the curve. Gently pull the rolled section out through one side of the facing to turn top and facing right side out.

Understitch

As the facing is already attached at the neckline, you won't be able to understitch the armhole all in one go. Understitch the armhole seam allowance to the facing by lifting the facing on the front armhole and sewing in from the side seam on the front and getting as close to the shoulder seam as possible.

Repeat for the back armhole by stitching from the back side seam around the armhole towards the shoulder seam.

Repeat the previous steps to attach the top and facing on the other side. Give the neckline and armholes a good press.

Sew the side seams

With the top inside out, flip up the facing so that you can access the side seam of both the top and the facing.

Pin the side seam of the facing and continue down the side seam of the top. Stitch the side seam with a 1.5cm (⅝in) seam allowance and press the seam allowances open.

(Please note: in this photo the side seams are not finished - as Saki was sewing flat-felled seams in her version. In your version, side seams should be finished already.)

Stitch the side seam with a 1.5cm (⅝in) seam allowance and press the seam allowances open.

And that's it for today's post. I hope you enjoyed it and learned something new!

See all the posts in the Collins Top Sew-along.


You may also like:

How to sew a hand-stitched button loop

While doing the sew-along for the Collins Top, I thought it would be a good opportunity to show you how to make a hand-stitched button loop. Although the instructions of the Collins Top call for a bias cut button loop (the tutorial for making that can be found here), a hand stitched button loop could be a beautiful alternative, if you find you've got the time, or would just like a lovely little detail (or even just to learn a new skill)! This tutorial will guide you through making a button loop for the Collins Top, but could be used for any pattern that includes a button loop. 

Take the top and place it right side up, with the shoulder seams flat. Turn back the right side of the centre back opening, so that you can access the left side. Place a pin horizontally 1cm (⅜in) down from the neckline to mark the position of the button loop.

Thread a hand needle and tie a knot in the end. You can choose to use a thick thread (what we used for this tutorial), or you can double thread your needle so that you have four strands of thread.

Put your needle through the fabric from the wrong side, at the point where the pin marks the button loop location. 

Position your button where it will be sewn and loop your thread around it, to work out the amount of thread you require for your loop.

Insert your needle into the fabric on the same side that you started, but about 1cm (3/8in) down from where you started, creating a loop (although this distance will depend on the size of your button). For example, if your button is only 5mm, then the top and bottom of your loop should only be about that far apart. 

Being careful to hold your loop of thread firmly (so it remains the correct size), flip your fabric to the wrong side (the side that your thread is now on).

Still holding the loop firmly, put your needle back in the fabric, close to the point where your thread came through. 

Pull the thread through to the right side of the fabric. 

Take your thread back to the point where you started, creating a second loop. Make a small knot on the inside of the garment to secure the loop.

Bring the needle (and thread) back to the right side of the garment. You are now going to make your button loop using blanket stitch around your loops.

To form a blanket stitch, insert your needle into the button loop, creating a circle with the remaining thread. Once the needle is through the button loop, put it over the thread of the circle. 

This is quite a difficult process to describe in photos, so if you are new to this technique or stitch, check out this youtube video

Pull the thread tight to form your stitch. 

Once the stitch is formed, push it to the base of the loop.

Continue making blanket stitches, stacking one on top of the next, until you reach the end of the loop. 

Take your needle and thread to the inside of the garment and then secure the thread with a knot. 

And there you have it. A beautiful button loop to give you a very beautiful finish!

Again, if you would prefer the quicker button loop, check out this tutorial.

See all the posts in the Collins Top Sew-along.


You may also like:


CREDITS: 

Fabric : The Drapers Daughter

Photography : Saki Jane Marsh


How to sew a bias bound seam

bias_bound_seam_cover.jpg

I'm interrupting the Collins Top sew-along today to show you how to sew a bias bound seam. Why? Because they are beautiful! And the centre back seam in the Collins Top, gives you the perfect opportunity to use bias binding to get a really clean, beautiful and professional looking finish. Bias bound seams can be used in a range of different garment, and work particularly nicely in a garment that you are likely to see the inside of.

For the sake of the Collins Top where you are guided to use lightweight fabric, a bias bound seam will work well. I'd suggest though, that if you were making a garment from a thicker or bulkier fabric, using a traditional Hong Kong bind (in the case of a Hong Kong bind, the underside of the binding is not folded and enclosed, but left raw to minimise bulk).

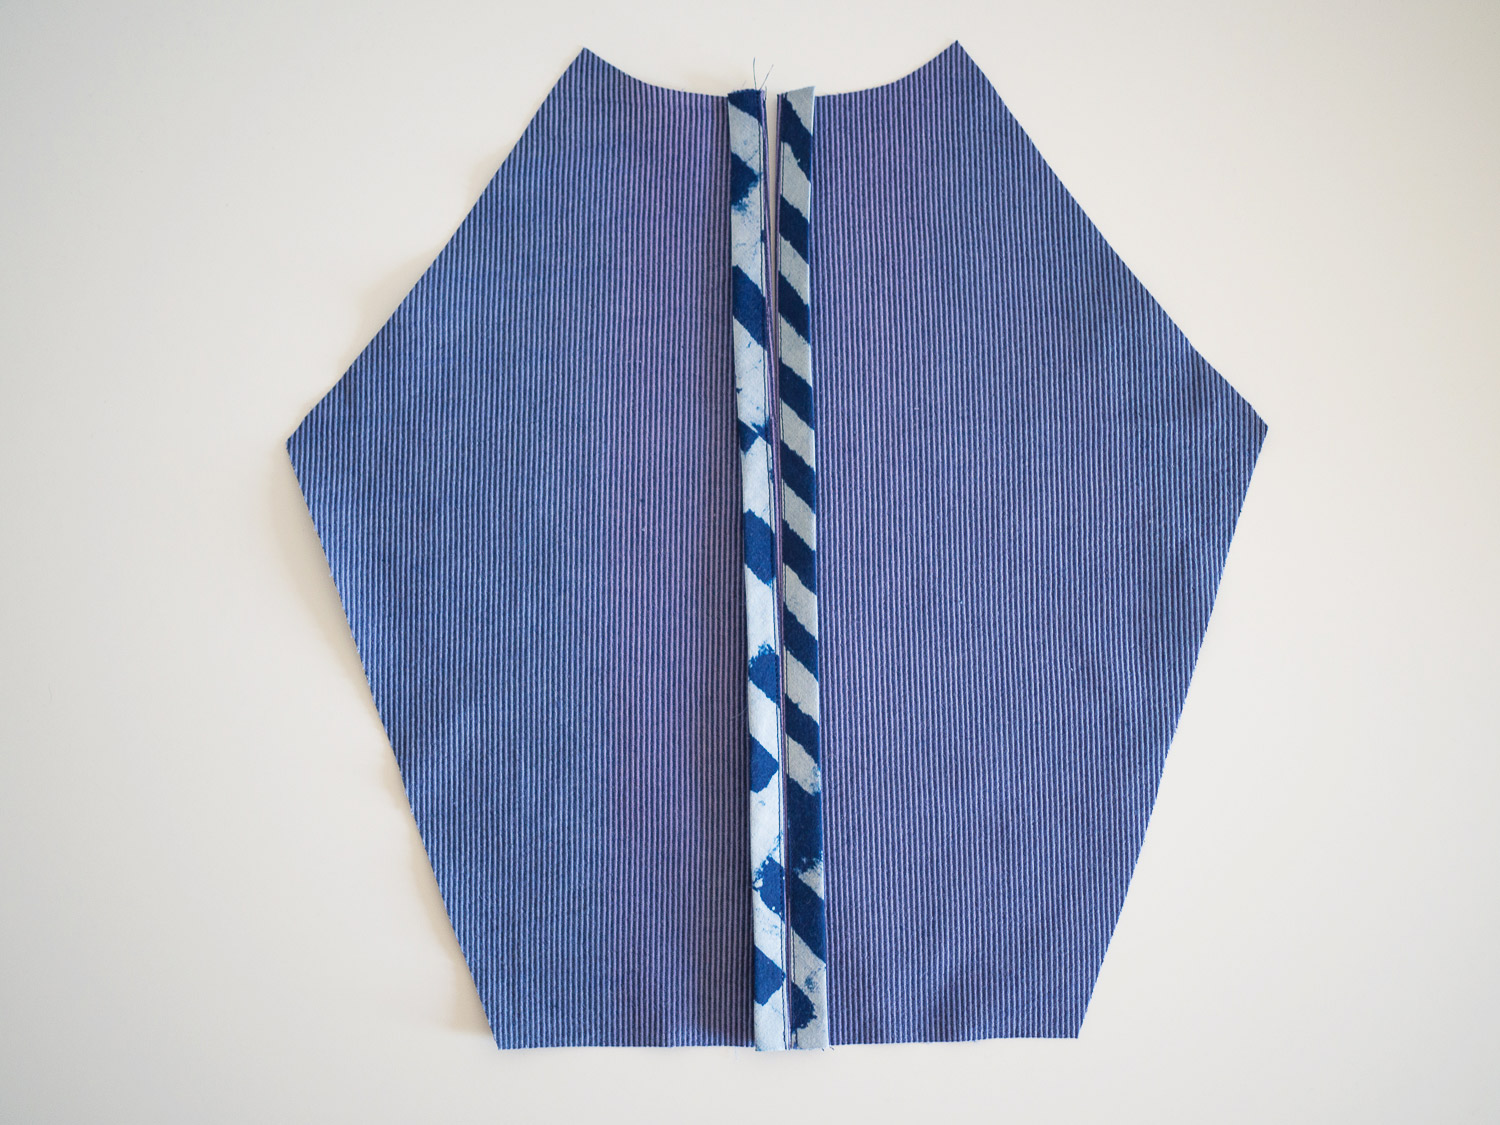
To get started there are two ways you can go about sewing a bias bound seam. You can bind the raw edges of the pieces you are joining before you sew the seam together, or you can sew the seam and then bind the raw edges. It really is a matter of preference and by the end, both options will look the same. It is easier to bind the raw edges before sewing the seam, but if you are sewing a really long seam (if you are using this tutorial for a pattern that is not the Collins Top), you may join the seams first to prevent any stretching or pulling. 


Getting started

For this tutorial you can use store bough bias binding, or you make your own from your choice of fabric. Cut some bias binding 32mm wide (1 1/4in) wide. If you would like some help with how to go about making your own bias binding, you can check out this tutorial which will guide you through the (very easy) process. 


Technique 1 

(Binding the raw edge before joining the seam)

bias_bound_seam_1

Cut a piece of binding that is a little longer than the edge you are binding.

With right sides together, pin the binding to the seam you are binding (in the case of the Collins Top, it is the centre back seam).

bias_bound_seam_2

Stitch the binding in place, sewing with a 1cm (3/8in) seam allowance. 

bias_bound_seam_3

Press the seam open, with the seam allowance pressed towards the bias binding. 

bias_bound_seam_4

Flip the panel so it is right side down and carefully trim down the seam allowance by about 3-4mm (1/16in).

Press the other long raw edge of the binding under by about 1cm (3/8).

bias_bound_seam_5

Fold the binding in half so that the binding wraps around the raw edge, the fold of the binding just overlapping the original stitch line. Carefully press and pin in place. 

bias_bound_seam_6

Carefully stitch the binding in place by stitching a pin width away (about 1-2mm) from the folded edge. If you have an edge stitch foot for your machine, this is a good time to use it!

bias_bound_seam_7

Give the binding a good press and admire your handiwork!

bias_bound_seam_8

You can see that your seam looks beautiful and clean from both sides. 

bias_bound_seam_9

You can repeat the process for the other side of the back, and then stitch the seam as normal. When you press the seam open you will see your beautiful bound edges!


Technique 2 

(joining the seam and then binding the raw edge)

bias_bound_seam_10

Pin and stitch the centre back seam allowance according to the instructions. 

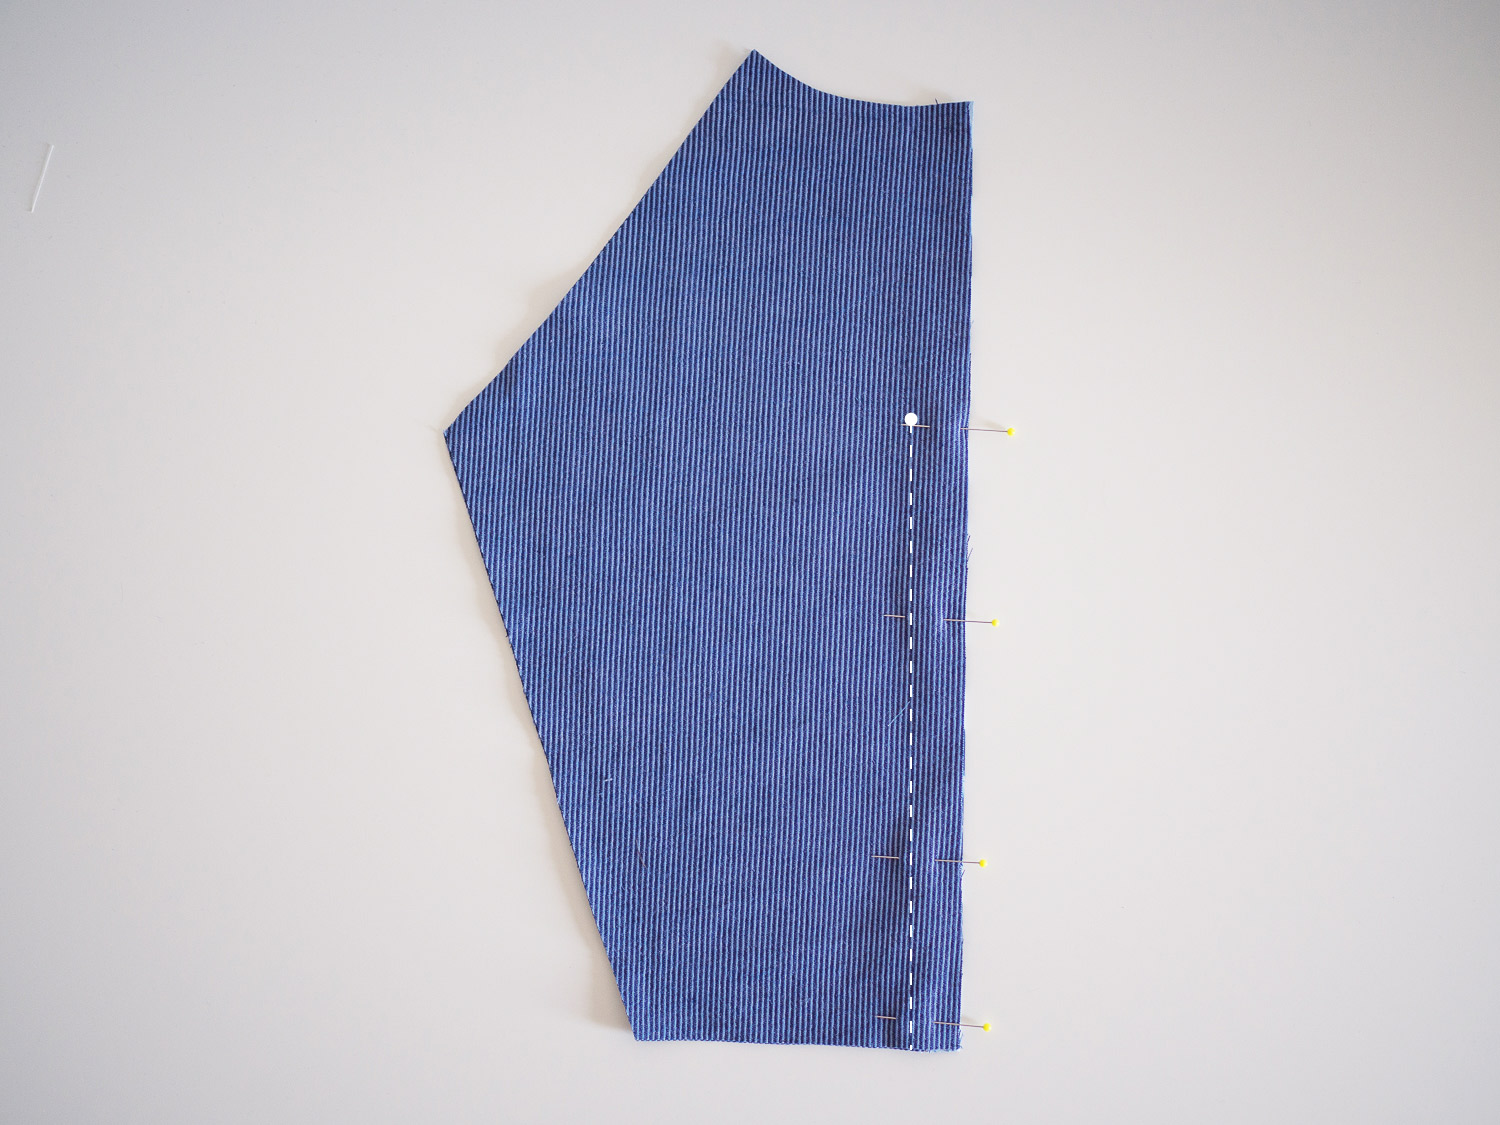
Pin from the upper notch (13cm / 5in down from the top edge) to the bottom edge. The upper part of the seam will be left open, as later on we will be adding a button and loop closure to make this section the opening on the top. Stitch the seam with a 2cm (¾in) seam allowance, being sure to backstitch at the notch. This will ensure the centre back opening stays nice and secure.

bias_bound_seam_11

Press the seam allowance open.

Please note: in the photos one side of the seam has already been bound. Disregard and follow the instructions for one side of the seam and then repeat for the other. 

bias_bound_seam_12

Press (just with your hands) the seam allowance on the left side of the opening towards the seam allowance on the right side of the opening.

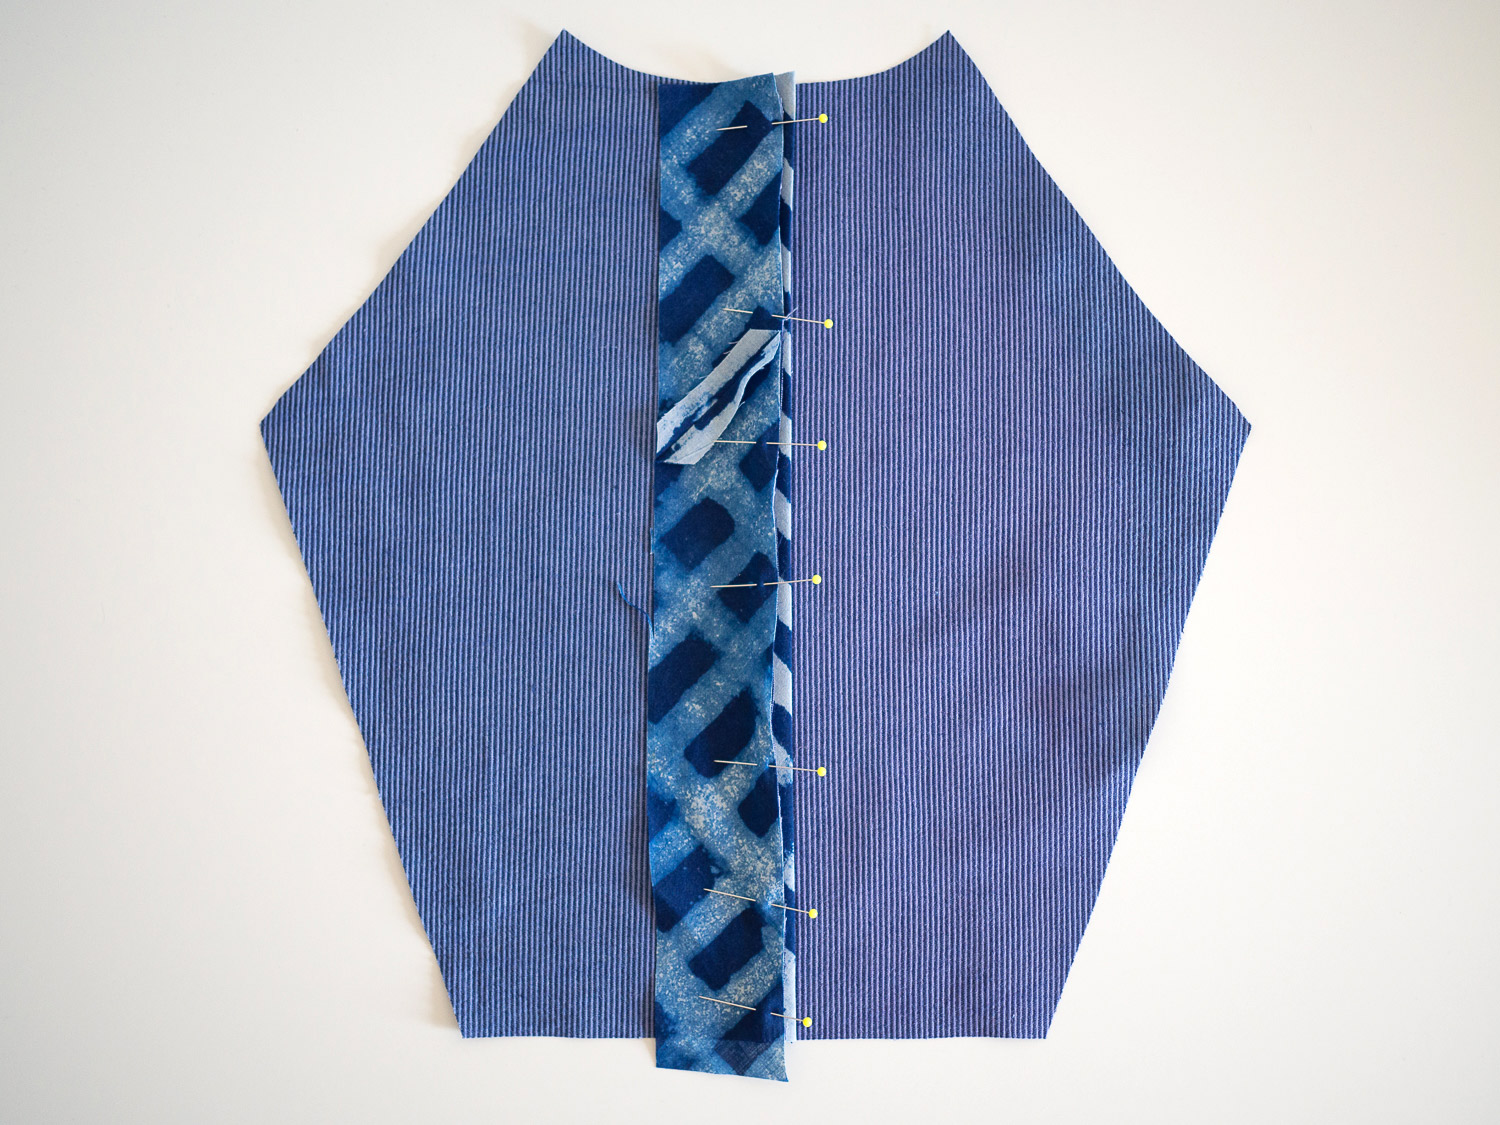
Take a length of bias binding approximately the length of the seam. Pin one edge of the binding to the raw edge of the seam. 

bias_bound_seam_13

Flip back the seam allowance to check that you have only pinned through the two layers and haven't printed through any of the layers underneath. 

bias_bound_seam_14

Stitch the binding in place, sewing with a 1cm (3/8in) seam allowance. Before stitching, make sure the other layers of fabric are out of the way. 

bias_bound_seam_15

Press the seam allowance towards the binding. 

Trim down the seam allowance by about 3-4mm (1/16in)

bias_bound_seam_16

Press the raw edge of the binding in towards the raw seam by about 1cm (3/8).

bias_bound_seam_17

Wrap the bias binding around the raw edge, bringing the fold so that it overlaps the original stitch line. Press and pin in place. 

bias_bound_seam_18

Continue pressing and pinning until the binding is in place on the whole seam.

bias_bound_seam_18

Flip the seam allowance open so that it is sitting flat (and there are no other layers of fabric underneath) and stitch the bias binding in place by stitching close to the folded edge. 

bias_bound_seam_19

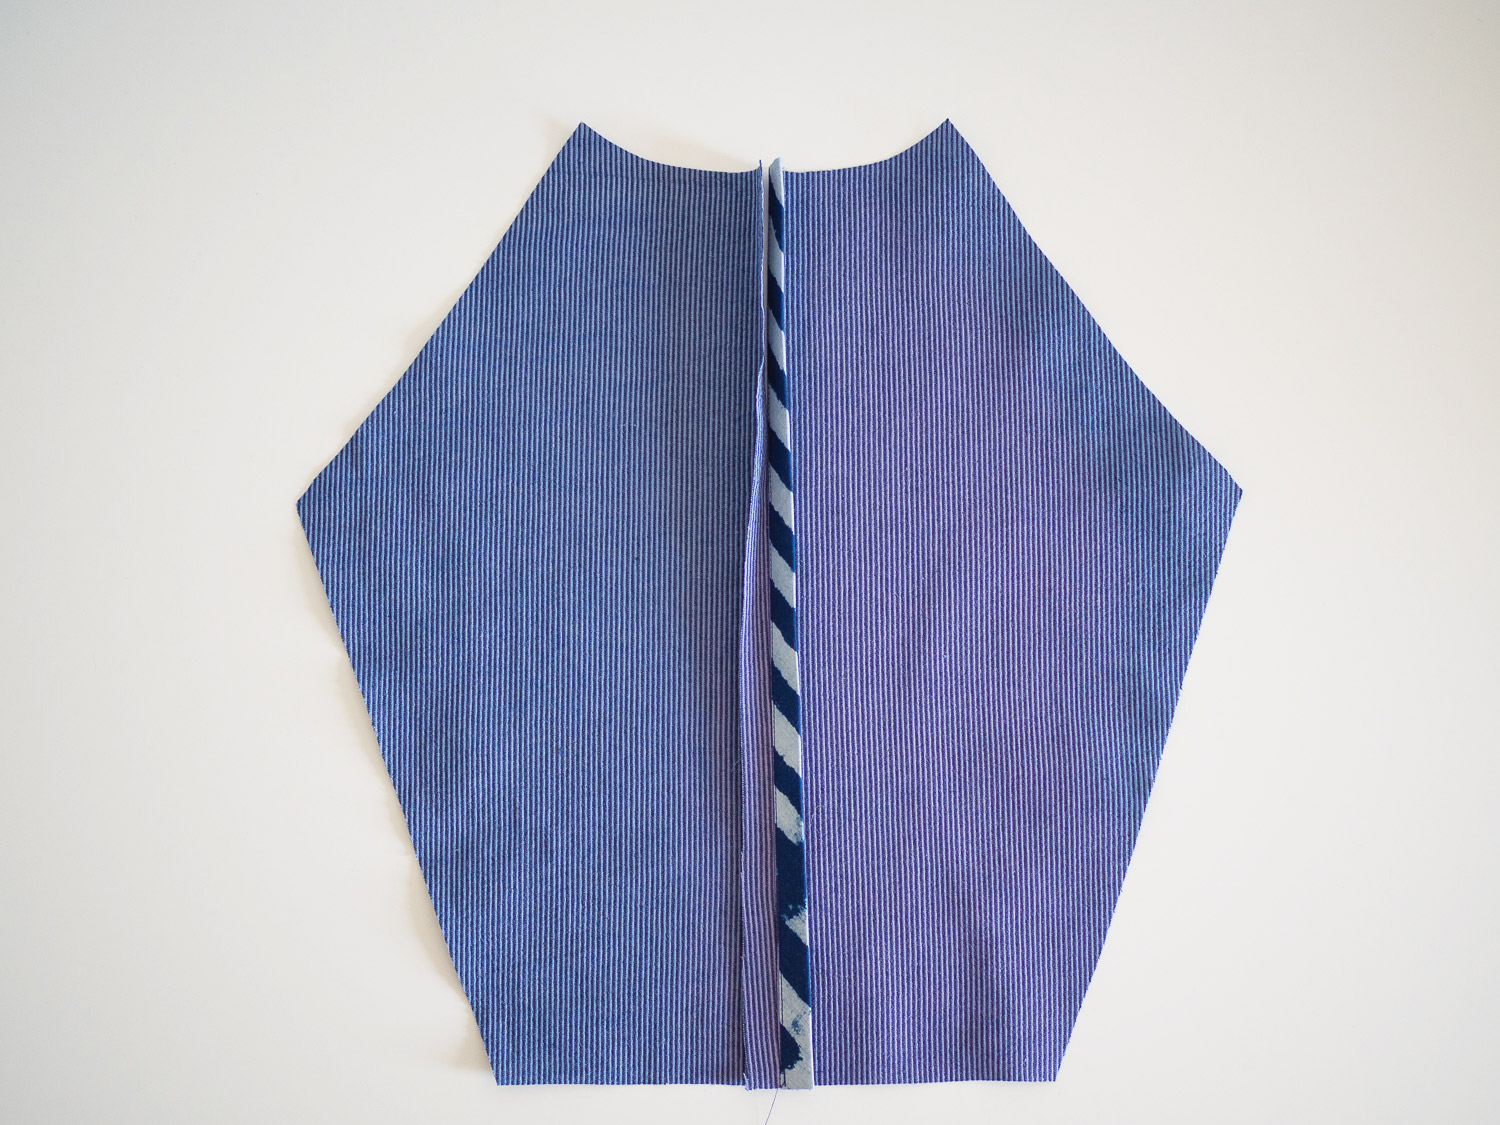
Press the seam allowance open and there you have it. You will see that the finish looks the same now as technique 1. 

There you have it... A beautiful way to finish your centre back seams!

See all the posts in the Collins Top Sew-along.


You may also like:


CREDITS: 

Fabric : The Drapers Daughter

Photography : Saki Jane Marsh


How to : Sew a rolled hem with a standard foot

how_to_sew_a_rolled_hem_1.jpg

There are many ways you could choose to finish the hem of your Rushcutter.

You could use the hem facing, just like I did for VIEW A, you could use a strip of bias binding, or like me, you could do a rolled hem.

You can do a really narrow rolled hem, which can be a beautiful finish on fabrics like organza or chiffon, but I went for something a little wider as I'd say most people aren't sewing their Rushcutters from chiffon! This method will work with a narrower hem, if you want one.

I know there are a bizillion great machine feet which can help you get all kinds of finishes, but I do things the old school way, as a lot of my learning was done on an industrial machine without any fancy feet. So in tofay's tutorial, I will show you how to sew a rolled hem with a standard machine foot.

Stitch

how_to_sew_a_rolled_hem_2

With the dress inside out, using your fingers, turn up the hem by 5mm (1/8in) and stitch. If you go nice and slow you don't need to press and pin, and can just fold up the hem as you go.

Press

how_to_sew_a_rolled_hem_3

Turn the hem by a further 5mm (1/8in) and press. Pin hem in place.

Stitch

how_to_sew_a_rolled_hem_4

 Stitch along the original stitch line.

Press

how_to_sew_a_rolled_hem_5

Give the hem a good press on the right side of the garment, You will see that you have only one row of stitching on the right side.  


I'd love to know if you have any secrets for finishing hems! Let me know in the comments.


You may also like:

How to finish an armhole with bias binding

how-to-finish-an-armhole-with-bias-binding.jpg

At this point in the Rushcutter Sew-along, our Rushcutter's are really starting to look like Rushcutters!

In today's post, we will be finishing the armholes with bias binding. I am a huge fan of binding as a finish, it gives you a lovely clean finish, without the extra bulk of a facing. 

Even if you are not sewing The Rushcutter, I am sure you will find this tutorial useful for projects to come!

Measure the armhole

how-to-finish-an-armhole-with-bias-binding_2

Take a tape measure and measure around the armhole. Take note of the measurement.

Prepare binding

how-to-finish-an-armhole-with-bias-binding_3

For this tutorial, you can use store-bought binding or make the binding yourself

Cut a piece of binding the length of your armhole.

If you are using binding that you made yourself, you will need to fold it before sewing. Take the binding and with right side down, press one long edge under by 10mm (5/8in).

Join binding

how-to-finish-an-armhole-with-bias-binding_4

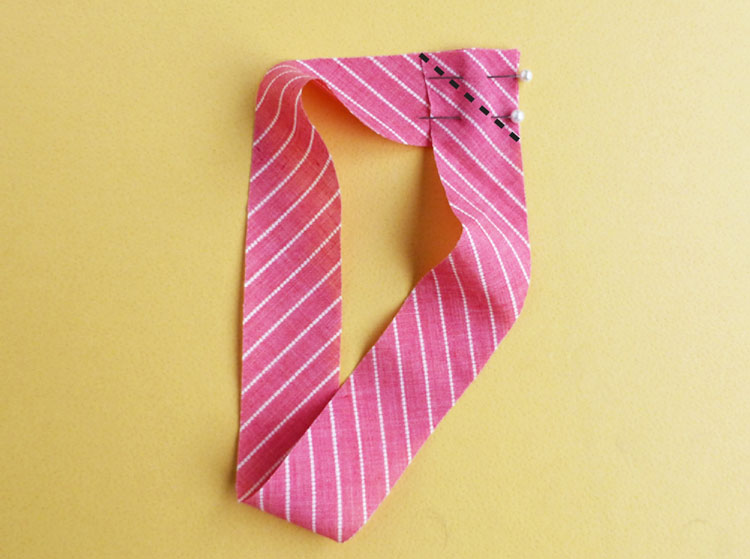
With right sides together, bring the short ends of the bias binding together at a right angle. The overlap will create a square. 

how-to-finish-an-armhole-with-bias-binding_5

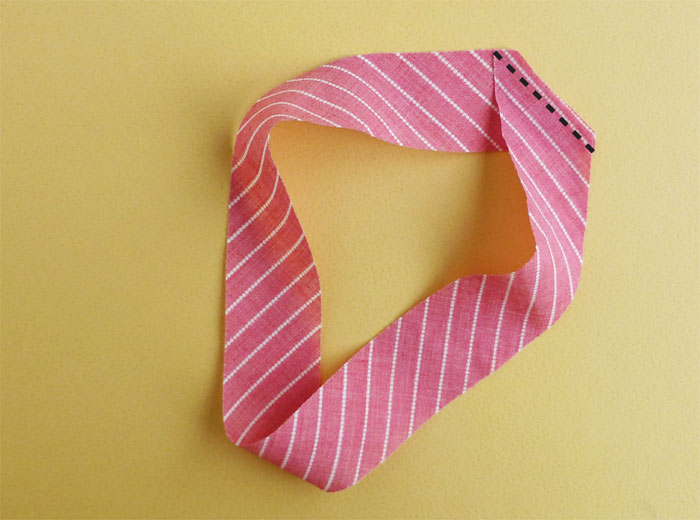
Pin in place and stitch across the diagonal of the square. 

how-to-finish-an-armhole-with-bias-binding_6

Trim back the seam, close to the stitch line, and press the seam open. 

Pin binding to armhole

how-to-finish-an-armhole-with-bias-binding_7

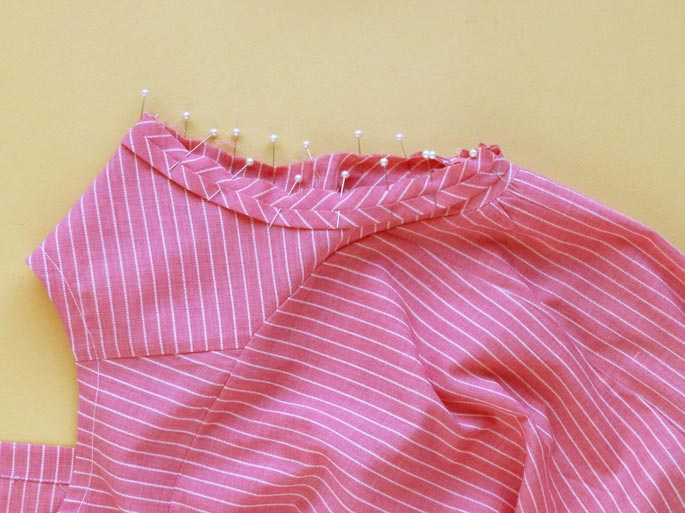
Now that the binding is in a continuous loop, with right sides together, pin the unpressed edge of the binding to one of the armholes, being careful to evenly distribute the binding around the armhole.

Be careful about where you place the binding seam - I suggest placing it somewhere where is there is not yet a seam, to minimise bulk (for example, the middle of the back armhole). 

Stitch

how-to-finish-an-armhole-with-bias-binding_8

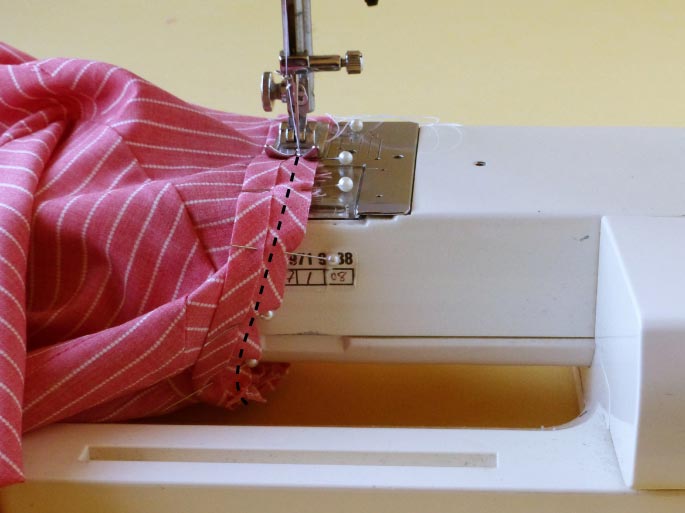
Stitch the binding to the armhole with a 1cm (3/8in) seam allowance. 

Clip into the seam allowance at regular intervals. This will help you achieve a smooth armhole. Trim back the seam allowance by 2-3mm (1/16in) if your fabric is thick or bulky.

Understitch

how-to-finish-an-armhole-with-bias-binding_9

Turn the binding to the right side and, using your finger, press it (and the seam allowance) nice and flat. Understitch the seam allowance to the binding. 

Edge stitch

how-to-finish-an-armhole-with-bias-binding_10

Fold the binding to the inside of the dress, rolling the seam line towards the inside of the dress slightly (this is so you won't be able to see the seam line from the right side).

Give the armholes a good press, from the outside. Pin the binding in place and then stitch around the binding close to the fold. It’s a good idea to start and finish your stitching at the underarm point as this line of stitching will be visible from the right side of the garment.

And tah-dah! You have a lovely clean finish on your armhole. 


You may also like:

How to : Join the bodice to the dress

how_to_join_the_bodice_rushcutter_1

If you are following along, you will know that over the last few weeks I have been guiding you through the process of sewing a Rushcutter dress. 

how_to_join_the_bodice_rushcutter_2

Today we will be joining the body of the dress to the bodice and your Rushcutter will really take shape. 

Pin

how_to_join_the_bodice_rushcutter_3

With wrong sides together, match the notch at the centre front of the FRONT panel to the notch in the centre of the CENTRE FRONT PANEL. Pin. 

Continue moving from notch to notch, pinning the two pieces together. Curved seams can be a little tricky, so you will need to use lots of pins!

Stitch the seam with a 6mm (1/4in) seam allowance, going nice and slow. Stop regularly to left the seam up and check that all the seams are lying flat and there is no puckering underneath. 

Trim seam

how_to_join_the_bodice_rushcutter_4

Trim back the seam allowance by 2-3mm (1/16in) and press the seam up towards the neckline.

Stitch

Fold the seam with right sides together, enclosing the raw edge within the seam. Press and pin. Stitch seam with a 6mm (1/4in) seam allowance.

Press

how_to_join_the_bodice_rushcutter_5

Press the seam down towards the hemline.

It is just a quick post today, as tomorrow we are up to binding the armholes, and I wanted to write that as a separate post, so it can be a tutorial you can look back on in projects to come!


You may also like:

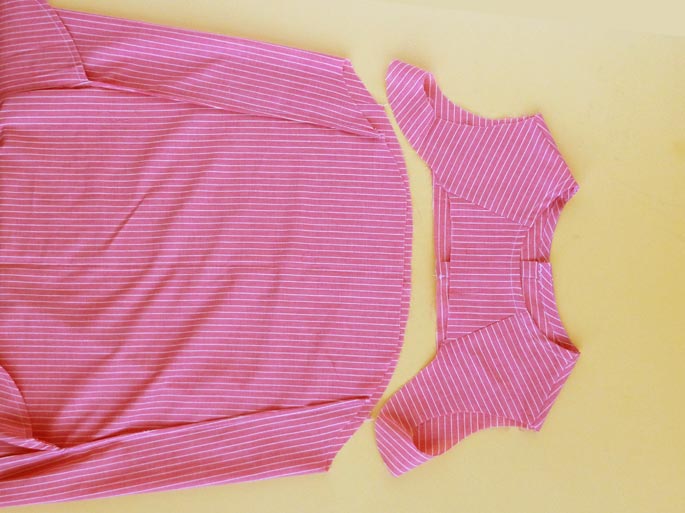
How to: Sew in-seam pockets with french seams

how_to_sew_pockets_with_french_seam_1

Over the past two days I have shown you how to prepare the bodice of your Rushcutter - View B. At this point we are up to putting in the in-seam pockets.

I just LOVE pockets, so I find a way to put them in pretty much every garment I make. Even a soft floaty dress like my Rushcutter.

If you're not as partial to a pocket as I am, you can simply attach the FRONT to the SIDE PANELS, ignoring the pocket all together. But if you are a fan of the pocket, well continue on with me today and I'll show you how to get a lovely finish with a french seam. And this method will work for other garments, not just The Rushcutter!

Place your pockets

how_to_sew_pockets_with_french_seam_2

Take 1 pair of pockets and, with wrong sides together, match the pockets to the notches on the FRONT. The notch in the centre of the pocket should be matched with the middle notch on the FRONT of the dress.

Pin pocket in place. Now, before sewing, I would suggest holding the panel up to your body, and checking how the pockets sit on your body. The top of the panel should sit just above your bust. If the pocket feels too low or too high, remove the pins and place the pocket in a more suitable location (this is when a toile really comes in handy). Measure the distance between the notch on the pocket and the notch on the dress, so that you will be able to place the other pocket pieces in the correct spot. 

Stitch one side of the pocket to the front

how_to_sew_pockets_with_french_seam_3

When you are happy with the pocket placement, stitch from the top of the pocket to the bottom, using a 6mm (1/4in) seam allowance. 

Repeat on the other side.

Trim back pocket seam allowance

how_to_sew_pockets_with_french_seam_4

Trim back the seam allowance by 2-3mm (1/16in), from the top of the pocket to the bottom, leaving the rest of the seam untrimmed, on both sides.

Open the seam, and press the seam allowance towards the pocket. 

Create a french seam

how_to_sew_pockets_with_french_seam_5

Fold the pocket back towards the dress, now with right sides together, enclosing the raw edge and the original row of stitching inside the fold. Once again, stitch from the top of the pocket to the bottom with a 6mm (1/4in) seam allowance. Repeat for the other side. 

Stitch pocket to side panel

how_to_sew_pockets_with_french_seam_6

Now take the remaining pair of pockets and match them to the SIDE PANEL pieces with wrong sides together, once again matching up the centre notches. If you changed the placement of your pockets on the front, make sure you do the same for the pockets being attached to the side panels. Pin in place and attach using the same method we used for the first side.

Join the front to the side panel

how_to_sew_pockets_with_french_seam_8

Press all 4 pocket bags away from the panel they are attached to. 

With wrong sides together, pin the SIDE PANEL to the FRONT on both sides. Pin up the seam, around the pocket, and then continue pinning the remainder of the seam.

how_to_sew_pockets_with_french_seam_9

Stitch the pieces together with a 6mm (1/4in) seam allowance. You will notice that, when you approach the pocket, your stitching line does not meet up with the seam between the body of the dress and the pocket. This is how it is supposed to look, they will match up when you sew your second row of stitching. 

Clip into corners

how_to_sew_pockets_with_french_seam_10

Clip into the corners between the pocket bag and the body of the dress, getting nice and close to the row of stitching, but being careful not to cut through. 

Trim back the whole seam by 2-3mm (1/16in).

Press seam

how_to_sew_pockets_with_french_seam_11

Turn the pieces inside out, and press the seam flat. Pin and then and stitch along the seam, with a 6mm (1/4in) seam allowance enclosing the raw edge inside the seam. 

Attach the back

how_to_sew_pockets_with_french_seam_12

Attach the BACK to the side panels with a french seam. Use the notches to help you position the pieces correctly. Press the finished seams towards the front of the dress.

So that brings us to the end of this post! Tomorrow, the Rushcutter will really start looking like a dress as we will be joing to the bodice to the body of the dress. Yay!


You may also like:

How to : Finish a neckline with bias binding

how_to_finish_neckline_bias_binding_1

Binding necklines and armholes can create a lovely clean and professional finish. It minimises bulk and can be a perfect finish for lightweight or transparent fabrics that you would be able to see a facing through.

Earlier in The Rushcutter sew-along, I showed you how to make your own bias binding, so head back there if you think you would prefer to make your own binding instead of buying the pre-made stuff. 

Measure the neckline

To start, measure the length of the neckline of your dress. Take note of the measurement. 

Cut a piece of binding the length of your neckline plus 2cm (3/4in) - this extra 2cm will account for the raw edge at each end that need to be turned under, to achieve a clean finish. 

Press the bias tape

how_to_finish_neckline_bias_binding_2

Lay the binding face-down and press one of the long edges under by 10mm (3/8in). If you are using a different width of binding, fold up by a third of the total width. 

how_to_finish_neckline_bias_binding_3

Fold back both short edges by 1cm (3/8in) and press.

Pin

how_to_finish_neckline_bias_binding_4

With right sides together, align the fold on the short edge of the binding with the centre back of the UPPER BODICE. Pin the unpressed edge of the binding to the neckline. 

how_to_finish_neckline_bias_binding_5

Continue pinning the binding around the neckline (being careful not to stretch it) until you reach the centre back on the opposite side. Check that the fold on the short edge matches up with the centre back seam. If it doesn't, you will need to adjust it, until it sits correctly.

Stitch

how_to_finish_neckline_bias_binding_6

Stitch the binding to the neckline with a 1cm (3/8in) seam allowance. Clip into the seam allowance at regular intervals. This will help you create a smooth neckline when you fold the binding to the inside of the dress. If you are using a thick or bulky fabric, you can trip down the seam allowance by 2-3mm (1/16in).

Understitch

how_to_finish_neckline_bias_binding_7

Using your finger, press the binding (as well as the seam allowance) nice and flat, with the seam allowance pushed towards the binding. Understitch the seam allowance to the binding. This will help the binding roll to the inside of the garment.

Press and pin

how_to_finish_neckline_bias_binding_8

Fold the neck binding to the inside of the dress, rolling the seam line towards the inside of the dress slightly. This will give you a nice clean finish, and will  prevent the stitch line from being seen on the right side of the dress. With the raw edge of the binding still folded under, press the binding flat around the neckline, and pin in place.

Edge stitch

how_to_finish_neckline_bias_binding_9

Stitch along the folded edge of the binding and then press to remove any wrinkles. 

Baste the placket in place

how_to_finish_neckline_bias_binding_10

The final step, before we are ready to move onto the body of the dress, is to join the UPPER BODICE at the centre back.  With right sides out, lay your bodice face down. Place the button stand on the right-hand side on top of the left-hand button stand, lining up the folded edge with the stitch line underneath. 

how_to_finish_neckline_bias_binding_11

Make sure that the edge of the button stand just covers the line of stitching unerneath . Use a pin to hold the button stands in position and make a short horizontal row of stitches 6mm (1/4in) from the bottom to hold in place. 

That's all for today, tomorrow I'll be showing you how to sew the inset pockets with a french seam!


You may also like:

The Rushcutter sew-along: View B begins!

the_rushcutter_bodice_french_seams_1

Today it's finally time to jump into The Rushcutter - View B sew-along, after concluding the sew-along for View A last week. 

I decided to construct this version with french seams, so that I could offer an alternative finish for those sewers who don't own overlockers, and because French seams are oh-so-nice! If you are not making The Rushcutter, but would like to learn how to sew a french seam, then keep reading. 

French seams are a good choice for you (even if you do have an overlocker), if your fabric is light to mid-weight. You get a lovely clean finish, which gives your garments a really high-end look. If you would prefer normal seams, just follow along, remembering to put right sides together (not wrong sides together, which is how you go about creating a french seam).

joining the front and back bodices

(sizes A & B only)

the_rushcutter_bodice_french_seams_2

For sizes C - K, the front and back bodice pieces are all-in-one. This was not possible for size A and B, because the armhole is not big enough to allow it, so these pattern pieces need to be cut and stitched together before following along with the instructions for all sizes,

With wrong sides together, attach the FRONT UPPER BODICE to the BACK UPPER BODICE and stitch together with a french seam (if you don't know how to sew a french seam, don't worry - I'll explain it in the following steps).

Preparing the button placket

the_rushcutter_bodice_french_seams_3

Place the UPPER BODICE face down, and fold back the centre back by 1cm (3/8 in), using the notches to guide you. Press in place.

the_rushcutter_bodice_french_seams_4

Make a second fold, this time 2cm (3/4 in) from the first, using the notches as a guide. Press in place.

adding interfacing

the_rushcutter_bodice_french_seams_5

If your fabric is lightweight, or quite flimsy, I suggest that you consider using interfacing to stiffen your button placket. I did not want to stiffen the whole stand, so decided to just use small pieces of interfacing to reinforce where the buttons and buttonhole will be sewn.You could consider cutting a strip of interfacing as long and as wide as the placket itself - depending on the fabric and finish you are going for. 

Open up the folds, and place your piece/s of interfacing with sticky side down. The folds will help you position it correctly. Press in place. 

the_rushcutter_bodice_french_seams_6

Re-fold the fold lines and stitch close to the edge on both sides. Your pattern placket is done!

Attaching the centre front panel

the_rushcutter_bodice_french_seams_7

With wrong sides together, join the CENTRE FRONT PANEL to the front sides of the UPPER BODICE pieces. Use the notch in the centre of the seam to help you place the pieces correctly. Stitch with a 6mm (1/4in) seam allowance.

the_rushcutter_bodice_french_seams_8

Trim down the seam allowances on both sides of the CENTRE FRONT PANEL by about 2-3mm (1/16in). Open the seam, and press the seam allowances away from the centre front.

the_rushcutter_bodice_french_seams_9

Fold the seam, with right sides together. You will see that this will enclose the raw edge and the original line of stitching inside the seam. Press and pin. Stitch the seam with a 6mm (1/4in) seam allowance. 

the_rushcutter_bodice_french_seams_10

Press seams away from the centre front. 

Joining the shoulder seams

the_rushcutter_bodice_french_seams_11

With wrong sides together, pin the front and back shoulder seams together. Pin in place.

Once again, stitch with a 6mm (1/4in) seam allowance, trim back, and enclose raw edge in a french seam.

the_rushcutter_bodice_french_seams_12

Press the shoulder seams towards the back, and then that's it for today.

Tomorrow I'll be walking you through using bias tape to bind the neckline.

Don't have bias tape? Make some yourself! 


You may also like:

How to sew an invisible zip

how_to_sew_an_invisible_zip_1

Zip time! And before some of you run away screaming, please just give it a go with me. I promise they're not that scary. 

Invisible zips really are the easiest zips to sew, and if you go nice and slow, you can get a really nice finish that I promise you will be proud of.

Finish the back opening

Try on the dress and adjust the back opening, if necessary.

Finish both sides of the back opening.

how_to_sew_an_invisible_zip_2

Lay the dress right-side down and fold up the centre back seam allowance on both sides of the opening by 20mm (3/4in) and press flat.

Press the zip

how_to_sew_an_invisible_zip_3

Open the invisible zip, and using a warm dry iron, press the zipper teeth flat. This will help you get nice and close to the teeth when you sew in the zip.

Pin and baste the zip

how_to_sew_an_invisible_zip_4

Place the zip face down on the right hand side of the dress. Align the stop at the top of the zip with the neckline and the teeth of the zip with the pressed seam line. Pin in place.

how_to_sew_an_invisible_zip_5

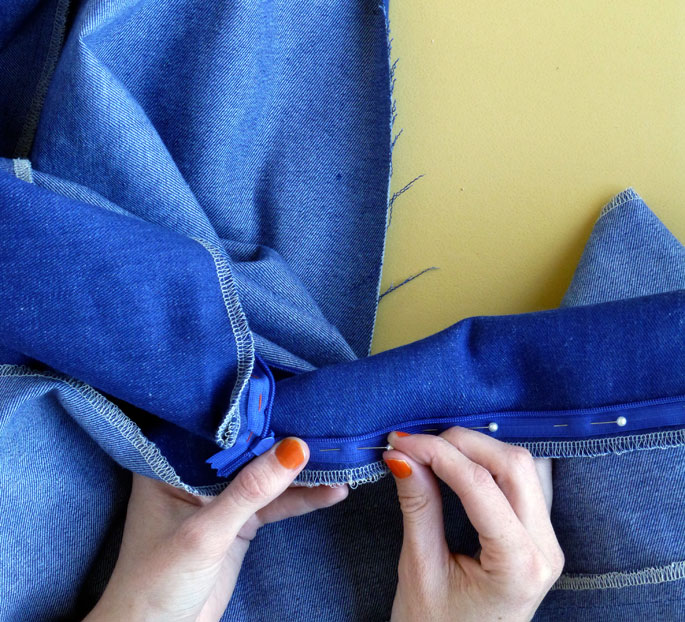
Now this is the step that really makes all the difference. Take a needle and thread (I always use a contrasting thread because it makes it nice and easy to remove the stitches later), and hand baste the zip tape to the dress. It takes a couple of minutes extra to do this, but it will ensure that the zip does not shift while you are sewing it in - and I prefer hand stitching to unpicking any day! When the zip is attached, remove the pins.

Sew one side of the zip

how_to_sew_an_invisible_zip_6

Using an invisible zip foot, insert the teeth of the zip into the right-hand channel of the foot. Using your finger, roll the zip teeth so that the zip lies as flat as possible. Slowly stitch down the length of the zip, stopping just before you hit the zip pull.

how_to_sew_an_invisible_zip_7

Close the zip and turn the seam allowance under, so that the zip lies flat. Press the fold. 

Matching the seam line

how_to_sew_an_invisible_zip_8

You will have noticed that the seam that joins the sleeves to the body of the dress, runs directly through the zip. To ensure the seam lines match up on either side of the zip, take a pin and put it through the zip tape (on the side not yet sewed) in line with the horizontal seam line.

how_to_sew_an_invisible_zip_9

Open the zip and place the zip tape face down on the left hand side of the back opening, aligning the pin with seam line.

You can use this same method for matching up waistbands, or waistlines on dresses.

how_to_sew_an_invisible_zip_9

Stitch the second side of the zip

Pin in place and then continue pinning the remainder of the zip tape (once again aligning the zip teeth with the pressed line). Baste the zip in place by hand.

how_to_sew_an_invisible_zip_10

Stitch the second side with your invisible zip foot - this time with the zip teeth in the left channel.

Admire your work

how_to_sew_an_invisible_zip_11

Close the zip and give it a good press. Look at those lovely matching seams! Worth it, right?

Finish the centre back seam

how_to_sew_an_invisible_zip_12

Turn the dress inside out and pin the remainder of the centre back opening closed. Make sure you keep the ends of the zip tape out of the way.

how_to_sew_an_invisible_zip_13

Using an ordinary zip foot, stitch the remainder of the centre back seam closed. Start by putting the needle into the fabric where the row of stitching for the zip ends (or as close to that as you can get) and then lower the foot before continuing down the seam with a 2cm (3/4in) seam allowance. 

Remove the basting stitches

how_to_sew_an_invisible_zip_14

With the dress still inside out, press the centre back seam open. At this stage you can remove the basting stitch from the zip tape.


And you're done! Not so bad, right?


You may also like:

How to finish a neckline with bias binding

binding_neckline_1.jpg

In yesterday's post in The Rushcutter sew-along, I showed you how to make your own bias tape, and today I am going to show you how to attach  the binding to the neckline. This method will also work if you are using store-bought binding, and will work on other sewing patterns that ask for a bound neckline and have a centre-back opening.

Measure the neckline of your garment

binding_neckline_2

Using a tape measure, measure around the neckline of your Rushcutter. Start measuring from the centre back on one side, and continue measuring around the neckline until you reach the centre back on the other.

Prepare bias binding

binding_neckline_3

Cut a piece of bias binding a couple of centimetres (1 inch) longer than your neck measurement. If your binding is not yet folded, place it face down and press one long edge of the binding under by 10mm (5/8in). 

Pin binding to neckline

binding_neckline_4

With right sides together, pin the binding to the neckline (pinning the edge that has not been folded), starting from the centre back and slowly working your way around the neckline. If you have two folds in the binding, that is totally fine. I just save time by only folding in one edge and then using the seam guide on my machine to achieve the correct seam allowance.

binding_neckline_5

Before sewing, turn the dress  over and check that all seams (and darts) are pressed the right way.

Stitch binding to neckline

binding_neckline_6

Stitch the binding to the neckline with a 1cm (3/8in) seam allowance. 

binding_neckline_7

Trim any excess binding from the centre back, so that the edge of the binding sits flush against the centre back on both sides.

Trim and clip

binding_neckline_8

Trim down the seam allowance by 5-6mm (1/4in). This will minimise bulk around the neckline, and help when turning the seam allowance to the inside of the dress. You can also clip into the seam to help it sit flat.

Understitch

binding_neckline_9

Using your finger, press the binding (and seam allowance) nice and flat, and understitch the seam allowance to the binding. This will help the binding to roll to the inside of the garment so that you won't see it poking out on the right side. 

We will leave the binding like that for the moment, as before we can finish it off we need to sew in the zip - so that's what we'll be doing tomorrow!


You may also like:

Assembling The Rushcutter (view A)

Yesterday I showed you how to sew the darts on the raglan sleeve, in The Rushcutter sew-along, so today it's time to assemble the sleeves and get the sleeves and dress sections connected. By the end of this post, it will really start looking like a dress!

Attach the centre front panel

With right sides together, pin the CENTRE FRONT PANEL to the front side of each SLEEVE, matching the centre notches. Sew each seam with a 15mm (5/8in) seam allowance, and finish the raw edges.

Press the seams away from the centre front. At this stage, you can also press your darts towards the back.

Sew the sleeves

Finish the bottom edge of both sleeves. Then, with right sides together, fold the sleeve so that you can sew the underarm seam. Pin and stitch with a 15mm (5/8in) seam allowance.

Finish the raw edges separately and press open. 

Pin the sleeves to the dress

With right sides together, match the notch at the centre of the FRONT to the notch in the centre of the CENTRE FRONT PANEL.

I found getting the sleeves out of the way, by turning the sleeves to the right side, helped me when pinning this seam.

Move next to the seam that connects the sleeve and the centre front panel, and match it to the corresponding notch on the front of the dress. 

Continue moving from notch to notch until you reach the centre back. 

As you are matching two different shaped curves together, you will need to be really careful to match up all your notches correctly. 

Match up all the notches and seams on the second side, and then fill the gaps between notches with more pins to get a nice flat seam.

Sew the sleeves to the dress

Stitch the seam with a 12mm (1/2in) seam allowance. Go nice and slow, and lift the seam regularly to check that all the seams are lying flat and that there is no puckering on the underside of the seam.

Press

Before finishing the seam, open the seam and check that it is smooth and there is no puckering. If there is, just unpick a few centimetres (or as much as you need to get the seam to sit flat) either side of the puckers and then pin and re-stitch. 

Finish the seam and press up towards the neckline. Press from both the right and wrong side, to ensure that you get a nice flat finish. 


And that's it for today, is your Rushcutter starting to resemble a dress now?


You may also like:

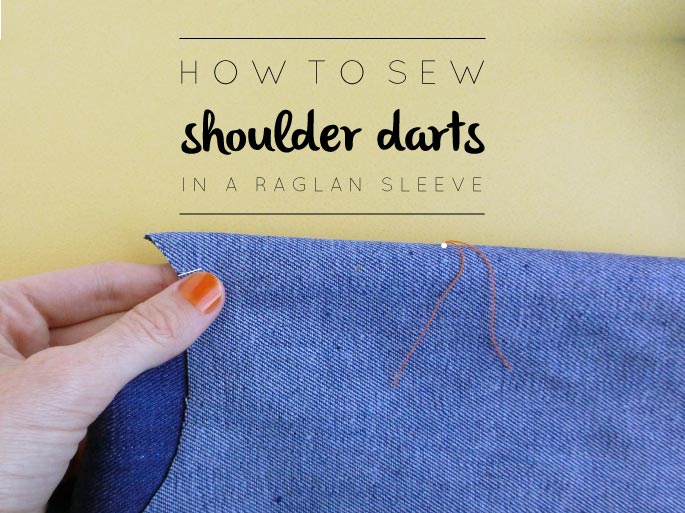
How to sew shoulder darts in a raglan sleeve

how_to_darts_raglansleeve_1

Yesterday we finally started sewing our Rushcutters! We assembled the lower part of the dress, but before we can go any further, we need to get our sleeves started.

The shoulder dart

The darts are slightly different, depending on what size pattern you cut.

how_to_darts_raglansleeve_2

For sizes A - F, the dart looks like this.

how_to_darts_raglansleeve_3

While for sizes G - K, the centre of the dart has been cut out - this is to minimise bulk in the dart.

When complete, both versions will look the same on the right side of the sleeve.

Sewing the dart  (sizes A - F only)

how_to_darts_raglansleeve_4

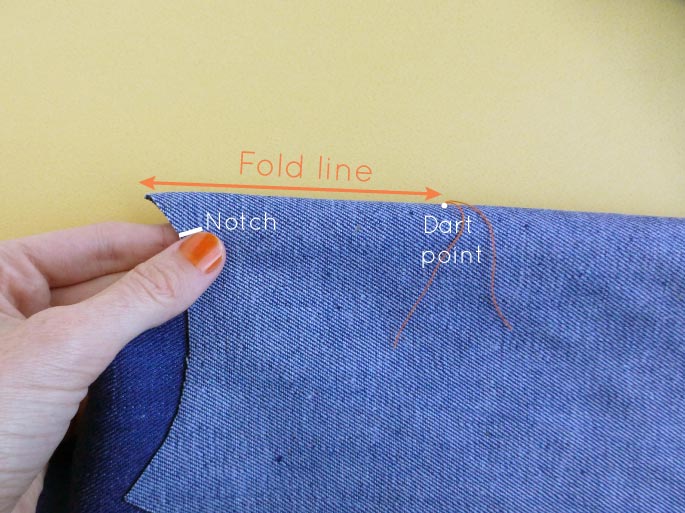
Take your sleeve and, with right sides together, fold along the centre of the dart, matching up the notches at the neckline and ensuring that the dart point is at the centre of the fold. Press and pin in place.

how_to_darts_raglansleeve_5

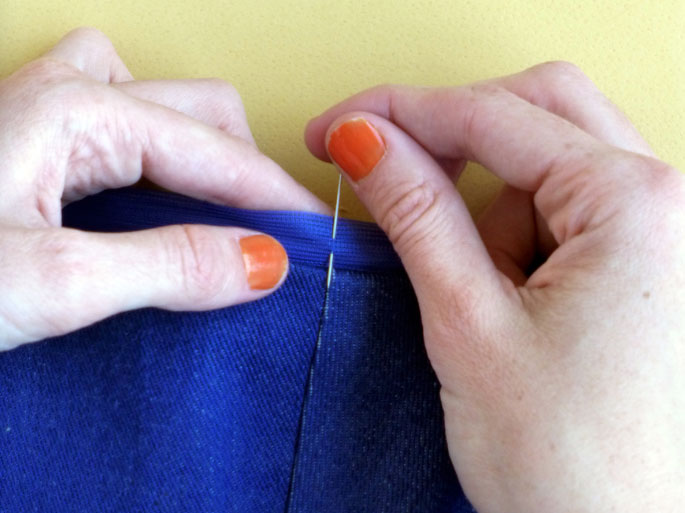
Stitch the dart from top to bottom, stitching 15mm (5/8in) beyond the dart point. I generally stitch darts by eye, but if this is not for you, then you can mark the stitching line on your fabric with a fabric pen, tailors chalk, or even with a line of hand stitching (if your fabric is delicate).

Sewing the dart  (sizes G - K only)

how_to_darts_raglansleeve_6

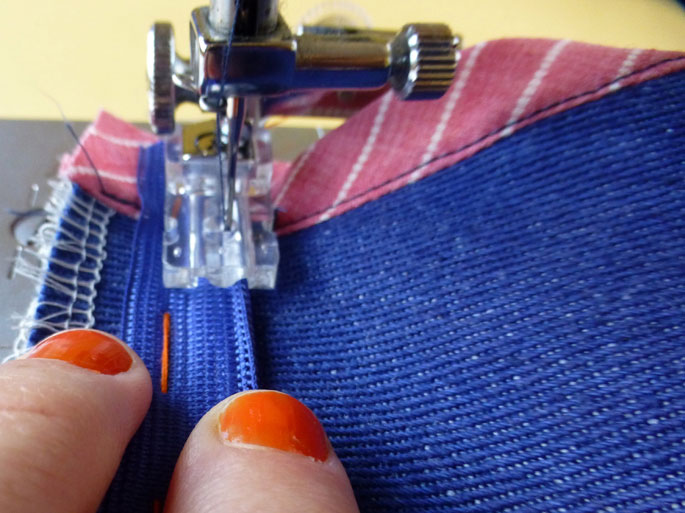
For the open dart, you can either stitch the dart and then just finish the raw edge of the dart (with overlocking or a zig-zag stitch) or, if you are using a light to midweight fabric, I would suggest using a french seam, to get a really nice clean finish.

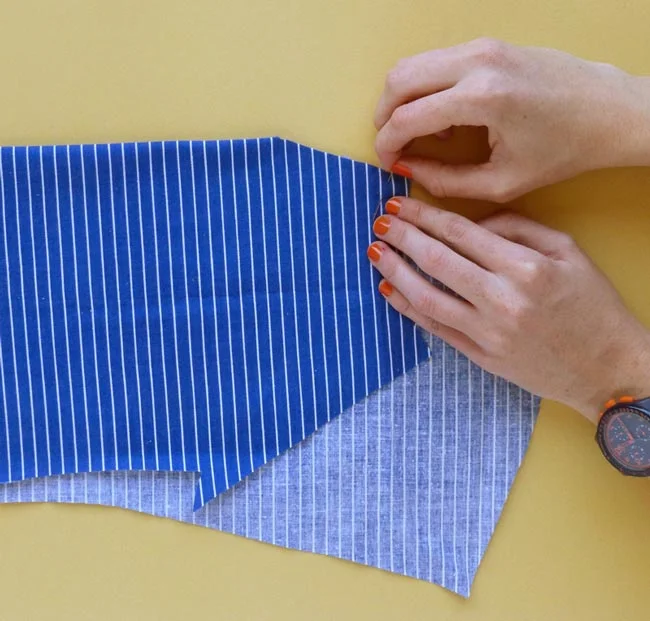
To do this, fold the sleeve with wrong sides together, along the centre of the dart. Match the notches at the neckline, and check that the dart point is at the centre of the fold. Press and pin along the raw edge.

how_to_darts_raglansleeve_7

Stitch along the raw edge with a 6mm (1/4in) seam allowance. 

how_to_darts_raglansleeve_8

Trim back the seam allowance by 2-3mm (1/16in). This step is really important, because you want this edge to be hidden cleanly in the next seam you sew.

how_to_darts_raglansleeve_9

Open the sleeve and press the seam allowance towards the front of the sleeve.

how_to_darts_raglansleeve_10

With right sides together this time, re-fold the dart, matching the darts at the neckline, and also checking that the dart point is at the centre of the fold. Press and pin in place.

how_to_darts_raglansleeve_11

Stitch the dart, from top to bottom, using a 6mm (1/4in) seam allowance, stitching 15mm (5/8in) beyond the dart point.

Repeat process for the other sleeve. And that's it, shoulder darts are done!

Tomorrow we will continue assembling the top section of the Rushcutter (View A).


Do you have any special tricks you use for sewing darts?


You may also like: