THREE PATTERNS TO HELP ORGANISE YOUR SEWING SPACE

Do you love the start of a new year as much as I do?

I love to reflect on the year that's passed, but there's nothing like the feeling of refreshing and opportunity a new beginning brings. And I particularly love the excitement of making ambitious creative plans for the months ahead!

Both Emily and I recently changed studios spaces and we have seen firsthand how impactful a sewing space can be on our motivation and ability to sew, which has inspired this month's Curated by ITF project, Organise Your Space.

THREE LITTLE PATTERNS THAT MAKE A BIG DIFFERENCE

When you're setting up or rejigging a sewing space it's easy to get distracted by the BIG things - tables, chairs, shelves and the like. But as we set up our new sewings spaces last year we realised how impactful the little things can be and that we really shouldn't discount them.

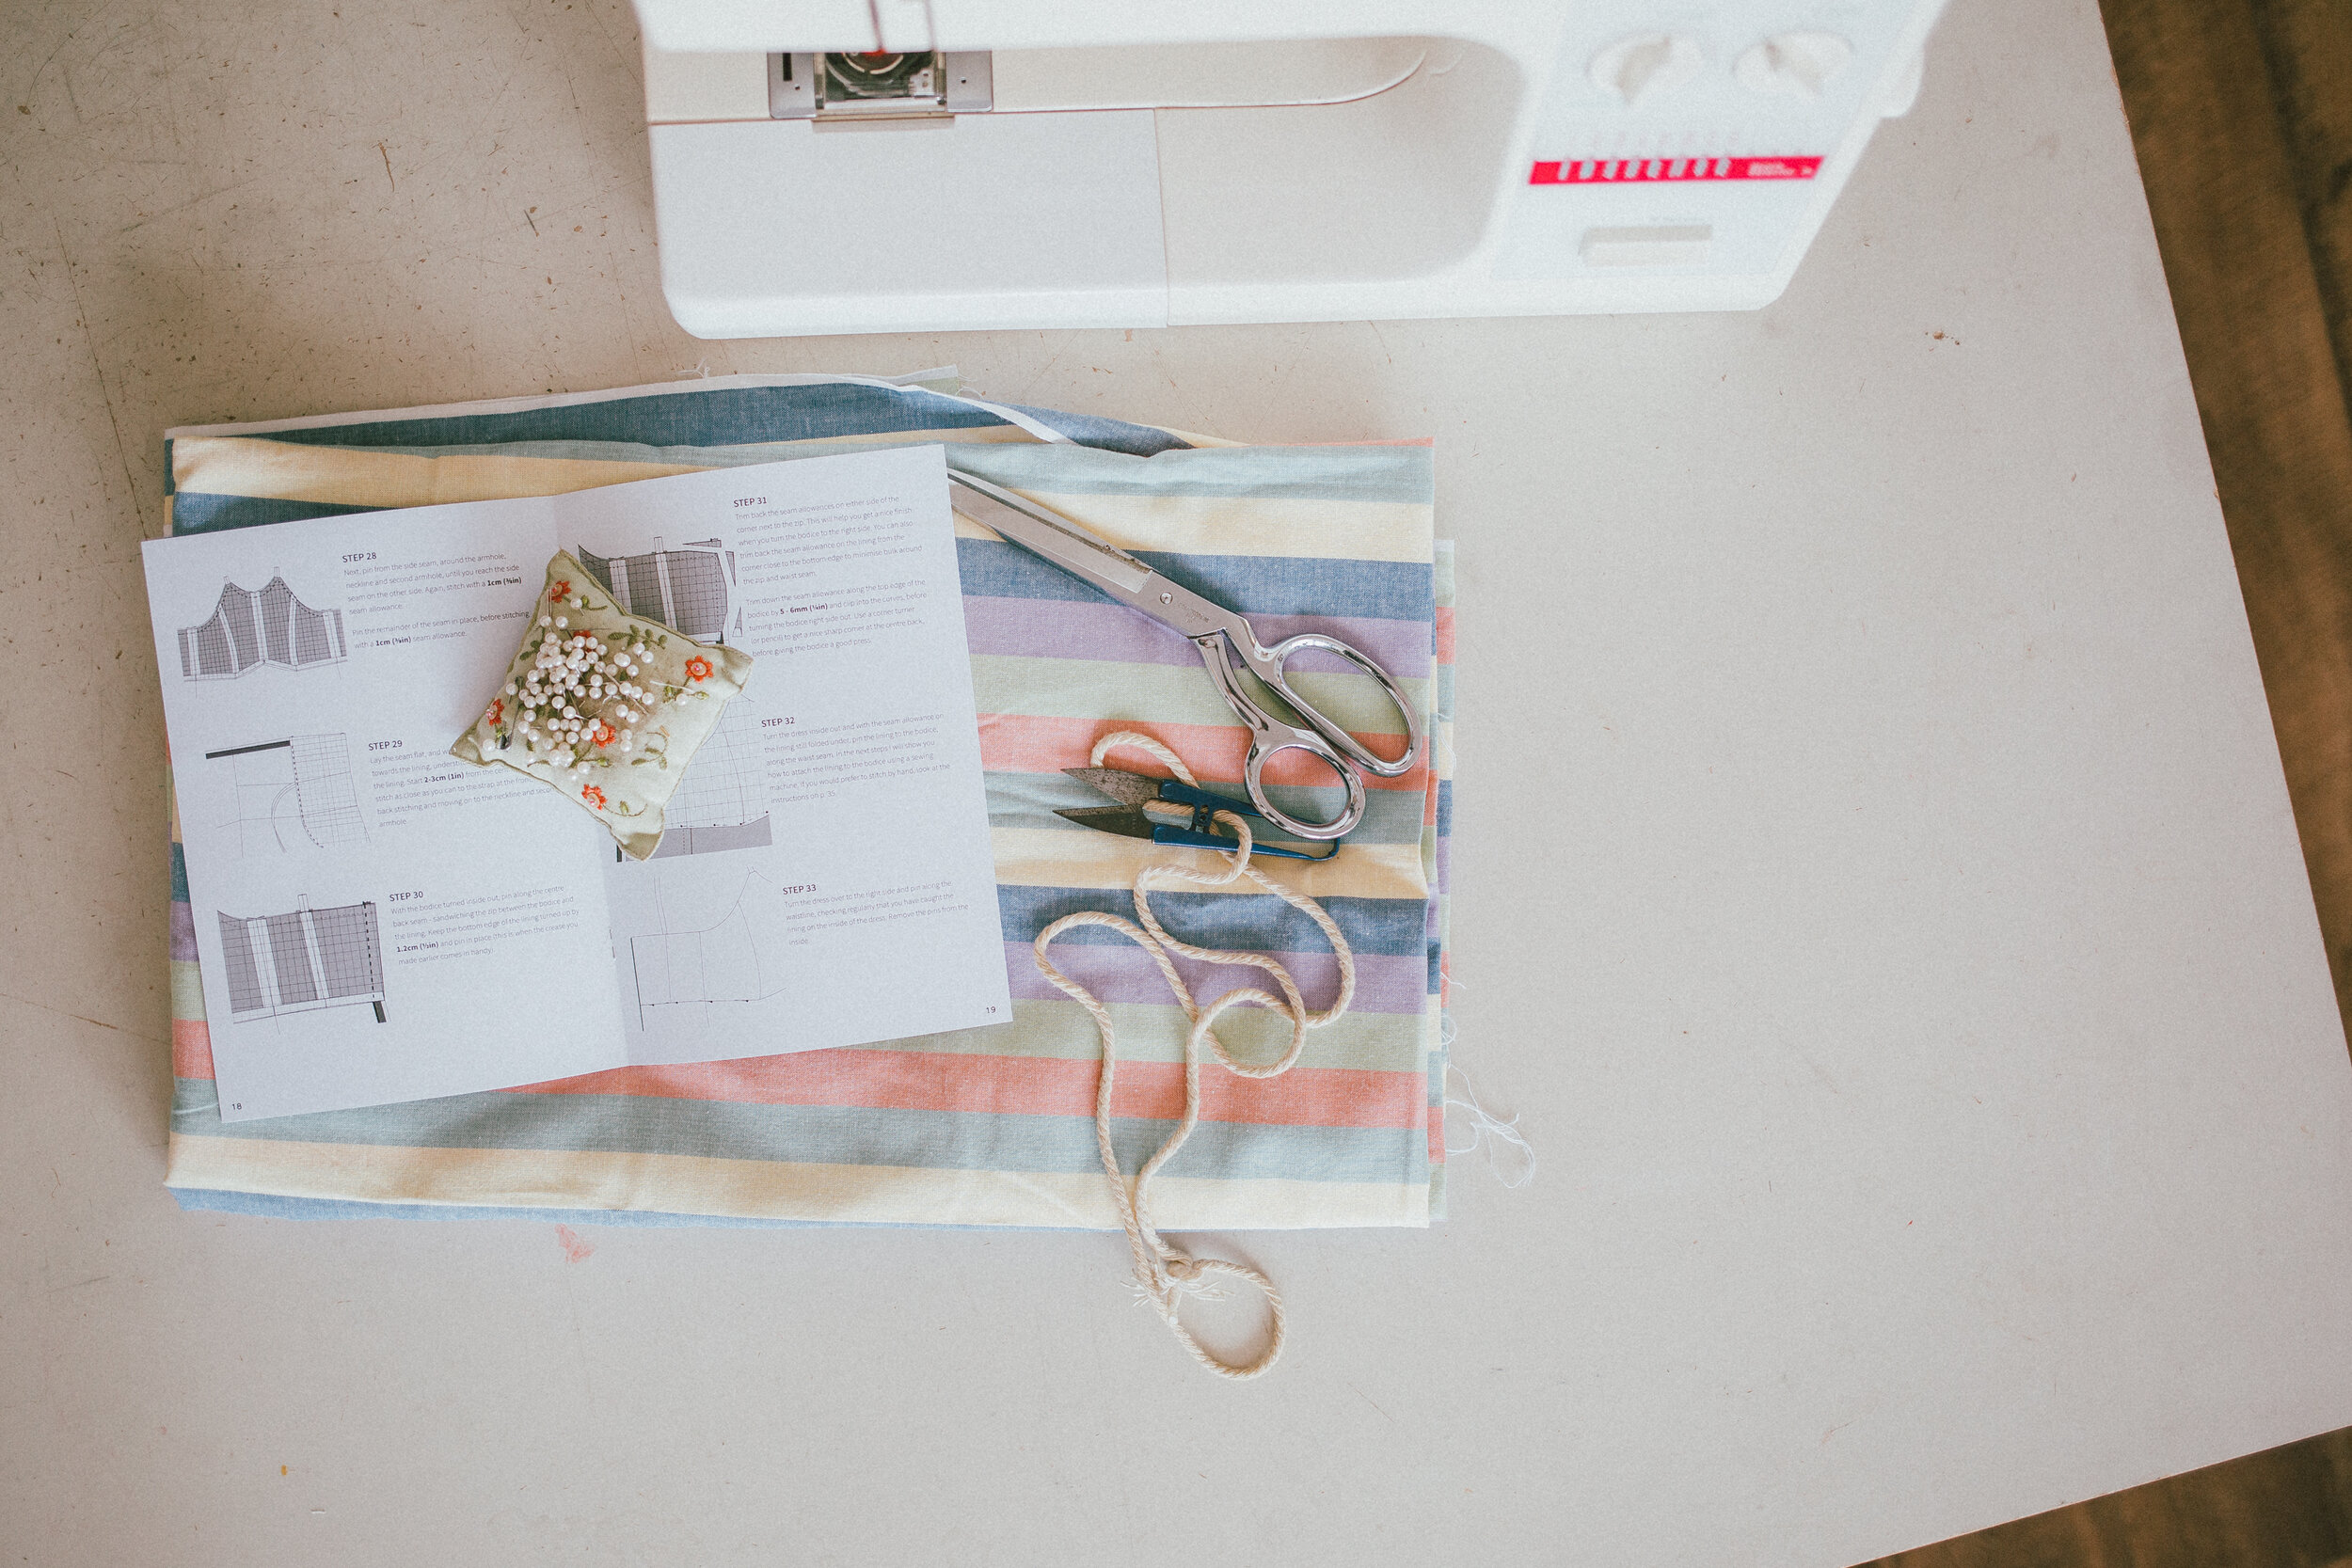
That's why we included three sewing room accessory patterns with this month’s Curated by ITF Issue. If you don't have the time or the money (or even the inclination!) to make big changes to your sewing space, these three little patterns will have you feeling just a wee bit more organised in just a short amount of time and with very little financial investment. In fact, they’ll even help you use up some of those fabric scraps we KNOW you’ve got lying around!

the sewing accessories you need (and want!)

One thing we’ve noticed is that makers will often use what’s at hand as a temporary measure to meet a need. Tinned food for pattern weights, clip-seal bags for pattern storage. You know what we’re talking about, right?

And while it’s perfectly acceptable to make-do like this, we’ve found that there will inevitably come a time when you’ve eaten all the tinned tomatoes or the clip-seal bag gets a hole in it… So we wanted to create some alternatives to those items we’re ‘temporarily’ (forever) using.

Our beautiful Project bag replaces crumpled plastic wallets and clip-seal bags.

Our cute Pattern weights replace tins of chopped tomatoes (or lentils or corn or tuna).

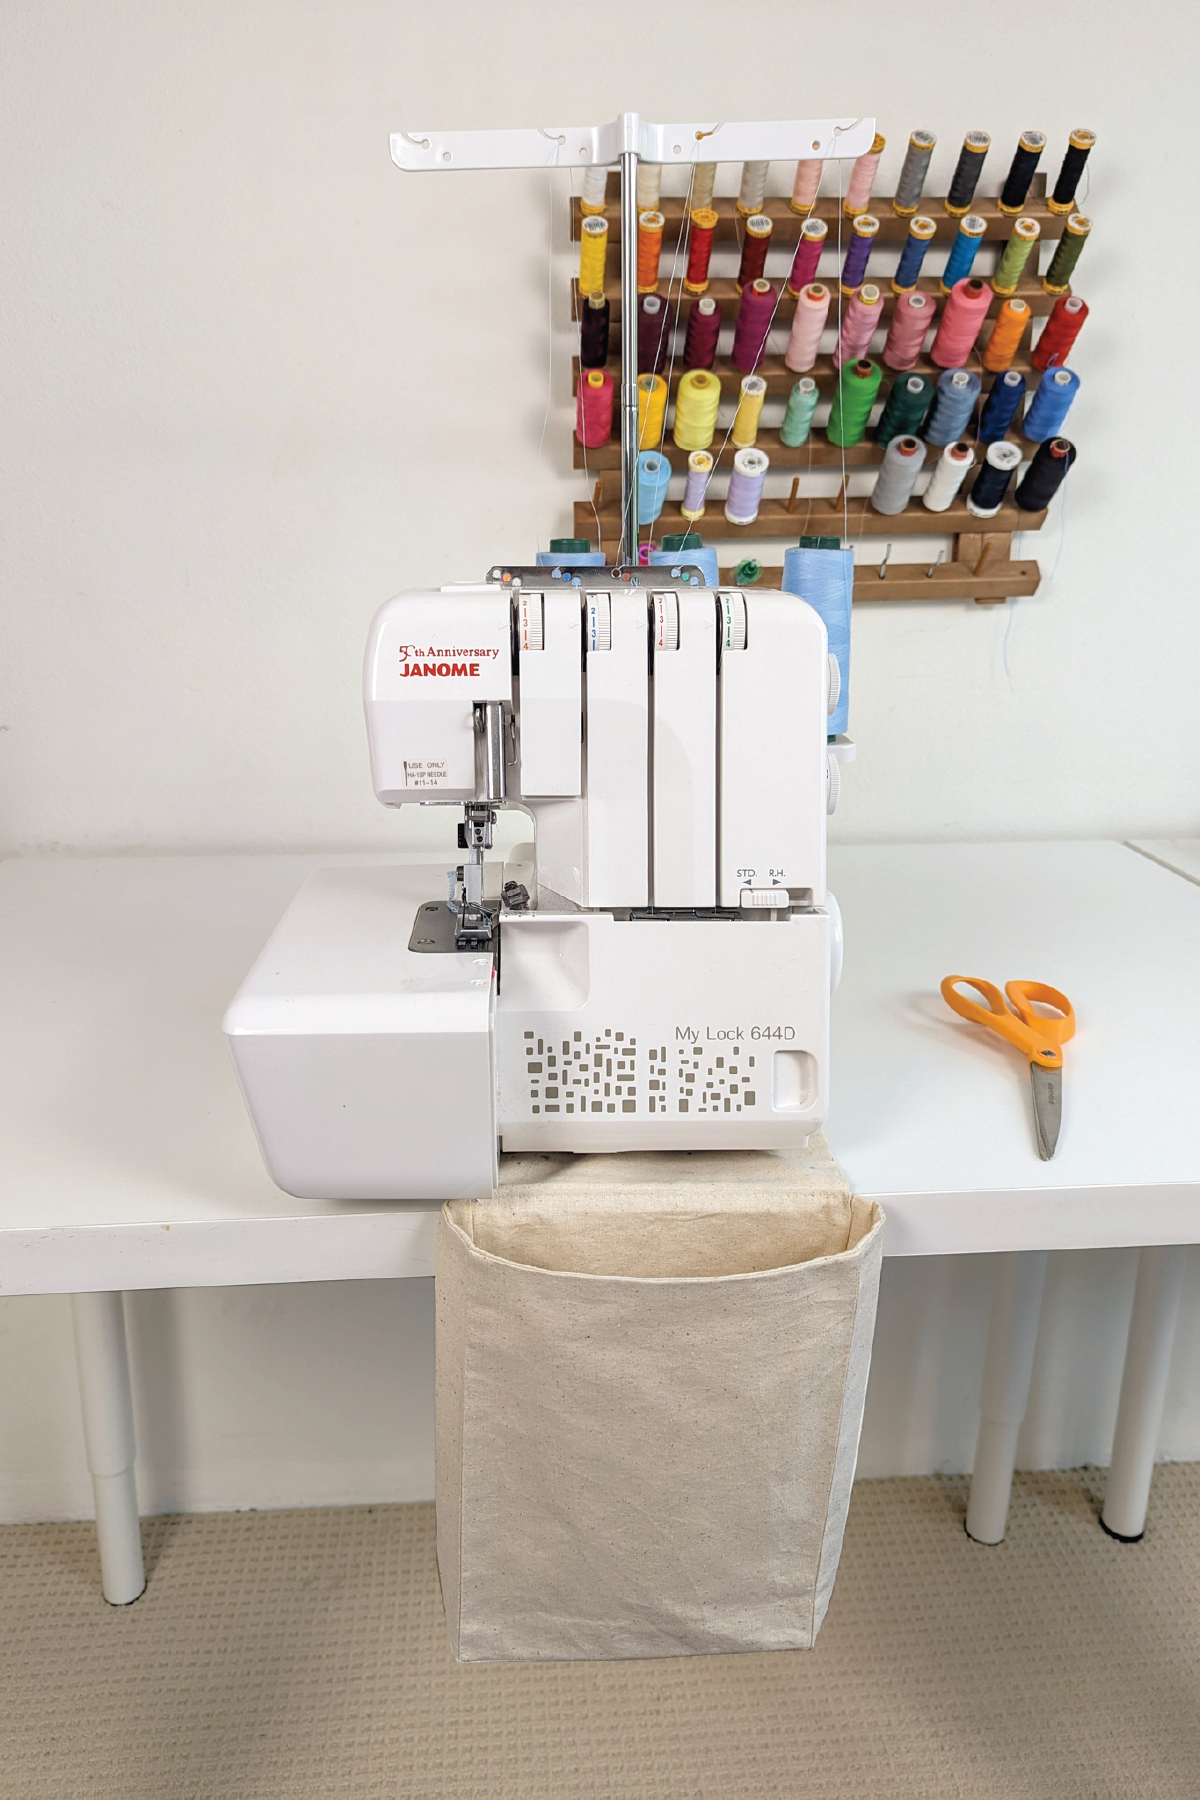
Our Overlocker Thread catcher replaces … well… scooping up all those scraps from the floor!


Did you know, you can actually join Curated by ITF just for the community?!

If you're looking to be supported, motivated and inspired through your sewing journey, but don't want the monthly projects, then our Curated by ITF Supporter tier might be just what you're looking for. You'll receive feedback and advice from other experienced makers and make sewing besties all over the world!


our design process

When we’re designing new projects, we start with a general idea of what we want the issue to be about, then we sit down together and decide the specific content that will be included. Emily and I chat through our thoughts and bounce ideas off each other until we’re happy with what to include.

For this month’s Issue, we had been separately thinking about what we wanted from a project bag, and when we started talking about it we realised our ideas were really aligned! We both wanted it to:

  • Be big enough to fit all of our projects in. 30 x 45cm had worked well for both of our current solutions.

  • Have a pocket to hold printed instructions. 

  • Have a flap opening fastened by Velcro.

  • Have a clear pocket to label what’s inside.

  • Include a hanger tab for easy storage.

Then we spoke about different things we needed in our sewing space and came up with the pattern weights and thread catcher ideas.

As you know, we have a big focus on skill-building in Curated by ITF so we wanted to make sure that these patterns also provided us with an opportunity to learn something new, or practice and hone some skills we already have.

Even though these patterns might look simple, they will definitely help you continue to grow in your sewing practice. Specifically, we cover:

  • Sewing tricky corners. We've got lots of top tips to get a perfect corner. Our overlocker thread catcher is a great time to put this to use!

  • Sewing velcro. Something that’s not commonly used in garment clothing.

  • Sewing patch pockets.

  • Bagging out (sewing something and turning it inside out).

  • Hand-stitching to finish patterns (useful for sewing accessories and linings).

SMALL CHANGES, BIG DIFFERENCE

Sometimes a few small changes to your space can really refresh it and make you want to get back sewing, and that’s our intention with these three little (but very impactful and functional) sewing accessory patterns.

No matter how big or small your space, you can maximise it by getting clever with storage solutions like our Project bag.

We hope they help you help your future-self by setting up your sewing space so it’s easy to get started sewing next time.

Happy sewing,

Alys


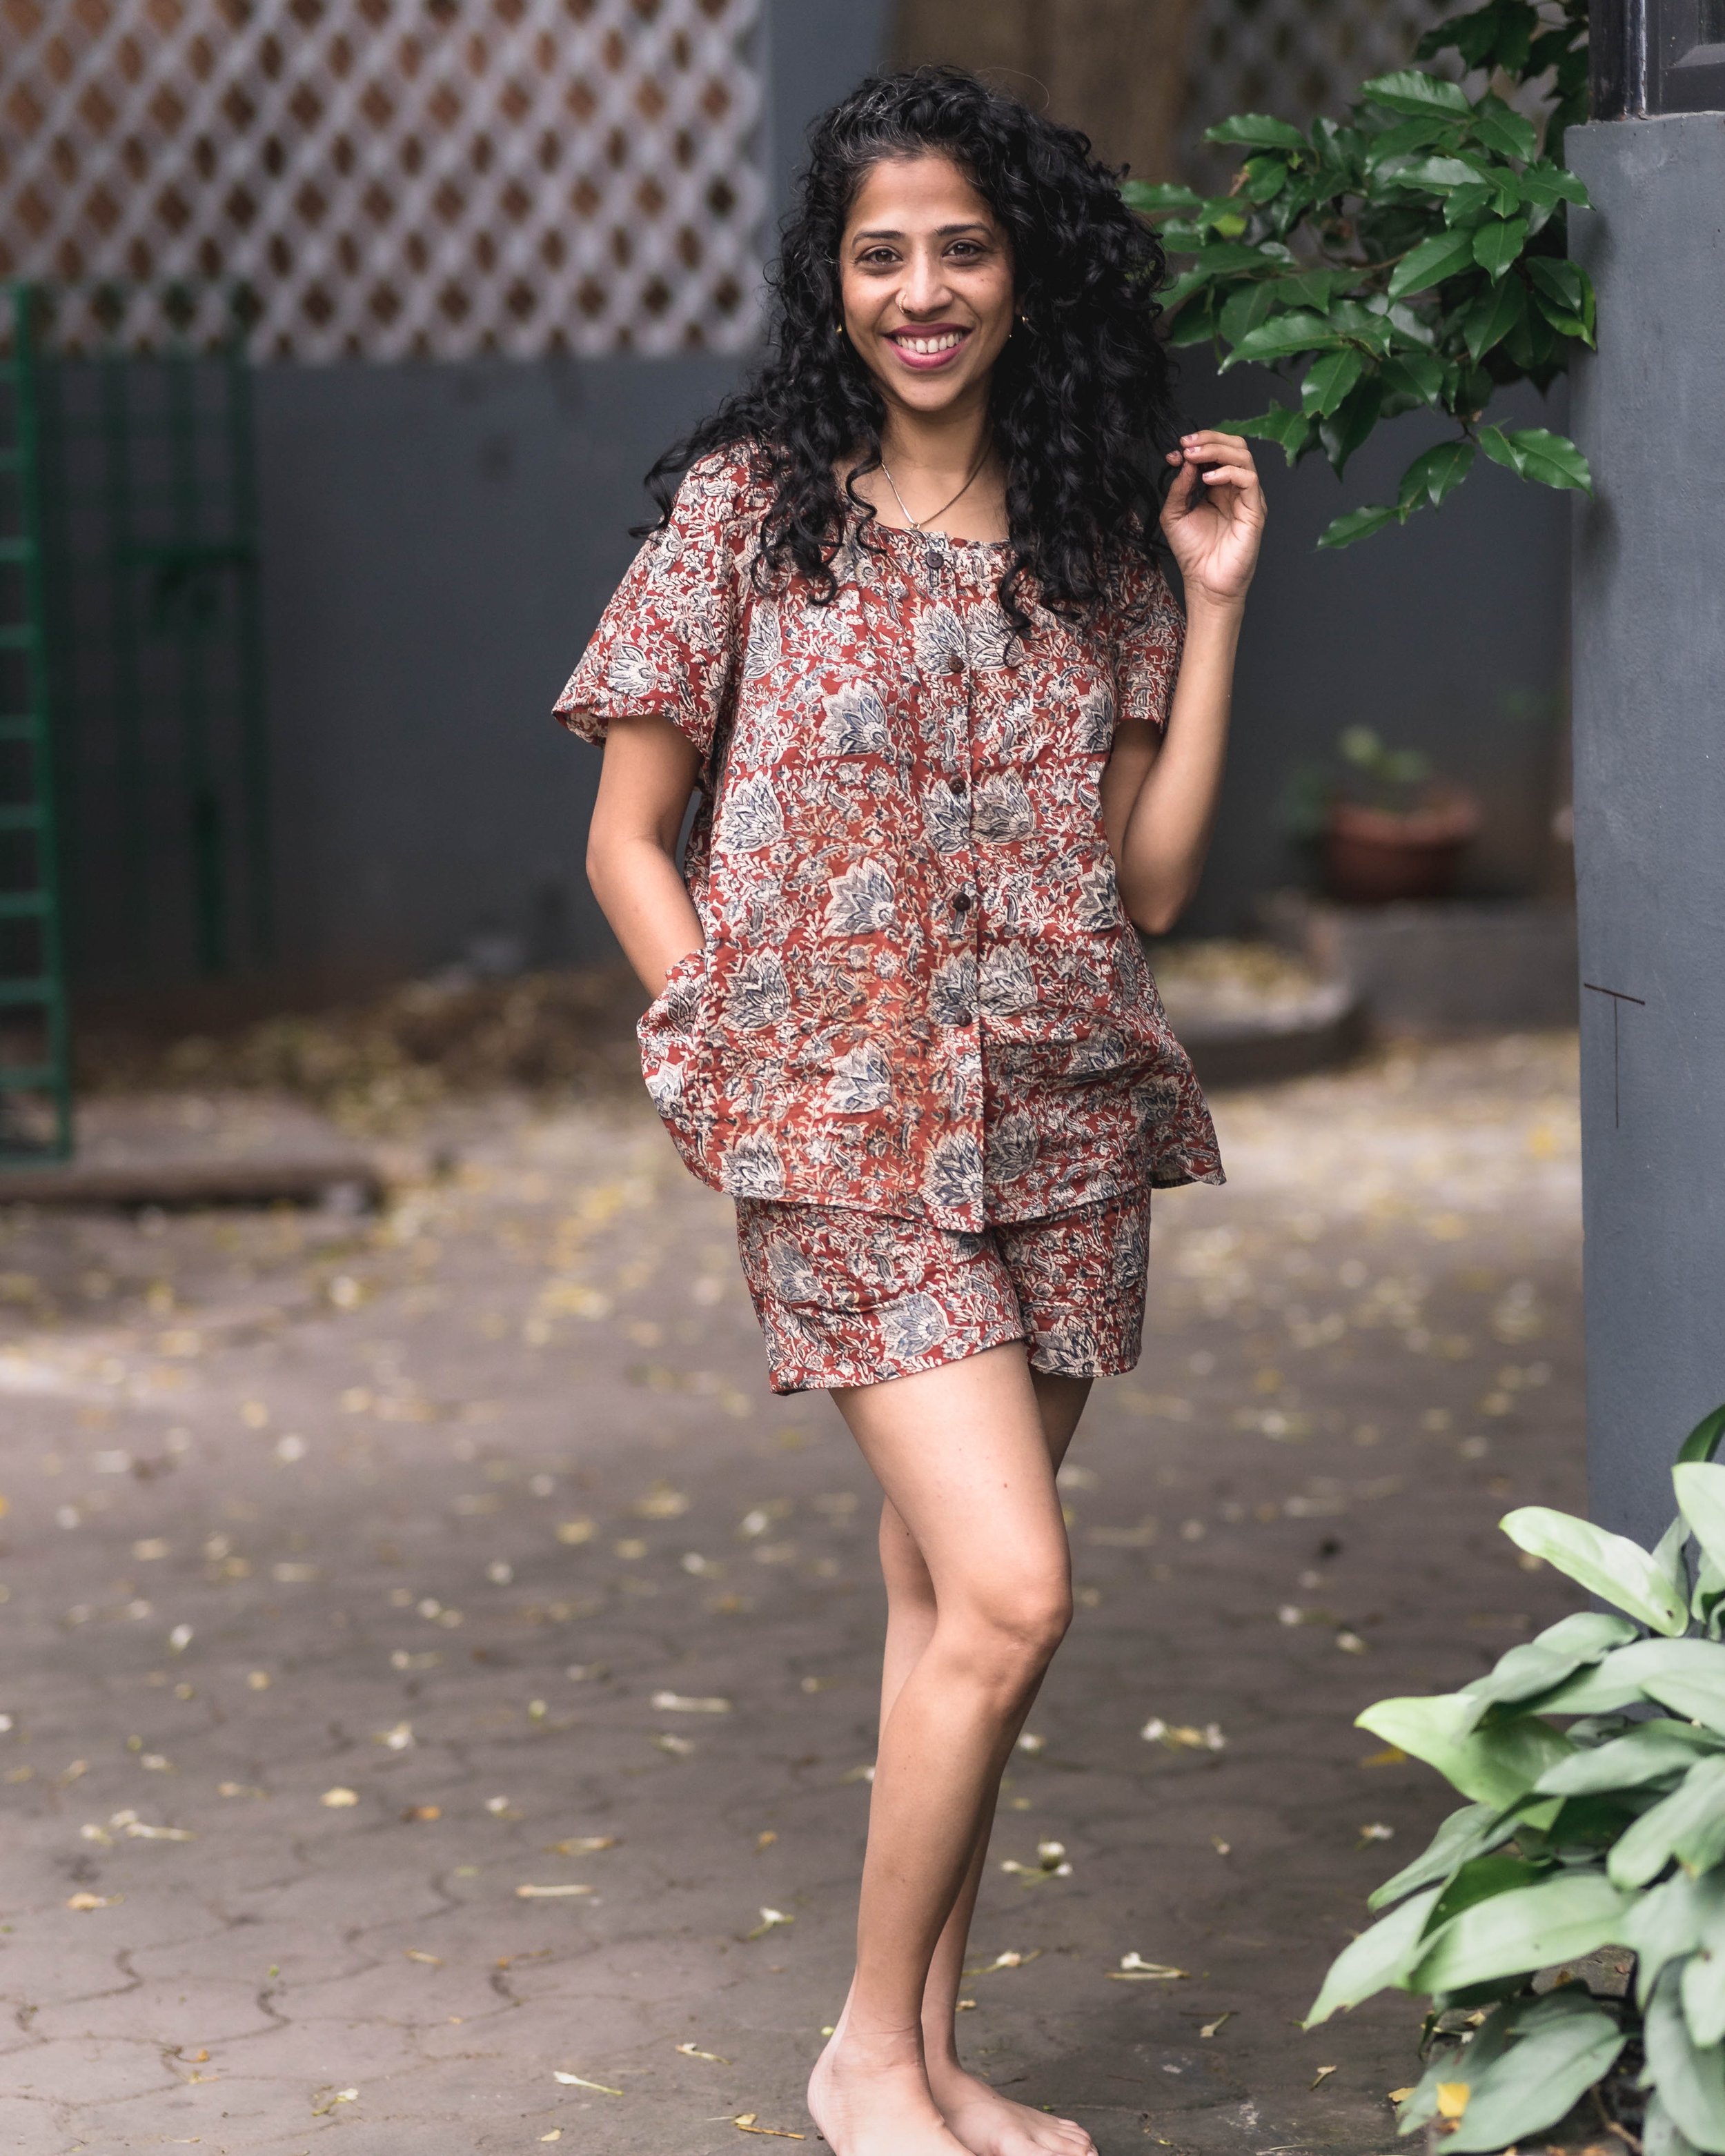
Digital garment design with the Gibson Loungewear pattern

Recently, the way I design garments has changed.

When I studied garment design at university we used a very hands-on approach. We drew designs by hand on paper. We played with fabric to see how they translated. It was literally design, toile and repeat... until we were happy with the outcome. 

While design software has been around for a while I never felt like the results compared to what I could create by hand. Many of them have a HUGE learning curve, along with an enormous upfront cost, which just isn't feasible for a small business.

But over the last couple of years software like Clo3d has entered the market, providing a good option for small businesses like mine (as well as students and other makers). I dabbled in it here and there, but didn't take it seriously at first. My established processes for design were effective and comfortable for me. Plus, I felt I was too busy with the day-to-day running of In the Folds to try and fit another thing in.

Garment Design: Learning a new way

When a Clo3d teaching opportunity came up at the university I work at, it seemed like the perfect opportunity. And, I decided it was probably a good idea to keep my skills current!

Since teaching 1st and 3rd year subjects on Clo this year I have gained a lot of confidence using it and I've realised it's a fantastic way of working.

As I mentioned above, before using Clo3d my process involved a loose draft of a pattern and then testing, toiling and patternmaking over and over until I was happy with a design. Needless to say, it was a time and resource-consuming process! 

Clo3d speeds up my process considerably and minimises the amount of resources I use, which is fantastic from a sustainability perspective - something that's very important to me. I can now do a lot of the experimentation in Clo, and have a much more resolved design by the time I get to sewing a sample and trying it on a fit model.

I can also quickly and easily test out a range of iterations - something I didn't do as much of previously because it meant redrafting a garment and making a number of new toiles to check what a design idea looked like.

The gibson LOUNGEWEAR design process

Unless you've worked in a design studio you may not have had the opportunity to see how a garment pattern is created, so I thought I'd share the process I followed to create the Gibson Loungewear design. 

Alys and I also recently chatted about the inspiration behind the design, which you can watch here.
Step 1

Using Clo3d I started with a basic raglan dress shape.

I then used the cut and spread technique to add volume to the neckline. (The purple lines show where the pattern has been cut and spread.)

This is what Clo3d gave us...

It always takes a bit of trial and error to work out how much volume you want to add to a pattern, and this will also depend on the recommended fabric.

If you’re using a thick or heavy fabric, you don’t need as much volume to make an impact, whereas if you are using lightweight fabrics, it will take a lot more fabric to give you a gathered effect. Being able to test this out digitally is a huge game-changer, as you can add some volume - check it and then add more or less, depending on the outcome. This is not the case when doing it by hand - it's not so easy to add or remove volume to a toile to check how it's going to look.


Did you know, you can actually join Curated by ITF just for the community?!

If you're looking to be supported, motivated and inspired through your sewing journey, but don't want the monthly projects, then our Curated by ITF Supporter tier might be just what you're looking for. You'll receive feedback and advice from other experienced makers and make sewing besties all over the world!


I then started having a play with different iterations and began to think about a sleeveless version.

As you can see, it doesn’t look great! This is why I love being able to test things out in Clo, rather than drafting a pattern, cutting from fabric and toiling.

I am mindful that some things will look better in the flesh than they do digitally and I have a suspicion that this would have worked better made in real fabric. But it got me thinking about our customers. I know a lot of them prefer a sleeve, so thought it best to go back to the sleeve option and continue playing with that.

It was at this point that I felt happy enough with the draft to print it out and start playing with the real thing.

And eventually we came up with the Gibson Loungewear set as it is today!

I really love the hands-on element of designing and making patterns and I definitely don’t want to lose that.

But using Clo3d gets me to a point where I know that the first toile will be fairly solid. I can now cut out the stage that normally uses the most paper and fabric, saving me time and money. Two important resources small businesses never have enough of!

Have you had a chance to play in Clo3d? If so, I'd love for you to share your thoughts with me!

Happy designing,

Emily


Thank you to our models and testers!

Thank you to our amazing sample makers & models @lovemade.handmade and @the.hemline.eclectic.


12 THINGS WE'VE LEARNED IN 12 MONTHS OF CURATED BY ITF

It's hard to believe, but it's been a year since we launched our first Issue of Curated by ITF. It's been a huge year for the ITF team and we have been learning just as much as our wonderful subscribers.

So we thought we'd share with you the key lessons we've learned this year!

1. SEWING IS EVEN BETTER WITH FRIENDS!

This is probably a no-brainer, but making a handmade wardrobe has lots of ups and downs and we've learned that being able to share your wins or frustrations makes for a much more enjoyable experience!

When we first started developing Curated by ITF we knew it needed to have a community element. Since those early days our Curated by ITF online community has grown to become a beautiful, encouraging, motivating, inspiring and, most importantly of all, a safe place where our community members (‘Foldies’ as we’ve starting calling them just recently!) feel comfortable to ask questions, share photos of their toiles, and have a bit of a maker-vent where needed.

It’s also a place I love checking in to every day. It has given me great joy to see how a little idea that was planted a long time and eventually came to fruition has helped so many people, and I love being able to provide that one-to-one assistance that can be lacking in many online communities. It’s incredible to see our members learning from our patterns and resources, but what has been even more wonderful is seeing the generosity that our members offer to each other by sharing their own learnings and wisdom.

In return the community has helped me when I’ve felt uninspired or a little battle-weary from running a small business with a very small team and for that I’m very grateful. All I need to do is check in and see the amazing things people are learning from our resources and I’m ready to get back to the patternmaking table (or more often that not, back to the computer!)


Did you know, you can actually join Curated by ITF just for the community?!

If you're looking to be supported, motivated and inspired through your sewing journey, but don't want the monthly projects, then our Curated by ITF Supporter tier might be just what you're looking for. You'll receive feedback and advice from other experienced makers and make sewing besties all over the world!


2. WE’RE NOT THE ONLY ONES WHO LOVE GEEKING OUT ABOUT SEWING.

For a long time we thought we may have been the only ones who enjoyed geeking out about ‘the why’ of sewing and patternmaking. Although Alys and I are qualified fashion designers, we both gravitated towards the more technical side of fashion (sewing and patternmaking) after our university days. You can often find us sitting at our desks chatting about the cleanest way to finish a particular seam, what different drag lines on a toile mean, or the easiest way to articulate how to smooth curves.
But since getting to know our Curated by ITF community over the last 12 months, we have realised we are most definitely not alone! It has been amazing to share so many lightbulb moments in our community over the last 12 months, because we know from experience that if you understand ‘the why’ (the reasons why you make an adjustment or alteration), you are able to make informed decisions about your makes in the future.

3. SLOW REALLY IS BEST.

Thoughtful and intentional consumption is the backbone of all that we do at In the Folds and we’ve realised that by slowing down our sewing practice we can ensure our makes are worn and loved.

This is exactly why we created the Slow Sewing Planner and released it as part of the Curated subscription earlier this year. We want to help our subscribers make careful and mindful decisions about their wardrobe. Decisions that consider people and the planet.

By making garments that fit well and make us feel great, we require less. If we take the time to ensure garments are made well, we will take better care of them. As we form stronger bonds and ties with our clothes we'll cherish them long into the future. Every decision we make has a flow on effect!

4. THE EXPERIENCE OF SEWING OUR OWN WARDROBE IS MORE REWARDING IF WE FOCUS ON INPUT INSTEAD OF OUTPUT.

At a time when clothing is as cheap as it has ever been, most of us are not sewing to fill our wardrobes, but to learn new skills and spend time doing something we love. But, it doesn’t take long to realise that sewing, although fun and fulfilling, can also have its frustrating moments. We’ve all put a sleeve in on the wrong side, clipped a seam too far, or just made something that just wasn’t what quite what you had in mind. And this is part of the process!

The truth is we usually learn more from these struggles than the projects that go smoothly from beginning to end (but it can be difficult to remember that when you’re picking up your seam ripper for the twelfth time in a sitting!). If we accept and embrace the idea that we will make mistakes along the way, then we are going to enjoy the time at our machine more. The easiest way to do this is to focus on building our skills (input), rather than how many items of clothing we've successfully made this year (output). By reframing our approach to sewing, mistakes we make can be seen as learning opportunities, rather than failures or something to be ashamed of.

An example of this that we’ve loved seeing is makers actually wanting to have fitting issues so they could have a go at using our Fit Kits. Never in our wildest dreams did we imagine this happening!

5. PUSHING THROUGH THE DISCOMFORT IS WORTH IT!

We’ve seen our community push through barriers over and over again. Having the guts to post a photo in our online group and ask for feedback, asking questions when they’re stuck… it can be hard!

As introverts who prefer to be at the patternmaking table instead of in front of the camera, we can relate! It takes a lot of encouragement for us to turn on the camera and put ourselves out there, but we’ve learned that it’s worth it every time. By being vulnerable, showing up, talking about both the highs and the lows, we have been able to connect with our community on a much deeper level.

6. DESIGNING PATTERNS THAT LAST THE TEST OF TIME IS REWARDING.

Curated by ITF has been designed to support our community to learn new skills over time. One month we might be working on fit, while another month we’re working on beautiful finishing techniques or pattern hacking.

What has been amazing is seeing our community learning new skills and then applying these skills to another pattern from the Curated or In the Folds archive (or another designer’s pattern). This is something we always keep front of mind when designing a new pattern because we want our patterns and resources to last the test of time. We steer clear of trends and fads so that our patterns will serve you well into the future.

7. TAKE IT ONE STEP AT A TIME.

It doesn't matter who you are, sometimes life just gets in the way. So, in a world that’s pushing us to do ‘More! More! More!’ it's helpful to remember that we don't have to do everything all at once.

We have enjoyed helping makers integrate sewing into their daily lives so that they're able to enjoy 20 minutes at the sewing machine before work or the 15 minutes spent chatting to other sewists online during a commute.

8. LEARNING NEW SKILLS TAKES TIME AND PATIENCE.

It can be easy to fall into the trap of wanting to learn ‘all the things’ all at once. But with any new skill it’s important to remember that it takes time and patience to get good at it. And particularly when doing new things with our hands it takes time and practice for it to become muscle-memory. We love this quote from Ira Glass about being a beginner - it's a good reminder for all of us!

Having a community to work alongside and share the process with makes sewing so much better. I think we can get into the trap of thinking we’re the only one who is getting stuck on something, or struggling with something. By working alongside a community of makers you can see that others have the same questions and the same struggles!

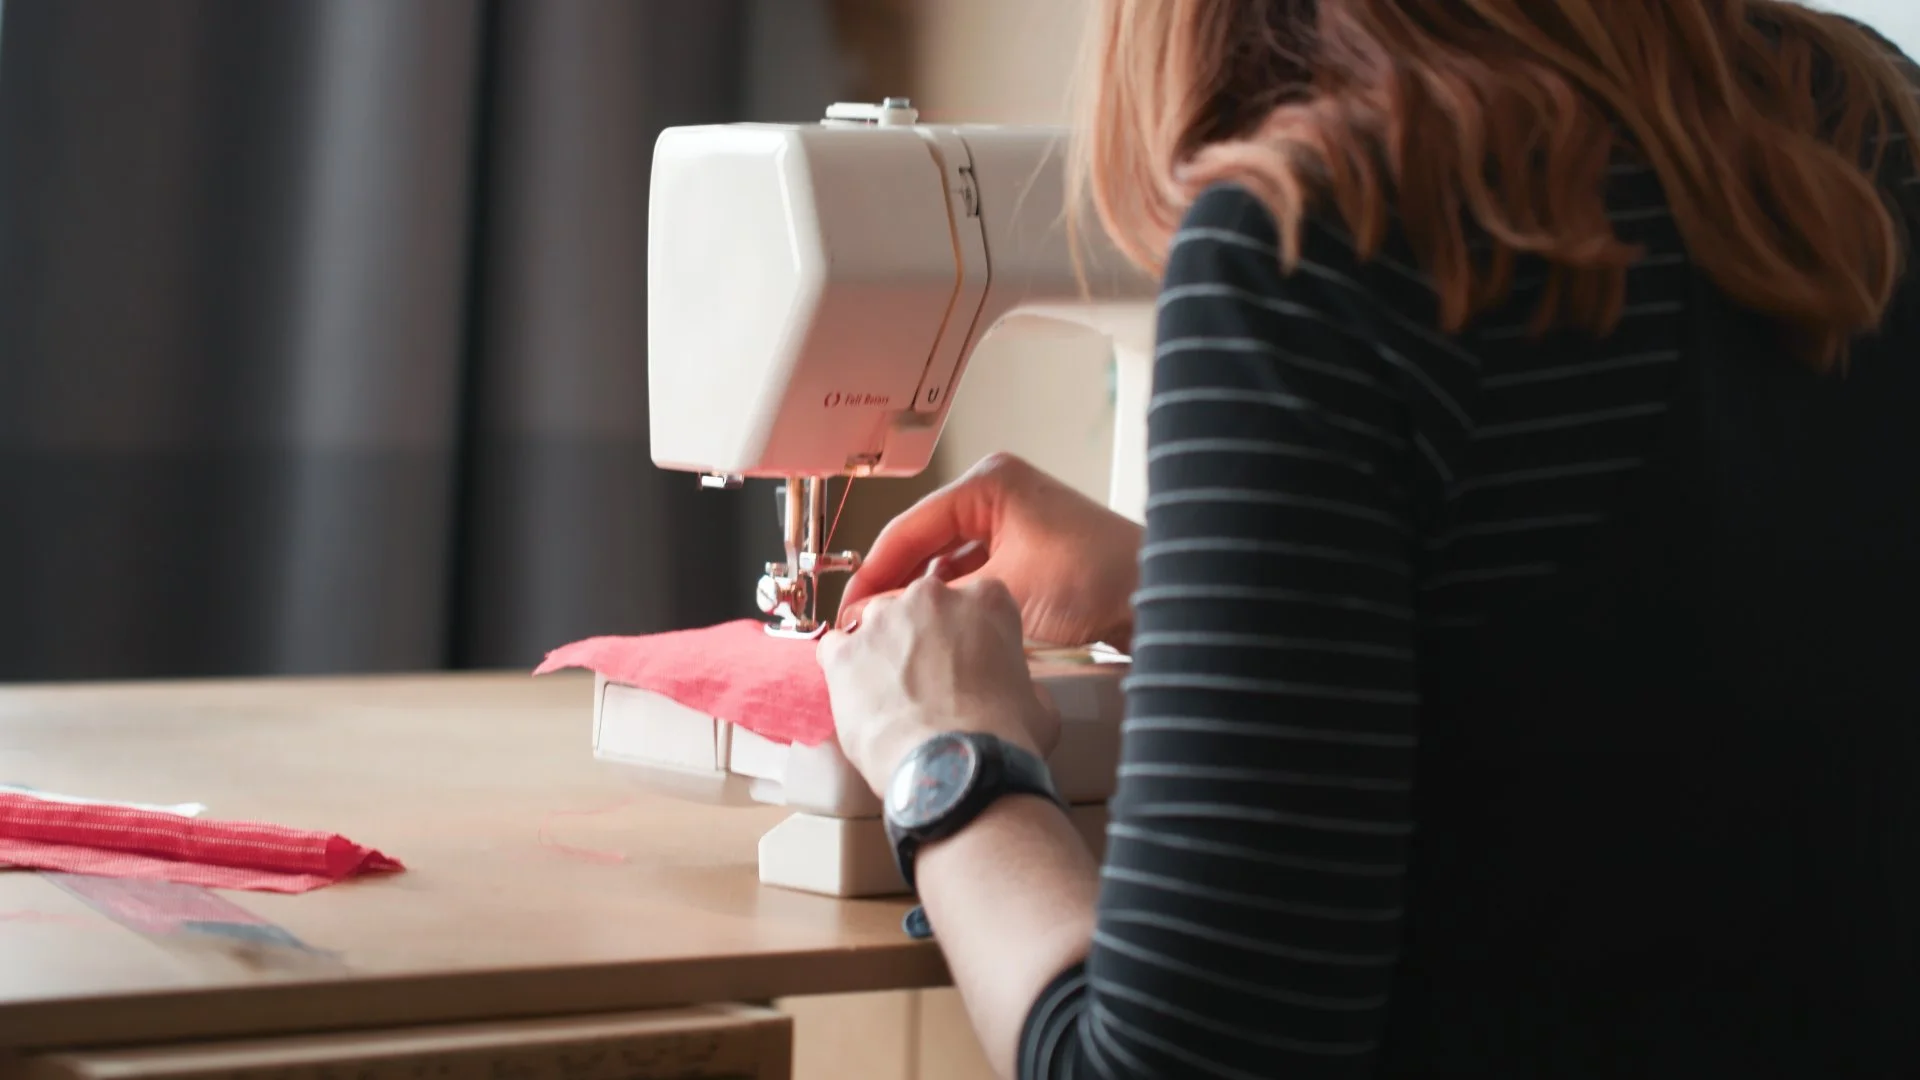
Woman in black sitting at sewing machine.

9. THERE IS SO MUCH WE CAN LEARN FROM OTHERS.

Something amazing we have noticed is how much our community members learn from each other! It's the questions, and the toile photos, and the realisations that makers are having that encourage others to give things a go, or helps them understand where they went wrong.

When our members aren’t able to get stuck into a project right away, they have told us they're still learning just by seeing what others are doing with the patterns and resources, and it gives them a base to work from when they get started.

10. SEWING IS A FORM OF SELF-CARE.

Sewing doesn’t need to be another thing that’s added to our to-do list! Giving time and space for making in our routines allows us to use sewing as a way to disconnect and unwind. Getting creative and lost in making can be so good for the soul!

11. IT’S FUN AND HEALTHY TO EXPLORE AND EXPERIMENT WITHOUT AN END GOAL IN MIND.

In the same way that it’s fulfilling to focus on skill-building instead of making more clothes, it’s also great for our brains to try something new just for the fun of it. We have loved seeing our community gain the confidence to hack a pattern just to see what will happen or just try an idea because they can’t get it out of their heads. And as we've said, even if it doesn't go to plan, if you're focused on input instead of output, any new skill or lesson learned is a win! Check out our archive of sewing tutorials if you’d like to start the journey of expanding your sewing skills!

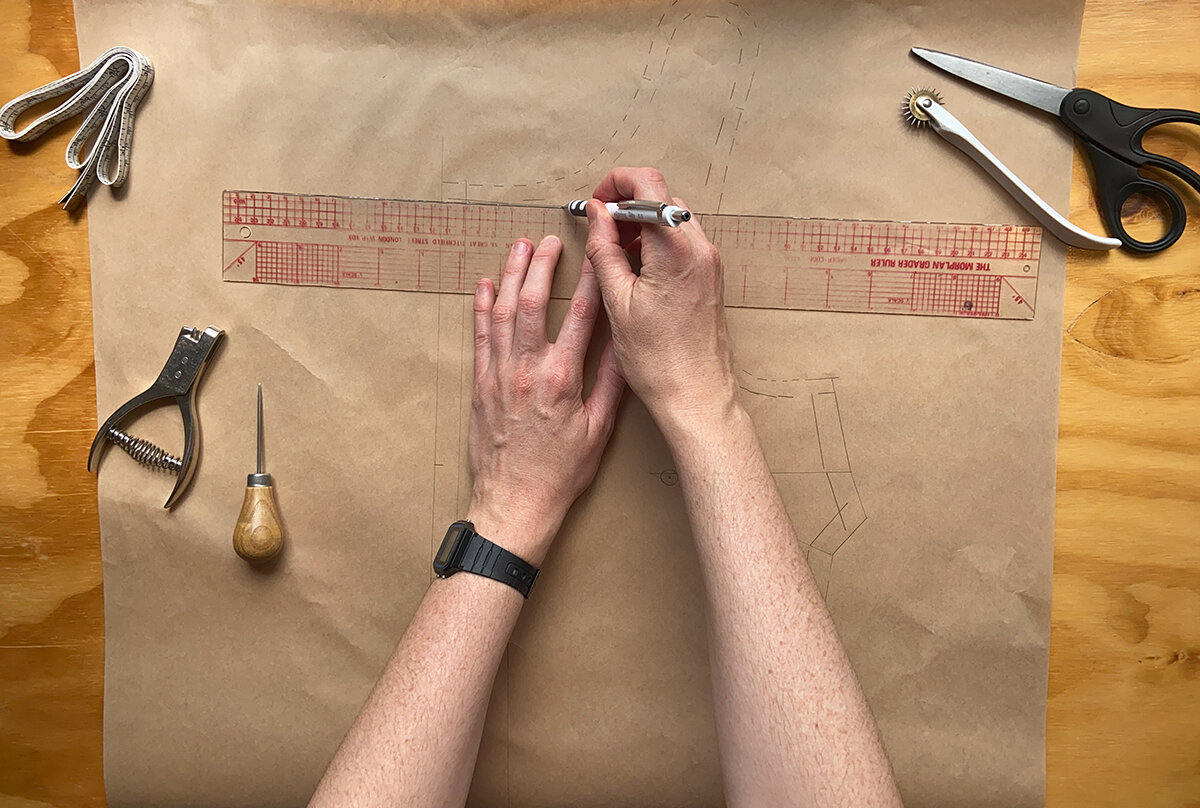
Woman working on making pattern alterations.

12. THERE IS ALWAYS MORE TO LEARN!

We have learned so much with the creation of Curated by ITF and we know (and now hope!) this will continue. While there are so many things we wish we’d known at the beginning, it was the mistakes and the experimentation that got us where we are today and we have to continually remind ourselves that it’s all part of the process.

We've loved seeing how makers of all different skill levels have approached each project. Beginners are focusing on gaining confidence in their finishing skills, while intermediate and advanced makers might be working with trickier fabrics, or learning how to make fitting adjustments and hack patterns.

The main thing is we're all learning alongside each other and making a community together! If you think you’d love to join a supportive community you can become an ITF Supporter here. If you would love to start building on your sewing skills with the benefits of an online community, you can learn more about Curated by ITF sewing subscription here and subscribe here.


Top tips for pattern hacking

Top tips for pattern hacking


Making clothing you love to wear is about having the ability to tailor garments to fit your body, your preferences and your needs. This is why, for Issue 2 of Curated by ITF, we are sharing the foundations of patternmaking with you.

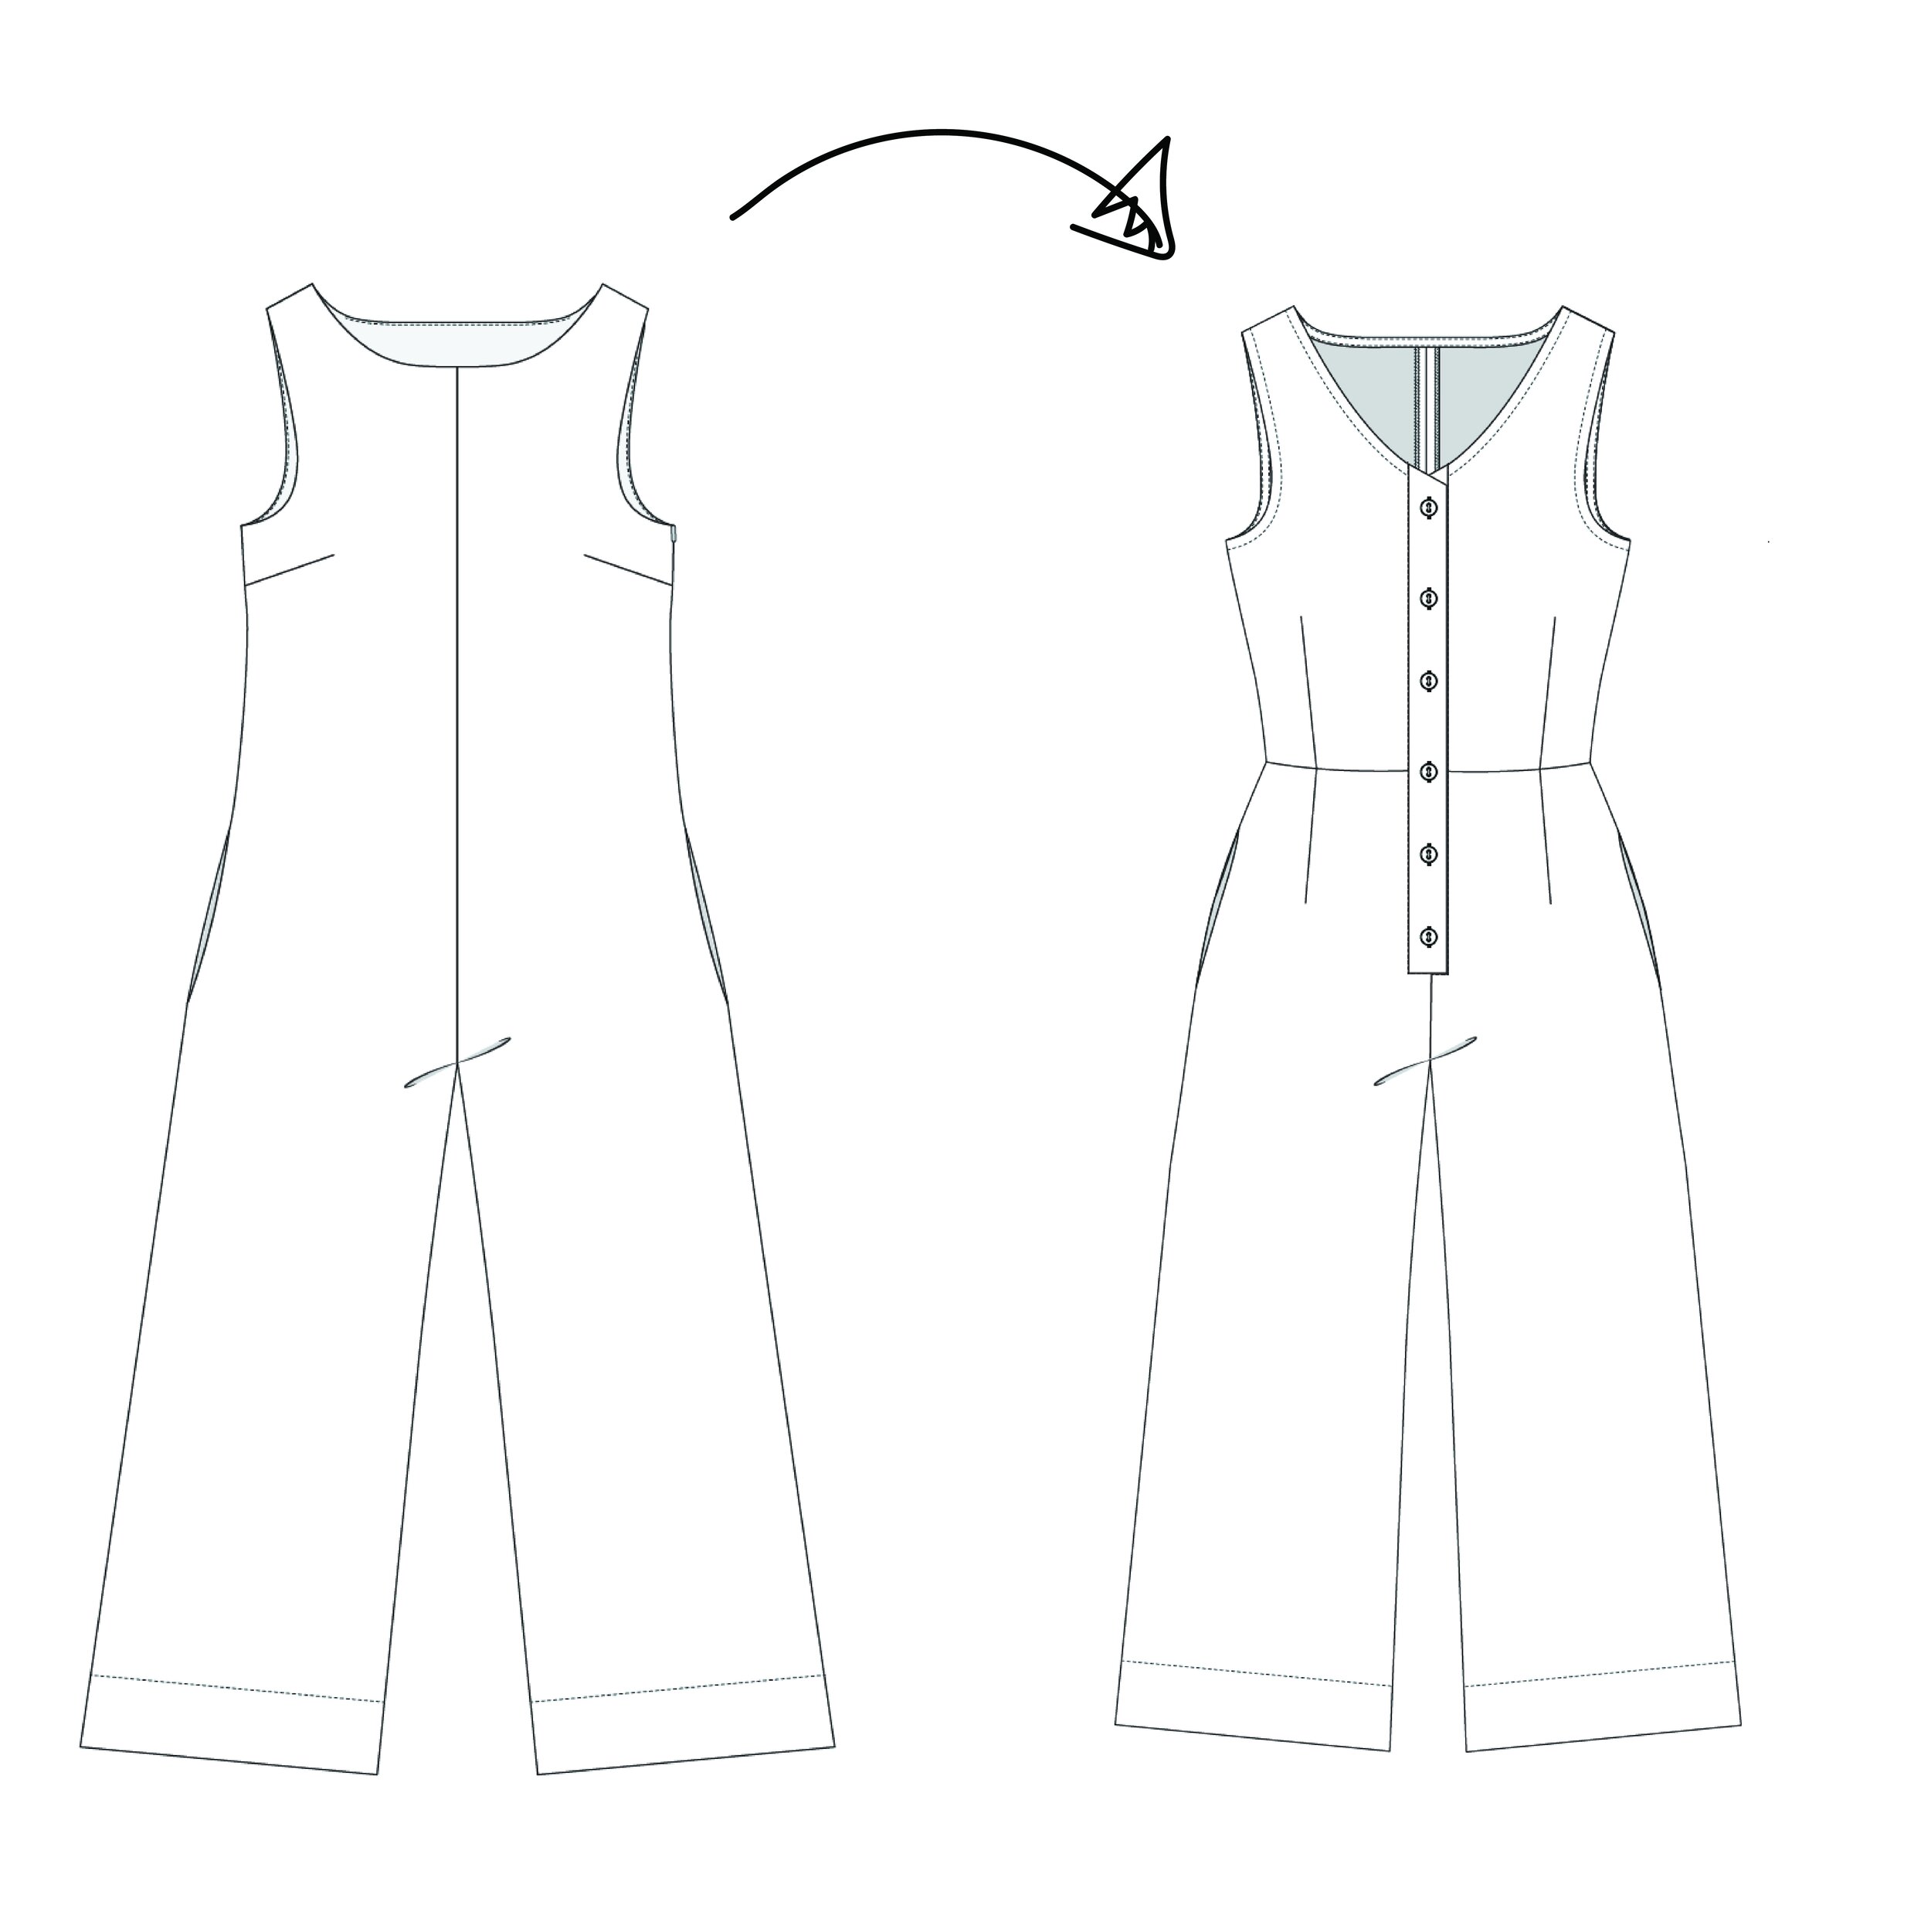
We'll be taking our Neale jumpsuit pattern that fits us so well and pattern hacking it into the designs below. So we thought that in today's email, we'd share a few of our top tips for successful pattern hacking with you.

What is pattern hacking?

Pattern hacking means that you use an existing pattern to draft a new pattern. This could mean small changes, such as adding a pocket or changing the neckline. It could also mean large-scale changes such as adding a sleeve to a sleeveless pattern or combining multiple patterns to create a new design.


1. Choose a pattern that fits you well! 

The main benefit of pattern hacking is that you can take a pattern that you know fits you and create a new design. This means you don't need to dive back into assessing the fit all over again, as you have already done that work with the original pattern. For large scale hacks, you may still need to make some fit alterations after checking your toile, but this will be far less than if you had started with a new pattern.

With Curated by In the folds - we teach you pattern hacking on patterns from previous issues, for example. Issue 1 focused on fitting the Neale jumpsuit and Issue 2 takes that pattern and creates 4 new designs! So you’re learning new skills as well as making clothes you know you’ll love!

Ready to join us but don't have the Neale jumpsuit pattern? Not a problem. After you sign-up, you will receive a link to purchase the jumpsuit pattern as a standalone pattern (for the same price as your monthly subscription).

2. Use the clothes you wear the most to determine what you sew

bb9812b0-d261-4af2-ba46-fb46aed22daf.jpeg

Another reason you might choose to hack a pattern is because sometimes it is difficult to know what changes you would like to make until after you have spent some time wearing a garment.

You may have worn a garment you have made and soon be thinking, 'if only it was longer' or 'if only it had pockets.' Pattern hacking gives you a chance to make the clothing you want to wear, without needing to draft patterns from scratch.

Learning pattern hacking will give you confidence to take ownership of the garments you sew and help you make exactly the kind of garment you want to wear.

3. Choose the right pattern to hack

It’s important to think about the main features of your design and cleverly pick which patterns you hack from. For example, if you want to make a dress with a big sleeve and a V-neck, you wouldn’t start with a sleeveless dress. You can always mash two patterns together if needed! 

In Issue 2 we’re using the Neale jumpsuit from Issue 1 and we’ve selected hacks that would work well using this jumpsuit or a similar one to start! (For example, you could apply some of these hacks to the Peppermint jumpsuit pattern).

4. Learn new skills at your own pace

Pattern making is a craft! It takes years to train and become a pattern maker. Pattern hacking is a great opportunity to learn pattern making skills and build on these skills gradually over time. Like any new skill or hobby, getting good at it will take time. Be patient and enjoy the process. That's what it's all about!

Start with simple hacks and work your way up to more complex ones. With Curated by ITF we introduce you to the basic concepts, techniques and tools for pattern hacking and take you through step by step until you’re ready to create your own! The hacks in this issue have been designed so that no matter what your patternmaking experience is, there will be something for you. Start with the beginner friendly hacks and work your way up to the more complex hacks if you are working on gradually building up your skills.

5. Always trace a copy and keep your drafts

When you are happy with the fit of the original pattern, trace a copy of the pattern so that you can always refer to or return to the original. In pattern making we also keep our drafts - which are the work in progress patterns, so we can have a ‘history’ of what we’ve done to the pattern. It's a good idea to put a date on each version of a pattern, so you always know which pattern is the most up to date.

Until the patterns are completely finalised (and beyond!) you never know when you might need to refer back to these previous versions.

6. Learn the basics

It's so important to learn the basics of patternmaking before you dive in. This will allow you to grasp the concepts and prevent you from getting overwhelmed when you get started. These techniques will take you a long way and once you learn a few basics you can get creative and have fun with the rest! 

We recommend knowing how to:

  • Add and remove seam allowance

  • Check seam lengths

  • True seams, curves and darts

  • Check patterns are squared off

  • How to move a dart

We cover all of these in our Hack kit for Issue 2 of Curated by ITF, as well as extra articles throughout the month with photos and videos in our community group. This is a great place to ask questions and see the process and questions from others as they’re working on the same thing.

7. Read through the instructions before you start

If you’re following instructions or a blog for a pattern hack then we recommend reading them through from beginning to end before you get started, so you can get an overview of what you are aiming to achieve. This will help when you come back to doing the earlier steps!

8. Make a toile to check you’re happy

Make a toile / muslin to check that you are happy with the design and fit of the garment before cutting the pattern from your final fabric. Because you’ve started with a pattern where you’re happy with the fit, this should help a lot when toiling. If you’re making small changes you can sometimes just go for it, but when you’re making bigger changes, especially adding volume etc. then it's always best to toile and check that you’re happy with style lines, silhouette and fit.

One of the challenges of pattern hacking is that you no longer have instructions for how to make the garment. We've solved this problem in Issue 2 of Curated by including a construction resource, that goes through everything from working out fabric yardage, order of construction for the hacks and then does a deep dive into specific dressmaking techniques.

9. As always, remember to enjoy the process!

b26c0b09-d9b8-4ac2-ad4a-ca42a0284f02.jpeg

Remember pattern making takes time, so be patient and enjoy the process!

The hacks we've created have been placed in order of difficulty and there is a skill rating on each hack's introduction page so that you can determine which hack you would like to try. Are you new to pattern hacking? Start with the Straight neckline jumpsuit or the Elastic waist pants. Ready to level up? Try the Sleeveless boxy top. Ready to get a lot of pattern making skills under your belt? Check out the Jumpsuit with waist seam and darts.

We start with introduction pages of the Hack Kit pdf to learn about concepts, techniques and tools for pattern hacking. Then you can use the rest of the Hack Kit to get started on the pattern hacks with step-by-step instructions.

If you’d like to learn more about pattern making and join us with our monthly subscription, Curated by ITF, you can do so via the link below.

Tips for getting a good fit on a jumpsuit

Getting+a+good+fit+on+a+jumpsuit+BLOG+HEADER.jpeg

Tips for getting a good fit on a jumpsuit

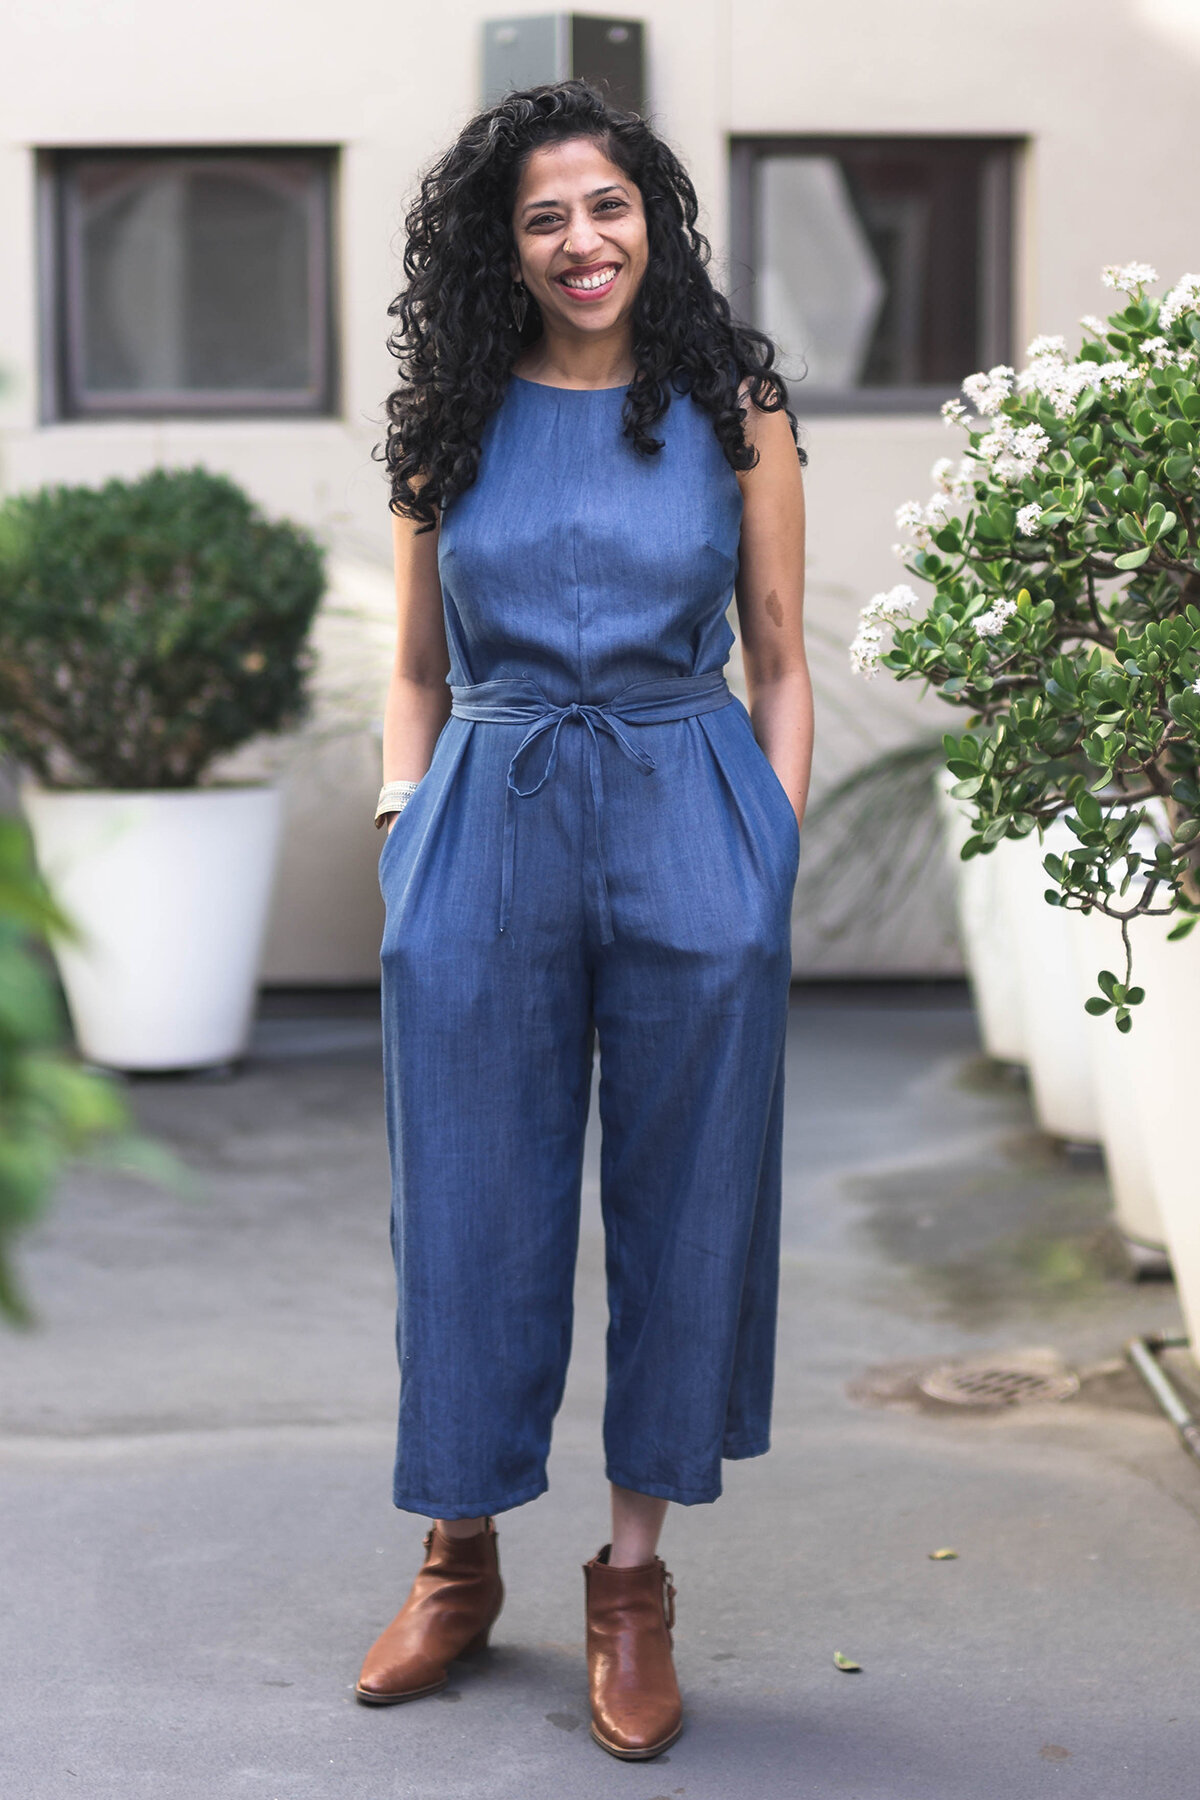
We are very excited to let you know that our new Neale jumpsuit pattern is here! This is the jumpsuit we've been dreaming about for a long time. It's the perfect piece to wear to work, to wear out, to relax on the weekend. It will make you feel put together, but incredibly comfortable and at ease to do the things you want to do in your handmade wardrobe.⁠⁠

Neale jumpsuit-Swetha 3.jpg

The Neale jumpsuit is a a real skill builder of a pattern! Which is why we chose it to be our first Curated by In the Folds pattern.⁠ Sewing a jumpsuit means working with both the top and bottom of the body, which allows for the opportunity to learn more fitting techniques. We created a jam-packed Neale Fit Kit to go along with our first Curated by ITF pattern, so you can jump straight into it.⁠⁠ In today’s post, we would like to shares some of these great tips for getting a good fit on a jumpsuit.

Sewing a jumpsuit can be tricky as you are fitting both the top and bottom part of a pattern. But often as they have a looser fit, they are a great intro introduction to pants fitting and with this post we hope to make the process a lot more fun!


1. Pick the right size for you

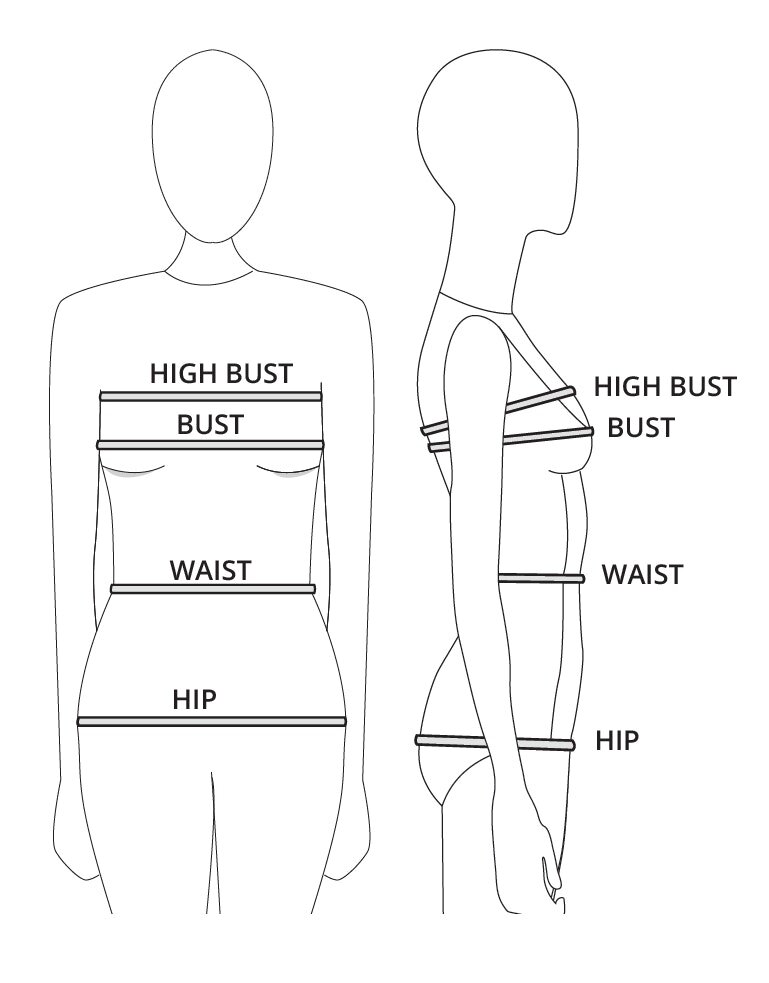
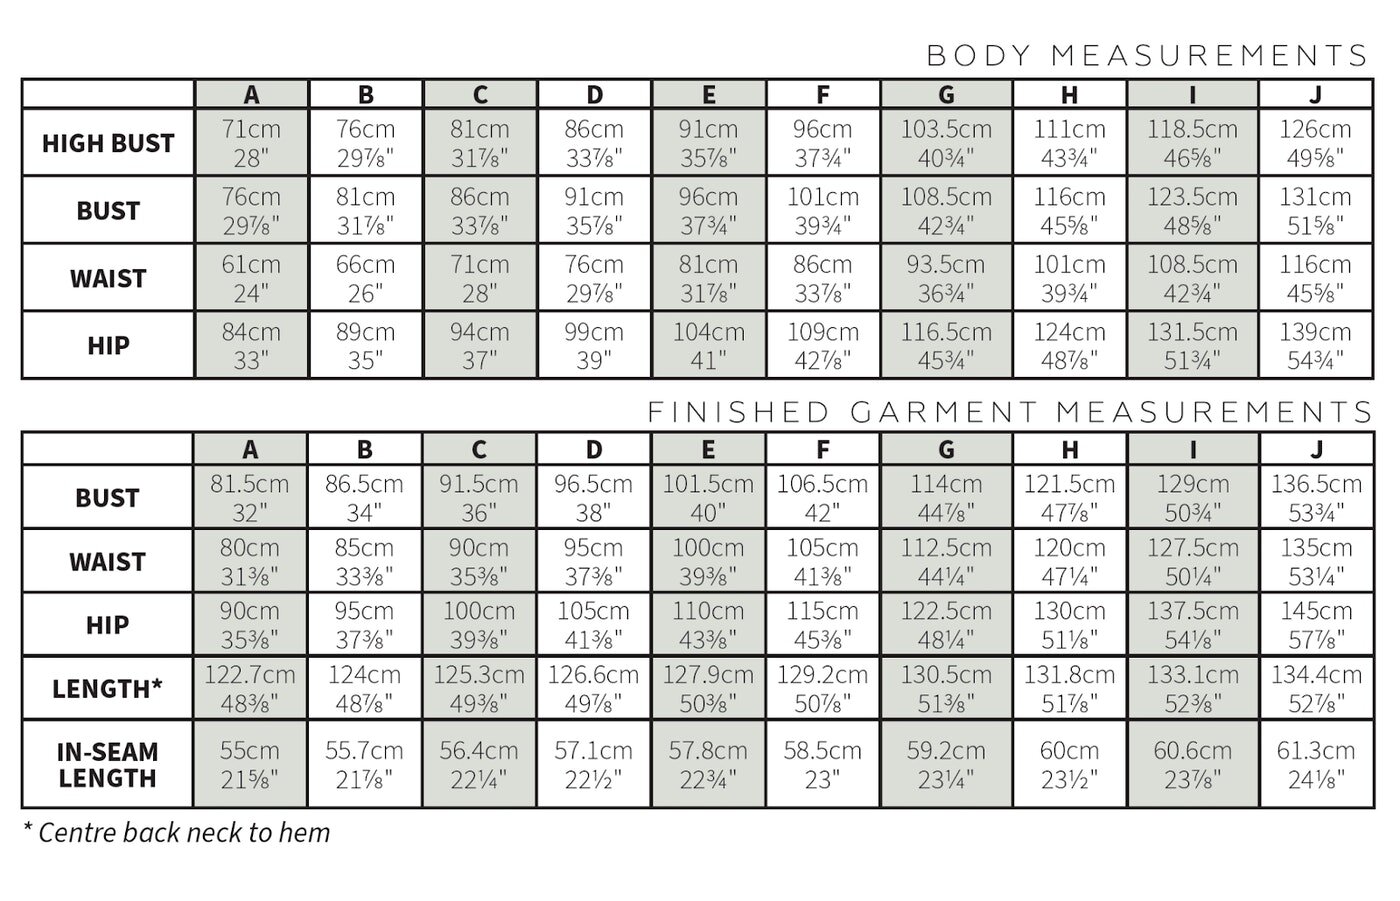
a. Take your measurements using a tape measure, check out our diagram to see exactly where you should measure! Make sure to measure at the fullest part of your hips. We suggest doing this in front of a full length mirror. 

b. Check the size chart and circle or note the corresponding size for each pattern. If your measurements are between sizes, you could blend between the two. Before doing this, look at the finished garment measurements to decide if you could select the smaller or larger size. 

TIP: Use a tape measure and place it around your body to get a feel for how it will fit. (Remember to place yourself in the centre of the tape measure rather than pulling it forward or back.) This allows you to see the amount of ease in the pattern - as this is something that changes between patterns. For example the Neale jumpsuit has more ease in the waist than it does in the bust and hip.

2. Make all the adjustments you can before sewing

Before we get started with making our toiles / muslins, it's worth thinking about which alterations you can do beforehand.  You can make some alterations before making a toile / muslin using your measurements, while others are made when you have done a fitting of a toile and have the toile to refer to.

Some of you will have a good idea of the alterations that are usual for you to make to a pattern before getting started. We encourage you to make these standard alterations to the pattern before you make a toile so that you can achieve a good fit at the fitting stage.

One example of an alteration you can do beforehand is checking the length. Especially in a jumpsuit you need to consider the length between each section e.g bust to waist, waist to hip, hip to crotch, then add in or take away length at the appropriate section.

Capture.PNG

Another alteration that you may be able to do before making a toile is a SBA (Small Bust Adjustment) or FBA (Full Bust Adjustment). To check this, work out the difference between your high bust measurement and bust measurement. If the difference between your high bust measurement and your full bust measurement is 2.5cm (1") your bust is an A cup, 5cm (2") it's a B cup, 7.5cm (3") is a C cup, 10cm (4in) is a D cup and so on. Record your bust cup size.

1629161752414.jpg

Often pattern companies draft for a B cup, sometimes they will offer a range of cup sizes. It's best to check before you start sewing. In the Folds currently offers a B cup.

• If you have a B cup bust cup size you will not need to make a bust adjustment to the pattern.

• If you have an A cup bust (or smaller) you may need to do a Small Bust Adjustment.

• If you have a C cup bust cup size or larger you may need to do a Full Bust Adjustment

3. Sew a toile

A toile is a test version of a garment, made from a similar, but often cheaper, fabric that assists with the fitting process. By making a toile, you can check the fit, and make any adjustments before cutting into your 'real' fabric.

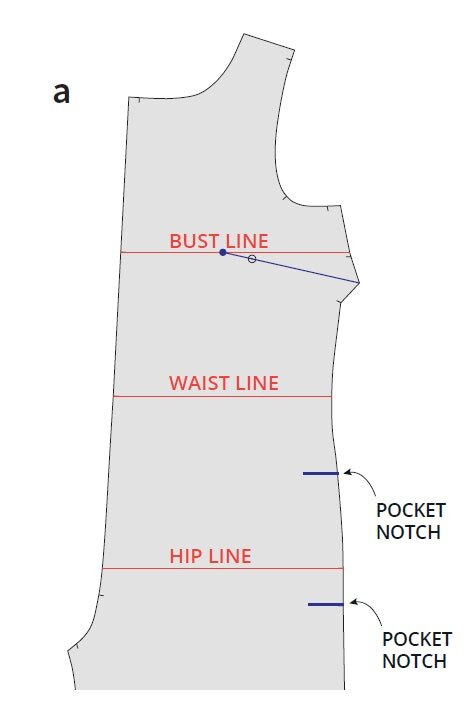
You only need to cut the front and back pieces, you don’t need to sew the zip, facing pieces, pockets or finish the seams. On the toile - mark the bust, waist and hip line on the fabric. On the Neale jumpsuit we’ve added notches so you can easily find these on your pattern!

You can also mark in the bust apex point by drawing a line from the centre of the dart, through the dart point and beyond the tip of the dart by 2.5cm (1in). Lastly extend the pocket notches on the toile with a marker so that you can check you are happy with the pocket positioning.

Other tips for sewing a toile are:

  • Remove the seam allowance from the neckline and armholes and add staystitching to stop them stretching.

  • Sew the toile with a longer stitch length than usual, so that when fitting the toile it is easy to release the seams if you need to.

  • Do not sew the hem. It is good to have the hem allowance available if you would like to experiment with length options. 

  • Remember, it is still important to press the toile well as you sew. This will help you when assessing the fit of the toile.


4. Assess the fit

Now it's time to assess the fit. Yay!

Get yourself set-up in front of a full length mirror with a notebook, pen, pins, seam ripper / snips and marker. If you have a friend who can help you - get them too! Work through the checklist below and take note of any issues. It’s also a good idea to take pictures on the front, side and back (you can use the timer on your camera). Sometimes you notice things on the photos that you may not see in real life. 

InTheFold_Edit-Still_07.jpg

Jumpsuit fitting checklist:

  • Check that your side seams appear straight and are perpendicular to the floor. If your side seam is pulling towards the front or the back, this normally means that you need more width in the area where it's pulling.

  • Lift your arms and check that the armhole sits in a comfortable position under your arm. Check that the armhole is a nice shape on the front and back.

  • Check that your BUST LINE, WAIST LINE and HIP LINE are in the correct position for you and are all parallel to the floor. If any of these lines are in the incorrect position, you will need to either shorten or lengthen the pattern. For a jumpsuit it’s important to notice where to add/take length because you are fitting both a top and pants in one.

  • Check the front and back crotch are not too tight or too loose. If they are, you will need to adjust the crotch length.

  • Move around. Check that you can move and sit comfortably in the jumpsuit. If a seam feels tight, let out the seam with your seam ripper and re-pin the seam with a smaller seam allowance to see if this helps.

You can find more fitting tips, the full checklist and instructions on how to make these adjustments in our first issue of Curated by In the Folds. Our September project, the Neale jumpsuit, comes with a bonus Fit Kit that will walk you through a range of different pattern alterations in detail. 


5. Grab a cup of tea and take a break!

InTheFold_Edit-Still_06.jpg

Fitting patterns at times can be hard. It’s important to take a break! Remember not to ‘over fit’, it’s easy to start obsessing over every wrinkle but in reality, we move around and we aren’t just a static image! 

You don’t have to make all of the adjustments at once. You can choose which are more important to you and if you like, you can build on these as you go. With Curated by In the folds we aim to help you through the fitting process, one step at a time, providing you with all the information (always tested by us!) in one place and hopefully have some fun with it! As part of the subscription, we also have a great online platform in which you can ask any questions and see what other people are making and learn from their fitting process too.

If you’d like to learn more about fitting and join us with our monthly subscription, Curated by ITF you can do so via the link below.

Drafting a bodice block - a few questions and answers

BODICE-BLOCK-ANSWERS.jpg

Drafting a bodice block - a few questions and answers

A few years ago, I created a blog post about how to draft a bodice block from your own measurements. Little did I know that this was going to become the most popular blog post on my website!

I have received a number of questions lately about the tutorial and I thought it could be a good idea to publish some of these questions and answers as an opportunity to help you on your own learning journey. I love the Q&A format - over the last year or so I have been sending a newsletter that includes a question from the community and my answer to it and I have loved all your responses to the series. I think it’s a great way to see what people actually need help with, rather than just producing the content that I assume people need. It’s also a fun challenge for me and I feel that I am constantly learning from these questions.

I will update this post as I receive more questions, so that hopefully, if you have a question, you will find a relevant answer here and can keep on going with your draft!

Update September 2021

Thank you so much for all the enthusiasm for my blog posts about bodice drafting. It has been my most popular blog post of all time! After 5 years of answering questions, I no longer have capacity to answer individual questions regarding bodice drafting. The comments have now been switched off and I will no longer be able to get back to emails regarding these blog posts.

The aim of pattern drafting

The first thing I’d like to talk about when it comes to making any pattern, is that we are not aiming for perfection right out of the gate. The idea is to get as close as you can to a good fit and then make a toile / muslin and check the fit on your body. It’s almost impossible to know if something is going to fit you properly by just looking at a flat pattern. You can get a good idea of how something will fit, but you just won’t know until you give it a go.

The aim when drafting or adapting patterns is to create a pattern that fits you. For example, in regard to the bodice block, you are aiming to get a bodice block that fits you closely so that you can use it to draft other patterns from it (for example, this simple summer top). If when you try on your toile, you realise that the shoulders are too wide, you can make a narrow shoulder adjustment. If you notice that the dart point is in the incorrect position, you can move it. Although following a tutorial down to the letter is a great first step, that is not the end goal. There will be a point where you need to assess your toile and make some changes to achieve a good fit. A tutorial like the bodice block tutorial I created, helps you get to a really good starting point, but then it’s about looking at your toile (and your pattern) and making some changes to get nice smooth lines, or get your lines in the right position. I hope that by sharing some of my questions and answers with you, you will know what I mean and can take something away from this post!


Question : Armhole curve

Hi Emily,

 Thank you so much for the well-written and detailed blog post on how to draft a bodice block! I am just starting to sew and really appreciate amazing resources like yours.

I have the same problem as Denise Palmones about the armhole: “On that note I am having some concerns on my shoulder area on draft. I notice that my TV line is too long that it is almost on the same column of my P on the darts. Having so makes a weird armhole that has a cross leading to look like an asymmetric infinity symbol and not an oblong (V, A2 crosses the O,Z line) and I can't make it sense out of it.”

Could you please let me know how to proceed?

Thank you!

- Crystal

bodice-block-armhole.jpg

Answer:

Hi Crystal,

It's looking great. I'd suggest just drawing your armhole as a nice smooth curve, don't worry too much that it's not hitting all the points (it’s much more important that you get a nice armhole shape). See example below:

bodice-block-armhole-2.jpg

I hope that helps!

Happy sewing,

Emily


Question : Armhole curve 2

Hi there,

Hope you are well.  I have been using your tutorial for how to draft a bodice block and everything seems correct apart from my armhole, which is looking very wonky!  Please could you offer me any advice on how to solve this problem?

I have attached pictures of my bodice block as it is.  

Thank you for the great tutorial, even as a beginner, I found it really straightforward to follow!

I look forward to hearing from you.

- Julia

bodice block-armhole 2.jpg

Answer:

Hi Julia,

Thanks for getting in touch.

I am pleased to see you're using my tutorial! Thanks for sending through photos, that really helps.

What I suggest you do is smooth out the armhole to get a nice curved shape on the front and back. See the photo below.

re-draft-bodice-block-armhole.jpg

You are then able to make a toile and see how it fits!

Happy sewing,

Emily


Question: Fitting the armhole

Hi there,

I continued to work on the block and finally got the fabric to make a blockout and see what edits needed to be made. Unfortunately there is some gaping in the armpit and despite looking online I can’t find how to fix it, a lot of what I see to fix it in the back of the arm would be a shoulder dart but nothing about the front. Would you have any advice on how to fix this?

Thank you so much,

 - Shayleen

Answer:

Hi Shayleen,

Nice to get an update and see your toile. It's looking good!

What I suggest you do is pin out some darts from the armhole (in both the back and the front if both are required) to get the armhole fitting more snugly. You will need to do this while it's on the body, so if you have someone who can help, it will be a little bit easier. Once you have pinned the darts, mark them with a marker and remove the pins. You can then transfer these new darts to your pattern. Once your darts are there, you can rotate the armhole dart value, so that it can be added to the waist or shoulder dart (or a little bit to each). This will help you get the correct shaping, without actually adding a third dart. I have a tutorial about rotating dart values that you can find here.

I hope that helps!

Happy sewing,

Emily


Question: Drafting the armhole

Hi Emily! 

I followed your bodice block tutorial to draft a block based on my measurements, and it was soooo much fun!  Thank you for the thorough and easy to follow tutorial ❤️  Unfortunately, I came across an issue when placing point V and drawing my line from T to V.  Based on your example in the tutorial, it looks as though point V should extend from point T, past the A1, A2 line.  Mine however falls short. 

When drawling the armsye, it looked strange to go from A2 to V, so I also drew a line from A2 to ? (You will see this ? point on my attached draft photos).  I have also included my measurements.  Do you know what I did incorrectly and how to fix it?

When measuring my shoulder length I stopped at the bony peak, however my shoulder socket extends well past that (approximately 5cm to the end of my shoulder to where my arm goes down to my elbow)... not sure if that could be the issue... 

Hopefully this makes sense to you! 

Warmly, 

- Kelly

armhole 3.jpg

Answer:

Hi Kelly,

I am so pleased to hear you had a good time following the tutorial!

I had a play in Illustrator and without having all your measurements and going through the whole process, it's a little bit tricky to see what's going to happen, but from what I can tell, what I suggest you do is:

  • I'd move point K slightly further away from the centre front

  • Rotate the angle of the dart slightly

  • Move point V so it's a bit further up / out. This just reduces the severity of the front shoulder angle

  • Check your front shoulder length. My suggested alteration might make your shoulder seam slightly longer - if so, you will need to add this onto the back too.

  • Draw armhole as illustrated below.

Artboard 12.jpg

This should be enough to get you to the point where you can make a toile, which is when you will really see what's working and not working.

Let me know how you go!

Happy sewing,

Emily


Question: Star Trek shoulders

Hi Emily, 

Thank you so much for your help, I’ve been scratching my head over this for the past 2 days! 

I’ve included photos, I traced the offending 80’s/Star Trek shoulder line in red to make it easier to see. 

I really appreciate the insight, I’m sure you get tons of cries for help. 

FYI I found your blog via WithWendy’s latest video and am *really* enjoying it, thank you for the quality content. 

High bust: 84cm 

Full bust: 87 cm (I’m obviously not very full chested! ^^) 

Best regards, 

- Silvia

bodice-block-shoulder.jpg

Answer:

Hi Silvia,

You're right! It was fantastic to get a shout-out on WithWendy's youtube channel, but it has made for quite a busy week! I don't follow anyone on youtube so it was nice to discover her and see how great her videos are!

I had a play in Illustrator and without having all your measurements and going through the whole process, it's a little bit tricky to see what's going to happen, but from what I can tell, what I suggest you do is:

answer.jpg
  • Move your point K slightly closer towards the centre front

  • reduce your shoulder dart size. I know the tutorial doesn't say to do this - but with your bust size, you can probably afford to make the dart smaller (and I can relate, you have similar full and high bust measurements to me! That's why it's so great to make your own clothes as you can avoid the baggy bit in the bust of fitted ready made clothes)

  • Reduce your shoulder length by about 1.5cm - you will need to remove this from the back shoulder too - as illustrated.

I think that should get you to the point when you can make a toile / muslin. You should be able to quickly see how things are looking and if you need to make an alteration. If you realise that you need that extra 1.5cm back on the shoulder, rather than extending the shoulder line I'd suggest you do a broad shoulder adjustment. I have a tutorial you can check out here.

I hope that helps Silvia. Let me know how you go!

Happy drafting,

Emily


Question: Shoulder lines overlapping

Hello Emily, 

I found your blog post via withwendy and try to make the bodice. 

Another person had the same problem as me regard to make a armhole. Because the lines JO and TV are crossing. 

Sorry for my poor english. I still hope you can understand my problem. 

Thank you very much. 

Best regards

Anhthu

bodice-block-shoulders.jpg

Answer:

Hi Anhthu,

 Thank you for getting in touch. I am pleased you're giving my tutorial a go!

 It's not a problem that your shoulder lines are crossing. Just keep working through the tutorial. When you get to the end you will trace the front and back bodice onto new pieces of paper, so the overlapping shoulders will no longer be a problem. Does that make sense?

Happy drafting,

Emily


Introducing the Barkly skirt!

Say hello to the Barkly skirt

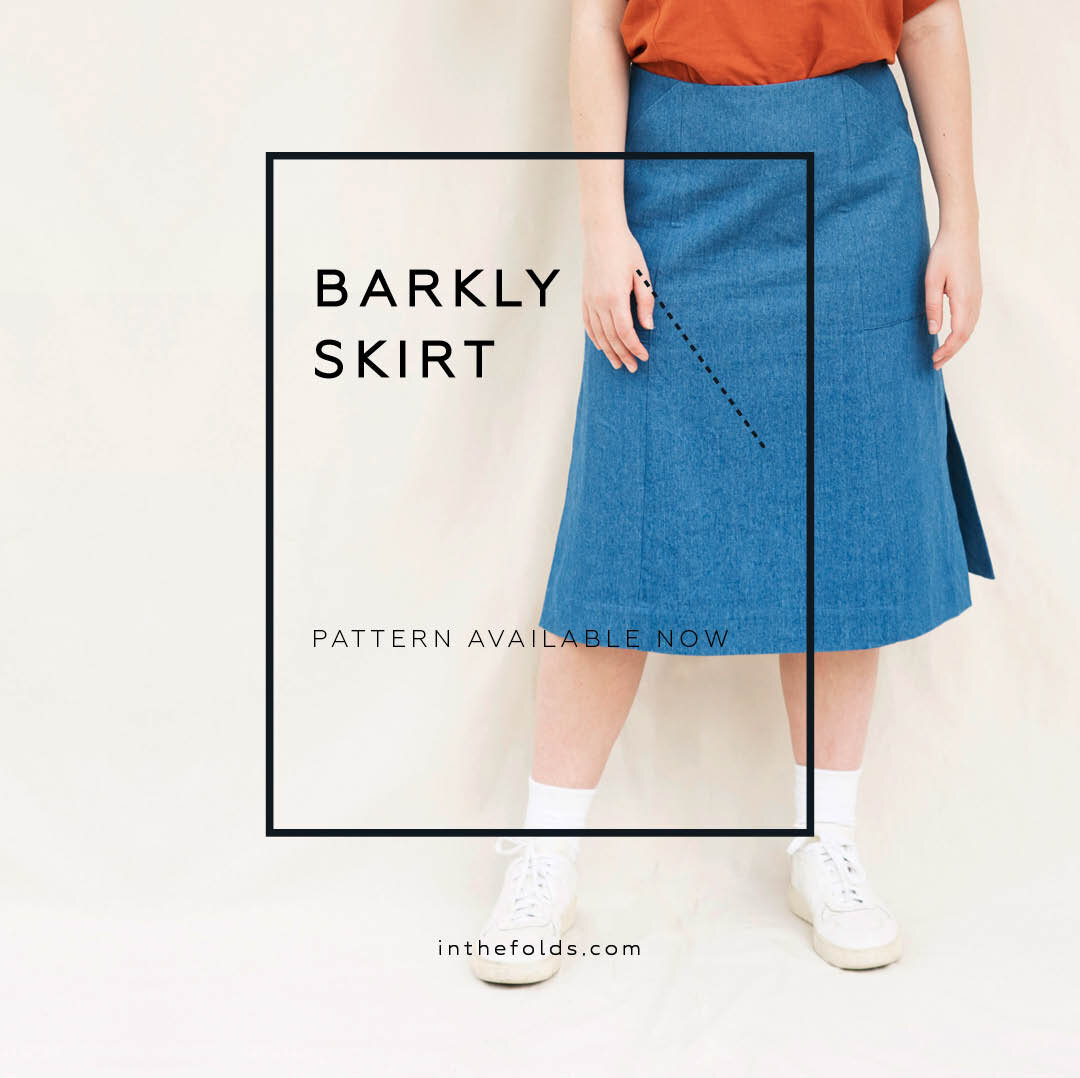
I am very excited to be popping in to your inbox today to welcome the Barkly skirt to the In the Folds collection. It is the first skirt in the range, and I am always very happy to add a new garment type that helps you make a whole outfit from the collection  - as you can see from the photos, it works very well paired with the Collins top

The Barkly skirt is a panelled A-line skirt with pockets and a range of interesting details. It has been designed to be worn all year round - in summer in soft linens with sandals and in winter in denim with tights and boots - so can be added to your project list whether you're in the Southern Hemisphere like me, or in parts of the world that are beginning to warm up.

Styles can be mixed and matched so that you can combine your style preferences - the pattern comes with the usual two views, as well as an additional resource that shows you how you can mix and match the elements to make a further six skirt styles. More information about this can be found in the STYLE VARIATION KIT.

View A details

View A sits on the natural waist (the top of the waistband will sit just above the natural waist) and features a shaped waistband, slanted pockets that are inset in the side panels and a hem facing. 

Both styles feature a centre back invisible zip for a clean finish - don't be afraid if you have never sewn an invisible zip, the instructions are very detailed and once you get the hang of it, you will be wanting to sew invisible zips in everything - I promise (and I also have plenty of online resources for those of you who prefer photos)!

VIEW B DETAILS

View B sits just below the natural waist (as it features a waist facing, rather than a waistband), has patch pockets (which are therefore optional), and side splits in the hem.


Who is the pattern for?

The pattern is placed at a Level 2 (out of 5) on the In the Folds pattern skill scale, which means that you feel quite confident with the basics and are ready for new challenges. If you're a brave beginner looking for some new skills to get under your belt, then this is a great pattern for you. If you've never made a skirt before, an A-line skirt like this is a great place to start. 

As always, the pattern is available in 10 sizes (A - J, which equates to Australian sizes 6-24). For more information about sizing, please visit the Sizing Chart.

What skills will you learn by working through this pattern?

By working through this pattern, you will gain confidence in:

  • Sewing straight seams

  • Sewing curved seams

  • Joining panels together

  • Sewing pockets

  • Setting an invisible zip

  • Sewing a waistband (depending on the variation you choose to make)

  • Sewing a waist facing (depending on the variation you choose to make)

  • Working with interfacing 

Pattern format

At this stage, the Barkly skirt pattern is only available in PDF format. I hope to have it in print format by the end of this year.

A huge thank you to Daisy

I'd like to finish off by saying a huge thank you to Daisy, who did such an incredible job with these photos! Due to Covid-19 restrictions I needed to get a bit creative with how I approached the shoot and she absolutely nailed it as you can see. Thank you Daisy!


Introducing the Hove jacket!

I am very excited to let you know that the Hove jacket is here!

It will be no surprise to you (if you have been following along with my journey for a while) that this pattern has taken a long time to come into fruition. I even accidentally gave a (not so sneaky) sneak-peek of it almost 2 years ago when I was running my Kickstarter campaign.

IMG_0167.jpg

The Flynn jacket and the Hove jacket actually started out as two variations of the same pattern! Over time as I continued to work on the patterns, I realised they were moving further and further apart in terms of design, and were going to become a mammoth of a pattern that would probably intimidate makers - rather than inspire!

HOVE-VIEW-B-BACK2.jpg

The Hove jacket is a loose-fitting jacket designed for woven fabrics. With two different styles, it is the perfect layering piece. It has a relaxed sporty vibe that can be dressed up or down, depending on what you pair it with.

Hove features a fully lined hood, open-ended zip closure (or double-ended zip if you'd prefer), high-low hem, in-seam pockets and pleated back detail.

VIEW A DETAILS

View A has a dropped shoulder and sleeve with a hem facing. The sleeves are designed to be worn either straight or folded back, for a more casual look

HOVE-JACKET-3.jpg
HOVE-JACKET-6.jpg

VIEW B DETAILS

The Hove jacket View B is sleeveless (creating the look of a dolman sleeve) and has been designed to be worn over long sleeve tops and dresses, although works equally well in warmer weather over a sleeveless top or t-shirt.


HOVE-JACKET-20.jpg

I am really excited to continue releasing patterns that work so well worn together! In the pattern shoot, we paired the Hove jacket with the Darlow pants, Collins top and Rushcutter dress.

Who is the pattern for?

The pattern is placed at a Level 3 (out of 5) on the In the Folds pattern skill scale, which means that you should feel confident using a range of different sewing patterns and class your sewing skills as immediate (or courageous beginner).

In saying that, the Hove jacket is a great entry level jacket, as you don’t have to worry about lining and due to it’s oversized silhouette, it is easy to achieve a good fit.

As always, the pattern is available in 10 sizes (A - J, which equates to Australian sizes 6-24). For more information about sizing, please visit the Sizing Chart.

HOVE-CLOSE-UP.jpg

On both views, all seams are finished with bias binding, for a beautiful and high-end finish. This means that not only will you end up with a beautifully finished jacket, you will also learn some new skills in the process!

What skills will you learn by working through this pattern?

By working through this pattern, you will gain confidence in:

  • Sewing curved seams

  • Sewing pockets

  • Setting in sleeves

  • Finishing seams with bias binding

  • Inserting an open-ended zip

  • Sewing a hood


What the testers said about this pattern:

HOVE-JACKET-14.jpg

‘As a beginner, when I first read the instructions I thought I was out of my depth, but as I started sewing pieces just magically came together, it was my most accomplished make to date and have given me great confidence.’ - Jo

[The Hove jacket pattern] ‘is really clean in the delivery. Your instruction style is spare but clear. Your designs are unique and kind of bananas in a beautiful way, so sewing this jacket up was such a delight and surprise. I just couldn't wait to see how you would have us pull it all together! And it was not only a great intellectual sew, but the way it fits is so well done. I think you're brilliant and nobody is doing what you're doing! THANK YOU!’ - Celeste

4M1A3267-Edit.jpg

‘The hood! The hood! It is so satisfying to have and it came together so well. I was a bit nervous about it, but it ended up being one of the easiest parts of the pattern for me. Also, pinning the long seams was a challenge (I ran out of pins!), but they were really satisfying to sew.’ - Leanne

‘I love the ease in the hips. I almost always need to grade up in the hips (29"waist, 43" hip) but it was so nice not to have to! The shoulders fit so nicely too.’ - Mia

4M1A3291-Edit.jpg

‘It was an amazing experience… I found you develop very clever methods for the finishings (the thing with the bias binding that was kind of difficult in the beginning was super delightful after I understood it, and the puzzle of the pieces (I don't know how to say this in other way) was really delightful - seeing how everything was coming together. This made me reconsider sewing all your other patterns :)’ - Juliana

For your reference, the model Marisabel wears a Size F.


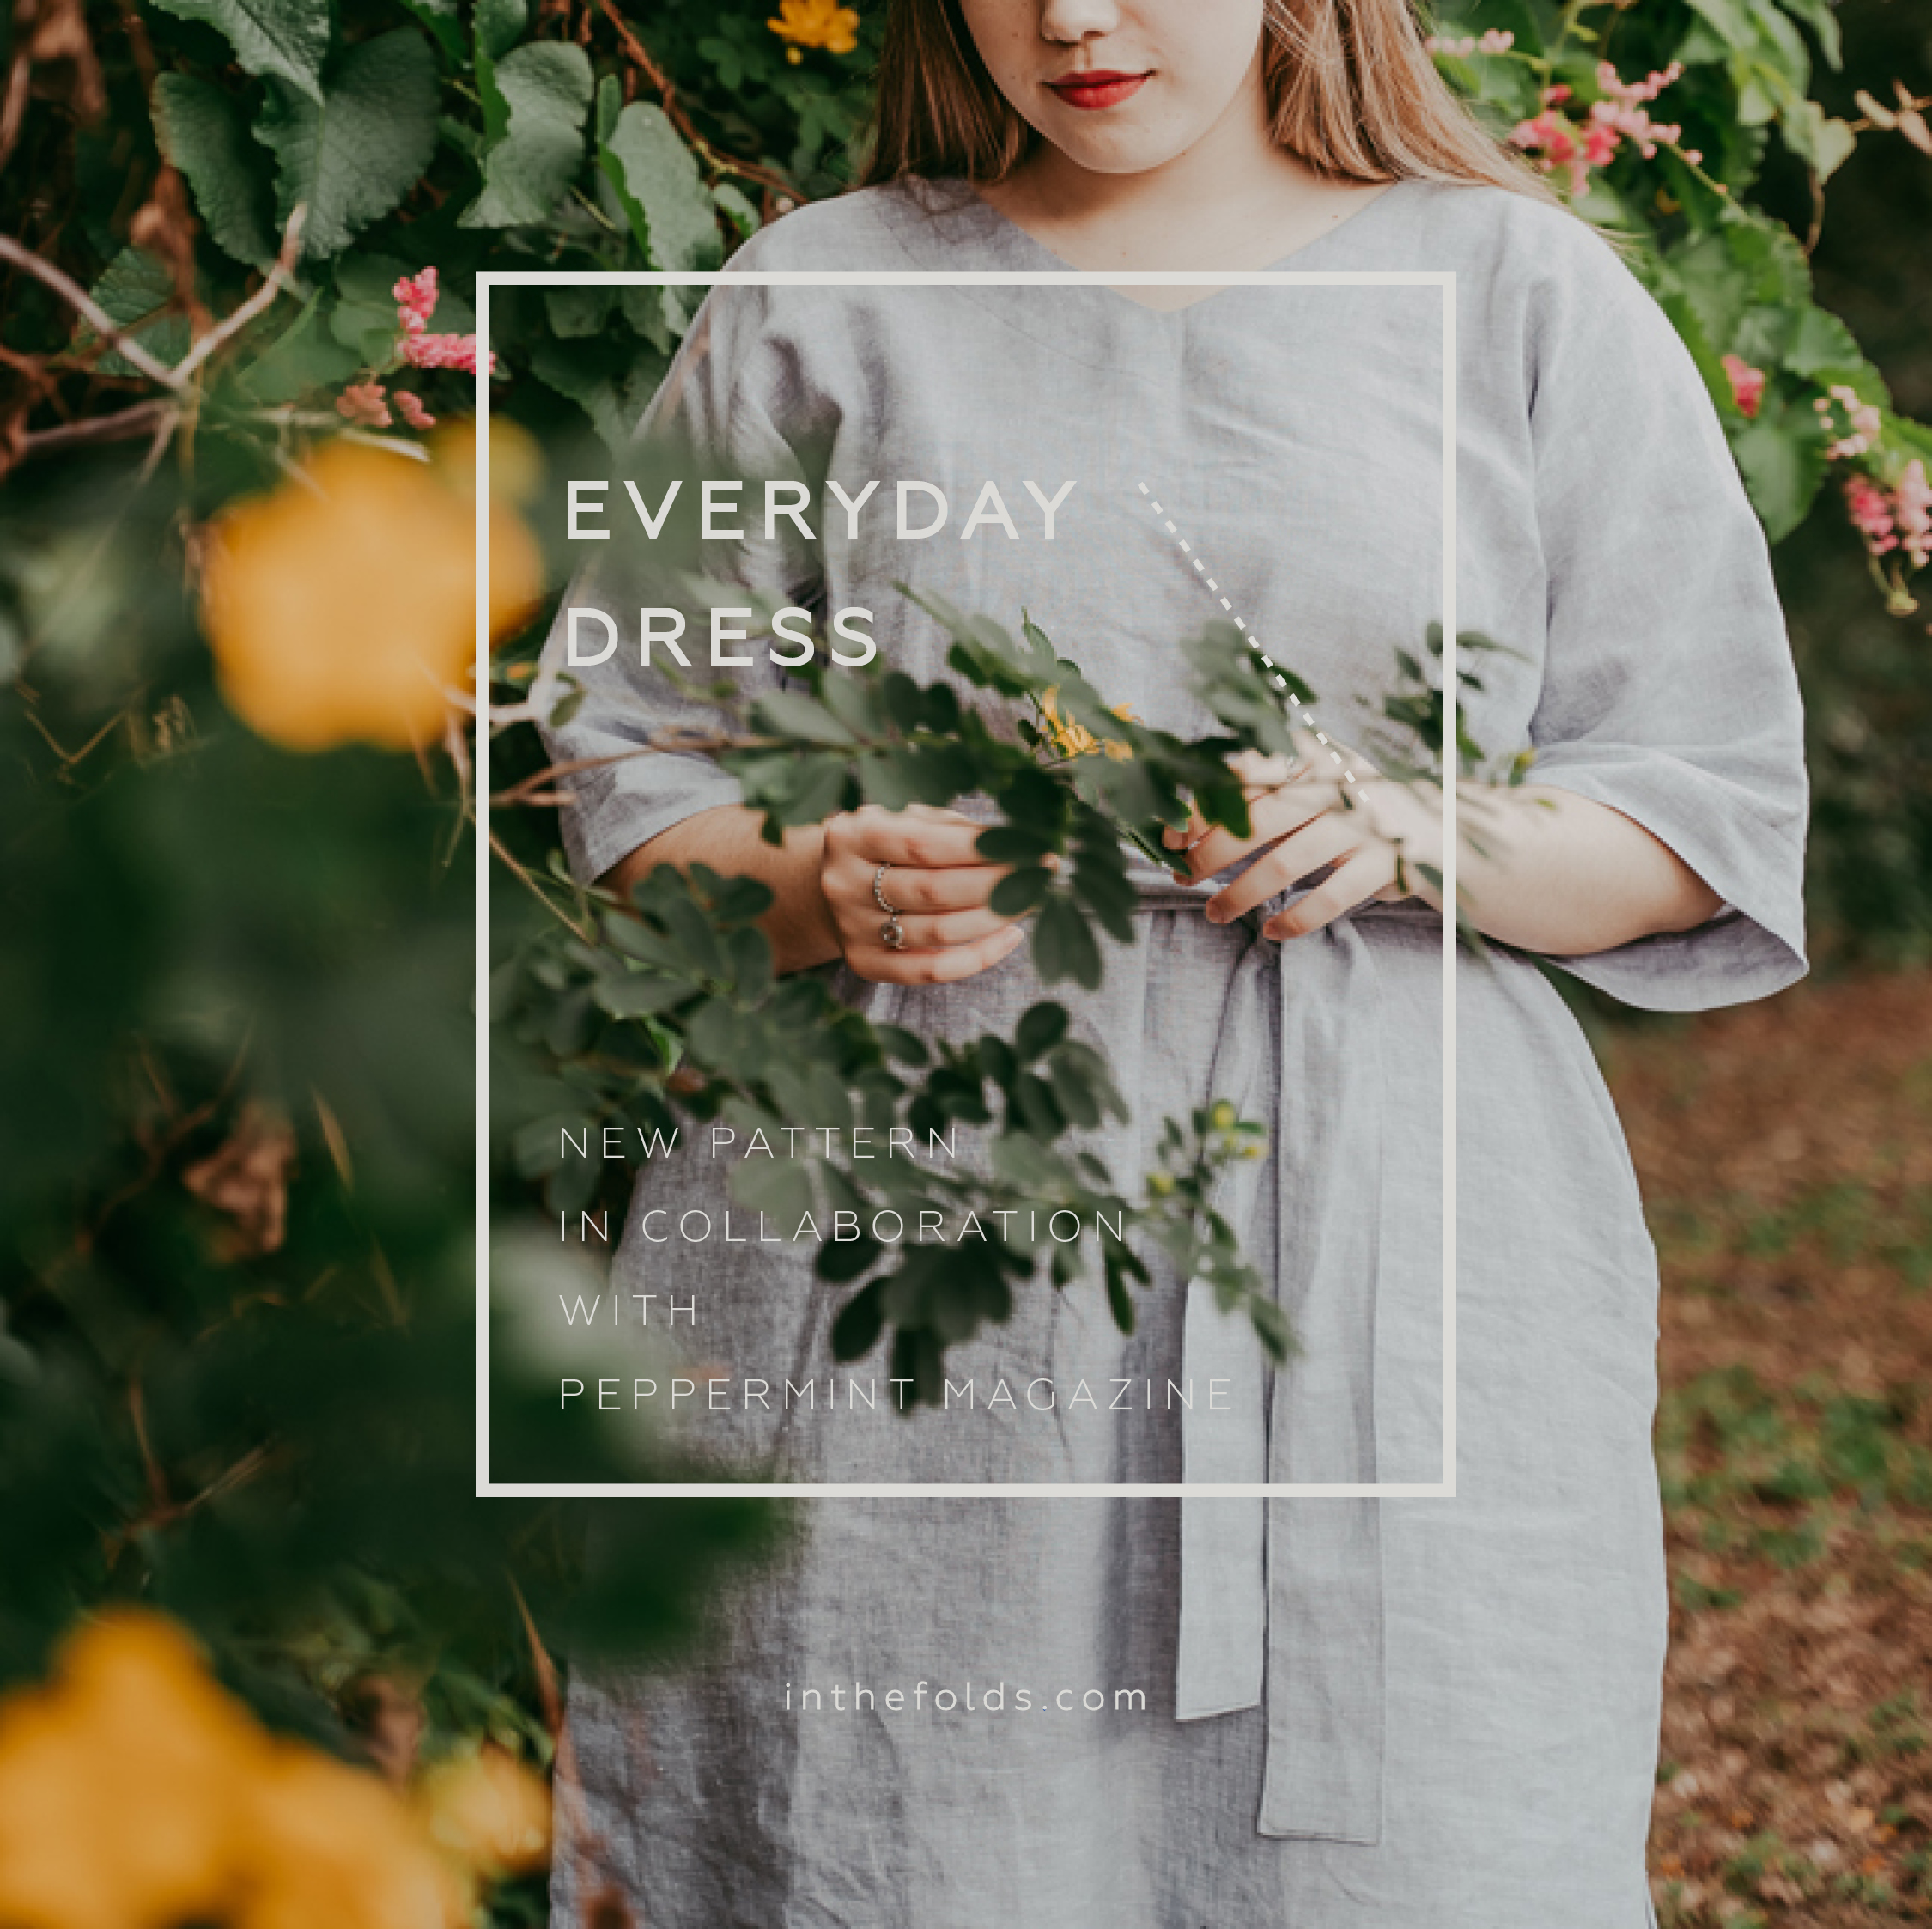
New pattern in collaboration with Peppermint Magazine : the Everyday Dress

BLOG HEADER EVERYDAY DRESS.jpg

I am very excited to be popping onto the blog today to let you know that we have just added a new pattern to the In the Folds in collaboration with Peppermint Magazine pattern family!

While we’re all going crazy for easy-wearing sack dresses, we thought it was about time we created one for you!

Peppermint-everyday-dress-1.jpg

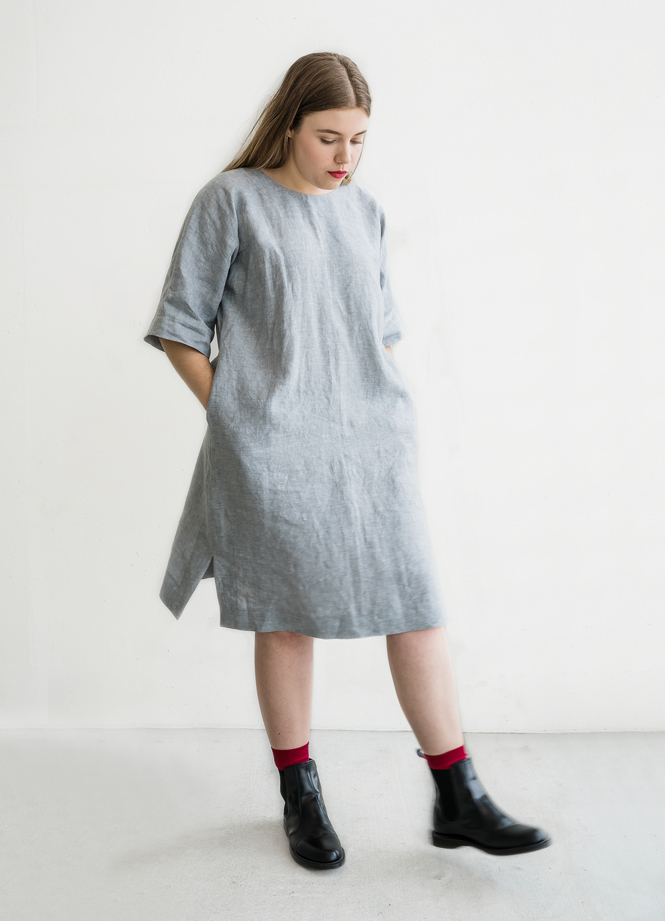
What is really fun about this design, is that you can wear it two different ways - depending on how you’re feeling / your style! The Everyday dress is a knee-length oversized reversible dress. One side of the dress has a soft v-neck, while the other has a round neck. The dress features relaxed boxy sleeves, inseam pockets, hem splits and an optional waist tie. A neck facing is used to finish the neckline, which gives a beautiful and clean finish, as well as a lovely detail on the neckline.

The pattern is available in 10 sizes (approximately AU size 6 - 24) and comes as a layered PDF so you can just download the size that you need. More information about In the Folds sizing can be found here.

PeppermintSewingSchool42-outside2.jpg

Through the creation of this garment you will gain confidence in:

  • sewing with woven fabrics

  • sewing in-seam pockets

  • sewing facings

  • sewing a hem split

As always, the instructions are very detailed, so I’ll be there to hold your hand every step of the way!

Peppermint-everyday-dress-6.jpg

The Everyday dress is compatible with light to mid-weight fabrics. Consider using: cotton, linen, viscose / rayon, chambray or silk. We used smoke chambray linen from The Fabric Store for ours.

Please note: due to the width of the pattern pieces, you will need to use 150cm (60in) wide fabric (or wider).

Peppermint-everyday-dress-4.jpg

The pattern can be downloaded in both A4 and A0 format. This is a great pattern for advanced beginners and beyond. 

I’d love to hear what you think!

Happy sewing lovely people.

Flynn jacket : Remove box pleat

REMOVE BOX PLEAT.jpg

Welcome back to the pattern adjustment series for the Flynn jacket!

I thought some of you might be interested in how to remove the box pleat from the Flynn jacket View A (sleeve version), and have it have a flat back like View B (sleeveless version). This is a really quick alteration to make and won’t take you longer than a couple of minutes.


Step 1

FLYNN - remove pleat-01.jpg

Take the BACK [2] and mark a vertical line down through the pattern - starting at the notch on the neckline that indicates the pleat stitch line - and drawing to the bottom of the pattern piece (through the drill hole marking). Be sure to keep the line parallel to the centre back.

Step 2

FLYNN - remove pleat-02.jpg

A - Cut along the line marked in STEP 1 to remove the pleat.

B - You will now be able to use the BACK HEM FACING [10] from View B. All you need to do is transfer the notch on to the top edge of the BACK HEM FACING [10] to the bottom edge of the BACK [2]. For more details on transferring notches - check out this post.

You will need to cut both the BACK [2] piece and the BACK HEM FACING [10] piece on the fold.


I hope you have enjoyed these posts! If there is a tutorial that would like to see, that wasn’t in the series, please leave me a comment or send me an email.

Posts in the series:

Flynn jacket : Narrow / broad shoulder adjustment

SHOULDER ADJUSTMENTS.jpg

Welcome back to the fitting series for the Flynn jacket!

Today we will be talking shoulder adjustments.

View B of the Flynn jacket is sleeveless and you will want the shoulder seam to end on the tip of your shoulder. (You might want to adjust View A (version with sleeves) for broad or narrow shoulders, but it will be more likely you will need it for the sleeveless version, so that is what I will be focusing on today).

If you have made a toile / muslin and noticed that the end of the shoulder seam is sitting beyond the tip of your shoulder, you may choose to do a narrow shoulder adjustment.

If the end of the shoulder seam does not reach the tip of your shoulder, you may choose to do a broad shoulder adjustment.


Step 1

FLYNN shoulder adjustment SMALL-01.jpg

Take the FRONT [8] pattern piece. You can use the original piece or trace a copy of it - depending on your preference. If you do choose to trace a copy, be sure to also trace the stitch line (the grey line on the pattern) of the shoulder seam and armscye.

A - Mark a point halfway along the shoulder (on the stitch line). Mark another point, approximately one third of the way down the armscye. Join these two points with a straight line running through the pattern piece [Line 1].

B - Join the corner of the shoulder and armscye to Line 1 with another line, this will be Line 2. Check that Line 2 is perpendicular to Line 1.

Step 2

FLYNN shoulder adjustment SMALL-02.jpg

A - Cut along Line 1, starting at the shoulder. Slow down as you approach the stitch line on the armscye. Stop cutting 1-2mm from the stitch line (indicated by the blue dot in the illustration).

B - Cut in from the other side of the line (through the seam allowance on the armscye), again stopping 1-2mm from the stitch line. This will create a small “hinge” that will allow the sections of the pattern to move quite flexibly without become detached.

FLYNN shoulder adjustment SMALL-03.jpg

A - Cut along Line 2, starting at the point that you just cut. Slow down as you approach the stitch line at the corner. Stop cutting 1-2mm from the stitch line (indicated by the blue dot in the illustration).

B - Cut in from the other side of the line (through the seam allowance on the corner), again stopping 1-2mm from the stitch line. This will create a small “hinge” that will allow the sections of the pattern to move quite flexibly without becoming unattached.


Broad shoulder adjustment

FLYNN shoulder adjustment SMALL-04.jpg

A - Take a piece of scrap paper and place it behind the shoulder section of the FRONT [8].

B - Carefully swing open the pattern (at the place that was Line 1), using the hinge to help you.

C - Measuring from the main section of the pattern piece (not the unattached triangles), mark the amount of width you would like to add to the shoulder. Remember to mark this on the stitch line and not the seam allowance line.

FLYNN shoulder adjustment SMALL-05.jpg

A - Use the hinges to manoeuvre the triangles back towards the shoulder. Line up the stitch line on the triangle with the mark you made in the previous step. You will notice that this requires the triangle sections to overlap.

B - Once the triangles are lined up with the point and all sections are sitting nice and flat, tape or glue in place onto the paper underneath.

FLYNN shoulder adjustment SMALL-06.jpg

Re-draw the seam lines - both the shoulder and the armscye - using a ruler (and a french curve if you have one).

Re-cut the pattern, removing the excess paper.

Repeat the process on the back piece.

Take the ARMHOLE FACING [11] piece and transfer the changes to the pattern piece.


Narrow shoulder adjustment

FLYNN shoulder adjustment SMALL-07.jpg

A - Take a piece of scrap paper and place it behind the shoulder section of the FRONT [8]. Carefully swing open the pattern (at the place that was Line 1), using the hinge to help you. On the main section of the pattern piece (not the unattached triangles), mark the amount of width you would like to remove from the shoulder. Remember to mark this on the stitch line and not the seam allowance line.

B - Use the hinges to manoeuvre the triangles back towards the shoulder. Line up the stitch line on the triangle with the mark you made. You will notice that this requires the triangle sections to overlap.

C - Once the triangles are lined up with the point and all sections are sitting nice and flat, tape or glue in place onto the paper underneath. Re-draw the seam lines - both the shoulder and the armscye - using a ruler (and a french curve if you have one). Re-cut the pattern, removing the excess paper.

Repeat the process on the back piece.

Take the ARMHOLE FACING [11] piece and transfer the changes to the pattern piece.


Keep your eyes out for more posts over the coming days!

During this series I will show you how to:

Flynn jacket : Full bust adjustment

FBA.jpg

The Flynn jacket is intended to have a substantial amount of design ease, to create an oversized shape, designed for layering. For this reason, I suggest focusing on your high bust measurement when selecting your size. The size chart for the Flynn jacket can be found here.

This pattern is drafted for a B cup bust. Due to the large amount of ease, it is unlikely you will need to do a full bust adjustment (or small bust adjustment) for View A. Check the finished garment measurements to ensure it will fit through the waist and hip.

For View B, which is closer fitting, due to its sleeveless nature, you may consider this alteration to achieve a better fit through the shoulders and armhole (and also so you can close it, if you would like to add a hook and eye). For today’s post, I will get you started for doing the adjustment and then will link to a past post that I wrote about full bust adjustments.

WHEN YOU'LL NEED TO DO A FULL BUST ADJUSTMENT 

Most indie pattern companies (including In the Folds) draft for a B cup bust. There are of course exceptions to this rule (such as Cashmerette and Colette Patterns), so make sure you check on your pattern before assuming the bust cup size.

In terms of the Flynn jacket, it is a loose style which means it is a little more forgiving than more fitted patterns (such as the Acton, for example) so in some cases you can probably get away with not making a bust adjustment. For example, if your bust is smaller than a B cup, it is unlikely you need to bother doing a Small Bust Adjustment. I have an A cup bust, but have not made adjustments to any of my Flynn jackets. Also if your bust is just slightly bigger than a B cup, it is also likely you will be okay without the adjustment.

Check the finished garment measurements and go from there. 

WORK OUT YOUR CUP SIZE

Your cup size in sewing patterns may not always correspond to the bra size you wear. To be safe, check your measurements before deciding if you need to make any adjustments to the pattern. 

To do this, measure your high bust measurement (the area above your breasts, under your arms) as well as your full bust  (the fullest part of your chest) and then take note of each measurement, as well as the difference.

If the difference is 2.5cm (1") your bust is an A cup, 5cm (2") it's a B cup, 7.5cm (3") is a C cup and so on. 

CHOOSE YOUR SIZE

Now, go back to your high bust measurement and add 5cm (2"). This is what your bust measurement would be if you were a B cup and therefore the size you should be choosing from the pattern.

For example, let's say your upper bust measures 81cm (32"). Add 5cm (2") to this measurement to find out what size your bust measurement falls into on the In the Folds sizing chart (and what size you would be if you had B cup breasts). 81cm + 5cm = 86cm which corresponds to a size C. Your actual bust measurement is 89cm  though - 3cm (1") larger than the cup size of the pattern. This means you need to do a FBA and add this 3cm (1") to your pattern. 

As the front pieces are cut as a pair, you need to take the measurement you will be adding and divide it by two. For example, this 3cm (just over 1") mentioned in the example, will be split between either side of the front - 1.5cm (1/2") on each side. 


Step 1

FLYNN FBA-01.jpg

For the sake of the example, I will be making the adjustment to the pieces of View B (as this is the style most likely to require the adjustment), but you can follow this tutorial for View A too.

Take the two pieces that make the front of the Flynn jacket - the FRONT HEM FACING [5] and the FRONT [8]. The first step will be to turn these pieces into one pattern piece (removing the panel line) as this will make the adjustment much easier to manage. At the end, we'll put the panel line back in place, so there won't be any change to the design (except for the addition of the dart - which can be removed later on, if you prefer). 

Step 2

FLYNN FBA-02.jpg

A - Take the SIDE FRONT [8] piece and place it on top of the FRONT HEM FACING [5], lining up the stitch lines (the grey line on the pattern), as if the pieces have been sewn together. If you are struggling to see the lines, it can help to put the pieces up to a window and see through the paper that way (or a lightbox, if you have one). Once the pieces are correctly lined up, use masking tape (or similar) to hold the pieces in place. 

As you can see in the example, you won’t be able to align the stitch line for whole seam, as the lines slightly change directions towards the shoulder (which is what gives you a nice shape in that area). Just focus on lining up the stitch line in the lower section of the pattern (as illustrated).

B - Take a piece of pattern paper and trace the piece - being sure to include all pattern markings (in this case: the grainline and notches). Also trace the panel line.

Make sure you trace both the cutting line and the stitching line - this is really important. In the Folds patterns include the stitching line on each pattern piece so that it is easier for you to make alterations to your pattern. I know we would all love to be able to cut a pattern in a straight size and for it to fit perfectly, but unfortunately that's not the way it is (I even have to make adjustments to In the Folds patterns so they fit my figure properly), so having the stitch lines can help you make adjustments more quickly and easily. When making pattern alterations, I normally suggest removing the seam allowance, but because the stitch line is marked on the pattern, you can leave it on. 

From this point you are ready to make the adjustment. Head over to this tutorial - starting at STEP 3 and work through the tutorial.


Keep your eyes out for more posts over the coming days!

During this series I will show you how to:

Flynn jacket : Shortening / Lengthening the sleeves

ADJUST SLEEVES.jpg

Today in the Flynn jacket pattern alteration series, I will be showing you how to lengthen or shorten the sleeves.

There are times when you can just add some (or remove) length to the hem of a sleeve (when the underseams of a sleeve are straight), but in the case of the Flynn jacket (and other patterns like it), you need to add/remove the length to the inside of the pattern piece, so that you can keep the shape intact - due to the tapered nature of the sleeve. As well as this, the Flynn jacket sleeve is finished with a hem facing, so by adding / removing length from the inside section of the sleeve, the hem facing will still fit and will not require any changes.


Lengthening the sleeve

Step 1

LENGTHENING + SHORTENING SLEEVE-SMALL-01.jpg

Take the SLEEVE [3] pattern piece. You can use the actual pattern piece, or trace a copy if you would prefer to keep the original piece intact.

Step 2

LENGTHENING FLYNN-SMALL-01.jpg

You will need to work out how much length you would like to add to the sleeve. You can do this by looking at your toile / muslin (for more details on making a toile / muslin look at this post from the Rushcutter sew-along), or holding the pattern pieces up to your body and getting an idea of where they will sit on your arm (keep in mind that the jacket has a dropped shoulder and the sleeve cap does not sit at your shoulder point).

A - Cut through the lengthen/shorten line on the SLEEVE [3].

B - Take the upper section of the sleeve, and tape or glue a piece of paper to the lower section - with enough paper extending past the pattern to add your length extension. Leave some paper either side too.

C - Extend the grainline onto the attached paper and then mark a horizontal line on each piece of paper, measuring down from the cut line the distance equal to the amount of length you would like to add. In the example above, you can see the red line is 5cm (2in) below the cut line (which is how much length we will be adding to the sleeve).

Step 3

LENGTHENING + SHORTENING SLEEVE-SMALL-03.jpg

A - Attach the lower part of the sleeve to the added paper, lining up the cut edge with the line marked in the previous step. Use the grainline to ensure that you line the pieces up correctly.

B - Glue or tape in place.

Step 4

LENGTHENING + SHORTENING SLEEVE-SMALL-04.jpg

Re-draw the seam lines with a straight line over the adjustment.

You can choose to trace the pattern on to fresh pattern paper or tape on small pieces of paper / masking tape where you need to fill a small gap to complete the seam line.

Cut off any excess paper that is outside of the new lines.


Shortening the sleeve

Step 1

LENGTHENING + SHORTENING SLEEVE-SMALL-05.jpg

You will need to work out how much length you would like to remove from the sleeve. You can do this by looking at your toile / muslin (for more details on making a toile / muslin look at this post from the Rushcutter sew-along), or holding the pattern pieces up to your body and getting an idea of where they will sit on your arm (keep in mind that the jacket has a dropped shoulder and the sleeve cap does not sit at your shoulder point).

A - Cut through the lengthen/shorten line on the SLEEVE [3].

B - Measuring up from the cut line, mark a horizontal line on each pattern piece, the distance of the amount of length you would like to remove.

In the example, you can see the red line is 5cm (2in) above the cut line and the shaded section shows the amount of length that will be removed from the sleeve

Step 2

LENGTHENING + SHORTENING SLEEVE-SMALL-06.jpg

A - Move the lower part of each pattern piece up to the line marked in the previous step. Use the grainline to ensure that you line the pieces up correctly.

B - Glue or tape in place.

Step 3

LENGTHENING + SHORTENING SLEEVE-SMALL-07.jpg

Re-draw the seam lines with a straight line over the adjustment (you can cut off any excess paper that is now outside the lines).


Keep your eyes out for more posts over the coming days!

During this series I will show you how to:

Flynn jacket : Lengthening the pattern

LENGTHEN FLYNN.jpg

As I have just released a new pattern (yay for the new Flynn jacket), I thought it would be helpful to post a few tutorials about making alterations to the pattern. Yesterday I showed you how to shorten the pattern, so today I thought I would show you how to lengthen the pattern.

All In the Folds patterns are drafted for a height of 170cm (5'7") , so you might need to shorten or lengthen my patterns if you are taller or shorter than this height (although it does sometimes come down to preference).


GETTING STARTED

Step 1

SHORTENING FLYNN-01.jpg

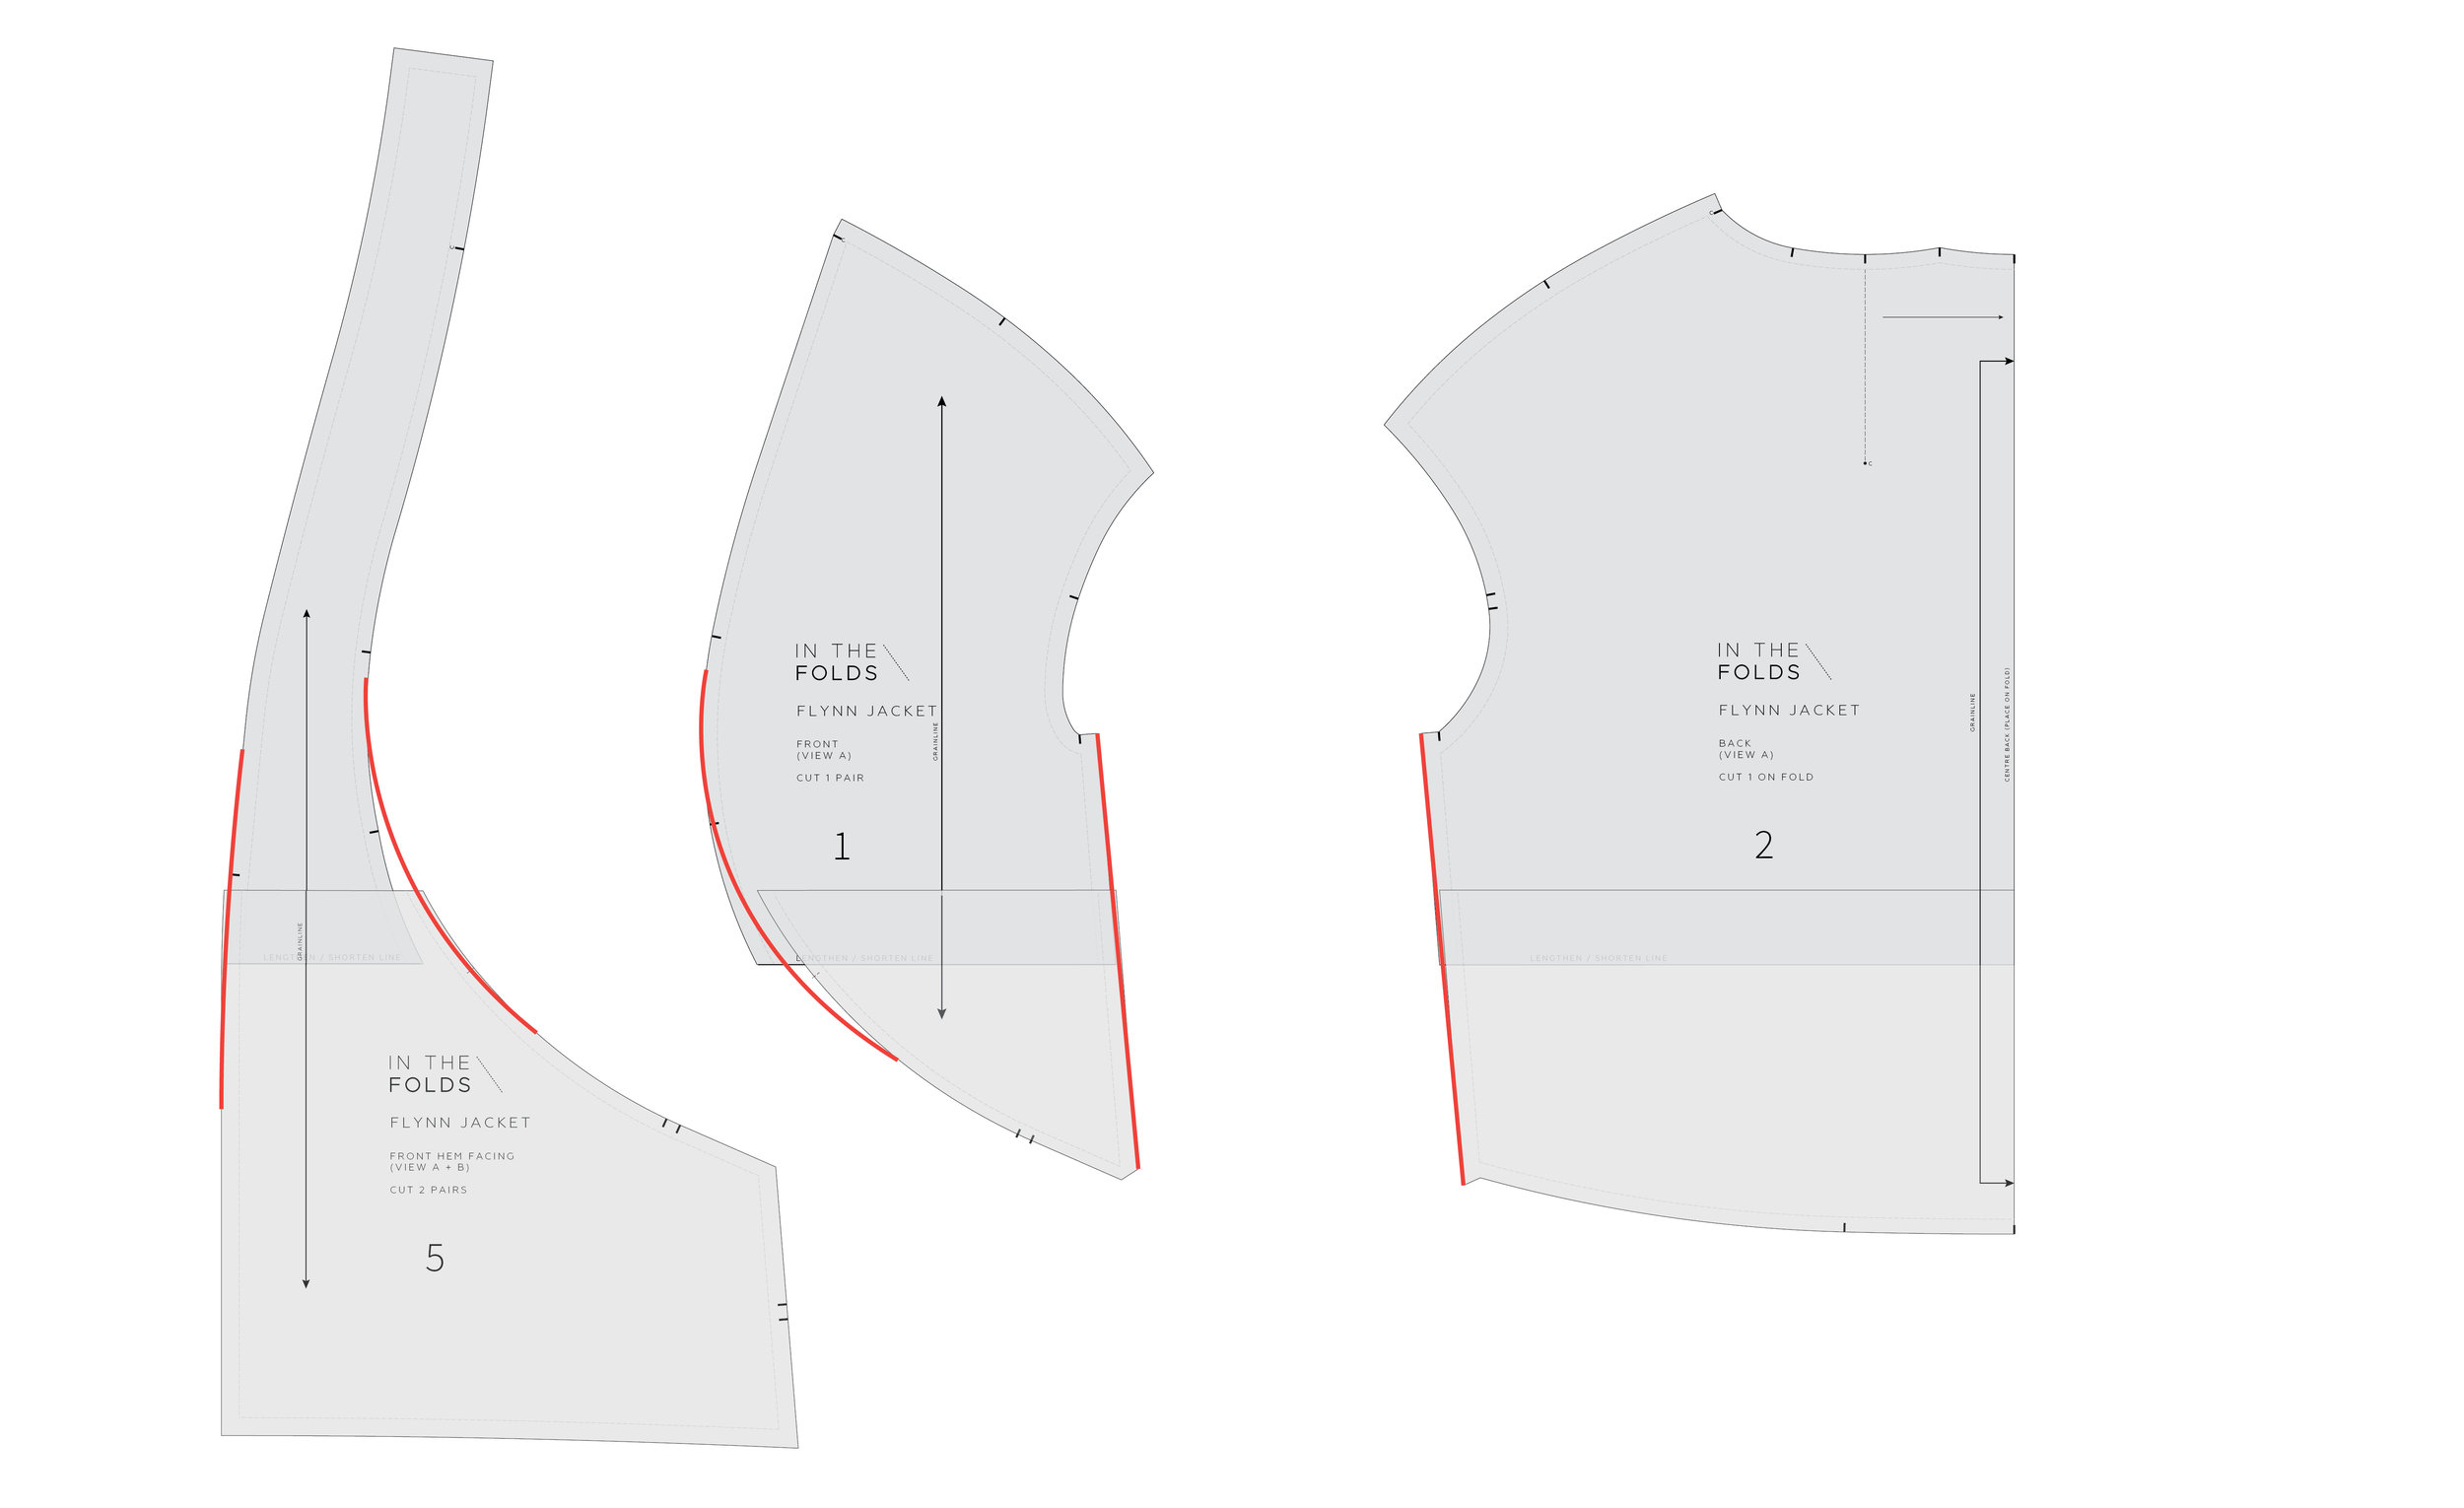
The pieces you will need for this adjustment are the FRONT HEM FACING [5], FRONT [1] and BACK [2] (or the corresponding pattern pieces from View B). You can use the actual pattern pieces, or trace a copy if you would prefer to keep the original pieces intact.

Step 2

LENGTHENING FLYNN-SMALL-01.jpg

You will need to work out how much length you would like to add to the pattern. You can do this by looking at your toile / muslin (for more details on making a toile / muslin look at this post from the Rushcutter sew-along), or holding the pattern pieces up to your body and getting an idea of where they will sit on your body.

If you would like to add any more than 7.5cm (3in), I’d suggest adding 5cm - 7.5cm (2in - 3in) to the mid-section of the pattern (where the LENGTHEN / SHORTEN lines are) and then adding the remainder to the hem facing (more on this in STEPS 5 + 6).

Also keep in mind that by lengthening the pattern, you will be moving the placement of the pockets down. If you are lengthening the pattern to change the jacket into a longer style, I would recommend adding more length (or all length) to the hem facing (rather than the mid-section), or moving the pocket placement so they don’t become too low.

A - Take the upper part of each pattern piece, and tape or glue a piece of paper to the lower section - with enough paper extending past the pattern to add your length extension. Leave some paper either side too.

B - Extend the grainline onto the attached paper and then mark a horizontal line on each piece of paper, measuring down from the cut line the distance equal to the amount of length you would like to add. In the example above, you can see the red line is 5cm (2in) below the cut line (and 5cm length will be added to the pattern in the example).

Step 3

LENGTHENING FLYNN-SMALL-02.jpg

A - Attach the lower part of each pattern piece to the added paper, lining up the cut edge with the line marked in the previous step. Use the grainline to ensure that you line the pieces up correctly.

B - Glue or tape in place.

Step 4

LENGTHENING FLYNN-SMALL-03.jpg

Re-draw the seam lines with smooth lines over the adjustment. You will notice that in some cases you will be adding a little bit on to create the line of best fit, while in other cases you will need to shave a bit off. This will even out as you go around the pattern.

When marking a line over the area that has been altered, there might be a large gap between the two sides of the line. In this case - split the difference by marking a point in the centre of the area and drawing the line across this point.

You can choose to trace the pattern on to fresh pattern paper or tape on small pieces of paper / masking tape where you need to fill a small gap to complete the seam line.

Cut off any excess paper that is outside of the new lines.

Check all seams are the correct length by "walking" the pattern pieces, as if you were sewing them together. For more details on how to do this, check out this tutorial.

Transfer / re-draw any notches that have been misplaced. Due to the shape of the pieces, some notches may not line up due to the different points the alteration was made. After checking that the seam is the correct length, transfer one notch to the other piece (and cross out the notch that is no longer in the correct position).

If you need to add more than 7.5cm (3in) and have opted to add some length to both the mid-section of the pattern and the hem facing, continue to STEP 5. Otherwise, you are ready to cut your fabric with your new altered pattern pieces!

Step 5

LENGTHENING FLYNN-SMALL-04.jpg

A - To add more length to the jacket, mark a horizontal line through the bottom section of the FRONT HEM FACING [5] and the BACK FACING [6]. Make sure the lines are perpendicular to the grainline. When making alterations like this, I try to stay away from notches when possible, so advise that you draw you horizontal line slightly above, or slightly below, the notches on the side of each piece.

B - Check the position of the grainline in relation to the horizontal line you just marked. If the grainline does not cut through the horizontal line, extend the grainline (as I have done on the FRONT [5] in the example). This will help you keep things straight when making the adjustment.

Cut through the horizontal line and stick a piece of scrap paper to the lower section of each pattern piece.

Step 6

LENGTHENING FLYNN-SMALL-05.jpg

A - Again, attach the lower part of each pattern piece to the added paper, lining up the cut edge with the line marked in the previous step. Use the grainline to ensure that you line the pieces up correctly.

B - Glue or tape in place.

C - Re-draw the sides that have been impacted and check that the notches still line up correctly.


And that’s it! You’re done!

During this series I will show you how to:

Flynn jacket : Shortening the pattern

SHORTEN FLYNN.jpg

As I have just released a new pattern (yay for the new Flynn jacket), I though it would be helpful to post a few tutorials about making alterations to the pattern.

If you’re shorter than 170cm (5'7") this tutorial might be a good one for you! All In the Folds patterns are drafted for this height, so you might need to shorten or lengthen my patterns if you are taller or shorter than this height (although it does sometimes come down to preference).

There are a couple of other reasons why you might also want to do this adjustment to the Flynn jacket:

  • You might be 170cm (5'7") but have a shorter torso and longer legs than the pattern was designed for

  • You would prefer more of a cropped style than the original design

The Flynn jacket is designed to finish at the top of the thighs (and just below your bum at the back). Due to the design of the hem band and curved front panel, you can’t just simply cut length off the bottom of the jacket pattern as it will change the proportions of the jacket. Instead, you need to take length out from the middle of the pattern pieces, so that the proportions remain intact, and today that is what I am going to show you how to do!

As is becoming quite common with my patterns, the Flynn jacket has some very unique panel lines. This means that making alterations to the pattern is slightly different to what you would need to do with a straight cut jacket. It’s not difficult at all, and the principle is the same, there is just a few extra steps you have to do!


GETTING STARTED

Step 1

SHORTENING FLYNN-01.jpg

The pieces you will need for this adjustment are the FRONT HEM FACING [5], FRONT [1] and BACK [2] (or the co-ordinating pattern pieces for View B). You can use the actual pattern pieces, or trace a copy if you would prefer to keep the original pieces intact.

Step 2

SHORTENING FLYNN-02.jpg

You will need to work out how much length you would like to remove from the pattern. You can do this by looking at your toile / muslin (for more details on making a toile / muslin look at this post from the Rushcutter sew-along), or holding the pattern pieces up to your body and getting an idea of where they will sit on your body.

If you would like to remove any more than 7.5cm (3in), I’d suggest taking 5cm - 7.5cm (2in - 3in) from the mid-section of the pattern (where the LENGTHEN / SHORTEN lines are) and then removing the remainder from the hem band (more on this in STEPS 5 + 6).

A - Cut through the 'LENGTHEN / SHORTEN' line on the FRONT HEM FACING [5], FRONT [1] and BACK [2].

B - Measuring up from the cut line, mark a horizontal line on each pattern piece, the distance of the amount of length you would like to remove. In the example, you can see the red line is 5cm (2in) above the cut line and the shaded section shows the amount of length that will be removed from the pattern piece.

Step 3

SHORTENING FLYNN-03.jpg

A - Move the lower part of each pattern piece up to the line marked in the previous step. Use the grainline to ensure that you line the pieces up correctly.

B - Glue or tape in place.

Step 4

SHORTENING FLYNN-04.jpg

Re-draw the seam lines with smooth lines over the adjustment. You will notice that in some cases you will be needing to add a little bit on to create the line of best fit, while in other cases you will need to shave a bit off. This will even out as you go around the pattern.

SHORTENING FLYNN-CLOSE-UP-04.jpg

When marking a line over the area that has been altered, there might be a large gap between the two sides of the line. In this case - split the difference by marking a point in the centre of the area and drawing the line across this point. You can choose to trace the pattern on to fresh pattern paper or tape on small pieces of paper / masking tape where you need to fill a small gap to complete the seam line.

Cut off any excess paper that is outside of the new lines.

Check all seams are the correct length by "walking" the pattern pieces, as if you were sewing them together. For more details on how to do this, check out this tutorial.

Transfer / re-draw any notches that have been misplaced. Due to the shape of the pieces, some notches may not line up due to the different points the alteration was made. After checking that the seam is the correct length, transfer one notch to the other piece (and cross out the notch that is no longer in the correct position).

If you need to remove more than 7.5cm (3in) and have opted to remove some length from both the mid-section of the pattern and the hem band, continue to STEP 5. Otherwise, you are ready to cut your fabric with your new altered pattern pieces!

Step 5

SHORTENING FLYNN-05-05.jpg

A - To remove more length from the jacket, mark a horizontal line through the bottom section of the FRONT HEM FACING [5] and the BACK FACING [6]. Make sure the lines are perpendicular to the grainline. When making alterations like this, I try to stay away from notches when possible, so advise that you draw the horizontal line slightly above, or slightly below, the notches on the side of each piece.

B - Check the position of the grainline in relation to the horizontal line you just marked. If the grainline does not cut through the horizontal line, extend the grainline (as I have done on the FRONT [5] in the example). This will help you keep things straight when making the adjustment.

Cut through the horizontal line in the same way you did in STEP 2.

Step 6

SHORTENING FLYNN-06-06.jpg

A - Again, measuring up from the cut line, mark a horizontal line on each pattern piece, the distance of the amount of length you would like to remove.

B - Move the lower part of each pattern piece up to the line marked. Use the grainline to ensure that you line the pieces up correctly.

C - Re-draw the sides that have been impacted and check that the notches still line up correctly.


And that’s it! Not too tricky, right?

In the following days I will show you how to:

Introducing the Flynn jacket!

INTRODUCING FLYNN.jpg

I am very excited to let you know that the Flynn jacket is here! As always, this pattern has been a long time in the works (I have been wearing one of my early samples for 2 years!!) and I am over the moon to be able to finally share it with you.

As I slowly add to the In the Folds pattern collection, it’s incredible to see how the pieces all work together. I don’t necessarily design new patterns thinking about collections and how everything will work together, but thankfully my aesthetic and style seems to be pretty consistent and each time I add a new piece to the collection I am thrilled to see how it fits in with the existing patterns. You will see the Flynn jacket paired with the Darlow pants and Collins top through this shoot, and see that they are a perfect match!

4M1A4508-Edit.jpg

The Flynn jacket is a loose-fitting jacket designed for woven fabrics. With two different styles, it is the perfect layering piece for autumn and winter (and maybe even spring).

One of the things I have struggled with most, when it comes to releasing my patterns, is releasing my patterns on time! I am chuffed to finally release a pattern at the perfect time of year (well at least for those of us down here in the southern hemisphere).

As it’s just cooling down here in Sydney, the Flynn jacket has now become one of my most worn pieces in my wardrobe again and I know I will be wearing it all winter long (just with a few extra layers underneath). As you can see though, it works equally well in something lighter (above sample was made in organic cotton linen) for a trans-seasonal piece.

4M1A3613-Edit.jpg

The Flynn jacket (View A) has a dropped shoulder and sleeve with a hem facing. It also features an inverted box-pleat in the back.

4M1A3323-Edit.jpg

The Flynn jacket (View B) is sleeveless and features armhole facings for a really beautiful finish (and a fun new technique for you to learn). It has been designed to be worn over long sleeve tops and dresses, although works equally well in warmer weather over a sleeveless top or t-shirt.

4M1A4085-Edit.jpg

View B has a closer fit than View A, due to its sleeveless design and flat back piece (no box pleat).

The details

4M1A3628-Edit.jpg

The Flynn jacket features a kimono-style collar, a high-low hem and large in-seam pockets. The sleeves on View A are designed to be worn either straight or folded back, for a more casual look.

The panel lines that wrap around the jacket to create the collar, make for a really fun and satisfying sew.

Who is the pattern for?

I have placed the Flynn jacket at a 2 on the In the Folds skill scale - which means that before starting this project you should feel quite confident with the basics and be ready for new challenges. I know the idea of making a jacket can be a little intimidating for advanced beginners or intermediate sewists, but the Flynn jacket is a great entry level jacket to sink your teeth into, as you don’t have to worry about lining and due to it’s oversized silhouette, it is easy to achieve a good fit.

4M1A3131-Edit.jpg
4M1A3098-Edit.jpg

On both views, all seams are finished with bias binding, for a beautiful and high-end finish. This means that not only will you end up with a beautifully finished jacket, you will also learn some new skills in the process!

4M1A3865-Edit.jpg

The Flynn jacket can be worn open, or closed discreetly with a hook and eye.

4M1A3584-Edit.jpg

What the testers said about this pattern:

4M1A3312-Edit.jpg

‘ I need hours to make any garment. But with yours, taking time is part of the task. You never mention how long this will take until completion and it just gives me a completely different feeling during the process. I enjoyed taking the time to make a flawless, beautiful jacket vest and could not be more proud of the perfect curves and impeccable insides. Stretching myself to make matching bias binding was really nice, too!’ - Julia

4M1A4534-Edit.jpg

‘The STYLE LINES knocked me out. I adore the swooping front piece with the enclosed large pockets. Very 20s-30s. I love the finishing with the bindings, but I am a former costumer, so neither of these points is surprising. Haha! Also - SO COMFY.’ - Myra

4M1A3535-Edit.jpg

‘Because of my fabric choice, the jacket is very structured and sculptural. I LOVE THAT. I absolutely love the binding (I like wearing blazers, and am a sucker for hong kong finished seams), especially when the jacket is left open, and the wind makes my binding peak out from the facing. Probably my favourite features are the big pockets and the style lines in the front… The instructions were so clear and well illustrated that even my non-sewing husband said he could make the garment himself.’ - Emilia

4M1A3905-Edit.jpg

For your reference, the model Marisabel wears a Size F.


Would you like to sew along with me?

I have recently started exploring the idea of running online sew-alongs as an opportunity for a group of us to work through a pattern together. Not only is it a great opportunity to set time aside to sew, but it is also a way to connect with other makers and learn from others.

A few months ago I ran my first online sew-along with the release of the Darlow pants. I loved getting the chance to get to know lots of different makers from all over the world and sew our Darlows together, so I have decided to do it again for the Flynn jacket.

4M1A3119-Edit.jpg

The sew-along will run in a Facebook group for 3 weeks from Friday May 24 - Friday June 14. This means you will have a few days to get the pattern printed, organise your fabric and read through the instructions, before we get started on Friday May 24.

What is an online sew-along?

Many different pattern companies run sew-alongs, so there is countless formats and ways this can be done. As mentioned, this is something I am currently experimenting with and working out what shape / format works best for me and my customers.

If you would like to take part, here are some things to note:

  • There are no formal lessons or classes. It is just a way for us to connect as a group and encourage and support each other to work through the same garment. You can take it as fast or slow as you like, and can spend as much (or as little) time in the Facebook group as you feel comfortable.

  • In the first week we’ll introduce ourselves and support each other to pick a size and make a toile. I will also do my best to connect people to others in the group with similar fitting concerns so we can work through our pattern adjustments together.

  • I will be sharing posts on my blog for alterations like shortening and lengthening and links to other resources that I think you might find helpful.

  • I will be in the group to offer feedback and advice and will encourage others to do the same. As we will all be in different time-zones, it’s nice to know that while I’m sleeping here in Sydney, someone in the northern hemisphere will be around to have a chat with for others in that part of the world!

  • There is no deadline. Although I will be encouraging makers to make the jacket in the three weeks specified - there is no problem if you can’t get it done. The reason I set a deadline is that I know some people like a little nudge like this that makes them accountable. It is also a realistic amount of time that I can dedicate to checking in on a group daily.

  • If you took part last time (for the Darlow pants sew-along), you will know we used Slack for the sew-along. As this is still a work in progress, I’m exploring options and seeing what the best way / format is to run these groups, so will be trying this with a Facebook group this time. I apologise to those of you who don’t use Facebook.

I hope you are as excited about the Flynn jacket pattern as I am!

Makers for Fashion Revolution 2019

FASH REV.jpg

I can’t believe that Makers for Fashion Revolution (#makersforfashrev) is in it’s fourth year! What started out as a little post on Instagram that I hoped might encourage a few makers to consider the impact of making their own clothes on the environment and society on a broader level, has become a movement. The hashtag now has over 5000 posts and is a treasure trove of inspiring and thought-provoking posts.

IMG_2948.JPG

What is Makers for Fashion Revolution?

If you are new around these parts, you may be asking ‘What is Makers Fashion Revolution?’ Makers for Fashion Revolution is a movement I started in 2016 as a way to promote the larger movement of Fashion Revolution. Fashion Revolution was born on the day 1138 people were killed in the collapse of the Rana Plaza factory in Bangladesh. The mission behind the movement is, “We want to unite people and organisations to work together towards radically changing the way our clothes are sourced, produced and consumed, so that our clothing is made in a safe, clean and fair way.” For more information about Fashion Revolution, check out their website.

You can also read more about it on my blog here and here.

This cause is a very important one, and in 2016 I decided it was important for the sewing community to become involved in it too. As makers of our own clothing we are in a position to ask where our fabrics are coming from, who is impacted by the clothing we make and what the most sustainable practices available to us are.

To promote this cause and encourage people to ask more questions and think more deeply about what a cleaner and more sustainable fashion industry would look like, I will be posting prompts each day of Fashion Revolution Week. This will give you a chance to learn more about what you can be doing to lessen your impact on people and planet, as well as give you a chance to start important conversations with other fashion revolutionaries.

Are you in? If you would like to be, all you need to do is post the below image on your Instagram with the hashtag #makersforfashrev and keep your eye on my Instagram for the daily prompts.

Instagram prompts-08.jpg

New pattern in collaboration with Peppermint Magazine : Wrap skirt

Free Wrap skirt pattern - Peppermint mag collab

In all the excitement of releasing the Darlow pants, I forgot to let you know that I just released a new pattern in collaboration with Peppermint Magazine. So I am popping in today to introduce you to the Wrap skirt! I have a feeling that this one is going to be really popular, as it’s a quick and easy sew for makers of all levels. And, as always, it’s available for free downloaded.

The pattern is available in 10 sizes (approximately AU size 6 - 24) and comes as a layered PDF so you can just download the size that you need.

PeppermintSewingSchool41c.jpg

The Wrap skirt is a three-quarter length skirt with a waist tie, that sits on the natural waist. The skirt features front and back waist darts, french seams and a buttonhole to feed the waist tie through.

Free Wrap skirt pattern - Peppermint mag collab 2

Through the creation of this garment you will gain confidence in:

  • sewing with woven fabrics

  • sewing darts

  • sewing french seams

As always, the instructions are very detailed, so I’ll be there to hold your hand every step of the way!

Peppermint wrap skirt - free pattern

The Wrap skirt is compatible with a wide range of fabrics. For a soft silhouette, consider using: lightweight cotton, linen, viscose / rayon or silk. For a more structured silhouette, consider using mid to heavy-weight fabrics such as: cotton drill, linen, denim or wool. For the sample, I used a beautiful mid-weight linen from The Fabric Store.

The pattern can be downloaded in both A4 and A0 format. This is a great pattern for beginners and beyond. 

The Darlow pants pattern is finally here!

DARLOW PANTS PATTERN.jpg

I am ecstatic to be here today to release my newest pattern! I know I say this every time, but this has been a very long time in the works.

The story of how they came to be

The Darlow pants were designed in their first incarnation when I was in my final year of university, back in 2011! I was experimenting with the way panels could wrap around the body and could subvert the shapes and details of traditional clothing shapes.

4M1A4594-Edit.jpg

When I started In the Folds, I kept thinking back to those pants and wondering if there was a way to work with the same idea but adapt them to a more commercial design. Although I loved the original design, they were a bit too “high-fashion” (aka bizarre) and I couldn’t imagine them appealing to the masses. I got to work, starting with the original pattern and then diluting the details of the design. There was a lot of volume in the thigh and leg area, so I started by reducing that. My design practice always starts out with a basic idea of what I’d like to make and then involves cutting the pieces, sewing them together, looking at it on the body and then re-working… over and over again. So by starting with the original pattern, I just begun removing some volume and then re-toiling and seeing how it looked on the body. I don’t like to make drastic changes and prefer to slowly change the details - re-toiling and then checking how it looks. I really love this way of working (although it’s very slow) as it means it is totally informed by the shape of the body and how the bodyworks (and feels) in the garment. All this is to say, I have made these pants, in all their many forms, countless times (which is the case for all of the patterns I have released so far). I finally came up with a shape that I was happy with (View A) and that’s when I designed View B. This is generally how I go about designing patterns - I make sure I have one style that I love and then I tweak the design elements to make the alternate view. I really like the challenge of designing within the constraints of the first design. The goal is to bring in new features and new sewing techniques, without the addition of too many new pattern pieces.

DARLOWS with ILLUSTRATIONS-10.jpg

When I design patterns, I am always thinking about the skills I would like makers to gain / brush up on by working through the pattern. Although the Darlow pants are far from conventional in look or construction, I did want to teach some of the main techniques used in pant making. For this reason I included a fly front, tailored waistband and pockets (in-seam on both styles and patch pockets on View A and welt pockets on View B). I spent a lot of time making sure the instructions for the fly front and welt pocket were spot on. I know a lot of sewists are daunted by these two things, so I wanted the instructions to be crystal clear so that makers could understand the process and not feel overwhelmed by them. Although this pattern is a little trickier than my previous releases, it is a skill builder and I know you are going to feel really satisfied when you finish sewing them!

The details

So now that you know how I went about designing the Darlow pants, I would love to introduce them to you in more detail!

4M1A3552-Edit.jpg

The pants sit on the natural waist and feature a fly front with concealed zip closure, shaped waistband, in-seam pockets, back pockets and hem facings. The Darlow pants are designed to be quite fitted through the waist and hip, before more volume is added through the leg, for an interesting shape.

4M1A3693-Edit.jpg

View A has slightly more volume through the leg than View B, and features patch pockets, while View B has back welt pockets and panel lines through the back section. Both views comprise a number of interesting shaped panel lines that encourage a unique shape and an interesting experience.

For your reference, the model Marisabel wears a Size F.

The panel lines are no doubt what make this pattern special. They make for an interesting finished pair of pants, but more importantly an interesting making experience for all of you! I like that the panel lines can be as obvious or as subtle as you like, as you can see from the shoot samples - when made in black or white, you can get a sense of the panel lines, without them being the main event. I have illustrated over the photos below so that you can get a better sense of the panel lines and how they work on the body.

DARLOWS with ILLUSTRATIONS-14.jpg
DARLOWS with ILLUSTRATIONS-09.jpg

I was a bit nervous about sending this pattern out into the world when it was time for testing. It is my most ambitious pattern to date and is slightly riskier in design than my previous releases. I was ecstatic (and relieved) when feedback started rolling in and it wasn’t just me that loved the experience of making these pants! I will be sharing the tester versions of the pattern on the blog next week, so keep your eye out for that!

What the testers said about this pattern:

‘I really felt like I was using my brain and levelling up my sewing skills. I only started sewing this year and the only pants I have made are culottes so it was a challenge but a very satisfying one.’ - Megan

4M1A3197-Edit.jpg

‘This pattern (and In The Folds patterns in general) just irradiates how much thought and detail went into it. I love that the result is a beautiful garment that reminds me to be mindful of the making process and that I will wear for many years… I liked that as I knew I was never going to be able to make them in one day, I took my time and made them in small portions. That way I saved myself a lot of pressure and stress. Also, inserting the fly was the least stressful experience I've had so far when making pants, I think I will stick to this method from now on.’ - Kamilla

‘I enjoyed the process of following the instructions exactly, it was great to let go and follow the processes. Also not knowing exactly what the style was, It was like magical mystery sewing tour… The instructions were great, very clear and easy to follow. Having the pattern pieces numbered made it even more clearer, well done. And all the illustrations were excellent too.’ - Alicia

4M1A4595-Edit.jpg

‘I love the fit of the pants! It's a fun and interesting style. I like how they're nicely fitted through the waist the hips and then have added volume below that. I think it's very flattering, while many other loose pants I've tried look overwhelming… I'm impressed with how well drafted this pattern is! When I cut it out, I was surprised by how many notches there were, but they were SO helpful. Everything fit together beautifully. This pattern seemed so well thought out, planned, and drafted. I was never stuck puzzling over what any instruction meant or how to sew my next step. I really enjoyed making the Darlow pants… The instructions for the welt pocket had a different approach to how I'd sewn them before, but I enjoyed your way. I also LOVED the instructions for the fly. It was easily the best description of how to sewn a fly that I've ever read.’ - Jaya

‘I loved the attention to detail, for example the bound inner waistband and the welt pockets. It was very satisfying seeing them come together over time.’ - Caroline

‘I Loved all your finishing choices...from the traditional fly front, to the welt pockets, bound waistband and hem facing. It felt a bit like I was sewing "couture"... This is definitely not a beginner project. It is, however, a great project to learn or practice skills that are often infrequently used by home sewers...like fly front and welt pockets!’ - Noreen


Would you like to sew along with me?

Last year I tested three patterns (the Darlows and two jackets that will be released later in the year). During testing I get to hang out with other makers online and learn more about them and their sewing journey and I loved every minute of it. After spending so much time working on my own, I just loved these interactions with makers. I know the online sewing community interacts a lot online, but this format felt very different to the way we engage in other spaces (such as Instagram etc.). It is a much more relaxed vibe and people seemed to be more comfortable to share their experiences and ask for help and advice than in other contexts. It got me thinking that I would love to have this experience more often and to be able to share it with more people.

4M1A3109-Edit.jpg

Because of this, I thought it would be fun to create an online group so that we can sew our Darlow pants together! The sew-along will be a workspace on Slack and will run for 3 weeks from Friday February 22 - Friday March 15. Places will be limited, so if you’re interested please purchase the pattern as soon as you can and sign-up for the sew-along (you will receive an email with a link to this after purchase). I will give you a few days to get the pattern printed, organise your fabric and read through the instructions and then we will get started on Friday February 22.

In the first week we’ll introduce ourselves and support each other to pick a size and make a toile. I will also do my best to connect people to others in the group with similar fitting concerns so we can work through our pattern adjustments together in week 2. In week 3 it will be time to get sewing! I will be in the group to offer feedback and advice and will pop links to tutorials etc. that will help along the way. One of the other things I love about pattern testing is the way we all come together to help each other and solve each others problems. My dream is that this works really well and I’ll be able to offer online sew-alongs for my other patterns - both new and old!

I hope you are as excited about the Darlow pants pattern as I am!

Saying goodbye to 2018

4M1A7417.jpg

I am one of those people (and I’m almost certain that a lot of you are too) that goes into reflective mode as the year draws to a close. I often wish I had the foresight and the hindsight that I have at the end of the year on a more regular basis (maybe monthly? Even quarterly would be nice!), but it seems that there is just something about the end of one year and the start of the other that makes us see things through a different lens.

Both 2017 and 2018 ended in somewhat similar ways. I barely took a break during the year and ended up feeling completely depleted of energy, inspiration and willpower by the time November rolled around. But then I did something that I felt I just had to do and these things gave me more energy and inspiration than I could imagine and got me through the final bit of the year.

IMG_0167.jpg

In 2017 it was launching a Kickstarter campaign, and this year it was Finders Keepers (a design market that took place in Sydney). Both these events were a much needed reminder that people see value in what I am doing and making and want to be a part of my vision. It can be easy to get totally lost behind the computer and all that we do day to day, but getting out from the studio and talking to people face-to-face always does me the world of good. I am always thrilled to see how excited people get and that they are will to show ip and be a part of it. These events were a reminder that I am part of a tribe - a tribe of incredible people that see the importance of making their own clothes, as well as a community of people who want me to succeed (thank you to the friends and family who are always jumping in to help!)

Me at Finders Keepers in Acton dress made from pre-loved vintage fabric.

Me at Finders Keepers in Acton dress made from pre-loved vintage fabric.

I am relieved that being part of Finders Keepers gave me the energy I needed to finish out this year, but it also made me think about how I’m doing things. I cannot rely on these external things to get me over the line and I have realised that I need to start thinking about the systems I use to get things done, so that I can work on avoiding these big highs and lows, as it is just too exhausting. Feeling as exhausted and burnt out as I did a month ago is not the reason I went into business and there is nothing glamorous about working to the point of complete exhaustion.

I had big plans for 2018 in both my business and personal life, and looking back, I achieved very few of them. There are a few things I am very proud of and have to acknowledge as highlights of the year / goals I achieved: I helped my partner make a drastic career change, which involved supporting him as he went to college and found a new job, I learned to run 5km (for anyone who knows me personally you know that was no small feat) and I got my sewing patterns into print and into the hands of stockists. I had an awesome launch party to officially bring my new printed sewing patterns into the world, and I packed up about 300 Kickstarter rewards and sent them out to the awesome people who backed my campaign. These were all big goals that I had to break down and work towards over a period of time and I am proud to say I got there with each one.

4M1A7713.jpg

But the thing I have been feeling a little down about is that I didn’t produce any new work (besides the patterns I released each quarter in collaboration with Peppermint magazine). Although just thinking about the patterns I made for Peppermint (photos below) makes me feel very proud and a little less defeated.

Peppermint-SewingSchool39.jpg
Peppermint-SewingSchool38.jpg
PeppermintSewingSchool40.jpg
SewingSchool37.jpg

When I first realised that I would see out the end of the year without releasing a new pattern, it was a difficult pill to swallow. I felt defeated and couldn’t imagine how a new year would fix this. But the more I thought about it, the more I realised that hitting this low about the nature of my output and my creative work is an important place to be. I needed to sit there in that horrible feeling for a while and let it wash over me. I needed to be there so that I can work on systems so this does not happen again. I don’t know if I would have gotten into this headspace without first realising how horrible I was feeling about where I was at. I am the first to say that creative work is not just about output and I do not believe that churning out patterns at the speed of light is what I should be aiming to do, but I do see the importance of producing patterns in a more consistent and regular way. I want to do this for my customers, but I also want to do this because it is the only way I can manage to create a sustainable income for myself in this line of work. And although I do love what I do, I do need to start thinking more about the numbers as I try to create a life that is a little more financially comfortable and stable.

As those of you who have been following along for a while would know, I tested three new patterns in 2018. That feels good to say. But for one reason or another, each of those patterns is not quite ready to be released. And instead of me facing what needed to be done on each pattern and getting it out into the world like I should have, I was tempted by the next shiny object (i.e. a new pattern) and would start on that. That’s the thing about running a small business, there is a million little things that you could spend your time doing each day and often it is difficult to work out what your priority should be - which thing is the most important. I often find myself just picking up the first thing that comes to my mind or is right in front of me - which generally is not the most important work.

IMG_0101.jpg

I recently made a hard decision. I decided that instead of pushing to get these three patterns out in a single release (which would hopefully generate more income, get them off my mind, excite the people who have been waiting for them) I will release each pattern separately, three months apart. Although this does extend how long these patterns have taken me to produce, the thought of getting ahead and seeing this as an opportunity rather than a failure has made me excited for 2019. It has given me hope that in 2019 I will do better than 2018, and I think that is what this whole small business thing is about. Learning new things, trying new things and growing both as an individual and a business. This choice has made me sit down and work on my processes and also get serious about what I can actually accomplish in a given hour, day, month or year. When I laid out all that I want to get done in a three month period, I suddenly realised that the expectations I have been putting on myself are far too high. I will do better in 2019, by being more realistic about my time and the expectations I put on myself. By seeing it all in front of me like this, I can also see that there will be times that I will need to ask for help, just to get projects over the line, and that’s okay. So now, instead of feeling like I hadn’t achieved some of the big goals I had set for myself for 2018, I am forgiving myself and feeling proud that although I didn’t release all the patterns I wanted to, I learned a great deal, nutted out my processes more and got myself prepared to do better next year. And most importantly, so many of you sewed my patterns this year, and just scrolling through the hashtags of the patterns I have released makes me eternally grateful to be part of this wonderful community.

Happy holidays everyone! I hope you have a relaxing break and can spend some time with with those you love and care about.

I’ll be taking two weeks off to relax, recoup and go camping! Any orders placed between now and January 8th will be shipped out when I’m back at work on January 9th, 2019. I appreciate your understanding.

Happy sewing everyone and thank you so much for supporting In the Folds this year. Seeing all your beautiful makes from my patterns has been an absolute highlight.