
THE Q & A SERIES - FULL CALF ADJUSTMENT ON THE DARLOW PANTS
Hi Emily,
I love the Darlow pants pattern! The panel lines are so unique and interesting and I have wanted to give the pattern a go ever since you released it.
I made a muslin recently and have managed to get quite a good fit in the waist and hips due to your fantastic Fit Kit, but I have realised they're a bit too tight in the calves. I have done a full calf adjustment with other pants patterns in the past, but have no idea where to start with the Darlows due to all those panels! I'd love your help.
Thanks,
Jenna
Melbourne, Australia
Hi Jenna,
I'm really sorry I didn't include the instructions about how to tackle a full calf adjustment in the Darlow Fit Kit! It now seems like quite an oversight as I know this is a common adjustment to make to pants.
Any adjustment made to the Darlow pants isn't that straightforward, but once you see how to go about dealing with the panels, it should make sense and hopefully you will see that there are a couple more steps than with a simpler pair of pants, but overall it isn't any more difficult.
For the sake of the example, I will be showing you how to make the adjustment on View B of the Darlow pants. At the end, I will show you how to get started with View A and then you will be able to follow this same tutorial for either style.
HOW DO YOU KNOW IF YOU NEED TO DO A FULL CALF ADJUSTMENT
There are three main ways you can tell if you are going to need to do a full calf adjustment:
1. Check your toile
If you have made a toile / muslin and your pants are too tight at the calf or bunching up in your calf area, you may require a full calf adjustment.

2. "Tissue fit" with your pattern
If you’d like to know if you’ll need to make this adjustment before making a toile, simply hold the FRONT LEG [5] piece of the Darlow pants pattern up to your body and wrap the lower section around your calf (you can use a pin to hold in place along the stitch line). You should be able to see if the pants are going to be too tight in the calf area. The Darlow pants are not designed to be tight in the calf - so keep this in mind when deciding whether or not to make the adjustment.

3. Compare your calf measurement to the finished calf measurement of the pattern
Alternatively you can measure the calf circumference on the pattern piece (again - hold the piece up to your leg and mark where the fullest part of your calf is). Then lay the pattern piece down and take a curved ruler and draw a line across the pattern that remains roughly parallel to the hemline. Measure the line with a tape measure (remembering to measure from stitch line to stitch line so that you don’t include the seam allowance in the measurement). Compare this to your calf measurement, to work out how much you're going to need to add - more about this later on in the tutorial.
HOW TO MAKE THE ADJUSTMENT
PREPARE THE PATTERN

Step 1
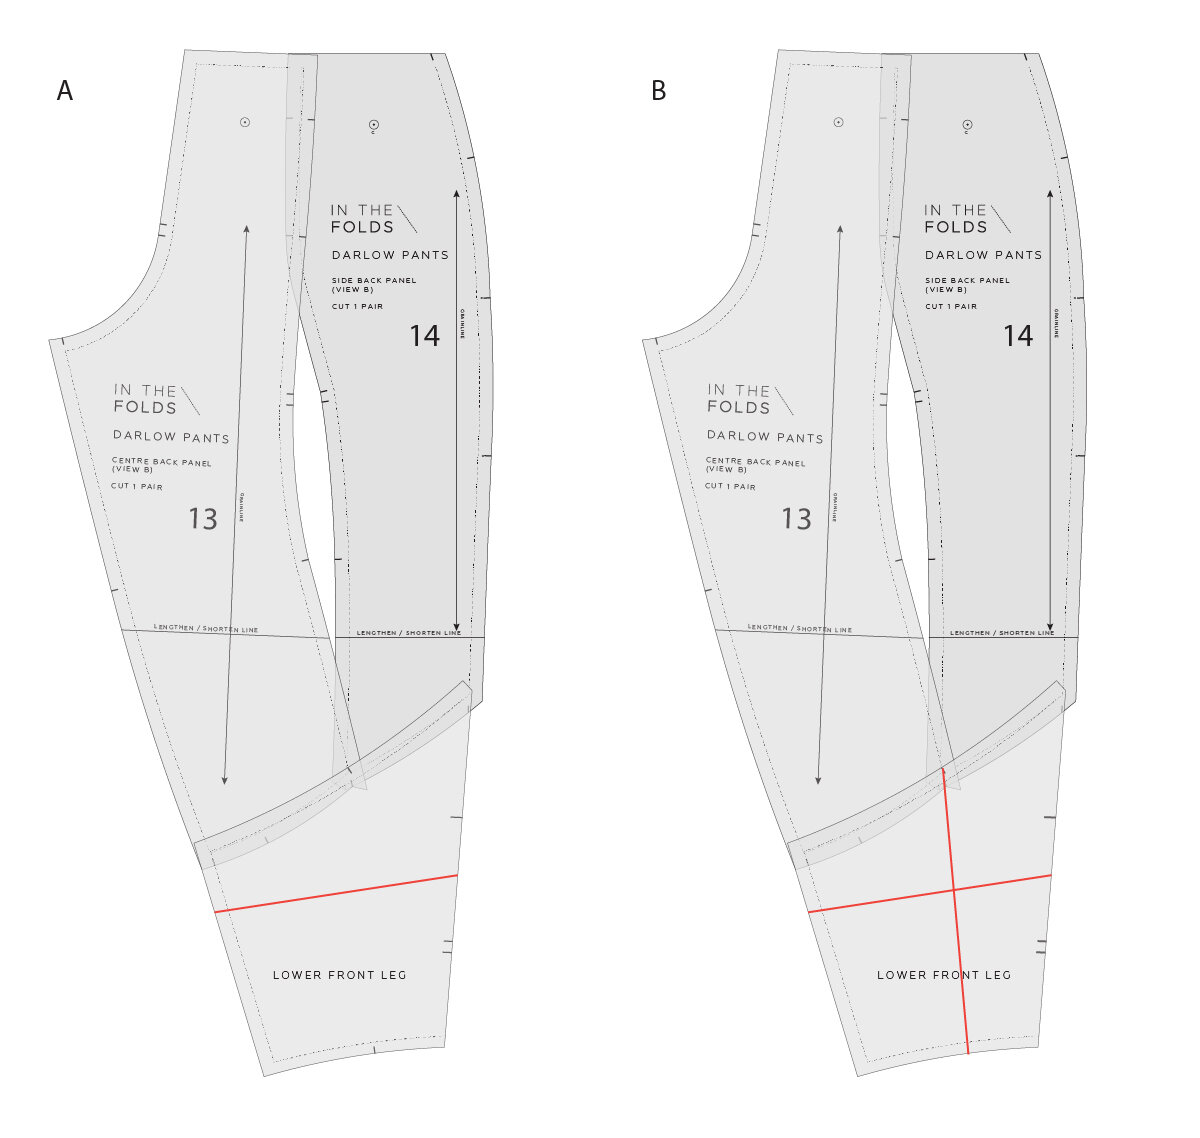
Take the FRONT LEG [5], CENTRE BACK PANEL [13] and SIDE BACK PANEL [14] pieces from the Darlow pants pattern. If you think you’d like to go back to the original design in the future, I’d suggest tracing a copy to make the alterations on (although if you are using the PDF version of the pattern, you can always re-print from the PDF later down the track if you need to).
The first step will be to separate the FRONT LEG [5] piece into a front and back (as the alteration will only be made to the back section of the pants). By looking at the design, you can see that the FRONT LEG [5] panel wraps around the leg, removing the need for a side seam in this section. For the adjustment we will need to create a side seam and then revert to the original design after the adjustment has been made.
A. Mark a point on the hemline (on the grey stitch line), about halfway along the line. This does not need to be exact.
B. Circle the notch on the inside curve on the FRONT LEG [5] that indicates the side seam position (the point where the side seam of piece 14 meets the FRONT LEG [5]. Extend this notch so that it meets the stitch line.

Step 2
A. Join the notch circled in the previous step (where it meets the stitch line) to the point marked on the hemline with a straight line.
B. Mark two sets of notches on this line (one single and one double notch). You can put these anywhere on the line that you like, they will just help you stick these two sections back together correctly later in the process.
C. Cut along the line, separating the FRONT LEG [5] into 2 pieces. We will call the section that we removed from the main section the ‘LOWER FRONT LEG’ for the sake of the tutorial.

Step 3
Now what we need to do is put the panels together to create a full back leg pattern piece.
A. To do this, line up the seam line that joins the CENTRE BACK PANEL [13] and SIDE BACK PANEL [14] at the top and bottom of the pieces. Place stitch line onto stitch line - as if the two pieces have been sewn together. As you can see, there is shaping through the seam, so you will not be able to line the pieces up through the middle section, but you can at the top and bottom. Tape in place with masking tape or scotch tape.
B. Flip the LOWER FRONT LEG piece and line up the stitch line on this piece with the stitch lines on the bottom of the CENTRE BACK PANEL [13] and SIDE BACK PANEL [14] pieces. You might not be able to get it lined up exactly, but you should be able to get it fairly close. You will notice that there is seam allowance on the side seam of the SIDE BACK PANEL [14], but we don't have it one one side of the LOWER FRONT LEG. Line up the cut edge of this piece with the stitch line. Tape in place.
Now you can see that the back panels resemble an almost standard pant leg! Which means an adjustment is now much more straightforward to make.
Step 4
Mark the point on the pattern that lines up with the fullest part of your calf. There are two ways you can do this:
1. Hold the pattern piece up to your body and work out where the fullest part of your calf is, in relation to the pattern (you may have done this earlier to see if you needed to make this alteration).
2. Take a look at your toile. Mark the point where the pants are too tight on your leg and then transfer this marking to your pattern.
A. Once you have found the fullest part of your calf, mark this line on the LOWER FRONT LEG with a straight line across the piece (running roughly parallel to the hem).
B. Mark another line from the notch on the top edge of the LOWER FRONT LEG (indicating where the panel line meets the LOWER FRONT LEG) down to the hem line. The point where these two lines intersect is where we will be adding width to make the calf circumference larger.
MARK THE CUT LINES

Step 5
Slide a piece of pattern paper under your pant leg. This will help later as you will need something to stick the pattern pieces to when you make the adjustment.
A. Mark a point on the inner leg seam below the crotch - marking the point on the stitch line. I marked mine about 6cm down from the crotch point.
Mark another point on the side seam - roughly halfway down the seam. Again, mark the point on the stitch line.
B. Connect the point on the inner leg seam to the top of the vertical line on the LOWER FRONT LEG with a straight line.
Connect the point on the side seam to the same point with another straight line.
C. Cut along the lines - up from the hem line through the LOWER FRONT LEG until you reach the top of the line. Cut along the diagonal lines until you reach the points where they meet the stitching line. Stop there. Cut into the seam allowance towards each point leaving a small 1-2mm “hinge” (a hinge in this sense is a small bit of paper that allows you to adjust patterns, whilst still keeping the piece intact.)

HOW MUCH YOU’LL NEED TO ADD TO THE PATTERN
If you have a toile, you may want to cut up from the back hemline towards the calf and pin in a strip of fabric to see how much width you need to add. This is a good way to quickly see how much more width you need. Take note of the width of the strip at the peak of your calf.
Alternatively, take the finished calf measurement from the pants (found at the beginning of the tutorial) and compare to your own calf circumference. Now consider how much ease you would like in this area.
Ease refers to the difference between your body measurement and the finished garment measurements. Some garments have more ease than others. The amount of ease will depend on the style, fit and design of the garment. As mentioned earlier, the Darlow pants are not designed to be tight around the calf area.
To work out how much ease you’re going to want, take a tape measure and hold it loosely around your calf to get a feel for how much fabric you will want in this area. Then walk, sit and squat to see that you have allowed enough ease to be comfortable. If the tape becomes too tight, loosen it up a bit and try again.
Once you have this measurement, subtract the pattern calf circumference from your own calf measurement and the difference will tell you how much you’re going to need to add when you make the adjustment.
MAKE THE ADJUSTMENT

Step 6.
A. Slowly open the pieces up - giving more space at the calf point. You will see that the small hinges allow you to move the pieces while still keeping everything nice and flat (when making adjustments, you always need to check that your pattern pieces are remaining flat as fabric is flat and therefore patterns need to be flat too).
B. Open up the calf by the amount required (check by measuring from one side of the opening to the other on the horizontal calf line). When you are happy with how it’s looking, tape or glue in place onto the paper underneath to keep everything in place.
TRACE YOUR NEW PATTERN PIECES

Step 7.
Take some fresh pieces of pattern paper and trace each adjusted pattern piece. Be sure to mark the grainline (by tracing the original grainline) and transfer drill holes and notches. I like to trace the stitch line and the cutting line, but it’s up to you - you may just want to trace the cutting line. Where the pattern piece has opened up and the lines have been broken, you will need to mark a line of best fit.

Step 8.
When you get to tracing the LOWER FRONT LEG you will need to re-draw the hem line as there will now be an opening. Take a curved ruler and draw in a nice smooth curve. When tracing this piece - be sure to remember to trace the notches on the temporary side seam that were marked in STEP 2B.
PUT THINGS BACK TOGETHER

Step 9.
A. Flip the LOWER FRONT LEG and line it back up to the FRONT LEG [5] using the notches you marked to help you. Tape in place.
B. Your hemline might be a little skewed after making the adjustment. Smooth out the curve with a straight or curved ruler.
CHECK THE PATTERN
Step 10.
Check that all your new pattern pieces fit together correctly and notches line up. For guidance on how to check patterns, check out this tutorial.
DRAFT A NEW HEM FACING
Step 10.
The Darlow pants have a hem facing piece. You will need to re-draft this piece to accommodate the alteration. You can refer to this tutorial to do this.

MAKING THE ALTERATION TO VIEW A OF THE DARLOW PANTS


Step 1.
As we did for View B, line up the panel lines as if they have been sewn together - stitch line on stitch line. Use the notches to help you. As you will see, it will be impossible to get some parts of the panels to line up (as the panels wrap around the body to make a three dimensional tape) - so don't worry. As long as the parts of the seam that will be impacted are lined up, that's all you need to do. In this case it's the back leg section that needs to line up.

Step 2.
Mark in a temporary side seam. You can do this by drawing a straight line from the side seam on the BACK [3] down to the centre of the hem line.

Step 2.
Mark in the alteration lines as we did in STEP 5 for View A and then use the above instructions to continue the alteration.
Whoa! That was a long one, but we got there! I hope this helped you and inspired you to give the Darlow pants a go!
Happy sewing,
Emily
P.S. Would you like to know what the Q & A series is all about? This page tells you a little bit more about the motive behind the series. Past issues from the Q & A series can be found here.
Don't have a question, but found this newsletter helpful? I'd love to hear from you! Get in touch and say hi.
What you’ve been making

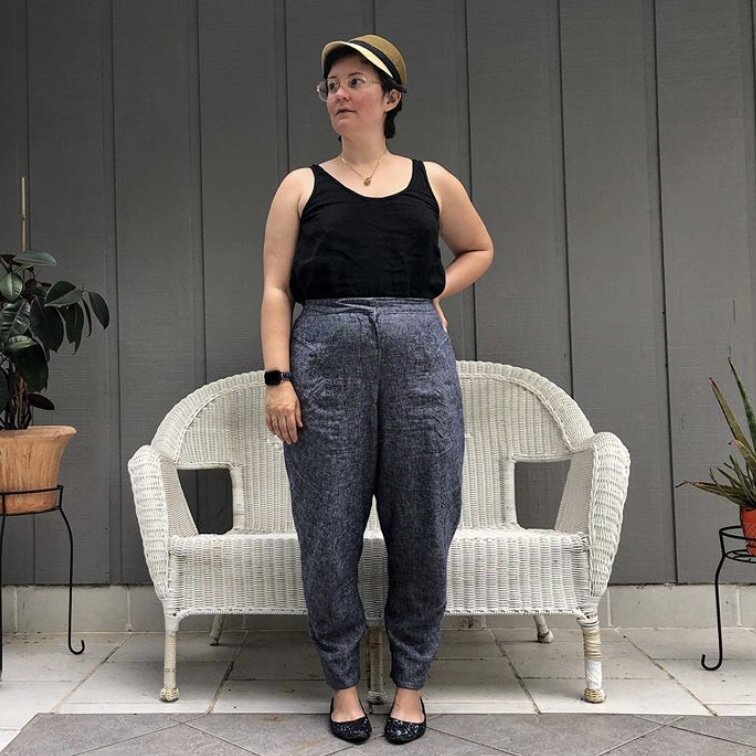
Darlow pants made by @breadandthread

Darlow pants made by @sew_singapore

Darlow pants and Peppermint Ruffle Sleeve Top made by @icecjan


