Elwood dress

ISSUE 183 - HOW TO DRAFT A LINING FOR THE ELWOOD DRESS

THE Q & A SERIES

HOW TO DRAFT A LINING FOR THE ELWOOD DRESS

Hi, 

Lining or not lining that is the question I ask myself since I bought the Elwood dress pattern. I want to make it sleeveless and I bought a wool linen with a geometric pattern.

Since I plan to wear it in the winter with tights or leggings, I think it would be more comfortable if I sewed a lining. Would you have any recommendations about how to do this?

Thank you very much. Bien amicalement,

C


Hi C,

Although our Sewing Linings project series (check it out in our Past Issue catalogue here) is over, I thought this was a great question to share with our community as we move into the more extreme seasons of the year. 

For those in the northern hemisphere like you, lining a garment is a great way to stay comfortable when using warmer fabrics like wool. For those in the southern hemisphere, you may be thinking of making a garment out of a lightweight or sheer fabric that needs a lining to give the garment a bit more weight or to make it opaque.

When it comes to drafting a lining for the Elwood dress the first thing you want to do is  remove as many of the panel lines as possible. This post covers why we remove panel lines from a pattern when creating a lining pattern. And, if you’re interested in learning more about removing panel lines, this post covers it in relation to our Acton dress and Attwood pants patterns. 

HOW TO DRAFT A LINING PATTERN FOR THE ELWOOD DRESS

Step 1
Place the SIDE FRONT PANEL [2] on the CENTRE FRONT PANEL [1], lining up the STITCH LINES as if they have been sewn together. Pin in place (this is when pins without heads are useful) or use a small piece of tape that can easily be removed.

Step 2

Place the FRONT SHOULDER PANEL [15] on the CENTRE FRONT PANEL [1] again lining up the STITCH LINES.

Step 3

Place a piece of pattern paper on top. Trace the STITCH LINES, ignoring the panel lines.

Step 4

Add seam allowance onto the pattern. The amount to use is the same as what is on the original pattern - 1cm (3/8in) on the neckline and 1.2cm (1/2in) on the other seams. The CENTRE FRONT seam no longer requires seam allowance as we are removing that seam too.

Step 5

Add notches to the CENTRE FRONT - at the top and bottom of the seam. Add a notch on the armhole where the panel line is and on the waist seam where the panel line is. The armhole notch will help you when attaching the lining to the dress and the waist notches will help you when attaching to the skirt lining.

Step 6

Add new pattern markings and labelling. Cutting instructions on lining patterns are written in green pen / marker so that lining pieces can be quickly and easily identified.

Tip for midweight or heavier fabrics

When lining sleeveless garments, to prevent the lining (or facing) from rolling out at the armhole and

becoming visible, you can shave off a small amount from the armhole. You can do this on the pattern, or on the cut garment (this option works well if you haven't chosen your fabric at the time of drafting). At the shoulder point, remove 3mm (⅛in) and then smooth into the original armhole curve around the notch.

Repeat the process for the back pieces to create the BACK BODICE LINING.

Step 7

Take the front skirt pieces and place together STITCH LINE on STITCH LINE.

Step 8

Trace the STITCH LINE onto a separate piece of paper. Shorten the hem by 2.5cm (1in). This prevents the lining from showing beneath the dress.

Step 9

Transfer notches onto the skirt pattern and label the pattern. Repeat on the back skirt.

Happy sewing,
Emily


RESOURCES MENTIONED IN THIS ISSUE

  • The Elwood dress pattern can be found here.

  • How to remove panel lines from a pattern - tutorial can be found here.

  • How to draft a skirt lining for the Acton dress - tutorial can be found here.

  • The Sewing Linings Series is currently only available in our Curated by ITF Past Issues catalogue. It will be released as a standalone resource in 2025. More information about our Curated by ITF subscription can be found here.


For more issues of the Q & A series, you can check out the archive here.


WHAT YOU’VE BEEN MAKING


MORE POSTS IN THE SERIES

ISSUE 162 - HOW TO ALTER A PATTERN WITH PANELS

THE Q & A SERIES

HOW TO ALTER A PATTERN WITH PANELS

Hi Emily,

I love this idea. It is so very helpful and generous of you to share all that you’ve learnt and your experience. Very cool.

I have a question about raising the back neckline of the Collins Top. Would you extend the back piece and the back sleeve and sleeve shoulder panel pieces and blend to the front neckline? I’m never sure how to deal with the curve of the neckline. I have discovered I need to do a High Round Back Adjustment on most tops, so I use the Centre Back seam to add length and a curve, but maybe I need to add this to the next seam along too (where the back meets the back sleeve?). Thanks for your help!

Cheers,

Genevieve

Brisbane, Australia


Hi Genevieve,

We thought this would be a great question to answer this week as we have just released the Elwood dress pattern

You’ll notice some similarities between Elwood and our Collins top, because Elwood was drafted from the Collins top. I always had this niggling feeling that I wasn’t quite done with the Collins top pattern, and had revisited it a number of times when experimenting with 3D pattern drafting. 

When our community asked for a signature In the Folds pattern for 2024, I knew it was time to revisit what I’d been working on in Clo3D and bring one of these ideas to fruition. (Check out this blog post if you’re interested in reading more about my Clo3D adventures!)

What this means for you (and any of our other customers thinking about sewing Elwood) is that our fitting tutorials created for the Collins top, will also apply to the Elwood dress. If you’d like to check out some of these tutorials, you can find some links to them below.

Here’s how to:

How to make fit alterations to a panelled pattern

When making fitting alterations to a pattern that has panel lines, there are a few things you need to do. This process will allow you to make any alterations you like to a pattern.

Step 1: Mark the stitch line on the pattern

Mark stitch lines on pattern.

When making pattern alterations the stitch line should be marked on the pattern. All In the Folds patterns have the stitch line marked, and we thought this was just standard in the sewing industry, but turns out it’s not! So what this means is you may need to mark in the seam allowance on the pattern yourself. 

Step 2: Remove panel lines

Remove panel lines for upper back adjustment.

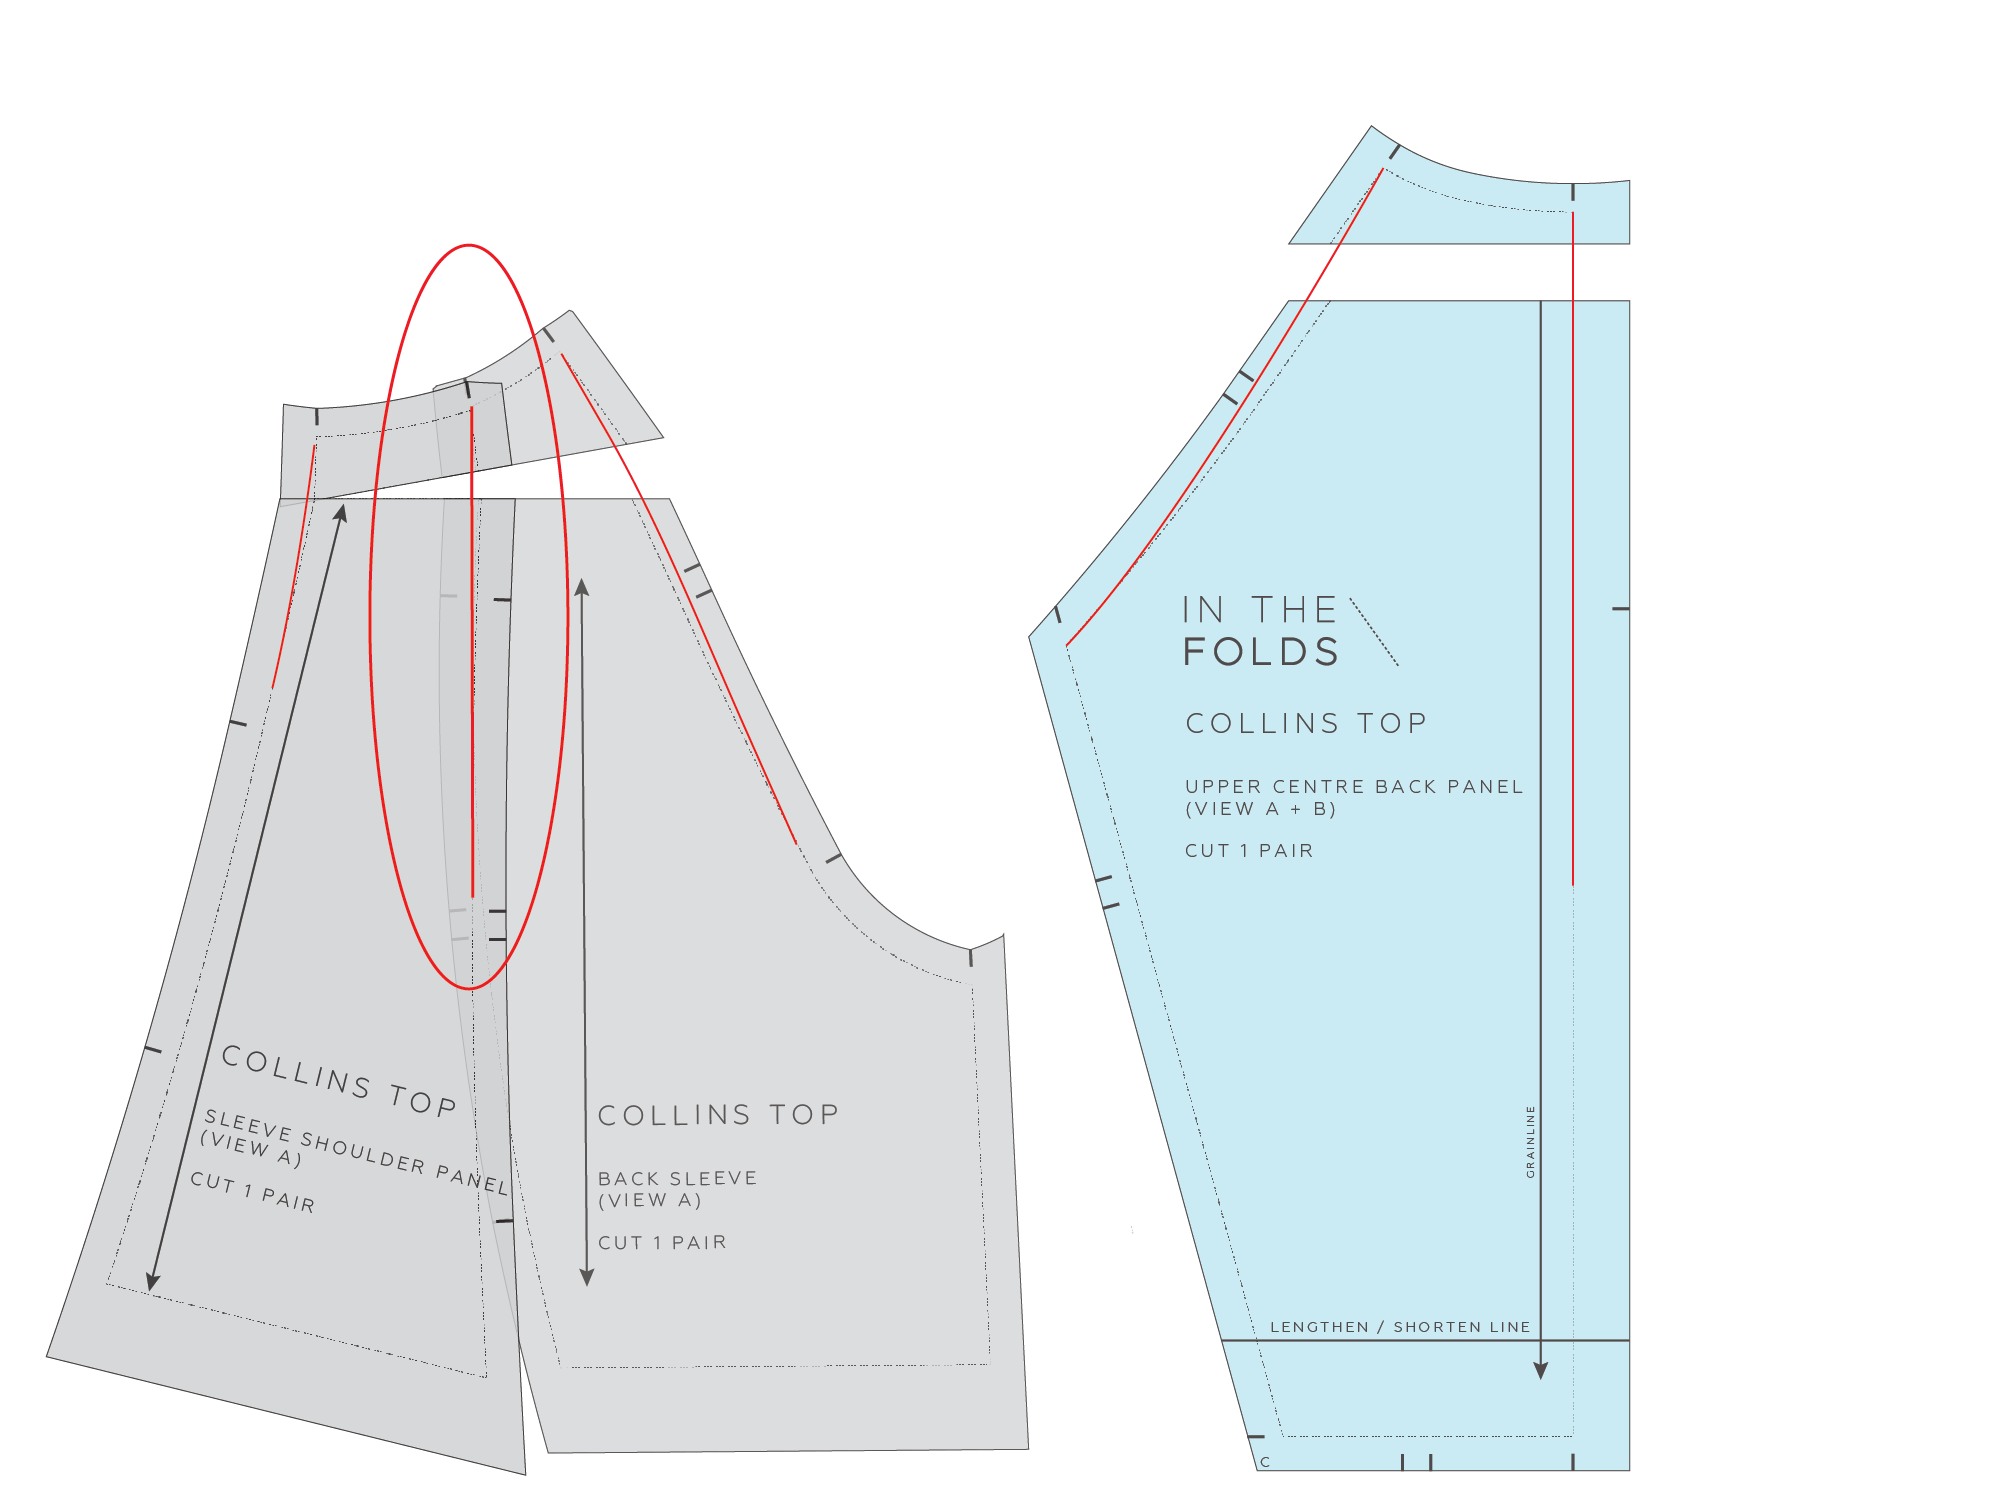
Place pieces together to temporarily remove the panel lines. In the case of the Collins top, this means joining the SHOULDER PANEL piece to the BACK SLEEVE. This is when your stitch lines come in handy because you need to position your pieces stitch line on stitch line as if the pieces have been sewn together. This doesn’t mean we’ll be losing our panel lines, just that we’re removing them to make the alteration easier to manage and then we’ll bring it back. Hold the pattern pieces together with tape or pins… something that won't rip your pattern piece or be too hard to remove.

Step 3: Make the alteration

Make the upper back alteration.

In this case we’ll be drawing a horizontal line through our back piece, towards the neck, and through the similar area on the sleeve pieces. On the sleeve I have marked the alteration line perpendicular to the back sleeve grainline.

Add the alteration amount required.

Add the amount required. This is when having a toile to refer to is very helpful. Or, if this is an alteration you regularly have to make, then you might have a good idea how much is required.

Step 4: True the lines

True the lines of your pattern alteration.

“Truing” your lines means that you need to draw a smooth line over the alteration. This takes some practice, so be sure to use a pencil. I like to use a transparent ruler and pivot it to create a nice smooth curve (similar to the way I add seam allowance on a pattern), but you may prefer to use a French curve.

Step 5: Add your panel lines back in

Add panel lines back in.

If you have joined any pattern pieces together to make the alteration, mark the panel lines back in. Do this the same way as how you trued your lines. You want the lines to be as smooth as possible.


Step 6: Finalise the pattern piece

Finalise the pattern piece.

To finalise the pattern pieces you will need to add seam allowance onto the areas that have been altered.

Trace altered pattern pieces onto pattern paper.

For pieces that have been joined, trace the altered pieces onto pattern paper, then add seam allowance on. When tracing a pattern, be sure to always transfer the notches and the grainline.

Step 7: Check the pattern pieces

Check the pattern pieces.

Walk the seams to check that everything fits together nicely and that none of the notches have moved. By doing this you are checking that seams that you will be joining together are the right length, so you don’t get any nasty surprises at the sewing stage. You also need to check that you have smooth lines. For example, in the diagram I am checking that the neckline is still a nice smooth curve. If you realise that the line is no longer smooth, smooth it out and use a tracing wheel to transfer the new line onto the overlapped paper.

Step 8: Make a toile

It’s always a good idea to make a toile to check a pattern alteration you’ve made. In the case of this alteration, you may also want to check if you need more shaping through the back. To do this you can get someone to help you and pinch our excess fabric through the back seams.

As with any pattern alteration, the important thing is to take it one step at a time. It’s usually when we’re rushing that we make mistakes, so I recommend working through the process bit by bit and having a practise before you start chopping into your good fabric!

Happy Elwood and Collins sewing!

Emily


RESOURCES MENTIONED IN THIS ISSUE

  • The Elwood dress pattern is currently available with a Curated by ITF subscription for the month of February 2024. More information can be found here.

  • The Collins top pattern can be found here.

  • Fitting tutorials that relate to the Collins top can also be applied to the Elwood dress. They can be found here.

  • How to make a toile - post can be found here.

  • Checking and truing seams - post can be found here.


For more issues of the Q & A series, you can check out the archive here.


WHAT YOU’VE BEEN MAKING


MORE POSTS IN THE SERIES