THE Q & A SERIES
HOW TO DRAFT A LINING FOR THE ELWOOD DRESS
Hi,
Lining or not lining that is the question I ask myself since I bought the Elwood dress pattern. I want to make it sleeveless and I bought a wool linen with a geometric pattern.
Since I plan to wear it in the winter with tights or leggings, I think it would be more comfortable if I sewed a lining. Would you have any recommendations about how to do this?
Thank you very much. Bien amicalement,
C
Hi C,
Although our Sewing Linings project series (check it out in our Past Issue catalogue here) is over, I thought this was a great question to share with our community as we move into the more extreme seasons of the year.
For those in the northern hemisphere like you, lining a garment is a great way to stay comfortable when using warmer fabrics like wool. For those in the southern hemisphere, you may be thinking of making a garment out of a lightweight or sheer fabric that needs a lining to give the garment a bit more weight or to make it opaque.
When it comes to drafting a lining for the Elwood dress the first thing you want to do is remove as many of the panel lines as possible. This post covers why we remove panel lines from a pattern when creating a lining pattern. And, if you’re interested in learning more about removing panel lines, this post covers it in relation to our Acton dress and Attwood pants patterns.
HOW TO DRAFT A LINING PATTERN FOR THE ELWOOD DRESS

Step 1
Place the SIDE FRONT PANEL [2] on the CENTRE FRONT PANEL [1], lining up the STITCH LINES as if they have been sewn together. Pin in place (this is when pins without heads are useful) or use a small piece of tape that can easily be removed.

Step 2
Place the FRONT SHOULDER PANEL [15] on the CENTRE FRONT PANEL [1] again lining up the STITCH LINES.

Step 3
Place a piece of pattern paper on top. Trace the STITCH LINES, ignoring the panel lines.

Step 4
Add seam allowance onto the pattern. The amount to use is the same as what is on the original pattern - 1cm (3/8in) on the neckline and 1.2cm (1/2in) on the other seams. The CENTRE FRONT seam no longer requires seam allowance as we are removing that seam too.

Step 5
Add notches to the CENTRE FRONT - at the top and bottom of the seam. Add a notch on the armhole where the panel line is and on the waist seam where the panel line is. The armhole notch will help you when attaching the lining to the dress and the waist notches will help you when attaching to the skirt lining.

Step 6
Add new pattern markings and labelling. Cutting instructions on lining patterns are written in green pen / marker so that lining pieces can be quickly and easily identified.

Tip for midweight or heavier fabrics
When lining sleeveless garments, to prevent the lining (or facing) from rolling out at the armhole and
becoming visible, you can shave off a small amount from the armhole. You can do this on the pattern, or on the cut garment (this option works well if you haven't chosen your fabric at the time of drafting). At the shoulder point, remove 3mm (⅛in) and then smooth into the original armhole curve around the notch.
Repeat the process for the back pieces to create the BACK BODICE LINING.
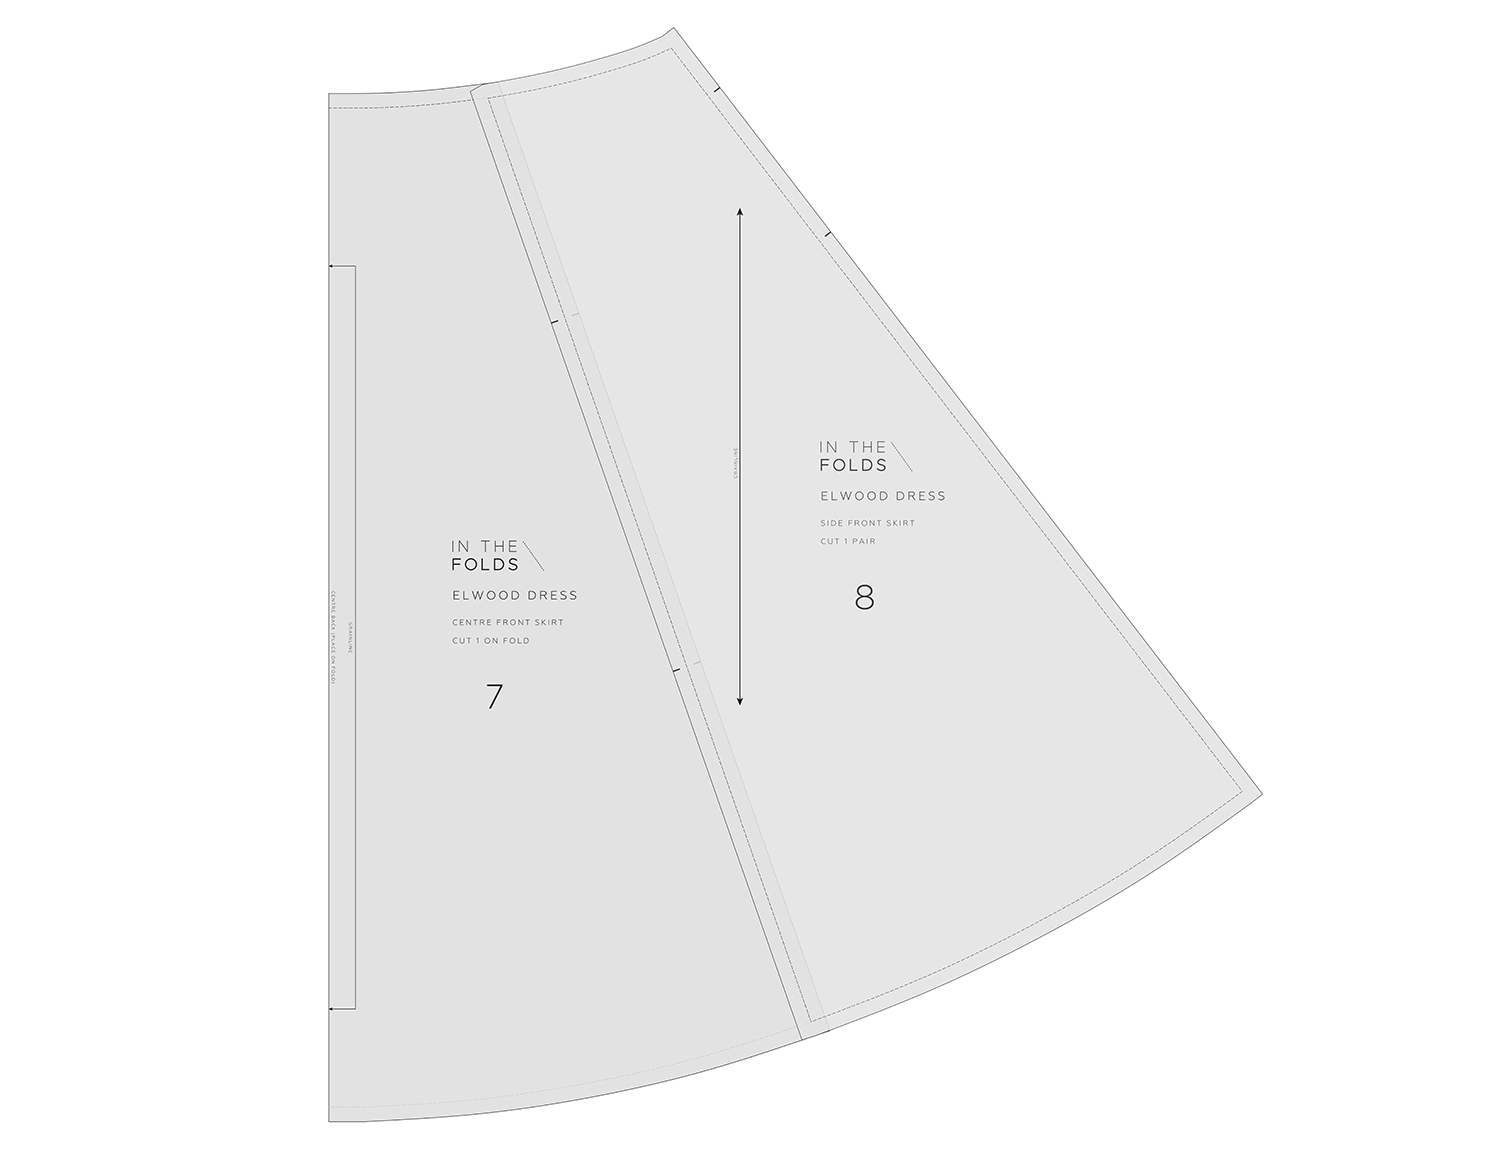
Step 7
Take the front skirt pieces and place together STITCH LINE on STITCH LINE.
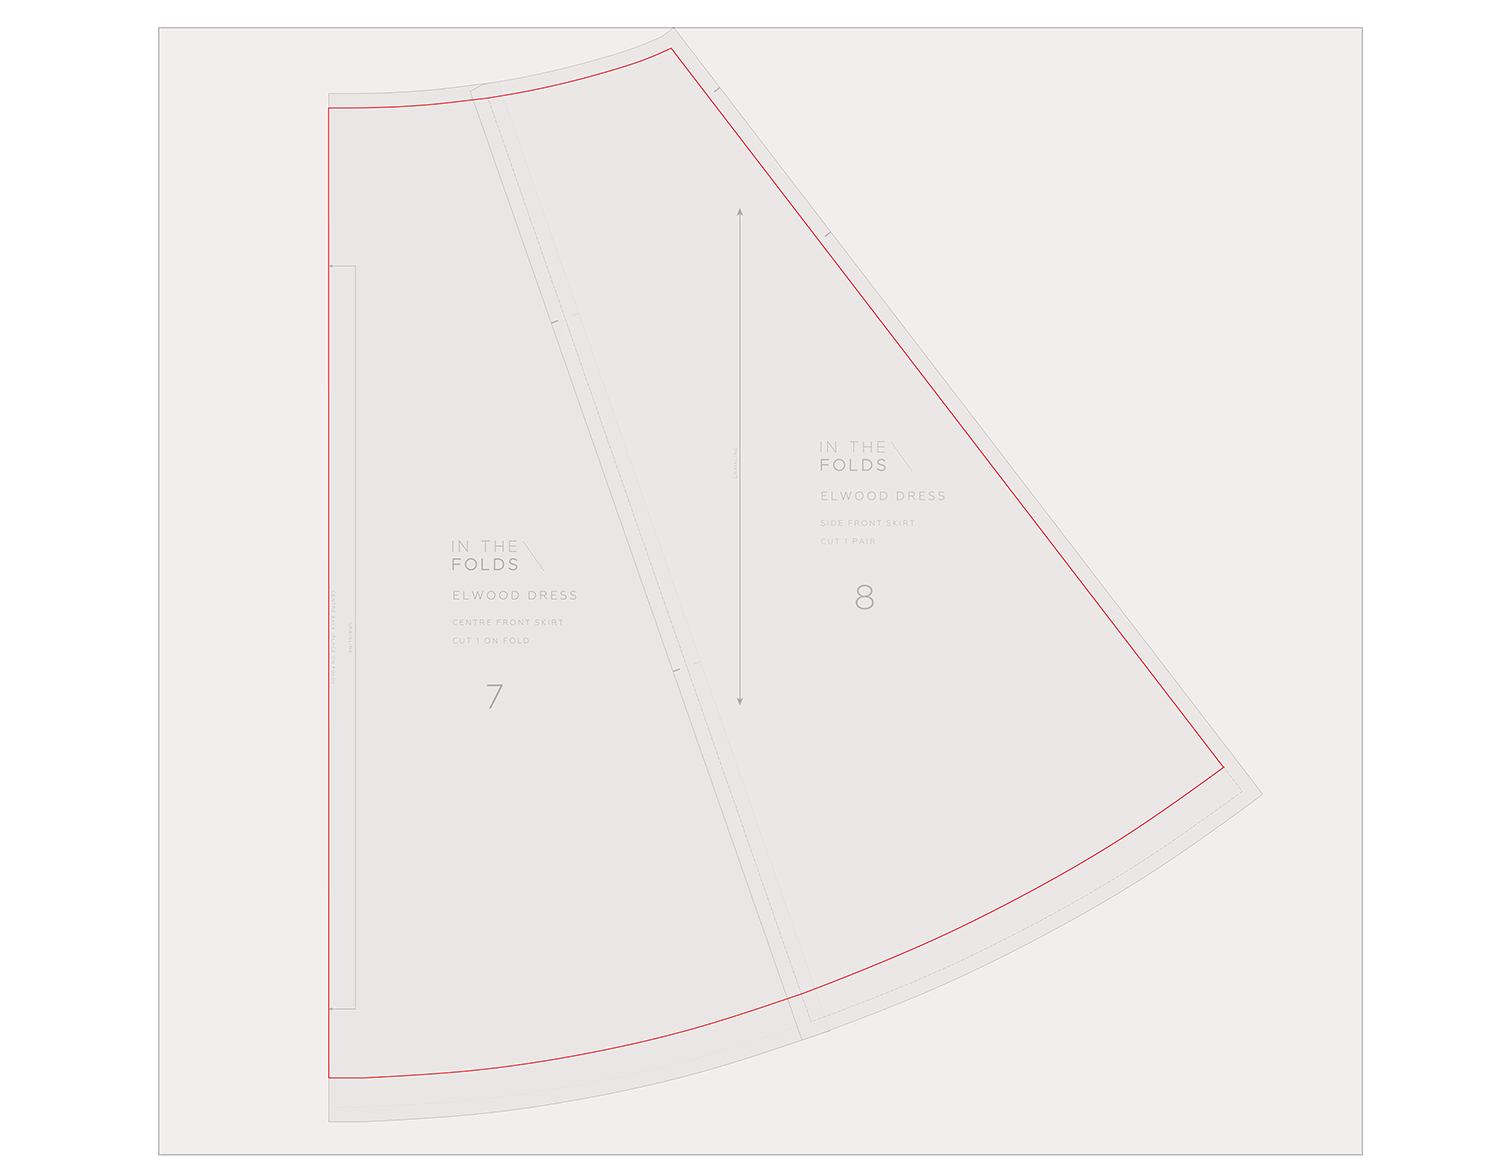
Step 8
Trace the STITCH LINE onto a separate piece of paper. Shorten the hem by 2.5cm (1in). This prevents the lining from showing beneath the dress.

Step 9
Transfer notches onto the skirt pattern and label the pattern. Repeat on the back skirt.
Happy sewing,
Emily
RESOURCES MENTIONED IN THIS ISSUE
The Elwood dress pattern can be found here.
How to remove panel lines from a pattern - tutorial can be found here.
How to draft a skirt lining for the Acton dress - tutorial can be found here.
The Sewing Linings Series is currently only available in our Curated by ITF Past Issues catalogue. It will be released as a standalone resource in 2025. More information about our Curated by ITF subscription can be found here.
For more issues of the Q & A series, you can check out the archive here.
WHAT YOU’VE BEEN MAKING

Barkly skirt made by @denise.does

Marden shirt made by @lisamcohen