THE Q & A SERIES
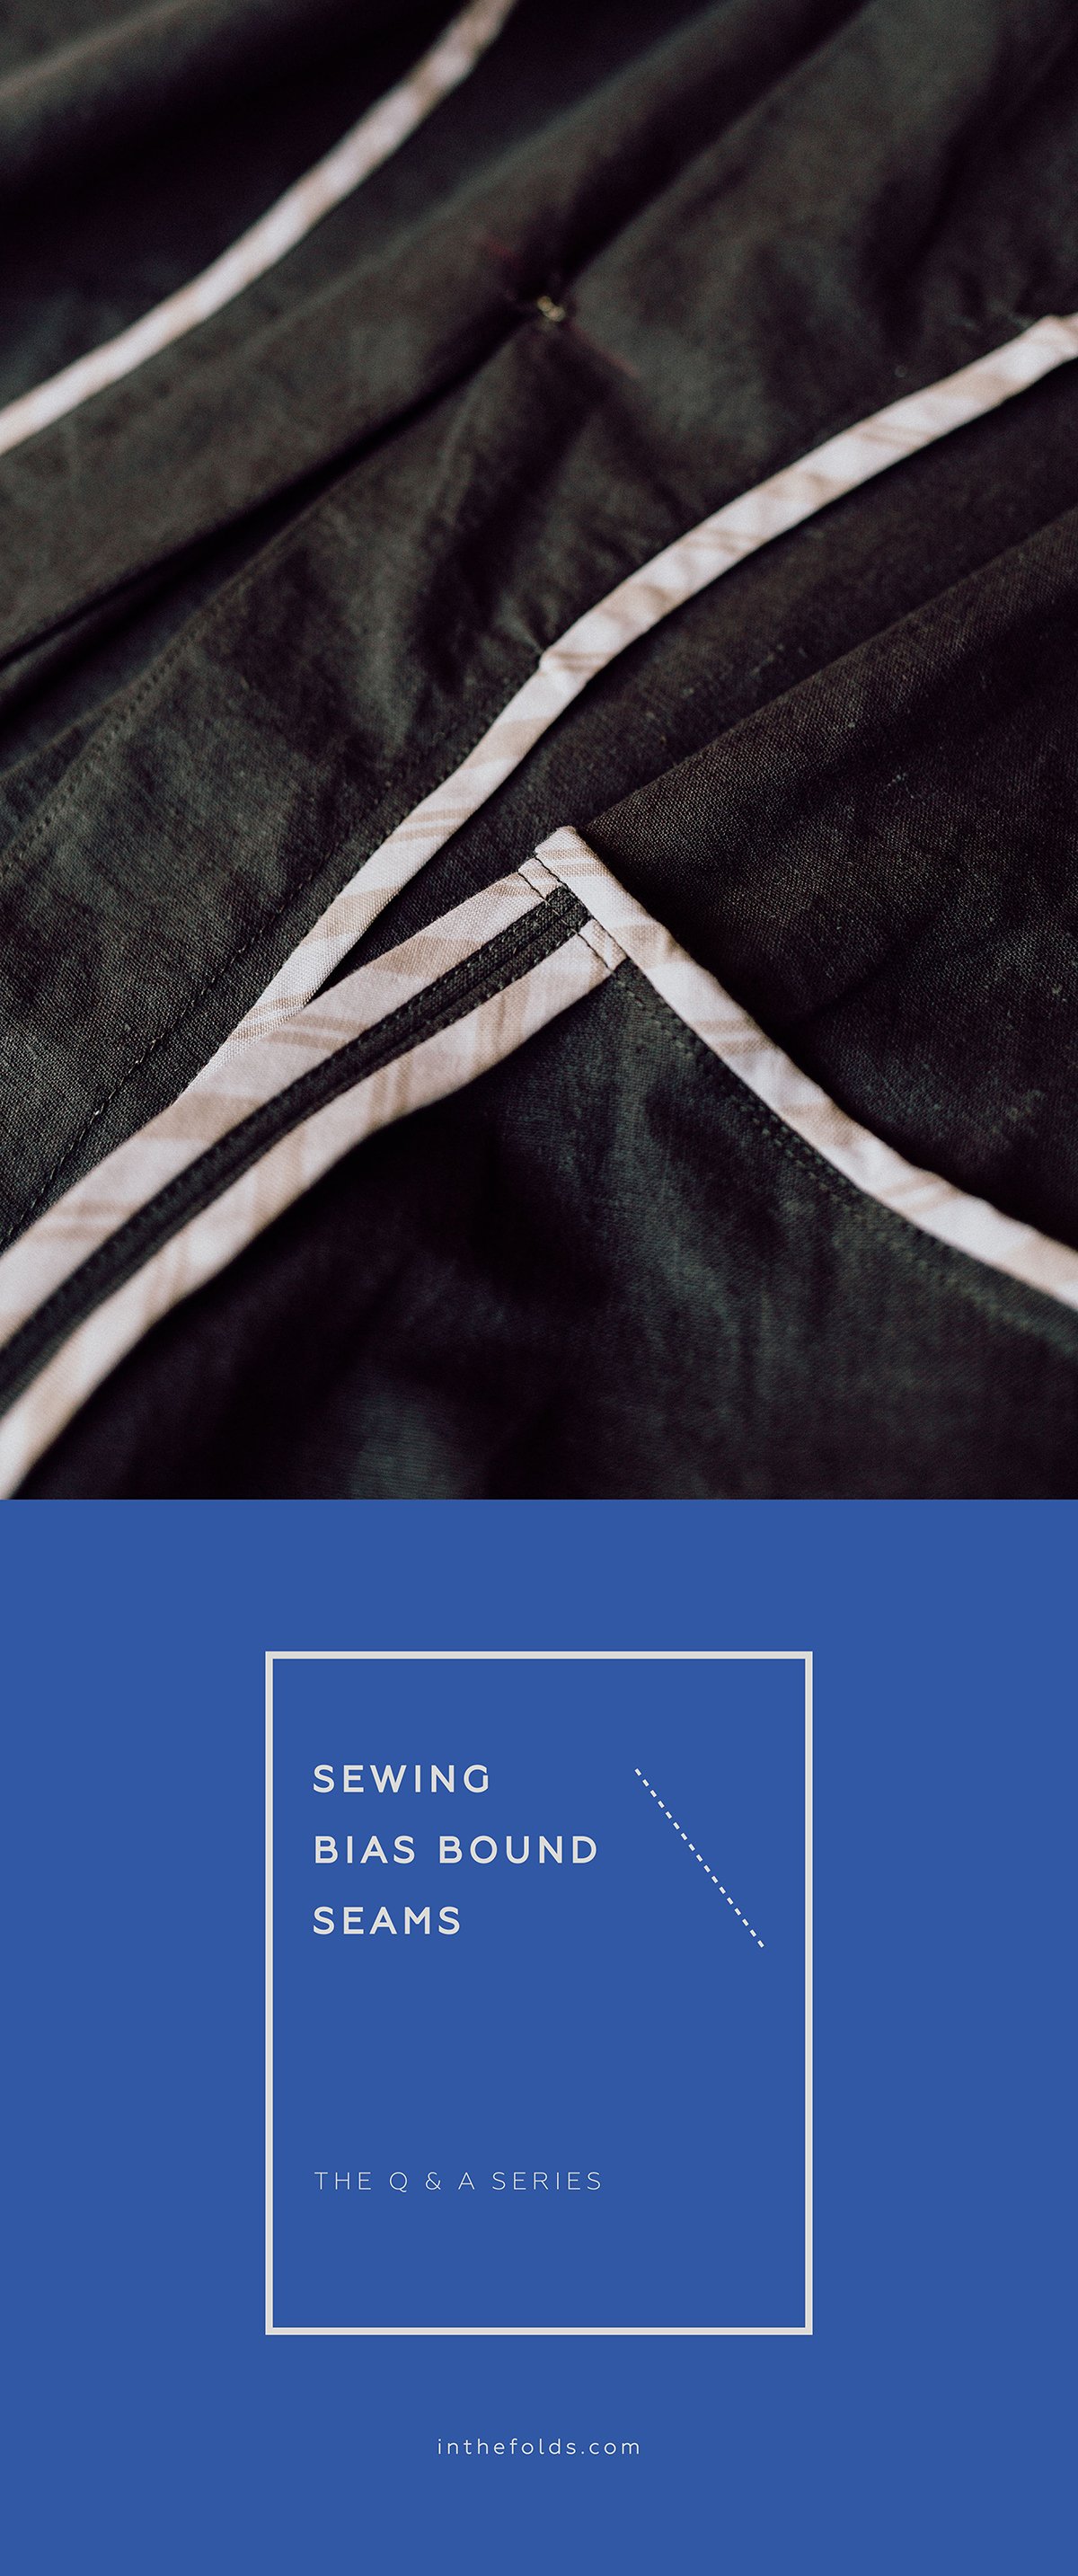
how to sew bias bound seams
Hi Emily,
I have a Hove question. Which I guess is also a Flynn question…
For the bindings- what is the basis between deciding between Hong Kong binding, and the other method . Do they look different in the finished garment, or is the decision based on fabric type ? Or have I not read the pattern closely enough yet and it will stipulate which way.
I have never done either method so either way will be fun!
Thanks,
Sue
Hi Sue,
I’m excited that you’re about to give the Hove jacket a go! It’s definitely been the most popular pattern for our ‘Make it With Us’ Curated by ITF project this month.
The instructions tell you which one to use, but I'm happy to give you the logic behind the decisions. It might be helpful when choosing between binding options in the future, or if you’re using binding on a pattern that doesn’t include binding instructions.
Bias bound seams
Bias bound seams are cleanly finished on both sides. This means both edges of the binding are enclosed inside the bind. These finishes are great when you can afford to have that little bit of extra bulk, when you're pressing seams open or when it's likely you will see both sides of the bind. For the Hove and Flynn jackets, the shoulder seams and side seams are finished like this.
To sew a bias bound seam:
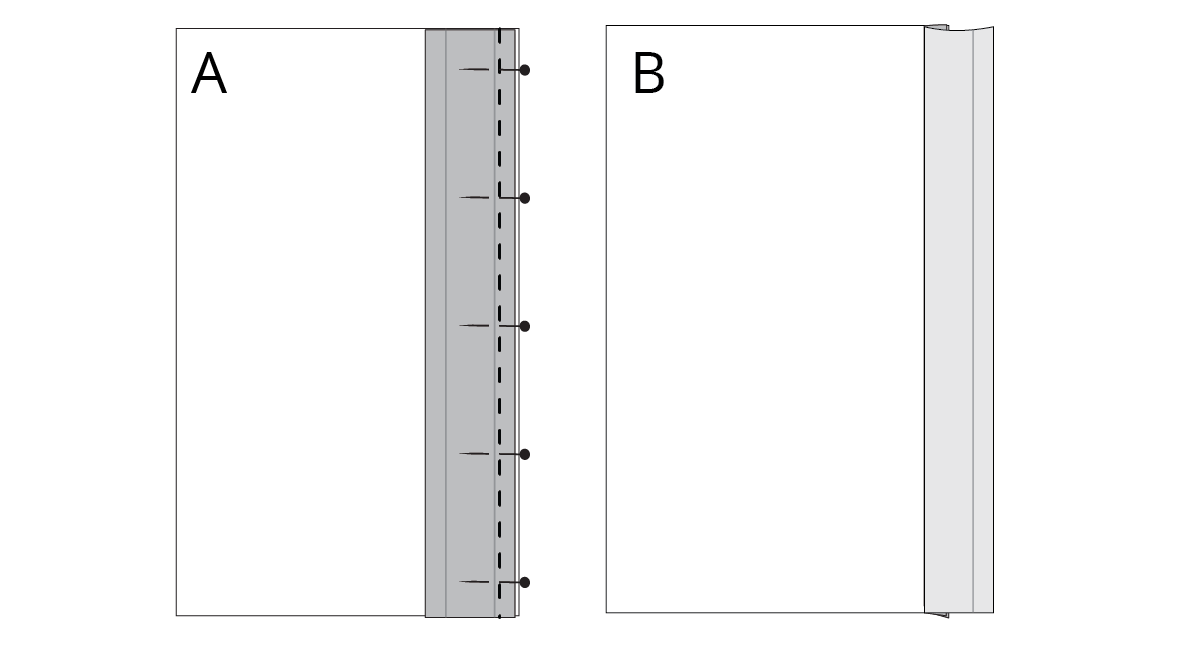
A Take a length of bias binding and place along the edge you will be finishing (right sides together) - lining up the raw edges. Pin in place. Stitch binding in place with a 6mm (¼in) seam allowance (this will be just inside of the first crease line on the binding).
B Turn bias binding to the right side and press seam allowance towards binding.
C Fold the other side of the binding along the crease and press.
D Wrap binding around the seam allowance and press. The folded edge of the binding (on the back of the seam) should overlap the first stitching line by 1-2mm. The seam allowance should fill the binding - but can be trimmed if required. If the seam allowance doesn't fill the binding, stick to the original fold of the binding. Pin binding from the right side - being sure to check that you are catching the folded edge of the binding on the back.
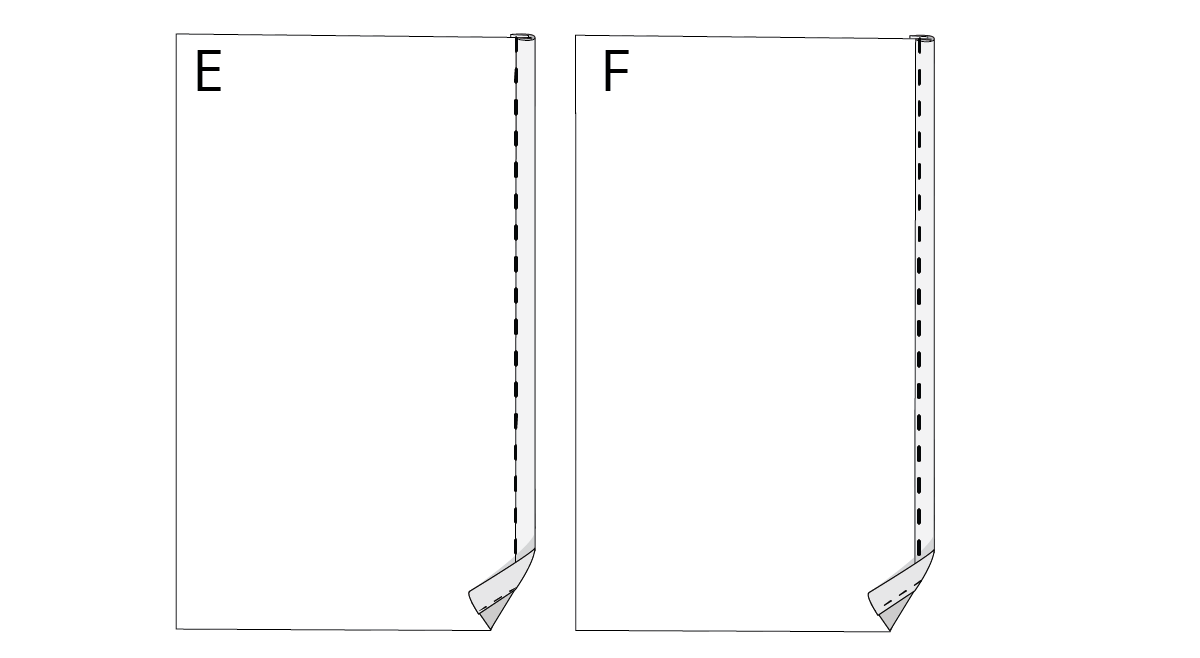
E Carefully stitch binding by stitching in the ditch.
F If you would prefer, you can stitch just to the side of the ditch (on the binding) as illustrated (this is a little easier to do if you are a beginner).
Hong Kong bind
Hong Kong binding leaves one side of the binding flat (not folded back). It won't fray as the fabric has been cut on the bias, but it does mean there is a raw edge on the back side of the finish.
Hong Kong binds are normally used for thick fabrics (think heavy wool coating etc.), when seams need to be pressed together or when the back side of the bind won't be seen.
For the Flynn and Hove jackets, the edge of the facing is sewn with a Hong Kong bind as it will minimise bulk. This is then attached by stitching in the ditch so the back side of the bind is enclosed inside the facing.
To sew a Hong Kong bind:
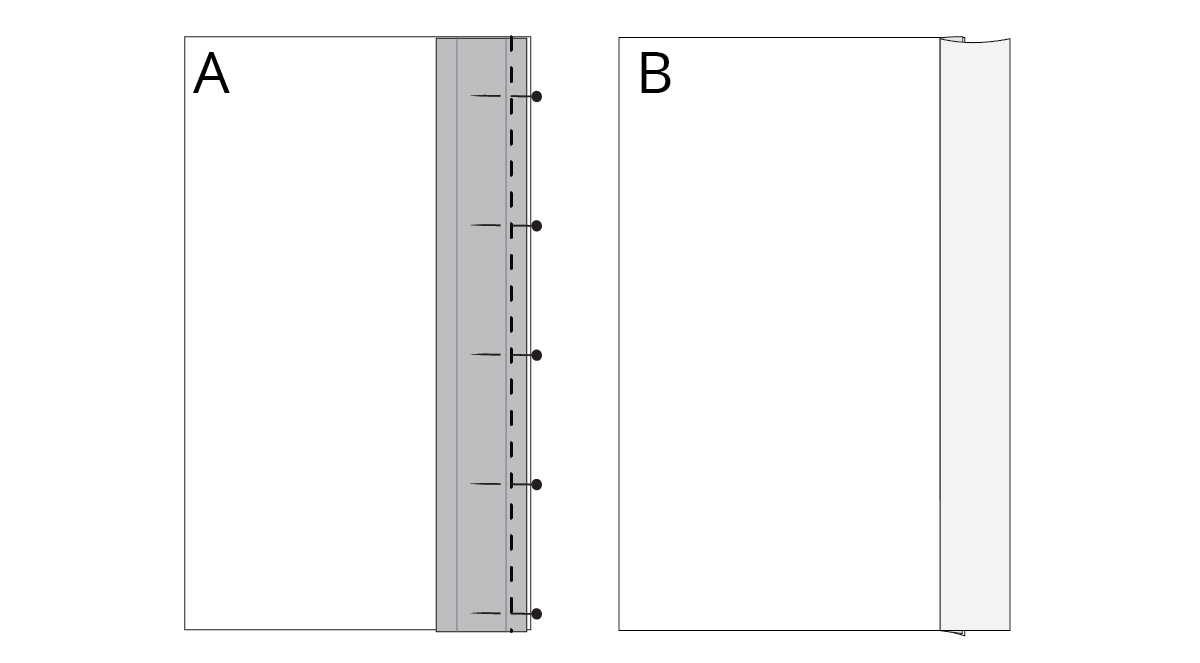
A Take a length of bias binding and place along the edge you will be finishing (right sides together) - lining up the raw edges. Pin in place. Stitch binding in place with a 6mm (¼in) seam allowance (this will be just inside of the first crease line on the binding).
B Turn bias binding to the right side and press seam allowance towards binding. Press the rest of the binding flat.
C Wrap binding around the seam allowance and press - keeping the remainder of the binding flat on the back side of the seam (rather than folded like it was in the previous method). Pin binding from the right side - being sure to check that you are catching the binding at the back at the same time.
D Carefully stitch binding by stitching in the ditch.
E If you would prefer, you can stitch just to the side of the ditch (on the binding) as illustrated (this is a little easier to do if you are a beginner).
Both are very satisfying to sew, and the Hove jacket (or the Flynn jacket) is the perfect opportunity to give these techniques a go!
Happy binding,
Emily
For more issues of the Q & A series, you can check out the archive here.
WHAT YOU’VE BEEN MAKING
Collins top made by @nikasews
Hove jacket made by @tandarady
Rushcutter dress made by @franny_sews_things
Acton dress made by @andrearangelknits

