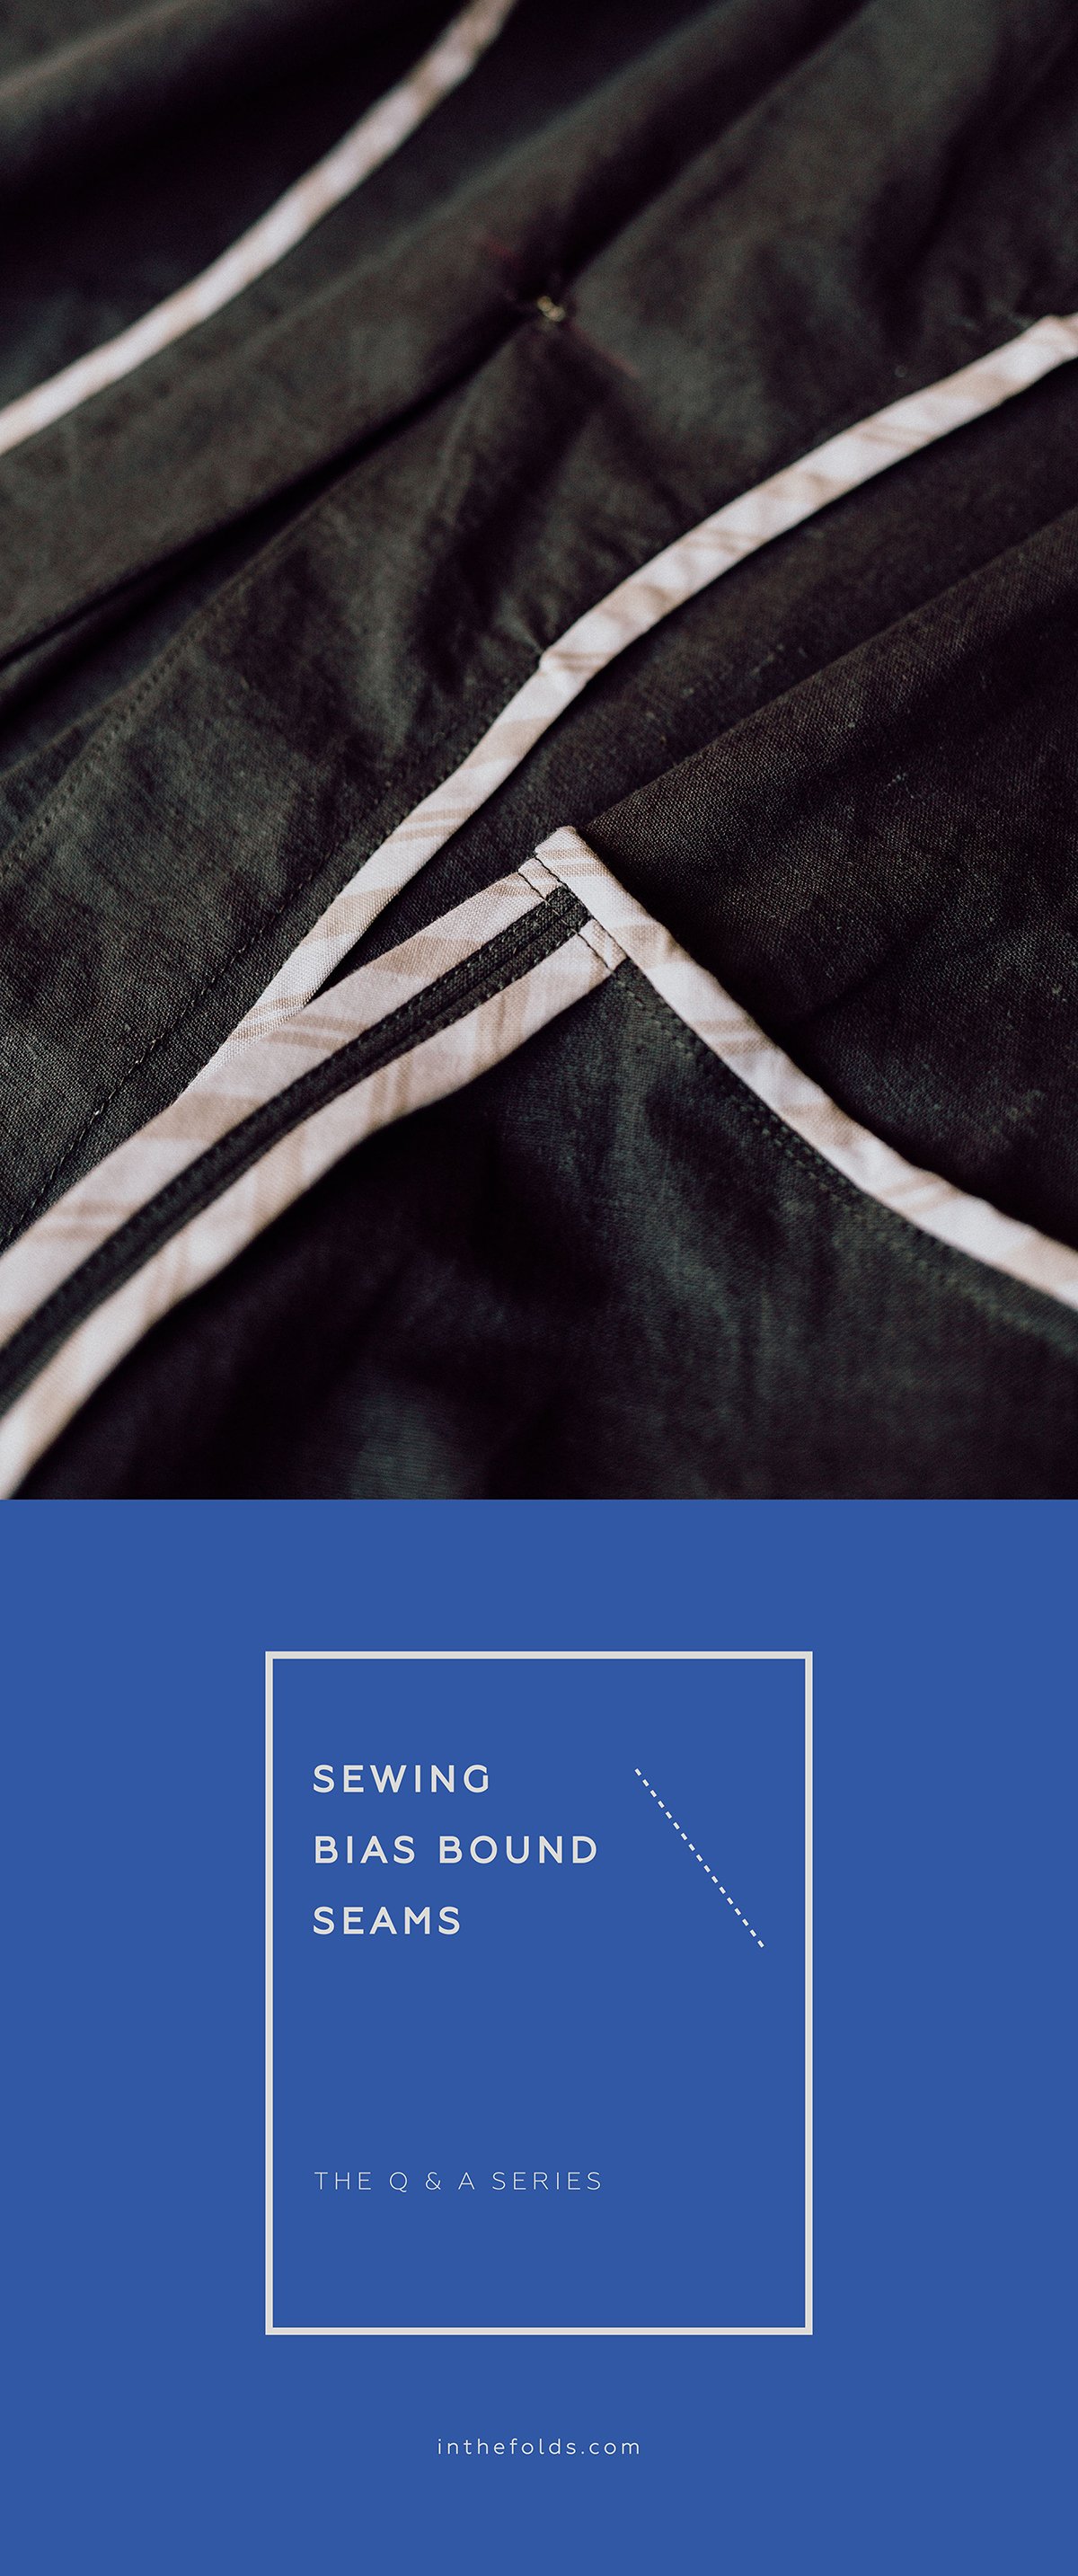
Hove jacket

ISSUE 130 - How to shorten the Hove jacket

THE Q & A SERIES

How to shorten the Hove jacket

Hi Emily 

I am really enjoying improving my skills each month with Curated and I’m about to start the Hove Jacket (View A).

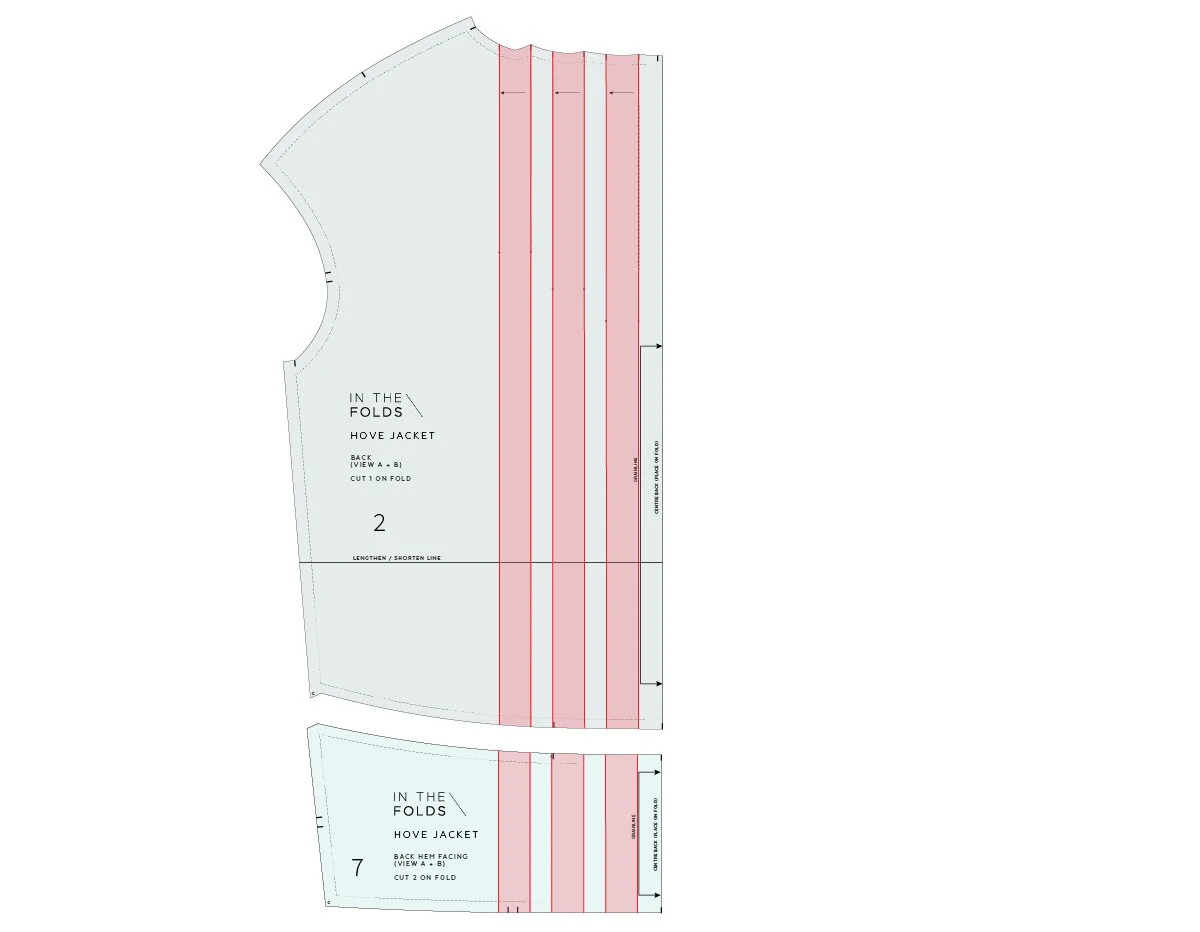
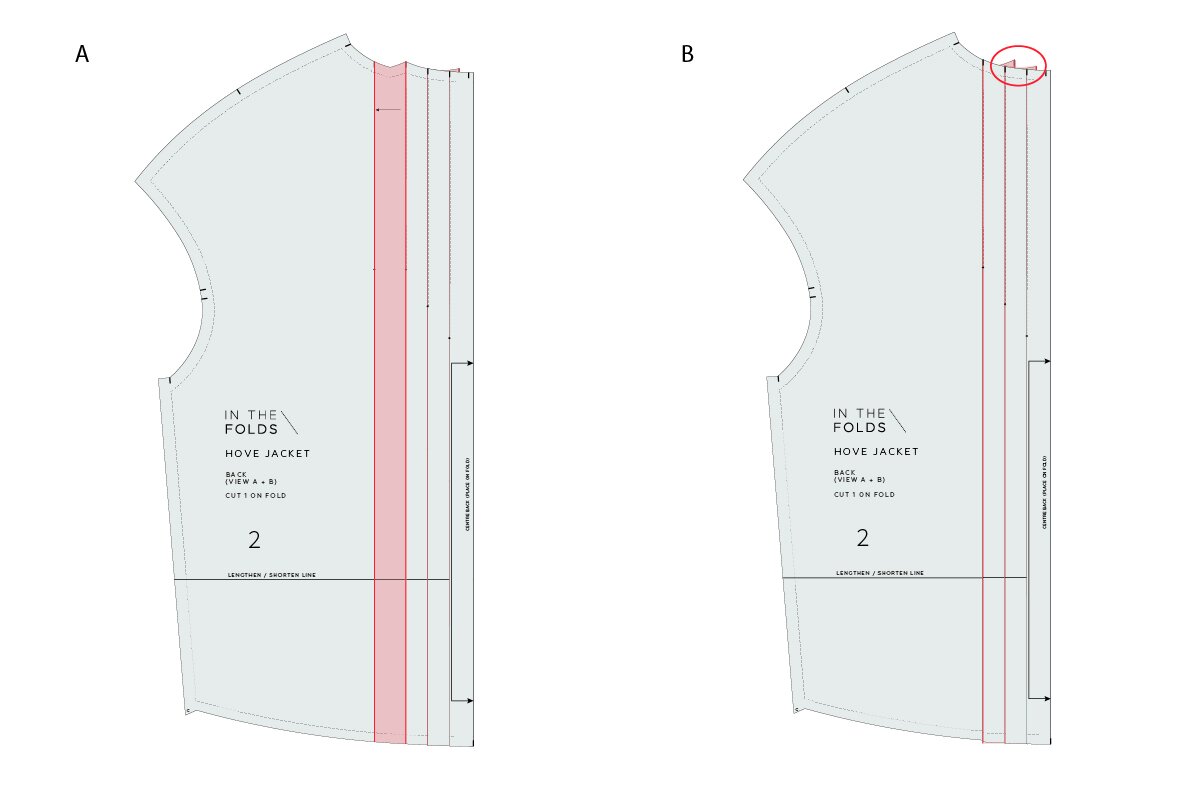
I am short and I would like to shorten the overall jacket length . This pattern has a couple of beautiful curves in its feature panels that are intersected by the shorten/lengthen lines - could you please provide some tips on grading a curve when shortening 80-100mm.

Jen
Adelaide


Hi Jen,

Great to hear you are enjoying Curated by ITF and would like to give the Hove jacket a go!

Here at In the Folds we love a curved seam. They make fun and interesting shapes to wear and sew. Some of our favourite curved seams can be found in the Hove jacket, Flynn jacket and the Darlow pants.

You’re right though, when it comes to shortening or lengthening a pattern with curves, it does change the process a little bit, in comparison to altering straight seams. 

The Hove jacket and the Flynn jacket are actually sibling patterns and share the same curves. We have a tutorial here that shows you how to shorten the Flynn, which you can use on the Hove jacket as well.

CHECK AND TRUING A PATTERN

Once you have made the adjustment to the length, the most important part of the process is to check that your seams fit together. This is called “checking and truing” a pattern.

This means that you walk the seams together as if they have been sewn and check that all the seams are the correct length and that the notches line up. We have a tutorial on that process here.

I’d suggest you get into the habit of checking and truing your patterns after making any pattern alterations. It only takes a few minutes once you get the hang of it. Believe me, it will save you a lot of frustration in the long run because you’ll be able to catch a rogue notch or a seam that you didn’t quite adjust properly before it affects the garment’s construction.

I hope these tutorials give you the confidence to shorten the pattern!

Happy sewing,
Emily

Happy sewing,

Emily


RESOURCES MENTIONED IN THIS ISSUE

  • The Flynn jacket pattern can be found here.

  • The Hove jacket pattern can be found here.

  • The Darlow pants pattern can be found here.

  • More information about our Curated by ITF sewing subscription can be found here.

  • Shortening the Flynn jacket - tutorial can be found here.

  • Checking and truing - tutorial can be found here.


For more issues of the Q & A series, you can check out the archive here.


WHAT YOU’VE BEEN MAKING


MORE POSTS IN THE SERIES

ISSUE 113 - SEWING BIAS BOUND SEAMS

THE Q & A SERIES

how to sew bias bound seams

Hi Emily,

I have a Hove question. Which I guess is also a Flynn question…

For the bindings- what is the basis between deciding between Hong Kong binding, and the other method . Do they look different in the finished garment, or is the decision based on fabric type ? Or have I not read the pattern closely enough yet and it will stipulate which way.

I have never done either method so either way will be fun!

Thanks,

Sue


Hi Sue,

I’m excited that you’re about to give the Hove jacket a go! It’s definitely been the most popular pattern for our ‘Make it With Us’ Curated by ITF project this month.

The instructions tell you which one to use, but I'm happy to give you the logic behind the decisions. It might be helpful when choosing between binding options in the future, or if you’re using binding on a pattern that doesn’t include binding instructions.

Bias bound seams

Bias bound seams are cleanly finished on both sides. This means both edges of the binding are enclosed inside the bind. These finishes are great when you can afford to have that little bit of extra bulk, when you're pressing seams open or when it's likely you will see both sides of the bind. For the Hove and Flynn jackets, the shoulder seams and side seams are finished like this.

To sew a bias bound seam:

A Take a length of bias binding and place along the edge you will be finishing (right sides together) - lining up the raw edges. Pin in place. Stitch binding in place with a 6mm (¼in) seam allowance (this will be just inside of the first crease line on the binding).

B Turn bias binding to the right side and press seam allowance towards binding.

C Fold the other side of the binding along the crease and press.

D Wrap binding around the seam allowance and press. The folded edge of the binding (on the back of the seam) should overlap the first stitching line by 1-2mm. The seam allowance should fill the binding - but can be trimmed if required. If the seam allowance doesn't fill the binding, stick to the original fold of the binding. Pin binding from the right side - being sure to check that you are catching the folded edge of the binding on the back.

E Carefully stitch binding by stitching in the ditch.

F If you would prefer, you can stitch just to the side of the ditch (on the binding) as illustrated (this is a little easier to do if you are a beginner).

Hong Kong bind

Hong Kong binding leaves one side of the binding flat (not folded back). It won't fray as the fabric has been cut on the bias, but it does mean there is a raw edge on the back side of the finish.

Hong Kong binds are normally used for thick fabrics (think heavy wool coating etc.), when seams need to be pressed together or when the back side of the bind won't be seen.

For the Flynn and Hove jackets, the edge of the facing is sewn with a Hong Kong bind as it will minimise bulk. This is then attached by stitching in the ditch so the back side of the bind is enclosed inside the facing.

To sew a Hong Kong bind:

A Take a length of bias binding and place along the edge you will be finishing (right sides together) - lining up the raw edges. Pin in place. Stitch binding in place with a 6mm (¼in) seam allowance (this will be just inside of the first crease line on the binding).

B Turn bias binding to the right side and press seam allowance towards binding. Press the rest of the binding flat.

C Wrap binding around the seam allowance and press - keeping the remainder of the binding flat on the back side of the seam (rather than folded like it was in the previous method). Pin binding from the right side - being sure to check that you are catching the binding at the back at the same time.

D Carefully stitch binding by stitching in the ditch.

E If you would prefer, you can stitch just to the side of the ditch (on the binding) as illustrated (this is a little easier to do if you are a beginner).

Both are very satisfying to sew, and the Hove jacket (or the Flynn jacket) is the perfect opportunity to give these techniques a go!

Happy binding,

Emily


RESOURCES MENTIONED IN THIS ISSUE

  • Hove jacket pattern can be found here.

  • Flynn jacket pattern can be found here.

  • Learn more about our Curated By ITF subscription here.


For more issues of the Q & A series, you can check out the archive here.


WHAT YOU’VE BEEN MAKING


MORE POSTS IN THE SERIES

ISSUE 112 - How to add a drawstring channel to the Hove Jacket

THE Q & A SERIES

how to add a drawstring channel to the hove jacket

Hello,

I just discovered your patterns. The Hove jacket looks to be what I am looking for. I do have a question about the hood. Is there any mechanism to make sure it stays on in the wind and rain? (Possibly wet snow?)

Would appreciate having your thoughts. And if nothing is currently in place for that, could it be hacked to add a tie in the facing/lining of the hood?

When closed, where does the zipper stop line up at the neckline? Pictures make it look rather low. I would perhaps want to extend to zip up to the neck, again for inclement weather.

Looking forward to hearing from you. Now must investigate waterproof fabric and whether they have drape suitable for the pleats.

Thanks,

Sharon

Ontario, Canada


Hi Sharon,

I am thrilled you have recently discovered our patterns and are interested in making the Hove jacket.

These are fantastic questions, and I think with a few minor alterations, you could make a fantastic winter jacket with this pattern.

Firstly, I'd suggest you sew it with a longer zip. As it is, the zip comes to the neck, but I'd imagine you would want it to come up to your chin, or higher. The hood piece for the opening is a gradual curve, so you could definitely just use a longer zip. I just tried on my Hove and measured that with another 15cm the zip would reach my chin. This would mean using a 70cm (28") zip. See the photos below with a pin at the point I suggest. You could also go higher if you wanted. I held it closed up to this point and it still sat nicely.

There isn't a mechanism for keeping the hood in place, but as the hood is already fully lined, I think it would be very easy to sew a channel with buttonholes or rivets so that you could thread a cord through. See marked-up photo below.

How did you go on your fabric search? If you realise you will need to remove the pleats due to the fabric, we have a post about how to do that here.

Happy sewing,

Emily


RESOURCES MENTIONED IN THIS ISSUE

  • Hove Jacket can be found here.

  • Instructions for How to remove pleats from a pattern can be found here.


For more issues of the Q & A series, you can check out the archive here.


WHAT YOU’VE BEEN MAKING


MORE POSTS IN THE SERIES

ISSUE 56 - How to draft a straight hemline on the Hove jacket

PINTEREST HEADERS TEMPLATE_LATEST2.jpg
HEADING - V2.jpg

Hi Emily, 

I am interested in adapting the Hove front to be more like the Flynn, ie even around the hem and not so hi-lo.  I can see it would be easy to redraft the hemline but how would this affect pocket length and placement?

Also - how would you line either jacket?


Many thanks,

Krystyna


Hi Krystyna,

This is a great question, and I think this would work really well! 

GETTING STARTED

Hove-Flynn-front-hem-1.jpg

Above you can see the hood pattern piece from the Hove jacket and the front hem facing from the Flynn jacket.

Hove-Flynn-front-hem-2.jpg

A I have checked the pattern pieces from the Hove and Flynn against each other and as you can see, all you would need to do is extend the centre front seam and hemline with straight lines.

To do this, attach some paper to the back of the Hove front piece, filling the gap in the hemline. Take a ruler and extend the centre front seam. Extend the side seam at the hem with a straight line, meeting the new centre front line at a right (90 degree) angle.

The only thing you will need to check is the zip length. You could have a zip that goes all the way to the bottom (I think a double ended zip could work really well), but just need to check what zip lengths are available in relation to the length of the seam.

Alter the pocket

Hove-Flynn-front-hem-3.jpg

As for the pocket, I would just be straightening it out along the bottom, so that it runs parallel to the hemline. You no longer need the shaping, and it will be fine to have it not go all the way to the hemline (in the Flynn jacket it's like this). If you were to extend it to the hem, like it is in the Hove, you'd end up with very deep pockets, so I'd suggest keeping it the same size that it is.

As for lining the jacket, I have this tutorial on my website with a few suggestions that you can find here.

Happy sewing,

Emily


resources mentioned in this issue

  • The Hove jacket pattern can be found here.

  • The Flynn jacket pattern can be found here.

  • How to line a jacket. Tutorial can be found here.


P.S. Would you like to know what the Q & A series is all about? This page tells you a little bit more about the motive behind the series. Past issues from the Q & A series can be found here.

Don't have a question, but found this newsletter helpful? I'd love to hear from you! Get in touch and say hi. 


What you’ve been making


More posts in the series

ISSUE 31 - Mix & match the Flynn and Hove jacket patterns

HEADER - ISSUE031.jpg

THE Q & A SERIES - Mix & match the Flynn and Hove jacket patterns

Hi Emily,

After reading 
your tutorial on removing the pleats from the Hove jacket I remembered that it and the Flynn were sibling patterns. Is it possible to mix and match them, for example Hove’s back pleats with Flynn’s collar? The front curved seams look the same on your line drawings but I wasn’t certain if they still were after you refined the designs.

Thank you!

Katina


Canberra, Australia


Hi Katina,

Lovely to hear from you!

Yes, you're right, the Hove jacket pattern and the Flynn jacket pattern are sibling patterns. They originally started out as two variations of the same pattern, but over time as I continued to work on the patterns, I realised they were moving further and further apart in terms of design, and it was going to become a mammoth of a pattern that would probably intimidate makers - rather than inspire!

They can be mixed and matched as you suggested, and I'd love to see a Flynn jacket with the Hove pleats. It sounds dreamy!

Mix and match Flynn Hove-1.jpg

As you can see in the illustration above, the curve on the two patterns is the same until you get to the shoulder point (circled in the illustration). The curve then changes course in shape, but is the same length, so still fits with each of the back pieces from the patterns.

Mix and match Flynn Hove-2.jpg

If you do choose to swap out the hood on the Hove jacket for the collar from the Flynn jacket, just be sure to transfer the notches from one piece to the other as they are different between styles to accommodate the difference in pockets. You can do this by laying one piece on top of the other and transferring with a tracing wheel, snipping in with scissors or tracing with a pen / pencil. It's also a good idea to put a small cross next to the notches you won't be using to save any confusion (or covering them up with masking tape). These new notches then need to be transferred to the FRONT piece too (or you can just print the FRONT from the pattern style you are using).

I'd love to see your version if you do go ahead and mix and match these patterns Katina!

Happy sewing,

Emily


resources mentioned in this issue

  • How to remove pleats from a pattern. Tutorial can be found here.

  • The Hove jacket pattern can be found here.

  • The Flynn jacket pattern can be found here.


P.S. Would you like to know what the Q & A series is all about? This page tells you a little bit more about the motive behind the series. Past issues from the Q & A series can be found here.

Don't have a question, but found this newsletter helpful? I'd love to hear from you! Get in touch and say hi. 


What you’ve been making


More posts in the series

ISSUE 30 - How to remove pleats from a pattern

HEADER - REMOVE PLEATS.jpg

THE Q & A SERIES - How to remove pleats from a pattern

Hi there!

I was hoping that you might be able to send me the details on how to remove the pleats from the back of the Hove Jacket?

Thank you kindly!

Amy


Hi Amy,

I’m excited you’re going to be adapting the Hove jacket to better suit your preferences! 

For those of you who aren't looking to remove the pleats from the Hove jacket, you can also use this technique on most patterns with pleats. 

PREPARE THE PATTERN

Hove jacket - remove pleats - 1.jpg

Step 1
Take BACK [2] and BACK HEM FACING [7] pieces from the pattern. If you think you’d like to go back to the original design in the future, I’d suggest tracing a copy to make the alterations on (although you can always re-print from the PDF later down the track - so that’s an option too).

Hove jacket - remove pleats - 2.jpg

Step 2
Place the BACK HEM FACING [7] piece on top of the BACK [2] piece, lining up the centre back lines (the fold line).

Place stitch line on stitch line (the grey line marked on the pattern), as if the pattern pieces have been sewn together. You will notice that you can’t match the seam line all the way along the piece - this is because there is some shaping in the seam - don’t worry about the end section (towards the side seam) where it doesn’t match - as long as the centre back lines match (as this is where the alteration will be made).

Tape pieces in place (with something that can be removed as you will want to separate pieces again in a moment).

EXTEND THE PLEATS

Hove jacket - remove pleats - 3.jpg

Step 3
Take a ruler and draw in the pleat lines by extending the pleat lines on the pattern all the way down to the bottom of the BACK [2] and through to the bottom of the BACK HEM FACING [7] - ensure these lines remain parallel to the centre back (a long clear pattern drafting ruler will really help with this, if you’ve got one).

REMOVE THE PLEATS

Hove jacket - remove pleats - 4.jpg

Step 4
Remove the tape so that you have the two seperate pattern pieces again.

I have shaded the pleats so you can see the parts of the pattern that make up the pleats and what we will be removing.

Hove jacket - remove pleats - 5.jpg

Step 5
a. On the BACK [2] piece, carefully cut along the pleat line closest to the centre back, detaching this section from the rest of the pattern piece.

b. Slide the section you removed across so that it lines up with the other side of the pleat and removes the pleat value. Line up the top and bottom of the piece and then glue / tape in place.

c. You will notice that there is some excess on the right side of the centre back seam (this is because the pleat value is greater than the section of the pattern to the right of it. Trim off the excess pleat value.

Hove jacket - remove pleats - 6.jpg

Step 6
a. Repeat Step 5 for the centre pleat (the next pleat along).

b. Repeat Step 5 for the final pleat.

Trim excess paper from the neckline.

Hove jacket - remove pleats - 7.jpg

Step 7
a. On the BACK HEM FACING [7] piece, carefully cut along the pleat line closest to the centre back, detaching this section from the rest of the pattern piece.

b. Slide the section you removed across so that it lines up with the other side of the pleat and removes the pleat value. Line up the top and bottom of the piece and then glue / tape in place.

c. You will notice that there is some excess on the right side of the centre back seam (this is because the pleat value is greater than the section of the pattern to the right of it. Trim off the excess pleat value.

d. Repeat process for the centre pleat (the next pleat along).

e. Repeat process for the final pleat.

FINALISE THE PATTERN

Hove jacket - remove pleats - 8.jpg

Step 8
Smooth out curves on the cutting line with a curved ruler before trimming off any excess. You can use the pieces as they are, or trace if you would like a fresh copy.

TIP: It’s always a good idea to keep note of the alterations you have made to a pattern, so that you can refer to this information later down the track. You can write this directly on the pattern itself, or download this pattern specification template.

Happy sewing,

Emily


resources mentioned in this issue

  • The Hove jacket pattern can be found here.

  • Pattern specification template can be downloaded here.


P.S. Would you like to know what the Q & A series is all about? This page tells you a little bit more about the motive behind the series. Past issues from the Q & A series can be found here.

Don't have a question, but found this newsletter helpful? I'd love to hear from you! Get in touch and say hi. 


What you’ve been making


More posts in the series