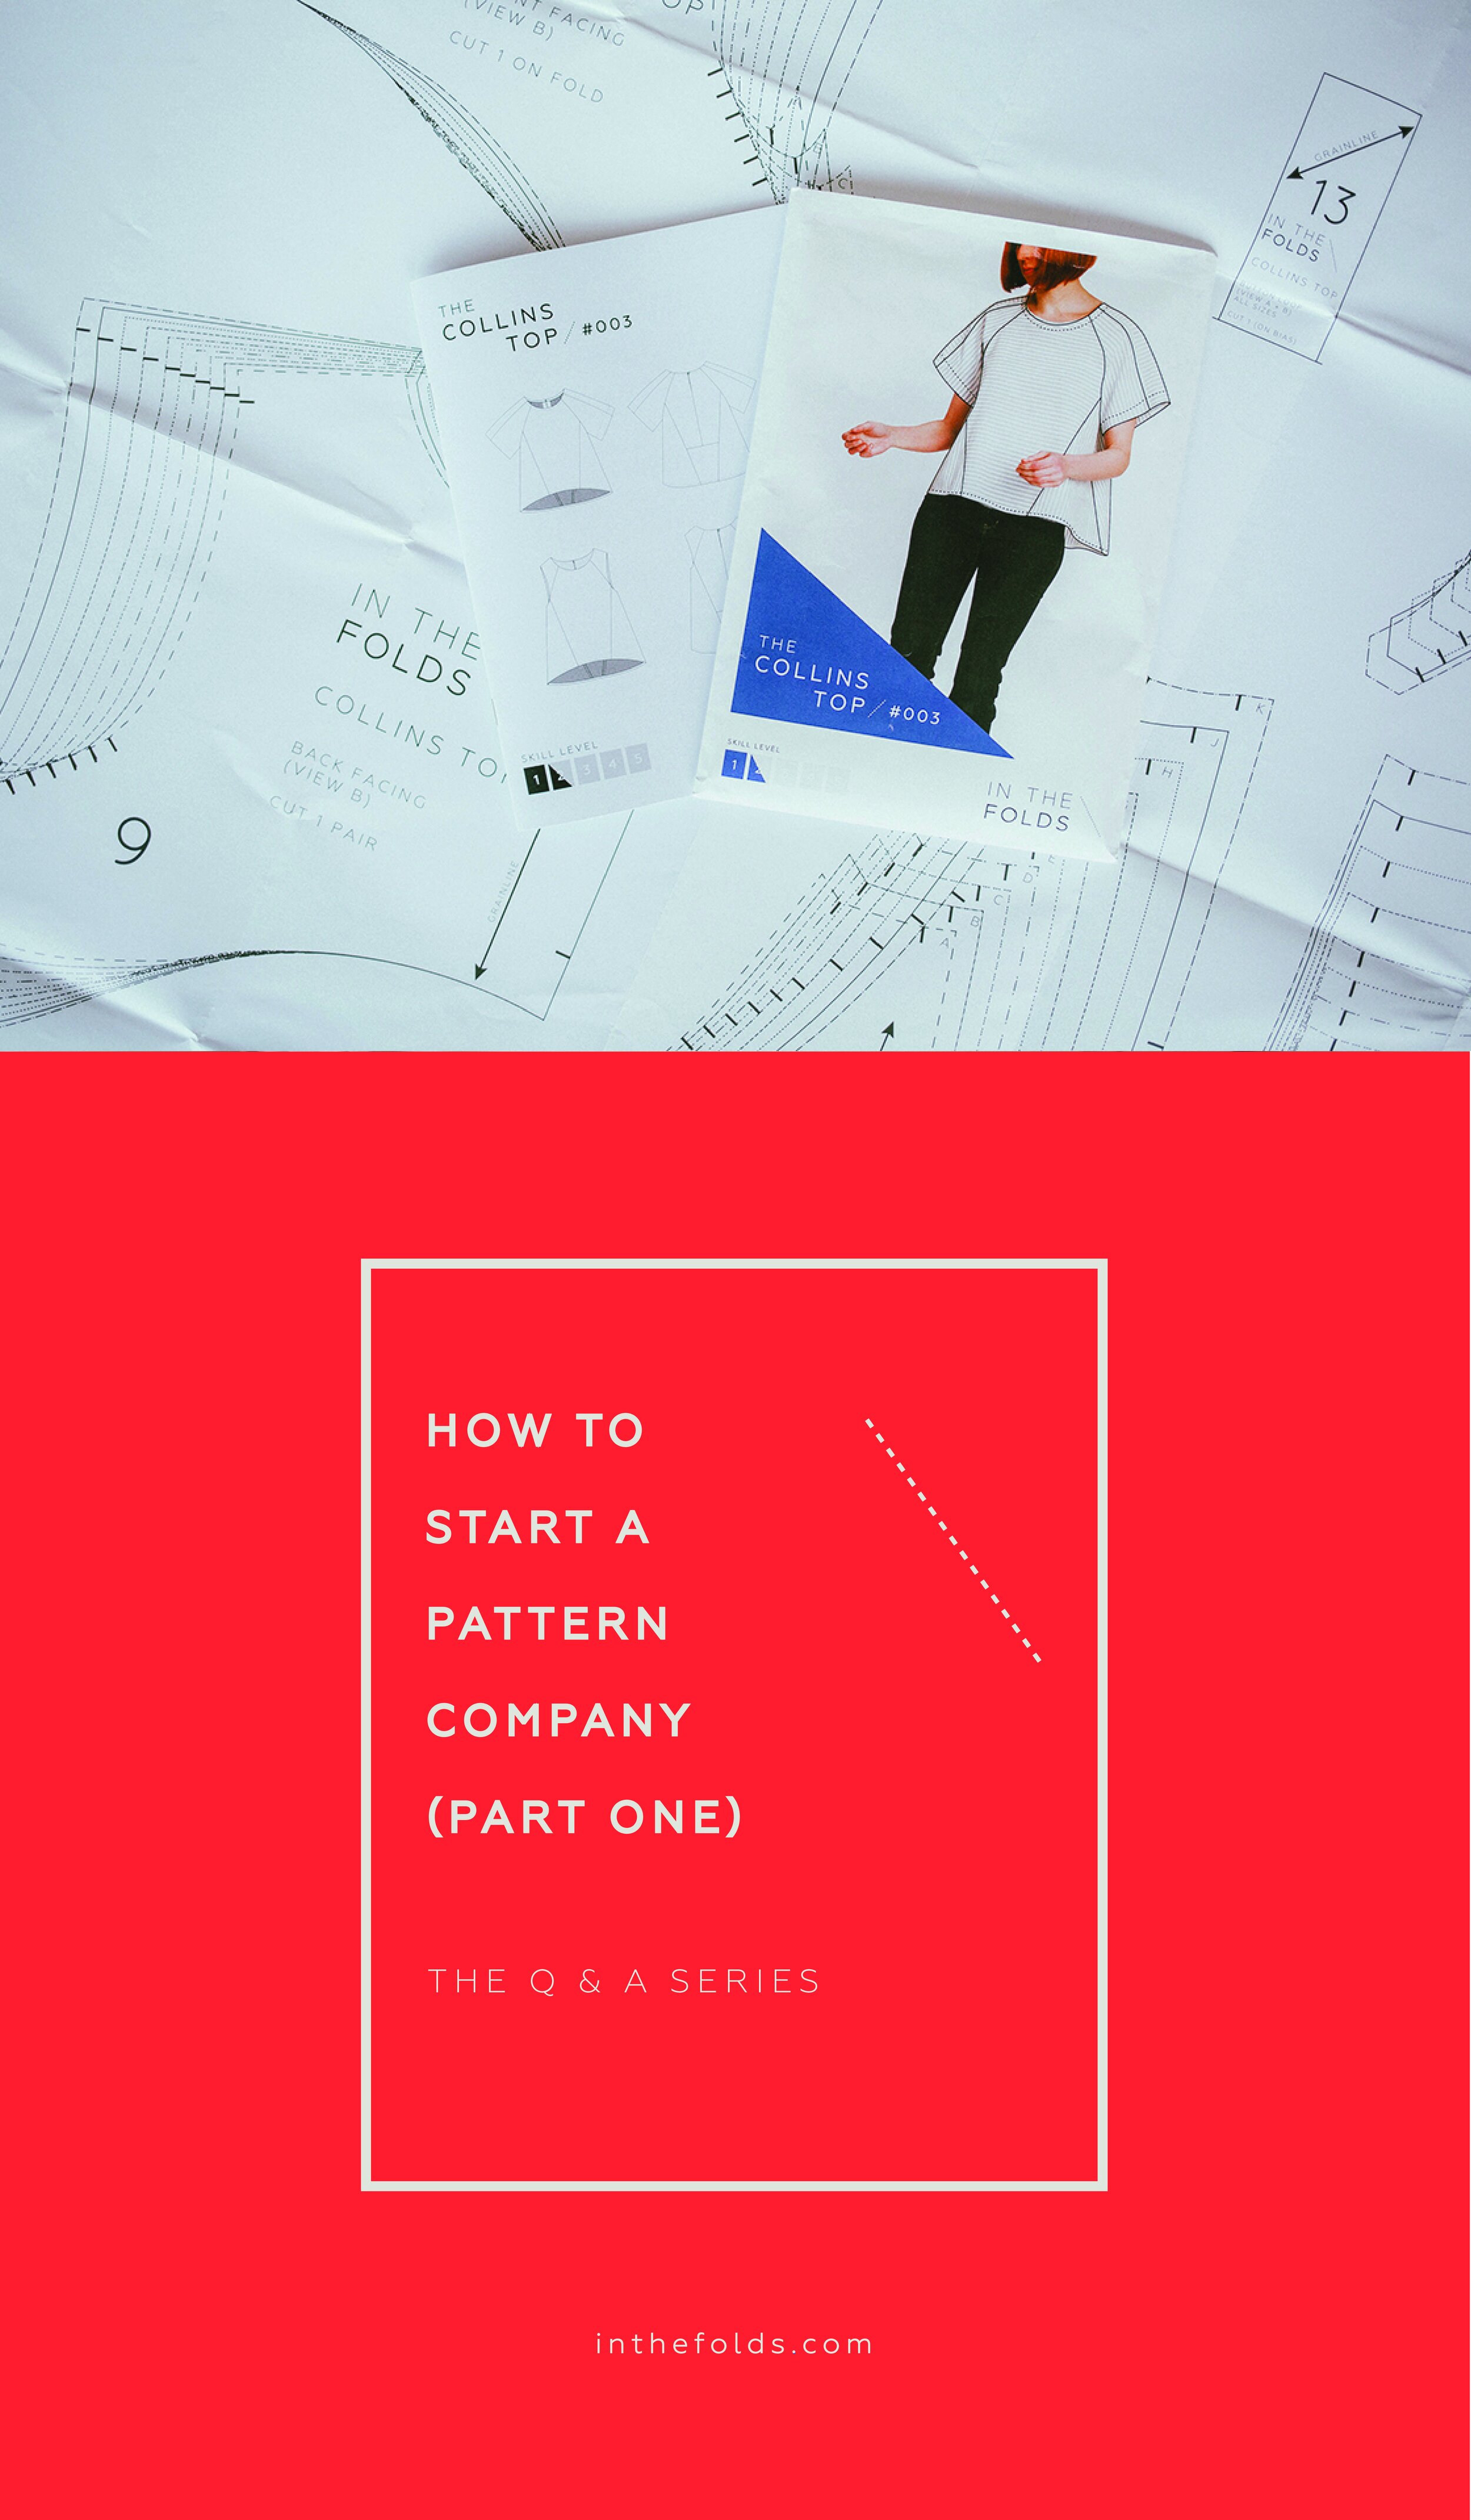
Q&A - small business

ISSUE 100 - Celebrating 100 issues of the Q&A series!

THE Q & A SERIES

Celebrating 100 issues of the Q&A series!

Today marks a very exciting ITF milestone. 100 issues of the Q&A series!

We have covered a lot of ground with this series (and will continue to do so, of course) over the last 100 issues. We have covered sewing, fitting, patternmaking and small business and a lot of things in between! We have answered the little questions and the very big questions! We have received countless emails of gratitude (thank you to all of you who have taken the time to write) and feel incredibly grateful to have a community so excited to learn from us and hear from us every Sunday evening. At a time when our inboxes are flooded with information, we know what a privilege it is that you choose to open our emails and read what we have to share with you!

Rather than answering a question this week, we wanted to take a moment to celebrate by asking you a question. Can you help us spread the word about what we do? Use the below graphics on Instagram to let people know what you love so much about the Q&A series or what you have learned from us. 

And for those of you who would like to say thank you for the content we share, do you know you can sign-up as a supporter? For $7 a month you gain access to our Curated by ITF online community and contribute to the work we do! Or you can say thanks with a one-off donation

Feel like visiting the archive of our last 100 posts? You can do so here.

Looking forward to the next hundred!

Happy sewing,

Emily


For more issues of the Q & A series, you can check out the archive here.


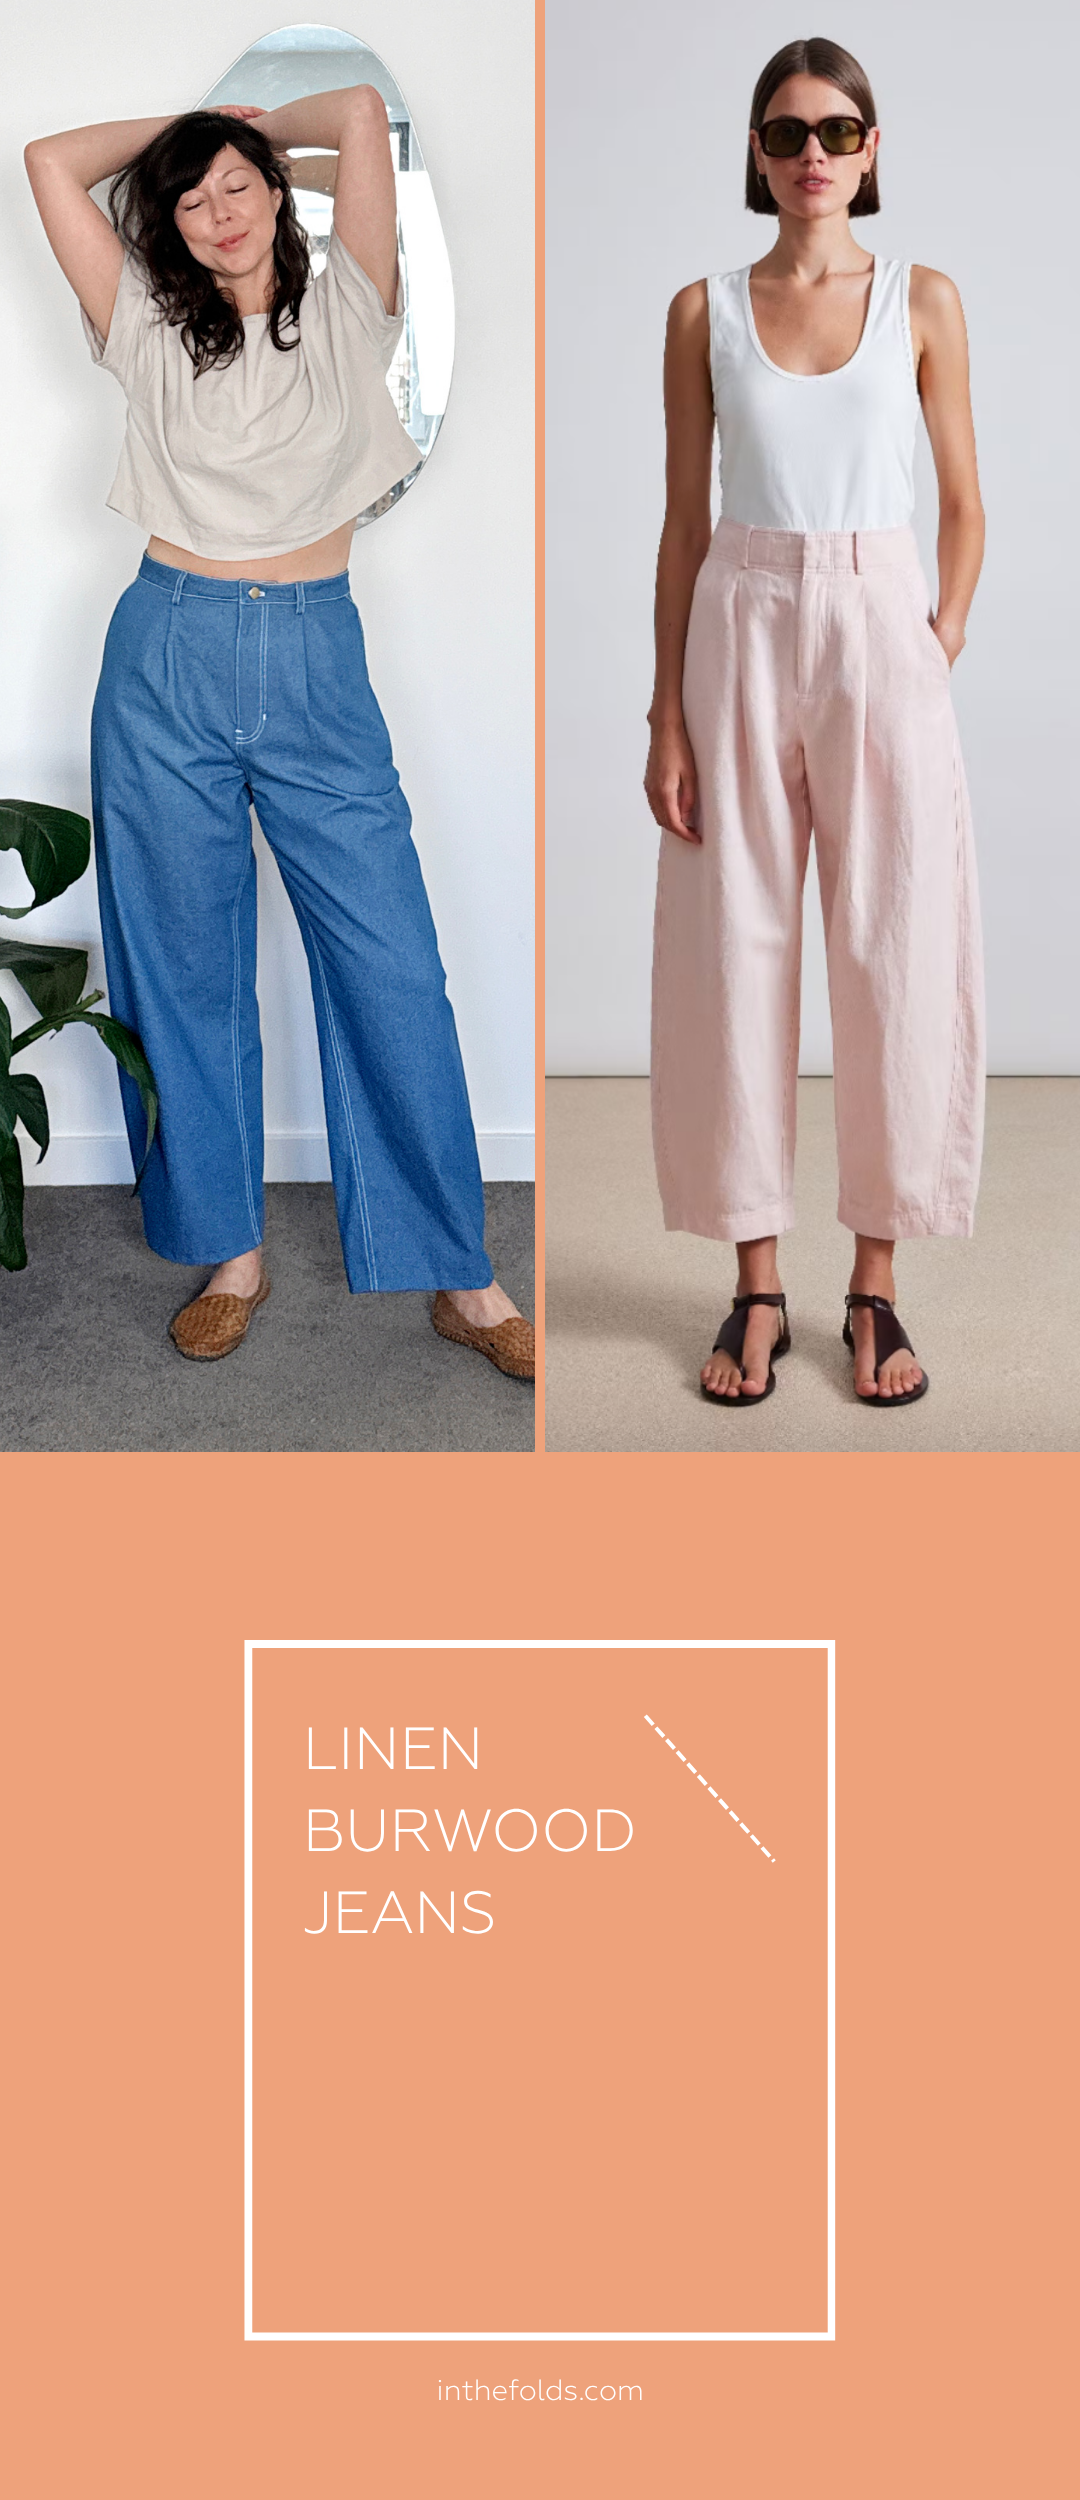
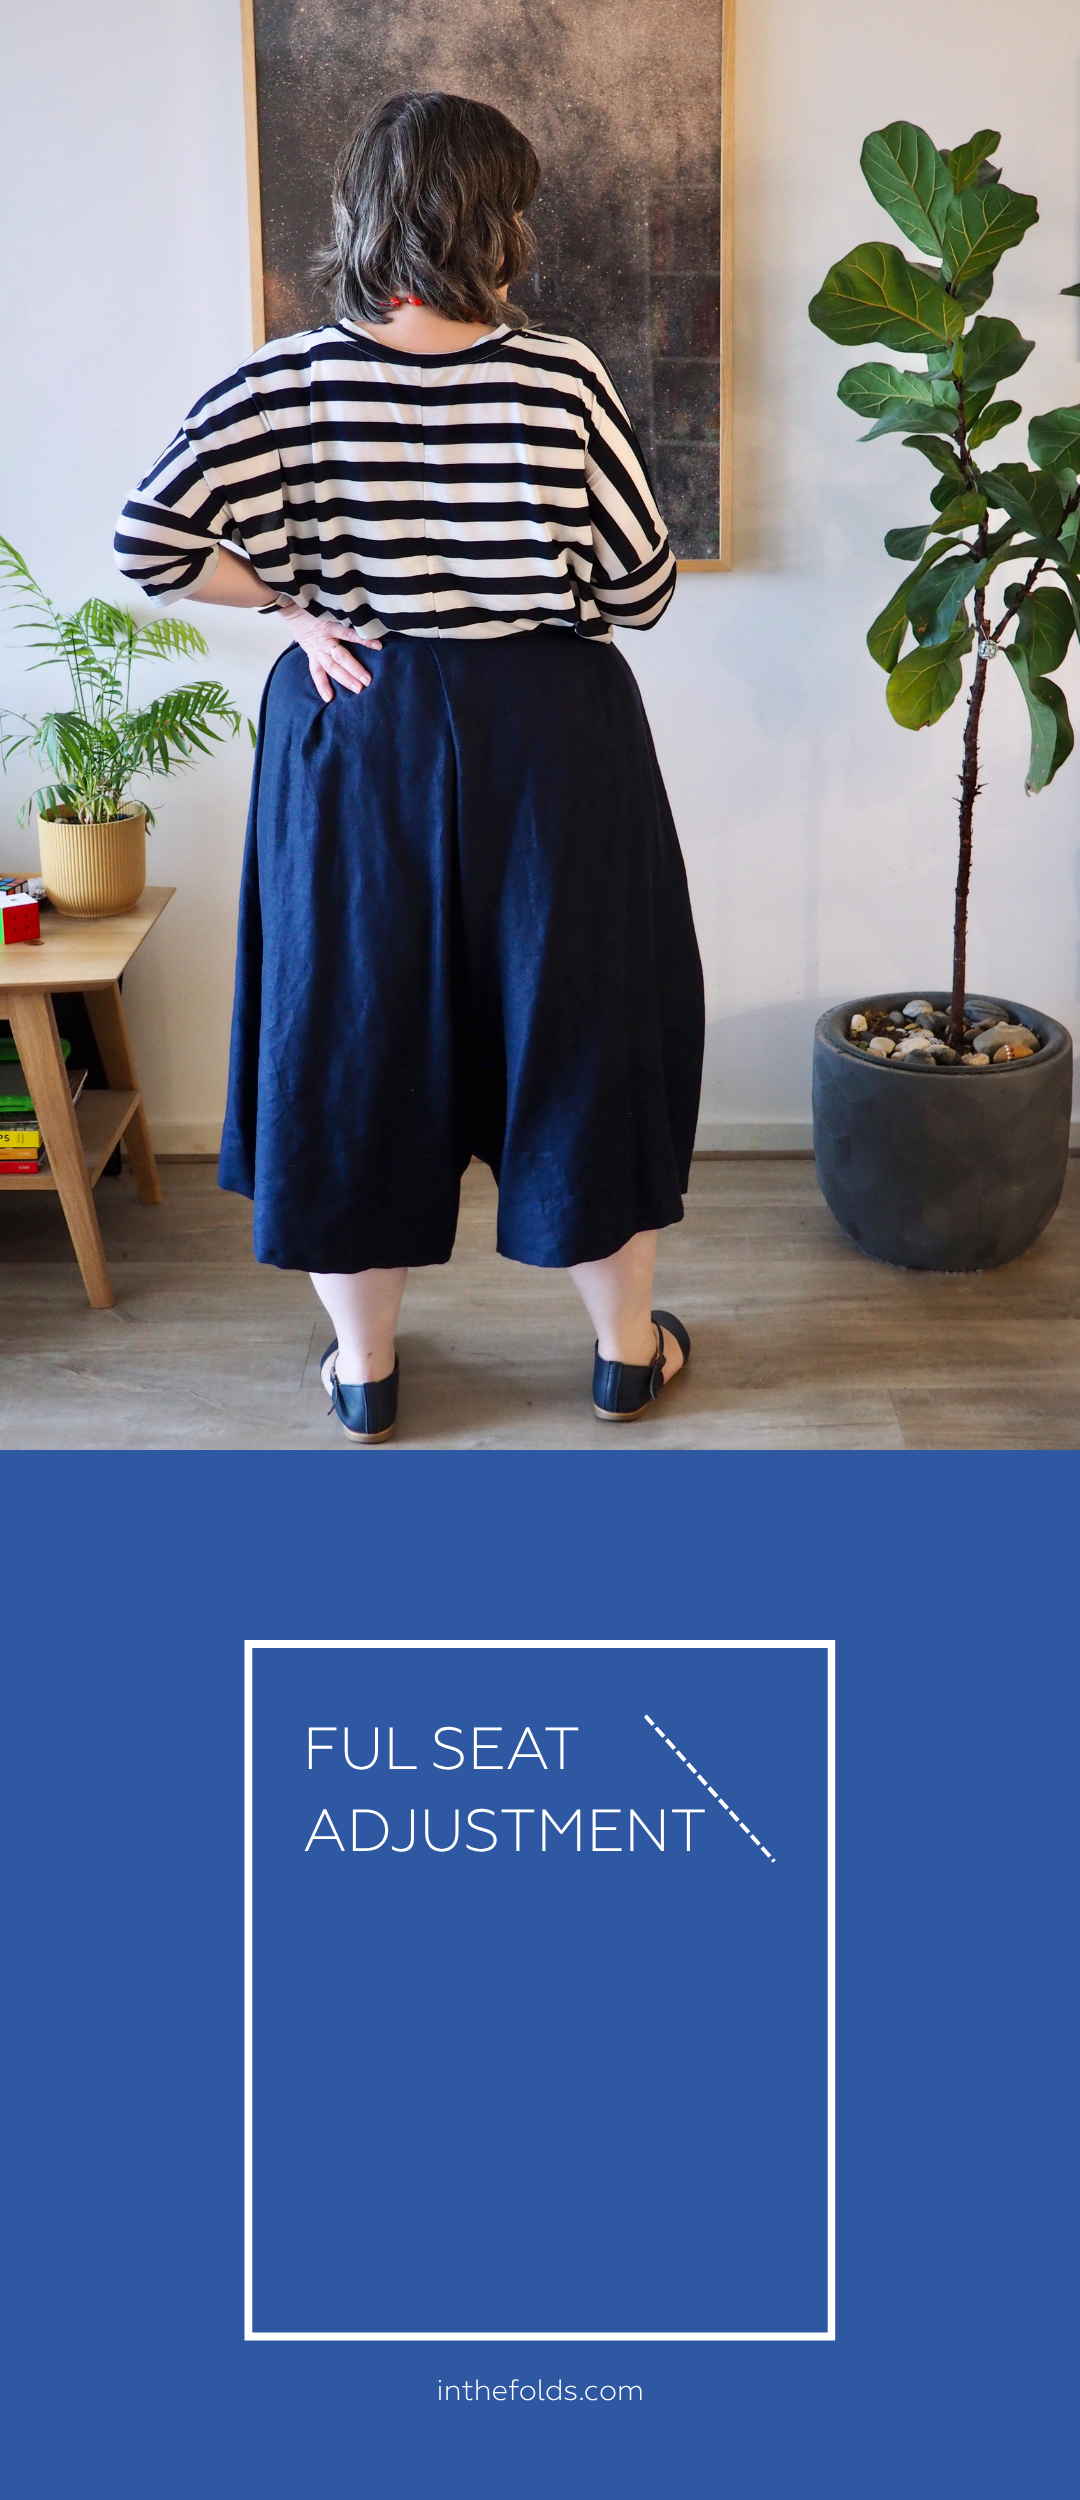
SHARE THE LOVE ON INSTAGRAM AND TAG @INTHEFOLDS

Use this graphic for sharing in your grid and tag us @inthefolds

Use this graphic for sharing in your stories and tag us @inthefolds


MORE POSTS IN THE SERIES

ISSUE 68 - New things for In the Folds - Part 2

We received a lot of lovely emails in response to our last email about our new offering (that will be coming soon) and a couple of questions. I thought I'd put those questions and answers together in today's email and then get back to regular content next week.

THE Q & A SERIES

FUTURE OF THE Q&A SERIES EMAILS

Hi!
I don't have a specific question, I just want to tell you that your Ask-A-Question e-mails have been a delight and a joy. Since I started working I don't have so much time for... me!

Just reading your e-mails and looking at your beautiful curated photos with clean lines (and perfectly placed contrasting bias bound insides of the garment) makes me happy :)

Thank you so much and I hope you'll keep this e-mails even with your new business scheme of paid content.


Ana
- Osijek, Croatia


Hi Ana,

Thank you for the lovely email. I am so pleased to hear you are able to get some "me time" by sitting down to read these emails each week.

The Q&A series emails will definitely continue, even with the shift of our business model. It has always been important to me to provide free and accessible content and I have found this email series to be the best way to do that. Writing these emails (and receiving your lovely responses) is, and will continue to be, a highlight of my week.

I know that many of you don't have the time or resources to consider signing up to our new content offering, and that is okay. We will continue to serve you with our weekly email content and you can sit down to enjoy it, whenever you can squeeze it in. We still want you to be here to come along for the ride, in whatever capacity suits you.


THE Q & A SERIES

PATTERNS AS STAND-ALONE PRODUCTS

So excited for you for you plans for the subscription, but can I put in a little plea for those of us that just want to buy the patterns to be able to do so?

I really love your patterns but I'm not really in the market for a regular subscription and am skilled enough to mostly just be able to work things out on an ad hoc basis. I often think the market for intermediate level sewing is a little underserved, everything is focused on beginners. I do understand why, there are a lot more beginners than intermediate sewers, and they need more help, but it's frustrating nonetheless.

I wish you all the best with this, but I hope there will be an option for me to support you in future!


Franca
- Edinburgh, UK


Hi Franca,

Sorry I didn't mention this in the email - I probably should have as I think this will be a common question. Patterns will definitely still be available as stand alone products. New patterns will be released in the subscription, but will then be available for purchase individually at a later date. I haven't got the final details on how it will work just yet, but please know I want as many people as possible to sew my patterns and learn from my resources, so that means having them available inside and outside of the subscription model.

Happy sewing,

Emily


P.S. Don't have a question, but found this newsletter helpful? I'd love to hear from you! Get in touch and say hi.

For more issues of the Q & A series, you can check out the archive here.


More posts in the series

ISSUE 68 - New things for In the Folds

Well this is not really a question, I just love your patterns and wish there were more!

Lola
- Buenos Aires, Argentina


Hi Lola,

Thank you for your lovely message, and although it's not really a question, I thought it would be a good opportunity to let you know what we've been working on behind the scenes here at In the Folds.

You may have noticed that it’s been a (long) while since we released a new pattern. That is because we are changing the structure of our business model. This has been a long time in the works and not something I had planned to do, but over time it just became something that made sense for us.⁠

In October 2019, I started this email newsletter series. I wanted to share my knowledge with others and connect more deeply with the online sewing community. I was tired of communicating with likes and quick comments on Instagram. I wanted to form a deeper connection with those using my patterns. ⁠

I just went back and re-read the first email in the series. It reads (in part):⁠

‘Over the last few years of running In the Folds, I have struggled with the idea of sending an email newsletter. At a time when we are constantly bombarded with information from all different directions, I kept wondering what I could create that would be truly valuable to the community that I serve.⁠

I wanted to create something that you will look forward to receiving, something that will encourage you to sit down with a cup of tea and take it all in, not another piece of content that will interrupt your day, but something that will inspire and encourage you on your handmade journey.⁠

The format I settled on is the Q & A series, an opportunity to share the questions I often receive in my inbox, with all of you. I realised that my answer to one person's question is a chance for us all to learn something new and an opportunity to continue the conversation about the many different parts of the process of making our own clothes.⁠

It is my hope that this series will take us to interesting and unexpected places…’⁠

Once I got started, I was surprised by the influx of questions - from the broad, to the very specific. With the ability to Google anything at our very fingertips, I was surprised to see how much uncertainty there was and how many questions had gone unanswered. I have made it my mission to answer as many questions as possible, freely and openly, but it did plant a seed of an idea. What if we started creating content that really focussed on skill building from the ground up? What if we built the answers into the content we were creating, so you could stop wondering and get sewing. What if we focussed on learning more skills, instead of just making more clothes? ⁠

So that’s what we have been working on... I guess the series did take us to a very unexpected place like I had hoped! ⁠

Once we launch, we will be providing subscribers with content each month that will empower you to become a more confident maker. This will come in the form of a new pattern, a pattern hack kit, a fit kit or new pattern pieces to supplement an existing pattern. We’re not about encouraging you to make a completely new garment each month, but to focus on learning new skills on an ongoing basis. It is about building your skills, confidence and your wardrobe one piece at a time. ⁠

We also hope this move will help our business become healthier. I hope that it gives us a structure to adhere to in terms of pattern releases and roll-out, but also helps us to connect more deeply with the people we are serving. We plan to send out surveys and do polls within the community so the things we are making and the content we are creating, is actually what you need - in the same way I started the Q&A series. It will allow us to be flexible and nimble.

⁠I have spent so much time over the last few years creating content for free - as it has always been important to me that my work is accessible for as many as people as possible - but I have realised that a business cannot survive without a good balance between free and paid content. I need to work on balancing things out and that is what I hope this new offering will allow us to do. To keep producing high end free content, as well as offer an option for those who would like to learn more from us.

You may have read in our last email that we will be starting to work on expanding our size range. Unfortunately the first issues of our subscription will be released in our current size range (up to a 139cm / 55in hip). This is for a couple of reasons:⁠

I started work on this new offering over a year ago (I am a snail when it comes to producing new things) and at that time I didn’t yet have plans to expand the size range. ⁠

Although I am really excited to expand our size range and have a clear goal in mind of what size expansion means to In the Folds, we need the income from the subscription to invest in expanding our size range. I want to put the same thought, love and care into the new size range that I put into the original size range. To make this happen I will be investing in working with experts, a new patternmaker and potentially investing in upskilling - depending on the route we decide to go to create the new patterns. ⁠

I apologise if this is disappointing to hear. I know it will exclude some of you. Please just know that it is front and centre of our minds as we move forward.

We are so excited to show you what we have been working on and we hope that you'll come along with us on this new chapter!

Happy sewing,

Emily


P.S. Don't have a question, but found this newsletter helpful? I'd love to hear from you! Get in touch and say hi.

For more issues of the Q & A series, you can check out the archive here.


More posts in the series

ISSUE 67 - Extending the In the Folds size offering

Hi Emily!

I’m just so excited to have found you! I love your designs and the simplicity with fantastic, rich details your patterns offer. I didn’t know there was a movement in the direction of our clothing being cared for and intended to be worn for years. I just love that and support it 100%.

Now, to the ask...I want to ask you to please, please consider expanding your size offerings. I am outside of your largest size, but feel like I am close enough to it that I can extrapolate a couple sizes out for myself. All the seam lines will make it easier! I am about a size 5x/32-34 in the US and I don’t like to feel excluded from having the very designs/looks I search the Internet for. Maybe we are a bit chubbier over here in the US? We want to be awesome in your patterns, too! I belong to many curvy sewing groups and know you have a whole lot of large ladies that would love to purchase your patterns.

Maybe to help convince you, I’ll send a picture of my make of your awesome design adorning my beautiful outsized body!

Sincerely,
Phyllis


Hi Phyllis,

Thank you for your lovely email. I am pleased you found my website too and that the mission behind the brand resonates with your values.

Let me start out by aplogising. I am sorry that my current size offering excludes you from being able to use my patterns. This is not okay and is definitely something I am actively rectifying behind the scenes.

I would love to see a photo of you in one of my patterns, but it's definitely not required to convince me to expand my size chart. I already know it's the right thing for In the Folds to do and something that I am excited about working on. I hope to encourage as many makers as possible to make clothes they will wear, love and cherish, and to do that means we need to add to our size offerings. I am sorry that for the time being this means you having to go to the trouble of grading up one of my patterns yourself to make it work. This is a lot of work that you shouldn't have to do yourself.

I don't have a set timeline in place just yet, or the specifics of the new size chart, but I will announce this info in my newsletter as soon as I have a better idea of the plan.

In the meantime, while I get my act together, I'd strongly suggest checking out Muna and Broad patterns, if you haven't already. They have a gorgeous aesthetic and make patterns from a 41.5" - 71.5" hip (105cm - 182cm).

Thanks again for reaching out and letting me know what you'd like to see from In the Folds. I feel very lucky to be a part of this incredible community.

I can't wait for you (and many others) to be able to enjoy my patterns.

Happy sewing,

Emily


resources mentioned in this issue

  • Muna and Broad patterns can be found here.


P.S. Don't have a question, but found this newsletter helpful? I'd love to hear from you! Get in touch and say hi.

For more issues of the Q & A series, you can check out the archive here.


What you’ve been making


More posts in the series

ISSUE 53 - Starting a pattern company (Part three)

PINTEREST HEADERS TEMPLATE_LATEST2.jpg
HEADING - V1 copy.jpg

Hello! 

I’ve really been loving your Q&A series. I am getting ready to start my own pattern company. I would love to know the steps in the process to getting a successful pattern ready for the market. Also I am not a pattern maker and do want to make my own patterns. How do I go about finding someone to help me make sewing patterns? 

Thank you,
May

Fairfax, United States

~

How do you make your gorgeous patterns?

Kate

Camden, UK


Hi May and Kate,

This week is part three of our little mini series of Q&A posts about the process of making an In the Folds pattern from beginning to end. If you missed part one, or two you can find them here and here.

By this stage, we’ve got everything we need to create a digital sewing pattern, so it’s time to pull all the assets together to create the pattern and the instruction booklet.

CREATING THE PATTERN

When the pattern comes back from my grader / illustrator, I format it into A4 / US letter size and A0 and add any notes etc. to the pattern. This always takes a while as I like to try to use as few pages as possible, so it’s the ultimate game of Tetris!

How-to-start-a-pattern-company-3-2.jpg

Next up is to start creating the instruction booklet in Adobe Indesign. I have a template I use and just work my way through it - updating it with the new pattern assets. I had a graphic designer design this for me a few years ago and I am very thankful for that, each time I use the template.

Laying out the instruction booklet can be a little overwhelming at the beginning (as my pattern booklets are normally 30+ pages), but I just break it down into chunks and work my way through page by page. To write the instructions themselves, I refer back to the instruction booklet that I sent to the illustrator and insert the illustrations. 

I normally get the instructions to about 90% complete and then print a copy to go through with a highlighter and red pen. There is only so long that I can look at a document on a screen before I need to print it and I enjoy this part of the process. I always feel like I’m nearing the end when I have a paper version in my hands!

After having a read through, I go back to the documents and update all the things I found and save all the documents as PDFs so that the pattern is ready for pattern testing.

PATTERN TESTING

How-to-start-a-pattern-company-3-3.jpg

Pattern testing time is exciting and a little bit scary. After putting so much work into something, I am always nervous to hear what people think of it, but also relieved to start the process of getting it out into the world. I won’t go into detail about my pattern making process as I have written a post about it in the past, so if this is something that interests you, you can find the post here.

MAKE UPDATES TO THE PATTERN

Once I have received all the pattern testing feedback, it’s time to make updates to the pattern. 

Although I go through the pattern with a fine tooth comb before testing, the pattern testers always have some great suggestions of things I can do to improve the pattern. Most of the time the updates are to the instructions, rather than the pattern pieces themselves. I always find it handy to bring a second monitor to my studio when I’m working on these updates, so that I can have the feedback open on one screen and the pattern open on the other and can just work through the document, one point at a time.

PROOFREADING

Once all the updates have been made to the pattern, I send the pattern and instruction booklets to an editor for proofreading.

PATTERN SHOOT

How-to-start-a-pattern-company-3-4.jpg

Towards the end of this process, I start thinking about shooting the pattern. I need to think about the model I am going to work with and what fabrics I am going to use for the samples. 

Preparing for a shoot involves meeting with the model to take measurements, making samples in their size and then doing a fitting. I then make the final samples for the shoot.

At this point I need to think about shoot location, make-up and hair inspiration and what shoes and accessories the model will wear.

When shooting, we’re always careful to get some nice editorial photos, but to mainly concentrate on getting clear photos of the garment. My photographer and I are quite methodical - front, back, side, detail shots etc. so that I know we will have exactly what we need for the product listing.

PRODUCT LISTING

I have my website built on Shopify, so once I have the photos back from the photographer, I work on creating the product listing. Just like the instructions, I have a template I use for each pattern, so that things remain consistent. I work through the template, updating all details for the new pattern.

I package the pattern into a zip file so that I can attach it to the product listing. In the file I have:

  • A0 pattern

  • A4 / US letter size pattern

  • Instruction booklet

  • Read me file (an overview of the pattern with print details etc.)

PREPARING FOR THE SEW-ALONG

How-to-start-a-pattern-company-3-6.png

If there is going to be a sew-along for the pattern, I start thinking about what tutorials will be helpful for makers as they approach this pattern and start drafting all the posts, so that they are ready when the pattern goes live.

PREPARING FOR LAUNCH DAY

To prepare for a pattern launch, I work on Instagram posts, create a new banner for the website, and schedule an email campaign with details of the new pattern. I contact any companies that wholesale In the Folds digital patterns so that they can also get the pattern onto their website for launch day. Again, I have a template I work through that helps with this process and is easy to replicate each time.

LAUNCH DAY

When launch day finally comes around, I am always ready for a long nap! I plan to do as little as possible on launch day, as all the excitement and adrenaline normally renders me brain fried. I have all my content scheduled so I can just go through the motions and be available to answer any questions as they come in.

MORE RESOURCES

If you are considering starting a pattern company, I’d suggest learning as much as you can by listening and reading about other indie pattern designers. There are a couple of interviews you can look at on The Fold Line that might be of interest:

You can also find a number of interviews with pattern designers on the Love to Sew podcast that are well worth a listen. Like anything, it’s good to do your research and get a feel for the market, but then there is a point that you just need to get started and learn what you need to as you go. 

I hope you have enjoyed this three part series about what goes into drafting and releasing an In the Folds pattern!

Happy sewing,

Emily


resources mentioned in this issue

  • Starting a pattern company Part one and two can be found here and here.

  • How to pattern test. Article can be found here.

  • In the Folds sew-a-longs can be found here.

  • Running an indie pattern company interview can be found here.

  • Love to sew podcast - pattern designer interviews can be found here.


P.S. Would you like to know what the Q & A series is all about? This page tells you a little bit more about the motive behind the series. Past issues from the Q & A series can be found here.

Don't have a question, but found this newsletter helpful? I'd love to hear from you! Get in touch and say hi. 


What you’ve been making


More posts in the series

ISSUE 52 - Starting a pattern company (Part two)

PINTEREST HEADERS TEMPLATE_LATEST2.jpg
HEADING - V1.jpg

Hello! 

I’ve really been loving your Q&A series. I am getting ready to start my own pattern company. I would love to know the steps in the process to getting a successful pattern ready for the market. Also I am not a pattern maker and do want to make my own patterns. How do I go about finding someone to help me make sewing patterns? 

Thank you,

May

Fairfax, United States

~

How do you make your gorgeous patterns?

Kate

Camden, UK


Hi May and Kate,

This week is part two of our little mini series of Q&A posts about the process of making an In the Folds pattern from beginning to end. If you missed part one, you can find it here.

Last week we finished up by talking about preparing the pattern for digitisation, so we will pick up right where we left off.

DIGITISING THE PATTERN

I always feel very excited at this point. I love knowing that the pattern itself is almost complete (I say ‘almost’ as there are always things changing up until the very end) and that it’s time to start digitising the pattern. I start by tracing the pattern onto large format paper and then taking it to my local copy shop for scanning. 

When tracing the pattern onto paper:

  • Trace stitch line (and cutting line if you like)

  • Transfer all notches, drill holes, pattern markings etc.

  • Mark the grainline on each piece

  • Label each pattern piece

  • Write any notes or things to keep in mind directly on the pattern

When I first started my business, I didn’t know I could find a large format scanner at my local copy shop, so I somehow managed to do this by scanning the pattern in piece by piece on my home scanner and then assembling in Photoshop. As you can imagine this was quite a boring and laborious task! There are ways to do this, so that is an option if you don’t have a copyshop nearby, but it is worth ringing around to see if you can find somewhere that does it. The place I go to is very cheap (just a few dollars per page), so it’s definitely worth it.

Once I have the scanned version of the pattern (in PDF format), I import it into Adobe Illustrator. I trace the pattern using the pen tool. When tracing onto paper, I trace the stitch line only, so this is what I trace when I import it into Illustrator. I then use the ‘offset path’ tool to add seam allowance. I add the grainline, notches and pattern markings. I then check and true the seams to check they are all correct, and make any necessary changes.

There are a lot of tools in Illustrator that make life much easier when drafting patterns, that I’ve managed to learn over the years. My mentality is to just learn as I go and aim to continue learning with each new pattern. If you have never used Adobe Illustrator, I’d say that’s something you should work on as it is a big part of the process.

GETTING PROFICIENT ON ADOBE ILLUSTRATOR

How-to-start-a-pattern-company-2-3.jpg

I was lucky enough to study fashion design at university, so I finished my bachelor with skills in Adobe Illustrator, Photoshop and InDesign. These skills have formed the basis of my business and over the last 5 years I have been adding to them as I go. 

If you’d like to start a pattern company, I’d say that this is probably the most important skill you can learn. The Adobe Creative Suite is fantastic and includes everything you need to create a digital sewing pattern, but it’s quite a learning curve if you have not used it before. Consider doing a short course or looking at tutorials online to get the hang of it. I’d suggest starting with Illustrator as it’s the one you will be needing the most, but also gives you a foundation that will help you understand the other software in the suite. 

A friend of mine recently told me about these great tutorials by Pattern Lab that show you how to draft digital sewing patterns using Illustrator. I had a quick look on their website and can’t believe how many great (and free) tutorials they have! These would have been really handy when I was learning - rather than the hours of strange Google searches!

SEWING THE FINAL SAMPLE

How-to-start-a-pattern-company-2-4.jpg

Once the pattern is digitised and checked, I print it on A0 sheets (back to the copyshop I go) and cut the pattern from fabric to make a fully finished sample. This is when I will sew the pattern from beginning to end, making sure I have resolved all parts of the process and check that all seams come together as expected.

How-to-start-a-pattern-company-2-5.jpg

As I sew the final sample, I take photos of each step and take notes in a Google doc as I go. I take note of any issues / problems with the pattern, or things that I think I can improve.

When the sample is  finished, I take all the photos and the instruction notes and turn it into a basic instruction booklet document. The aim of this is not to be pretty or completely resolved, but to be a document I can use as the basis of the instruction booklet and that I can handover to the illustrator I work with.

I make any updates to the pattern that I may have found during the sampling process, and create the instruction booklet document - resolving any issues as I work through the document.

PATTERN GRADING + INSTRUCTION CONTENT

How-to-start-a-pattern-company-2-6.jpg

I am lucky enough to have found a brilliant person to work with on the pattern grading and illustrations for my patterns. When I started In the Folds, I did all these things myself, but eventually I found someone who could do it more efficiently so I could work on other aspects of the business. I am pleased that I used to do these things myself though, because it means that if there are any issues when I get things back, I know how to make tweaks and can also tell if an error has been made. 

I send the pattern and the instruction notes to my grader / illustrator, along with any additional information, and generally about 4 weeks later, I get the pattern assets back.

This feels like a good time to end this issue. Next week I will tell you about the creation of the digital product itself (graded pattern files and instruction booklet) and finalising the pattern for release.

Happy sewing until next time!

Emily


resources mentioned in this issue

  • Starting a pattern company (part 1) can be found here.

  • How to check and true seams. Tutorial can be found here.

  • Pattern Lab can be found here.


P.S. Would you like to know what the Q & A series is all about? This page tells you a little bit more about the motive behind the series. Past issues from the Q & A series can be found here.

Don't have a question, but found this newsletter helpful? I'd love to hear from you! Get in touch and say hi. 


What you’ve been making


More posts in the series

ISSUE 51 - Starting a pattern company (Part one)

PINTEREST HEADERS TEMPLATE_LATEST.jpg
HEADING - V1.jpg

Hello! 

I’ve really been loving your Q&A series. I am getting ready to start my own pattern company. I would love to know the steps in the process to getting a successful pattern ready for the market. Also I am not a pattern maker and do want to make my own patterns. How do I go about finding someone to help me make sewing patterns? 

Thank you,

May

Fairfax, United States

~

How do you make your gorgeous patterns?

Kate

Camden, UK


Hi May and Kate,

Happy (belated) 2021! I hope you all had a good start to the new year and are staying well at this difficult time. I am very excited to be back with the Q&A series for the new year.

I thought I’d start the new year off with a bang, with a big question - that I will answer over three parts over the next three weeks. There is only so much depth I can go into, but I will try my best to cover all the important parts of my pattern making process. I hope it encourages and inspires you!

DESIGN

I’m never sure where my design ideas come from. They seem to just pop into my mind as an idea I would like to explore or play with. They are never even close to fully formed ideas, just a starting point. As the pattern collection grows, I also think about what the collection is missing and what gaps need to be filled. This may be a specific garment type, or it may also be a finishing technique that I’d like to use in the next pattern. 

Sometimes I have an idea of a pattern I would like to create, but it just doesn’t fit the collection or the In the Fold ethos. If that’s the case - it doesn’t make the cut. I also think about what patterns already exist on the market. There are a lot of patterns out there, and I hope to offer patterns that are new and exciting - so it’s always important for me to think about the broader context of my patterns.

Once I have an idea I would like to play with, I get to work. I am not a great drawer, so I rarely draw anything. I just get started on the pattern from whatever picture I have in my mind.

DRAFTING THE INITIAL PATTERN

How-to-start-a-pattern-company-2.jpg

I normally draft my patterns flat initially. This means that I take a pattern block, or an existing pattern, and manipulate it to create the basis of the new design. I always make the first pattern in its most basic form - no pockets, collars, button plackets etc. This is because I just want to get an idea of the shape and see if I’m on the right track. This also keeps things free and open, so that I can design through drape when the toile is on the stand (mannequin / dressmakers form). 

When I have the initial pattern made, I cut it from calico (muslin) and make a toile. For me, this is when the magic happens. So much of my design process happens when I’m drafting a pattern or sewing a sample. As I sew, I often think of design features or things that will make the pattern more interesting to sew.

How-to-start-a-pattern-company-3.jpg

Once I have a toile, I fit it on my mannequin and check how it’s going. I then start playing with seam lines, pockets, closures etc. Sometimes I cut into the toile to play with an idea, add fabric on, or draw directly onto the toile. I usually sew a toile with a long stitch length so that it is easy to unpick seams if I need to at this stage.

Normally I will make a lot of tweaks and then make the updates to the pattern, re-cut and re-toile. This process always goes on for a while! I keep going until I have a garment that I am happy with.

If all this sounds a bit beyond where your pattern making skills are, I’d suggest checking out this post on starting a business without formal training.

drafting patterns if you’re not a pattern maker

Acton dress - border print - 3.jpg

If you are not a pattern maker, but would like to start a pattern company, you will need to find a pattern maker to work with. I have worked with a number of pattern makers over the years in my business for assistance with a range of tasks, and I have found them through word of mouth or simply Googling ‘Pattern maker Sydney.’ Another option would be to contact a university in your area that teaches Fashion Design. They may have some teachers or students they could refer you to. Facebook groups are also another great way to get referrals. If there is a business group in your area, try posting there.

If working with a pattern maker, you will need to get really clear on your designs. It will be helpful if you can draw, but if you can’t, you can find photos of garments you like and annotate the features you like (or even what you don’t like). Prepare to have a bit of back and forth with a pattern maker as you get to know them and they get to know you. 

There are a few things you should work on and consider before working with a pattern maker. This will make the process a bit smoother and help you get on the same page in terms of goals and what you want out of the collaboration. Things to consider before sending your designs to a pattern maker:

  • What size you want the base pattern drafted for - consider bust cup size and height too

  • What your size chart will be (difference between sizes and how many sizes there will be)

  • What format you would like the pattern in when it is returned to you (do you want the paper version as well as digital? What file type will you be able to open with the software you are using?)

  • What is the turnaround time on the project?

  • How will you communicate updates and edits that you would like to make?

WORKING WITH A FIT MODEL

How-to-start-a-pattern-company-5.jpg

As I draft to an Australian size 10 (size C in In the Folds patterns), this is about the point where I need to get my fit model in. Although I can sometimes try things on to get a feel for a garment (especially because the things I draft are normally quite relaxed in fit), it is very important to see how the pattern looks - and feels - on a person with the measurements I draft for. 

Charlotte, my fit model, is great as her measurements put her in an exact size 10, she doesn’t mind slipping in and out of toiles in front of me, and she is also very honest and direct, which is great for getting feedback. 

I like to be organised when conducting a fitting, so that things run smoothly and I don’t miss anything. I make sure to have the following things ready ahead of time:

  • The toile/s I will be fitting

  • A notebook. Here I will also take note of specific things I’d like to check so that I don’t forget.

  • Pen

  • Sharpies in a few different colours

  • Masking tape (this is good to tape directly onto the toile if I need to mark something)

  • Pins

  • Tape measure

  • Scissors

  • Phone for taking photos

  • A chair (so I can check the fit model can sit down in the garment)

During a fitting, I ask her questions about how the clothing feels. Things like:

  • How is the pocket positioning?

  • Is that too tight under your arms?

  • Could you sit down / run / dance in that?

  • Are you comfortable? 

I check that all the seams are sitting correctly on her body and take notes of any changes that need to be made. If a seam needs to be moved, I normally mark it directly on the toile with a Sharpie. I take photos of the front and back and close-ups of any changes I’d like to make.

FINALISING THE PATTERN

How-to-start-a-pattern-company-6.jpg

At this point I might be ready to finalise the pattern (depending on how the fitting goes), although normally I need to make a couple more toiles to finalise the design. 

At this stage I am thinking a lot about the finishes I’d like to include in the pattern, and what I hope makers will learn by working with this particular pattern. I get really clear on the finishing techniques I’d like to use for the pattern, and have a practice run if any of them are new or tricky.

If needed, I get my fit model back for another fitting (most patterns will be fitted on my fit model 2-3 times before they are finalised) and then when I am satisfied with the pattern, I trace the pieces onto large pieces of paper, ready for digitising.

I think that’s a good place to end part one of this issue. Next week I will go into more detail about digitising the pattern and creating the instruction booklet content.

Happy sewing until next time!

Emily


resources mentioned in this issue

  • In the Folds pattern collection can be found here.

  • In the Fold ethos can be found here.

  • How to draft a pattern block - Tutorial can be found here.

  • Starting a business without formal training - Article can be found here.

  • In the Folds size chart can be found here.


P.S. Would you like to know what the Q & A series is all about? This page tells you a little bit more about the motive behind the series. Past issues from the Q & A series can be found here.

Don't have a question, but found this newsletter helpful? I'd love to hear from you! Get in touch and say hi. 


What you’ve been making


More posts in the series

ISSUE 45 - Online retailers in Australia

HEADER_ISSUE_45.jpg
HEADING - V1.png

Woah! I’m Australian- and I want Stephanie’s list!

I’m newly returned to sewing after 20 years (babies, kids, work - finally have a little breathing room) and am struggling to come to grips with the question of where to buy fabric and notions - the sewing world has changed! (Sadly my overlocker exasperates me as much as ever).

I really love your emails - you answer things very thoroughly and obviously put a lot of thought into it.


- Marg


Hi Marg,

I’m pleased to hear you enjoyed the post about online fabric retailers in the US and Canada. I am very happy to share with you a list of retailers here in Australia! I hope some of these are new to you and you can find some lovely fabric for your next sewing project.

I have some fantastic Australian pattern stockists that I'd love to share with you. I reached out to some of them and asked for them to give us an idea of the fabrics they specialise in!

MAAIDESIGN

MaaiDesign.jpg

MaaiDesign is a family-owned, online fabric store based in Victoria, Australia. We specialise in high-quality, modern dressmaking fabrics for those who love to sew fabulous clothes. Our swoonworthy designer collection includes fabric brands like Atelier Brunette, Art Gallery Fabrics, See You At Six, Nani Iro, Lady McElroy, Mind The Maker and more.

Because high-quality basics are hard to find, we have a large range of solid colours in different fabrics to mix and match with our designer collection. Matching sewing threads can be added with just a click of a button, and with our expanding range of sewing patterns you can find everything you need all in one place.

Happy customers are a top priority so we work hard to offer personal customer service and an easy to browse website. New fabrics are released almost every week, so sign up to our newsletter here to be in the know (as some sell out fast).

Find out more:
www.maaidesign.com.au

The drapery

The Drapery.jpg

The Drapery is a real, bricks-and-mortar fabric shop in Adelaide, South Australia - and an online store, too! We specialise in natural fabrics, particularly more sustainable fibres like linen, hemp, wool and organic cotton, plus independent designer patterns and high quality notions. Hand-crafting and sewing are an antidote to a throwaway society, and we believe in using beautiful materials that will last!

Some of our quality, natural fabrics for everyday wear include washed linens from Lithuania, selvedge and organic denims from Japan and Italy and a wide range of modern Japanese fabrics including double gauze by Nani Iro.

Find out more:
www.thedrapery.com.au

pattern scissors frock

Pattern Scissors Frock Image 2.jpg

Pattern Scissors Frock is an Australian online independent fabric store that specialises in quality modern apparel fabrics with a focus on natural and sustainable fibres that will be launching in late December 2020. We stock a beautiful range of independent patterns and fabrics including lyocell, linen, hemp, cotton and knits. Many of the fabrics we have chosen meet global textile standards or certifications.

At Pattern Scissors frock we hope to inspire others to sew, create and feel great in what they wear with beautiful modern fabrics and indie patterns.

Find out more:
www.patternscissorsfrock.com.au

Pattern Scissors Frock Image.jpg
SUB-HEADING 1 copy 2.png

Minerva’s bower

Minervas bower-2.jpg

We are Kylie Crowe and Clare Sanders and our store is Minerva’s Bower, located in Katoomba Blue Mountains NSW.

We have a dressmaking fabric focus and specialise in natural fibres with attention given to appropriate fabrics for our cooler weather. We also aim to be able to tell the story of all of our fabrics so that we are able to provide our customers with as much information as possible.

We stock a wide range of natural fibres; cotton, linen, wool and leather as well as a wide variety of man made natural fibres such as Tencel, Lyocell and viscose. All of these are available online.

In store we have a constantly changing selection of fine vintage fabrics. To complement our fabrics we stock independent Australasian patterns, a wide range of haberdashery, including vintage trims and hard to find notions.

Find out more:
www.minervasbower.com.au

house of cloth

houseofcloth_instagram.jpg

House of Cloth was established in 2010 in Bendigo, Victoria, Australia. We hold a unique place in Bendigo as the only independent fabric store providing fabrics for the home sewist.

House of Cloth is a destination point for anyone looking for high quality fabrics. We are committed to maintaining a strong focus on natural fibre fabrics. We have a diverse range of fabrics across cotton, linen, wool and silk, including suiting fabrics, lawn, voiles, coatings, to name a few. New fabrics arrive throughout the year, especially around autumn/winter and spring/summer.

We have diversified our products to include boutique knitting yarns, knitting accessories, patterns from independent designers, a small range of haberdashery, and Bernina sewing machines and accessories. We are also committed to assisting people to find new homes for their vintage/retro fabric collections.

Find out more:
www.houseofcloth.com.au/

fibresmith

fibresmith.jpg

Fibresmith is a boutique space dedicated to quality, natural cloth yarn and fibre craft supplies in Melbourne’s Inner West, founded by Maze & Vale designer, Leslie Keating.  

“Fibresmith lived in my head for over three years, a little dream of a beautiful shop filled with gorgeous, natural fibre yarn and cloth in modern, graphic prints. Trained as a graphic designer with a life long love of craft, I was naturally drawn to simple, graphic patterns and colour combinations, especially muted, impure or ‘different’ shades. In 2011, I began playing around with block printing on fabric, first with simple shapes and then moving into carving my own stamps and eventually discovered and fell in love with screen printing as a way to cover larger areas of cloth. I enjoyed designing and printing cloth so much that I began selling it, creating a small business called Maze & Vale. Maze & Vale was the most excellent and flexible outlet for my creativity with two small children and over the years, gave me great insight into customers’ wants and needs for modern and interesting textiles. In 2017 that I firmly made the decision to open Fibresmith, to focus on sourcing beautiful, natural fibre cloth and yarn and high quality tools and supplies for sewing, needlecraft, knitting and crochet.”

Find out more:
www.fibresmith.com.au

Some other stores you may like to checkout:


resources mentioned in this issue

  • Online retailers in the US and Canada. Post can be found here.

  • A list of In the Folds pattern stockists can be found here.


P.S. Would you like to know what the Q & A series is all about? This page tells you a little bit more about the motive behind the series. Past issues from the Q & A series can be found here.

Don't have a question, but found this newsletter helpful? I'd love to hear from you! Get in touch and say hi. 


What you’ve been making


More posts in the series

ISSUE 44 - Preparing a pattern for testing

HEADER_ISSUE_44.jpg
HEADING - V1.png

Hi Emily,

I hope that you’re doing well!

I saw that you mentioned using Slack for your testing group and was wondering if you had any tips. I’ve used Slack for work and like the immediacy of it but I’ve mostly done it with just one or two people on a channel.

I’ve used a Facebook group for testing before but I didn’t really like it.

In general, I tend to get a little overwhelmed during testing and have a hard time tracking everything. So, anything that would make testing easier appeals to me.

 Did you have just one group slack channel that everyone was a part of? How many people did you have? 

All the best.


Hi there,

I am pleased to hear you have a new pattern in the works and are almost ready for testing! I can definitely relate to how overwhelming pattern testing can be. I feel like I have almost streamlined my testing process to a point that it feels manageable and not as intimidating as it used to feel, so I would be very happy if it could help you feel less overwhelmed too!

2. In-the-folds-pattern-testing-2.jpg

SLACK VS FACEBOOK

I am definitely pleased I transitioned to Slack rather than Facebook and will continue using Slack in future. Having channels really helps and I like that things stay in chronological order, rather than becoming one endless random thread of posts.

For pattern testing I set it up with just a couple of channels, but recently I used it for my Darlow pants sew-along and tried using more channels and I think that it worked better.

In future I think I will create the following channels:

  • General - I think you have to have this channel in Slack. This can be used as a general conversation space - a place for people to get to know each other. I like having a channel where people can just chat about whatever. Generally people were talking about what they're reading, watching, listening to etc. and was a nice way for participants to connect with each other

  • View A

  • View B - If the styles are quite similar or follow the same construction, I would consider keeping both in one channel, but for the Darlows I had View A and View B so it was quick and easy for people to find what they were looking for.

  • For the Darlows I did separate channels for pattern alterations and sewing. For example: View A alterations / View A sewing. I think this was really helpful for pants as most people needed to make alterations. For a pattern that doesn't need as much tweaking I would probably just keep alterations and sewing in the one channel (e.g. View A).

  • Finished makes - During pattern testing a few people said they would have liked a separate channel just for finished makes, so I did add one in the Darlow sew-along and it seemed to work well

As for numbers, I normally have about 20 people in the testing group - 2 for each size in thesize range - 1 making each of the two views.

I found this article really helpful for things like privacy settings etc. in Slack and just worked my way through it as I set up the workspace and channels.

I wrote an introduction and posted to the General channel. In the post I detailed:

  • An introduction and explained briefly what the channels are for

  • Pattern feedback deadline

  • Asked people not to share the pattern details on social media

  • Attached the pattern files. I attached directly to Slack, which was fine, but I think next time I will also include a Dropbox link.

  • I then pinned the post so it could easily be found in the thread

3. In-the-folds-pattern-testing-3.jpg

COLLECTING FEEDBACK


I have also found that collecting feedback can be overwhelming, so have come up with a few systems that have really helped:

I collect feedback in two ways: 

1. An online form that is completed / submitted at the end of testing for in-depth feedback regarding fit and the experience of using the pattern. I set this up through my website. I ask questions such as:

  • Did you make any modifications to the pattern?

  • What do you like about how the garment fits?

  • What don't you like about how the garment fits?

  • What do you like MOST about the finished garment?

  • What do you like LEAST about the finished garment?

  • Were there any steps that you feel require more detail?

  • Are you happy with the techniques used to assemble the garment or do you think there could be a better way?

2. For general feedback I use a Google Doc which has been a real game changer for me. Using this method means that all the feedback is in one place and I don't have too many notes doubling up as participants can see previous notes - as it's a live / interactive document.

On the Google doc I include instructions for testers and then create a table so there is space to write notes about each section of the pattern. This means that when feedback is added, there is a clear place for each note to go and testers can quickly and easily see what has been mentioned and what hasn’t. This document is basically used for keeping track of any typos, errors, or steps that need further explanation etc.

I have a rule for myself that is that I don't read any of the feedback until testing is over, as I have learned that it just stresses me out and I'd rather just go through it all when testing is finished. I have also learned that any negative feedback, never feels as big or as overwhelming when I can read all the feedback at the same time. This rule also means that I can spend my time in the Slack group just hanging out with the testers, which has to be the best bit about pattern testing!

When testing is done, I go through all the feedback that has been submitted from the online form and add any notes to the Google doc that I have found in the feedback that aren't already in the doc. This is when a second computer monitor helps a lot! I work through all feedback and then the Google doc becomes my checklist for updating the pattern.

4. In-the-folds-pattern-testing-4.jpg

PREPARING THE PATTERN FOR TESTING

One thing I learned recently is that it’s worth getting the pattern copy edited before it goes into testing. I used to just copy edit the pattern myself, but would often miss a few things here or there and these became stumbling blocks for testers, that meant they were spending more time on missed steps / typos than the flow of the order of construction. By getting my patterns professionally edited before I send them out for testing, I noticed a big difference in the types of things the testers were able to focus on, when not distracted by the errors that had slipped through the cracks in the past.

Best of luck with your pattern testing and please do let me know if you have any questions about any of this!

Talk soon,

Emily


resources mentioned in this issue

  • The In the Folds sizing chart can be found here.

  • How (and why) to create a Slack community article can be found here.


P.S. Would you like to know what the Q & A series is all about? This page tells you a little bit more about the motive behind the series. Past issues from the Q & A series can be found here.

Don't have a question, but found this newsletter helpful? I'd love to hear from you! Get in touch and say hi. 


What you’ve been making


More posts in the series

ISSUE 29 - Staying motivated

Q&A STAYING MOTIVATED - HEADER.jpg

THE Q & A SERIES - Staying motivated

Hi Emily,

Is there anything in particular you can point to that has helped you stay motivated in your business when much of the work is self directed? On days when you'd rather rest, what keeps you going?

Thanks,

Amber

- Sydney, Australia


Hi Amber,

As you may have noticed, this is my first email in a while. If you read my last email, you will know that my dad passed away unexpectedly a few months ago. It was a huge shock to my family (he was only in his mid fifties) and we have been dealing with the grief ever since.

I was lucky enough to be able to take the time I needed off work and am slowly easing back into things. It now feels like the right time to get back to writing my weekly newsletter. I love creating this email and it has been an incredible way to connect with makers in our community. At a time when we are all struggling to connect with our loved ones due the restrictions most of us are all living with, an email series like this seems like a small but important way to connect with all of you. 

Q&A STAYING MOTIVATED-1

I thought this would be a good question to restart the series with, as finding motivation is something I have been thinking about a lot lately. I am sure there are a lot of you struggling with it too as we are living through fairly difficult times at present. In my experience, it can be easy to find motivation when all is well, but at times like this it can be difficult. This rings very true for my personal experience over the last few months and although I don’t think I am an expert on it, I do feel like I have learned a few things that helped that I’d be happy to share with you.

I’ll be talking about motivation as it relates to my business, but I’d hope this could apply to whatever you are currently working on - whether that’s a business too, learning a new skill, working towards a goal or sewing a handmade wardrobe.

TAKE A BREAK

Q&A STAYING MOTIVATED-2.jpg

This may seem counter-intuitive, but the first thing I want to talk about is taking a break when you need to. I think it’s easy to get caught up in the “hustle culture” of doing more, more, more, rather than taking a pause when we need to.

I found there were times in the last few years that I have accidentally gotten swept up into this way of thinking (as it can be difficult to avoid this messaging that surrounds us and sometimes you don’t even realise you’re doing it), but losing my dad made me realise that I can stop if I need to and nothing is going to collapse.

A few months ago I felt like I didn’t have time for anything, then suddenly I needed to stop everything, and I did. I spent 6 weeks doing not much more than watching Netflix and I realised that life (and my business) went on. It was a difficult way to learn that we can stop and take a break if we prioritise it.

All this is to say that we are living through a very difficult time. Maybe it’s not motivation that you need right now, but a break. Inspiration and motivation seems to slowly seep back in with time (well at least that is what happened to me). 

I am now being careful about what I re-introduce into my schedule. I definitely don't have the energy to do all the things that I used to do, so it has been a good lesson in boundary setting and getting clear about the things I really want to do and the things that I have to say no to at the moment.

Read / listen to / watch things that inspire you

Q&A STAYING MOTIVATED-3.jpg

Apart from bingeing on Netflix, I did read a lot during my break and have continued to do so. At first I couldn’t stomach my usual go-to motivators (business and self-development books), so I started with fiction.

Eventually I started gravitating back to business books and found these really helped me to re-focus and get back into the habit of thinking about actionable things I can do to grow my business. I think sometimes you can get distracted by the busy day-to-day work, but business books generally make me take a step back and look at the business from a different perspective.

I have also been listening to the podcast How I Built This a lot lately. Hearing about the struggles of other entrepreneurs is a good reminder that it takes a lot of work to have a successful business and there are ups and downs for everyone.

RECONNECT WITH YOUR MISSION

Q&A STAYING MOTIVATED-4.jpg

I think that it can be easy to lose motivation when you have lost track of why you are doing the thing in the first place. Whenever I set goals, I always make sure to write next to it the reason I’m striving towards this particular goal. At the time "the why" seems obvious, but in the weeks and months that follow, often I can lose sight of the why and having it there to refer to is helpful when I need to get back on track (more about my goal setting process can be found here if you are interested).

One of the books I read recently is Building a Storybrand by Donald Miller, and I really enjoyed that it forced me to reconnect with my mission and remember why I created In the Folds in the first place. Simply put, my mission is to help you make clothes that you are going to wear, love and cherish. As soon as I re-focused on that, I felt more inspired to keep serving my customers and making a difference in my own little way.

Now when I look at my to-do list, I’m thinking about what will make the greatest impact in line with that mission, that I'm able to get done today. Taking it one day at a time like that is a good way to break down big goals, but is also all we can do - especially at the moment when the future feels particularly uncertain. 

CONNECT WITH PEOPLE THAT ENCOURAGE AND INSPIRE YOU

Q&A STAYING MOTIVATED-5.jpg

I am lucky enough to have some incredibly inspiring and creative people in my life. When I’m struggling to get in a groove, I have found making a phone call or catching up with one of these people helps a lot.

Getting a second set of eyes on the problem can also be hugely beneficial, and if you have friends from different industries / areas of focus, they can often suggest things you have never even thought of. Also hearing about other people's struggles can give you a change of perspective as you approach what you are facing. The last three months have been particularly hard in my personal life and having amazing people around me is the thing that has been getting me through.

LOOK AT THE PROGRESS YOU HAVE MADE

Q&A STAYING MOTIVATED-6.jpg

It can also be a good idea to look over things that remind you of the progress you have made already. Working on a handmade wardrobe? Make a list of all the pieces you have made in your wardrobe, or the skills you have learned that you didn’t have 12 months ago.

I think reflection plays a huge part in feeling motivated and making sure you are celebrating the wins along the way, rather than just continuously moving back your goal post. For me, I always find looking through the hashtags for my patterns very inspiring. To see that there are people using my patterns to make beautiful garments that are bringing them joy and they are wearing proudly and sharing online feels like a huge win. I also have a file in my inbox called “for smiles.” Each time I get an email from a happy customer I put it in there. Sometimes if I’m feeling low or forgetting why I’m doing this, I look there and it reminds me of the people I’m serving.

LEARN SOMETHING NEW

Q&A STAYING MOTIVATED-7.jpg

Learning something new can sometimes be a good way to inspire you or motivate you. It might be related to the thing you are struggling to motivate yourself to do, or something completely different. Recently I have done this by reading business books, doing an online course, listening to podcasts about things I'm interested in, but don't know much about, and even getting out my old sketchbook. 

FAKE IT TILL YOU MAKE IT

Q&A STAYING MOTIVATED-8.jpg

I didn’t feel like working 6 weeks ago, but there came a point where I just had to (hello bills that need to be paid and a small business that I run on my own) and I decided to just get back on the horse and fake it till I made it.

I think we all dream of showing up to work everyday absolutely loving what we do and overflowing with inspiration and energy, but unfortunately it’s not like that a lot of the time (even when you are doing what you love), and I feel just getting started is often the hardest bit. Once you are on your way, things feel a lot easier and you are reminded of what you love about it.

Lately I have been telling myself that I only need to get through a few hours of work in the studio, and normally by that point I am in the zone and want to keep working. But if I’m not, I’m giving myself permission to say that’s okay too (which takes us back to point number one about taking a break if you need one). A few hours of important work feels like a greater achievement than eight hours of faffing about.

I hope this helps some of you get back on track to do the things you want to do. But as I said, if it doesn’t, that’s okay too. Give yourself some time to just rest or relax - the days are difficult enough to get through at the moment without the added pressure of a never ending to-do list. The motivation will come back, it generally does if you give it time. 

Happy sewing!

Emily


resources mentioned in this issue

  • How I Built This podcast can be found here.

  • Making a plan for the year / quarter. Post can be found here.

  • Building a Storybrand by Donald Miller. Book can be found here.


P.S. Would you like to know what the Q & A series is all about? This page tells you a little bit more about the motive behind the series. Past issues from the Q & A series can be found here.

Don't have a question, but found this newsletter helpful? I'd love to hear from you! Get in touch and say hi. 


What you’ve been making


More posts in the series

ISSUE 16 - Starting a business without formal training

ISSUE 16 - STARTING-A-BUSINESS-WITHOUT-FORMAL-TRAINING.jpg

THE Q & A SERIES - STARTING A BUSINESS WITHOUT FORMAL TRAINING

Hi there!

I think this is such a great series you are doing, and I really appreciate how thorough your responses are! I am a home sewist and an aspiring designer and pattern-maker. I don’t have any formal training, and I have a background in a completely different field (education). I’m really struggling against the voice in my head that’s telling me I’ll never be able to do this and all my efforts won’t go anywhere.

I was wondering if you have any advice for someone who is trying to learn patternmaking and fashion design, and hoping to starting a business without formal training? I’m soaking up as much as I can from classes on Bluprint and Skillshare, and I’d be so appreciative of any additional resources or suggestions you may have for someone who is starting from scratch!

Thank you for taking the time to read this!

Sofia


Hi Sofia,

This is a great question, and one that I think many creatives struggle with, or have at least thought about! Many creative ventures are self-taught, and it makes sense that for many there is a tipping point where you go from sewing (or any other type of craft) for fun to realising it could be the beginning of a new career or business venture. 

I have to be honest and say that I find this question a little tricky to answer because I do have a formal education in fashion design and I can see a clear path from my university degree, to where I am now (although the journey has been far from linear). In saying that though, so little of my day-to-day work for In the Folds is related to what I learned at university, so I’m almost certain I could be doing my job without my degree behind me. 

When I started In the Folds I envisaged days at the studio, patternmaking new pieces, cutting fabric and sewing samples. The reality is very different. I spend most of my days working on my computer, doing many different tasks that I have learned on the job, by reading countless marketing and business books, watching hours of Youtube videos, doing online courses, following tutorials meticulously to make something work in the way I would like it to or just plain winging it until I work it out. So although my degree gave me a really solid foundation of skills and knowledge to get started with, it is definitely the learning I have done since then that has kept my business running. I often think that if I was going to go back to university and study something it would be business, marketing or entrepreneurship as, at the end of the day, I think these are the skills that lead to a business being successful. 

In terms of more tangible advice and resources for you, it sounds like you are on the right track - learning what you can from online course and practicing at home.

I have a few other suggestions that might help, some very practical, while others are about mindset.

Get used to that voice

If you’re wanting to start a business or go out on your own in any way - or even change careers - get used to that little voice in your head that’s telling you that your efforts won’t go anywhere. Unfortunately that voice comes with the territory, but I can tell you that it gets easier to manage (well at least mine has).

This voice of mine became present in my life when I decided to work in the home sewing world, rather than the fashion industry. I questioned whether I was going the right way, if I would be able to get the experience I needed for a fashion job, if I was wasting my education…. you name it, I thought it! But the excitement of starting a new business and serving a community of makers trumped those fears every time and I worked on just ignoring that voice when it began to whisper.

After a while though, as my business grew and I learned more and more skills related to running it, I started to quantify my learnings and realised that what I was learning was experience I could use to get another job, if for any reason I needed to. All this is to say, try to get to a place where you focus on the skills you are learning, as new skills will always lead to something. It may not be exactly what you have in mind now, but skills are valuable and if all goes pear shaped, you can put them on your CV and find a job related to the new found skills. Well at least that's my plan!

IMG_0101.jpg

Value the skills you do have

I’m not sure what exactly you are planning on doing if you do take this leap, but your career in education could really help in the sewing world, if that’s where you are hoping to end up! I think one of the most important aspects of my job is making clear and easy to follow instructions that all makers will understand - so I’d imagine your experience in teaching would really help you with aspects of the job like this!

I can imagine that you also have plenty of skills that are very relevant to the career you are hoping to go into, that you haven't even thought about. For example, I have a lot of work experience in customer service and didn't realise how helpful that would be until I started my business and people mentioned time and time again how much they appreciate the level of service I provide to my customers. Until that point I saw this experience as completely irrelevant to the job - I now can see countless parallels to things I have learned through previous (unrelated) jobs I have had and the work I do today.

IMG_0087.jpg

Find a mentor

Can you find a tutor or mentor in your local area, or even online? You might reach out to local fashion schools or colleges to see if there are any students towards the end of their courses who might be interested in private tutoring - or even a teacher who teaches on the side.

A couple of years ago I was struggling with the fit of a particular pattern and I found a local patternmaker that could help. Although what she showed me was helpful, the main thing that she helped me with was my confidence! I was doing things correctly and she reminded me that patternmaking (even for the patternmakers who have been doing it for decades), involves trial and error and I just needed to stick with it until I found the right solution.

Work experience

Have you thought about doing work experience or an internship? I know this can be almost impossible if you work full time, but I learned a lot from interning with a local designer when I was at university. If you are in a position to do this, you may want to contact a few small designers in your local area and see if they would be open to you lending a hand for a few hours a week. I think the smaller the business, the better!

I interned with a designer who was working on her own and I learned so much! I was able to work on a range of different things, as she was doing it all herself, and it also means there’s time for you to talk one-on-one with someone who is doing the type of job you would like to do.

InTheFold_Edit-Still_07.jpg

Get help / outsource

The other thing I think you need to think about is that you really don’t have to do it all! People say this all the time and I really didn’t believe it until a couple of years into running In the Folds.

When I started the business I did every little thing myself - whether I was good at it or not. By this point I have a much better idea of the tasks I should be doing and the tasks I can outsource. For example, when I started, I manually graded my patterns into the 10 sizes in my size range (in Adobe Illustrator as I don’t have computer grading software)! As you can probably imagine, it was a long and very monotonous process.

Eventually I realised I needed to outsource this task as there was no way I could produce more patterns at the rate I was going. I found a fantastic freelancer online, who was able to grade the patterns with CAD software for a rate that is far cheaper than the days it was taking me to grade manually. It did help that I do know how to grade patterns though as I can check the patterns when they’re returned and spot any issues if there are any. So I'd recommend at least wrapping your head around the process of grading before outsourcing, if you can. I think this and this is a good place to start if you would like to get your head around grading.  

InTheFold_Edit-Still_10.jpg

Have the right people around you

Also try and get as many creative people around you. I run my business from a shared creative space and having others who are on a similar journey to me does the world of difference. I also have my partner and friends who I can call who really understand my business and can put my doubts to rest when that little voice returns.

On this note, have these types of conversations with the people who will understand. Some people will always direct you to the safe path, or encourage you to stay put with what you're doing. That is completely fine, I just wouldn't be asking their advice if you need a little nudge to take the leap you want to take.

Look to others for guidance / inspiration

Look at other people doing the kind of job you would like to do and speak to them if you can, or listen to / read interviews they have done.

You will realise that there are plenty of people out there doing jobs in industries that they don’t have formal qualifications in. I love reading interviews and listening to podcasts with people from my industry (or related industries) and learning how they got to where they are. Often the route is far less straightforward than it seems from the outside! Jenny Rushmore of Cashmerette is also a great example of this or Heather Lou of Closet Case Patterns - who took her experience in interior design into the world of patternmaking. If you are looking for more business inspiration and start-up success stories, I’d also recommend listening to How I Built This.

InTheFold_Edit-Still_06.jpg

I hope this motivated you and didn’t overwhelm you. Try to pace yourself and not get carried away by the details. In time you will be able to look back and realise how much you have learned and how much closer you are to reaching your goal!

Happy sewing,

Emily


resources mentioned in this issue

  • Making Sense of pattern grading by Threads. Post can be found here

  • How to make a sewing pattern bigger (or smaller) - pattern grading by Melly Sews. Post can be found here.

  • Times, they are a 'changing: A conversation about Growth and adaptation - Elizabeth Suzann. Audio essay can be found here

  • Elizabeth Suzann, Ask me anything: Professional. Post can be found here.

  • Elizabeth Suzann, Ask me anything: Personal. Post can be found here.

  • Curvy Sewing with Jenny Rushmore - Love to Sew podcast. Episode can be found here.

  • Let's talk money with Heather Lewenza - Seamwork Radio. Episode can be found here.

  • How I Built This with Guy Raz. Listen to the podcast here


P.S. Would you like to know what the Q & A series is all about? This page tells you a little bit more about the motive behind the series. Past issues from the Q & A series can be found here.

Don't have a question, but found this newsletter helpful? I'd love to hear from you! Get in touch and say hi. 


More posts in the series

ISSUE 12 - RELEASING YOUR CREATIVE WORK INTO THE WORLD

ISSUE 12 - HOW-TO-RELEASE-YOUR-CREATIVE-WORK-INTO-THE-WORLD.jpg

THE Q & A SERIES - RELEASING YOUR CREATIVE WORK INTO THE WORLD

Hi Emily!

I’m writing today because I’m wondering if I could get your advice. As I’ve grown my business, I’ve also grown in the number of criticisms received. I think I do a bad job of taking these too personally, even though the good feedback far, far outweighs the negative. (Why do we remember the harsh words more than the kind?)

I’m getting ready to test my first graded pattern and I find myself REALLY dragging my feet because I know it won’t fit everyone, it won’t make everyone happy, people will say mean things. So, I’d like to just ask you how you handle that criticism and still feel bold enough to put your work out there. How does that feel to you?

- S


IN THE FOLDS PATTERNS.JPG

Hi S,

Thanks for reaching out. I really like that we have been able to connect and it's great to know there are other people experiencing the many ups (and downs) of making sewing patterns.

This is definitely something I have gotten a lot better with over time, and I'd imagine it will be the same for you. A few things have really helped though and I am happy to tell you what has worked for me, in the hope it might help you too!

First thing, when I was testing the Rushcutter (my first pattern) I definitely took any form of constructive criticism very personally. Although there was a lot of positive feedback during testing, the negative is what stuck in my mind. I remember speaking to my partner about it and telling him what people didn't like about the pattern. I told him that some said there was too much ease in it, it was too big, the neckline was too high etc. He then pointed out that all of these things were design / preference things and that there actually wasn't anything wrong with the pattern.

This has stuck in my mind and is something I constantly remind myself of. If there is a mistake in the grading, construction etc. I will always fix it, but if someone doesn't like the design, then that is not something I will change or tamper with as I believe this is what integrity of design is about. My designs will not always be to everyone's liking, but I think it's really important to stick to your guns as you can't please everyone. Now when I read through the feedback, I will ask myself "Is this something they don't like about the design, or is it a flaw in the pattern?"

I am very grateful that I learned this early on and did stick to my vision, as to this day this is still the most popular of my patterns!

COLLINS TOP LINEN IN THE FOLDS.jpg

Speaking of feedback - ask people very particular questions. I am not sure how your pattern testing runs, but I create a feedback form with very specific questions. I do not look at the feedback until the testing period is over and look at it all in one go to save stressing about something that might only be a big deal for one tester. I learned this lesson the hard way!

IN THE FOLDS PATTERNS 2.jpg

The other thing I have recently been thinking about and that I want to work on in future, is opening testing to customers only. In past tests I have opened it on Instagram for everyone, but have recently realised that so many people apply who have never used one of my patterns as they just want to experience pattern testing. At times I think this has been slightly detrimental to the quality of feedback I have received because some of these makers don't really get what I do or my style / mission doesn't resonate with them. They might have been looking for a quick and easy project and that's not at all what my work is about. I really try to make my testing period an enjoyable experience for all involved, so I think making sure we're all roughly on the same page from the outset is a good place to start.

Related to this is acknowledging with feedback, "is this person really my customer?" I know who I am making my patterns for and it is not everyone. For example, someone who loves all things 'fit and flare' etc. is probably not going to like my patterns and that is okay. Their feedback is likely to say that my design should have much less ease or be more shaped at the waist etc.

Also, I don't think anyone will say anything mean when giving feedback - at least not intentionally. Makers are generally lovely people (obviously there are some exceptions to this) and will try to be kind (or at least that is my experience). I do my testing in a Slack group and I really love connecting with the whole group through that platform. I think it helps to run testing in a group like that, as makers will help each other along and it takes some of the pressure off your shoulders. I think it also adds to the experience for the testers as they can connect with each other and learn from each other.

COLLINS TOP PATTERN IN THE FOLDS.jpg

The last thing that comes to mind is that I think we need to seperate ourselves from our work. I really struggle with this one, but am constantly working on it. If someone doesn't like what I'm doing, it is not a reflection on me or my character, it is my work and that is seperate from me (although it does feel like my baby latched onto me most of the time). This one is getting easier as I connect with more of my tribe with each pattern release.

Have you read Daring Greatly by Brené Brown? Or watched her show on Netflix? If you haven't, I think it would be a good thing to read right now. It's all about putting yourself out there.

It starts with this quote from Theodore Roosevelt which I think is an important one for us creatives to keep in mind as it can be really hard to put yourself out there again, particularly after receiving negative feedback / comments:

“It is not the critic who counts; not the man who points out how the strong man stumbles, or where the doer of deeds could have done them better. The credit belongs to the man who is actually in the arena, whose face is marred by dust and sweat and blood; who strives valiantly; who errs, who comes short again and again, because there is no effort without error and shortcoming; but who does actually strive to do the deeds; who knows great enthusiasms, the great devotions; who spends himself in a worthy cause; who at the best knows in the end the triumph of high achievement, and who at the worst, if he fails, at least fails while daring greatly, so that his place shall never be with those cold and timid souls who neither know victory nor defeat.”

PATTERN MAKING IN THE FOLDS.jpg

I hope this helps you! And let me know if you have any more questions.

Best of luck with pattern testing! I am sure it will go really well. And if it doesn't, you'll just learn something for next time!

Talk soon,

Emily


RESOURCES MENTIONED IN THIS ISSUE

  • The Rushcutter dress sewing pattern. Pattern can be found here.

  • Daring Greatly by Brene Brown. Book can be found here.

  • Brene Brown: The Call to Courage. The Netflix show can be found here.


P.S. Would you like to know what the Q & A series is all about? This page tells you a little bit more about the motive behind the series. Past issues from the Q & A series can be found here.

Don't have a question, but found this newsletter helpful? I'd love to hear from you! Get in touch and say hi.


More posts in the series

ISSUE 4 - MAKING A PLAN FOR THE YEAR / QUARTER

ISSUE 4 - HOW-TO-MAKE-A-PLAN-FOR-THE-YEAR-QUARTER.jpg

THE Q & A SERIES - MAKING A PLAN FOR THE YEAR / QUARTER

Hi Emily,

I messaged you recently about a post you made on Instagram talking about something you’re using to help you stay on top of your work. Would love to know what you’re using!

(The fact that it has taken a week for me to email you should be indicative of my current state of affairs!)

thanks so much,

- Dawn


Hi Dawn,

Thanks for the email.

I am sorry to hear you are struggling to keep on top of things. I totally feel your pain and was definitely in the same state for the first 3 years of running my business!

I am very happy to share with you what I have learned, in the hope it may help you too!

THE SYSTEM

The system I am using is probably something you could do in any project management program, or even in a paper diary, as I think it's more about the concept rather than the tools.

I am currently following this system in the project management system I use (Trello) as well as a paper planner (the planner is something I created myself which has been growing and adapting as I work out what works best for me). I am using the two formats as I do like the ability to sit down regularly and write on paper, particularly for the reflection exercises I do and the weekly planning, but then transferring all the important bits to Trello means that I can access my plan wherever I am, as I have the app on my phone - so that is really handy.

GOAL SETTING

For me, I think the goal setting is one of the most important parts of this system. Having my goals set and sorted means that I have a north star - something to refer to when I have difficult decisions to make or need to prioritise projects or tasks.

I spent a day at the beginning of the year doing some overall goal setting and thinking about what I wanted to work on for the year. I did this by reflecting on the previous year - what worked, what didn't and thinking about how I was feeling about each aspect of my life - things like business, finances, health etc. I used a simple ranking system (1-10) in each area to see what areas needed some work.

I didn't want to overwhelm myself with goals, so came up with just three to focus on for the year. My main goal is pretty simple and something I can keep coming back to when I'm questioning whether I should do something. It is related to the number of patterns I want to produce / release this year. I then have a few secondary goals that are more related to my personal life.

QUARTERLY PLANNING

I then decided to split the year into quarters - and this is probably the thing that has been the game changer for me. I created lists for the 12 weeks of each quarter (plus a 13th week that is a break week) and worked out when things needed to be done to meet the goal for the quarter.

For example, when I was creating patterns in collaboration with Peppermint magazine I put in the deadline for the sample to be made and then for the pattern to be published - these milestones were set in stone so it was very important I could always meet those deadlines. I would put the deadlines in my quarterly plan and then with this information I then worked out at what point I would need to send the pattern to be graded and illustrated (it takes the freelancer I work with 4 weeks to do it, so that helped me work out when it needed to be sent). From that I could go week by week and work out when the design needed to be finalised, when I needed to order fabric etc. I find the easiest way of doing this is by setting the project completion date and then working backwards, week by week, until all aspects of the project are accounted for.

I then did the same thing for my own patterns - working out timing in relation to the Peppermint pattern (as I can't swamp my freelancer with 2 jobs at the same time). I was realistic about how long things actually take me. For example, if I am working on a new pattern, I give myself the full quarter to work on design and development, so that means if there is a week without a more pressing deadline, I set a day aside to work on design and development. I did this for each task I wanted to complete for the quarter - trying to be realistic about what could actually get done.

For pattern releases, I put notes in the weeks before to do things like contact the testers, prepare website pages etc. For sample making, I put things like washing the fabric in my plan - this means I can be a lot more organised and also batch tasks when possible.

BREAKING IT DOWN FURTHER

Once I have a basic idea of what needs to be done when in the quarter, I add more detail. I have a list for each week of the quarter (I don’t plan any further than the quarter ahead, although have a rough idea of what will be happening for the remainder of the year. For a really small business, I think it’s difficult to realistically plan for more than 3 months in advance - so that’s the way I like to do things).

I then break each weekly list up by day and batch tasks together. This way I can see if I am setting myself reasonable amounts of work. For example, I only have 3 days a week to work on my business, so I might say, this week Wednesday is for admin and I batch all my tasks, Thursday is for sample sewing and Friday is for pattern creation and digitsation (computer based work). If something doesn’t fit or I realise I have overloaded myself - I will move the task to another week in the plan where it fits better. I find this the best way to set myself up for success, rather than packing my days to the brim and then feeling frustrated and overwhelmed when I (inevitably) don't manage to get everything done. If there is a conflict, I can look back at my goals and work out what is the priority, or consider getting outside help if it looks like I can't get through everything I need to get done.

I use the previous quarterly plan as a guide each time I sit down to do quarterly planning and tweak as I learn how long things really take. It’s a work in progress and I imagine that it is something that will always be changing and adapting as my business grows. But it's good that after I created my quarterly plan the first time, I have been able to just tweak it each quarter and have not needed to start from scratch.

WEEKLY PLANNING

As well as my 'Quarterly plan,' I have a 'Weekly to do' board in Trello. On a Sunday I do a reflection exercise from the previous week and take note of anything that didn’t get done, anything I’m struggling with etc. I then take a fresh weekly plan and copy down all the tasks from my Quarterly plan - allocating each task to the work days I have available. I do this all in my paper planner before transferring it to Trello (as mentioned earlier, I like having a digital copy so I can always access my plan on my phone, using the Trello app, even when I don’t have my planner with me).

I set a couple of goals / milestones for the week to ensure I am focused on my larger big-picture goals and am focused on doing the right work to get me there. I also add any tasks that I didn’t complete the previous week back into the current weekly plan.

DAILY CHECK-IN

Something I have added to my planner recently is space for a daily check-in. I realised that it was great to feel productive and get everything done, but there wasn’t any space in my day / plan for checking in and taking stock. I now answer a few questions each morning and evening in my planner (such as ‘What is the one thing you would like to get done today?’ ‘What will you do to celebrate completing it?’ 'What are you grateful for today?') and that is really helping me feel good about what I am achieving as well as reminding myself to schedule joyful things in my days too.

SCHEDULED BREAKS

Scheduling a break week has also been a game changer. It was so good last quarter to actually take scheduled time off and see it as a celebration for the hard work I had done. I think as creative business owners this is probably something we struggle with the most.

THE BENEFITS

The thing I have found most beneficial about the plan is that it has given me permission to not do certain things. It gives me a place to dump all the information so that when I am ready to do a particular task it is there. For example, I might suddenly think, 'I have to make a sample of xxx' and then I see it's in the plan for 2 weeks time and I can just forget about it. Prior to this I was just trying to work on everything at the same time and felt like I was never completing anything.

Working this way has also helped me realise that there are only so many hours in the day and to not over-commit myself. I try to be realistic about how long things will take so that I don't always feel like I am behind. I always try to make make my daily task list reasonable and achievable. If you struggle with this - consider writing down how long you expect the task to take next to each item. I often do this when I am feeling overwhelmed and suddenly realise I have scheduled 16 hours worth of things in a day - which is obviously setting myself up for defeat.

Although I try to always follow my plan, I am also working on going easy on myself when things don't go to plan. Most of my deadlines are self-imposed, and pushing something back by a couple of weeks is not going to be the end of the world.

Best of luck with it!

Emily


RESOURCES MENTIONED IN THIS ISSUE

  • Trello can be found here.


P.S. Would you like to know what the Q & A series is all about? This page tells you a little bit more about the motive behind the series.

Don't have a question, but found this newsletter helpful? I'd love to hear from you! Get in touch and say hi.


More posts in the series

Issue 2 - HOW TO LAUNCH A KICKSTARTER CAMPAIGN

ISSUE 2 - HOW-TO-LAUNCH-A-KICKSTARTER-CAMPAIGN.jpg

THE Q & A SERIES - HOW TO LAUNCH A KICKSTARTER CAMPAIGN

Hi Emily,

I hope this email finds you well?

I'm a quilter/seamstress/designer/teacher and I'm about to launch a Kickstarter campaign for a project I'm very excited about.

I'm wondering if you have any tips you would be willing to share from your successful campaign? I've got a few people in my circle of friends/contacts I'm going to be asking and I hope it's OK that I asked you.

Thank you so much; I look forward to hearing from you,

- L


Hi L,

Thank you for reaching out. How exciting that you are about to launch your own Kickstarter campaign! Although it was a tough slog, I would definitely recommend it and say it was by far one of the best things I've done for my business so far.

It was a great opportunity to connect with my community and meet other makers. It also really validated what I'm doing and gave me the push I needed to get my patterns out into the world. I hope this information doesn't overwhelm you (I'd suggest making yourself a cup of tea, as it's going to be a long one!) - it's just all the things I would have liked to have known before going into it.

understanding the playing field

I started my campaign by researching the Kickstarter platform a lot and finding campaigns that looked great and had been successful. This gave me a good idea of what I needed my campaign to look like and what information to include.

My approach is to always look at the best work (even if it took a whole team to produce it) and model my work against that. My theory is that although I will never be able to make work as polished (I am a one person show), it gets me a lot closer than if I was modelling my work up against projects that weren't as strong. Like the saying goes “Shoot for the moon. Even if you miss, you'll land among the stars.”

I found the Kickstarter creator handbook really helpful. I printed all the information out and worked through it - taking notes as I went. This became the scaffold of my whole campaign.

PLANNING REWARDS

In terms of rewards, I know it's tempting to offer heaps of different things, but I'd say hold back. I thought I'd given just enough options, but then found it difficult to fulfil one of the rewards (a slow sewing planning template) as it took longer than I had anticipated. It would have been easier (and reduced stress) if I had just offered the patterns and tote bags.

I also think it's a good idea to put an option down that is just a donation with no reward. For my campaign I did a $50 reward that was 'nothing but a whole lot of love' and a number of people picked this option as it's good for people who want to support you, but don't sew or need your product.

Also, make sure you've got a broad range of price options. I had rewards from $1 to $150, and probably could have even had an even higher value reward. It was clear that some people who were really excited about it were just scrolling down to the highest reward and picking that one.

THE VIDEO

f4cc2580-1e0a-4f5f-a89b-43641aa0e67f.jpg

I am not sure if you are planning on making a video, but if you can, I'd say it's definitely worth it. I found the video the most stressful part of it all (I'm quite camera shy), but it really did bring it all together, and it's the easiest way to succinctly say what your project is about.

Just like I said in the first point, I watched a lot of videos to see what I liked / didn't like and modelled mine on that. I was also lucky enough to have a trusted friend create the video for me, so I knew he would be able to create a video that was able to tell the story of me and my brand.

I prepared by writing a script that succinctly summed up what my project was about and had my friend ask questions / prompt me during filming.

PHOTOS

If you can, I'd suggest getting some professional photos taken of your product / what you are creating. I had taken some on my phone and at the last minute, decided to get a photographer in and it was a game changer. I also got her to take portraits of me for the campaign and it was good having fresh photos to use on the campaign as well as on social media. These images really brought it all together and gave my campaign a very cohesive and on-brand look. You are really selling yourself as well as the product when you're crowdfunding, so make sure you show people who you are. Also a great excuse to get some photos of your beautiful work!

DESIGN COLLATERAL

The other thing that I also found made a difference to the look of the campaign was to get a graphic designer to design all my collateral. She is the designer I worked with for my branding, pattern envelopes etc. and then she just rolled it out onto illustrations of the rewards, as well as templates for me to use on social media when I hit certain targets (for example, 'We're halfway there').

REWARD FULFILLMENT

TOTE BAG.png

In terms of fulfilling rewards, I had said I would get all my rewards out to people in April and found that a huge struggle. I got all my Australian ones out in time, but the international rewards were a month late. No one seemed worried about it, but I did find it stressful. If I were to do it again, I'd definitely give myself a bit of extra time. I was expecting a certain number of people to pledge and then there were a lot more in the end (which was great), but it did mean it was a lot more work to pack and send the rewards than I had thought.

As for postage, make sure you have a really good idea of how much things are going to cost to send out. I thought I'd estimated well, but quite a surprise when I got to the post office (this especially applies to shipping things internationally)!

FINAL TIPS

When it comes to launching your campaign, keep in mind it needs to be approved. I was on a bit of a deadline and hadn't taken this into consideration. It didn't take long, but I think it could take up to a couple of days - so worth keeping in mind.

To promote the Kickstarter I started by emailing all my friends and family, before I let people on my business social media / email list know. I thought it looked good if a few people had already pledged before I spread the word further.

Also, I'd suggest being as organised as you can. You want to enjoy the campaign period, so be ready to respond to questions and have posts prepared for sharing on social media etc.

Best of luck with your campaign!

Happy sewing,

Emily


RESOURCES MENTIONED IN THIS ISSUE

  • In the Folds Kickstarter campaign can be found here.

  • The Kickstarter Creator Handbook can be found here.


P.S. Would you like to know what the Q & A series is all about? This page tells you a little bit more about the motive behind the series.

Don't have a question, but found this newsletter helpful? I'd love to hear from you! Get in touch and say hi.


More posts in the series