sewalong

How to: Sew in-seam pockets with french seams

how_to_sew_pockets_with_french_seam_1

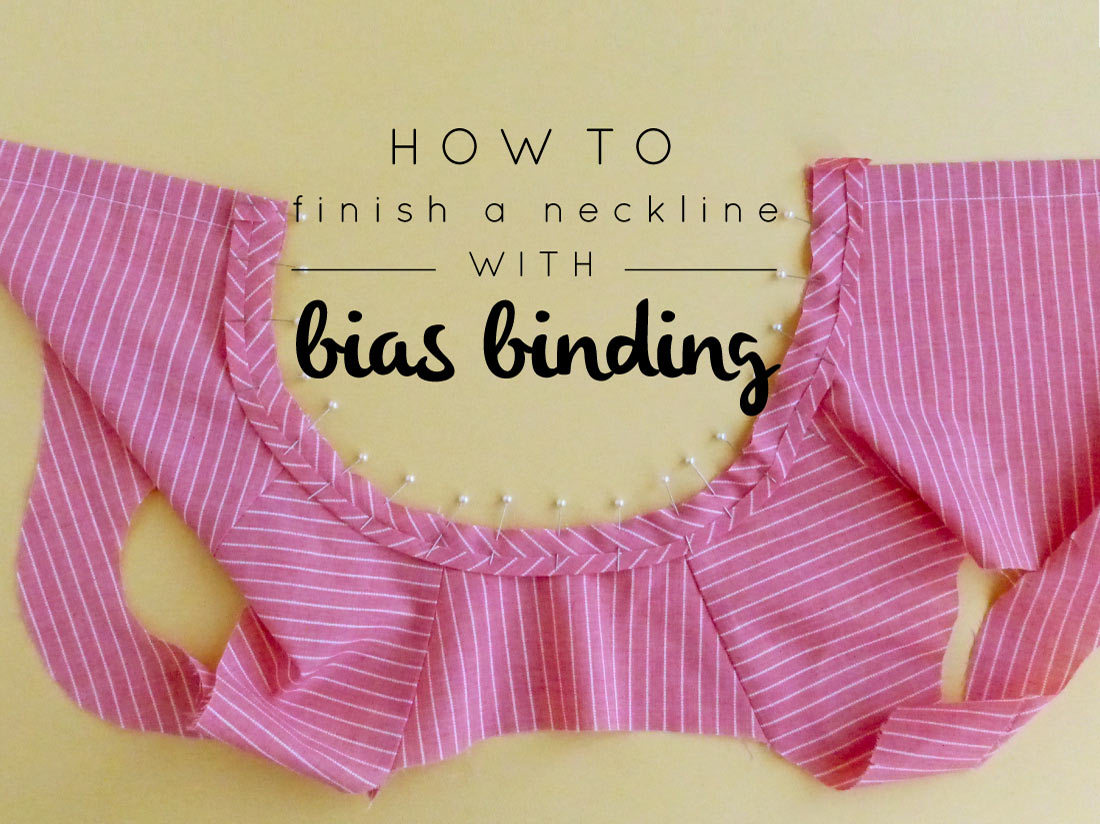
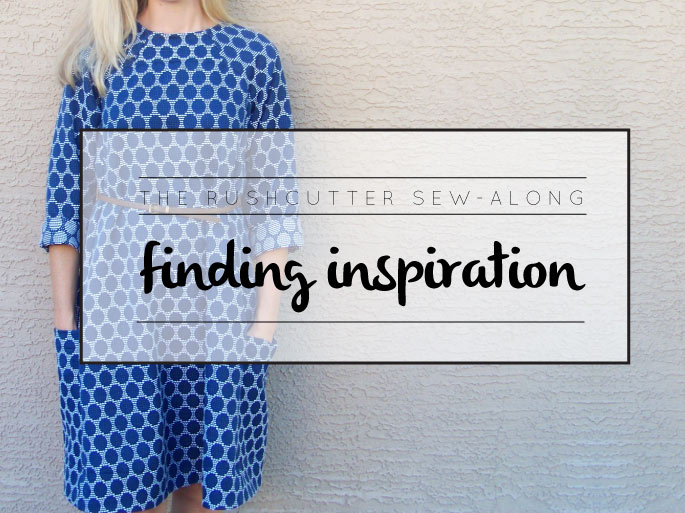
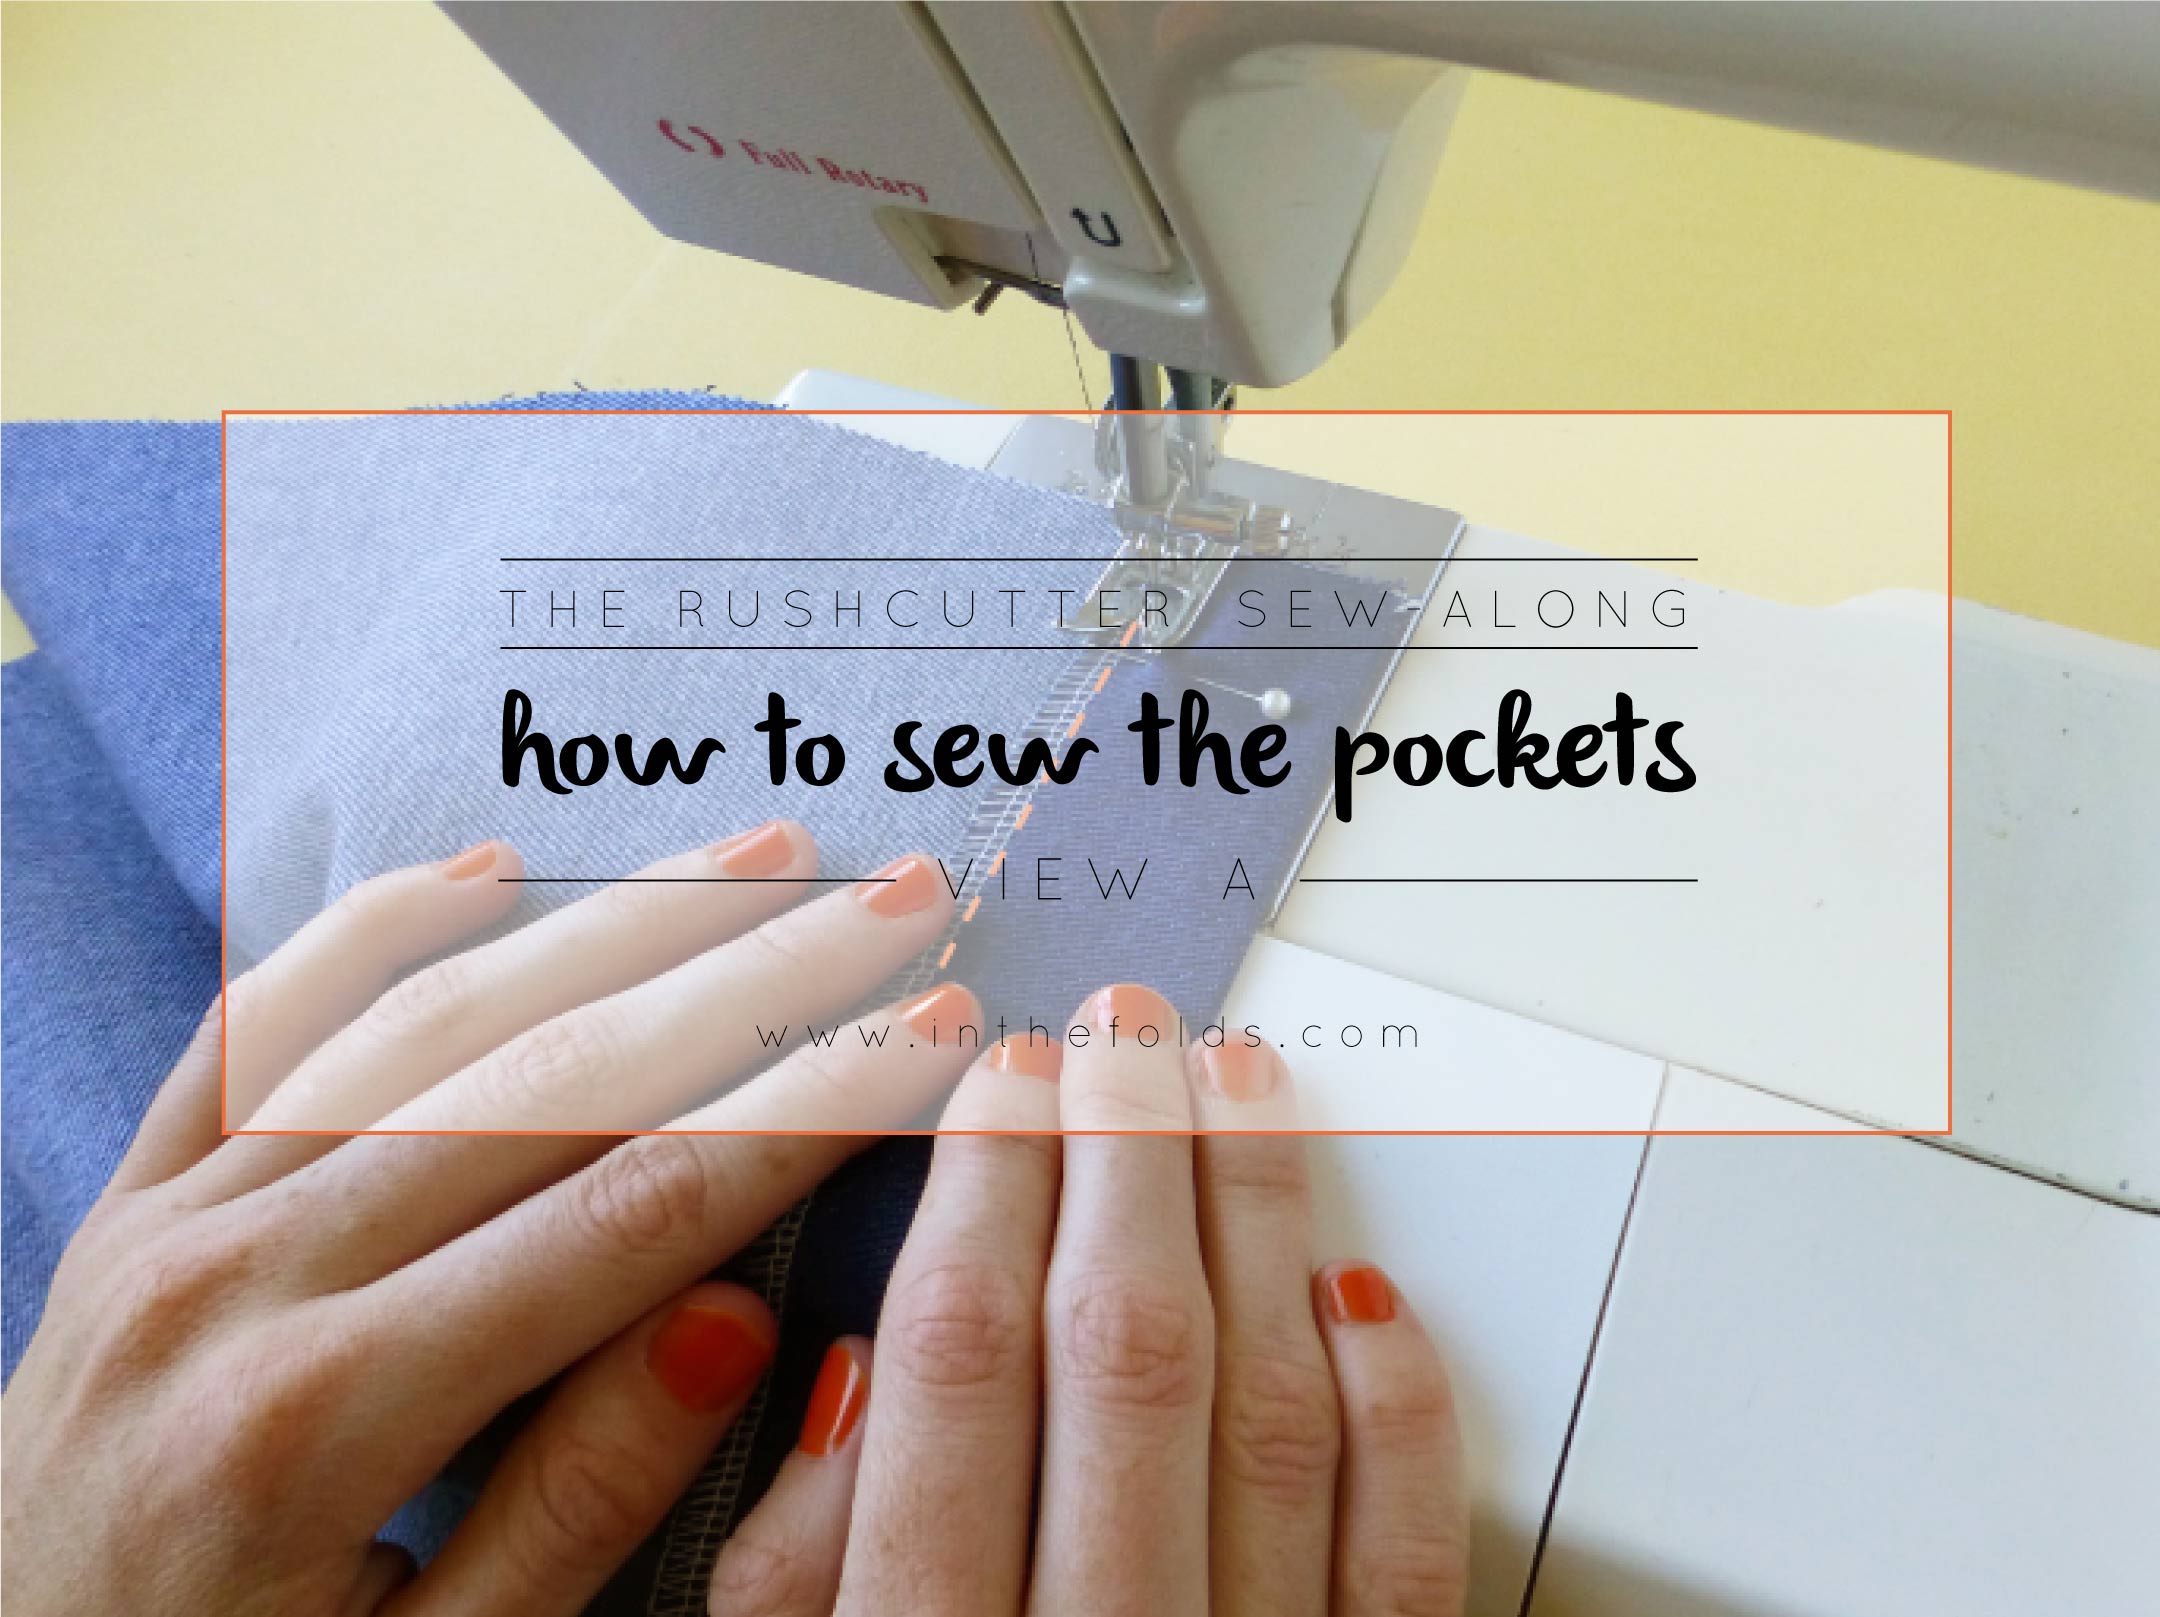
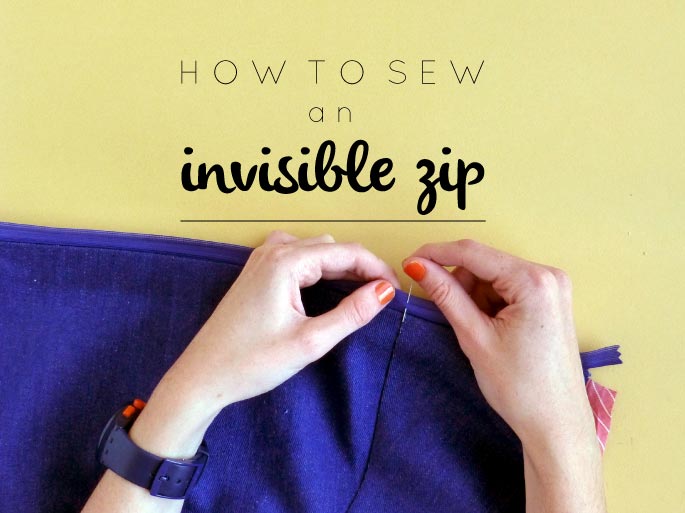
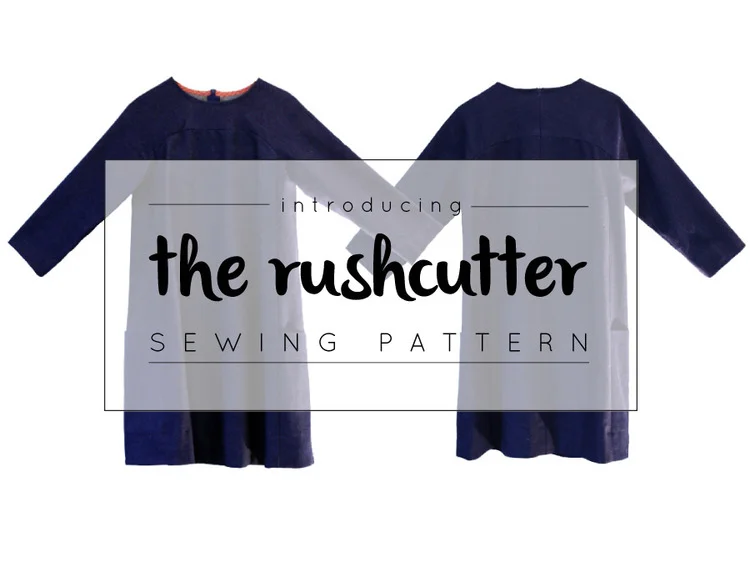
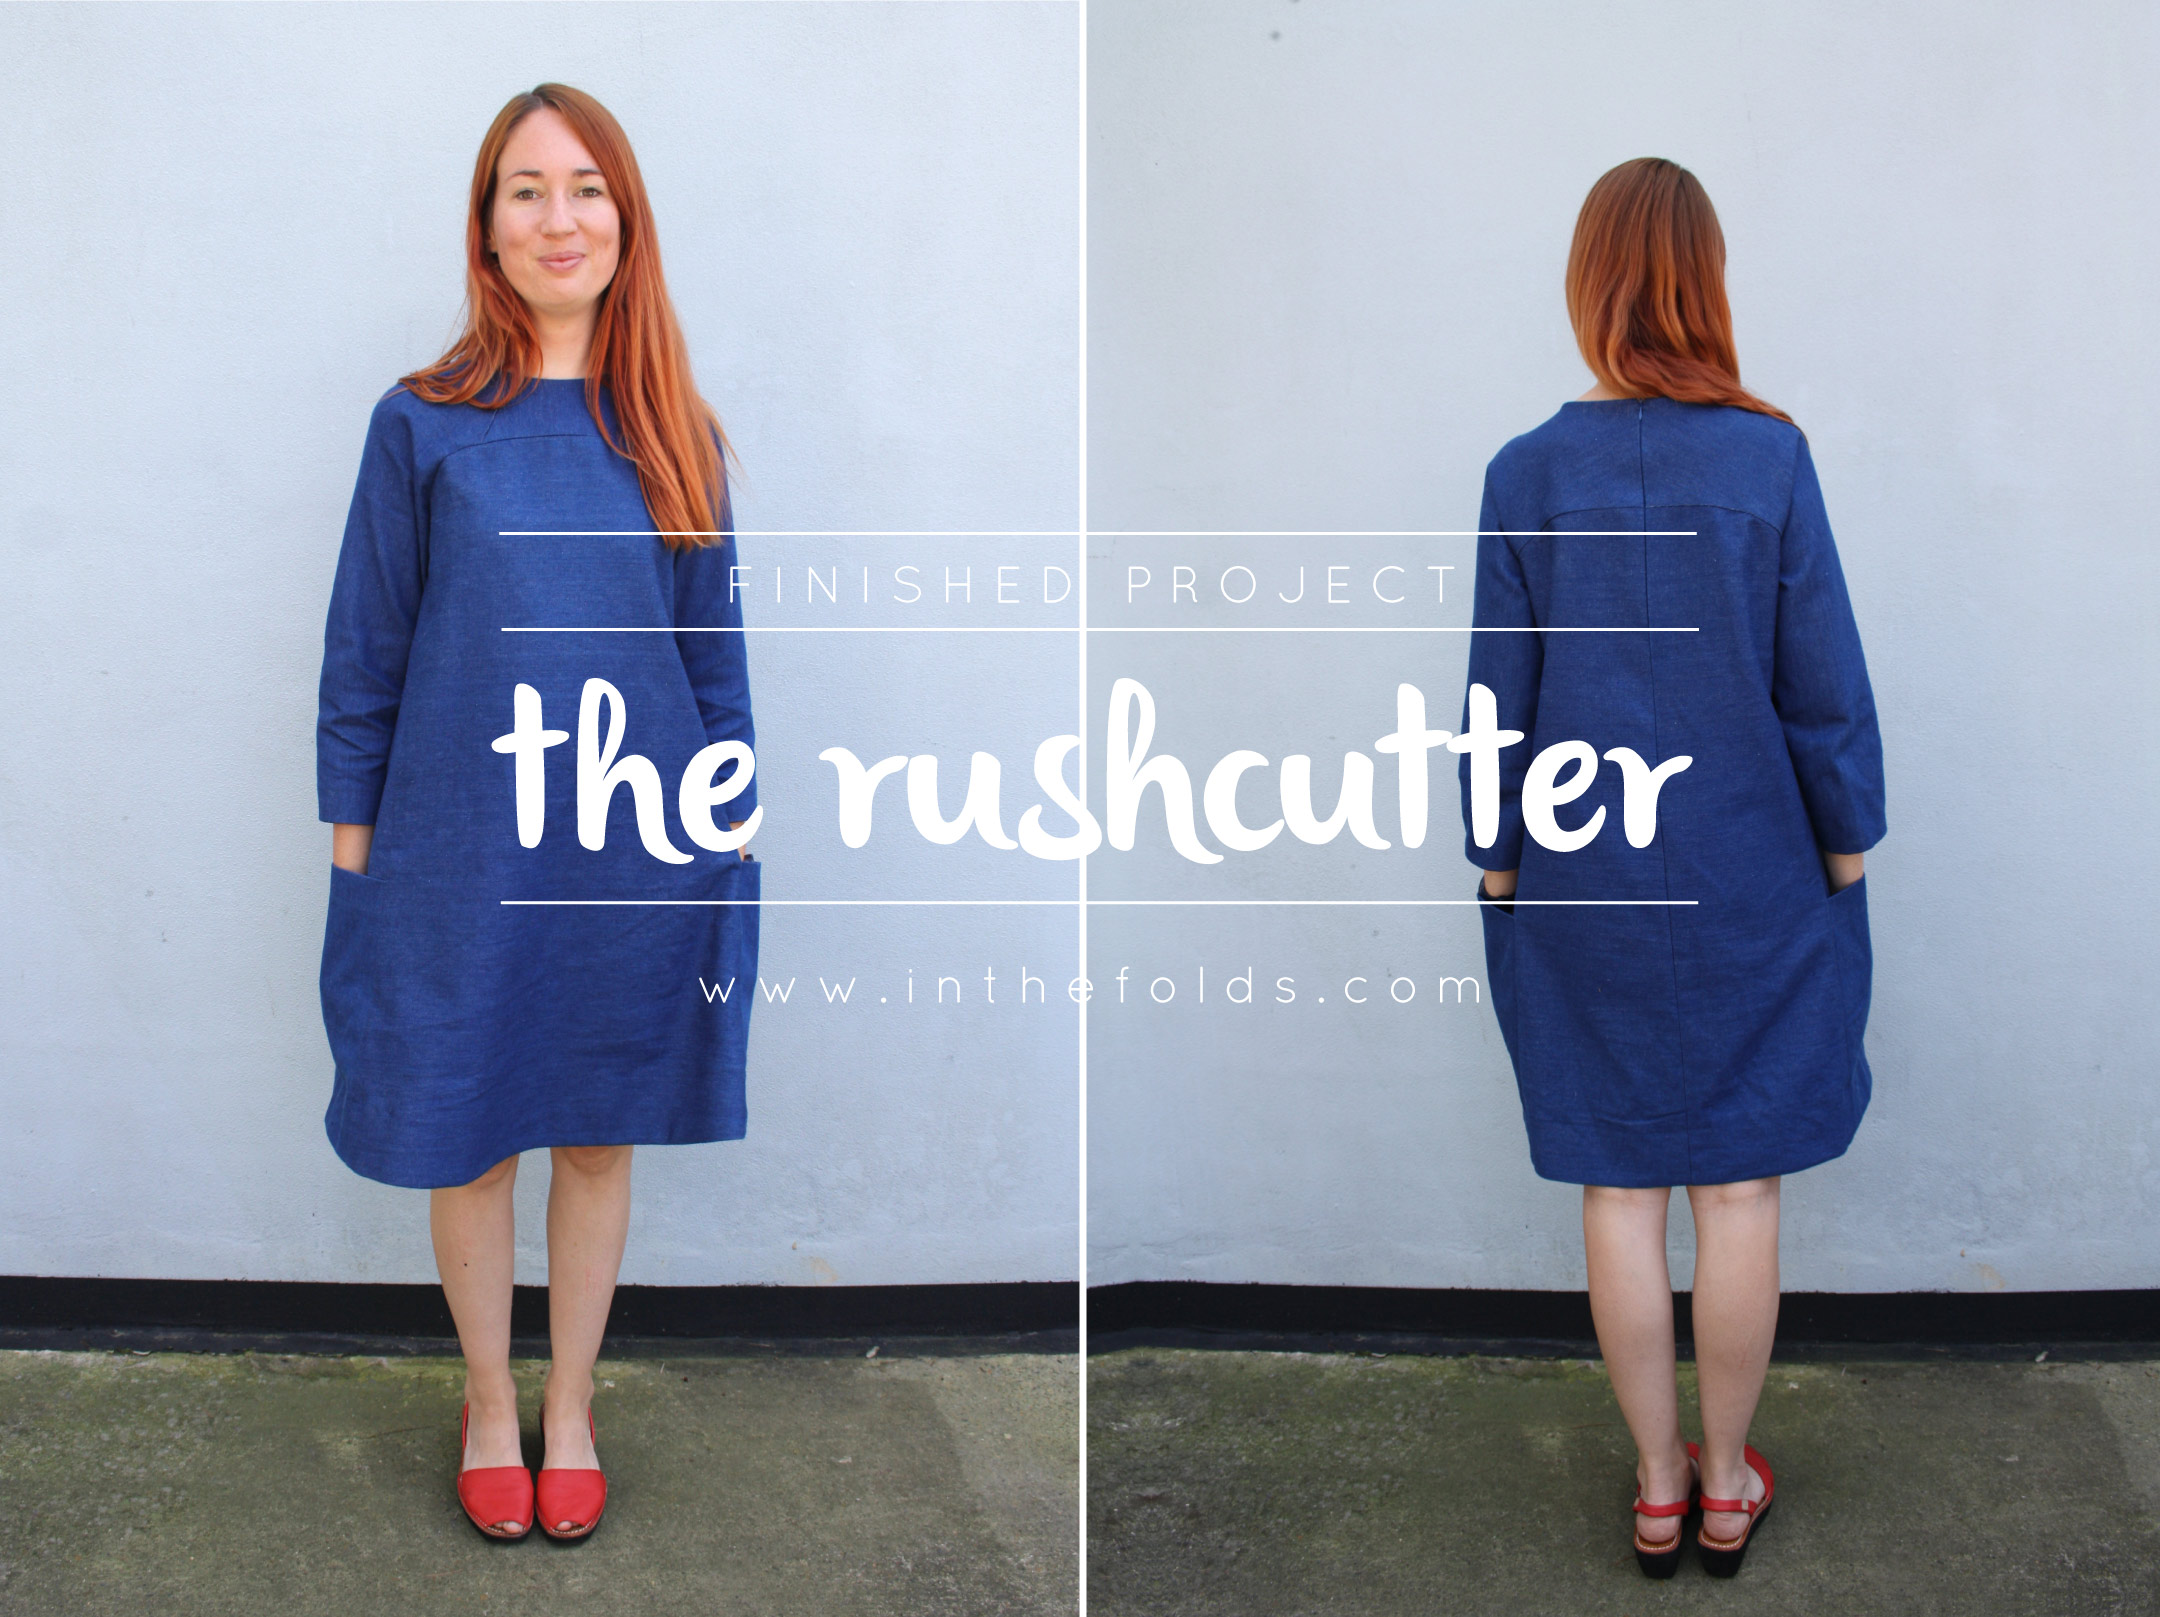
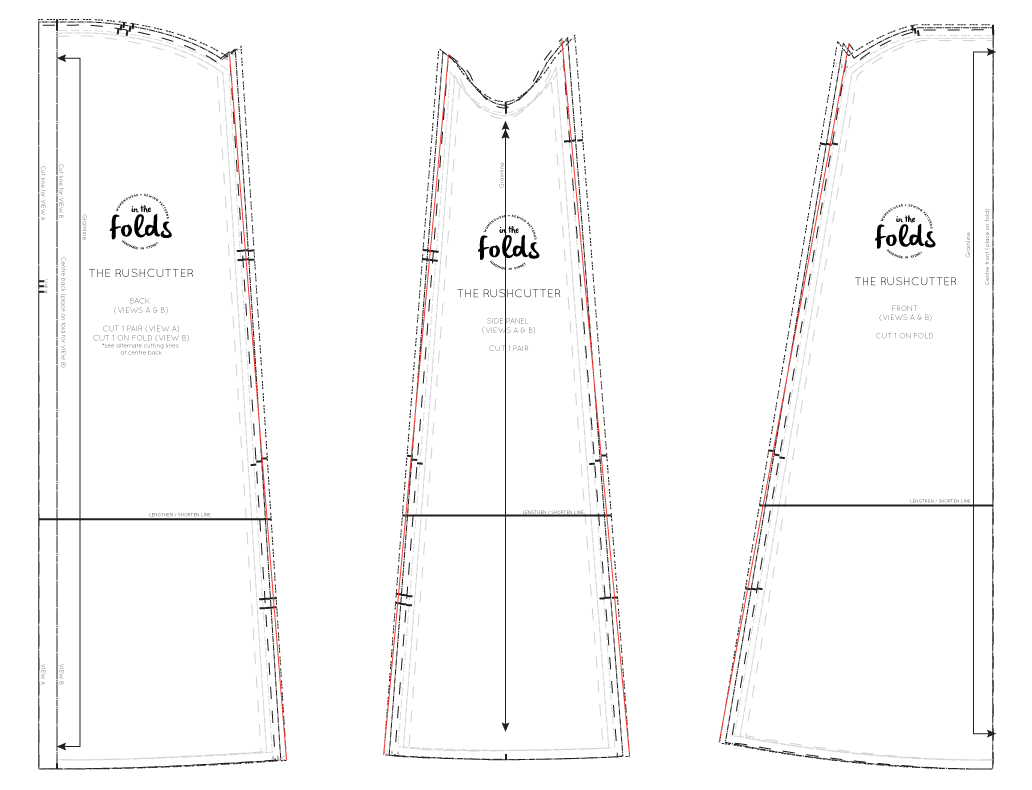
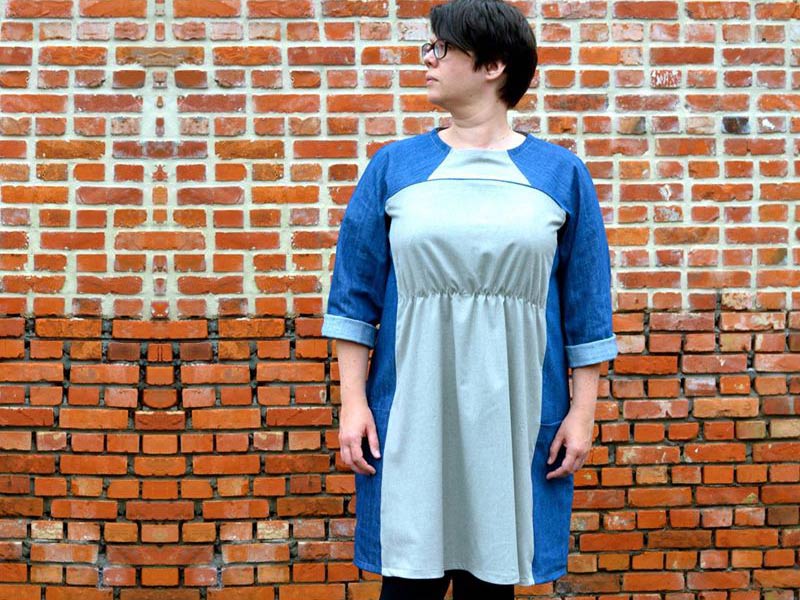
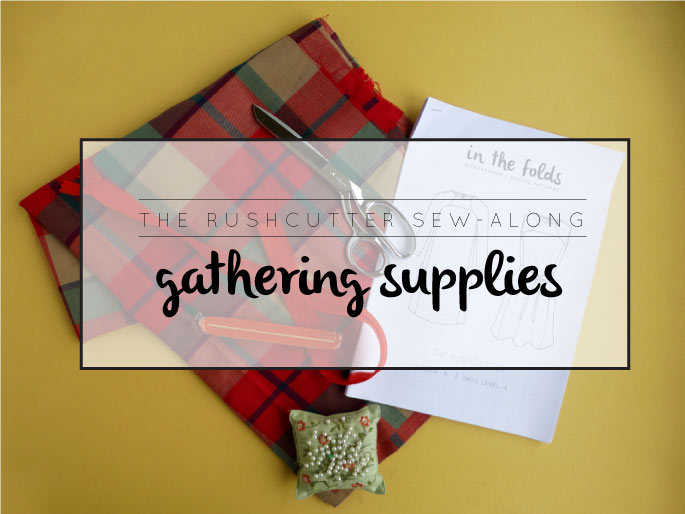
Over the past two days I have shown you how to prepare the bodice of your Rushcutter - View B. At this point we are up to putting in the in-seam pockets.

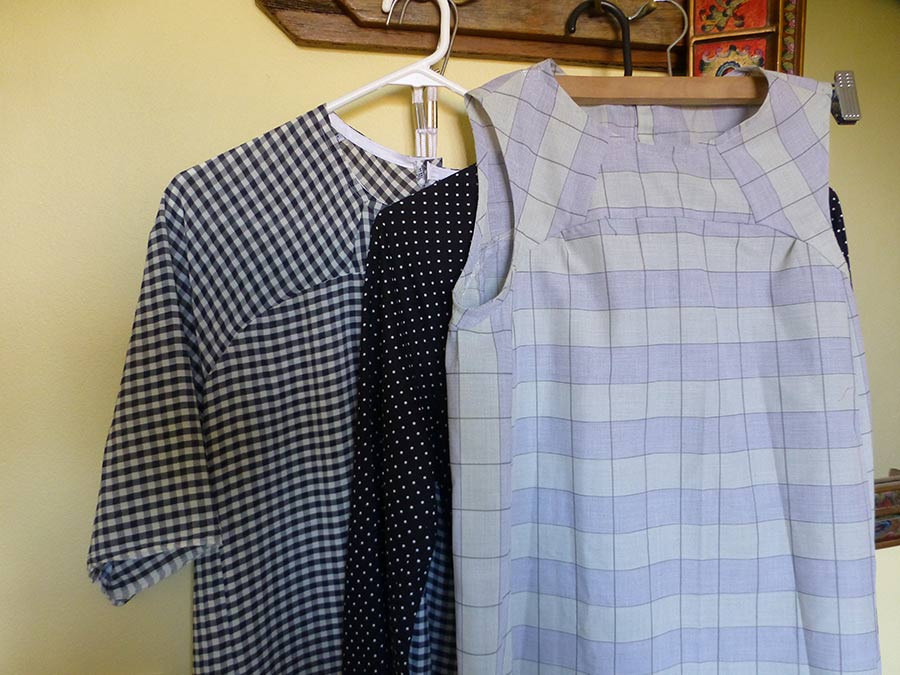
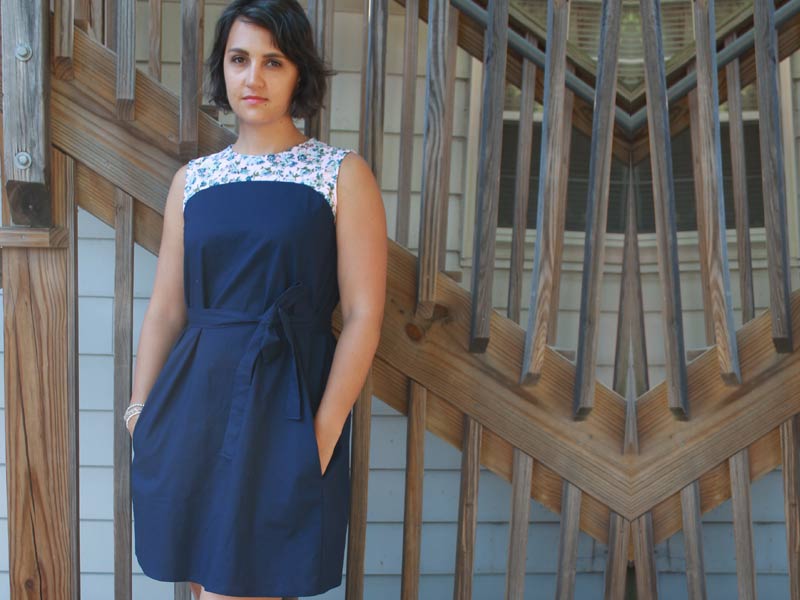
I just LOVE pockets, so I find a way to put them in pretty much every garment I make. Even a soft floaty dress like my Rushcutter.

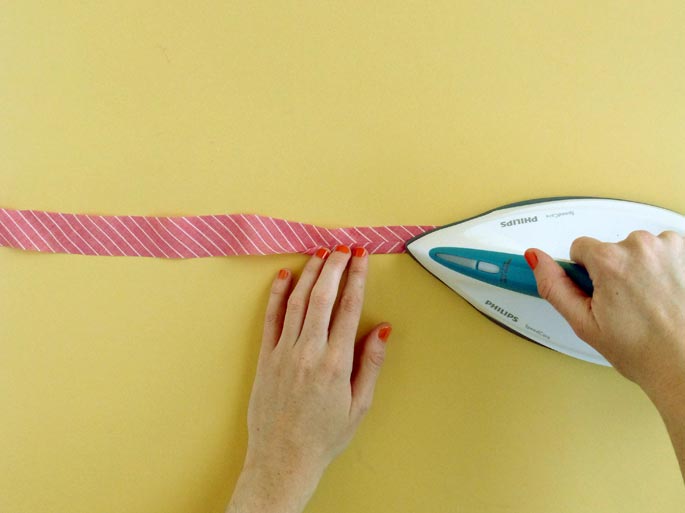
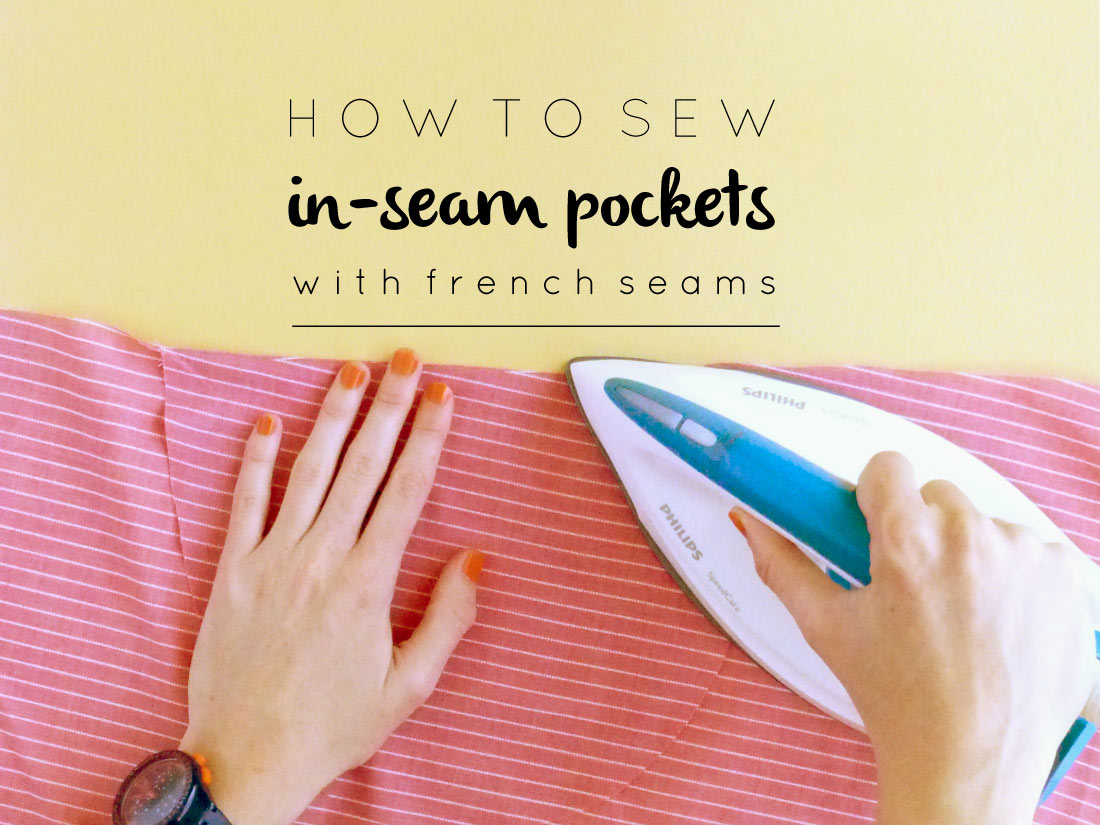
If you're not as partial to a pocket as I am, you can simply attach the FRONT to the SIDE PANELS, ignoring the pocket all together. But if you are a fan of the pocket, well continue on with me today and I'll show you how to get a lovely finish with a french seam. And this method will work for other garments, not just The Rushcutter!
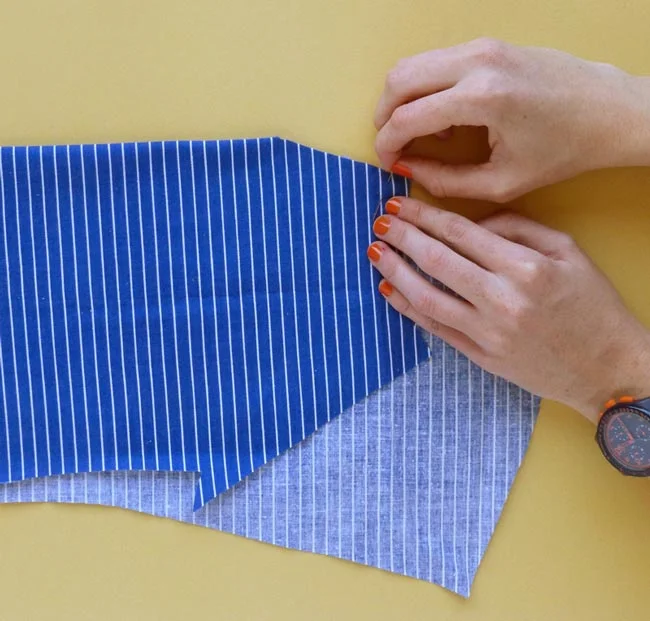
Place your pockets

how_to_sew_pockets_with_french_seam_2

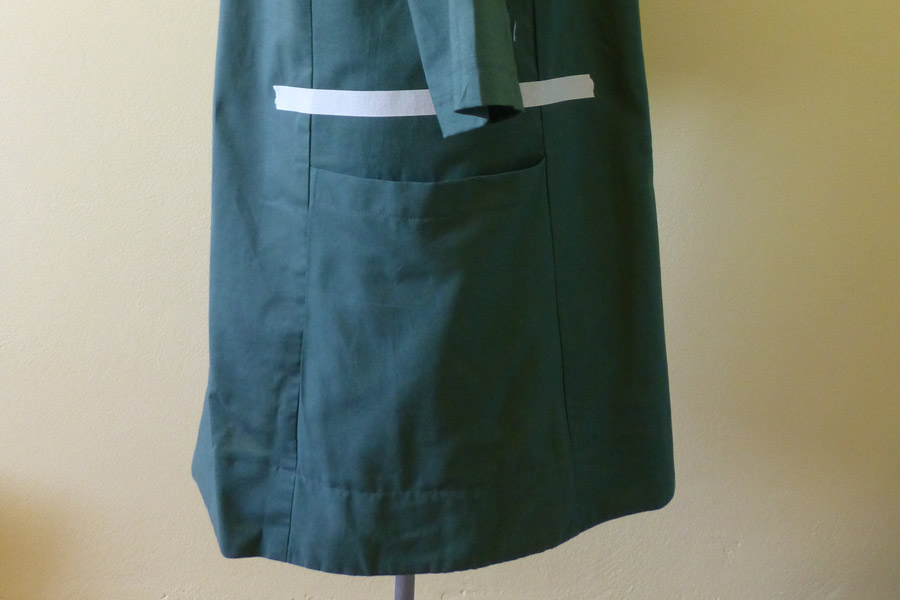
Take 1 pair of pockets and, with wrong sides together, match the pockets to the notches on the FRONT. The notch in the centre of the pocket should be matched with the middle notch on the FRONT of the dress.

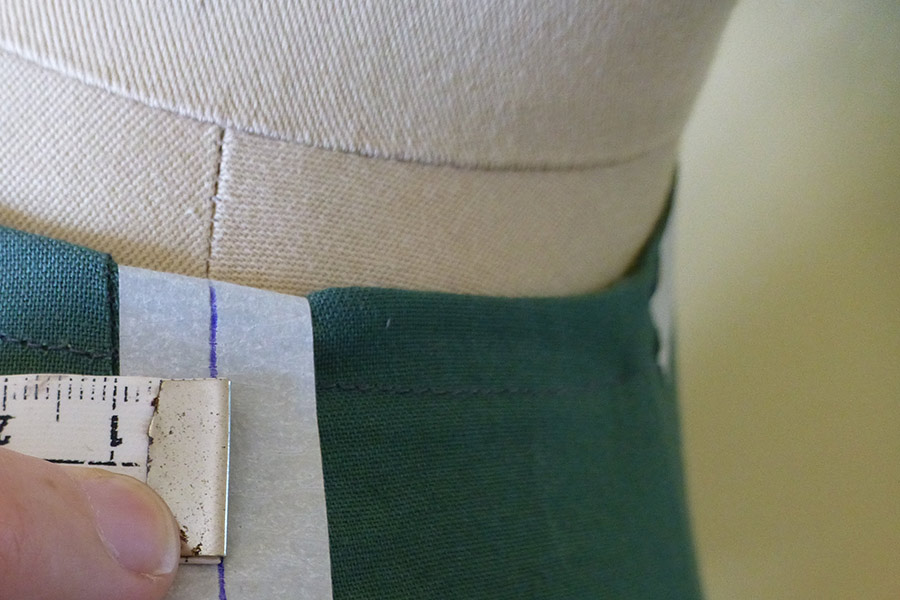
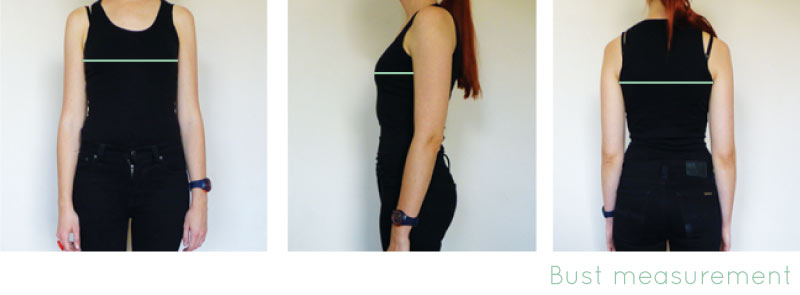
Pin pocket in place. Now, before sewing, I would suggest holding the panel up to your body, and checking how the pockets sit on your body. The top of the panel should sit just above your bust. If the pocket feels too low or too high, remove the pins and place the pocket in a more suitable location (this is when a toile really comes in handy). Measure the distance between the notch on the pocket and the notch on the dress, so that you will be able to place the other pocket pieces in the correct spot. 

Stitch one side of the pocket to the front

how_to_sew_pockets_with_french_seam_3

When you are happy with the pocket placement, stitch from the top of the pocket to the bottom, using a 6mm (1/4in) seam allowance. 

Repeat on the other side.

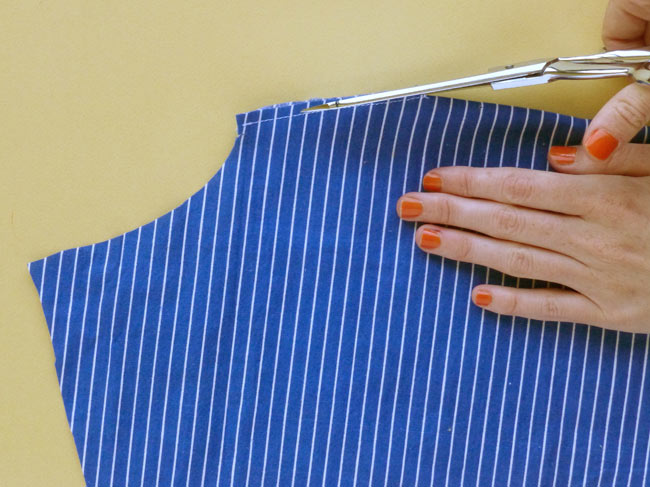
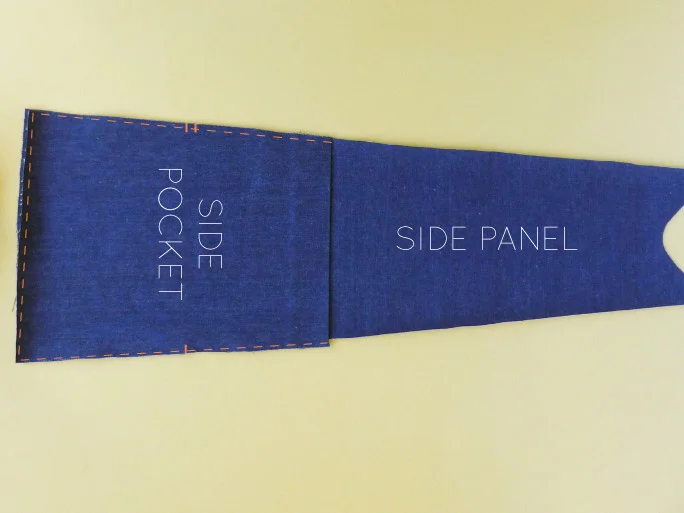
Trim back pocket seam allowance

how_to_sew_pockets_with_french_seam_4

Trim back the seam allowance by 2-3mm (1/16in), from the top of the pocket to the bottom, leaving the rest of the seam untrimmed, on both sides.

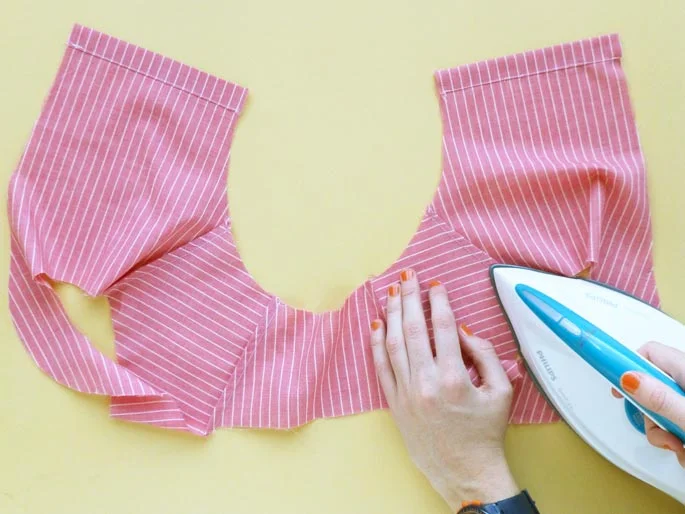
Open the seam, and press the seam allowance towards the pocket. 

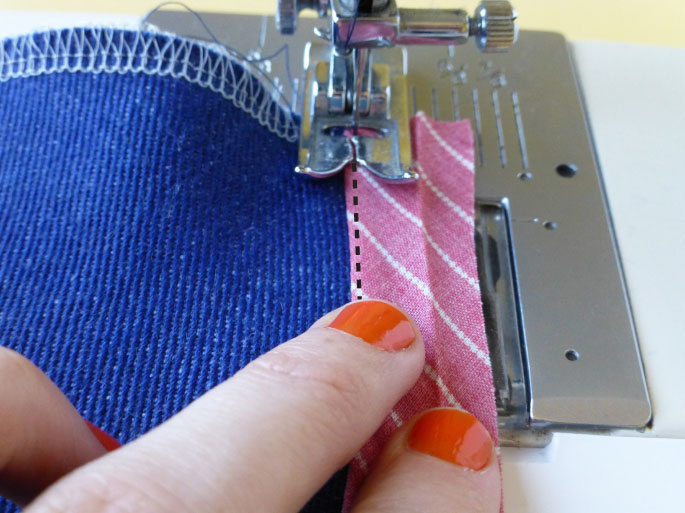
Create a french seam

how_to_sew_pockets_with_french_seam_5

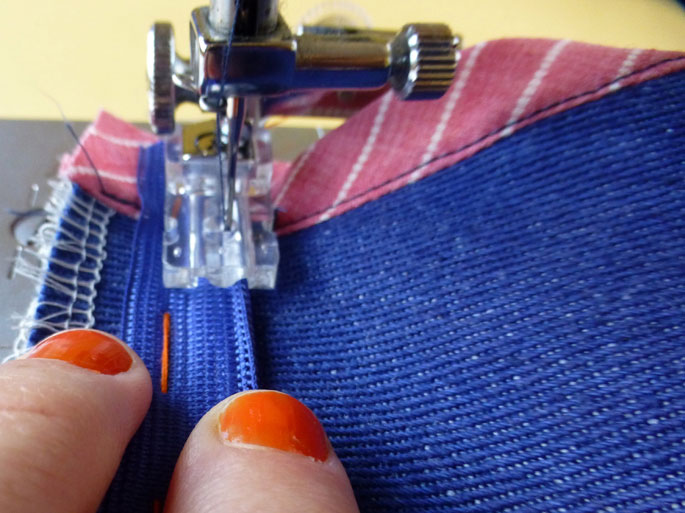
Fold the pocket back towards the dress, now with right sides together, enclosing the raw edge and the original row of stitching inside the fold. Once again, stitch from the top of the pocket to the bottom with a 6mm (1/4in) seam allowance. Repeat for the other side. 

Stitch pocket to side panel

how_to_sew_pockets_with_french_seam_6

Now take the remaining pair of pockets and match them to the SIDE PANEL pieces with wrong sides together, once again matching up the centre notches. If you changed the placement of your pockets on the front, make sure you do the same for the pockets being attached to the side panels. Pin in place and attach using the same method we used for the first side.

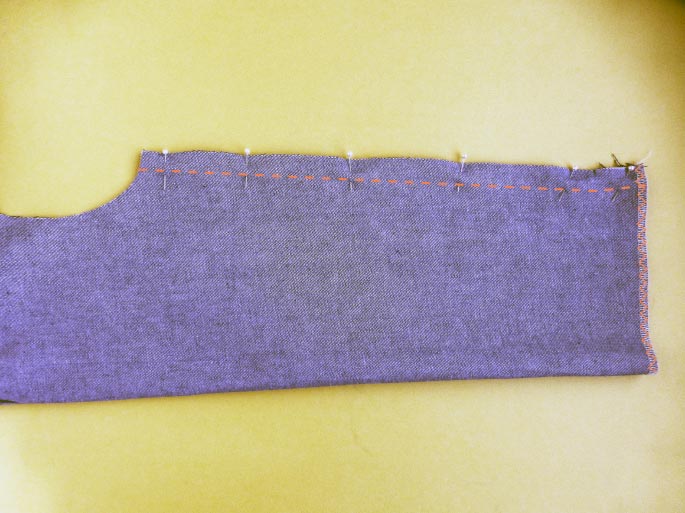
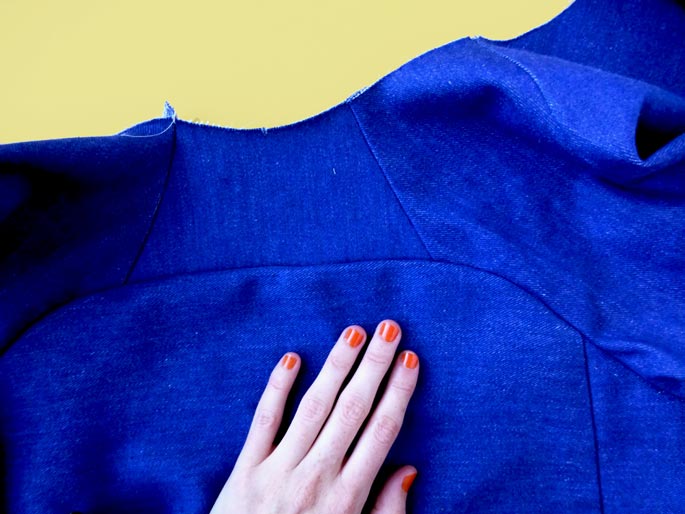
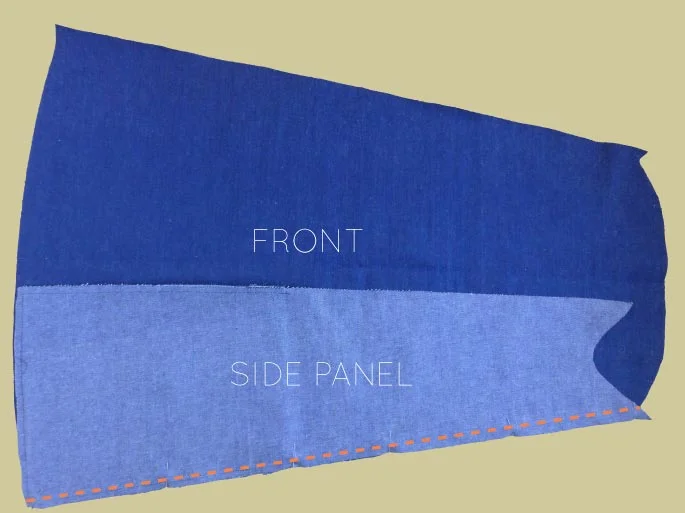
Join the front to the side panel

how_to_sew_pockets_with_french_seam_8

Press all 4 pocket bags away from the panel they are attached to. 

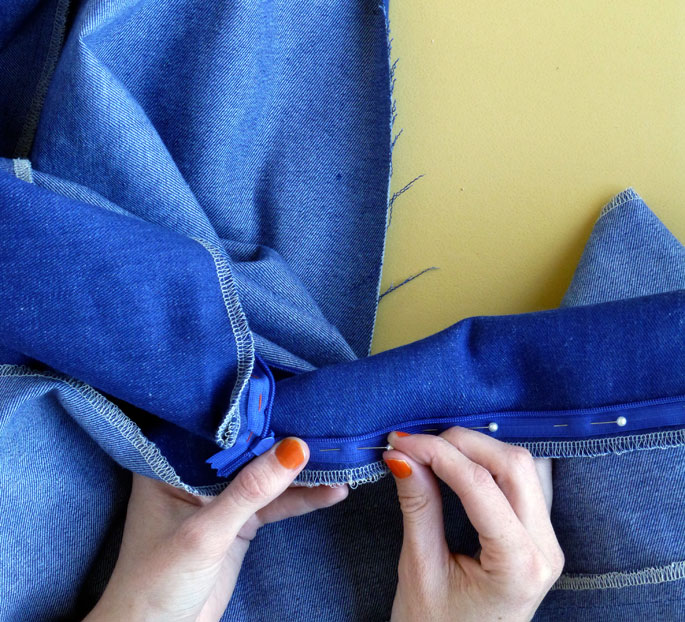
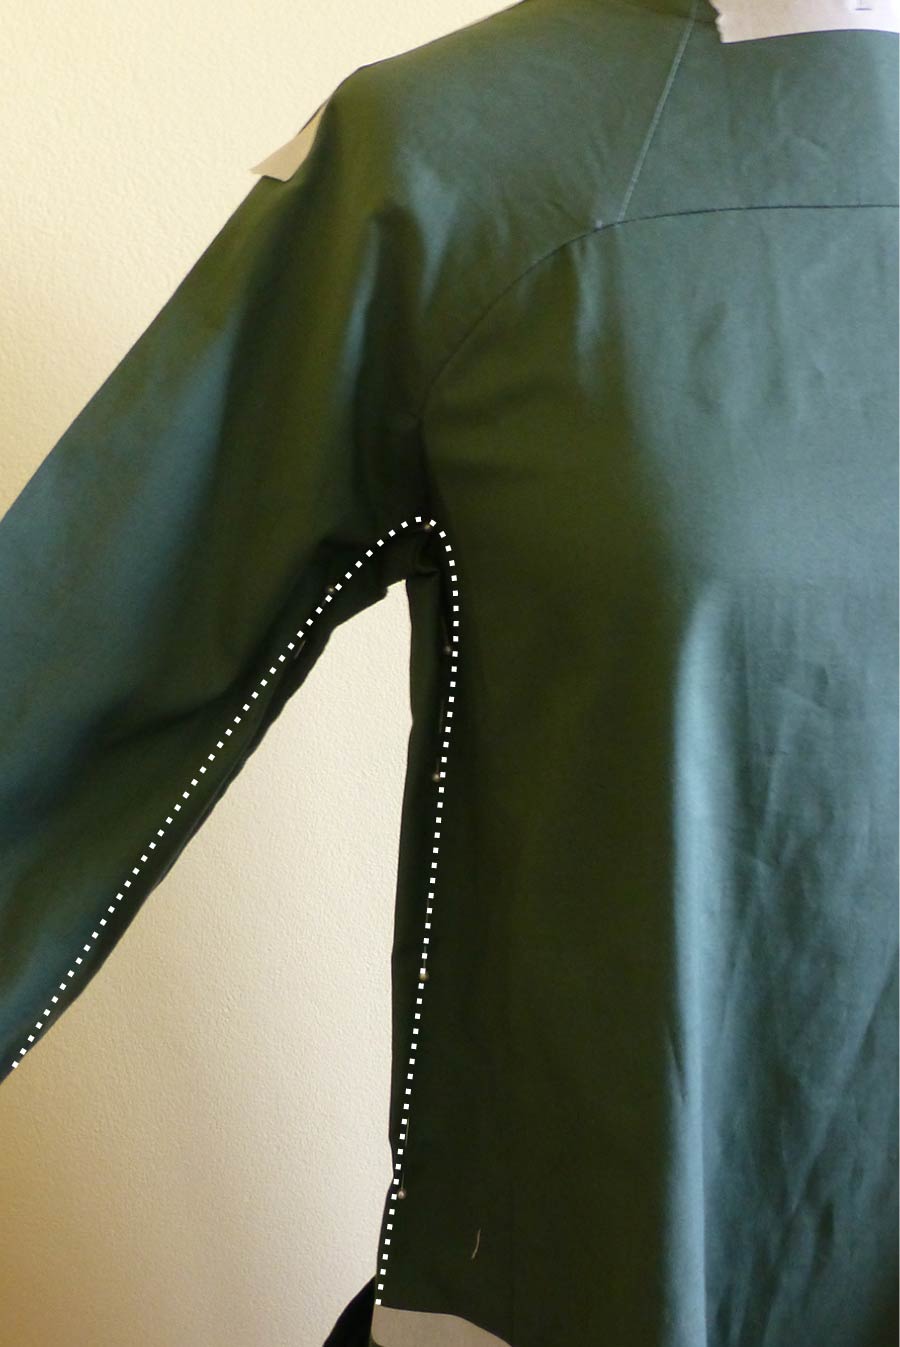
With wrong sides together, pin the SIDE PANEL to the FRONT on both sides. Pin up the seam, around the pocket, and then continue pinning the remainder of the seam.

how_to_sew_pockets_with_french_seam_9

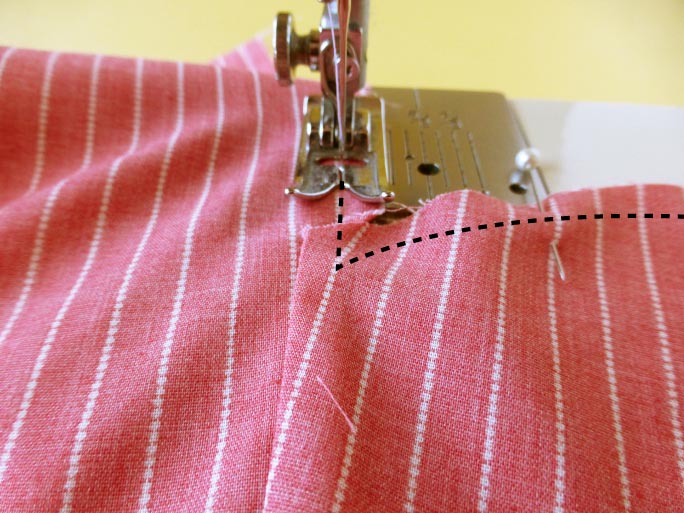
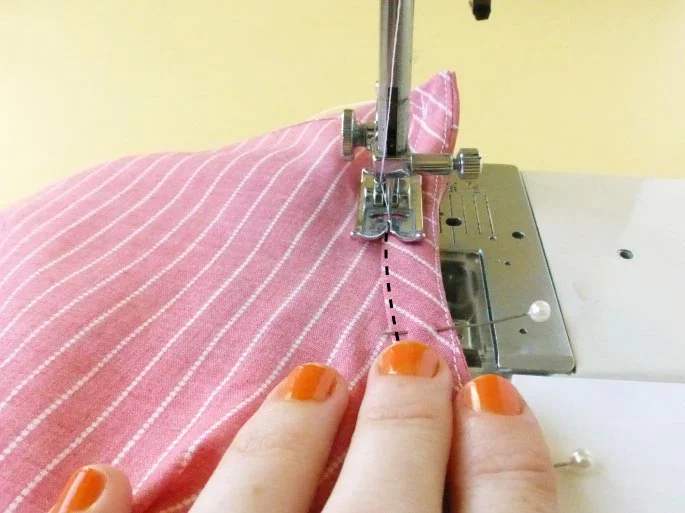
Stitch the pieces together with a 6mm (1/4in) seam allowance. You will notice that, when you approach the pocket, your stitching line does not meet up with the seam between the body of the dress and the pocket. This is how it is supposed to look, they will match up when you sew your second row of stitching. 
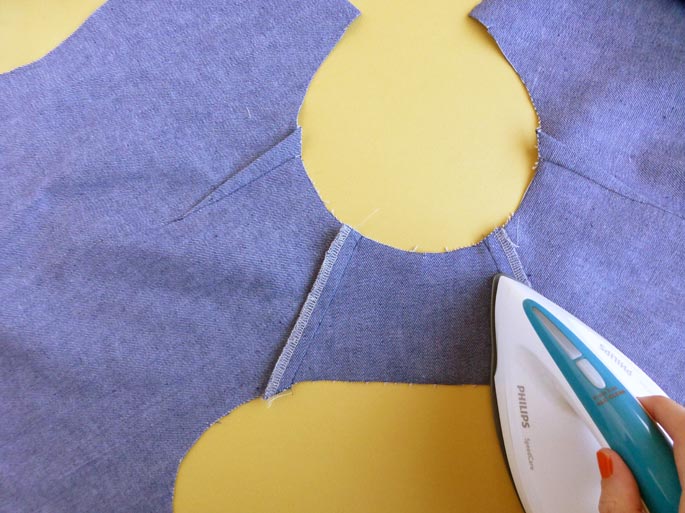
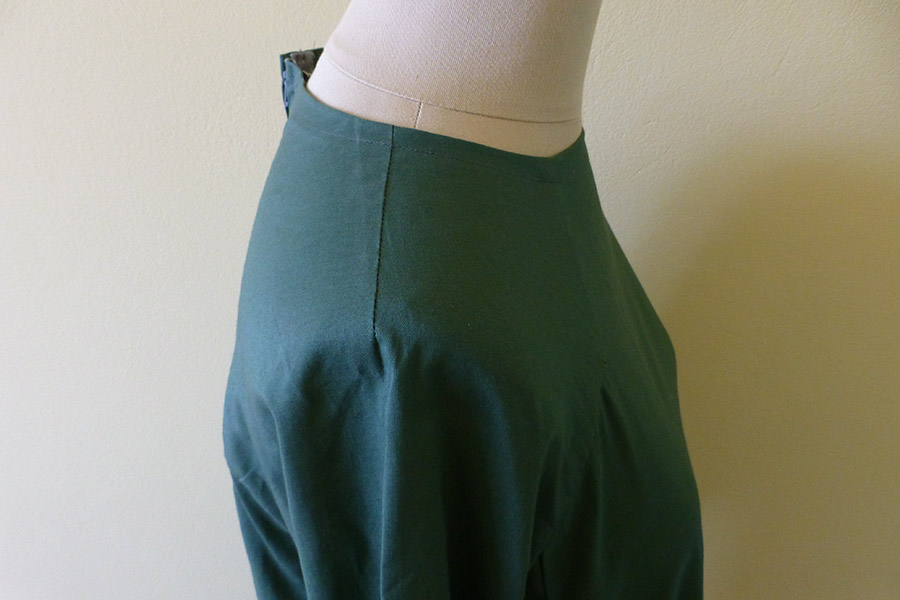
Clip into corners

how_to_sew_pockets_with_french_seam_10

Clip into the corners between the pocket bag and the body of the dress, getting nice and close to the row of stitching, but being careful not to cut through. 

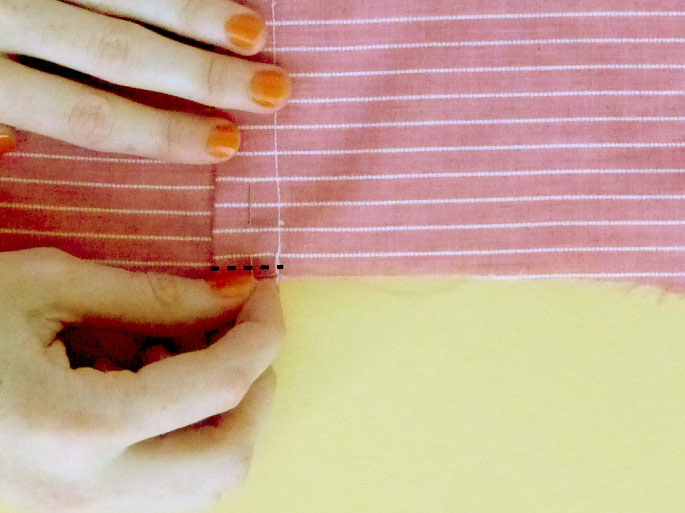
Trim back the whole seam by 2-3mm (1/16in).
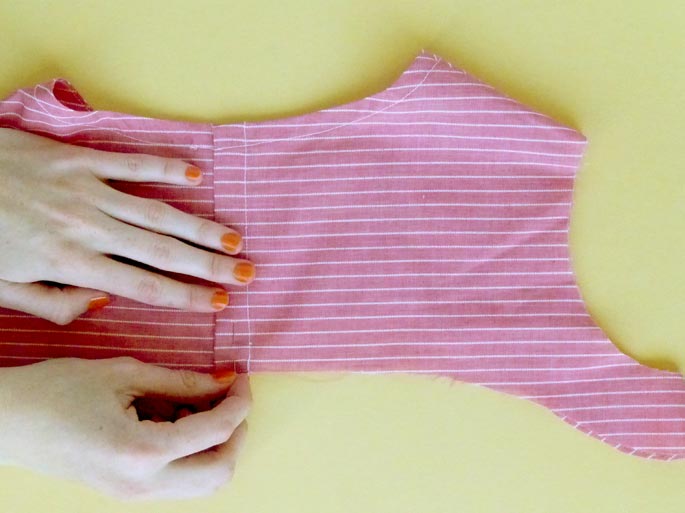
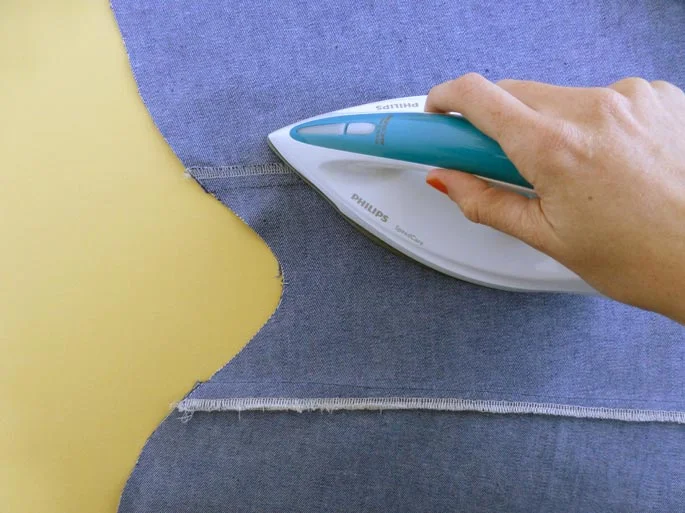
Press seam

how_to_sew_pockets_with_french_seam_11

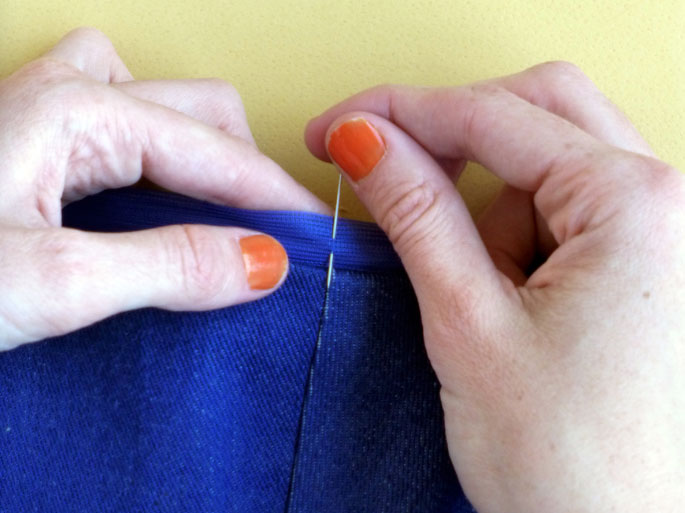
Turn the pieces inside out, and press the seam flat. Pin and then and stitch along the seam, with a 6mm (1/4in) seam allowance enclosing the raw edge inside the seam. 
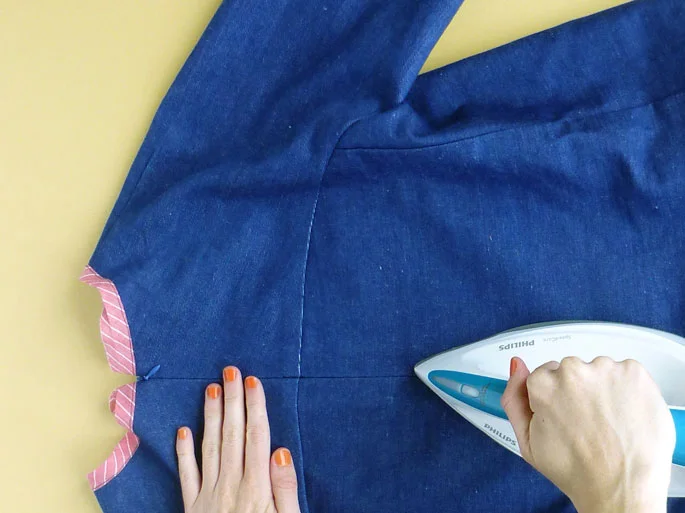
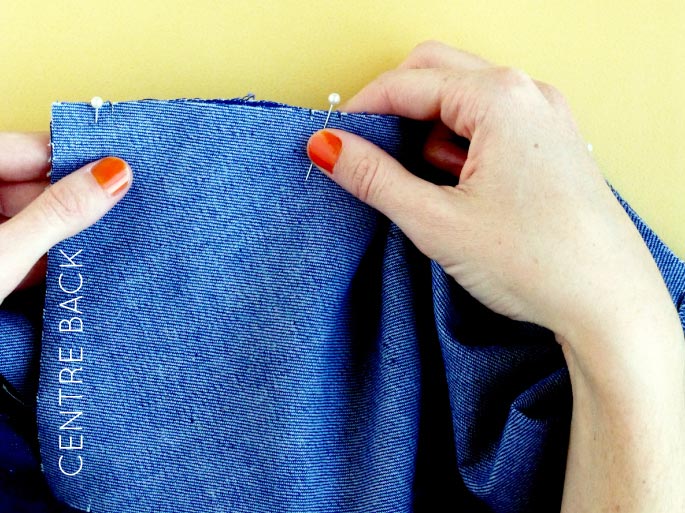
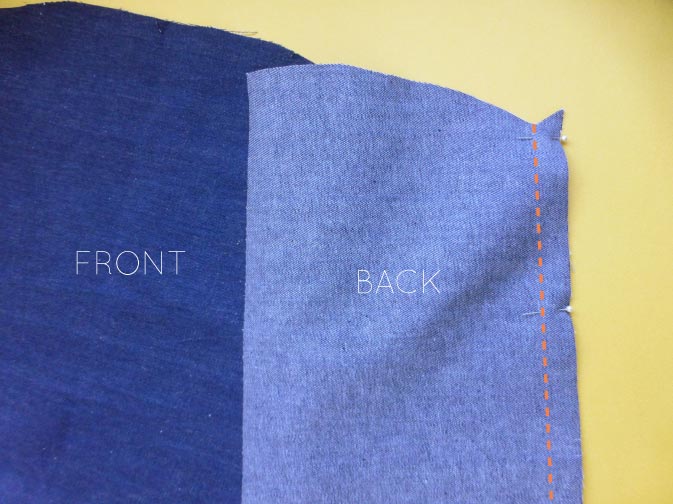
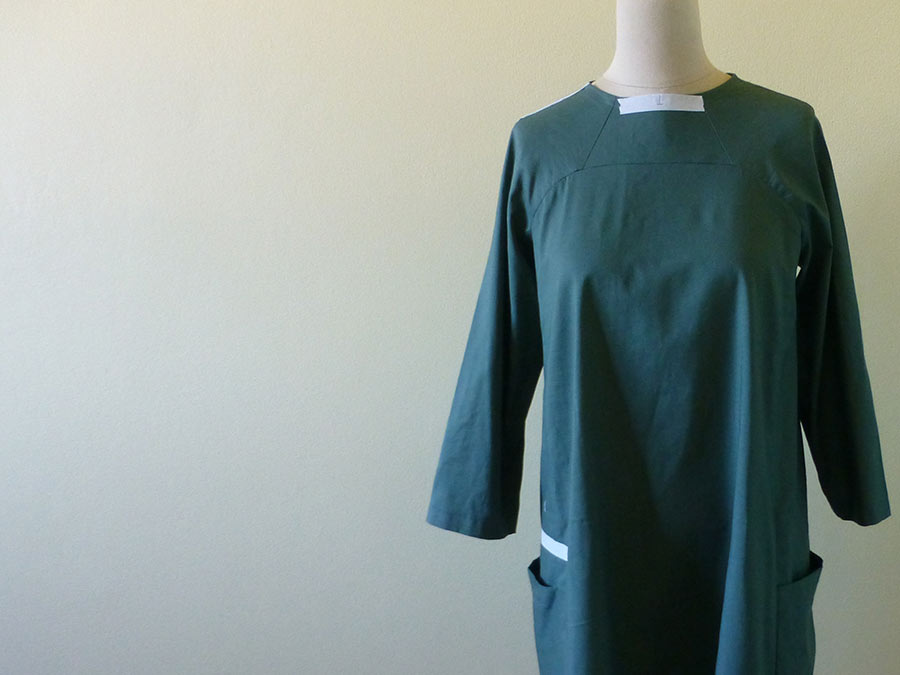
Attach the back

how_to_sew_pockets_with_french_seam_12

Attach the BACK to the side panels with a french seam. Use the notches to help you position the pieces correctly. Press the finished seams towards the front of the dress.

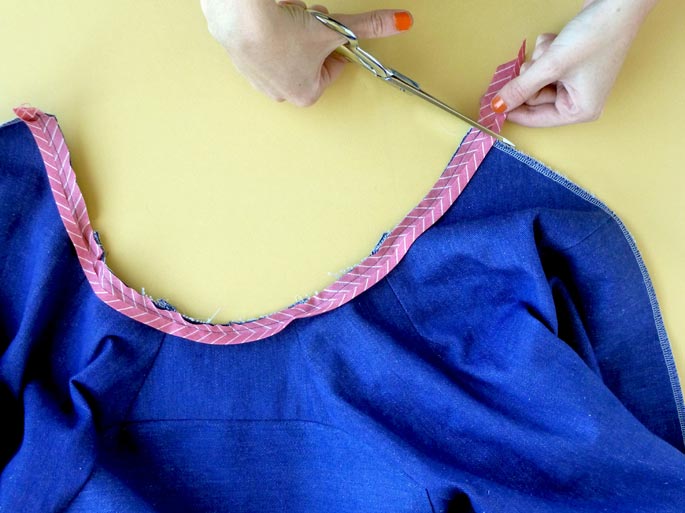
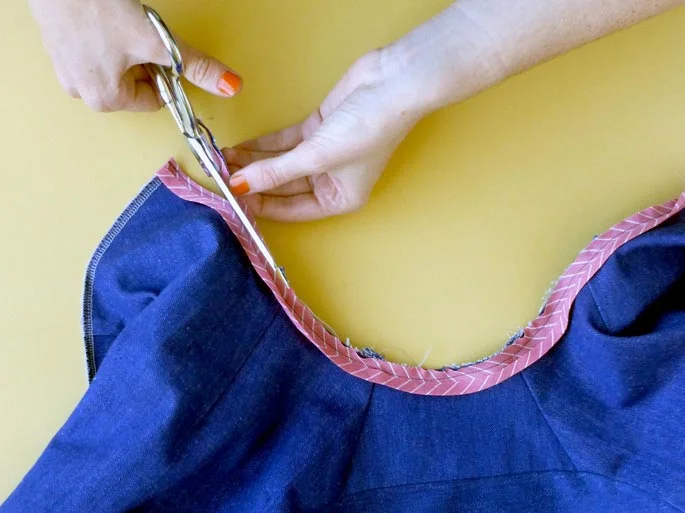
So that brings us to the end of this post! Tomorrow, the Rushcutter will really start looking like a dress as we will be joing to the bodice to the body of the dress. Yay!


You may also like:

How to : Finish a neckline with bias binding

how_to_finish_neckline_bias_binding_1

Binding necklines and armholes can create a lovely clean and professional finish. It minimises bulk and can be a perfect finish for lightweight or transparent fabrics that you would be able to see a facing through.

Earlier in The Rushcutter sew-along, I showed you how to make your own bias binding, so head back there if you think you would prefer to make your own binding instead of buying the pre-made stuff. 

Measure the neckline

To start, measure the length of the neckline of your dress. Take note of the measurement. 

Cut a piece of binding the length of your neckline plus 2cm (3/4in) - this extra 2cm will account for the raw edge at each end that need to be turned under, to achieve a clean finish. 

Press the bias tape

how_to_finish_neckline_bias_binding_2

Lay the binding face-down and press one of the long edges under by 10mm (3/8in). If you are using a different width of binding, fold up by a third of the total width. 

how_to_finish_neckline_bias_binding_3

Fold back both short edges by 1cm (3/8in) and press.

Pin

how_to_finish_neckline_bias_binding_4

With right sides together, align the fold on the short edge of the binding with the centre back of the UPPER BODICE. Pin the unpressed edge of the binding to the neckline. 

how_to_finish_neckline_bias_binding_5

Continue pinning the binding around the neckline (being careful not to stretch it) until you reach the centre back on the opposite side. Check that the fold on the short edge matches up with the centre back seam. If it doesn't, you will need to adjust it, until it sits correctly.

Stitch

how_to_finish_neckline_bias_binding_6

Stitch the binding to the neckline with a 1cm (3/8in) seam allowance. Clip into the seam allowance at regular intervals. This will help you create a smooth neckline when you fold the binding to the inside of the dress. If you are using a thick or bulky fabric, you can trip down the seam allowance by 2-3mm (1/16in).

Understitch

how_to_finish_neckline_bias_binding_7

Using your finger, press the binding (as well as the seam allowance) nice and flat, with the seam allowance pushed towards the binding. Understitch the seam allowance to the binding. This will help the binding roll to the inside of the garment.

Press and pin

how_to_finish_neckline_bias_binding_8

Fold the neck binding to the inside of the dress, rolling the seam line towards the inside of the dress slightly. This will give you a nice clean finish, and will  prevent the stitch line from being seen on the right side of the dress. With the raw edge of the binding still folded under, press the binding flat around the neckline, and pin in place.

Edge stitch

how_to_finish_neckline_bias_binding_9

Stitch along the folded edge of the binding and then press to remove any wrinkles. 

Baste the placket in place

how_to_finish_neckline_bias_binding_10

The final step, before we are ready to move onto the body of the dress, is to join the UPPER BODICE at the centre back.  With right sides out, lay your bodice face down. Place the button stand on the right-hand side on top of the left-hand button stand, lining up the folded edge with the stitch line underneath. 

how_to_finish_neckline_bias_binding_11

Make sure that the edge of the button stand just covers the line of stitching unerneath . Use a pin to hold the button stands in position and make a short horizontal row of stitches 6mm (1/4in) from the bottom to hold in place. 

That's all for today, tomorrow I'll be showing you how to sew the inset pockets with a french seam!


You may also like:

The Rushcutter sew-along: View B begins!

the_rushcutter_bodice_french_seams_1

Today it's finally time to jump into The Rushcutter - View B sew-along, after concluding the sew-along for View A last week. 

I decided to construct this version with french seams, so that I could offer an alternative finish for those sewers who don't own overlockers, and because French seams are oh-so-nice! If you are not making The Rushcutter, but would like to learn how to sew a french seam, then keep reading. 

French seams are a good choice for you (even if you do have an overlocker), if your fabric is light to mid-weight. You get a lovely clean finish, which gives your garments a really high-end look. If you would prefer normal seams, just follow along, remembering to put right sides together (not wrong sides together, which is how you go about creating a french seam).

joining the front and back bodices

(sizes A & B only)

the_rushcutter_bodice_french_seams_2

For sizes C - K, the front and back bodice pieces are all-in-one. This was not possible for size A and B, because the armhole is not big enough to allow it, so these pattern pieces need to be cut and stitched together before following along with the instructions for all sizes,

With wrong sides together, attach the FRONT UPPER BODICE to the BACK UPPER BODICE and stitch together with a french seam (if you don't know how to sew a french seam, don't worry - I'll explain it in the following steps).

Preparing the button placket

the_rushcutter_bodice_french_seams_3

Place the UPPER BODICE face down, and fold back the centre back by 1cm (3/8 in), using the notches to guide you. Press in place.

the_rushcutter_bodice_french_seams_4

Make a second fold, this time 2cm (3/4 in) from the first, using the notches as a guide. Press in place.

adding interfacing

the_rushcutter_bodice_french_seams_5

If your fabric is lightweight, or quite flimsy, I suggest that you consider using interfacing to stiffen your button placket. I did not want to stiffen the whole stand, so decided to just use small pieces of interfacing to reinforce where the buttons and buttonhole will be sewn.You could consider cutting a strip of interfacing as long and as wide as the placket itself - depending on the fabric and finish you are going for. 

Open up the folds, and place your piece/s of interfacing with sticky side down. The folds will help you position it correctly. Press in place. 

the_rushcutter_bodice_french_seams_6

Re-fold the fold lines and stitch close to the edge on both sides. Your pattern placket is done!

Attaching the centre front panel

the_rushcutter_bodice_french_seams_7

With wrong sides together, join the CENTRE FRONT PANEL to the front sides of the UPPER BODICE pieces. Use the notch in the centre of the seam to help you place the pieces correctly. Stitch with a 6mm (1/4in) seam allowance.

the_rushcutter_bodice_french_seams_8

Trim down the seam allowances on both sides of the CENTRE FRONT PANEL by about 2-3mm (1/16in). Open the seam, and press the seam allowances away from the centre front.

the_rushcutter_bodice_french_seams_9

Fold the seam, with right sides together. You will see that this will enclose the raw edge and the original line of stitching inside the seam. Press and pin. Stitch the seam with a 6mm (1/4in) seam allowance. 

the_rushcutter_bodice_french_seams_10

Press seams away from the centre front. 

Joining the shoulder seams

the_rushcutter_bodice_french_seams_11

With wrong sides together, pin the front and back shoulder seams together. Pin in place.

Once again, stitch with a 6mm (1/4in) seam allowance, trim back, and enclose raw edge in a french seam.

the_rushcutter_bodice_french_seams_12

Press the shoulder seams towards the back, and then that's it for today.

Tomorrow I'll be walking you through using bias tape to bind the neckline.

Don't have bias tape? Make some yourself! 


You may also like:

The Rushcutter sew-along: The finishing touches

finishing-touches_the_rushcutter_1.jpg

So we are almost there! By now your Rushcutter should be really be looking like a dress. All we have got left to do is to finish the neckline and do the hems.

Finishing the neckline

Now that the zip is done, you can finish the neckline.

finishing-touches_the_rushcutter_2

With the dress inside out, fold the binding to the inside of the dress, rolling the seam line slightly towards the inside too. Make sure the raw edge is folded under, and press in place.

finishing-touches_the_rushcutter_3

Pin the binding around the neckline, using your fingers to smooth out the binding.

finishing-touches_the_rushcutter_4

When you reach the zip, make sure that the short edge of the binding sits a few milimetres away from the zip teeth. 

finishing-touches_the_rushcutter_5

Stitch along the edge of the binding. Press to remove any wrinkles.

Hem the sleeves

finishing-touches_the_rushcutter_7

With the neck done, move onto the sleeve hem. With the dress still inside out, fold back each sleeve hem by 4cm (1 1/2in). Press and pin in place. 

finishing-touches_the_rushcutter_8

Stitch the hem in place, by stitching close to the edge. 

Prepare the hem facing

finishing-touches_the_rushcutter_9

Take the FRONT and BACK HEM FACING and, with right sides together, pin them together at the side seams. Stitch with a 15mm (5/8in) seam allowance. These seams will be enclosed in the hem, so do not need to be finished.

finishing-touches_the_rushcutter_10

Press both seams open.

finishing-touches_the_rushcutter_11

Finish the top edge of the facing (the edge that will not be attached to the hem of the dress). Consider using a contrasting binding for an interesting inner detail. 

Attach the hem facing

finishing-touches_the_rushcutter_12

Pin the hem facing to the dress, with right sides together. Start at the centre front notch and work way around the facing, matching each seam line with the corresponding notch. Stitch with a 1cm (3/8in) seam allowance.

finishing-touches_the_rushcutter_13

Trim back the seam allowance of your hem facing, to minimise bulk in the hemline.

finishing-touches_the_rushcutter_14

Lay the seam flat and, with the seam allowances pushed towards the hem facing, understitch the seam allowances to the facing.

finishing-touches_the_rushcutter_15

Turn the hem facing to the inside of the dress, being sure to roll the seam line slightly to the inside, and press.

finishing-touches_the_rushcutter_16

Stitch the hem in place, by hand or machine, close to the end of the facing.

Give the dress one final press and you're done! Wooohooo! 


You may also like:

How to sew an invisible zip

how_to_sew_an_invisible_zip_1

Zip time! And before some of you run away screaming, please just give it a go with me. I promise they're not that scary. 

Invisible zips really are the easiest zips to sew, and if you go nice and slow, you can get a really nice finish that I promise you will be proud of.

Finish the back opening

Try on the dress and adjust the back opening, if necessary.

Finish both sides of the back opening.

how_to_sew_an_invisible_zip_2

Lay the dress right-side down and fold up the centre back seam allowance on both sides of the opening by 20mm (3/4in) and press flat.

Press the zip

how_to_sew_an_invisible_zip_3

Open the invisible zip, and using a warm dry iron, press the zipper teeth flat. This will help you get nice and close to the teeth when you sew in the zip.

Pin and baste the zip

how_to_sew_an_invisible_zip_4

Place the zip face down on the right hand side of the dress. Align the stop at the top of the zip with the neckline and the teeth of the zip with the pressed seam line. Pin in place.

how_to_sew_an_invisible_zip_5

Now this is the step that really makes all the difference. Take a needle and thread (I always use a contrasting thread because it makes it nice and easy to remove the stitches later), and hand baste the zip tape to the dress. It takes a couple of minutes extra to do this, but it will ensure that the zip does not shift while you are sewing it in - and I prefer hand stitching to unpicking any day! When the zip is attached, remove the pins.

Sew one side of the zip

how_to_sew_an_invisible_zip_6

Using an invisible zip foot, insert the teeth of the zip into the right-hand channel of the foot. Using your finger, roll the zip teeth so that the zip lies as flat as possible. Slowly stitch down the length of the zip, stopping just before you hit the zip pull.

how_to_sew_an_invisible_zip_7

Close the zip and turn the seam allowance under, so that the zip lies flat. Press the fold. 

Matching the seam line

how_to_sew_an_invisible_zip_8

You will have noticed that the seam that joins the sleeves to the body of the dress, runs directly through the zip. To ensure the seam lines match up on either side of the zip, take a pin and put it through the zip tape (on the side not yet sewed) in line with the horizontal seam line.

how_to_sew_an_invisible_zip_9

Open the zip and place the zip tape face down on the left hand side of the back opening, aligning the pin with seam line.

You can use this same method for matching up waistbands, or waistlines on dresses.

how_to_sew_an_invisible_zip_9

Stitch the second side of the zip

Pin in place and then continue pinning the remainder of the zip tape (once again aligning the zip teeth with the pressed line). Baste the zip in place by hand.

how_to_sew_an_invisible_zip_10

Stitch the second side with your invisible zip foot - this time with the zip teeth in the left channel.

Admire your work

how_to_sew_an_invisible_zip_11

Close the zip and give it a good press. Look at those lovely matching seams! Worth it, right?

Finish the centre back seam

how_to_sew_an_invisible_zip_12

Turn the dress inside out and pin the remainder of the centre back opening closed. Make sure you keep the ends of the zip tape out of the way.

how_to_sew_an_invisible_zip_13

Using an ordinary zip foot, stitch the remainder of the centre back seam closed. Start by putting the needle into the fabric where the row of stitching for the zip ends (or as close to that as you can get) and then lower the foot before continuing down the seam with a 2cm (3/4in) seam allowance. 

Remove the basting stitches

how_to_sew_an_invisible_zip_14

With the dress still inside out, press the centre back seam open. At this stage you can remove the basting stitch from the zip tape.


And you're done! Not so bad, right?


You may also like:

How to finish a neckline with bias binding

binding_neckline_1.jpg

In yesterday's post in The Rushcutter sew-along, I showed you how to make your own bias tape, and today I am going to show you how to attach  the binding to the neckline. This method will also work if you are using store-bought binding, and will work on other sewing patterns that ask for a bound neckline and have a centre-back opening.

Measure the neckline of your garment

binding_neckline_2

Using a tape measure, measure around the neckline of your Rushcutter. Start measuring from the centre back on one side, and continue measuring around the neckline until you reach the centre back on the other.

Prepare bias binding

binding_neckline_3

Cut a piece of bias binding a couple of centimetres (1 inch) longer than your neck measurement. If your binding is not yet folded, place it face down and press one long edge of the binding under by 10mm (5/8in). 

Pin binding to neckline

binding_neckline_4

With right sides together, pin the binding to the neckline (pinning the edge that has not been folded), starting from the centre back and slowly working your way around the neckline. If you have two folds in the binding, that is totally fine. I just save time by only folding in one edge and then using the seam guide on my machine to achieve the correct seam allowance.

binding_neckline_5

Before sewing, turn the dress  over and check that all seams (and darts) are pressed the right way.

Stitch binding to neckline

binding_neckline_6

Stitch the binding to the neckline with a 1cm (3/8in) seam allowance. 

binding_neckline_7

Trim any excess binding from the centre back, so that the edge of the binding sits flush against the centre back on both sides.

Trim and clip

binding_neckline_8

Trim down the seam allowance by 5-6mm (1/4in). This will minimise bulk around the neckline, and help when turning the seam allowance to the inside of the dress. You can also clip into the seam to help it sit flat.

Understitch

binding_neckline_9

Using your finger, press the binding (and seam allowance) nice and flat, and understitch the seam allowance to the binding. This will help the binding to roll to the inside of the garment so that you won't see it poking out on the right side. 

We will leave the binding like that for the moment, as before we can finish it off we need to sew in the zip - so that's what we'll be doing tomorrow!


You may also like:

Assembling The Rushcutter (view A)

Yesterday I showed you how to sew the darts on the raglan sleeve, in The Rushcutter sew-along, so today it's time to assemble the sleeves and get the sleeves and dress sections connected. By the end of this post, it will really start looking like a dress!

Attach the centre front panel

With right sides together, pin the CENTRE FRONT PANEL to the front side of each SLEEVE, matching the centre notches. Sew each seam with a 15mm (5/8in) seam allowance, and finish the raw edges.

Press the seams away from the centre front. At this stage, you can also press your darts towards the back.

Sew the sleeves

Finish the bottom edge of both sleeves. Then, with right sides together, fold the sleeve so that you can sew the underarm seam. Pin and stitch with a 15mm (5/8in) seam allowance.

Finish the raw edges separately and press open. 

Pin the sleeves to the dress

With right sides together, match the notch at the centre of the FRONT to the notch in the centre of the CENTRE FRONT PANEL.

I found getting the sleeves out of the way, by turning the sleeves to the right side, helped me when pinning this seam.

Move next to the seam that connects the sleeve and the centre front panel, and match it to the corresponding notch on the front of the dress. 

Continue moving from notch to notch until you reach the centre back. 

As you are matching two different shaped curves together, you will need to be really careful to match up all your notches correctly. 

Match up all the notches and seams on the second side, and then fill the gaps between notches with more pins to get a nice flat seam.

Sew the sleeves to the dress

Stitch the seam with a 12mm (1/2in) seam allowance. Go nice and slow, and lift the seam regularly to check that all the seams are lying flat and that there is no puckering on the underside of the seam.

Press

Before finishing the seam, open the seam and check that it is smooth and there is no puckering. If there is, just unpick a few centimetres (or as much as you need to get the seam to sit flat) either side of the puckers and then pin and re-stitch. 

Finish the seam and press up towards the neckline. Press from both the right and wrong side, to ensure that you get a nice flat finish. 


And that's it for today, is your Rushcutter starting to resemble a dress now?


You may also like:

How to sew shoulder darts in a raglan sleeve

how_to_darts_raglansleeve_1

Yesterday we finally started sewing our Rushcutters! We assembled the lower part of the dress, but before we can go any further, we need to get our sleeves started.

The shoulder dart

The darts are slightly different, depending on what size pattern you cut.

how_to_darts_raglansleeve_2

For sizes A - F, the dart looks like this.

how_to_darts_raglansleeve_3

While for sizes G - K, the centre of the dart has been cut out - this is to minimise bulk in the dart.

When complete, both versions will look the same on the right side of the sleeve.

Sewing the dart  (sizes A - F only)

how_to_darts_raglansleeve_4

Take your sleeve and, with right sides together, fold along the centre of the dart, matching up the notches at the neckline and ensuring that the dart point is at the centre of the fold. Press and pin in place.

how_to_darts_raglansleeve_5

Stitch the dart from top to bottom, stitching 15mm (5/8in) beyond the dart point. I generally stitch darts by eye, but if this is not for you, then you can mark the stitching line on your fabric with a fabric pen, tailors chalk, or even with a line of hand stitching (if your fabric is delicate).

Sewing the dart  (sizes G - K only)

how_to_darts_raglansleeve_6

For the open dart, you can either stitch the dart and then just finish the raw edge of the dart (with overlocking or a zig-zag stitch) or, if you are using a light to midweight fabric, I would suggest using a french seam, to get a really nice clean finish.

To do this, fold the sleeve with wrong sides together, along the centre of the dart. Match the notches at the neckline, and check that the dart point is at the centre of the fold. Press and pin along the raw edge.

how_to_darts_raglansleeve_7

Stitch along the raw edge with a 6mm (1/4in) seam allowance. 

how_to_darts_raglansleeve_8

Trim back the seam allowance by 2-3mm (1/16in). This step is really important, because you want this edge to be hidden cleanly in the next seam you sew.

how_to_darts_raglansleeve_9

Open the sleeve and press the seam allowance towards the front of the sleeve.

how_to_darts_raglansleeve_10

With right sides together this time, re-fold the dart, matching the darts at the neckline, and also checking that the dart point is at the centre of the fold. Press and pin in place.

how_to_darts_raglansleeve_11

Stitch the dart, from top to bottom, using a 6mm (1/4in) seam allowance, stitching 15mm (5/8in) beyond the dart point.

Repeat process for the other sleeve. And that's it, shoulder darts are done!

Tomorrow we will continue assembling the top section of the Rushcutter (View A).


Do you have any special tricks you use for sewing darts?


You may also like:

The Rushcutter sew-along : How to sew the pockets (view A)

therushcutter_sewalong_pockets_1

Welcome back to The Rushcutter sew-along.

Yay! After all that preparation, it is finally time to start sewing. 

In today's post, I'll be guiding you through the first few steps of The Rushcutter (View A). We'll be preparing our pockets, stitching them to the side panels, and then attaching our front and back.

Prepare the pockets

therushcutter_sewalong_pockets_2

Take your SIDE POCKET pieces, and finish the top edge of both pieces. Consider using an overlocker, zig-zag stitch, binding, or even folding the raw edge under by 1cm. The best finish for you will depend on your chosen fabrication.

therushcutter_sewalong_pockets_3

There is a notch on either side of the pocket, 4cm (1 1/2in) from the finished edge. You will be using these notches to help you fold back the pocket hem.

therushcutter_sewalong_pockets_4

With the pocket face-down, fold back the top of the hem by 4cm using the notches to guide you.

Press and pin.

therushcutter_sewalong_pockets_5

Sew along the edge to secure the hem in place. I used the edge of my overlocking as a guide to keep my stitching straight. If you are using a striped fabric, consider sewing your hem from the right side, so that you can follow a stripe, and get the line of stitching in exactly the right place.

Attach pocket to side panel

therushcutter_sewalong_pockets_6

Work out which pocket is for your right side and which is for your left, by checking the notches. Double notches indicate the back of the panel, and a single notch indicates the front. 

therushcutter_sewalong_pockets_7

With right-sides facing up, place the SIDE POCKET on top of the SIDE PANEL, matching the double notch on the pocket with the double notch on the side panel, and the single notch on the pocket with the single notch of the side panel. This ensures that the right pocket is matched with the right side panel. Pin in place.

You will notice that the pocket is slightly wider than the panel it will be stitched to. This is how it is meant to be! The pocket piece is designed to be a little wider, to create a bit of shape and volume in the pocket. 

Stitch around the edge of each pocket, using a 6mm (1/4in) seam allowance. This stitching is just to hold the pocket in place for when you attach the front and back pieces to the side panel. This stitching will be hidden within the seam allowance. 

Attach the front

therushcutter_sewalong_pockets_8

With right sides together, pin the SIDE PANELS to either side of the FRONT. Use the notches to guide you - especially if you are using a slinky fabric that is prone to stretching when cut on the bias! Check that you are attaching the edge of the SIDE PANEL that has single notches. Stitch each seam with a 15mm (5/8in) seam allowance, and finish the seam.

Attach the back

therushcutter_sewalong_pockets_9

With right sides together, pin the open side of each SIDE PANEL to the corresponding BACK PANEL (you will know which one is which by looking at the notches). Stitch seams with a 15mm (5/8in) seam allowance. Finish the seam.

Press

therushcutter_sewalong_pockets_10

Press the seams away from the SIDE PANEL. The seam allowances should match up nicely with the curve.

Well that's all for today! Tomorrow we will be getting onto the sleeves, so stay tuned.


You may also like:


The Rushcutter Sew-along: Cutting your fabric

the_rushcutter_sew_along_cutting

So it's finally time to cut out our Rushcutters!

If you are sewing a long with me, by this stage you should have gathered your supplies, picked your size,  printed your pattern, made a toile and made any necessary adjustments. Now that much of the hard work is done, it's time for the fun(ner) stuff!

Prepare your fabric

Grab you fabric (that you have pre-washed, dried and pressed) and lay it out on a flat surface. I won't judge you if your only flat surface is on the floor! I went years without a proper cutting table and I managed just fine - so use whatever space you can.

Cutting flat vs cutting on the fold

Generally speaking, most patterns ask you to fold your fabric lengthways, matching selvedge to selvedge, so that you can cut a piece once and get a pair. This is the most time efficient method (and what I included in the pattern's instructions), but I must say that I generally cut flat.

By cutting flat, you get much more control, which is especially good if you are using a placement print or matching a print or stripes.

Cutting_flat-vs-on-fold_the_rushcutter.png

The other bonus is that you use much less fabric. Above, I have shown the suggested lay plan for View A on 115cm (45in) wide fabric. By cutting flat, instead of on the fold, you could save almost 1 metre (the saving is not so big when using 150cm wide fabric - about 30cm). So if you are tight on fabric, or have a bit of extra time up your sleeve, then I recommend giving it a go. 


Pattern piece inventory

the_rushcutter_VIEW-A.png
 
the_rushcutter_VIEW-B.png

View A

Front - cut 1 on fold

Back - cut 1 pair

Side panel - cut 1 pair

Side pocket - cut 1 pair

Centre front panel - cut 1

Front hem facing - cut 1 on fold

Back hem facing - cut 1 on fold


View B

Front - cut 1 on fold

Back - cut 1 on fold

Side panel - cut 1 pair

Centre front panel - cut 1

Front upper bodice (size A and B only) - cut 1 pair

Back upper bodice (size A and B only) - cut 1 pair

Upper bodice (sizes C - K only) - cut 1 pair

In-seam pocket - cut 2 pairs

Optional

Waist sash - cut 1 pair

Cutting tips + suggestions

If you are using a heavy weight fabric, consider cutting your in-seam pockets (View B) in a lighter weight fabric. You could also consider a lighter fabric for the neckline / armhole binding.

You may also want to use consider adding interfacing to your hem facings - if you would like to add weight to the hem. 

Cutting your fabric

After working out what pattern pieces you require, cut loosely around the pattern pieces. This will make them much easier to handle, and give you more flexibility when working out the best cutting layout. 

If you are cutting on the fold, fold your fabric lengthways, with right sides together, matching your selvedges. You may notice that I cut my pattern with wrong sides together. This is because I was planning to make my dress with the wrong side of the fabric on the outsidem but changed my mind at the last minute!

cutting_the_rushcutter_1
cutting_the_rushcutter_2

1. Place your pattern on the fabric, and measure the distance between one end of the grainline and the selvedge. Hold this side in place with a weight or pin.

2. Measure the distance between the other end of the grainline and the selvedge, and pivot until it is the same distance as the first side. 

cutting_the_rushcutter_3
cutting_the_rushcutter_4

3. Use weights (or whatever you have got lying around) to hold the pattern in place, and use pins to hold in place. 

4. Cut around the edge of the pattern, being very careful to get as close to the line as possible.

Cutting notches

cutting_the_rushcutter_6
cutting_the_rushcutter_7

When the piece is cut, work your way around the pattern, cutting into each notch. The notches are 6mm - try not to cut them any longer as you may risk getting too close to the stitching line. Be careful to find them all - they really do help when making sure you are putting the correct pieces together!

Marking the dart point

There are a number of ways to mark the dart point, and the best option will depend on the fabric you are using.

cutting_the_rushcutter_8
cutting_the_rushcutter_9

1. If you are using something stable, or dark in colour, fabric chalk or fabric pen will work fine.

2. Mark the dart point on one side of the fabric, and then put a pin through the point so that it comes out the other side. Make sure the pin is nice and straight, and then mark the dart on the other side with chalk.

cutting_the_rushcutter_10
cutting_the_rushcutter_11

3. If your fabric is a little more delicate or prone to moving, use a needle and contrast thread to put one long stitch through both layers of fabric at the point of the dart. Tie a knot at wither end of the thread.

4. Open up the two pieces and cut the thread in between. Now you can tie a knot on either side so that the stitch remains in place.


Do you cut the old-school way like me? Or are you a rotary cutter kind of gal (or boy)?


You may also like:

The Rushcutter sew-along: more pattern alterations

the_rushcutter_pattern_alterations

In yesterday's post, I showed you a few alterations that you may want to make to The Rushcutter: lower the neckline, add or removing volume, shortening and lengthening the pattern.

Today I have a follow on post for you, as I was worried I might intimidate you if I put all the alterations in the one post!

Create a slimmer Rushcutter

The Rushcutter sewing pattern is designed to be over-sized, so there is a lot of ease in it. It may be a little too much for some of you, so, in today's post, I will show you how to slim down the dress a little. It is not overly complicated, but is slightly more difficult  than it would be on a more conventional pattern, as it does not have side seams!

I would suggest, before making any major adjustments to the pattern (like this one) make a toile, so you know exactly how much width you can afford to remove from the pattern.

1. To start, take the 'Side Panel' pattern piece. This is where we will be removing some width from the pattern piece. The grainline, which runs right through the middle of the pattern piece (and therefore down the side of the body) is where you will be removing the fabric from.

2. Work out how much you would like to remove, by referring to your toile. You will want to take the amount evenly from both sides of the dress. Divide the total amount by 2 and then distribute this measurement either side of the grainline (on the stitching line) - half on the front section  of the pattern piece (indicated by the single notches) and half towards the back (indicated by the double notches).

3. Cutting from the top, cut along the grainline, down towards the hemline. Do not cut all the way through the pattern. Stop a 2-3mm from the bottom, so that a small "hinge" of paper remains intact. You will now notice that you can separate the two sides of the pattern quite easily, without detaching them entirely. 

4. Now, swing one side of the pattern over the other (doesn't matter which one) until the points that you marked overlap. You will see that, by doing this, you have removed a slice from the middle of the pattern. Tape (or glue) in place.

5. By taking out this slice, the underarm curve will now come to a sharp point. Redraw the stitch line and the cutting edge, with a nice smooth line, to correct this. 

Now that you have removed some width from the side panel, you will need to remove the same amount from the raglan sleeve - as these two pieces are sewn together. 

1. Remember the amount we distributed either side of the grainline on the side panel? Take this measurement and divide it by 2. Measuring in from the underarm seam (remember to measure from the stitch line, if your pattern still includes seam allowance), marking a point the distance determined. Repeat for the second side.

2. Draw a line from the points marked, down towards the hemline, meeting with the original stitch line, at the line that indicates where to fold up the sleeve hem.

3. Redraw the cutting line, by adding 1.5cm seam allowance to the new line.

Re-draft the pocket

You may decide to make a short version of the Rushcutter. Megan, one of my lovely testers, decided to shorten hers to tunic length. Nice, right? The only problem is that you end up losing quite a bit of pocket depth. The easiest way to solve this is to simply re-draft the pocket piece, so that it will be your desired depth.

I will show you how I drafted the original pattern piece, so your new pattern will fit perfectly, just like the original!

the_rushcutter_altering_the_pocket_1

1. Work out how deep you would like to make the pocket, you can do this by referring to the original pattern piece, or by holding the 'Side Panel' pattern piece up to your side and marking where you would like the pocket to start. Mark the point on the grainline of your pattern piece.

2. Draw a line, perpendicular to the grainline, from the marked point. Extend the line 5mm past stitching line on both ends (this is because the pocket panel was drafted to be slightly wider than the piece it is stitched to, to add a little volume).

3. Starting at one endpoint, draw a straight line that meets the bottom corner of the pattern piece, easing back into the original stitch line. Repeat for the other side.

the_rushcutter_altering_the_pocket

4. Take a seperate piece of paper and trace a copy of the new pattern piece, being sure to also transfer grainline and notches onto the new pattern piece.

5. Add seam allowance to both sides and the hem (not the top edge, just yet). The seam allowance needs to be 1.5cm on each side and 1cm at the hem. 

6. Draw a line that runs parallel to the top edge of the pocket, 4cm above the original line. Fold along the top edge of the pocket.

7. Trace the seam lines onto the pocket hem (you want to do this so that when the piece is cut, and you fold the top hem of the pocket back to finish the edge, it meets the pocket smoothly).

8. You now have your pocket piece! Add markings and get sewing!

Relocating the shoulder dart

After trying on your toile, you may feel that the dart does not quite sit on your shoulder. If this is the case, you may want to move the dart slightly forward or backwards, from its original position.

move_a_dart_raglan_sleeve_1
move_a_dart_raglan_sleeve_2

1. Work out where your dart needs to be (by measuring in relation to the original dart) and draw a straight line running from the new location on the neckline, to the original dart point.

2. Focusing on the original dart, cut down the outside dart arm, from the neckline to the dart point. Don't cut all the way to the end, stop when you are 2-3mm away. Do the same with the line you just marked, also stopping a few millimetres from the end. This will create a small 'hinge,' which allows you to move this section of the pattern, whilst still keeping the pieces attached.

move_a_dart_raglan_sleeve_3
move_a_dart_raglan_sleeve_4

3. Rotate the cut section until you have closed out the original dart (one dart arm overlaps the other), and tape in place.

4. You will now see that you have opened up a new dart. To complete it, you will need to add dart shaping, and seam allowance to the new dart.


Okay, thats it for today's post. And guess what, tomorrow it's finally time to cut some fabric! Yippee! Let me know if there is an alteration that I didn't include in today or yesterday's post that you need!


You may also like:

Transferring pattern changes from toile to pattern

transferring_pattern_changes_toile_to_pattern

Last week I showed you how to make a toile, and what you should be looking for when fitting. In today's post, I will show you how to transfer changes from toile to pattern.

Lowering the neckline

The first change that I will show you is how to lower the neckline of The Rushcutter. I am all about the high neck on this dress, but I understand that it's not for everyone. If you'd prefer it to be slightly lower (or even drastically lower) it's not a difficult alteration to make. 

To start, take the sleeve pattern and the centre front panel pattern piece, and put them together. Place one sewing line over the other, so you can see how the pieces fit together when they are sewn. You will notice that on The Rushcutter sewing pattern, both the stitching line and the cutting line are marked, so that making pattern alterations is a little simpler. 

Work out how much you would like to lower the neckline by, by taking the measurement from your toile (measuring down the centre front) and mark it on your pattern piece. Make sure you measure it from the stitch line rather than the edge of the pattern. For the example, I only lowered the neckline at the front, but if you would also like to lower the neckline at the back, place a mark on your centre back too.

Before redrawing the neckline, you will need to fold the dart (so you can get the neckline all in one piece). The easiest way to do this is by placing the dart point on the corner of the table like this. The dart fullness should be folded towards the back.

Starting at the point you marked on the centre front, re-draw the neckline with a smooth curve, gradually easing back into the original neckline (unless you are also lowering the neckline at the back, in which case you will want your new neckline to meet with the point you marked on the centre back).

Before unfolding the dart, take a tracing wheel and trace over the new neck curve at the dart. This will transfer the correct neck shaping onto your dart. If you need some extra help with this, check out this tutorial. You will now just need to add seam allowance to the neckline and you are good to go!

Add or remove volume

The next thing I'm going to show you is how to use the cut and spread technique to add or remove volume from The Rushcutter. You may want to use this technique on the body of the dress, or maybe even the sleeve. 

If you have never used the method of cutting and spreading before, this example will basically show you how to do it. If you want to see it in more detail, check back on the blog later this week, as I am planning to do a post on this technique.

Pattern alterations are much easier to manage if your pattern does not have seam allowance. Remove the seam allowance from the pattern you are altering, or trace a copy of the pattern piece without seam allowance. This is really easy to do with The Rushcutter pattern as the stitch line is marked for you.

1. Draw two vertical lines through the pattern, which will cut the pattern into three equal-ish parts (this does not have to be exact).

2. Starting with one of the lines, cut up from the hemline towards the top of the pattern. Do not cut all the way through the pattern, leave a 1-2mm "hinge." The hinge will give you the freedom to move the parts of the pattern easily, but will still keep the pieces together. Repeat for the second line. 

3. Place the pattern on top of a piece of pattern paper, slightly larger than the pattern piece. Spread the pieces apart, by the desired amount, being careful to distribute the width evenly. When you are happy, tape (or glue) the pieces down carefully.

4. Redraw the hemline with a smooth curve. If the opposite edge has changed shape too drastically you should also re-draw the line.

cut_and_spread_therushcutter_2.gif

The method is the same for reducing volume, you just need to close the cut and spread line, rather than open it.

Shortening pattern

There are two ways of shortening a pattern - the first is to simply remove some length from the hem of the pattern. This method is often used when a garment has been made up and then once it can be tried on and fitted, the length is determined.

The other method is to shorten the pattern piece by removing the length from inside the pattern piece. By using this method, the overall shape of the pattern piece will not be lost.

For this method, you first need to find the 'length and shorten line,' on the pattern piece you would like to shorten. I am using the sleeve from The Rushcutter as an example, but this method can be used on any of the pattern pieces.

Cut along the line to create two separate pieces.

Think about how much length you would like to remove from your pattern piece. Mark this distance on one side of the pattern, measuring from the cut line. Marking this point on the grainline will help ensure the mark remains perpendicular to the cut line. 

Draw a perpendicular line through this point, extending to either side of the pattern piece. 

Move the unmarked pattern piece (in this case, the lower part of the sleeve) to line up with the perpendicular line just drawn, and tape (or glue) in place. 


You can now redraw the seam lines on each side of your pattern with a straight line (or a curve, if your pattern piece has curved seams).

Lengthening a pattern

For lengthening a pattern piece, the concept is exactly the same. Cut up through the 'lengthen and shorten line' and separate the pattern into two pieces.

Open the pattern pieces by the amount you want to lengthen your pattern piece by. Tape a piece of pattern paper onto the back ofthe pieces to fill the gap.

Redraw the side seams with a straight line, and you are done!

I think that's enough pattern altering for today's post, in the next post I'll show you how to slim down the dress by removing some width from the side panel, move the dart on the raglan sleeve (View A), move the shoulder seam (View B) and adjust the pocket.


You may also like:

How to (and why) make a toile

how_to_make_a_toile_inthefolds_1

At this point in the Rushcutter sew-along, I thought it would be a good time to talk about toiling.

What is a toile?


A toile (also known as a ‘muslin’) is basically a draft version of a garment. A toile is normally made from a cheaper fabric, so that you can test the fit of a particular garment before cutting into your real (and normally more expensive) fabric. 

It is best to choose a fabric to toile in, that is similar to what you plan to make the actual garment in. If you are using a lovely sandwashed silk, then you will need something with a similar handle and drape as the silk, so you can get a good idea of what the final garment will look like. Making a winter coat? Choose something with a similar thickness and drape.


how_to_make_a_toile_inthefolds_2


While I was developing The Rushcutter I made countless toiles. Many of them are ‘wearable toiles’ – meaning that I used a cheapish fabric and finished them properly, but expected to need to make some small adjustments. This way I could wear them around for a few days, and see how each dress really felt out in the wild! 

Why should I toile?


We all come in different shapes and sizes, and although I may have the same measurements as the girl next to me, this does not at all mean we have the same body shape. Some of us may have a sway back, forward sitting shoulders (that’s me!), narrow shoulders, longer legs etc. By doing a toile, you can quickly see if any adjustment needs to be made. As you sew more garments for yourself, you will get better at knowing what to look for, as you will often notice the same fitting problem across the board. 


How do I make a toile?


Make up the dress in your chosen toiling fabric. You don’t have to add facings, collars or pockets etc. I never bother with buttonholes or zips when I toile, I just pin the opening closed when it’s on.

You just want to check the overall fit of the garment, so you will only need the main pattern pieces. There is no need to even finish the seams! Mark the position of pockets so you can check pocket placement, without actually having to sew them.

When sewing, consider using a long stitch length, so that you can quickly and easily unpick any seams that need to be altered. You can also use a contrasting thread to make it even easier to see your stitches. As you will not be adding binding around the neckline and armhole of The Rushcutter, make sure you trim back the seam allowance (1cm) so you can get an accurate idea of how it will look when it’s finished. 


What’s next?

Try it on, get in front of the mirror and take a look! Is it sitting like it should? How does it feel? Can you sit down comfortably? Can you raise your hands in the air without showing off too much booty? Is it hanging properly? Does it feel too tight in any areas?

If you do need to make some changes, then take a pen (or fabric marker / chalk) and draw the changes directly onto the toile.  

Check the neckline

how_to_make_a_toile_inthefolds_3

For example, if the neckline is too high, then draw where you would like the neckline to be. If you are toiling in a darker fabric, or making a wearable toile (like I was), then use masking tape to indicate problem areas and mark the changes on that. I also like to use tape to write notes on the toile, if needed.

how_to_make_a_toile_inthefolds_4

Use a tape measure, or ruler, to make note of any distances / measurements. You can write them directly on the toile (like I do) or write them on a piece of paper. 

Focus on the overall fit

how_to_make_a_toile_inthefolds_5


If it feels too big, pin out some of the excess fabric in the side seams and / or centre back.

how_to_make_a_toile_inthefolds_6

If the dress feels too wide in the body of the dress, pin out the excess in the centre of the SIDE PANEL. Remember, if you bring the dress in at the side, you will also need to reduce the width of the sleeve, as these two pieces join together. 

On the contrary, if an area is too tight, cut into the fabric and use pins to fill the gap with a separate piece of fabric.

Check the length

how_to_make_a_toile_inthefolds_7

Check the length – does it need to be lengthened or shortened? Place a pin horizontally at your ideal length (or take note of how much longer you would like to make it).

Is the hem sitting straight?

You will see in the image above that the hem lifts slightly at the front - this could be a sign of needing to do a full bust adjustment (my dummy has quite large breasts for her size!) The same goes for the back. If the hem is lifting at the back, you may need to add some length to the pattern.

Focus on the placement / position of design details 

how_to_make_a_toile_inthefolds_8

Check the pocket placement (whether it is with actual pockets or just markings of where they are) and make note of any changes required.

Check dart placement / shoulder seams

how_to_make_a_toile_inthefolds_9


For View A, check the placement of the shoulder dart. Does it sit on your shoulder and finish at the peak of your shoulder? You will see in the image above, that the dart sits slightly back from the shoulder line. 

how_to_make_a_toile_inthefolds_10

To mark the change I required, I used masking tape to draw in the new dart position (being sure to also mark the dart point).

For View B, check that the shoulder seam lies on your shoulder. Re-draw the shoulder seam if you feel it needs to be further forward or back.

Check the sleeves

how_to_make_a_toile_inthefolds_10

Have you got enough room in the sleeve to bend your elbow? Is the length of the sleeve right?

All done. Now what?


If you have made a lot of changes, you may need to make another toile to check the fit again. If the changes are minor (shortening or lengthening, moving the shoulder dart, changing the neckline etc.) then you will probably be fine to skip making a second toile.

In the next post I will show you how to go about transferring these changes to your pattern!


I'd love to know, do any of you always make a toile? I must say, I'm a bit cheeky and skip it sometimes (I do often regret it though!) 


You may also like:

How to grade between sizes

grading_between_pattern_sizes

For many women, your measurements will range across several sizes, and you will need to grade between sizes after you print your pattern. The Rushcutter pattern has a lot of ease in it, and I have said already that you should really check the finished measurements before deciding you need to grade up a size at the waist or hip. But, this technique is one you can use on all nested patterns, to grade between sizes, and after saying all this, you may still feel you would like to grade between sizes for your Rushcutter!

In yesterday's post in the Rushcutter Sew-along, I showed you how to use layers to print only the size (or sizes) you need.

How to grade between sizes in a nested pattern

When your pattern is printed and assembled, take a contrast coloured pen or pencil and a ruler.

how_to_grade_between_pattern_sizes_inthefolds_2

With your ruler, draw a diagonal line from one size line to the next. As you can see in my example, I have gone up from a size A at the bust, up to a size C at the hip.

how_to_grade_between_pattern_sizes_inthefolds_3

If you are a size A at the bust, and then a C at the waist, you will need a sharper diagonal line.

how_to_grade_between_pattern_sizes_inthefolds_4

If you do make this adjustment to your pattern, be sure to change all relevant pattern pieces, so that the pieces still fit together. 


You may also like:

How to print and assemble your PDF sewing pattern

ASSEMBLING PDF HEADER.jpg

Today in the Rushcutter sew-along, it's time to print out our PDF pattern!

Some of you may already have the printing, trimming and cutting of PDF patterns down to a fine art, but for those of you who hear the phrase 'PDF pattern' and shudder, I'm going to show you that it's not too bad at all!

Opening the file

Download the pattern to your desktop and save it (this way you will be able to access it whenever you want).

The file is a zip file. This reduces the size of the file so that all elements are compressed together and can be delivered to you quickly. You will need to open (or unzip) the compressed folder so that you can access what’s in the folder.

When you buy the Rushcutter dress pattern, you will receive four different files inside the pattern folder:

  • A read me file that gives you an introduction to what is included in the pattern

  • The pattern - in both print-at-home (A4 / US letter size) and copy shop format (A0 / US 36” wide printing)

  • The instruction booklet

Screen Shot 2021-06-03 at 3.29.54 pm.png

Open the PDFs in your preferred PDF viewer. I use Adobe Acrobat (if you don’t have it, you can download it for free here).

How to use layers

The pattern has been designed to have layers embedded. This means that you can select only the size (or sizes) you would like to print. Layers make it much less confusing to cut out the pattern, and also saves on ink (and paper in some cases).

Artboard 1.jpg


When you have the pattern file open in Adobe Acrobat, look to the left hand side of the screen. You will see a vertical panel with a few options available. Click on the icon that is called ‘Layers’ (third one down). This will open up your layers panel, so you can see what layers are available in the file.

LAYERS.jpg

You will see that there is a separate layer for each of the available sizes. The ‘PATTERN INFO’ layer has all the elements that are the same between sizes, such as the page numbers, the pattern key and the grainlines and pattern labels. There is an eye icon next to each layer, and this lets you know whether the layer is visible or not.

LAyers-cropped.png

Turn off (by clicking on the eye) all the layers you don’t require. Remember to keep the ‘TAGS,’ ‘GRID’ and ‘PATTERN INFO’ layers on for all sizes.

Printing the pattern

Before printing the file, you will need to check the scaling settings on your printer.

PRINT BOX.jpg

You want to print the pattern at its true scale (the scale it was designed in). To do this, go into your print settings and select “actual size” or set page scaling to ‘none’ or ‘turn off page scaling.’ The wording will depend on your printer and the program you are using to view your PDF.

Checking scaling

IMG_4710.JPG

Print only Page 1 of the pattern, and check that the test square measures exactly 5cm x 5cm or 1in x 1in. It really needs to be precise, so if it is not quite right, you will need to go back and check your printer settings again. 

Check both the vertical and horizontal measurement of the test square, to ensure the scaling is right in both directions.

When you have the scaling right, you can print the remainder of the pattern. In some cases, you won't need to print all the pages. This will depend on the size and style you have chosen to maker. There is a printing plan in the instruction booklet that you can refer to before printing.

Assemble the pattern

Cut around the border of each page - one long side and one short side (keep your choice of sides consistent between pages).

ASSEMBLE PDF CIRCLES.jpg

Align the circles so that 1A matches up to 1A, 2A with 2A etc, and tape or glue in place.

Continue working along the columns and rows until you have attached all pages. Loosely cut around each pattern piece required so that the pieces are easier to manage. And you are ready for cutting!


You may also like:

The Rushcutter Sew-along: Selecting your size

So now that we are all feeling inspired (hopefully) and have chosen our fabric, it is time to think about sizing. The Rushcutter sewing pattern is available in sizes A - K (approximately equivalent to AU size 6-24).

Take your measurments

To select the appropriate size, first take your measurements.

It is best to take your measurements while wearing only underwear, or otherwise very tight clothing, so that you can get true measurements. Get someone to help you, if you can. Otherwise take your measurements in front of the mirror, so that you can check that your tape measure remains parallel to the floor, and is not twisted. 

First, measure your bust and take note of the measurement. 

Measure your waist... and don't suck in your tummy like me!

And then measure your hips.


Body measurements

Now look at the size chart and circle where your measurements lie. Your measurements may lie across several sizes or between sizes. 


Rushcutter finished measurements 

You should also look at the finished measurements of the Rushcutter. This dress is designed to be oversized, so there is A LOT of ease included (14cm at the bust, 43cm at the waist, and 28cm at the hip). If your bust measurements  fit one size and then your waist and hips are another, it is likely that you can go with the size of your bust, but do check the finished measurements and make a decision based on them. It is no problem if your size ranges between  multiple sizes. It is very easy to grade between sizes, as the pattern is nested, and I will show you how to do this next week in the sew-along. 

Take note of which size/s you need to print, as the pattern has been made with embedded layers so that you can just print the size/s you want! Layers make it much less confusing to cut the right size, and also saves on ink (and paper, in some sizes).

In the next post in the sew-along, I will show you how to print and assemble your PDF pattern


You may also like:

The Rushcutter Sew-Along : Gathering supplies

therushcutter_sewingpattern_gathering-supplies_2.jpg

I hope that yesterday's post in the Rushcutter sew-along inspired you! I know it sure did inspire me. Now that you (hopefully) know what fabric you would like to use, let's talk supplies.

Below is a list of ideal supplies, but before I go on, I must say that I  am an advocate of using whatever you've got at home (within reason, of course) for your sewing projects. So if you've got a zip that's a little too long or a little too short, then use it! Buttons a little bigger or small than required? Use them! If you don't have an invisible zip around, then consider using a standard zip. As well as this, consider cutting your fabric flat, rather than on the fold, you'll be able to squeeze your pieces on way less fabric (I will talk about that more when we get to cutting fabric). 

For View A, you will need:

therushcutter_Lay-plan_viewA.gif
  • Fabric: 2.9m x 150cm wide (3 yards x 60in) OR 4.2m x 115cm wide (4 5/8 x 45in)
  • 40cm (16in) invisible zip
  • Coordinating thread
  • 35mm bias tape (store bought or made at home) - I will do a tutorial about making your own binding, so stay tuned, if you think you'd like to go down that route

For View B, you will need:

therushutter_Lay-plan_viewB.gif
  • Fabric: 2.2m x 150cm wide (2 1/2 yards x 60in) OR  3.3m x 115cm wide (3 5/8 yards x 45in)
  • 3 x 10mm (3/8in) buttons 
  • Coordinating thread
  • 35mm bias tape (store bought or made at home)
  • A small piece of iron-on interfacing (not required for all fabrics, but if your fabric is quite delicate or flimsy, this is a good way to stabilise your buttons and buttonholes)

When you have chosen the fabric you will be using, you will need to wash it, dry it and press it. Use the same method you plan to use when laundering your actual dress, to avoid it shrinking after the first wash!

And that's all for today. Tomorrow we'll be talking about sizing!


You may also like:

The Rushcutter Sew-Along : Finding inspiration

inspiration.jpg

Yay! It's the first day of my very first sew-along, and I couldn't be more excited to get started.

For those of you who are just joining us, in the last post I introduced you to my brand new sewing pattern, the Rushcutter! If you missed the memo, you can check out all the details here.

I thought the best place to start the Rushcutter sew-along would be with some inspiration.

I had the most amazing group of women volunteer to test the pattern for me (thanks again ladies!) and they really did an incredible job of showing how different this dress can look, depending on your fabric choice. They each really made the dress their own.

As I mentioned in the last post, she is quite a versatile pattern and will make up well in a variety of different fabrics. Your fabric choice will really govern the end result, so before running off to the fabric shop, have a think about the kind of silhouette you would like to achieve and then go from there. I hope this images help!

therushcutter_sewingpattern_1

If you think you would like a dress that is quite structured or boxy, consider using a mid-weight cotton, sateen or twill or or brocade. Jennifer used a beautiful jacquard weave to make hers, and achieved a really beautiful silhouette, which works both belted and un-belted. 

If you prefer something a little softer or more relaxed, I suggest light to mid-weight cotton shirting, poplin, sateen, viscose (rayon) or silk. Cindy achieved quite a soft silhouette using mid-weight cotton, and created a nice detail by using exposed binding on the armholes and neckline.

Claire also achieved a relaxed look, perfect for a casual summer dress, using this striped light-weight cotton shirting. 

For something in between the soft look and the structured look, consider using chambray or linen. Kimberly used a bottom weight denim wash cotton to achieve this silhouette. 

As the Rushcutter is made up of a few different panels, there is a lot of room to play with the pattern, with piping or colour blocking... or both, like Marie-Paule. She also attached some elastic at the waist to achieve a more fitted silhouette.

I really love the dress Corey made. She cut the bodice panels in the same fabric to make it look like a standard yoke, and then used a solid colour for the remaining panels, to create a lovely contrast between the two sections. 

This lovely relaxed Rushcutter by Indu is just the perfect summer dress. She shows how beautiful it can look with, or without, the waist sash. 

There is a lot of room for playing with stripes or contrasting fabrics in this dress, and Sneha really showed what is possible. Didn't she do an incredible job of this dress? 

Megan made this lovely light-weight cotton Rushcutter, which she shortened considerably to tunic length. I will show you how to do this during the sew-along, so keep your eyes peeled, if this is something that interests you! I think it goes perfectly with those black tights and shoes, although I think this dress will work just as well in spring.

Sarah also made a couple of changes to the pattern. She shortened the dress, as well as the sleeves, and also widened the neckline. I really love the changes she made and I think this fabric (wool boucle) just works perfectly.

Ann made this lovely blue Rushcutter, with a fabric that has a slightly quilted texture. It goes wonderfully with her red hair, don't you think?

And last, but not least, is Andreia. I am a huge fan of this dress. She really thought outside the box when it came to selecting fabric, and went for a Ponte di Roma. It has a lovely modern aesthetic, and I just love how the sleeves sit when the fabric has a bit more body to it.


These wonderful ladies have provided me with a lot of inspiration (and I hope they have provided you with some too) - now I just have to work out which one to make first! I'd love to know what you are planning to make your Rushcutter in?


You may also like: