Flynn jacket

ISSUE 142 - THE DIFFERENCE BETWEEN PATTERN SIZING AND READY TO WEAR

THE Q & A SERIES

THE DIFFERENCE BETWEEN PATTERN SIZING AND READY TO WEAR

Hi, 

I purchased the Flynn Jacket pattern. I need your sizes in international sizing (XS, S, M, L, XL). Your sizing does not help in cutting these sizes.

Thanks,

A


Hi there,

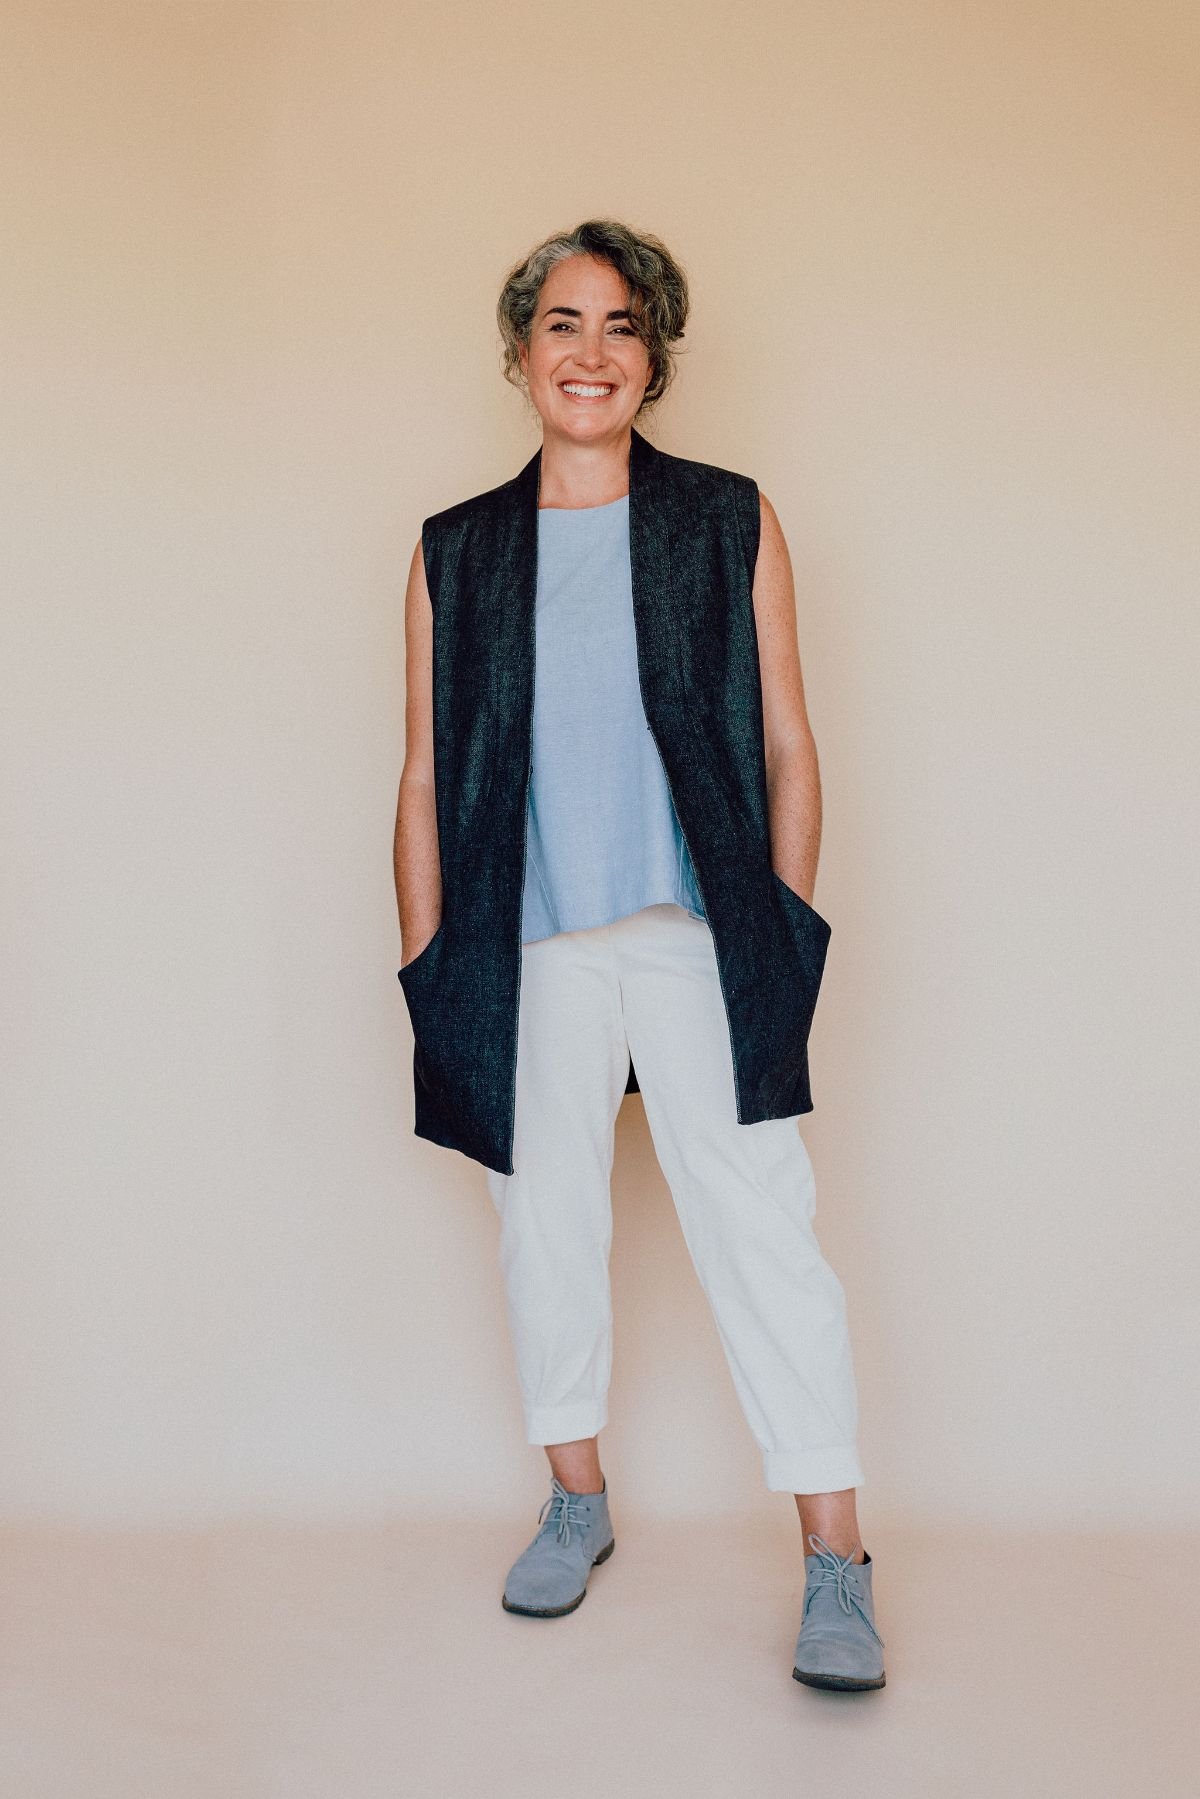
I am thrilled to hear you will be giving the Flynn jacket a go!

If you have never used one of our patterns, you may have been surprised to see the size charts and realise there is no sign of numbers (apart from the measurements themselves) or international sizing, as you noted. This was a very intentional choice that I made when starting In the Folds.

WHY HAND-MADE IS DIFFERENT TO READY TO WEAR

Sewing your own clothes is very different to buying ready-to-wear clothing.

When it comes to ready-to-wear you have to pick the closest size to your body measurements and hope for the best.

This might mean the garment fits you well through the bust, but pulls a little at the hips. Or that the hips fit well, but the neckline gapes. 

When it comes to sewing your own clothes you don’t have to settle for a garment that only fits certain parts of your body. Just one of the perks of making your own clothes! You can make a garment fit your unique body measurements by grading between pattern sizes. You can then alter the length to suit you, and make other alterations too, such as a full bust adjustment or a narrow shoulder adjustment).

WHY IN THE FOLDS SIZING DOESN’T USE NUMBERS

Here’s two reasons why we don’t use numbers in our garment sizing:

1. The focus should be on YOUR body, not a standard someone else has set.

By steering clear of international sizing and standard numbered sizing, we are encouraging sewists to do the most important thing you can do before starting a project… take accurate measurements of your body!

When it comes to sewing, using your measurements (rather than the numbers next to the measurements) is really important because it will help you make a garment that fits YOU.

It also means that you can acquaint yourself with the size chart for the particular pattern brand you are using, because they are all different.

2. We will not support systems that encourage body shaming.

By using letters instead of numbers in our size chart, we aim to remove the hesitance or shame some makers may feel when looking at traditional sizing numbers on tags in stores.

This is a side to ready-to-wear fashion that we want to leave behind! We believe making garments is about making clothes that fit your unique body, not about the size you wear. And this is one way we can help you (and the fashion world at large!) achieve this.

HOW TO FIGURE OUT YOUR IN THE FOLDS SIZE

We suggest you grab a tape measure, put on some tight clothing (leggings and a tight t-shirt or singlet work well), step in front of a mirror and take your measurements.

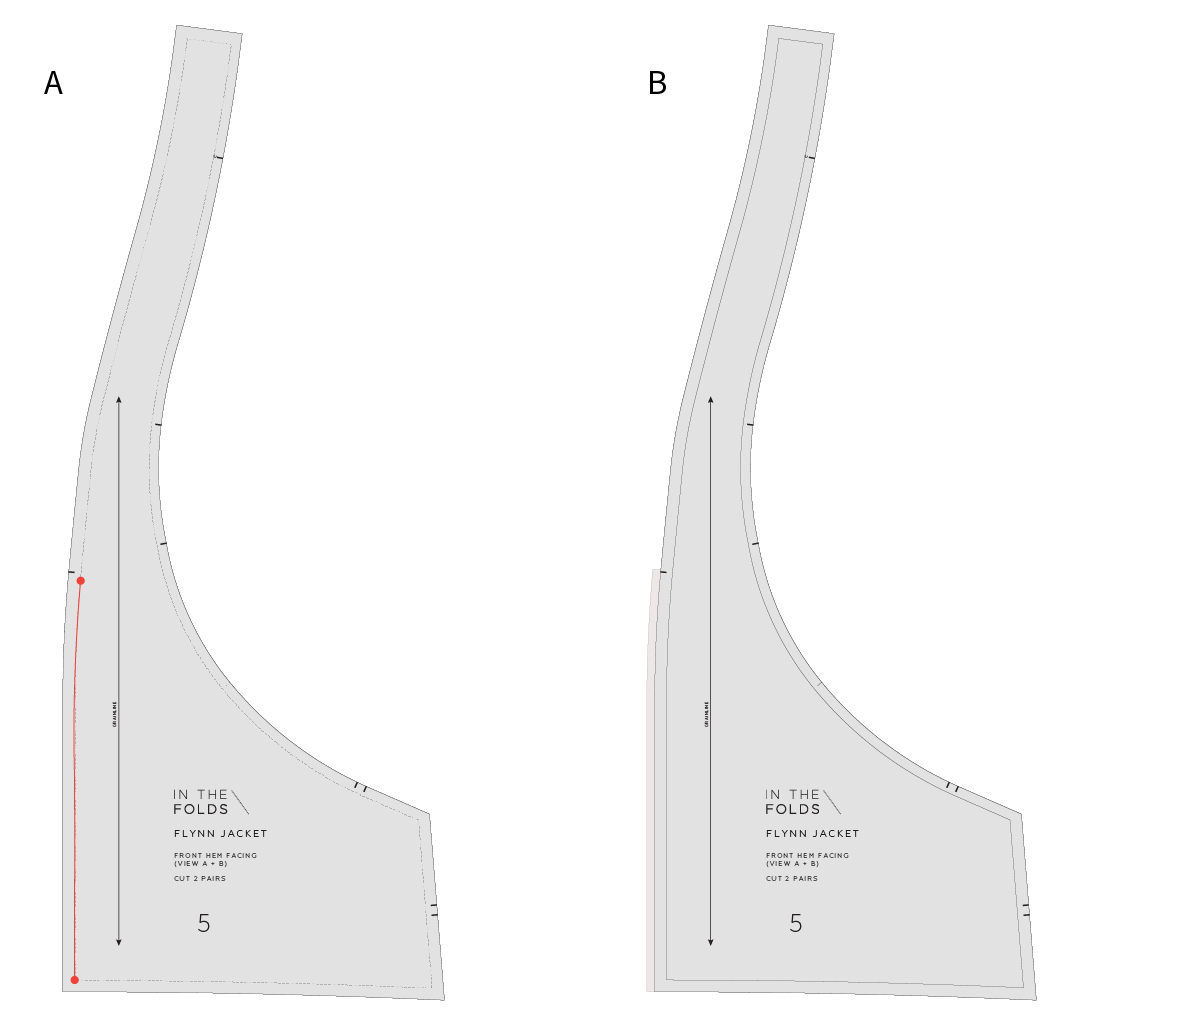
If you’ve printed a copy of the pattern, circle the size (or sizes) your measurements align with for each point of your body. In the case of the Flynn jacket, this is your bust, waist and hips.

ALWAYS CHECK THE FINISHED GARMENT MEASUREMENTS

Before selecting a size it’s always a good idea to understand how closely the garment is supposed to fit and how much ease is in each area of the pattern.

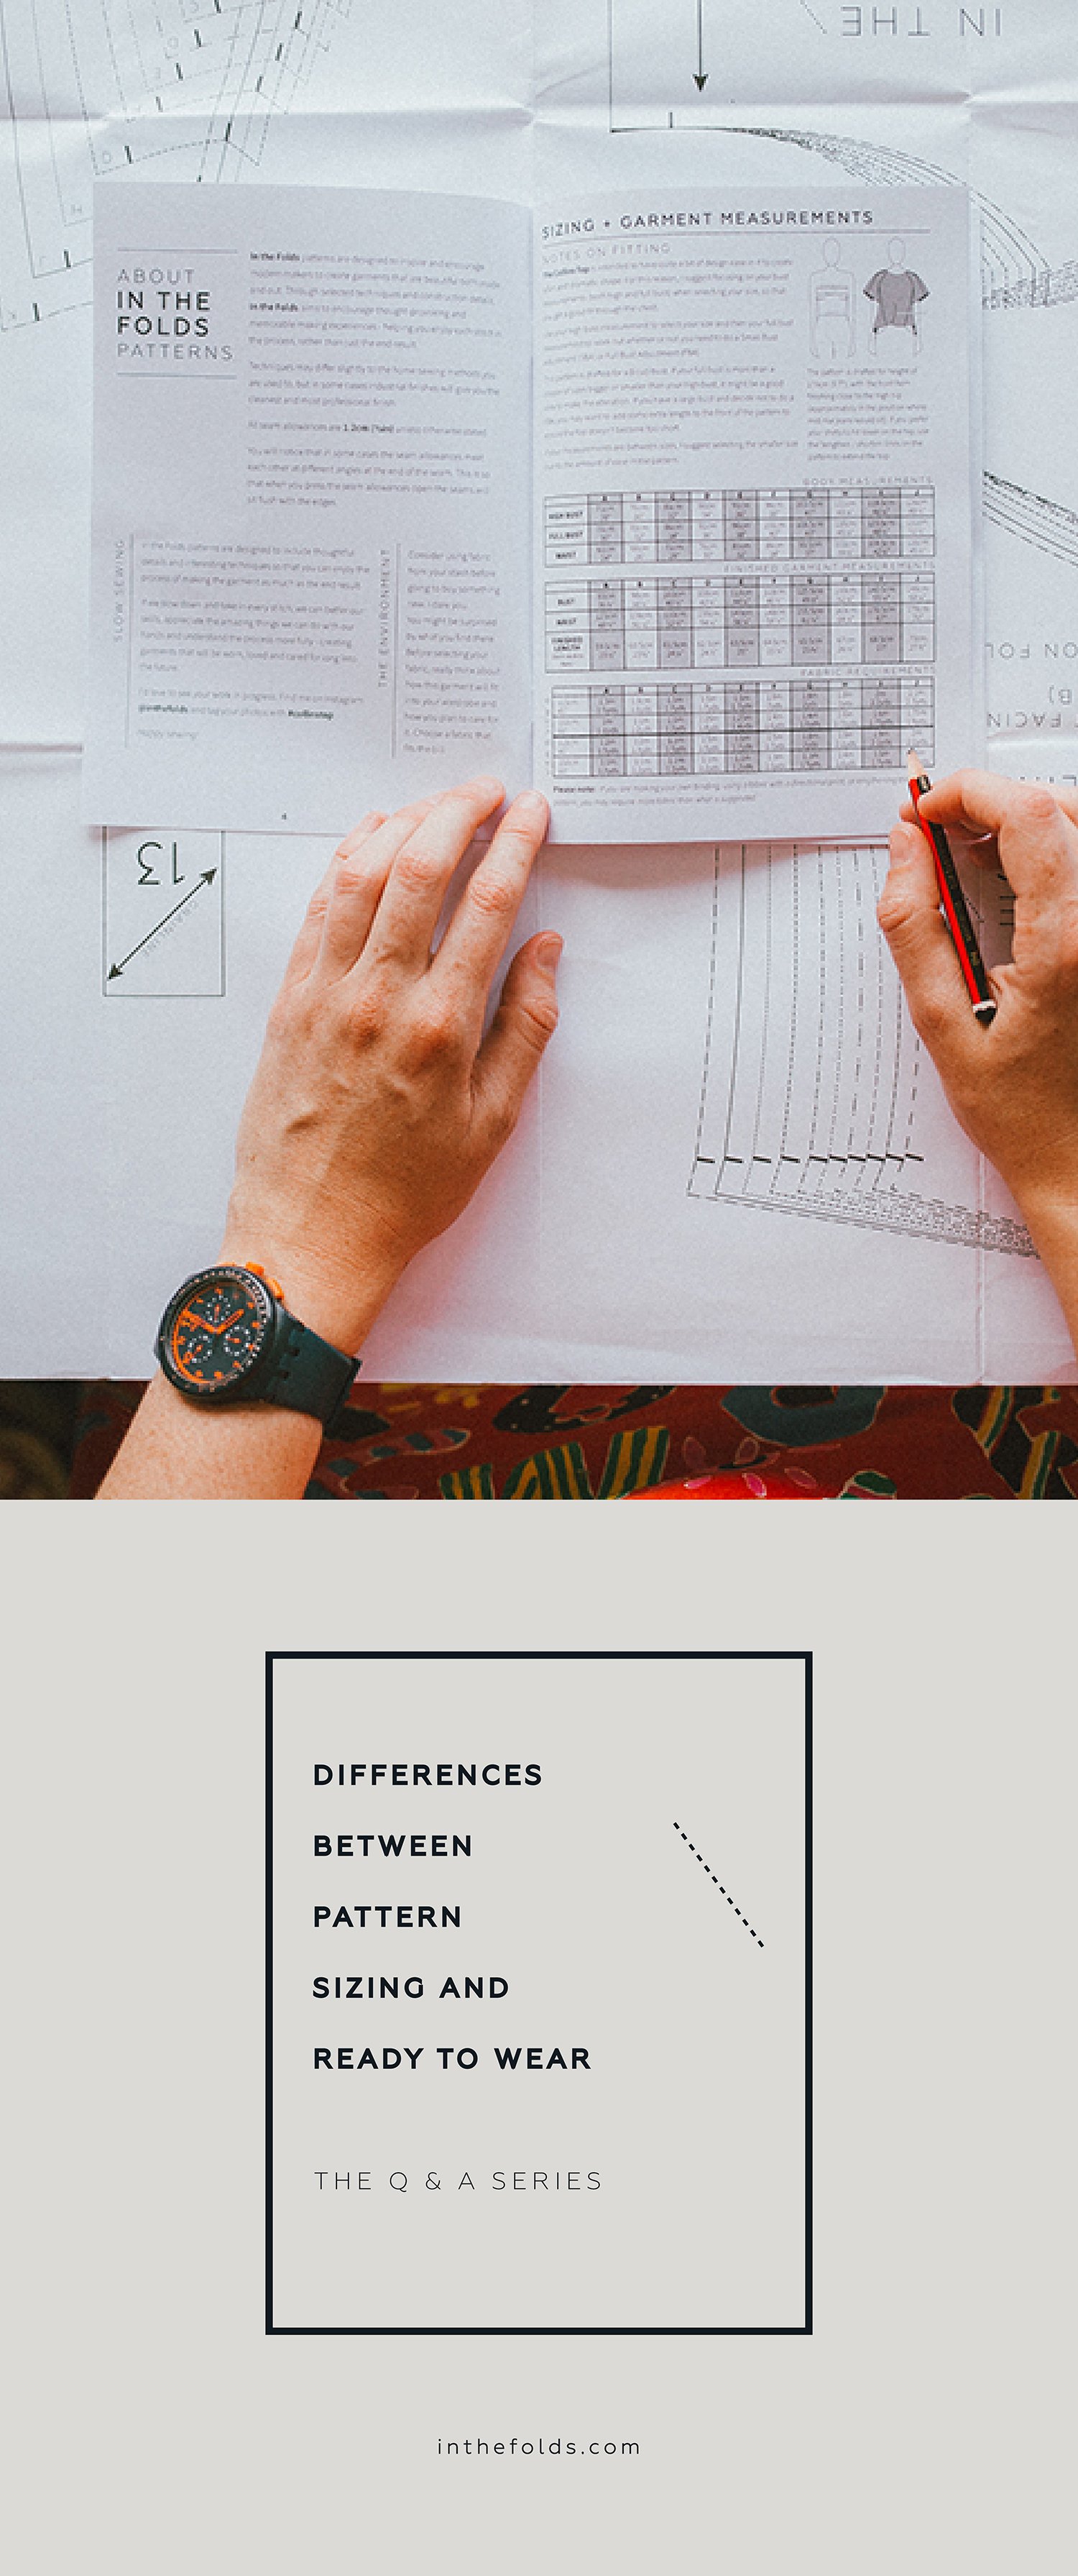
With In the Folds patterns, we always include two measurement charts in our instruction booklets. One for body measurements (which are the same across all In the Folds patterns), and the other for finished measurements chart (which changes between patterns depending on the intended fit of the design).

The finished measurements chart includes the measurements of the finished garment in specific locations, and information about the amount of ease that has been included in the pattern.

UNDERSTANDING PATTERN EASE

How much ease there is in a pattern will determine if you need to make alterations to a pattern.

For example, if your hip measurement is in a larger size than your waist measurement, you might usually need to grade between sizes. But, if you look at the amount of ease in the hips of the Flynn pattern you may choose not to grade because there is a lot of ease provided in the design.

Selecting the correct size before you begin is an important part of the sewing process and we want to support you to feel confident when doing this. We have another post about selecting the correct pattern size that you might be interested to read here.

Happy sewing,

Emily


RESOURCES MENTIONED IN THIS ISSUE

  • The Flynn jacket pattern can be found here.

  • Selecting the correct size - tutorial here.


For more issues of the Q & A series, you can check out the archive here.


WHAT YOU’VE BEEN MAKING


MORE POSTS IN THE SERIES

ISSUE 129 - THREE WAYS TO ADD A CLOSURE TO THE FLYNN JACKET

THE Q & A SERIES

Three ways to add a closure to the Flynn jacket

Hi Emily,

I got a Flynn jacket pattern and am wondering if there are any ways to add buttons or a zip. Is that possible?

I love the jacket as is but at the same time I would love to close the front when it is cold.

Thank you :)

Manami


Hi Manami,

Great to hear you’d like to give the Flynn jacket a go.

We’re celebrating 12 months of Curated by ITF this month and are celebrating all things skill-building. Being able to alter and adapt patterns (check out all our sewing tutorials to help you do this here!) to better suit your needs is a fantastic skill to have and is something we love supporting our community to do in our Curated community.


You’ve got a few options for adding a closure to the Flynn jacket. You could add an open-ended zip (similar to the Hove jacket), buttons or a hook and eye.

The first thing that’s helpful is to understand the construction of the Flynn jacket. The front panel wraps around to connect at the centre back neck and creates the collar and the front panel opening. I’ve highlighted it in the photo above so you can see the shape. The front opening meets, but doesn’t overlap.

Before hacking a pattern (read our top tips here!) we suggest making the pattern in its original form. You may make it as a completed garment or just a toile - a test version of a garment. This blog post talks about why you should make toiles.

Having the garment in its original form is a great way to make design decisions, as you will have the garment to refer to and can try it on and use pins to mark points of interest. For example, in this case you could try on the jacket and decide how high up you would like the zip to go. This is more difficult to estimate on the flat pattern than a garment. 

HOW TO ADD A ZIP CLOSURE TO THE FLYNN JACKET

You can use an open-ended zip to create a closure. 

A First, mark the centre front opening on the pattern. You will want to place the zip in the straight section of the opening - which is roughly about the position of the centre notch on the pattern. From this point you can see that the seam starts changing shape, so you won't want a zip going too high up as it would distort the way the centre front hangs.

Measure from the stitch line at the hem up to the point where you’d like the zip to stop. Then look to see if you can get a zip this length. You may need to tweak the measurement (and notch position) a little to get it to line up with a standard zip measurement (unless you’d like to shorten a zip). Here in Australia, 35cm and 40cm open-ended zips are easy enough to come by and both could work well.

B The pattern has a 1.2cm (1/2in) seam allowance along the centre front edge. This is adequate for sewing a zip although it doesn't give you much room to play with. If you would prefer a little bit more room for installing the zip, we suggest extending the seam allowance in the area you will be adding the zip to 2cm (3/4in).

HOW TO ADD A BUTTON CLOSURE TO THE FLYNN JACKET

As mentioned at the beginning of this tutorial, the Flynn jacket front pieces meet at the centre front, but do not overlap. We have demonstrated this above (the overlap is just the seam allowance that won’t be there when the garment is sewn).

To create a button closure you will first need to create an overlap, as buttons and buttonholes need to be placed on the centre front of the garment.

Step 1

A Take a piece of pattern paper and tape it behind the centre front opening so you have some room to add the button extension.

Mark in your centre front line (the stitch line on the pattern piece) and extend it up.

Have a think about the size and position of the buttons you would like to use. This is when having the garment in its original form would be helpful as you can lay the buttons on the garment to get an idea of the scale. Alternatively, lay the buttons on the pattern piece. You’ll want to determine where your first button will go and the width of the buttons you plan to use.

B Mark a second line - measuring from the centre front, half the width of your buttons plus 1cm (3/8in). This will allow room for the button, and a little bit of space between the edge of the button and the edge of the opening.

Step 2

A Add seam allowance to the edge. We suggest 1cm (3/8in). We have a tutorial on adding seam allowance here.

B Join the bottom and top of the line back to the original pattern. You want the transition between the new section and the original pattern to be nice and smooth.

Step 3

A Consider what shape you would like the top of the opening to be. You may have it come to an angle as demonstrated in Step 2, or you may prefer a curve which is more in line with the original design.

B Once you have determined the shape, cut off any excess paper and mark button position on your pattern.

When sewing the garment we suggest adding a strip of fusing down the centre front opening to support the buttons and buttonholes.

HOW TO ADD A HOOK & EYE CLOSURE TO THE FLYNN JACKET

The other option is to sew a hook and eye on each side of the opening. This is what I've done on one of my Flynn jackets and it works really well because the jacket can be worn open without the hook and eye being seen, and when it’s closed it doesn’t change the design much. The only thing is that a bit more wind can get in compared to using a zip or buttons! So this is something to keep in mind.

Happy pattern hacking,

Emily


RESOURCES MENTIONED IN THIS ISSUE

  • The Flynn jacket pattern can be found here.

  • The Hove jacket pattern can be found here.

  • More information about our Curated by ITF sewing subscription can be found here.

  • Our sewing tutorials archive can be found here.

  • We talk about why you should make toiles in this blog post.

  • How to add seam allowance to a pattern - tutorial can be found here.


For more issues of the Q & A series, you can check out the archive here.


WHAT YOU’VE BEEN MAKING


MORE POSTS IN THE SERIES

ISSUE 124 - Choosing the right seam finish

THE Q & A SERIES

Choosing the right seam finish

I am just about to start cutting out the Flynn pattern for the first time. I bought the pattern because I loved the style of the jacket, but was so excited to see the steps on seam bindings when I was looking at the instructions. I am new to sewing and have been wanting to make my mom a quilted vest and jacket, but wasn’t sure how to finish the seams. I am hoping that once I finish the Flynn (in linen) that I will have a better idea of how to do that when I make a quilted pattern :-) 

Thank you!

Julianne


Hi Julianne,

I am pleased to hear you will be making the Flynn jacket!

It is a really fun sew with loads of new skills to learn - especially binding seams. This month we’re working on beautiful finishes with our Curated by ITF community and I thought it would be a great opportunity to talk about seam finishes.

When you’re working with a sewing pattern, you’ll see that a number of finishes are referred to. The application of a seam finish will depend on the garment type, suggested fabric and the seam type. Today I'll run you through the most used seam finishes so you have a little reference the next time you’re trying to decide between two different seam finishes.

Different seam finishes and what they're for...

Zig-zag finish

Zig-zag finish is one of the quickest and simplest ways to finish raw edges as you can do it on your regular sewing machine (as long as it has a zig-zag stitch function).

What's a zig-zag finish for?

This finish is best suited to mid-weight, stable fabrics.

On certain light-weight fabrics you run the risk of the fabric being pulled into the teeth or bobbin opening on your machine. To check this you should always do a test run before trying it on your garment. 

One thing to keep in mind is that fabrics can still fray when finished this way, so after washing the garment a few times you might notice the seams not looking as neat as they did originally (although this will depend on the fabric type and the way the seams have been cut).

Turn and straight stitch

One of the simplest ways to finish a seam is to turn back the raw edges of the seam allowance and stitch.

This is a good finish to try if you don't own a serger/overlocker and don't have a zig-zag stitch on your regular sewing machine. It's also a great alternative if you would like a cleaner finish.

What's this finish for?

This finish is suitable for almost all fabrics, although it works better on straight seams, rather than curves. If working with light-weight or sheer fabrics, it is suggested that you consider French seams before choosing this option.

This finish will work best for seams that will be pressed open. Be careful applying this finish to heavy-weight fabrics as it will add bulk to the seams.

More details on this technique can be found here.

French Seams

French seams are great for light to mid-weight fabrics, especially those that are prone to fraying. French seams are also the best choice of finish if you are using a sheer fabric.

French seams will give you a beautiful, clean finish, without the need for an overlocker/serger. Although French seams can be a little time consuming, they are very satisfying and give one of the most beautiful finishes possible.

What's this finish for?

This finish is suitable for light-weight to mid-weight fabrics or sheer fabrics.

Tips on sewing French seams can be found here.

Did you know you can even sew in-seam pockets with French seams? More info on how to do that can be found here.

Flat felled seams

Flat felled seams are one of the strongest seam finishes. The raw edges are enclosed inside the seam (like French seams), but it's pressed flat and stitched to keep the seam nice and flat.

What's this finish for?

Flat felled seams are suitable for hard wearing items such as jeans and jackets. You may also use this finish for making shirts.

Bias bound seams

Bias bound seams are strong and hard wearing. This finish gives you a beautiful, clean finish on the right and wrong side of the seam, by wrapping binding around a raw edge. Bias bound seams also add visual interest to the inside of garments. 

What's this finish for?

Great for seams that will be exposed (such as in unlined jackets), formal wear and also centre back seams (it can be a really nice finish either side of a zip opening).

Hong Kong bind

A Hong Kong binding is strong and hard wearing. This seam finish gives you a beautiful, clean finish and adds visual interest to the inside of garments.

From the right side, a Hong Kong bind looks the same as a bias bound seam. The difference is that a Hong Kong bind is finished differently on the unexposed side of the seam.

What's this finish for?

Great for seams that will be exposed (such as unlined jackets). A Hong Kong bind is an alternative to bias bound seams and is especially suited to thick or bulky fabrics.

It is an ideal finish to use when the back of the seam will not be exposed and you would like to minimise bulk, such as the edge of facings and waistbands.

More details about sewing bias bound seams and Hong Kong binding can be found here.

We’ve shared quite a few posts about bindings in the past, so if you’d like to know more about making your own binding, finishing armholes or necklines, attaching single fold bias binding or attaching double fold binding click on the links to learn more.

Happy sewing,

Emily


RESOURCES MENTIONED IN THIS ISSUE

  • Flynn jacket pattern can be found here.

  • More information about Curated by ITF can be found here.

  • Alternate finishes for the wrap top - tutorial here.

  • Tips for sewing French seams - tutorial here.

  • How to sew in-seam pockets with French seams - tutorial here.

  • How to sew bias bound seams - tutorial here.


For more issues of the Q & A series, you can check out the archive here.


WHAT YOU’VE BEEN MAKING


MORE POSTS IN THE SERIES

ISSUE 80 - Fabric recommendations for the Flynn jacket

THE Q & A SERIES

Fabric recommendations for the Flynn jacket

Hi there,

Love your Flynn jacket pattern, I am looking into purchasing it. I did want to know what kind of fabric weight would you recommend for the pattern? Also what fabric are you using in the pictures for the green and the blueish gray jacket? Would love your help in that regard. Thank you so much.

Ambreen


Hi Ambreen,

I'm thrilled to hear that you'd like to give the Flynn jacket pattern a go!

I suggest bottom-weight fabrics such as: denim, cottons like canvas, duckcloth and drill, and heavyweight linens. In the photos, the green is a brushed cotton drill and the grey is a heavyweight linen. You want a fabric that will support the shape, but won’t be overly boxy or stiff. I once made it in a lightweight wool and wasn’t happy with the way the centre front opening hang. If I made it again in a fabric like that, I’d add lightweight fusing strips down the centre front opening to give it a bit more stability.

Happy sewing,

Emily


resources mentioned in this issue

  • The Flynn jacket pattern - can be found here.


For more issues of the Q & A series, you can check out the archive here.


What you’ve been making


More posts in the series

ISSUE 71 - Moving pockets on the Flynn jacket

THE Q & A SERIES

MOVING POCKETS ON THE FLYNN JACKET

Hi there,

I've purchased the Flynn Jacket pattern but being 5' 2" tall I'm concerned that the pockets are going to be too low for me.

Do you have a suggestion as to how I can make them higher?

Would appreciate your help.

Steph


Hi Steph,

Thank you for getting in touch.

 I am pleased to hear you will be making the Flynn jacket!

I would suggest shortening the jacket all together - this will bring the pockets up to the position you need them. The jacket was designed for a height of 5'7" - so you might want to take 2" or so out of the length. I'd hold the collar / hem piece up to your body to work out the length you would like the jacket to be. 

There are a couple of other reasons why you might also want to do this adjustment to the Flynn jacket:

  • You might be 170cm (5'7")  but have a shorter torso and longer legs than the pattern was designed for

  • You may prefer more of a cropped style than the original design

THE FIT OF THE FLYNN

The Flynn jacket is designed to finish at the top of the thighs (and just below your bum at the back). Due to the design of the hem band and curved front panel, you can’t just simply cut length off the bottom of the jacket pattern as it will change the proportions of the jacket. Instead, you need to take length out from the middle of the pattern pieces, so that the proportions remain intact, and today that is what I am going to show you how to do! 

As is becoming quite common with my patterns, the Flynn jacket has some very unique panel lines. This means that making alterations to the pattern is slightly different to what you would need to do with a straight cut jacket. It’s not difficult at all, and the principle is the same, there is just a few extra steps you have to do.

As the Flynn jacket and Hove jacket have style lines in common, you can use this tutorial for shortening the Hove jacket too.

GETTING STARTED

STEP 1

The pieces you will need for this adjustment are the FRONT HEM FACING [5], FRONT [1] and BACK [2] (or the coordinating pattern pieces for View B). You can use the actual pattern pieces, or trace a copy if you would prefer to keep the original pieces intact.

STEP 2

You will need to work out how much length you would like to remove from the pattern. You can do this by looking at your toile / muslin (for more details on making a toile / muslin look at this post from the Rushcutter sew-along), or holding the pattern pieces up to your body and getting an idea of where they will sit on your body. 

If you would like to remove any more than 7.5cm (3in), I’d suggest taking 5cm - 7.5cm (2in - 3in) from the mid-section of the pattern (where the LENGTHEN / SHORTEN lines are) and then removing the remainder from the hem band section so that you don't alter the proportions of the jacket too much.

A Cut through the 'LENGTHEN / SHORTEN' line on the FRONT HEM FACING [5], FRONT [1] and BACK [2].

B Measuring up from the cut line, mark a horizontal line on each pattern piece, the distance of the amount of length you would like to remove. In the example, you can see the red line is 5cm (2in) above the cut line and the shaded section shows the amount of length that will be removed from the pattern piece.

STEP 3
A
Move the lower part of each pattern piece up to the line marked in the previous step. Use the grainline to ensure that you line the pieces up correctly.

B Glue or tape in place.

STEP 4
A Re-draw the seam lines with smooth lines over the adjustment. You will notice that in some cases you will be needing to add a little bit on to create the line of best fit, while in other cases you will need to shave a bit off. This will even out as you go around the pattern.

When marking a line over the area that has been altered, there might be a large gap between the two sides of the line. In this case - split the difference by marking a point in the centre of the area and drawing the line across this point. You can choose to trace the pattern on to fresh pattern paper or tape on small pieces of paper / masking tape where you need to fill a small gap to complete the seam line.

Cut off any excess paper that is outside of the new lines.

STEP 5
Check all seams are the correct length by "walking" the pattern pieces, as if you were sewing them together. For more details on how to do this, check out this tutorial.

Transfer / re-draw any notches that have been misplaced. Due to the shape of the pieces, some notches may not line up due to the different points the alteration was made. After checking that the seam is the correct length, transfer one notch to the other piece (and cross out the notch that is no longer in the correct position).

Happy sewing,

Emily


resources mentioned in this issue

  • The Flynn Jacket pattern - can be found here.


P.S. Don't have a question, but found this newsletter helpful? I'd love to hear from you! Get in touch and say hi.

For more issues of the Q & A series, you can check out the archive here.


What you’ve been making


More posts in the series

ISSUE 31 - Mix & match the Flynn and Hove jacket patterns

HEADER - ISSUE031.jpg

THE Q & A SERIES - Mix & match the Flynn and Hove jacket patterns

Hi Emily,

After reading 
your tutorial on removing the pleats from the Hove jacket I remembered that it and the Flynn were sibling patterns. Is it possible to mix and match them, for example Hove’s back pleats with Flynn’s collar? The front curved seams look the same on your line drawings but I wasn’t certain if they still were after you refined the designs.

Thank you!

Katina


Canberra, Australia


Hi Katina,

Lovely to hear from you!

Yes, you're right, the Hove jacket pattern and the Flynn jacket pattern are sibling patterns. They originally started out as two variations of the same pattern, but over time as I continued to work on the patterns, I realised they were moving further and further apart in terms of design, and it was going to become a mammoth of a pattern that would probably intimidate makers - rather than inspire!

They can be mixed and matched as you suggested, and I'd love to see a Flynn jacket with the Hove pleats. It sounds dreamy!

Mix and match Flynn Hove-1.jpg

As you can see in the illustration above, the curve on the two patterns is the same until you get to the shoulder point (circled in the illustration). The curve then changes course in shape, but is the same length, so still fits with each of the back pieces from the patterns.

Mix and match Flynn Hove-2.jpg

If you do choose to swap out the hood on the Hove jacket for the collar from the Flynn jacket, just be sure to transfer the notches from one piece to the other as they are different between styles to accommodate the difference in pockets. You can do this by laying one piece on top of the other and transferring with a tracing wheel, snipping in with scissors or tracing with a pen / pencil. It's also a good idea to put a small cross next to the notches you won't be using to save any confusion (or covering them up with masking tape). These new notches then need to be transferred to the FRONT piece too (or you can just print the FRONT from the pattern style you are using).

I'd love to see your version if you do go ahead and mix and match these patterns Katina!

Happy sewing,

Emily


resources mentioned in this issue

  • How to remove pleats from a pattern. Tutorial can be found here.

  • The Hove jacket pattern can be found here.

  • The Flynn jacket pattern can be found here.


P.S. Would you like to know what the Q & A series is all about? This page tells you a little bit more about the motive behind the series. Past issues from the Q & A series can be found here.

Don't have a question, but found this newsletter helpful? I'd love to hear from you! Get in touch and say hi. 


What you’ve been making


More posts in the series

ISSUE 23 - Lining the Flynn jacket

PINTEREST HEADERS23.jpg

THE Q & A SERIES - LINING THE FLYNN JACKET

Hi Emily!

I'm currently working on a toile of the Flynn jacket. I shortened it per your instructions on the blog, which were super helpful!

I ordered some cool deadstock fabric to make the jacket. Once it arrived, I realized that the wrong side of the fabric isn't super pleasant to the touch. I probably want to line the jacket with some lightweight lining.

I've never lined anything before. I have two questions here -

1. Would you recommend that I cut the inner/outer hem facing out of the lining fabric, or both the outer fabric and the lining?

2. More generally, any tips?

Thanks!

- Hannah

Los Angeles, Unites States


Hi Hannah,

Thanks for getting in touch. I am pleased to hear you're making a Flynn jacket! It is also great to hear that you found the tutorial for shortening the Flynn jacket helpful!

Your options are to interline the jacket or fully line it.

Interlining is a little easier because you attach the lining fabric to the main fabric before you assemble the jacket, so that the main fabric and the lining act as one fabric - this way you would still use bias binding on the seams (you can baste the two layers together by hand or machine - making sure your stitches are within the seam allowance, so that you don't see them later) and construct the jacket as usual.

If you were to line it, you would be enclosing all the raw edges inside the jacket lining, by making two jackets (one of the main fabric and one from the lining fabric). It's up to you which option you choose, as both would work. If you would like some more information on lining a jacket, this post from Seamwork should help.

FLYNN-JACKET-3.jpg

Either way though, I would cut both the inner and outer hem facing (back and front) from the main (deadstock) fabric. This means the lining is only required for the front, back and sleeves. This will ensure that the hem facing has the correct weight (same as the outer jacket) and will sit nicely. It will also give you the nicest finish on the inside.

I hope that helps! Let me know if there is anything else I can assist with.

Happy sewing,

Emily

P.S. Hannah wrote to my quite a while a go with this question, so you can see which method she chose to go with (and her beautiful Flynn jacket) here.


resources mentioned in this issue

  • Shortening the Flynn jacket. Tutorial can be found here.

  • The Flynn jacket pattern can be purchased in paper or PDF format here.

  • A Lesson in Lining from Seamwork. Post can be found here.

  • Hannah's finished Flynn jacket can be seen here.


P.S. Would you like to know what the Q & A series is all about? This page tells you a little bit more about the motive behind the series. Past issues from the Q & A series can be found here.

Don't have a question, but found this newsletter helpful? I'd love to hear from you! Get in touch and say hi. 


More posts in the series